- Windows Subsystem for Linux Installation Guide for Windows 10
- Simplified Installation for Windows Insiders
- Manual Installation Steps
- Step 1 — Enable the Windows Subsystem for Linux
- Step 2 — Check requirements for running WSL 2
- Step 3 — Enable Virtual Machine feature
- Step 4 — Download the Linux kernel update package
- Step 5 — Set WSL 2 as your default version
- Step 6 — Install your Linux distribution of choice
- Install Windows Terminal (optional)
- Set your distribution version to WSL 1 or WSL 2
- Troubleshooting installation
- UNIX. Шаг первый. Эмуляция и установка UNIX System V Release 4
- Этап 1. Скачивание и приготовление дистрибутива
- Этап 4. Установка UNIX System V Release 4
Windows Subsystem for Linux Installation Guide for Windows 10
There are two options available for installing Windows Subsystem for Linux (WSL):
Simplified install (preview release): wsl —install
The wsl —install simplified install command requires that you join the Windows Insiders Program and install a preview build of Windows 10 (OS build 20262 or higher), but eliminates the need to follow the manual install steps. All you need to do is open a command window with administrator privileges and run wsl —install , after a restart you will be ready to use WSL.
Manual install: Follow the six steps listed below.
The manual install steps for WSL are listed below and can be used to install Linux on any version of Windows 10.
If you run into an issue during the install process, check the Troubleshooting installation section at the bottom of this page.
Simplified Installation for Windows Insiders
The installation process for Windows Subsystem for Linux has been significantly improved in the latest Windows Insiders preview builds of Windows 10, replacing the manual steps below with a single command.
In order to use the wsl —install simplified install command, you must:
- Join the Windows Insiders Program
- Install a preview build of Windows 10 (OS build 20262 or higher).
- Open a command line windows with Administrator privileges
Once those requirements are met, to install WSL:
- Enter this command in the command line you’ve opened in Admin mode: wsl.exe —install
- Restart your machine
The first time you launch a newly installed Linux distribution, a console window will open and you’ll be asked to wait for files to de-compress and be stored on your PC. All future launches should take less than a second.
CONGRATULATIONS! You’ve successfully installed and set up a Linux distribution that is completely integrated with your Windows operating system!
The —install command performs the following actions:
- Enables the optional WSL and Virtual Machine Platform components
- Downloads and installs the latest Linux kernel
- Sets WSL 2 as the default
- Downloads and installs a Linux distribution (reboot may be required)
By default, the installed Linux distribution will be Ubuntu. This can be changed using wsl —install -d . (Replacing with the name of your desired distribution.) Additional Linux distributions may be added to your machine after the initial install using the wsl —install -d command.
To see a list of available Linux distributions, enter wsl —list —online .
Manual Installation Steps
If you are not on a Windows Insiders build, the features required for WSL will need to be enabled manually following the steps below.
Step 1 — Enable the Windows Subsystem for Linux
You must first enable the «Windows Subsystem for Linux» optional feature before installing any Linux distributions on Windows.
Open PowerShell as Administrator and run:
We recommend now moving on to step #2, updating to WSL 2, but if you wish to only install WSL 1, you can now restart your machine and move on to Step 6 — Install your Linux distribution of choice. To update to WSL 2, wait to restart your machine and move on to the next step.
Step 2 — Check requirements for running WSL 2
To update to WSL 2, you must be running Windows 10.
- For x64 systems: Version 1903 or higher, with Build 18362 or higher.
- For ARM64 systems: Version 2004 or higher, with Build 19041 or higher.
- Builds lower than 18362 do not support WSL 2. Use the Windows Update Assistant to update your version of Windows.
To check your version and build number, select Windows logo key + R, type winver, select OK. Update to the latest Windows version in the Settings menu.
If you are running Windows 10 version 1903 or 1909, open «Settings» from your Windows menu, navigate to «Update & Security» and select «Check for Updates». Your Build number must be 18362.1049+ or 18363.1049+, with the minor build # over .1049. Read more: WSL 2 Support is coming to Windows 10 Versions 1903 and 1909. See the troubleshooting instructions.
Step 3 — Enable Virtual Machine feature
Before installing WSL 2, you must enable the Virtual Machine Platform optional feature. Your machine will require virtualization capabilities to use this feature.
Open PowerShell as Administrator and run:
Restart your machine to complete the WSL install and update to WSL 2.
Step 4 — Download the Linux kernel update package
Download the latest package:
If you’re using an ARM64 machine, please download the ARM64 package instead. If you’re not sure what kind of machine you have, open Command Prompt or PowerShell and enter: systeminfo | find «System Type» . Caveat: On non-English Windows versions, you might have to modify the search text, for example, in German it would be systeminfo | find «Systemtyp» .
Run the update package downloaded in the previous step. (Double-click to run — you will be prompted for elevated permissions, select вЂyes’ to approve this installation.)
Once the installation is complete, move on to the next step — setting WSL 2 as your default version when installing new Linux distributions. (Skip this step if you want your new Linux installs to be set to WSL 1).
Step 5 — Set WSL 2 as your default version
Open PowerShell and run this command to set WSL 2 as the default version when installing a new Linux distribution:
Step 6 — Install your Linux distribution of choice
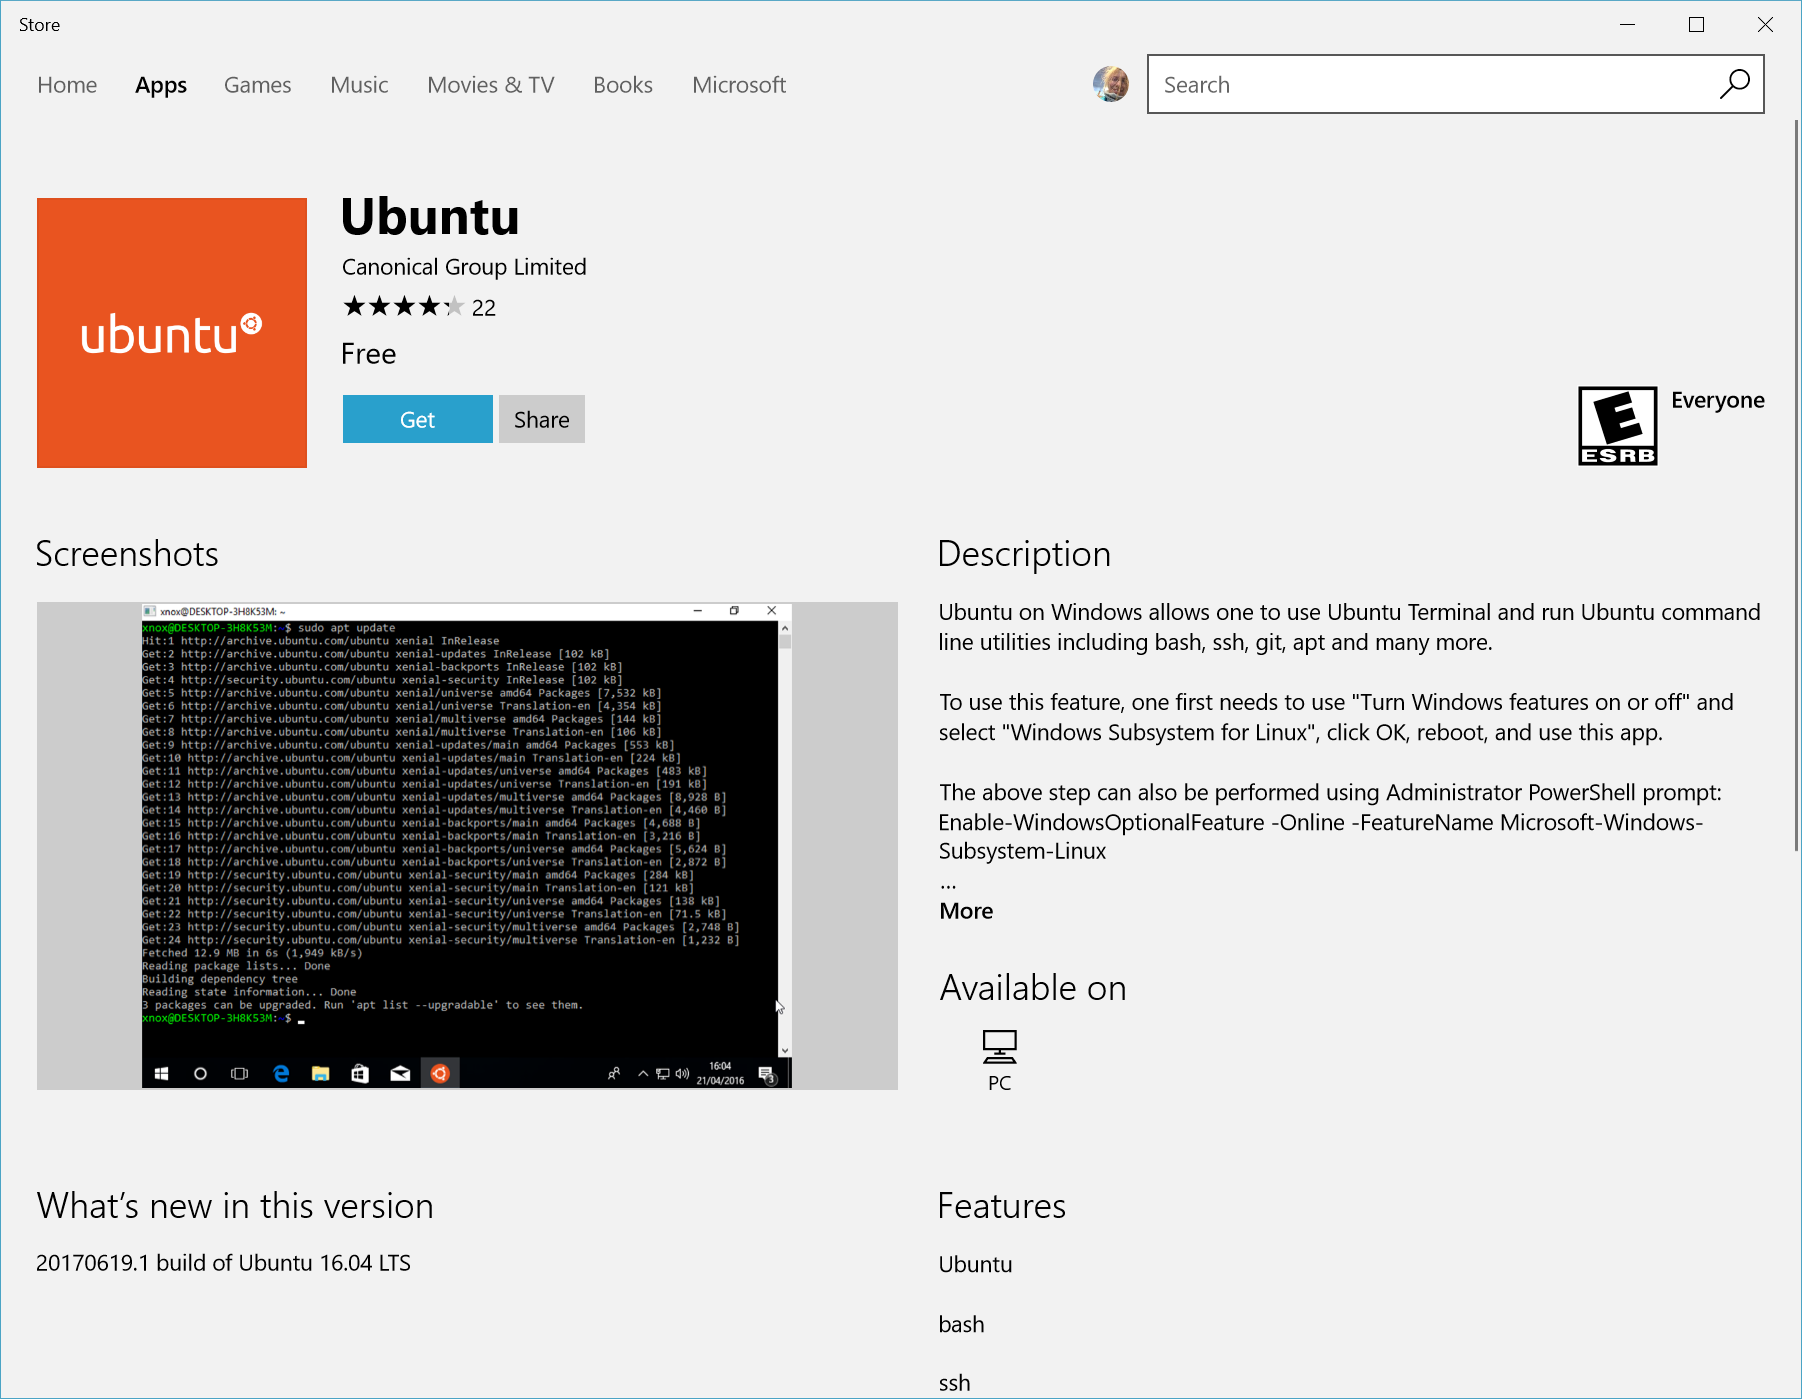
Open the Microsoft Store and select your favorite Linux distribution.

The following links will open the Microsoft store page for each distribution:
From the distribution’s page, select «Get».
The first time you launch a newly installed Linux distribution, a console window will open and you’ll be asked to wait for a minute or two for files to de-compress and be stored on your PC. All future launches should take less than a second.

CONGRATULATIONS! You’ve successfully installed and set up a Linux distribution that is completely integrated with your Windows operating system!
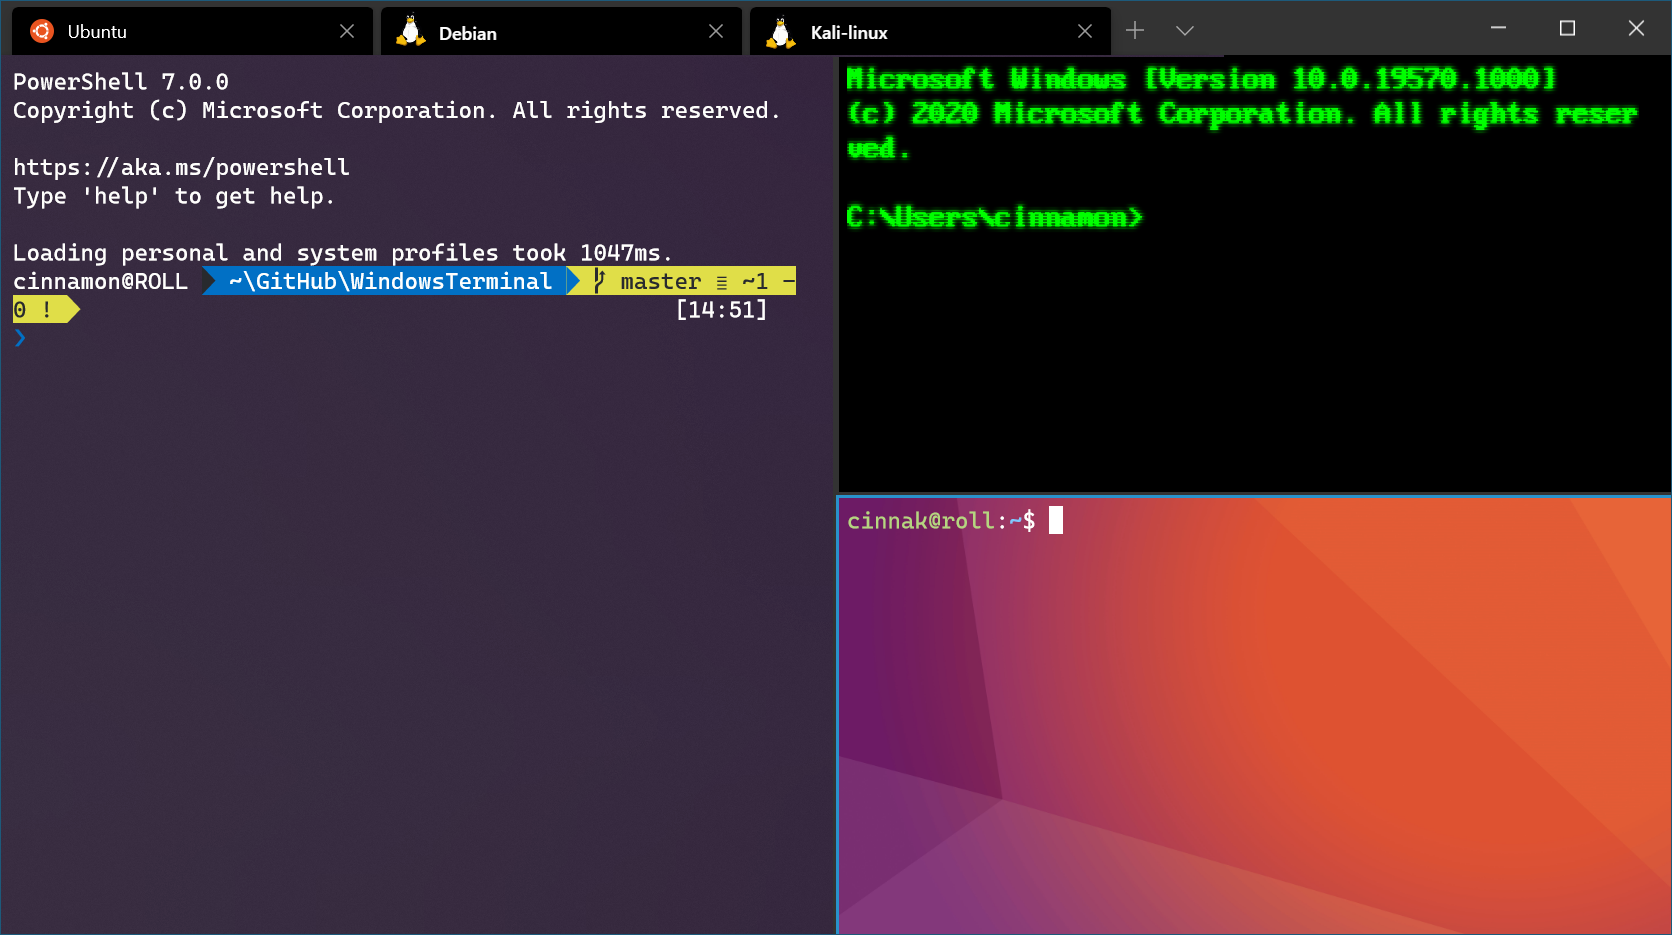
Install Windows Terminal (optional)
Windows Terminal enables multiple tabs (quickly switch between multiple Linux command lines, Windows Command Prompt, PowerShell, Azure CLI, etc), create custom key bindings (shortcut keys for opening or closing tabs, copy+paste, etc.), use the search feature, and custom themes (color schemes, font styles and sizes, background image/blur/transparency). Learn more.
Set your distribution version to WSL 1 or WSL 2
You can check the WSL version assigned to each of the Linux distributions you have installed by opening the PowerShell command line and entering the command (only available in Windows Build 18362 or higher): wsl -l -v
To set a distribution to be backed by either version of WSL please run:
Make sure to replace with the actual name of your distribution and with the number ‘1’ or ‘2’. You can change back to WSL 1 at anytime by running the same command as above but replacing the ‘2’ with a ‘1’.
The update from WSL 1 to WSL 2 may take several minutes to complete depending on the size of your targeted distribution. If you are running an older (legacy) installation of WSL 1 from Windows 10 Anniversary Update or Creators Update, you may encounter an update error. Follow these instructions to uninstall and remove any legacy distributions.
If wsl —set-default-version results as an invalid command, enter wsl —help . If the —set-default-version is not listed, it means that your OS doesn’t support it and you need to update to version 1903, Build 18362 or higher. If you are on Build 19041 for ARM64, this command may fail when using PowerShell in which case you can use a Command Prompt instead to issue the wsl.exe command.
If you see this message after running the command: WSL 2 requires an update to its kernel component. For information please visit https://aka.ms/wsl2kernel . You still need to install the MSI Linux kernel update package.
Additionally, if you want to make WSL 2 your default architecture you can do so with this command:
This will set the version of any new distribution installed to WSL 2.
Troubleshooting installation
Below are related errors and suggested fixes. Refer to the WSL troubleshooting page for other common errors and their solutions.
Installation failed with error 0x80070003
- The Windows Subsystem for Linux only runs on your system drive (usually this is your C: drive). Make sure that distributions are stored on your system drive:
- Open Settings -> **System —>Storage ->More Storage Settings: Change where new content is saved


WslRegisterDistribution failed with error 0x8007019e
- The Windows Subsystem for Linux optional component is not enabled:
- Open Control Panel ->Programs and Features ->Turn Windows Feature on or off -> Check Windows Subsystem for Linux or using the PowerShell cmdlet mentioned at the beginning of this article.
Installation failed with error 0x80070003 or error 0x80370102
- Please make sure that virtualization is enabled inside of your computer’s BIOS. The instructions on how to do this will vary from computer to computer, and will most likely be under CPU related options.
- WSL2 requires that your CPU supports the Second Level Address Translation (SLAT) feature, which was introduced in Intel Nehalem processors (Intel Core 1st Generation) and AMD Opteron. Older CPUs (such as the Intel Core 2 Duo) will not be able to run WSL2, even if the Virtual Machine Platform is successfully installed.
Error when trying to upgrade: Invalid command line option: wsl —set-version Ubuntu 2
- Enure that you have the Windows Subsystem for Linux enabled, and that you’re using Windows Build version 18362 or higher. To enable WSL run this command in a PowerShell prompt with admin privileges: Enable-WindowsOptionalFeature -Online -FeatureName Microsoft-Windows-Subsystem-Linux .
The requested operation could not be completed due to a virtual disk system limitation. Virtual hard disk files must be uncompressed and unencrypted and must not be sparse.
- Deselect “Compress contents” (as well as “Encrypt contents” if that’s checked) by opening the profile folder for your Linux distribution. It should be located in a folder on your Windows file system, something like: USERPROFILE%\AppData\Local\Packages\CanonicalGroupLimited.
- In this Linux distro profile, there should be a LocalState folder. Right-click this folder to display a menu of options. Select Properties > Advanced and then ensure that the “Compress contents to save disk space” and “Encrypt contents to secure data” checkboxes are unselected (not checked). If you are asked whether to apply this to just to the current folder or to all subfolders and files, select “just this folder” because you are only clearing the compress flag. After this, the wsl —set-version command should work.
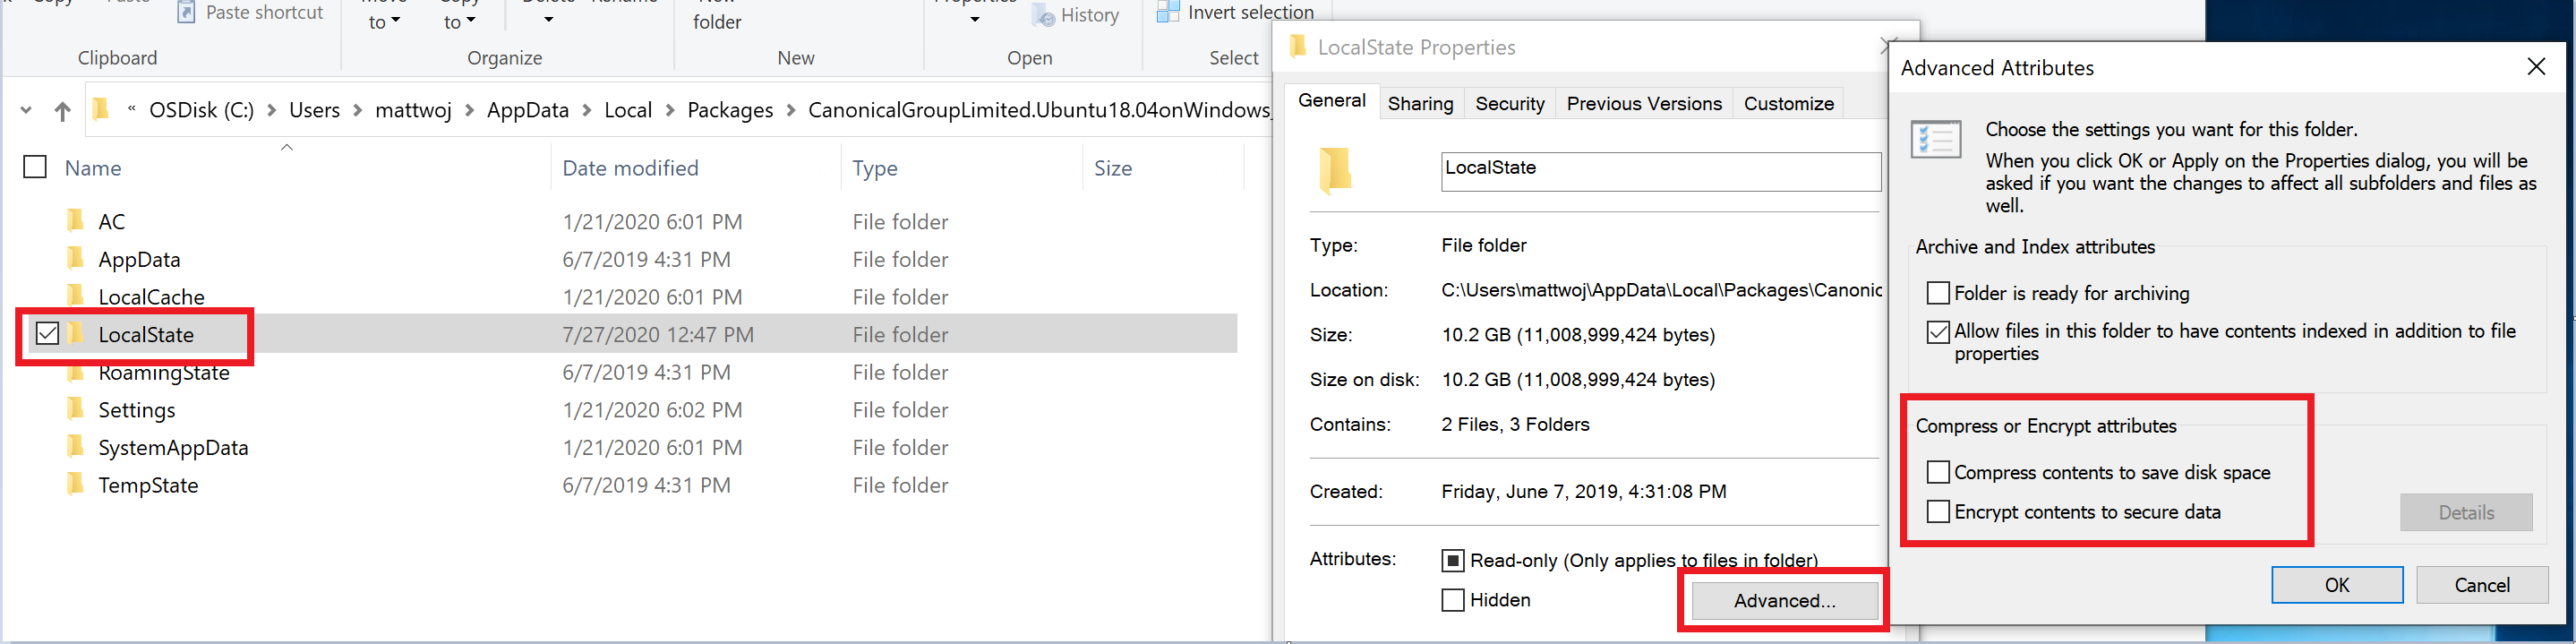
In my case, the LocalState folder for my Ubuntu 18.04 distribution was located at C:\Users \AppData\Local\Packages\CanonicalGroupLimited.Ubuntu18.04onWindows_79rhkp1fndgsc
Check WSL Docs GitHub thread #4103 where this issue is being tracked for updated information.
The term ‘wsl’ is not recognized as the name of a cmdlet, function, script file, or operable program.
- Ensure that the Windows Subsystem for Linux Optional Component is installed. Additionally, if you are using an ARM64 device and running this command from PowerShell, you will receive this error. Instead run wsl.exe from PowerShell Core, or Command Prompt.
Error: This update only applies to machines with the Windows Subsystem for Linux.
- To install the Linux kernel update MSI package, WSL is required and should be enabled first. If it fails, it you will see the message: This update only applies to machines with the Windows Subsystem for Linux .
- There are three possible reason you see this message:
- If the Linux kernel package is missing in the %SystemRoot%\system32\lxss\tools folder, you will encounter this error. Resolve it by installing the Linux kernel update MSI package in step #4 of these installation instructions. You may need to uninstall the MSI from ‘Add or Remove Programs’, and install it again.
You are still in old version of Windows which doesn’t support WSL 2. See step #2 for version requirements and links to update.
WSL is not enabled. You will need to return to step #1 and ensure that the optional WSL feature is enabled on your machine.
After you enabled WSL, a reboot is required for it to take effect, reboot your machine and try again.
Error: WSL 2 requires an update to its kernel component. For information please visit https://aka.ms/wsl2kernel .
—>
UNIX. Шаг первый. Эмуляция и установка UNIX System V Release 4
Любому человеку, работающему в сфере IT-инженерии, рано или поздно приходится сталкиваться с UNIX-подобными операционными системами, как бы не любил он продукцию корпорации Microsoft. Тоже самое приключилось и со мной, когда я стал устраиваться на работу в одну небезызвестную компанию. Именно после часа технического собеседования я серьёзно заинтересовался изучением UNIX-систем.
Самый первый вопрос, который встанет перед вами после решения окунуться в мир UNIX – с чего же начать изучение? Вопрос, на который однозначного ответа я для себя так и не нашёл. Поэтому решил так: начну изучать архитектуру и устройство системы, причём начать мне хотелось именно с тех самых ранних UNIX-систем. В своём городе стал искать в книжных магазинах (люблю всё читать с книги, электронные варианты использую только в крайних случаях) и нашёл книжку-руководство по легендарной UNIX System V Release 4. Перед тем, как заказывать её, мне хотелось точно понимать, что я смогу сэмулировать данную систему на своём ПК. Стал искать дистрибутивы данной системы на трекерах и всё-таки нашёл.
Первый вариант дистрибутива напугал наличием 30 IMA-файлов (файлы виртуальных дискет) с Readme-файлов описания назначения каждой из дискет, из которого начинающему IT-инженеру вряд ли что будет понятно. Попробовал добить в строку поиска фразу «готовый образ» — и, к своей радости, нашёл! Образ UNIX System V Release 4 для… Parallels Desktop (одним из лучших эмуляторов для Apple OS X, разработанным компанией Parallels, основанной нашим земляком, Сергеем Белоусовым). Попытки установить OS X с рабочим Интернетом и свободным доступом к папкам основной и гостевой ОС на VirtualBox и VMWare ограничился провалом (поиск по коду ошибок kernel.panic дал предположить, что всё дело в видеокарте AMD). Поэтому, стал искать другой способ эмуляции UNIX System V Release 4.
В комментариях к тому самому «страшному» торренту из 30 файлов-дискет я прочитал, что у многих получилось развернуть эту систему в эмуляторе Bochs. Начав искать информацию о принципе работы этого эмулятора и о том, как устанавливается UNIX System V Release 4, я начал понимать первые принципы организации дистрибутива этой ОС. Далее, я приведу Вам процедуру описания успешной установки этой системы, результатом которой станет доступ shell системы с правами супер-пользователя.
Не знаю, стоит ли выкладывать подобную информацию, но вот описание машины, на которой выполнялась вся процедура:
• Процессор Intel Core i5-3450 CPU 3,1 ГГц;
• ОЗУ 4 ГБ;
• ОС Microsoft Windows 8.1, 64-разрядная.
Нам понадобятся:
• Дистрибутив UNIX System V Release 4 (можно скачать с rutracker rutracker.org/forum/viewtopic.php?t=882391);
• Эмулятор Bochs 2.6 (НЕ работает в версиях 2.6.7 и 2.6.8, скачать можно здесь: bochs.software.informer.com/2.6).
Этап 1. Скачивание и приготовление дистрибутива
Поскольку, Bochs понимает только IMG-файлы, нужно преобразовать все скаченные IMA-образы в IMG. Делается это очень просто – переименованием расширения файлов (да, это действительно работает). В дистрибутив входят 30 дискет (U01.IMA – U30.IMA). В Readme-файле идёт их описание, которое я переведу для Вас на более понятный и простой язык. Для удобства, я советую Вам перекопировать все файлы в отдельную папку и переименовать их так, как это сделал я.
Итак, выделим три группы дискет:
• Необходимые для минимальной установки системы;
• Опциональные;
• Неиспользованные дискеты в данной процедуре установки системы.
1 группа – Необходимые файлы-дискеты для установки системы, которые располагаются в таком порядке:
U14.IMA —> Base — [01 of 10].img
U16.IMA —> Base — [02 of 10].img
U17.IMA —> Base — [03 of 10].img
U18.IMA —> Base — [04 of 10].img
U19.IMA —> Base — [05 of 10].img
U20.IMA —> Base — [06 of 10].img
U21.IMA —> Base — [07 of 10].img
U22.IMA —> Base — [08 of 10].img
U25.IMA —> Base — [09 of 10].img
U23.IMA —> Base — [10 of 10].img
U24.IMA —> Maintenance [01 of 02].img
U01.IMA —> Maintenance [02 of 02].img
Именно U14.IMA является первой загрузочной дискетой для установки системы, а не U01.IMA как это было бы логично. Советую Вам переименовать вышеперечисленные файлы в соответствующие им названия, указанные после стрелки – так будет гораздо удобнее переключаться между дискетами. Данная подгруппа называется Base – именно эти дискеты будет по порядку запрашивать программа установки UNIX. Два других дисковода (подгруппа Maintenance) содержат в себе базовые необходимые пакеты для работы с системой. Наличие этих дискет необходимо и достаточно для нормальной работы UNIX.
2 группа – Опциональные дискеты:
U02.IMA —> Remote Terminal Package [01 of 01].img
U03.IMA —> BSD Compatibility Package [01 of 02].img
U04.IMA —> BSD Compatibility Package [02 of 02].img
U05.IMA —> Networking Support [01 of 01].img
U06.IMA —> Xenix Compatibility Package [01 of 01].img
U07.IMA —> Framed Access Command Environment Package [01 of 01].img
U08.IMA —> Form + Menu Language Interpreter Package [01 of 01].img
U09.IMA —> Editing Utilities [01 of 01].img
U10.IMA —> Operations, Administration, and Maintenance package [01 of 03].img
U11.IMA —> Operations, Administration, and Maintenance package [02 of 03].img
U12.IMA —> Operations, Administration, and Maintenance package [03 of 03].img
U30.IMA —> 2 Users to 16 Users License [01 of 01].img
U29.IMA —> 16 Users to Unlimited Users License [01 of 01].img
U28.IMA —> Printer Package [01 of 03].img
U27.IMA —> Printer Package [02 of 03].img
U26.IMA —> Printer Package [03 of 03].img
Я думаю, что здесь пояснять ничего не нужно, названия дискет говорят сами за себя.
3 группа — Неиспользованные дискеты в данной процедуре установки системы:
U13.IMA Floppy Options) и выставляем следующие параметры:
• Type of floppy drive: 3.5” 1.44M;
• First floppy image/device – выбираем образ, соответствующий U14.IMA, то есть Base — [01 of 10].img;
• Type of floppy media: 1.44M;
• Установите галочку Inserted – это означает, что данная дискета вставлена в привод; если Вам потребуется далее выполнить перезагрузку системы, выгрузив все дискеты с приводов – просто снимите галочку.
Далее – подключаем жёсткий диск Disk & Boot -> ATA Channel 0:
• Устанавливаем галочку Enable this device;
• Path or physical device name – выбираем созданный файл-образ жёсткого диска;
• Здесь заполняем из блокнота информацию о цилиндрах, заголовках и SPT.
Теперь осталось настроить приоритет загрузки устройств Disk & Boot -> Boot Options:
• Boot drive #1: floppy;
• Boor drive #2: disk.
Нажимаем ОК и возвращаемся в главное меню Bochs. Сохраняем эту конфигурацию под любым удобным для Вас именем (получится файл с расширением BXRC) и после любого перезапуска эмулятора загружаем эту конфигурацию (кнопка Load), чтобы постоянно не производить все эти настройки вручную.
Этап 4. Установка UNIX System V Release 4
Убедитесь, что во floppy-дисководе находится файл-образ U14.IMA / Base – [01 of 10].img и нажимаем кнопку Start. Произойдёт загрузка с гибкого диска и мы начнём получать сообщения от программы установки:
Please insert the UNIX System «Base System Package» Floppy Disk 2 and then strike ENTER.
Вверху будет иконка floppy-диска A – используя её, мы сможем переключаться между нашими файлами-образами. Переключаемся на U16.IMA / Base — [02 of 10].img и нажимаем ENTER.
Please strike ENTER to install the UNIX System on your hard disk or DEL to cancel the installation.
Нажимаем ENTER.
WARNING: A new installation of the UNIX System will destroy all files currently on the system. Do you wish to continue (y or n)?
Конечно же, да – нажимаем y.
If you wish to use part of your hard disk for other operating system(s) other than the UNIX System, such as MS-DOS, that space MUST be reserved now. You are about to partition hard disk 0. Please strike ENTER when ready or DEL to cancel the installation.
Нажимаем ENTER.
The recommended default partitioning for your disk is: a 100% «UNIX System» partition. To select this, please type «y». To partition your disk differently, type «n» and the «fdisk» program will let you select other partitions
Если Вы желаете поделить диск сами, нажимайте n и используйте утилиту fdisk. Нажимаем y, затем ENTER, если соглашаемся на автоматическое разбиение диска.
Please select the File System Type for / (Root File System) from the following list: ufs, s5. Please press ENTER for the default type, ufs.
UFS нас устраивает, нажимаем ENTER.
Do you wish to create any optional disk slices of filesystems (y or n)?
В данной процедуре нас эта опция не интересует, нажимаем n, затем ENTER.
Далее система выведет информацию о логической организации диска и спросит Is this configuration acceptable (y/n)
Нажимаем y, затем ENTER.
Surface analysis will now be performed on your hard disk and UNIX System file systems will be created on your hard disk. This will overwrite all data in the UNIX System partition. Please strike ENTER to continue ot DEL to cancel the installation.
Нажимаем ENTER.
Система выведет конфигурацию жёсткого диска и спросит Is this configuration acceptable (y/n)
Нажимаем y, затем ENTER.
Далее система потребует перезагрузку и предупредит Вас о том, чтобы Вы изъяли из дисковода floppy-диск. Не забудьте это сделать (снимите галочку Inserted) и нажмите вверху кнопку Reset. Поскольку floppy-привод теперь пустой, система загрузится с жёсткого диска и выведет на экран следующее сообщение:
Затем нас спросят о том, с какого носителя будет устанавливаться система. Установку UNIX мы будем производить при помощи дискет, поэтому нажимаем f.
Далее потребуется поочерёдно эмулировать Base-дискеты с 3 по 10, когда этого требует система.
После этого нужно будет придумать и ввести пароли для трёх пользователей системы:
• Первый пользователь – это всем известный root или супер-пользователь;
• Второй пользователь – это install user, назначение которого мне пока не понятно;
• Третий пользователь – service user, назначение которого мне тоже пока не понятно.
Далее надо придумать и ввести системное имя. Введите любое (кроме «UNIX»). Система будет перестраивать ядро в соответствии с введёнными данными.
Установка продолжится и теперь нам понадобятся диски группы Maintenance. Сэмулируйте первый диск этой подгруппы и менеджер пакетов обнаружит список пакетов на этом диске для установки:
The following packages are available: 1 basepat UNIX SystemV/x86 Release 4.0 Version 2.1 Maintenance Disk #1 (i386) 4.0 2.1
Select package(s) you wish to process (or ‘all’ to process all packages). (default: all) [. q]:
Нам нужны все пакеты, поэтому просто нажимаем ENTER и через некоторое время эмулируем вторую дискету подгруппы Maintenance, пишем go и нажимаем ENTER. Появится следующее сообщение:
If any of the following packages are ever installed or reinstalled, you must reinstall the UNIX System V/x86 Release 4.0 Version 2.1 Maintenance Disk #1:
LP Print Service Version 4.0 2.1
Networking Support Utilities Version 4.0 2.1
XENIX Compatibility Package Version 4.0 2.1
Нажимаем ENTER. Теперь если Вы удалите гибкий диск из привода и перезагрузите машину, то, введя в качестве логина root и пароля – придуманный пароль, попадёте в командную оболочку легендарной операционной системы – поздравляю, Вы только что установили UNIX и можете лично прикоснуться к истории!
Если эта статья будет интересна, полезна и актуальна, то в следующий раз попробую описать установку опциональных пакетов. Всех благодарю за внимание, надеюсь увидеть конструктивную критику и советы от уже бывалых «юниксоидов»!
Данная статья не подлежит комментированию, поскольку её автор ещё не является полноправным участником сообщества. Вы сможете связаться с автором только после того, как он получит приглашение от кого-либо из участников сообщества. До этого момента его username будет скрыт псевдонимом.


