- Программирование в Cmd введение для новичков
- Для новичков
- Windows Terminal Tips and Tricks
- On first launch
- Customization
- Global profile settings
- Custom color schemes
- Custom command line
- Old school fonts
- Places for background images
- Functionality
- wt.exe command line arguments
- Panes
- Copy and paste
- Defining key bindings and actions
- Send input commands
- WSL starting directory
- Cheers
- Command-Line Reference
- Prerequisites
- Feature description
- New and deprecated functionality
- Command shell overview
- Customize the Command Prompt window
- To configure the Command Prompt window
- Command-line reference A-Z
Программирование в Cmd введение для новичков
Для новичков
Это всего лишь введение в команды cmd, не судите строго, статья писалась для Новиков, та и многим другим я думаю пригодиться =)
Наверно многие и не подозревают, что cmd это универсальная оболочка,
которая позволяет не просто администрировать систему, но и программировать!
Конечно уровень языка не столь высок, как например с , но все же.
Для начала, напишем маленькую программку, которая будет выводить строчку, записанную в переменную.
Заходим на диск С:\ и создаем там что то типа program_1.cmd (можно *.bat)
открываем его блокнотом и вписываем туда следующие строки:
rem программа_1
cls
@echo off
color 0A
set string=Hellow World.
echo %string%
rem — используеться для описния коментариев
cls — если кто еще незнает, это отчистка экрана
@echo off — выключаем отображение команд на экране. Обратите внимание на @
перед ECHO! Она предотвращает эхо-отображения команд в отдельной строке.
color 0A — задаем цвет фона и текста
set string=Hellow World. — set используется для описания переменных
echo %string% — вывод на экран переменной, обратите внимание на %%, это
обозначает, что это действительно переменная, а не строка!
С кодом разобрались, теперь посмотрим на исход программы! Запускаем ее на выполнение через cmd:
program_1.cmd
Результат выполнения будет, как вы догадались Hellow World. Ярко-зелеными буквами на черном фоне
Теперь немножко усложним задачку, добавим в этот код условие!
rem программа_2
cls
@echo off
color 0A
set a=1
set timer=10
if %a%==1 (shutdown /r -t %timer% -c «Вас похекали»
) else (echo a!=1)
Я думаю вы уже догадались что будет на выводе. Мы сравниваем значение записанное в переменную “а” с 1, если условие истина, то компьютер перезагрузиться через 10 секунд, в ином случае на вывод подается надпись, что a!=1. Пример банален и прост,
ну зато понятен для многих.
А теперь перейдем непосредственно к циклам. Рассмотрим самый элементарный пример:
rem программа_3
cls
@echo off
color 0A
for /l %B in (0,1,10) do echo %B
данная программа выведет в столбик цифры, от 0 до 10 с шагом 1 =) все просто, как .
А теперь немного сложнее, for может использоваться в более весомых целях,
например для перебора файлов, для примера можете написать в cmd:
for %B in (C:*.cmd) do (echo %B)
В ответ вы получите все ваши программки с расширением *.cmd
Также циклом for можно перебрать каталоги, к примеру
for /d %B in (C:*) do echo %B
Покажет все каталоги на диске С:\ (Обратите внимание, только каталоги, а не подкоталоги!)
А теперь напишем существенную программу, которая будет из базы выбирать емейлы и записывать их в другой файл.
(for /f «tokens=1-5» %A in (users.txt) do @echo %D) > emails.txt
К примеру, база у нас «идеальная», типа:
Vasya Pupkin heck 111@mail.ru 81231111111
Dima Ivanov lamer 222@mail.ru 81232222222
Genya Petrov lamer 333@mail.ru 81233333333
Egor Sidorov lamer 444@mail.ru 81234444444
Anton Popovich lamer 555@mail.ru 81235555555
Kostya Terentev lamer 666@mail.ru 81236666666
Vanya Onisenko lamer 777@mail.ru 81237777777
Misha Loshenko lamer 888@mail.ru 81238888888
Vlad Sorochinskiy lamer 999@mail.ru 81239999999
Мы с помощью цикла перебираем все слова, и записываем 4(%D) в файл emails.txt =)
Что же еще можно сделать с cmd?
Опишу свой пример. Я занимаюсь созданием веб-сайтов, которые используют базу данных mysql. С базой я работаю через консоль, для меня привычнее. Что б не париться я написал небольшую программку mysql.cmd которая к ней будет подключаться:
PHP код:
v:
cd usrlocalmysql4bin
mysql.exe -u root –p pass
v – виртуальный диск на котором стоит денвер
root – имя пользователя
pass – пароль пользователя
Нам остается ее запустить и наслаждаться работой с базой
PS Ну вот собственно и все! Статья получилось маленькой, но я все же надеюсь, что она кому то будет полена =)
Windows Terminal Tips and Tricks
October 15th, 2020
Windows Terminal comes with a lot of features that allow you to customize it and interact with it in a way that feels most comfortable to you. Let’s run through some tips and tricks that could help you set up your terminal in a way that’s perfect for you. At the time of this blog post, Windows Terminal is on version 1.3 and Windows Terminal Preview is on version 1.4.
On first launch
When you first install Windows Terminal, you will be greeted with a Windows PowerShell prompt. Windows Terminal ships with Windows PowerShell, Command Prompt, and Azure Cloud Shell profiles by default.
In addition to these profiles, if you have any Windows Subsystem for Linux (WSL) distributions installed, the terminal will automatically create profiles for those distros as well. If you would like to install additional WSL distros on your machine, you can do so after installing terminal and on your next terminal launch, the profiles for those distros should automatically appear. These profiles will have Tux as their icon, however you can change the icon of the distro in your settings to match whichever distro you have. You can find more information about WSL on the WSL docs site.
👉 Note: You will have to download the distro icons as they do not come shipped inside the terminal.
Customization
Windows Terminal comes with a large set of default settings, including color schemes and keyboard shortcuts. If you’d like to view the default settings file, you can hold Alt and click on the Settings button inside the dropdown menu.
Global profile settings
Windows Terminal provides you the option of applying a setting to every profile without having to duplicate the setting for each profile entry. This can be done by adding a setting inside the «defaults» array inside the «profiles» object. A list of all possible profile settings can be found on the Profile settings page on our docs site.
Custom color schemes
Windows Terminal comes with an assortment of color schemes by default. However, there are unlimited possibilities when it comes to color schemes. A great place to find additional terminal schemes is terminalsplash.com.
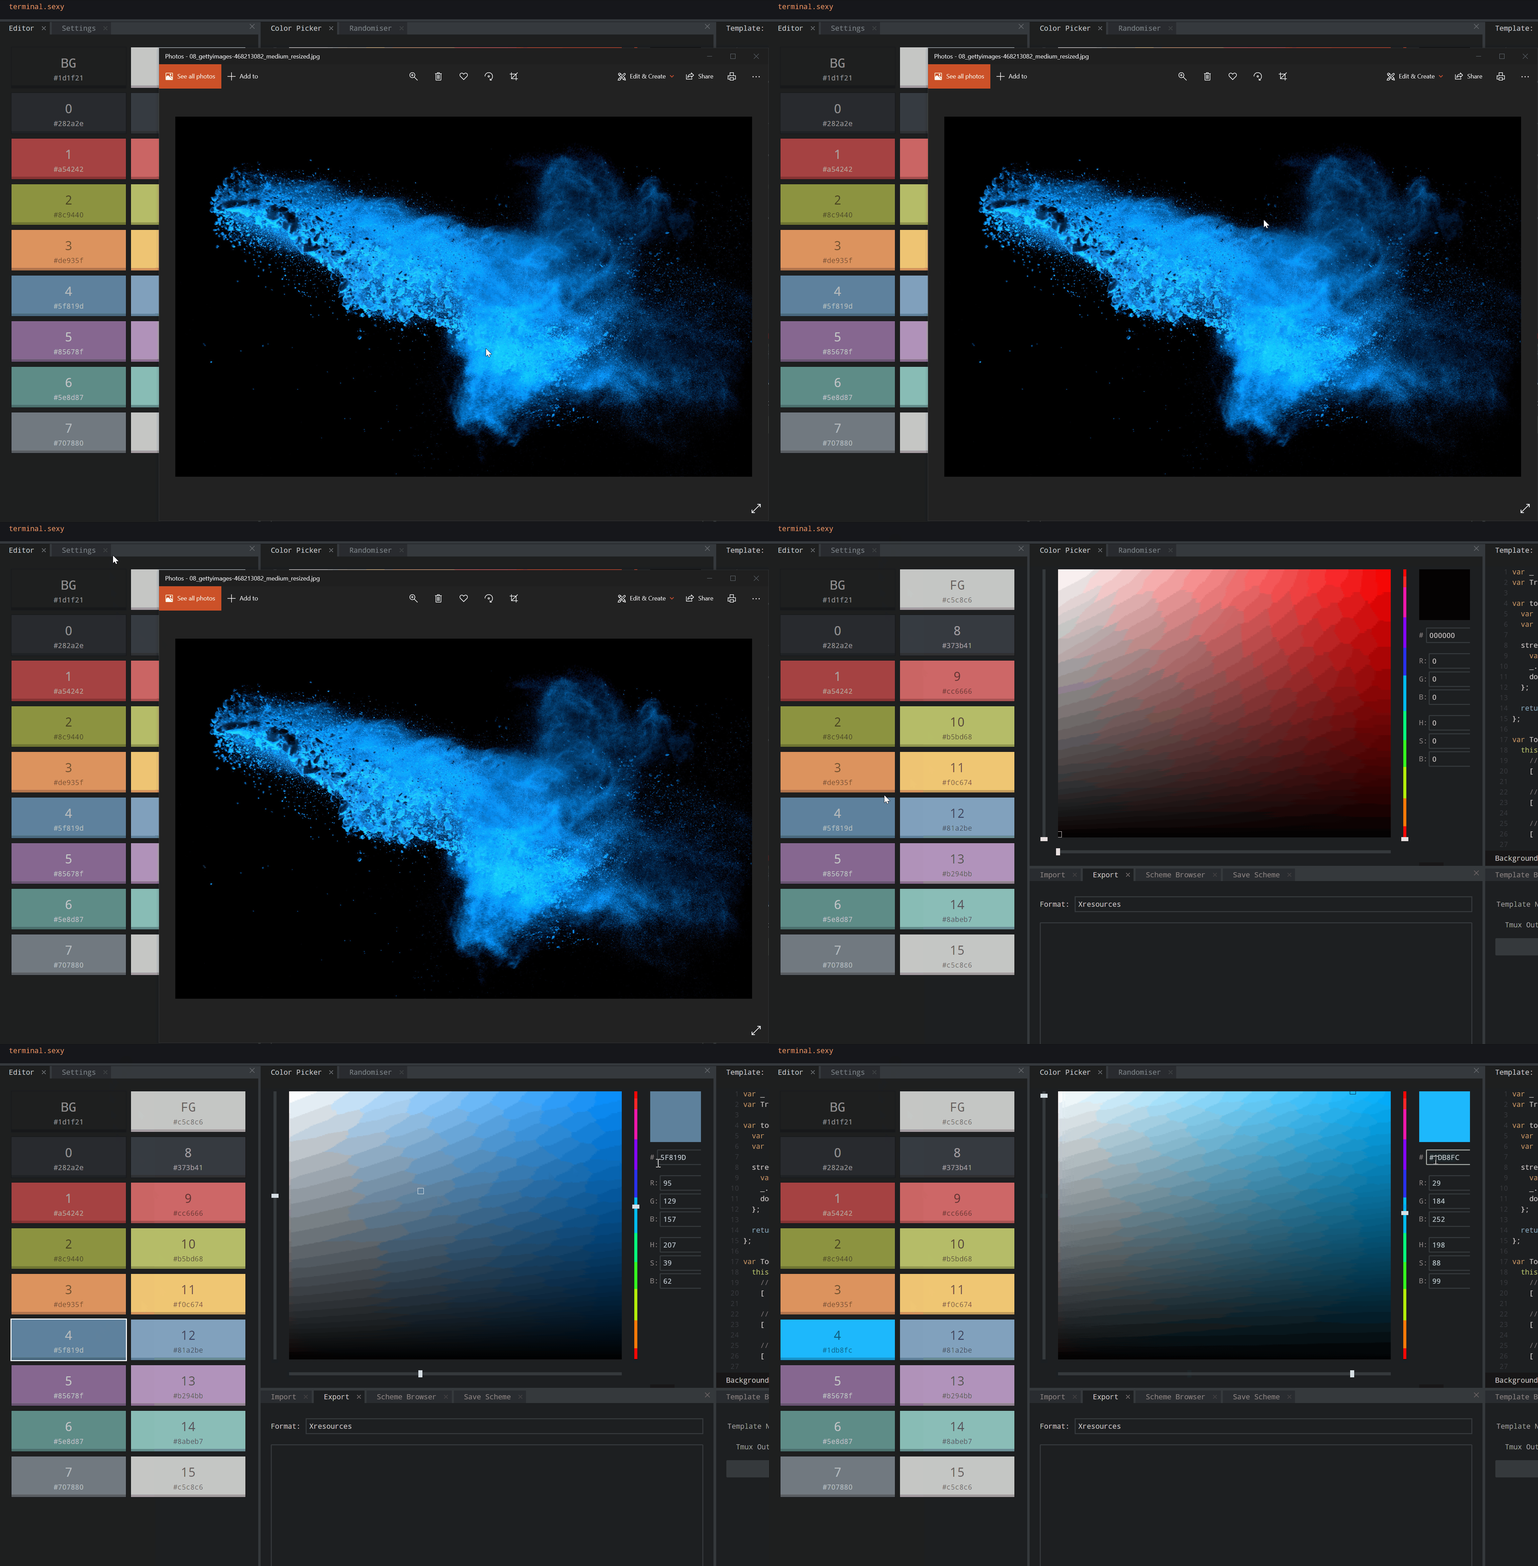
If you’d like to create your own color scheme, terminal.sexy is a great tool for creating and visualizing your own color schemes.
💡 Tip: You can match your custom color scheme to a background image by using the PowerToys color picker to grab hex codes for colors to use inside your scheme. PowerToys can be installed using winget with winget install powertoys .
Custom command line
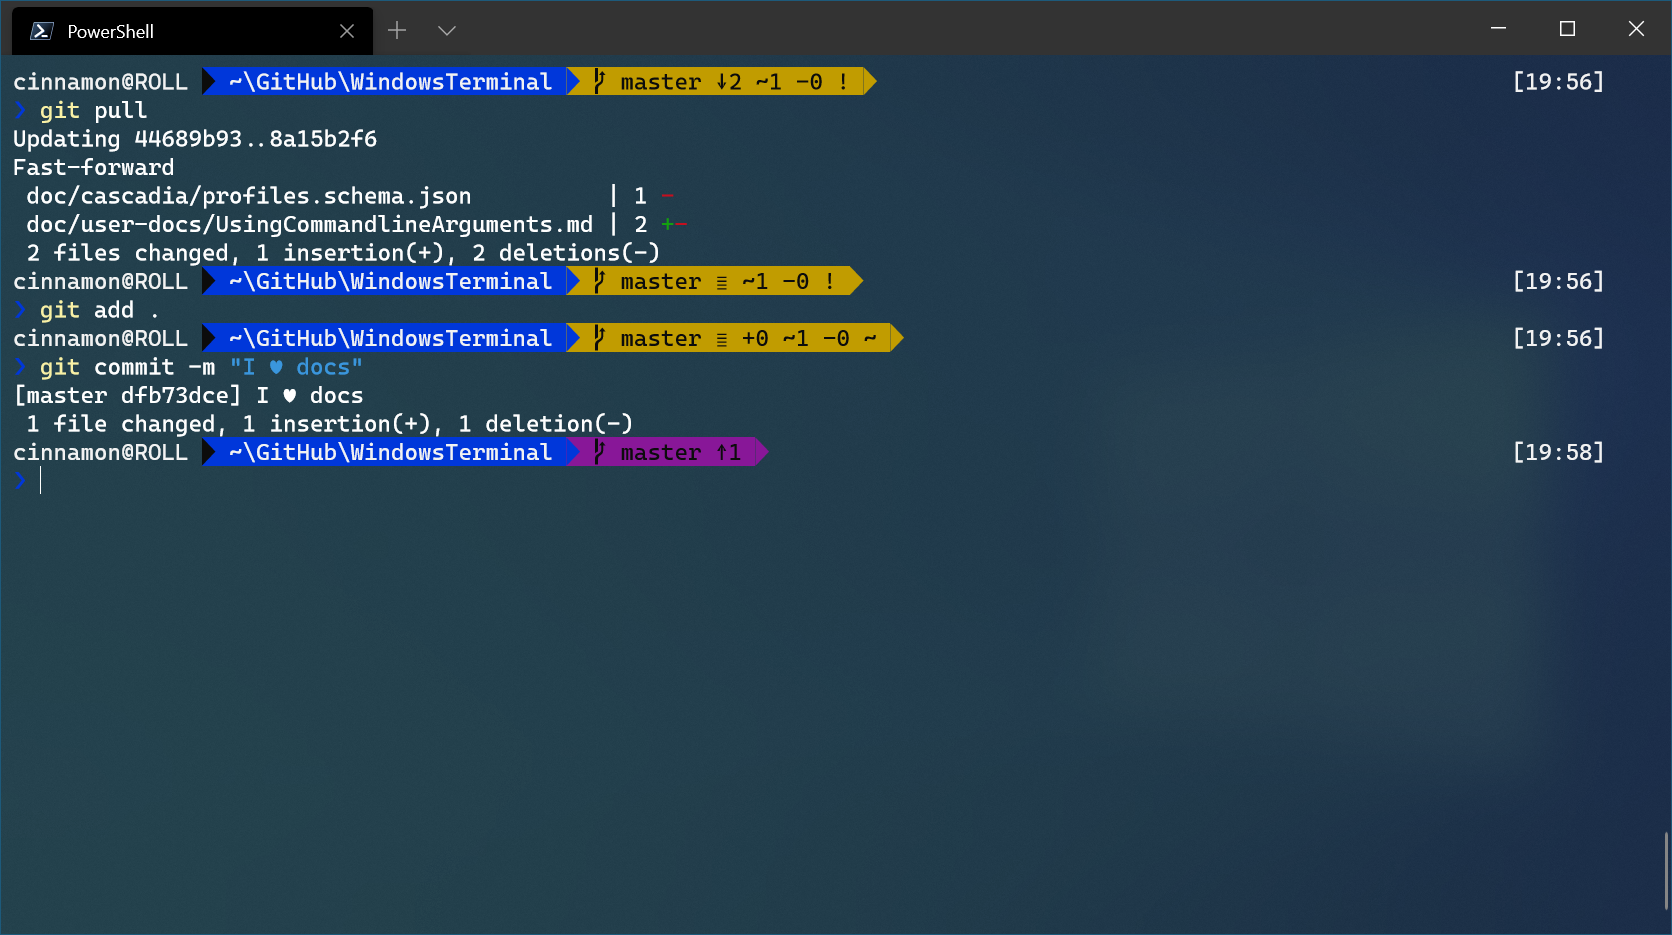
You can give your command line some style with Oh my Posh and Terminal-Icons. These tools allow you to customize what your prompt looks like with colors, glyphs, and emojis. To get Oh my Posh with Posh-Git and PSReadline up and running, you can follow this tutorial.
Oh my Posh recently came out with Oh my Posh 3, which has a lot more customization options and is not only exclusive to PowerShell. After going through the tutorial linked above, you can upgrade to V3 with the following command:
You can add a bit more flair to your shell by adding custom icons with Terminal-Icons. The image below is also using a custom Posh theme to add emojis to the prompt line.
👉 Note: You will need to set your font to a Nerd Font in order to get the Terminal Icons to appear.
Old school fonts
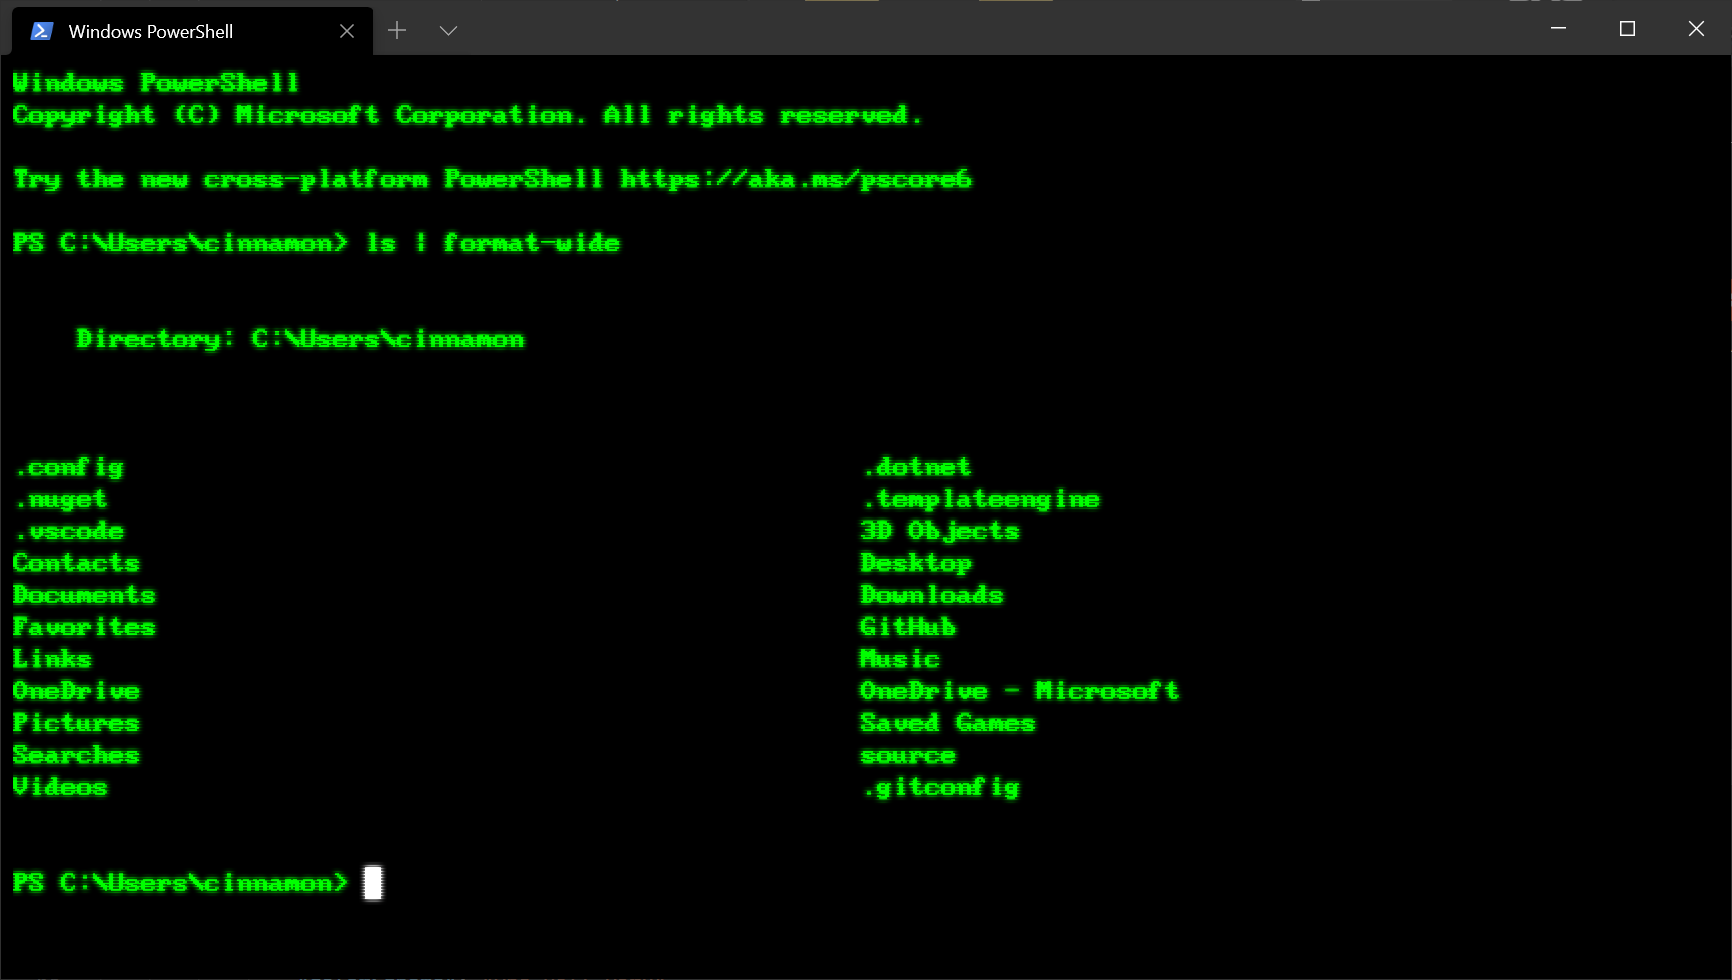
For those of you who are fans of the retro terminal effect, a great place to find old school fonts is at https://int10h.org/oldschool-pc-fonts/.
Places for background images
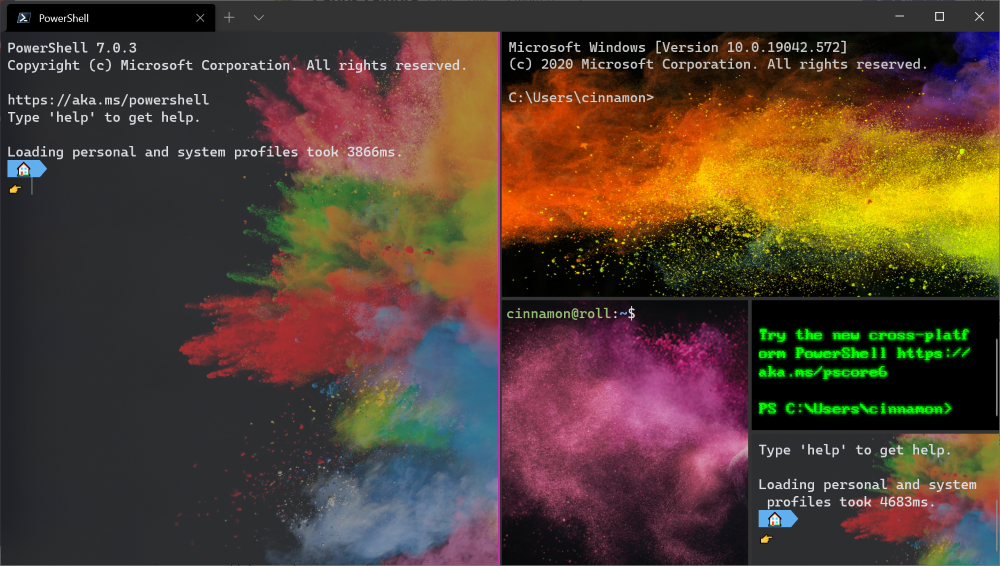
Desktop wallpapers often look great inside Windows Terminal as background images. Some great places to find background images are Windows Themes as well as WallpaperHub. Windows Terminal supports both images and gifs for background images.
Another popular option is placing the logo of the shell you are using as the background image, to help identify which shell you are in. You can set where the background image is placed with «backgroundImageAlignment» in your settings. More information on background image settings can be found on our docs site.
Functionality
wt.exe command line arguments
You can launch your terminal in a specific configuration by using the wt.exe command. Some options you can set are tab and pane arrangements as well as their starting directories and profiles. You can save a custom command as a shortcut and pin it to your taskbar to open your desired configuration.
If you use the wt.exe command inside the command palette, it will take effect in your current terminal window, rather than spinning up a new terminal instance.
This example will open the PowerShell profile in the current working directory in a new tab with a vertical pane running your default profile.
wt -p «PowerShell» -d . ; split-pane -V
Full documentation about wt command line arguments can be found on our docs site.
Panes
Windows Terminal has pane support for profiles. You can open a new pane of a profile by either holding Alt and clicking on the profile in the dropdown, or by using the following keyboard shortcuts:
Automatic pane split of current profile
Horizontal pane split of default profile
Alt + Shift + Minus
Vertical pane split of default profile
Alt + Shift + Plus
You can also move focus around your panes by holding Alt and using the arrow keys. Lastly, you can resize your panes by holding Alt + Shift and using the arrow keys. You can find more information about panes on our docs site.
Copy and paste
In Windows Terminal, the default keyboard shortcuts for copy and paste are Ctrl + C and Ctrl + V , respectively. If you do not have a selection, Ctrl + C will act as normal as the break command.
You can customize which keys you’d like to copy and paste with by editing the «copy» and «paste» key bindings. If you delete these key bindings from your settings.json, the terminal will default to Ctrl + Shift + C and Ctrl + Shift + V . This can be especially helpful for WSL users who need Ctrl + C and Ctrl + V free to use for their shells.
You can also choose which formatting is copied to your clipboard along with newline characters with the «copyFormatting» and «singleLine» actions associated with the copy command. Full documentation on clipboard integration commands can be found on our docs site.
Defining key bindings and actions
A large portion of the customizable properties inside Windows Terminal come from key bindings and actions. Commands inside the «actions» array will automatically be added to your command palette. If you’d like to also use them with key bindings, you can add «keys» to them to invoke them with the keyboard. A full list of every possible command can be found on the Actions page of our docs site.
Send input commands
Windows Terminal gives you the ability to send input to your shell with a key binding. This can be done with the following structure inside your «actions» array.
Sending input to the shell with a keyboard shortcut can be useful for commands you run often. One example would be clearing your screen:
Navigating to the parent directory with a key binding may also be helpful.
You can also use this functionality to run builds or test scripts.
WSL starting directory
As of now, Windows Terminal defaults to setting WSL profiles’ starting directory as the Windows user profile folder. To set your WSL profile to start in the
folder, you can add the following line to your profile settings, replacing DISTRONAME and USERNAME with the appropriate fields.
Cheers
We hope you learned a few tips and tricks about Windows Terminal throughout this blog post. We are currently planning another release for the month of November, so keep your eyes peeled for that one! If you have any questions or feedback, feel free to reach out to Kayla (@cinnamon_msft) on Twitter. For more information about Windows Terminal, you can check out our docs site.
Kayla Cinnamon
Program Manager, Windows Terminal, Console, Command Line, & Cascadia Code
Command-Line Reference
Applies To: Windows Server 2003, Windows Vista, Windows XP, Windows Server 2008, Windows 7, Windows Server 2003 R2, Windows Server 2008 R2, Windows Server 2000, Windows Server 2012, Windows 8
Use this topic to find the documentation resources and other technical information that you need to learn about the command shell, and to automate command-line tasks by using scripts or scripting tools.
To read introductory information about the command shell and command-line tools, see Feature description. To see a listing of new and deprecated command-line tools see New and deprecated functionality.
To find information about a specific command, in the following A-Z menu, click the letter that the command starts with, and then click the command name.
Prerequisites
The information that is contained in this overview applies to:
Windows Server 2012
WindowsВ ServerВ 2008В R2
WindowsВ ServerВ 2008
WindowsВ ServerВ 2003В R2
WindowsВ ServerВ 2003
Feature description
New and deprecated functionality
New or Deprecated?
Create a new cluster or configure an existing cluster.
Configure DFS folders and folder targets in a DFS namespace.
Creates and manages File Server Resource Manager quotas.
Create and manage file groups, file screens, file screen exceptions, and file screen templates that are used to configure general administrative options for screening files.
Enable optional features in Windows by downloading required files from WindowsВ Update or a source that Group Policy specifies.
Read, write, run, debug, and test Windows PowerShell scripts and modules in a friendly, graphic-assisted environment.
Install or remove roles, role services, and features.
Monitor an RD Session Host session.
Create and manage storage reports and storage report tasks, and configure general administrative options for File Server Resource Manager.
Command shell overview
The command shell is a software program that provides direct communication between the user and the operating system. The non-graphical, command shell user interface provides the environment in which you run character-based applications and utilities. The command shell executes programs and displays their output on the screen by using individual characters similar to the MS-DOS command interpreter, Command.com. The command shell in the Windows Server operating system uses the command interpreter, Cmd.exe. Cmd.exe loads applications, directs the flow of information between applications, and translates user input into a form that the operating system understands.
You can use the command shell to create and edit scripts to automate routine tasks. For example, you can create simple scripts in batch (.bat) files to automate the management of user accounts or nightly backups. You can also use the command-line version of Windows Script Host to run more sophisticated scripts in the command shell. For more information, see Cscript or Wscript. You can perform operations more efficiently by using scripts than you can by using the user interface. Scripts accept all commands that are available at the command line.
Customize the Command Prompt window
You can change the properties for the Command Prompt window.
To configure the Command Prompt window
Open a Command Prompt window, click the upper-left corner of the Command Prompt window, and then click Properties. (Or to open Command Prompt Properties from the keyboard, press ALT+SPACEBAR+P.)
Click the Options tab.
In Command History, type or select 999 in Buffer Size, and then type or select 5 in Number of Buffers. By increasing the screen buffer size to 999, you enable scrolling through the Command Prompt window. By increasing the number of buffers to five, you increase the number of lines in the Command Prompt window to 5000.
In Edit Options, select the Quick Edit Mode and Insert Mode check boxes.
Click the Layout tab.
In Screen Buffer Size, type or select 2500 in Height.
To further customize your Command Prompt window settings, perform any of the following optional tasks:
In Screen Buffer Size, increase Width.
In Window Size, increase Height.
In Window Size, increase Width.
Clear the Let system position window check box, and then, in Window Position, change the values in Left and Top.
In the Apply Properties dialog box, click Save properties for future windows with same title.
To enable or disable file and directory name completion on a computer or user logon session, run Regedit.exe and set the following REG_DWORD value : HKEY_LOCAL_MACHINE\Software\Microsoft\Command Processor\CompletionChar\REG_DWORD To set the REG_DWORD value, use the hexadecimal value of a control character for a particular function (for example, 0Г—9 is Tab and 0Г—08 is Backspace). User-specified settings take precedence over computer settings, and command-line options take precedence over registry settings.
Incorrectly editing the registry may severely damage your system. Before making changes to the registry, you should back up any valued data on the computer.
Command-line reference A-Z
To find information about a specific command, in the following A-Z menu, click the letter that the command starts with, and then click the command name.
Each command-line tool topic displays the version of Windows that is supported by the command-line tool.


