- Paravirtualized Block Drivers for Windows
- Contents
- Introduction
- Download
- Installation
- Setup On Running Windows
- Tested guest OS
- Setup Steps
- Setup During Windows Installation
- Old VFD Method
- Vova1234.com
- Проблемы и их решение
- Прямой эфир
- Блоги
- Установка Windows на ProxMox
- Windows VirtIO Drivers
- Contents
- Introduction
- Windows OS Support
- Installation
- Using the ISO
- Wizard Installation
- Manual Installation
- Downloading the Wizard in the VM
- Записки IT специалиста
- Установка и настройка Proxmox VE 6.0
Paravirtualized Block Drivers for Windows
Contents
Introduction
In order to improve disk performance, special paravirtualized block drivers can be installed in Windows guests. You have to download and install those drivers in the VM, as Windows does not provides them by default.
 | Note: Proxmox recommends using SCSI with VirtIO SCSI as SCSI Controller Type for VM disks, to have the most features and best performance. VirtIO block may get deprecated in the future. DownloadYou can download the latest stable Windows VirtIO drivers from: https://fedorapeople.org/groups/virt/virtio-win/direct-downloads/stable-virtio/virtio-win.iso Older Windows Versions may sometimes need older VirtIO drivers. See Windows VirtIO Drivers for more info about the change log, guest OS compatibility and other useful VirtIO guest devices. Upload the ISO through the Proxmox VE WebUI: Select a Storage which allows ISO images in the PVE WebUI and switch to Content tab where you can use the «upload» button on the menu bar. You may also copy the ISO manually onto a PVE configured storage. InstallationThe goal to use VirtIO SCSI or Block (SCSI is recommended) to improve the performance and available features of (Windows) VMs. The way we do this depends if we want to change an already installed and running Windows VM or if we want to set this up during a Windows installation. Setup On Running WindowsHere we add a temporary disk with the new wanted disk controller to the VM and install the respective drivers. The Windows OS in your VM knows nothing about VirtIO drivers, so you can’t simply stop the VM, change the disk to Vrtio-SCSI or VirtIO and reboot. You have to force Windows to install VirtIO drivers during it runs. To do this we add a small temporary SCSI-VirtIO or VirtIO disk to the VM and install its drivers explicitly. Without adding the Disk the installation of the driver is flawed under Windows, as driver installation of an not plugged in Hardware does not works. Tested guest OS
Setup Steps
You should now be able to enter Windows «Disk Management» and format the temporary SCSI/VirtIO disk (this is not necessary, it just proves that the driver is installed and working). (Legacy Note: Windows 2000 may report each disk 8 times in disk management, just install and use the first of each 8-tuple. In «My computer» you should see each disk only once.) Windows has now the VirtIO SCSI/Block driver installed, and we need to re attach the VM disks as SCSI or virtio.
After finishing, through PVE web interface, you can:
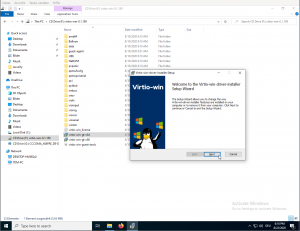
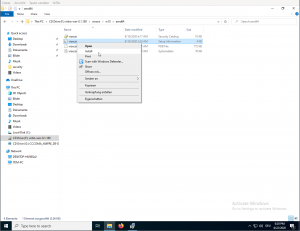
Setup During Windows InstallationDownload the VirtIO drivers as described above. Set the drive type to SCSI (preferred) or VirtIO and the Network also to VirtIO for improved performance. Add a second IDE CDROM drive, in the first mount the Windows installer ISO and in the second the VirtIO driver ISO. Startup the VM and the Installation process. When you arrive at the Disk/Partition selection you won’t see a Disk because the driver aren’t loaded. Click on the Load Driver button and then Browse. In the file browser select the second CDROM drive with the VirtIO drivers and navigate to the vioscsi/WINVERSION/amd64 (or x86 if you have a 32 bit system) and click OK. RedHat driver should show up in the Driver Installer click next to install them. Repeat the process for other VirtIO driver (e.g. network, qxl, . ). The Disks should now show up and you can continue with the installation process as usual. Old VFD MethodNote: This is kept for legacy reasons, newer Windows versions (XP and newer) should use the above menthod. You can add the block drivers during install by manually adding a virtual floppy drive (vfd) and a second IDE CDROM Drive (for network VirtIO) to the VM for the initial install (thanks to meto & user100 in the forum). Download the VirtIO drivers as described above, upload VFD (for disks) and the ISO (for network) to PVE. to add the VFD as virtual floppy to the VM. Now start the VM and open the console. The standard boot sequence for a new KVM seems to be HDD — Floppy — CD, you can change this but it’s just as easy to reboot using the Ctrl-Alt-Del button in the console, use F12 to bring up a boot selection window & boot from CD. Once windows starts to load, press F6 to get it to look for extra drivers to load. It will automatically load the floppy & away you go. Note that older VirtIO drivers aren’t signed by Windows, so you need to tell the system to continue to load the drivers on a warning. Vova1234.comПроблемы и их решениеПрямой эфирБлоги
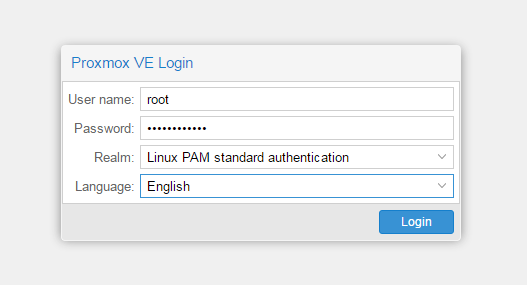
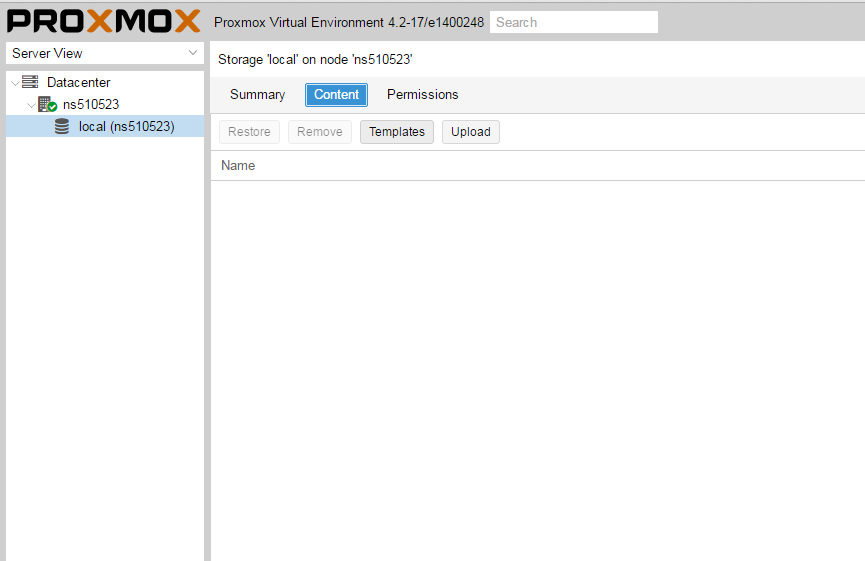
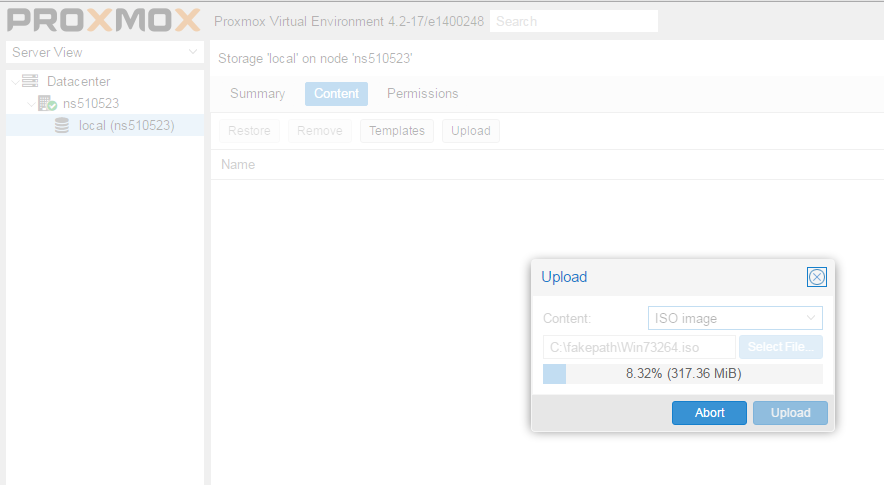
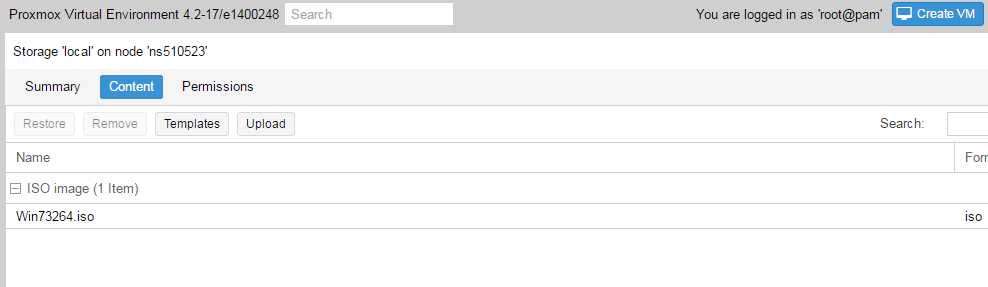
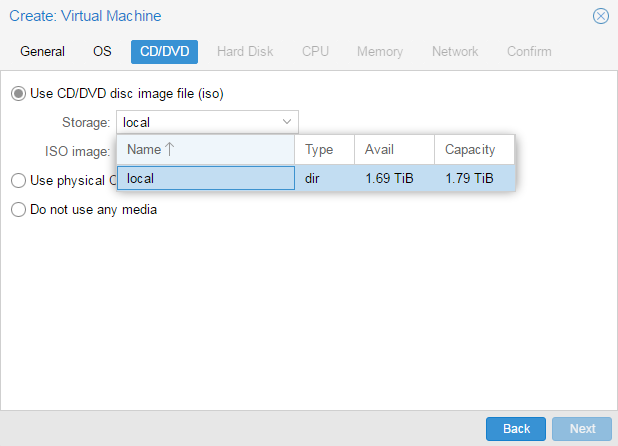
Установка Windows на ProxMoxУстановка была сделана на сервере: Intel® Core(TM) i3-2130 CPU @ 3.40GHz, 2000GB SATA HDD, 8192 MB RAM. VPS Proxmox VE 5 — эта версия пашет по мануалу. Готовые ISO образы: ОС на сервере Debian. Идем на адрес: https:// ваш ip:8006. Вводим и заходим. Открываем NS, далее local как на скриншоте внизу:
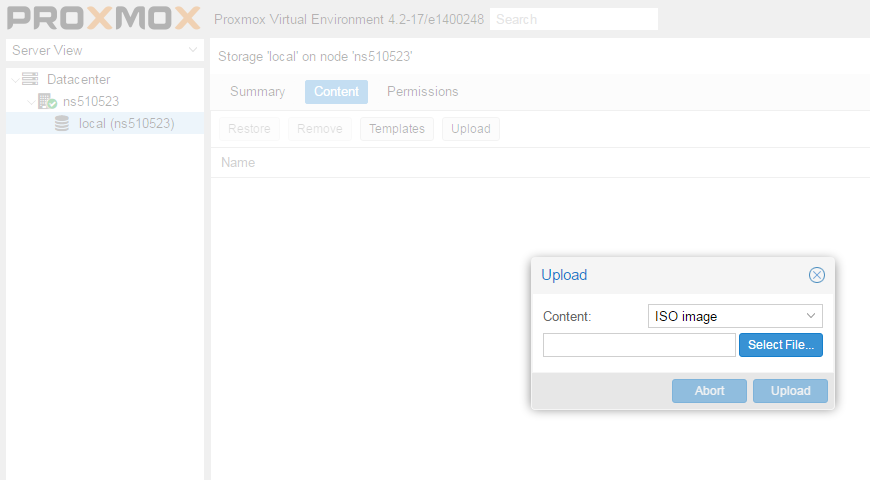
Жмем Upload. И грузим свой ISO образ Windows какой скачали по ссылке выше.
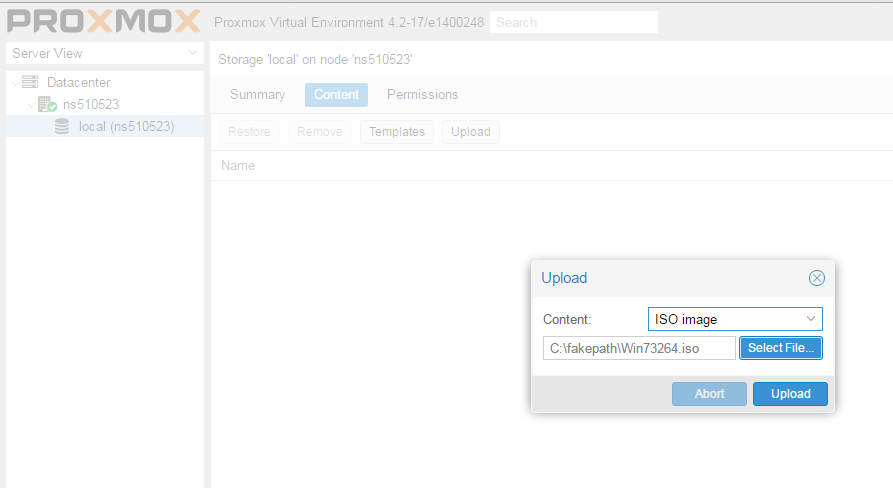
Ну и грузим его:
У меня 100 мегабит интернет по этому 3ГБ быстро загружается.
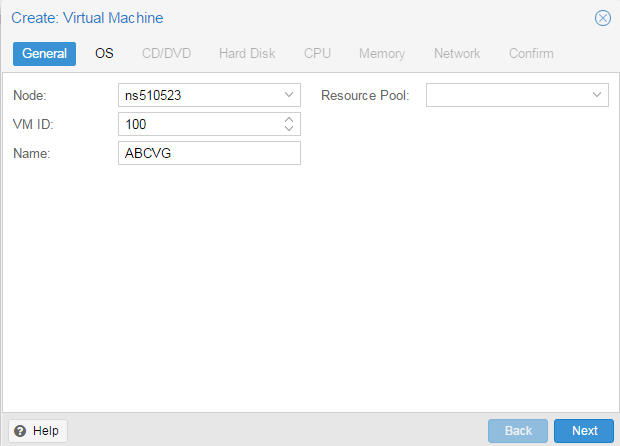
Нажимаем Create VM. Можем вписать свое имя виртуальной машины.
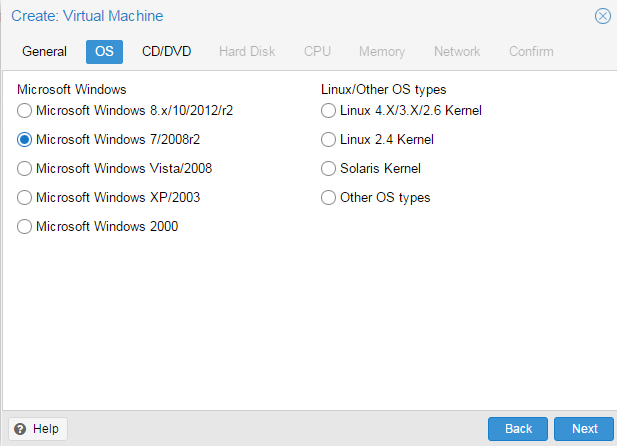
Я не вшарил зачем это выбирать если мы и так с образа устанавливаем.
Выбираем хранилище образов.
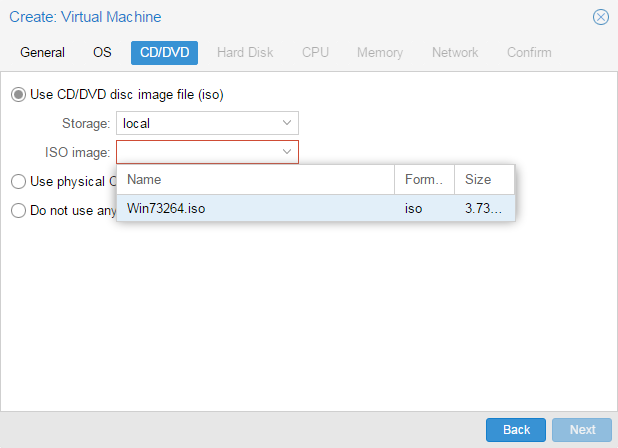
Выбираем образ наш загруженный.
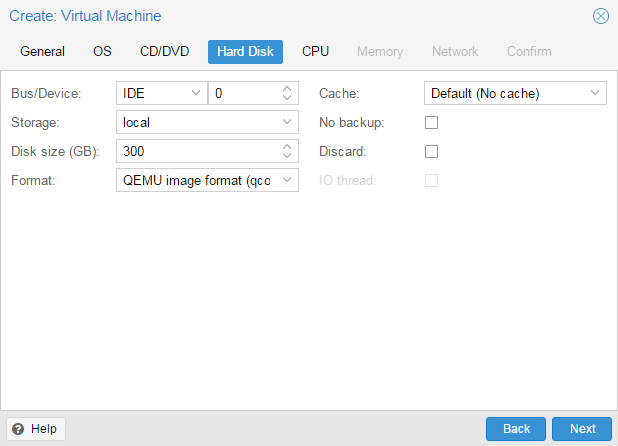
Указываем сколько места надо, 300 ГБ я выбрал.
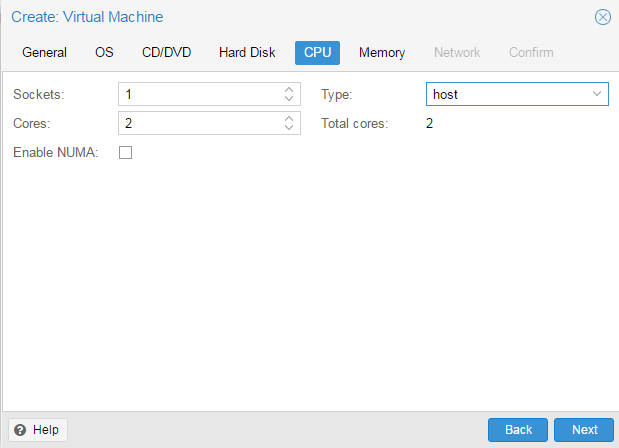
I3 имеет два ядра. Лучше ставить как есть.
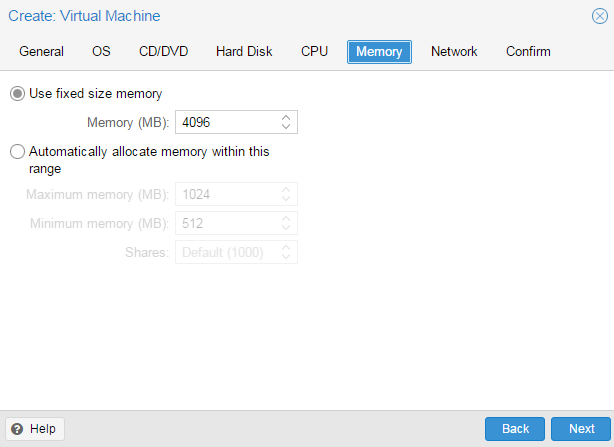
Половину доступной памяти поставил я. ProxMox резервирует оперативную под всю виртуальную машину.
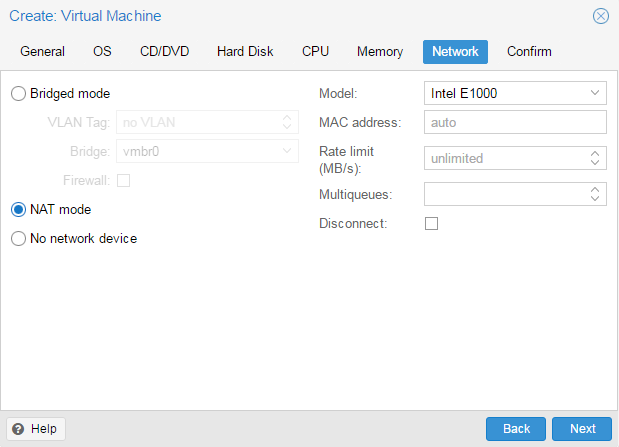
NAT mode ставить надо по дефолту.
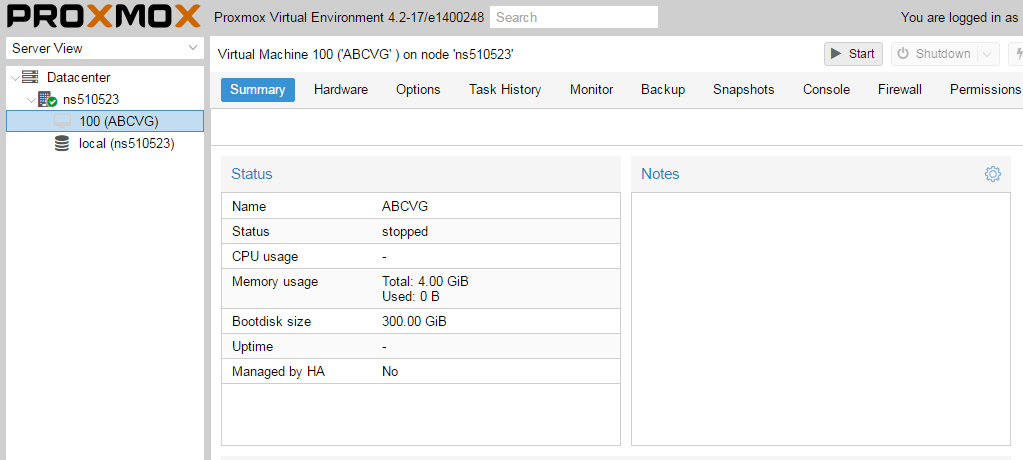
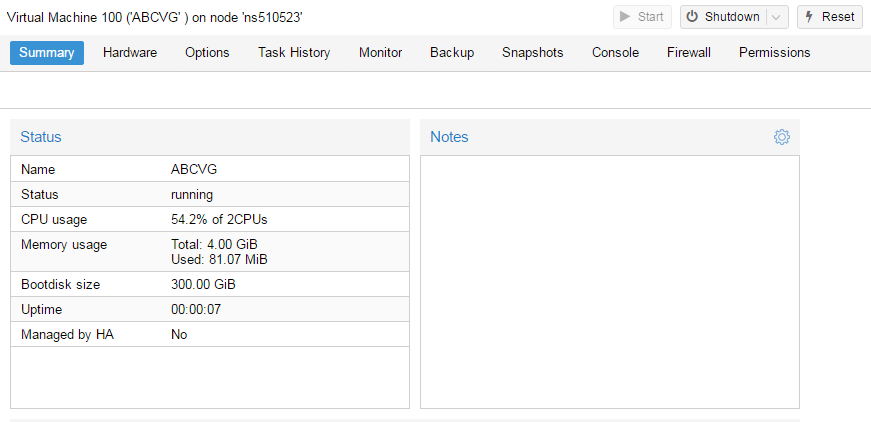
Запускаем. И видим что все ок, запустилось.
Переходим в консоль и видим как идет установка Windows.
Как настроить удаленный рабочий стол на ProxMox, статья здесь: клац Windows VirtIO DriversContentsIntroductionVirtIO Drivers are paravirtualized drivers for kvm/Linux (see http://www.linux-kvm.org/page/Virtio). In short, they enable direct (paravirtualized) access to devices and peripherals for virtual machines using them, instead of slower, emulated, ones. At the moment these kind of devices are supported: You can maximize performances by using VirtIO drivers. The availability and status of the VirtIO drivers depends on the guest OS and platform. Windows OS SupportWindows does not have native support for VirtIO devices included. But, there is excellent external support through opensource drivers, which are available compiled and signed for Windows: Note that this repository provides not only the most recent, but also many older versions. Those older versions can still be useful when a Windows VM shows instability or incompatibility with a newer driver version. The binary drivers are digitally signed by Red Hat, and will work on 32-bit and 64-bit versions of Windows InstallationUsing the ISOYou can download the latest stable or you can download the most recent build of the ISO. Normally the drivers are pretty stable, so one should try out the most recent release first. You can access the ISO can in a VM by mounting the ISO with a virtual CD-ROM/DVD drive on that VM. Wizard Installation
You can use an easy wizard to install all, or a selection, of VirtIO drivers.
Manual Installation
Downloading the Wizard in the VMYou can also just download the most recent virtio-win-gt-x64.msi or virtio-win-gt-x86.msi from inside the VM, if you have already network access. Then just execute it and follow the installation process. Записки IT специалистаТехнический блог специалистов ООО»Интерфейс»
Установка и настройка Proxmox VE 6.0
Получить Proxmox VE можно на официальном сайте, сейчас доступна новая версия 6.0, которую мы и будем устанавливать. Да, это действительно open-source и это бесплатно, корпоративная подписка предоставляет доступ к закрытому репозиторию Proxmox VE Enterprise, который содержит стабильные обновления ПО и обновления безопасности, а также техническую помощь и поддержку. Никаких ограничений функциональности, если вы откажетесь от подписки, нет. Для установки используется собственный инсталлятор и весь процесс предельно прост, от вас потребуется указать конфигурацию дисковой подсистемы:
Но не будем спешить. Прежде всего отключим корпоративный репозиторий, на который у нас все равно нет подписки, и подключим вместо него некоммерческий репозиторий Proxmox. Для отключения просто удалим файл репозитория из источников apt: Затем создадим свой список: В который внесем следующие строки: Теперь можно переходить к консоли управления, откроем браузер и наберем предложенный адрес, консоль управления продуктами Proxmox работает на порту 8006, что следует помнить.
Но есть и «сложности перевода», так в разделе Обновления, нас ждут две одинаковые кнопки Обновить.
Перед тем, как создавать виртуальные машины и контейнеры, обратимся к Хранилищам, по умолчанию создается два хранилища: local и local-lvm.
Для получения шаблонов следует нажать кнопку Шаблоны и мы попадем в официальное хранилище шаблонов, здесь мы может сразу загрузить шаблон другого продукта Proxmox — Mail Gateway или шаблоны стандартных Linux-систем.
Для создания виртуальной машины нажмем Создать VM. На первом экране укажем имя виртуальной машины:
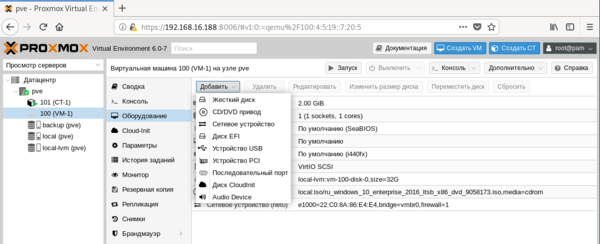
После чего, последовательно перемещаясь по пунктам следует настроить все остальные параметры виртуалки, особых сложностей это составить не должно. Но создав виртуальную машину не спешите ее запускать. Прежде всего перейдем в раздел Оборудование. Здесь можно не только настроить уже подключенное оборудование, но и добавить новое. В отличие от Hyper-V, Proxmoх позволяет пробрасывать внутрь виртуальных машин USB-устройства, что может быть полезным, если вам нужно работать с ключами защиты или USB-токенами.
Итак, все настройки закончены, включаем виртуальную машину и переключаемся в консоль. Да, прямо в браузере вы увидите экран вашей виртуалки, при этом ничего не тормозит, работать с системой достаточно комфортно.
Для других дистрибутивов следует установить пакет qemu-guest-agent штатным пакетным менеджером. С Windows все несколько сложнее, прежде всего скачаем и поместим в хранилище Proxmox ISO-образ с virtIO драйверами. Получить его можно со страницы Fedora Project. Затем подключим скачанный образ к виртуальной машине.
Еще одна важная функция, которая доступна в Proxmox VE — это резервное копирование. Существует хорошая практика — хранить резервные копии за пределами хоста. Поэтому подключим к Proxmox сетевое хранилище, для этого перейдем в Датацентр — Хранилище. Выбор здесь достаточно богатый: iSCSI, NFS, CIFS и прочее.
Затем перейдем в раздел Резервная копия и создадим новый сценарий резервного копирования:
Как видим, Proxmox представляет собой вполне серьезный и самодостаточный продукт, способный стать основой вашей системы виртуализации, предоставляя возможности на уровне дорогих коммерческих гипервизоров. Помогла статья? Поддержи автора и новые статьи будут выходить чаще: Или подпишись на наш Телеграм-канал: |


 Proxmox Virtual Environment (Proxmox VE) — система виртуализации с открытым исходным кодом на базе Debian, использующая в качестве гипервизора KVM для виртуальных машин и LXC для контейнеров. Это позволяет запускать в виртуальной среде Linux-системы без потери производительности и остальные, поддерживаемые KVM ОС с минимальными потерями. Кроме того, Proxmox VE позволяет создавать высокодоступные конфигурации с несколькими серверами и распределенными системами хранения.
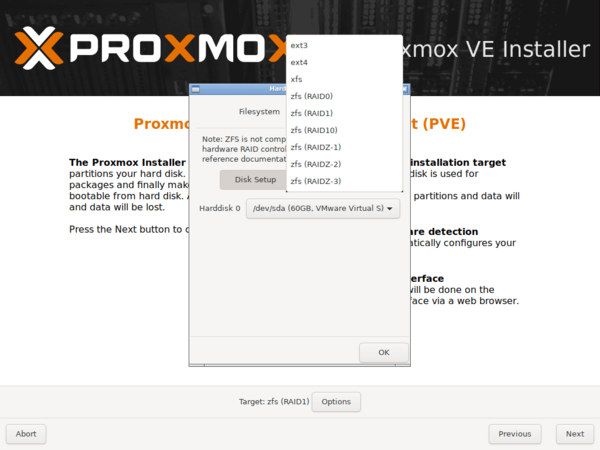 А также пароль суперпользователя, настройки сети, страну и часовой пояс. Потом останется только откинуться в кресле и немного подождать, пока система установится на ваш компьютер. По завершении процесса установки вас встретит приглашение входа в систему, над которым будет указан адрес, который следует набрать в браузере для доступа к консоли управления.
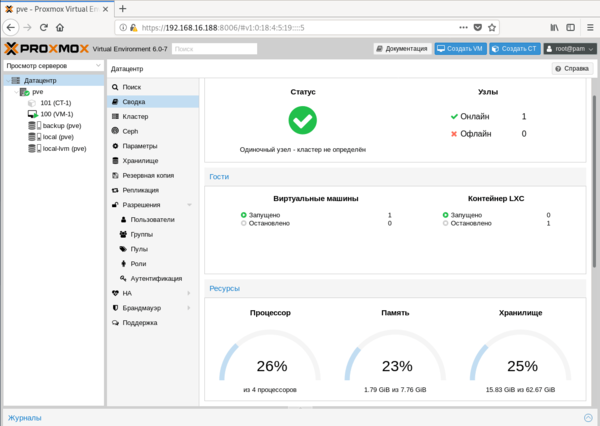 Структура Proxmox VE иерархична, высший уровень составляет Датацентр, здесь есть настройки, применяемые сразу ко всем узлам, например, управление пользователями или хранилищами, настройки резервного копирования и т.д.
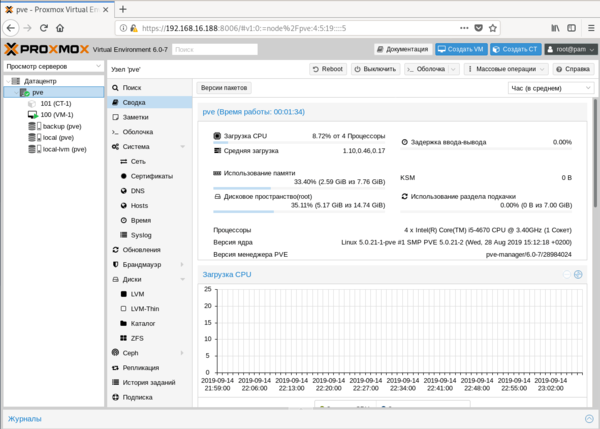 Следующий уровень — настройки узла, здесь доступна подробная статистика и большое количество настроек, которые относятся именно к этому серверу. Мы не будем останавливаться на них подробно, для администратора с достаточным уровнем подготовки разобраться с ними не составит труда.
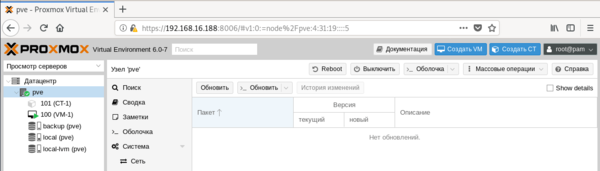 В английской версии это были Update и Upgrade, а вот здесь перевели как перевели. Первая из них запускает обновление списка пакетов, а вторая запускает само обновление, открывая в отдельном окне консоль сервера.
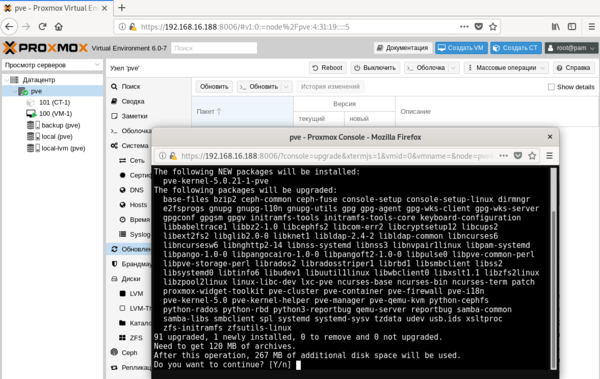 Если вам нужно просто попасть в консоль сервера, можно нажать кнопку Оболочка и перед вами в отдельном окне браузера откроется noVNC-сессия, при этом не требуется ни Flash, ни Java, что позволяет подключаться как к серверу, так и к виртуальным машинам с любого устройства, был бы браузер.
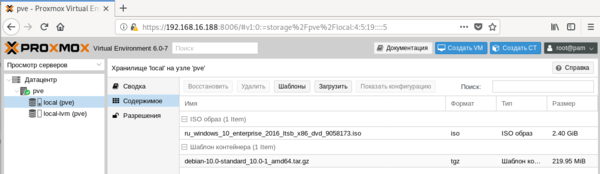 Первое предназначено для хранения ISO-образов и шаблонов контейнеров, а во втором хранятся сами виртуальные машины. Поэтому перед тем, как создать виртуальную машину или контейнер, нам нужно загрузить в хранилище нужный образ диска или шаблон. С образами все просто, нажимаем кнопку Загрузить и указываем нужный нам ISO-образ.
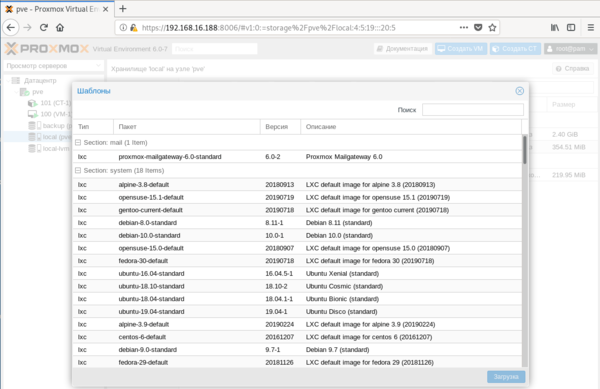 Прокрутив ниже, мы обнаружим шаблоны предварительно настроенных систем практически на все случаи жизни. Использовать их, либо настраивать все самостоятельно — решать вам, в ряде случаев такие шаблоны способны хорошо сэкономить время, особенно при развертывании большого количества однотипных систем.
 Чтобы загрузить выбранный шаблон достаточно нажать кнопку Загрузка внизу окна.
 Затем укажем тип и версию гостевой ОС и подключим нужный образ из хранилища.
 Также не забудьте заглянуть в Параметры, где стоит включить Запуск при загрузке и Агент QEMU. И если с первым пунктом все понятно, то Агент позволяет управлять системой со стороны гипервизора, без него вы, например, не сможете сделать резервную копию без остановки работы машины.
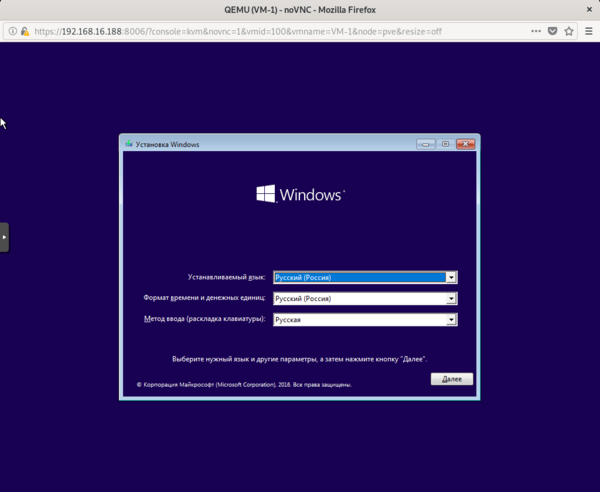 Пока идет установка системы создадим еще новый контейнер, для этого следует нажать кнопку Создать CT в правом верхнем углу консоли управления. В качестве контейнеров могут быть только Linux-системы, на первом экране укажите имя контейнера и задайте пароль root или загрузите публичный SSH-ключ.
 Затем укажите шаблон и следующими шагами сконфигурируйте виртуальное железо.
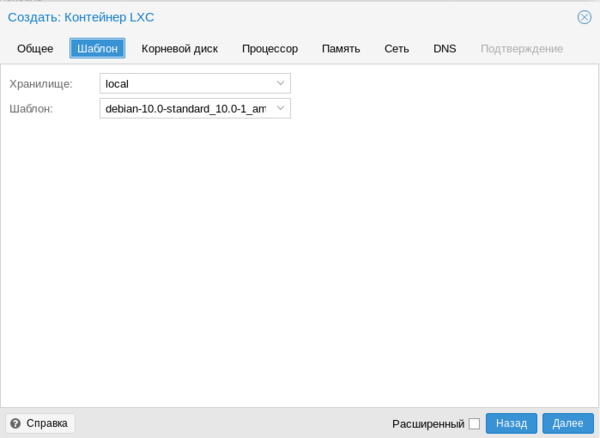 Доступных настроек у контейнеров гораздо меньше, зато они гораздо более экономно расходуют ресурсы.
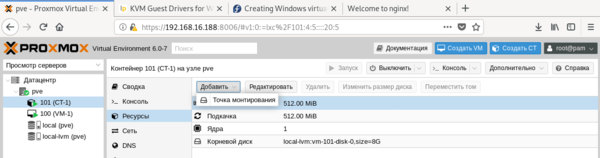 Обратите внимание, что запущенный контейнер с Debian 10 потребляет всего лишь 55,46 МБ оперативной памяти.
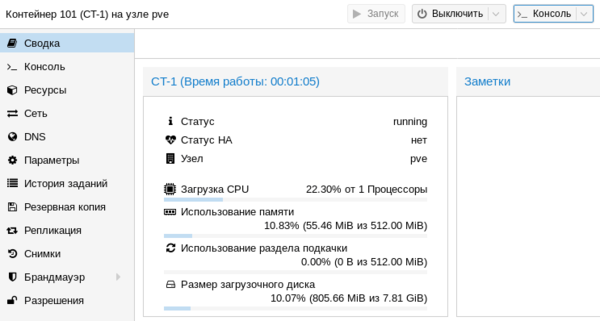 Тем временем, пока мы создавали контейнер, должна была установиться наша виртуальная машина. После установки ВМ потребуется установить в нее QEMU-агента для полноценного взаимодействия с гипервизором. Для Linux систем все просто, на deb-based системах достаточно выполнить:
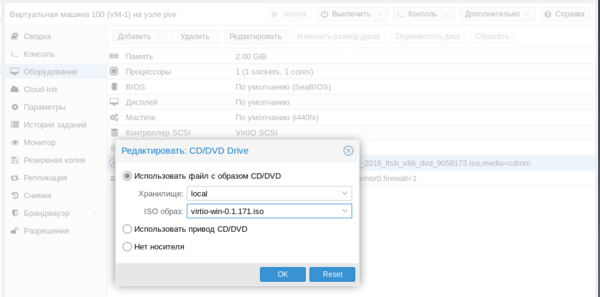 При включенном QEMU-агенте мы увидим три неустановленных устройства.
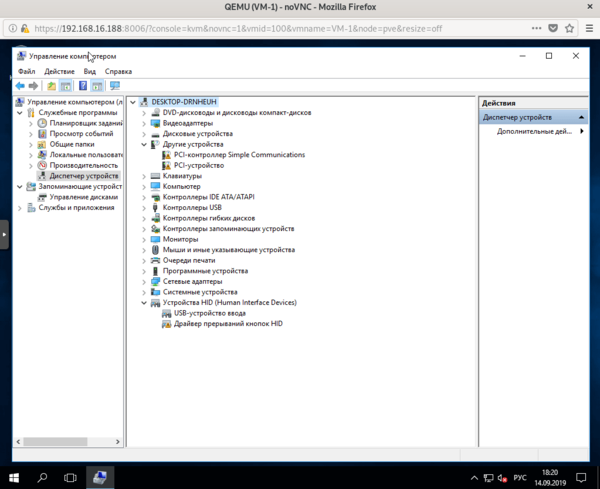 Начнем с последнего, для Драйвера прерываний кнопок HID перейдем в выбор из списка уже установленных драйверов и укажем драйвер Универсальной шины.
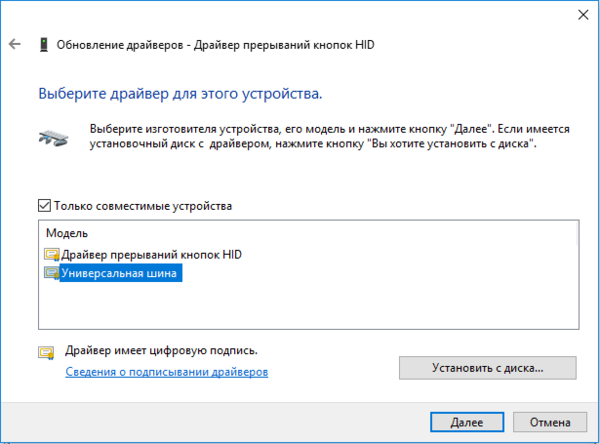 Для двух оставшихся выполним поиск драйверов на смонтированном диске и устанавливаем драйвер VirtIO Serial Driver, который отвечает за работу QEMU-агента:
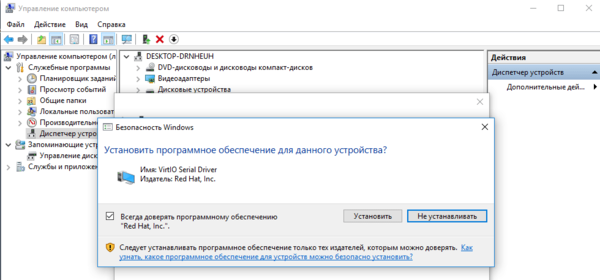 И VirtIO Balloon Driver, который отвечает за динамическое управление памятью. При работающем QEMU-агенте внизу окошка со сведениями о виртуальной машине вы увидите ее IP-адрес, в противном случае там будет сообщение, что QEMU-агент не установлен.
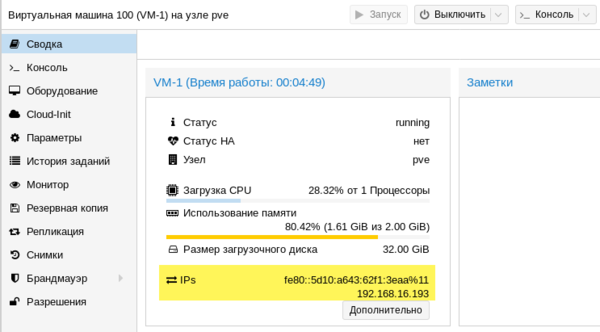 Также вы можете теперь включить для виртуальной машины динамическую память, для этого установите флаг Раздувание памяти и укажите минимальный размер оперативки, с которой начнет работу виртуалка:
 Но придерживайтесь при этом разумных пределов, так вы можете столкнуться с невозможностью запустить современные версии Windows если укажете минимальный размер памяти менее 1 ГБ.
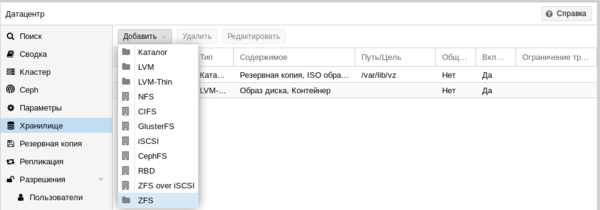 В нашем случае мы подключим CIFS (SMB) хранилище.
 Укажите имя хранилища, в нашем случае backup, его IP-адрес или FQDN-имя, доступные ресурсы будут просканированы автоматически и вам останется только выбрать их из списка, в поле Содержимое укажите Резервная копия , а также не забудьте указать максимальное количество резервных копий в хранилище.
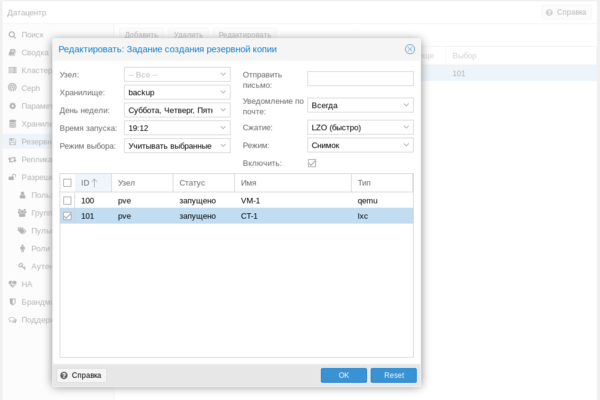 Особых сложностей там нет, выбираете нужные виртуальные машины или контейнеры и задаете расписание копирования. После чего вам только останется проверить, что резервные копии действительно создаются.