- Pulse Secure 4+
- Pulse Secure LLC
- Screenshots
- Description
- Pulse Secure 4+
- Pulse Secure LLC
- Screenshots
- Description
- Скачать Pulse Secure для ПК
- Pulse Secure для ПК Скриншоты
- загрузить и установить Pulse Secure на вашем персональном компьютере и Mac
- Шаг 1: Загрузите эмулятор Android для ПК и Mac
- Шаг 2: установите эмулятор на ПК или Mac
- Шаг 3: Pulse Secure для ПК — Windows 7/8 / 8.1 / 10
- Шаг 4: Pulse Secure для Mac OS
- Secure Access made Easy, Comprehensive, Flexible
- Solving Remote Access Challenges
- Zero Trust, Secure Access Checklist
- Trusted by over 24,000 organizations
- American University
- Brethren Mutual Insurance Company
- Installing Pulse Secure on macOS / OS X
- Choose your OS
- Configuring the Pulse Secure VPN Client after installation is complete
Pulse Secure 4+
Pulse Secure LLC
Screenshots
![]()
![]()
![]()
![]()
![]()
Description
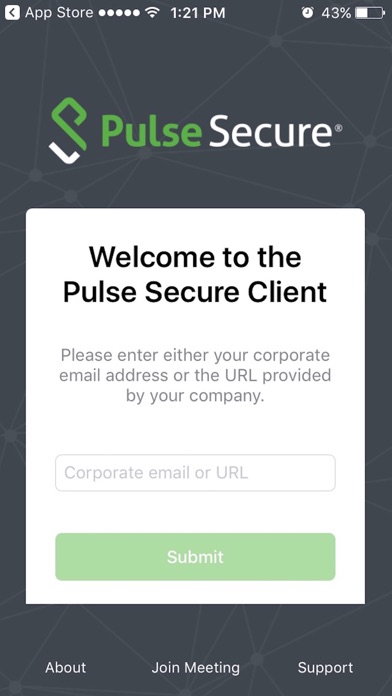
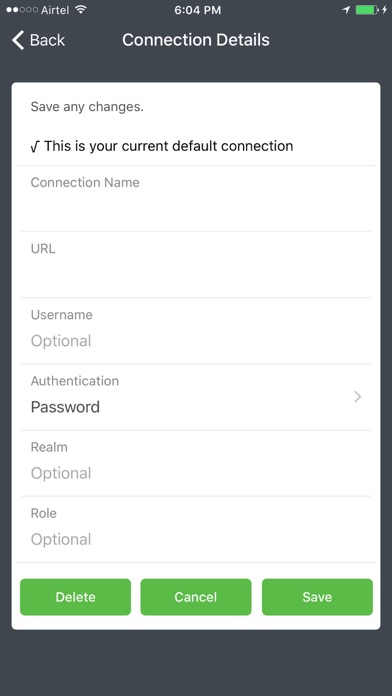
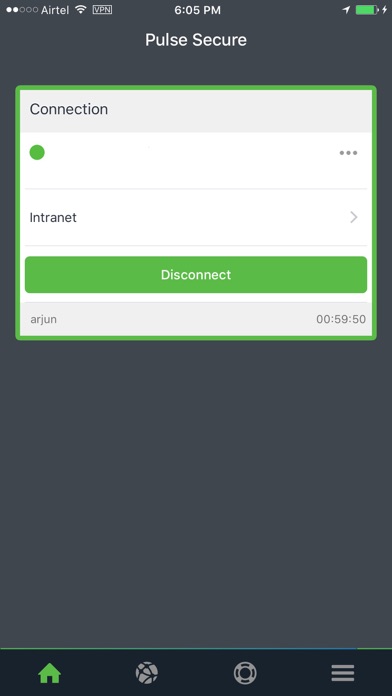
Pulse Secure for iOS enables secure connectivity over SSL VPN to corporate applications and data from anywhere, at any time. Using Pulse Secure, you can connect securely to your corporate Pulse Secure SA Series SSL VPN gateway and gain instant access to business applications and networked data from wherever you are. Our app’s integration with Pulse Workspace helps the enterprise mobilize their applications, govern their data, and respect the privacy of their employees without compromising native user experience.
For Client Software EULA, please refer: https://www.pulsesecure.net/support/client-software-eula/
Important Note: Pulse Workspace requires an enterprise license. Please contact your IT organization before attempting to use this client to connect to Workspace.
For Documentation and Release Notes, please refer:
https://www.pulsesecure.net/techpubs/pulse-client/pulse-secure-client-mobile
For Documentation related to iOS Workspace onboarding please refer:
https://docs.pulsesecure.net/WebHelp/PulseOne/Home.htm#ps-pws_admin-guide_formatted_mc1/iOS_Workspace_Onboarding.htm?Highlight=onboarding
«Continued use of GPS running in the background can dramatically decrease battery life.»
Источник
Pulse Secure 4+
Pulse Secure LLC
Screenshots
![]()
![]()
![]()
![]()
![]()
Description
Pulse Secure for iOS enables secure connectivity over SSL VPN to corporate applications and data from anywhere, at any time. Using Pulse Secure, you can connect securely to your corporate Pulse Secure SA Series SSL VPN gateway and gain instant access to business applications and networked data from wherever you are. Our app’s integration with Pulse Workspace helps the enterprise mobilize their applications, govern their data, and respect the privacy of their employees without compromising native user experience.
For Client Software EULA, please refer: https://www.pulsesecure.net/support/client-software-eula/
Important Note: Pulse Workspace requires an enterprise license. Please contact your IT organization before attempting to use this client to connect to Workspace.
For Documentation and Release Notes, please refer:
https://www.pulsesecure.net/techpubs/pulse-client/pulse-secure-client-mobile
For Documentation related to iOS Workspace onboarding please refer:
https://docs.pulsesecure.net/WebHelp/PulseOne/Home.htm#ps-pws_admin-guide_formatted_mc1/iOS_Workspace_Onboarding.htm?Highlight=onboarding
«Continued use of GPS running in the background can dramatically decrease battery life.»
Источник
Скачать Pulse Secure для ПК
Опубликовано Pulse Secure LLC
- Категория: Business
- Дата выпуска: 2020-12-28
- Текущая версия: 9.5.0
- Размер файла: 39.38 MB
- Совместимость: Требуется Windows 10/8.1/8/7/Vista
Pulse Secure для ПК Скриншоты
загрузить и установить Pulse Secure на вашем персональном компьютере и Mac
Некоторые приложения, например, те, которые вы ищете, доступны для Windows! Получите это ниже:
| SN | заявка | Скачать | рецензия | Разработчик |
|---|---|---|---|---|
| 1. |  Pulse Secure Pulse Secure | Скачать | 3.4/5 150 рецензия |
Или следуйте инструкциям ниже для использования на ПК :
Если вы хотите установить и использовать Pulse Secure на вашем ПК или Mac, вам нужно будет загрузить и установить эмулятор Desktop App для своего компьютера. Мы усердно работали, чтобы помочь вам понять, как использовать app для вашего компьютера в 4 простых шагах ниже:
Шаг 1: Загрузите эмулятор Android для ПК и Mac
Хорошо. Прежде всего. Если вы хотите использовать приложение на своем компьютере, сначала посетите магазин Mac или Windows AppStore и найдите либо приложение Bluestacks, либо Приложение Nox . Большинство учебных пособий в Интернете рекомендуют приложение Bluestacks, и у меня может возникнуть соблазн рекомендовать его, потому что вы с большей вероятностью сможете легко найти решения в Интернете, если у вас возникнут проблемы с использованием приложения Bluestacks на вашем компьютере. Вы можете загрузить программное обеспечение Bluestacks Pc или Mac here .
Шаг 2: установите эмулятор на ПК или Mac
Теперь, когда вы загрузили эмулятор по вашему выбору, перейдите в папку «Загрузка» на вашем компьютере, чтобы найти приложение эмулятора или Bluestacks.
Как только вы его нашли, щелкните его, чтобы установить приложение или exe на компьютер или компьютер Mac.
Теперь нажмите «Далее», чтобы принять лицензионное соглашение.
Чтобы правильно установить приложение, следуйте инструкциям на экране.
Если вы правильно это сделаете, приложение Emulator будет успешно установлено.
Шаг 3: Pulse Secure для ПК — Windows 7/8 / 8.1 / 10
Теперь откройте приложение Emulator, которое вы установили, и найдите его панель поиска. Найдя его, введите Pulse Secure в строке поиска и нажмите «Поиск». Нажмите на Pulse Secureзначок приложения. Окно Pulse Secure в Play Маркете или магазине приложений, и он отобразит Store в вашем приложении эмулятора. Теперь нажмите кнопку «Установить» и, например, на устройстве iPhone или Android, ваше приложение начнет загрузку. Теперь мы все закончили.
Вы увидите значок под названием «Все приложения».
Нажмите на нее, и она перенесет вас на страницу, содержащую все установленные вами приложения.
Вы должны увидеть . Нажмите на нее и начните использовать приложение.
Шаг 4: Pulse Secure для Mac OS
Привет. Пользователь Mac!
Шаги по использованию Pulse Secure для Mac точно такие же, как для ОС Windows выше. Все, что вам нужно сделать, это установить Nox Application Emulator или Bluestack на вашем Macintosh. Вы можете получить Это здесь .
Источник
Secure Access made Easy, Comprehensive, Flexible


Solving Remote Access Challenges
Gartner report offers decision tree to solve different challenges of scaling out large, modern remote access
Zero Trust, Secure Access Checklist
How to ensure Secure Access usability, protection and compliance for data center and multi-cloud
Trusted by over 24,000 organizations
American University
«What I’ve been most impressed with is that it was able to scale up sixfold and still maintain a usable user experience and throughput. Man, I’m impressed!»
— Eric Weakland, Director of Information Security, American University
Read the case study here

Brethren Mutual Insurance Company
«Brethren Mutual has been using Pulse Secure for remote access for several years. When the Pandemic hit and caused us to close the office in April, we were able to quickly implement our “ICE” license. This gave us the time to switch our licensing to be able to cover the large change in remote workers without make any changes to our current setup. The flexible licensing and the ability of the appliance to handle our total number shows how well the solution works for our environment and for many others.»
— Tom Harley, Director of Information Security Systems, Brethren Mutual Insurance Company
Источник
Installing Pulse Secure on macOS / OS X
This article covers how students, faculty, and staff install the Pulse Secure VPN client on Mac OS X 10.13 or macOS 10.14 and higher.
If you need assistance or if you are not running MacOS 10.13 or higher, submit a support ticket to the Technology Support Center.
Choose your OS
Mac OS 11 Upgrade
Mac users who upgrade to the latest version of macOS 11 (Big Sur) should uninstall the Pulse Secure client prior to the upgrade and then install the latest version available after the macOS upgrade is complete. Use the «Simple Removal» instructions on the Removing the Pulse Secure Desktop Client guide.
If you upgrade to macOS 11 (Big Sur) ) with a version of Pulse Secure older than 9.1.9 installed it can cause a Mac running Big Sur to crash and restart 4-5 times before recovering.
- Download the Pulse Secure Desktop client for Mac OS 11.
- Click on the file to extract the installer.
- Double click on the pkg file to initiate the install process.
- Once the installer begins, click Continue.
- Click Install to begin the installation.
You may encounter several popups during and after the install process when attempting to connect to the UConn network.
System Extension AND Network Content Filtering:
This prompt below will pop up after installation (If your Mac is managed by ITS you will not see this pop up).
- Click Ok

- Click the lock in the bottom left corner to make changes (You will be prompted for your user password).
- Click Allow


Filter Network Content:
This prompt will popup during the connection process the first time press Allow; if you do not press Allow the VPN will not work correctly. *If you do not see this prompt, see the below fix.

If you don’t press anything or if you press Don’t Allow you will soon see this popup:

Press Retry and then press Allow when the popup pictured above re-appears.
*If the «Filter Network Content» prompt does not appear:
- Quit the Pulse Secure app.
- Navigate to Apple menu > System Preferences > Network
- Select Pulse Secure in the left-hand menu and click the minus button ( — ) to remove it.
- Open the Pulse Secure app again and connect to the VPN. The Filter Network Content prompt shown above should now appear. If it does not, repeat this process and try again.
 > System Preferences > Network
- Download the Pulse Secure Desktop client for Mac OS.
- Click on the file to extract the installer.
- Double click on the pkg file to initiate the install process.
- Review the following warning, select «OK»
- Click on the Apple icon in the top-left of your screen. Choose System Preferences >Security & Privacy >General
- Find the warning «‘PulseSecure.pkg’ was blocked from use because it is not from an identified developer.» Select «Open Anyway»
- Review the following warning, select «Open».
- Run through the installation process.


- Download the Pulse Secure Desktop client for Mac OS X.
- Click on the file to extract the installer.
- Double click on the pkg file to initiate the install process.
- Once the installer begins, click Continue.
- Click Install to begin the installation.
- During the installation process you should expect to see several pop-up messages informing you of security steps that need to be taken to complete the install.
- Click OK on the first two messages.
- Click «Open Security Preferences» in the third message to open up the «Security & Privacy» settings window.
- Click OK on the first two messages.
- Once the Security & Privacy window has opened, look for the following message: System software from developer «Pulse Secure LLC» was blocked from loading.
- Next to the message, click Allow to enable the extension.
-
If you do not receive the above mentioned pop-up messages, you will need to manually permit the Pulse Secure Client the required access.
- To manually permit access to the client,
- Click the Apple menu at the top left of your desktop.
- Click System Preferences.
- Click Security & Privacy.
- Click the lock to make changes.
- Click the General tab.
- Under Allow apps downloaded from, select App Store and identified developers
- Look for the following message: System software from developer «Pulse Secure LLC» was blocked from loading.
- Next to the message, click Allow to enable the extension.
- To manually permit access to the client,
- Close the Security & Privacy window. The kernel extension will have been authorized and full functionality of the Pulse Desktop client should be available.


Configuring the Pulse Secure VPN Client after installation is complete
- Open the Pulse Secure client, which should be shown at the top right corner of the screen.
- Create a new connection using the + in the bottom left corner.
- Enter the following info:
- Connection name of your choosing
- The server URL, vpn.uconn.edu
- Click Add.
- Close the client.
- To start the VPN session, go back to the Pulse Secure client in the top right corner of the screen.
- Select the connection you created.
- Select Connect.
- When prompted for a username and password, enter your NetID and NetID password.
- When attempting to connect, you may receive the following prompt. Select «Open SecurityPreferences».
- Within «Security Preferences», select the lock on the bottom left corner. Once unlocked, select Allow, for the system to allow Pulse Secure to load.
-
Once you receive this prompt, select Allow to allow Pulse to operate. After this, you should be all set to connect via Pulse Secure. *If you do not see this prompt, see the below fix.
*If the «Filter Network Content» prompt does not appear:
1. Quit the Pulse Secure app.
2. Navigate to Apple menu
> System Preferences > Network3. Select Pulse Secure in the left-hand menu and click the minus button ( — ) to remove it.
4. Open the Pulse Secure app again and connect to the VPN. The Filter Network Content prompt shown above should now appear. If it does not, repeat this process and try again.
Источник


