- 15 Tools To Split Your Monitor’s Screen In Windows And macOS
- ↓ 01 – WindowsGrid | Free | Windows
- ↓ 02 – GridMove | Free | Windows
- ↓ 03 – AltDrag | Free | Windows
- ↓ 04 – Spectacle | Free | macOS
- ↓ 05 – Microsoft PowerToys | Free | Windows
- ↓ 06 – Aquasnap | Free Personal | USD18 Pro
- ↓ 07 – Divvy | USD14 | Windows | macOS
- ↓ 08 – BetterSnapTool | €3.49 | macOS
- ↓ 09 – Magnet (Windows Manager) | USD1 | macOSX
- ↓ 10 – Moom | USD10 | macOSX
- ↓ 11 – Better Window Manager | USD5 | macOSX
- ↓ 12 – MaxSnap | USD6 | macOSX
- ↓ 13 – MaxTo | USD20/30 | Windows
- ↓ 14 – Shutter Split Screen | USD15 | Windows
- ↓ 15 – UltraView Desktop Manager | USD99 | Windows
- ↓ 16 – KDE Mover-Sizer [ Discontinued ] | Free Open Source | Windows
- 10 ways to take a screenshot on any Windows 10 device
- Print Screen
- Windows + Print Screen
- Alt + Print Screen
- Snip & Sketch tool
- Snipping Tool
- Game Bar
- Power + Volume Up
- Third-party screenshot apps for Windows
15 Tools To Split Your Monitor’s Screen In Windows And macOS
How to split your laptop or desktop PC Screen / 4K Monitor in Windows or macOS for better productivity? Microsoft Windows 10 and Apple macOSX already have this feature build into them, just drag your window the any corner of the screen and it will automatically snap, resize and fit half of the screen. The only problem is, what if you need to fit 5 or 6 windows into a screen?
How to split your Laptop or PC Screen/Monitor in Windows? Here’s a complete list of software that enables you to split your computer screen monitor into two or more so that they can view two applications side-by-side. This split screen software works across dual monitors too, it will also split your wallpapers so you can have a different wallpaper on each monitor.
Above is a short video showing how to take advantage of the new Apple’s macOS El Capitan feature called “Spilt Screen” where you can have 2 windows placed side by side automatically.
↓ 01 – WindowsGrid | Free | Windows

WindowGrid is a modern window management program that allows the user to quickly and easily layout their windows on a dynamic grid. WindowGrid gives functionality to the normally useless right mouse button when moving a window. Doing this will enable the grid snap mode.
↓ 02 – GridMove | Free | Windows
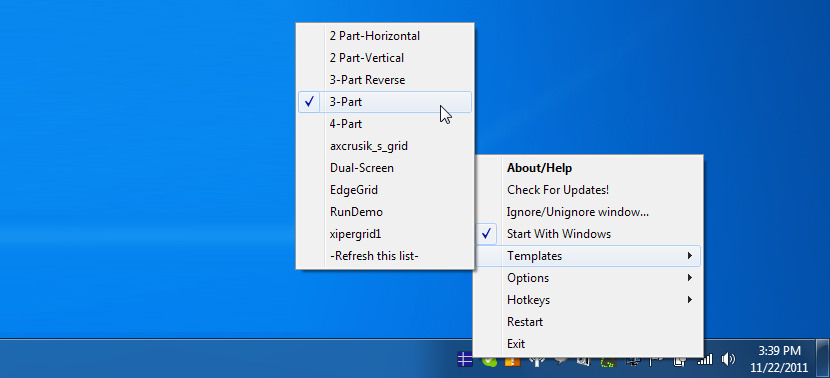
GridMove is a program that aims at making windows management easier. It helps you with this task by defining a visual grid on your desktop, to which you can easily snap windows. This program comes bundled with some predefined grid templates, that can be easily swaped, but also has ways of creating custom grids or sharing grids made by others.
GridMove makes moving windows, resizing windows, displaying them on cascade or on mosaic, making them on top or anything you can think of as easy as drag and drop.
↓ 03 – AltDrag | Free | Windows
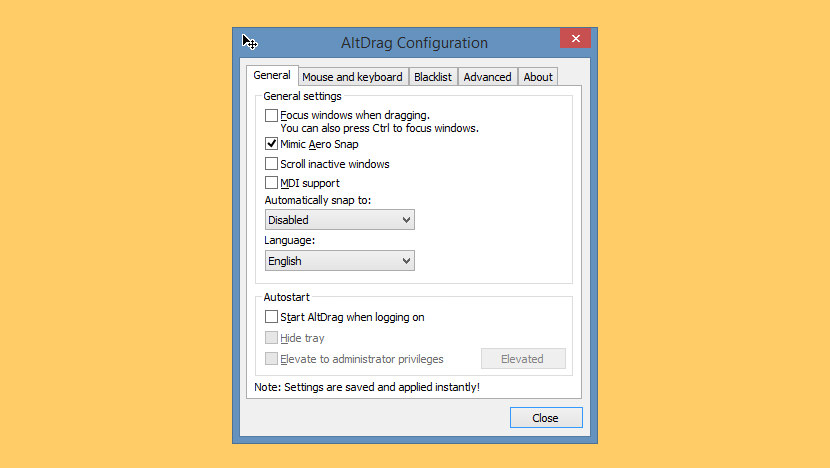
AltDrag gives you the ability to move and resize windows in a new way. After starting AltDrag, you can simply hold down the Alt key and then click and drag any window. This behavior already exists in Linux, macOS and Windows 10 operating systems, and AltDrag was made with the mission to copy that behavior to the older Windows platform, and then to further expand it with new intuitive functionality.
↓ 04 – Spectacle | Free | macOS
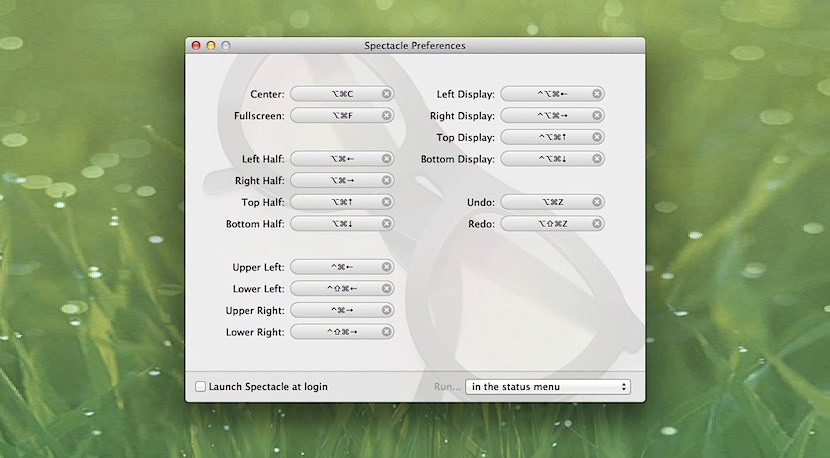
Using Spectacle you can view multiple documents side-by-side, move windows to other displays, or even focus your full attention to a single task. Move and resize windows with ease. Window control with simple and customizable keyboard shortcuts
↓ 05 – Microsoft PowerToys | Free | Windows
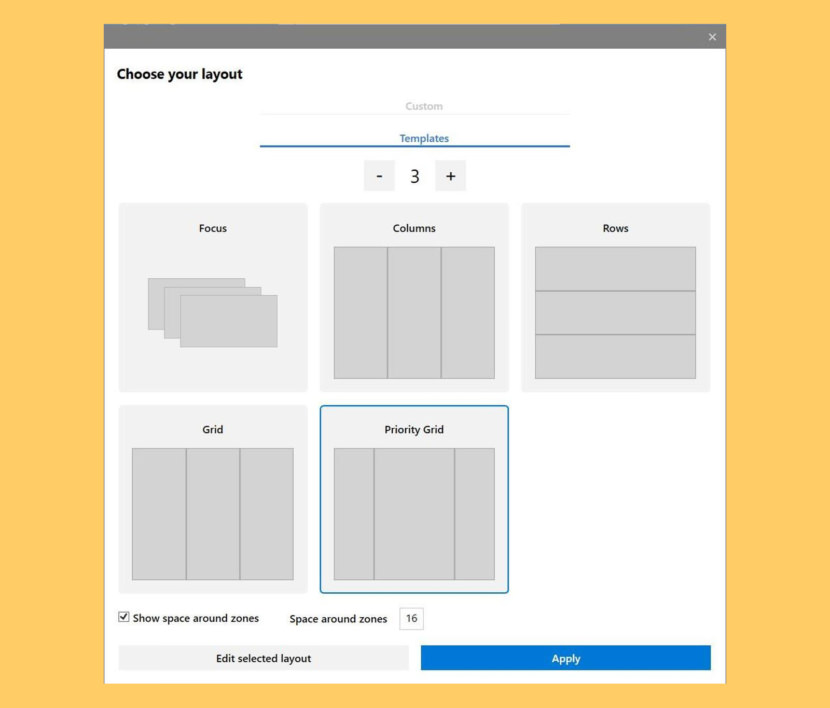
Windows 10 received PowerToys four years after its release. On May 8, 2019, Microsoft relaunched PowerToys and made them open-source on Github. Users can add their own additions and customizations to PowerToys. The first preview release was in September 2019, which included FancyZones and the Windows key shortcut guide. PowerToys for Windows 10 comes with the following utilities:
↓ 06 – Aquasnap | Free Personal | USD18 Pro
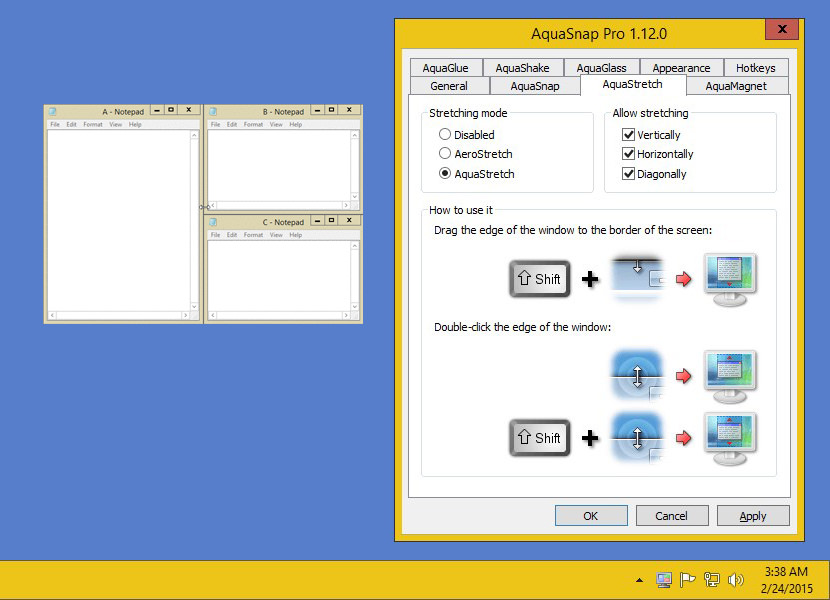
Aquasnap is a powerful window manager that helps you arrange and organize multiple applications on your desktop with minimum effort. It allows you to achieve maximum multitasking, especially if you own a high-resolution monitor or a multi-monitor setup.
Drag and drop your windows to the sides or corners of the screen, and they’ll automatically be resized to fit one half or one quarter of the screen. This feature is just like the built-in Aero Snap function of Windows 10, but with more possibilities! This is especially useful on either a 4K monitor or multiple monitors.
↓ 07 – Divvy | USD14 | Windows | macOS
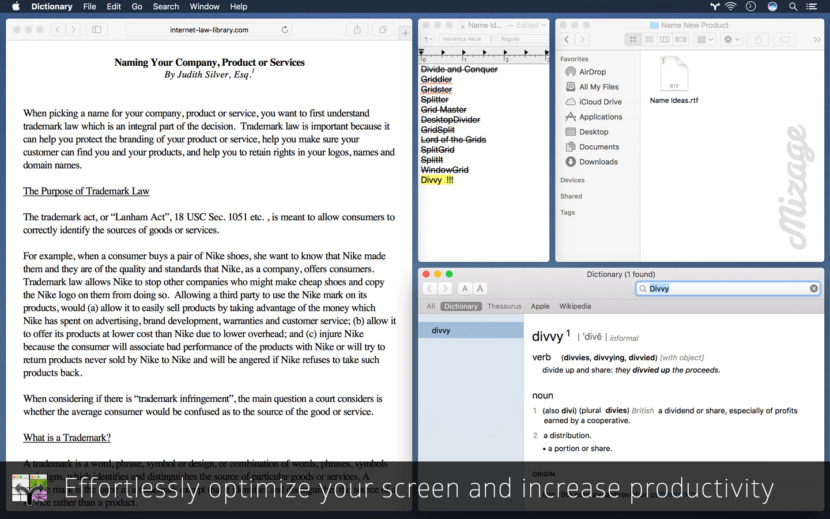
Divvy is an entirely new way of managing your workspace. It allows you to quickly and efficiently “divvy up” your screen into exact portions. With Divvy, it is as simple as calling up the interface, clicking and dragging. When you let go, your window will be resized and moved to the relative position on the screen. If that seems like too much work, you can go ahead and create as many different shortcuts as youd like that resize and move your windows in exactly the same way. Works great on Microsoft’s Windows 10 and Apple’s macOS.
↓ 08 – BetterSnapTool | €3.49 | macOS
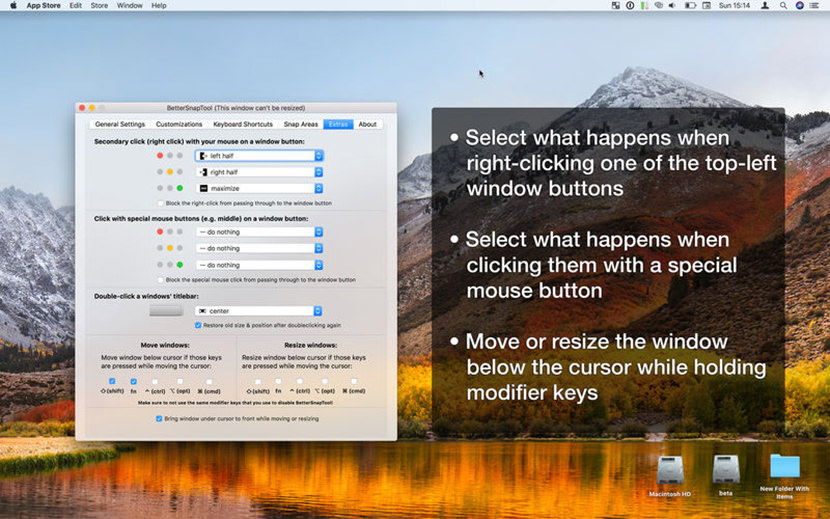
As the name implies, it is a better snap tool than the default window snapping feature in macOSX. BetterSnapTool is a utility that mimics Windows 7 Aero snap, allowing you to easily manage your window positions and sizes by either dragging them to one of your screens corners or to the top, left or right side of your screen. This lets you easily maximize your windows or position them side by side. BetterSnapTool supports multiple monitors, hidden dock etc. You can change the design of the preview window and even set application specific snapping sizes!
↓ 09 – Magnet (Windows Manager) | USD1 | macOSX

Every time you want to copy content from one app to the other, compare files side by side or multitask in any other way, you need all the windows arranged accordingly. Magnet makes this process clean and simple. In just one drag to the edge, you snap any window into left, right, top or bottom half of your screen. And by dragging windows to the corners, you snap them into quarters. Taking advantage of such arrangements eliminates app switching and greatly enhances workspace efficiency. Magnet supports keyboard shortcuts as well, for every command it has to offer. There is that little icon sitting in the Menu Bar where you can find a predefined set or create yours. Features:
- Left/Right/Top/Bottom Halves of the screen supported
- Left/Center/Right Thirds of the screen supported
- Left Two Thirds & Right Two Thirds of the screen supported
- Fullscreen & all four Quarters of the screen supported
- Runs both on Retina and regular displays
- Up to six external displays supported
- Built to run on all macOS versions since 10.9 Mavericks
- macOS 10.12 Sierra optimized
↓ 10 – Moom | USD10 | macOSX
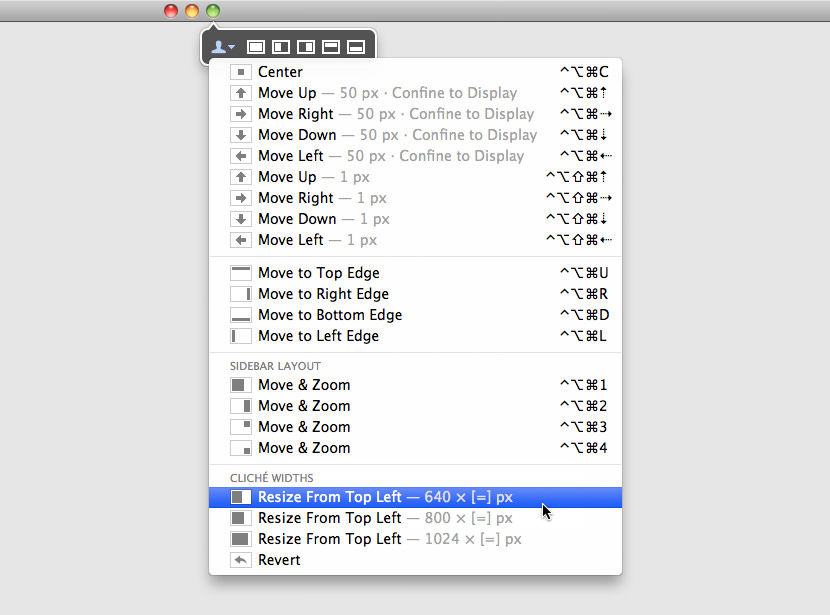
Do you spend a lot of time moving and zooming windows, so you can better see and work with all the content on your Mac? Instead of doing that work yourself, let Moom handle the task for you. When used via the mouse, all you need to do is hover over the green resize button in any Mac OS X window. Moom’s panel appears, and you then click the desired action.
When used via the keyboard, a hot key displays the Moom bezel, and you can then use the arrow and modifier keys to move and resize the windows. You can also save window layouts, create custom controls with shortcuts that work globally or work only when Moom’s keyboard bezel is onscreen.
↓ 11 – Better Window Manager | USD5 | macOSX
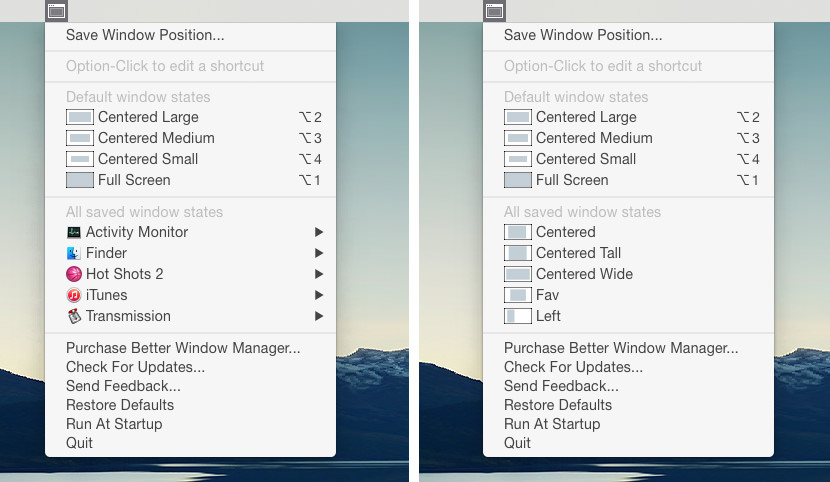
A tiny window management app for the Mac. Better window manager allows you to put windows where you want, save their positions, and restore them with a keyboard shortcut.
↓ 12 – MaxSnap | USD6 | macOSX
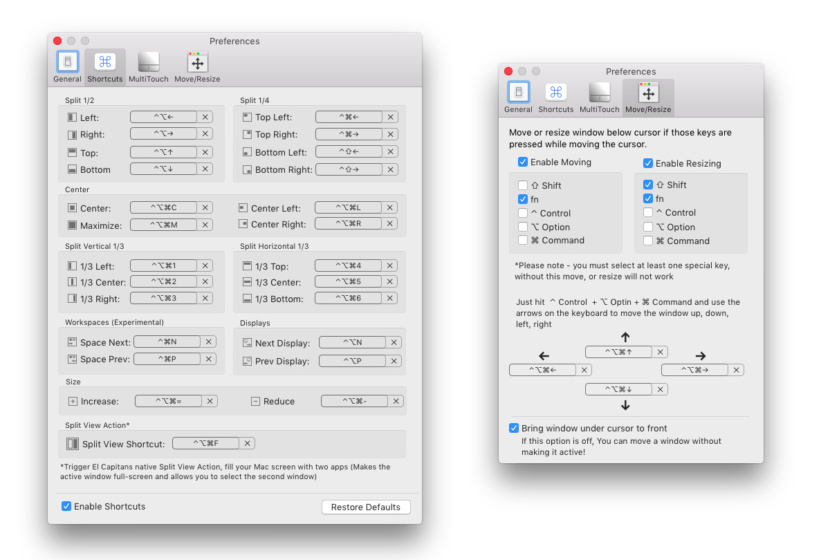
Typically, in macOS, you use the window title to move and the lower right corner to resize the window. MaxSnap allows you to re-arrange windows by using its entire surface – just click fn or Fn+Shift. and start changing window size or location. It is very convenient. You won’t be able to survive without it. Those who used Linux before probably remember Alt-Drag function.
↓ 13 – MaxTo | USD20/30 | Windows
The window manager you didn’t know you missed. Divide your screen, increase your productivity. You can keep a different set of regions open on each virtual desktop. Use our handy setting to choose if you want each virtual desktop to have its own set of profiles. Only works on Windows 10. Because only Windows 10 has virtual desktops.
↓ 14 – Shutter Split Screen | USD15 | Windows
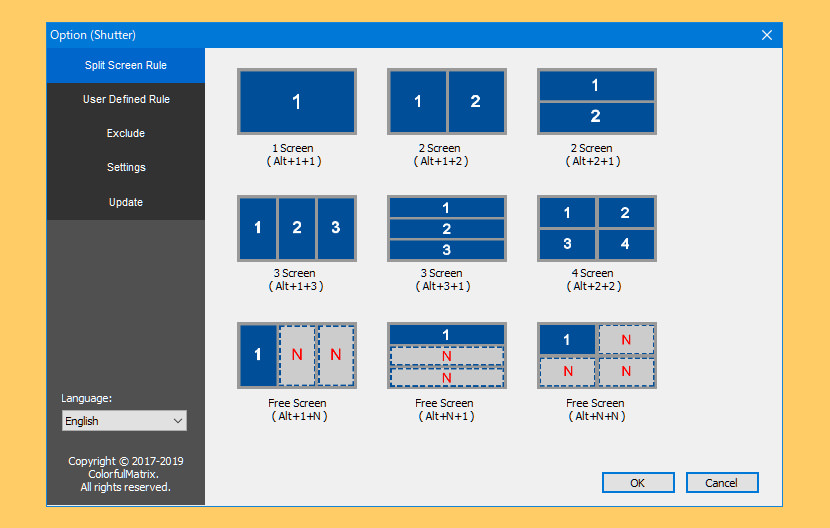
With widescreen, multi-screen, Ultra HD screen (4K, 5K and 8K) use increasing, you often switch back and forth between browser, or between your browser and a text document.
Sometimes you also need to move or resize the window and wished there was some way you could just fast and look at multiple at the same time. When you focus only on a portion of the area on the screen, you do not take full advantage of every area in the screen.
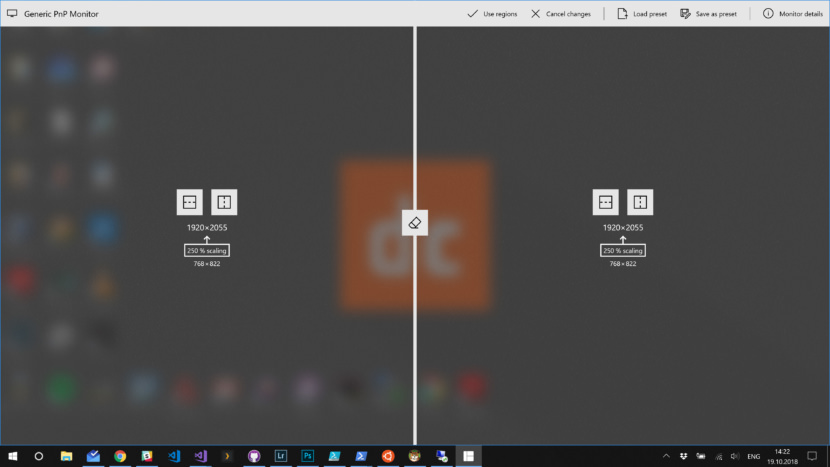
↓ 15 – UltraView Desktop Manager
| USD99 | Windows
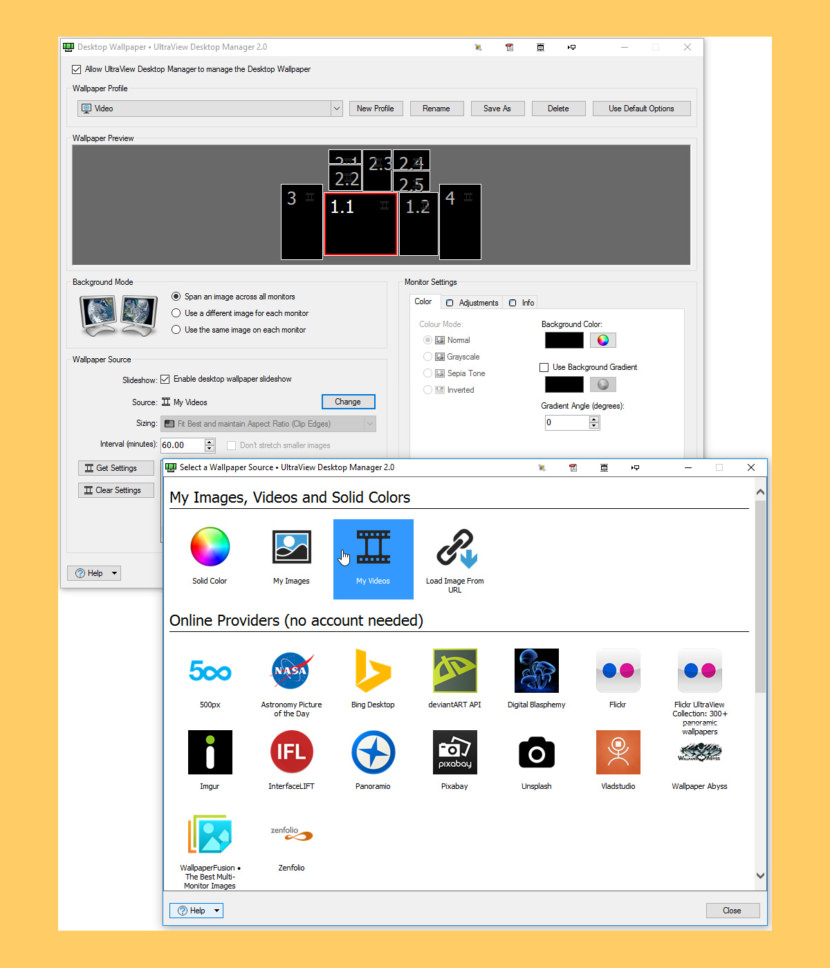
UltraView Desktop Manager 2.0 now brings the productivity benefits of multiple monitors to large, high-resolution monitors, especially 4K UHD, QHD and ultrawide monitors.
Today’s massive LED monitors and 4K TVs are exciting to look at but can be difficult to work with productively. Key info and apps can get buried under other windows, causing you to miss deadlines or important alerts as you struggle to task-switch and multitask across a variety of work obligations, personal obligations and personal interests, little of which is visible to you at any one time.
Now you can split those giant monitors and 4K TVs into any number of virtual monitors, including micro monitors dedicated to time tracking, task managers, personal email, instant messaging, social media, live financial TV news, streaming music and video, newsfeeds and security cameras. Now you’ll never miss anything important because you lacked timely awareness.
↓ 16 – KDE Mover-Sizer [ Discontinued ] | Free Open Source | Windows

An essential add-on for Windows XP, 2K, Windows Server, Windows 7 and Windows 8/8.1. It is a background application that emulates the behaviour of KDE, which is a rather good Linux desktop environment. Essentially, you hold down the Alt key, and Left-click to move a window, Right-click to resize it; and from anywhere inside the window.
10 ways to take a screenshot on any Windows 10 device
If you need to capture a screenshot of something on your computer screen, Windows 10 offers a variety of methods for doing just that.
Whether you want to save the entire screen, or just a piece of it, we’ve rounded up all the most common techniques for taking a Windows 10 screenshot.
Print Screen
The easiest way to take a screenshot on Windows 10 is the Print Screen (PrtScn) key. To capture your entire screen, simply press PrtScn on the upper-right side of your keyboard.
The screenshot will be saved to your Clipboard. To save the file, paste the screenshot into any program that allows you to insert images, like Microsoft Word or Paint.
Windows + Print Screen
To take a screenshot on Windows 10 and automatically save the file, press the Windows key + PrtScn.
Your screen will go dim and a screenshot of your entire screen will save to the Pictures > Screenshots folder.
Alt + Print Screen
To capture only the active window you’re working in and copy it to your Clipboard, press Alt + PrtScn. You’ll need to paste it into another program to save it.
Snip & Sketch tool
Snip & Sketch is the best way to screenshot on Windows if you’re looking to customize, annotate, or share your screen captures.
To activate Snip & Sketch, use the keyboard shortcut Windows Key + Shift + S. Your screen will dim and a mini menu will appear at the top of your screen, giving you the option to take a rectangular, free-form, window, or full-screen capture.
With these Snip & Skitch options, you can choose how you’d like to take a screenshot:
| Mode | Function |
| Rectangular | Size a rectangle for your screenshot. |
| Free-form | Draw free-hand with your cursor. |
| Window | Choose a specific window to capture. |
| Full-screen | Grab an image of your entire screen. |
After you capture the screenshot, it will be saved to your clipboard and a preview notification will appear in the lower-right corner of your screen.
Click on the preview notification to open the Snip & Sketch app and edit the screenshot with the available drawing tools before saving or sharing.
Snipping Tool
Though Snip & Sketch will eventually replace the Snipping Tool on Windows, it’s still possible to use the old tool to take screenshots in Windows 10, 8, 7, and Vista.
To start the Snipping Tool, you’ll have to find it through the search bar. Use the «Mode» button to customize your screenshot and then click the «New» button to capture your screen.
You can also time your capture up to five seconds via the «Delay» dropdown menu. After you take your screenshot, it’ll open in a new window, where you can annotate it, save it, or share it with Microsoft Outlook.
Game Bar
The Game Bar is an overlay you can use within most Windows 10 apps and games to take screenshots and record video. To open the Game Bar, press Windows Key + G.
Quick tip: If the Game Bar doesn’t open, make sure it’s enabled. To enable the Game Bar, search «Game bar settings» and in the menu, toggle on «Record game clips, screenshots, and broadcast using Game Bar.»
On the overlay menu, click the camera icon to capture a full-screen screenshot. You can also record a video clip by pressing the record button, with the option to include audio by clicking the microphone icon.
Screenshots and video clips captured by the Game Bar are saved in PNG format to the Videos > Captures folder. You can also find it through the Game Bar, by clicking «Show all captures» underneath the screenshot and recording buttons.
Power + Volume Up
To take a screenshot on Windows 10 with a Microsoft Surface device, press the Power Button + Volume Up Button. The screen will dim, and your screenshot will save to the Pictures > Screenshots folder.
Important: To take a screenshot on a Surface 3 or earlier, you’ll need to press the Windows Logo + Volume Down Button.
Third-party screenshot apps for Windows
If you’re unsatisfied with any of the built-in Windows methods, there are third-party screenshot tools worth considering, each with their own extra offerings.
- Snagit is a screenshot tool that allows you to create animated GIFs, take full-page screenshots, and more. The downside? The premium version costs $50. There’s also a 30-day free trial, although any picture you capture during this trial will be watermarked.
- Lightshot is a free screenshot tool designed for quick social sharing. When you download and install Lightshot on Windows 10, it replaces the Print Screen function and offers more editing capabilities.
- Greenshot is another free tool that allows you to edit and customize screenshots, as well as the option to capture a complete scrolling web page.


