- Terminal emulator
- Open the Terminal tool window
- Start a new session
- Configure the terminal emulator
- Project Settings
- Application Settings
- Install PyCharm
- System requirements
- Install using the Toolbox App
- Install the Toolbox App
- Install the Toolbox App
- Install the Toolbox App
- Standalone installation
- Install using tar archives
- Install using snap packages
- Silent installation on Windows
- Silent configuration file
Terminal emulator
This feature is not available in the Educational edition of PyCharm.
PyCharm includes an embedded terminal emulator for working with your command-line shell from inside the IDE. Use it to run Git commands, set file permissions, and perform other command-line tasks without switching to a dedicated terminal application.
Initially, the terminal emulator runs with your default system shell, but it supports many other shells, such as Windows PowerShell, Command Prompt cmd.exe , sh , bash , zsh , csh , and so on. For information about changing the shell, see Configure the terminal emulator.
Open the Terminal tool window
From the main menu, select View | Tool Windows | Terminal or press Alt+F12 .
Right-click a project item in the Project tool window and choose Open in terminal from the context menu. This way the terminal will start with the directory corresponding to the selected item.
Start a new session
Click on the toolbar to start a new session in a separate tab.

To run multiple sessions inside a tab, right-click the tab and select Split Vertically or Split Horizontally in the context menu.
The Terminal saves tabs and sessions when you close the project or PyCharm. It preserves tab names, the current working directory, and even the shell history.
To close a tab, click on the Terminal toolbar or right-click the tab and select Close Tab from the context menu.
Press Alt+Right and Alt+Left to switch between active tabs. Alternatively, you can press Alt+Down to see the list of all terminal tabs.
To rename a tab, right-click the tab and select Rename Session from the context menu.
To search for a certain string in a Terminal session, press Ctrl+F . This searches all text in the session: the prompt, commands, and output.
Configure the terminal emulator
- Press Ctrl+Alt+S to open the IDE settings and select Tools | Terminal .
Project Settings
These settings affect the terminal only for the current project:
| Start directory | Specify the working directory where every new shell session should start. By default, it starts in the root directory of the current project. |
| Environment variables | Specify custom environment variables for every new shell session. |
Application Settings
These settings affect the terminal in any project that you open with the current PyCharm instance.
Specify the shell that will run by default. PyCharm should automatically detect the default shell based on your environment. Here are some examples of different shells:
Bash for Windows: bash.exe
Command Prompt: cmd.exe
Cygwin: «C:\cygwin\bin\bash.exe» —login -i
Integrate the terminal with the system shell to properly keep track of your command history for sessions and load a custom config file with required environment variables.
Shell integration works for sh , bash , zsh , and fish shells.
Detect and highlight commands that can be used as IDE features instead of running them in the terminal and reading console output.
When enabled, instead of pressing Enter , which runs the command in the terminal, press Ctrl+Enter to open the corresponding GUI element.
For the Python interpreter being a virtual environment, with this checkbox selected, the virtual environment is automatically activated ( activate is performed automatically).
This option is available only if you have the Python plugin installed.
The embedded terminal emulator also inherits the following IDE settings:
On the Keymap page, you can configure the copy Ctrl+C and paste Ctrl+V shortcuts.
On the Editor | General | Appearance page, you can configure blinking frequency for the caret. The Terminal does not inherit the Use block caret option because there is a separate option for that: Cursor shape.
On the Editor | Color Scheme | Console Font page, you can configure line spacing and fonts.
On the Editor | Color Scheme | Console Colors page, you can configure font colors.
On the Editor | Color Scheme | General page, you can configure the selection foreground and background colors.
Источник
Install PyCharm
PyCharm is a cross-platform IDE that provides consistent experience on the Windows, macOS, and Linux operating systems.
PyCharm is available in three editions: Professional , Community , and Edu . The Community and Edu editions are open-source projects and they are free, but they have fewer features. PyCharm Edu provides courses and helps you learn programming with Python. The Professional edition is commercial, and provides an outstanding set of tools and features. For details, see the editions comparison matrix.
System requirements
| Requirement | Minimum | Recommended |
|---|---|---|
| RAM | 4 GB of free RAM | 8 GB of total system RAM |
| CPU | Any modern CPU | Multi-core CPU. PyCharm supports multithreading for different operations and processes making it faster the more CPU cores it can use. |
| Disk space | 2.5 GB and another 1 GB for caches | SSD drive with at least 5 GB of free space |
| Monitor resolution | 1024×768 | 1920×1080 |
| Operating system | Latest 64-bit version of Windows, macOS, or Linux (for example, Debian, Ubuntu, or RHEL) |
You do not need to install Java to run PyCharm because JetBrains Runtime is bundled with the IDE (based on JRE 11).
Python 2: version 2.7
Python 3: from the version 3.6 up to the version 3.10
Install using the Toolbox App
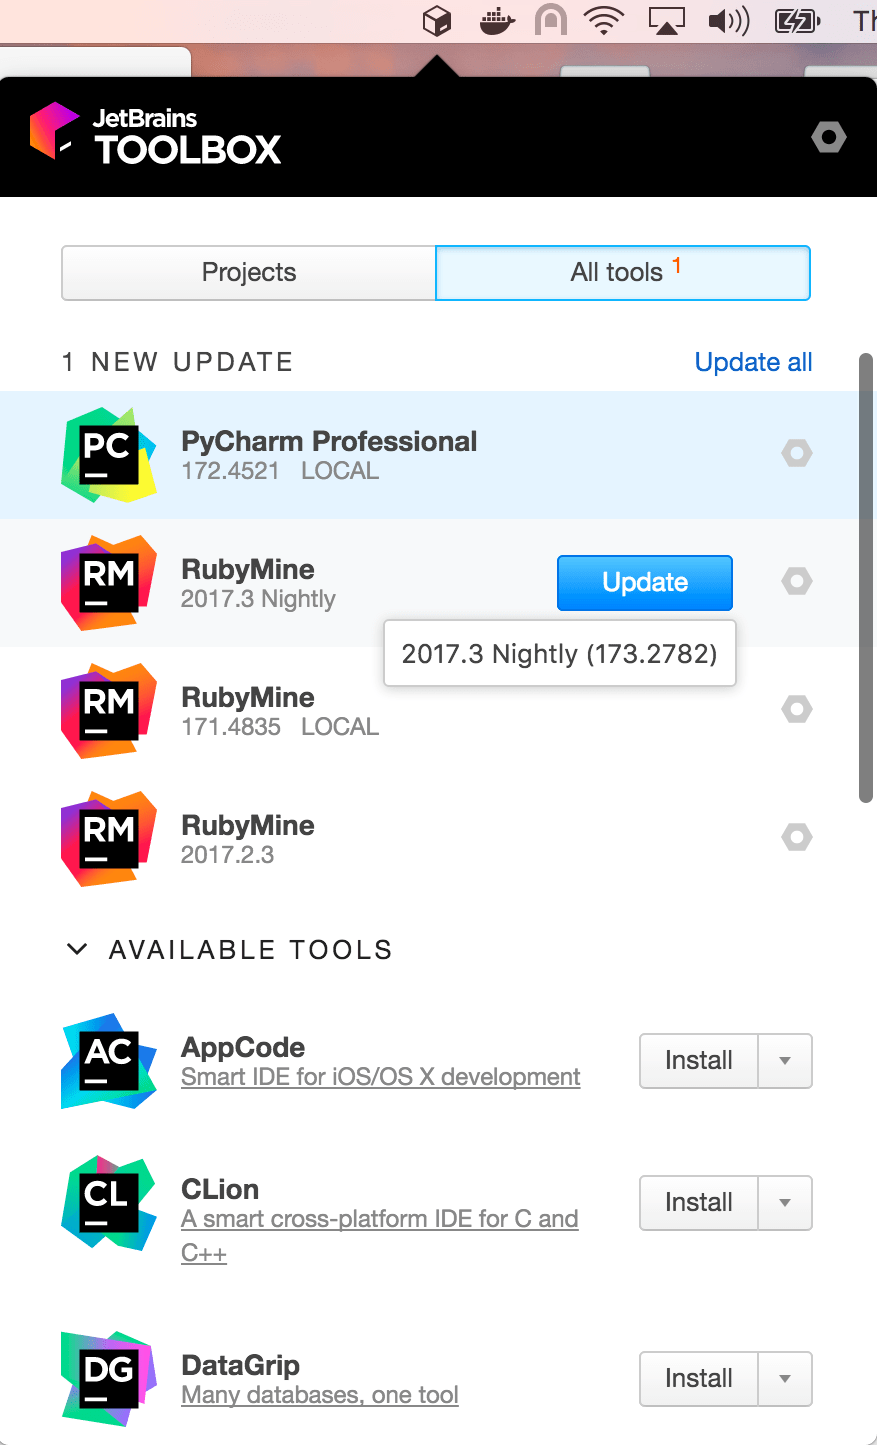
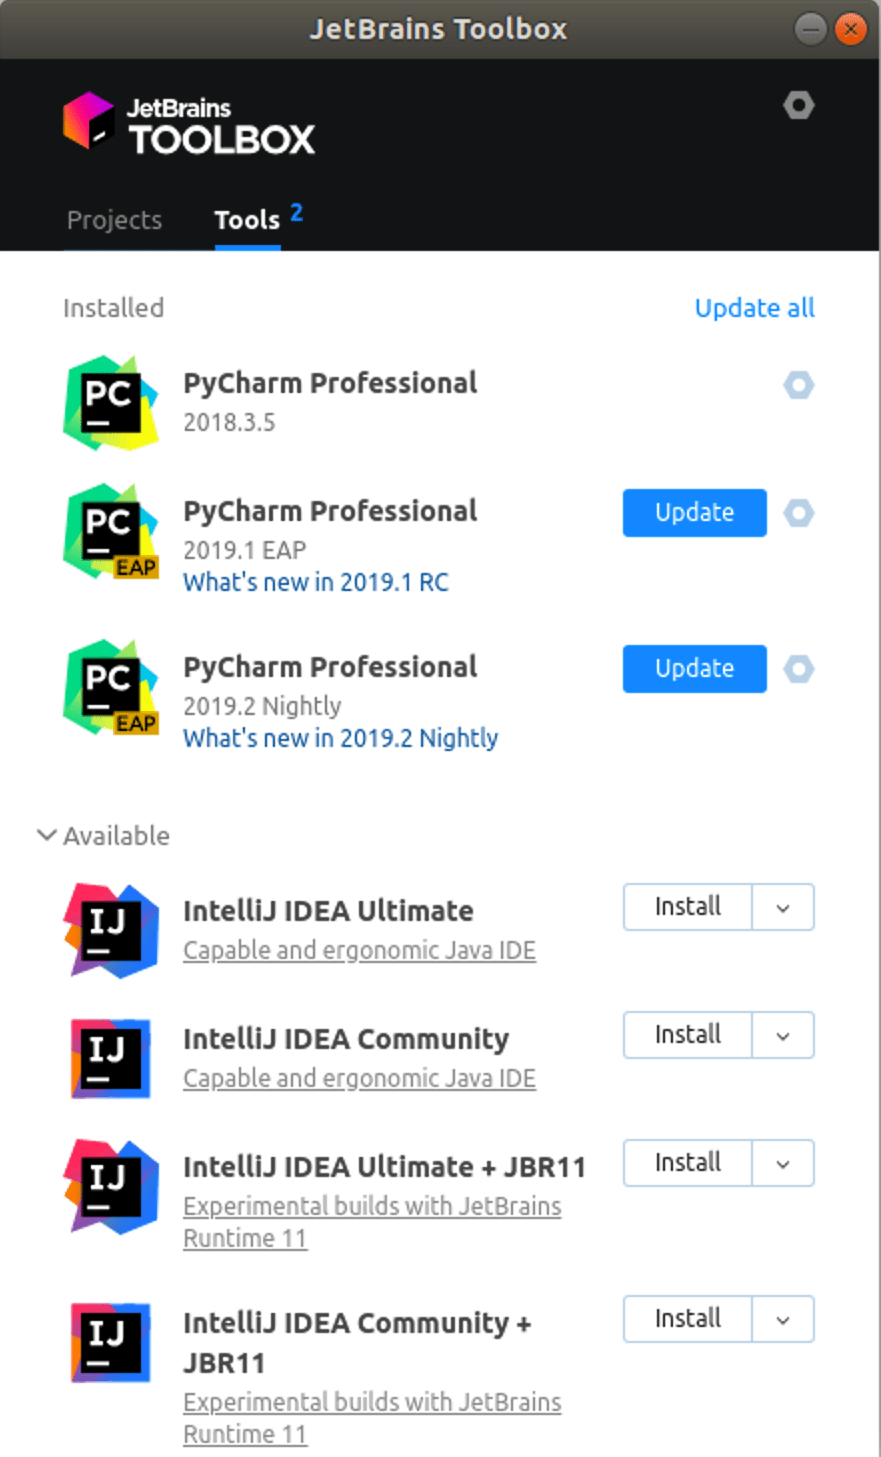
The JetBrains Toolbox App is the recommended tool to install JetBrains products. Use it to install and manage different products or several versions of the same product, including Early Access Program (EAP) and Nightly releases, update and roll back when necessary, and easily remove any tool. The Toolbox App maintains a list of all your projects to quickly open any project in the right IDE and version.
Install the Toolbox App
Download the installer .exe from the Toolbox App web page.
Run the installer and follow the wizard steps.
After you run the Toolbox App, click its icon in the notification area and select which product and version you want to install.

Log in to your JetBrains Account from the Toolbox App and it will automatically activate the available licenses for any IDE that you install.
Install the Toolbox App
Download the disk image .dmg from the Toolbox App web page.
There are separate disk images for Intel and Apple Silicon processors.
Mount the image and drag the JetBrains Toolbox app to the Applications folder.
After you run the Toolbox App, click its icon in the main menu and select which product and version you want to install.
Log in to your JetBrains Account from the Toolbox App and it will automatically activate the available licenses for any IDE that you install.
Install the Toolbox App
Download the tarball .tar.gz from the Toolbox App web page.
Extract the tarball to a directory that supports file execution.
For example, if the downloaded version is 1.17.7391, you can extract it to the recommended /opt directory using the following command:
Execute the jetbrains-toolbox binary from the extracted directory to run the Toolbox App and select which product and version you want to install. After you run the Toolbox App for the first time, it will automatically add the Toolbox App icon to the main menu.
Log in to your JetBrains Account from the Toolbox App and it will automatically activate the available licenses for any IDE that you install.
You can use this shell script that automatically downloads the tarball with the latest version of the Toolbox App, extracts it to the recommended /opt directory, and creates a symbolic link in the /usr/local/bin directory.
Standalone installation
Install PyCharm manually to manage the location of every instance and all the configuration files. For example, if you have a policy that requires specific install locations.
To verify the integrity of the installer, use the SHA checksum linked from the Download page.
Run the installer and follow the wizard steps.
Mind the following options in the installation wizard
64-bit launcher : Adds a launching icon to the Desktop.
Open Folder as Project : Adds an option to the folder context menu that will allow opening the selected directory as a PyCharm project.
.py : Establishes an association with Python files to open them in PyCharm.
Add launchers dir to the PATH : Allows running this PyCharm instance from the Console without specifying the path to it.
To run PyCharm, find it in the Windows Start menu or use the desktop shortcut. You can also run the launcher batch script or executable in the installation directory under bin .
There are separate disk images for Intel and Apple Silicon processors.
To verify the integrity of the downloaded disk image, use the SHA checksum linked from the Download page.
Mount the image and drag the PyCharm app to the Applications folder.
Run the PyCharm app from the Applications directory, Launchpad, or Spotlight.
Install using tar archives
Unpack the pycharm-*.tar.gz file to a different folder, if your current Download folder doesn’t support file execution:
The recommended installation location according to the filesystem hierarchy standard (FHS) is /opt . To install PyCharm into this directory, enter the following command:
To verify integrity of the downloaded archive, use the SHA checksum linked from the Download page.
Switch to the bin subdirectory:
Run pycharm.sh from the bin subdirectory.
Install using snap packages
For Ubuntu 16.04 and later, you can use snap packages to install PyCharm.
PyCharm is distributed via two channels:
The stable channel includes only stable versions. To install the latest stable release of PyCharm, run the following command:
The —classic option is required because the PyCharm snap requires full access to the system, like a traditionally packaged application.
The edge channel includes EAP builds. To install the latest EAP build of PyCharm, run the following command:
Run pycharm-professional , pycharm-community , or pycharm-educational in the Terminal.
To create a desktop entry, do one of the following:
On the Welcome screen, click Configure | Create Desktop Entry
From the main menu, click Tools | Create Desktop Entry
When you run PyCharm for the first time, some steps are required to complete the installation, customize your instance, and start working with the IDE.
For information about the location of the default IDE directories with user-specific files, see Directories used by the IDE.
Silent installation on Windows
Silent installation is performed without any user interface. It can be used by network administrators to install PyCharm on a number of machines and avoid interrupting other users.
To perform silent install, run the installer with the following switches:
/S : Enable silent install
/CONFIG : Specify the path to the silent configuration file
/D : Specify the path to the installation directory
This parameter must be the last in the command line and it should not contain any quotes even if the path contains blank spaces.
To check for issues during the installation process, add the /LOG switch with the log file path and name between the /S and /D parameters. The installer will generate the specified log file. For example:
Silent configuration file
The silent configuration file defines the options for installing PyCharm. With the default options, silent installation is performed only for the current user: mode=user . If you want to install PyCharm for all users, change the value of the installation mode option to mode=admin and run the installer as an administrator.
The default silent configuration file is unique for each JetBrains product. You can modify it to enable or disable various installation options as necessary.
It is possible to perform silent installation without the configuration file. In this case, omit the /CONFIG switch and run the installer as an administrator. Without the silent configuration file, the installer will ignore all additional options: it will not create desktop shortcuts, add associations, or update the PATH variable. However, it will still create a shortcut in the Start menu under JetBrains .
Источник


