- Как создать exe файл для Python кода с помощью PyInstaller
- Установка PyInstaller
- Создание exe файла с помощью PyInstaller
- Добавление файлов с данными, которые будут использоваться exe-файлом
- Добавление файлов с данными и параметр onefile
- Дополнительные импорты с помощью Hidden Imports
- Файл spec
- Вывод:
- Подписывайтесь на канал в Дзене
- Using PyInstaller
- Options
- General Options
- What to generate
- What to bundle, where to search
- How to generate
- Windows and Mac OS X specific options
- Windows specific options
- Windows Side-by-side Assembly searching options (advanced)
- Mac OS X specific options
- Rarely used special options
- Shortening the Command
- Running PyInstaller with Python optimizations
- Using UPX
- Encrypting Python Bytecode
- Defining the Extraction Location
- Supporting Multiple Platforms
- Supporting Multiple Python Environments
- Supporting Multiple Operating Systems
- Capturing Windows Version Data
- Building Mac OS X App Bundles
- Platform-specific Notes
- GNU/Linux
- Making Linux Apps Forward-Compatible
- Windows
- Mac OS X
- Making Mac OS X apps Forward-Compatible
- Building 32-bit Apps in Mac OS X
- Getting the Opened Document Names
Как создать exe файл для Python кода с помощью PyInstaller

Установка PyInstaller
Установка PyInstaller не отличается от установки любой другой библиотеки Python.
Вот так можно проверить версию PyInstaller.
Я использую PyInstaller версии 4.2.
Создание exe файла с помощью PyInstaller
PyInstaller собирает в один пакет Python-приложение и все необходимые ему библиотеки следующим образом:
- Считывает файл скрипта.
- Анализирует код для выявления всех зависимостей, необходимых для работы.
- Создает файл spec, который содержит название скрипта, библиотеки-зависимости, любые файлы, включая те параметры, которые были переданы в команду PyInstaller.
- Собирает копии всех библиотек и файлов вместе с активным интерпретатором Python.
- Создает папку BUILD в папке со скриптом и записывает логи вместе с рабочими файлами в BUILD.
- Создает папку DIST в папке со скриптом, если она еще не существует.
- Записывает все необходимые файлы вместе со скриптом или в одну папку, или в один исполняемый файл.
Если использовать параметр команды onedir или -D при генерации исполняемого файла, тогда все будет помещено в одну папку. Это поведение по умолчанию. Если же использовать параметр onefile или -F , то все окажется в одном исполняемом файле.
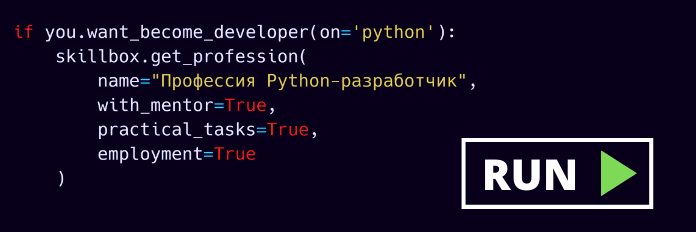
Возьмем в качестве примера простейший скрипт на Python c названием simple.py, который содержит такой код.
Создадим один исполняемый файл. В командной строке введите:
После завершения установки будет две папки, BUILD и DIST, а также новый файл с расширением .spec. Spec-файл будет называться так же, как и файл скрипта.
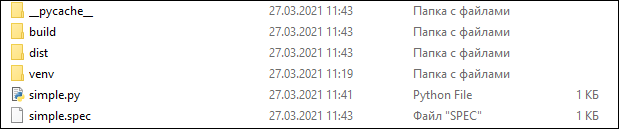


Python создает каталог распространения, который содержит основной исполняемый файл, а также все динамические библиотеки.
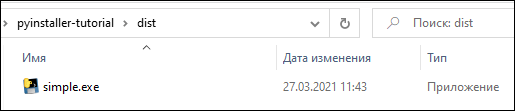
Вот что произойдет после запуска файла.
Добавление файлов с данными, которые будут использоваться exe-файлом
Есть CSV-файл netflix_titles.csv, и Python-script, который считывает количество записей в нем. Теперь нужно добавить этот файл в бандл с исполняемым файлом. Файл Python-скрипта назовем просто simple1.py.
Создадим исполняемый файл с данными в папке.
Параметр —add-data позволяет добавить файлы с данными, которые нужно сохранить в одном бандле с исполняемым файлом. Этот параметр можно применить много раз.
Можно увидеть, что файл теперь добавляется в папку DIST вместе с исполняемым файлом.
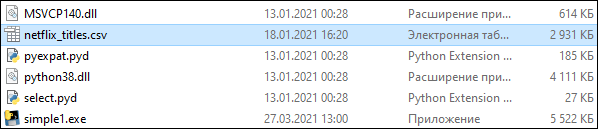
Также, открыв spec-файл, можно увидеть раздел datas, в котором указывается, что файл netflix_titles.csv копируется в текущую директорию.
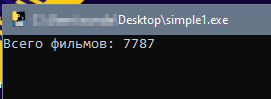
Запустим файл simple1.exe, появится консоль с выводом: Всего фильмов: 7787 .
Добавление файлов с данными и параметр onefile
Если задать параметр —onefile , то PyInstaller распаковывает все файлы в папку TEMP, выполняет скрипт и удаляет TEMP. Если вместе с add-data указать onefile, то нужно считать данные из папки. Путь папки меняется и похож на «_MEIxxxxxx-folder».
Скрипт обновлен для чтения папки TEMP и файлов с данными. Создадим exe-файл с помощью onefile и add-data.
После успешного создания файл simple1.exe появится в папке DIST.


Можно скопировать исполняемый файл на рабочий стол и запустить, чтобы убедиться, что нет никакой ошибки, связанной с отсутствием файла.
Дополнительные импорты с помощью Hidden Imports
Исполняемому файлу требуются все импорты, которые нужны Python-скрипту. Иногда PyInstaller может пропустить динамические импорты или импорты второго уровня, возвращая ошибку ImportError: No module named …
Для решения этой ошибки нужно передать название недостающей библиотеки в hidden-import.
Например, чтобы добавить библиотеку os, нужно написать вот так:
Файл spec
Файл spec — это первый файл, который PyInstaller создает, чтобы закодировать содержимое скрипта Python вместе с параметрами, переданными при запуске.
PyInstaller считывает содержимое файла для создания исполняемого файла, определяя все, что может понадобиться для него.
Файл с расширением .spec сохраняется по умолчанию в текущей директории.
Если у вас есть какое-либо из нижеперечисленных требований, то вы можете изменить файл спецификации:
- Собрать в один бандл с исполняемым файлы данных.
- Включить другие исполняемые файлы: .dll или .so.
- С помощью библиотек собрать в один бандл несколько программы.
Например, есть скрипт simpleModel.py, который использует TensorFlow и выводит номер версии этой библиотеки.
Компилируем модель с помощью PyInstaller:
После успешной компиляции запускаем исполняемый файл, который возвращает следующую ошибку.
Исправим ее, обновив файл spec. Одно из решений — создать файл spec.
Команда pyi-makespec создает spec-файл по умолчанию, содержащий все параметры, которые можно указать в командной строке. Файл simpleModel.spec создается в текущей директории.
Поскольку был использован параметр —onefile , то внутри файла будет только раздел exe.
Если использовать параметр по умолчанию или onedir, то вместе с exe-разделом будет также и раздел collect.
Можно открыть simpleModel.spec и добавить следующий текст для создания хуков.
Создаем хуки и добавляем их в hidden imports и раздел данных.
Файлы хуков расширяют возможность PyInstaller обрабатывать такие требования, как необходимость включать дополнительные данные или импортировать динамические библиотеки.
Обычно пакеты Python используют нормальные методы для импорта своих зависимостей, но в отдельных случаях, как например TensorFlow, существует необходимость импорта динамических библиотек. PyInstaller не может найти все библиотеки, или же их может быть слишком много. В таком случае рекомендуется использовать вспомогательный инструмент для импорта из PyInstaller.utils.hooks и собрать все подмодули для библиотеки.
Скомпилируем модель после обновления файла simpleModel.spec.
Скопируем исполняемый файл на рабочий стол и увидим, что теперь он корректно отображает версию TensorFlow.
Вывод:
PyInstaller предлагает несколько вариантов создания простых и сложных исполняемых файлов из Python-скриптов:
- Исполняемый файл может собрать в один бандл все требуемые данные с помощью параметра —add-data .
- Исполняемый файл и зависимые данные с библиотеками можно собрать в один файл или папку с помощью —onefile или —onedir соответственно.
- Динамические импорты и библиотеки второго уровня можно включить с помощью hidden-imports .
- Файл spec позволяет создать исполняемый файл для обработки скрытых импортов и других файлов данных с помощью хуков.
Подписывайтесь на канал в Дзене
Полезный контент для начинающих и опытных программистов в канале Лента Python разработчика — Как успевать больше, делать лучше и не потерять мотивацию.
Using PyInstaller
The syntax of the pyinstaller command is:
In the most simple case, set the current directory to the location of your program myscript.py and execute:
PyInstaller analyzes myscript.py and:
- Writes myscript.spec in the same folder as the script.
- Creates a folder build in the same folder as the script if it does not exist.
- Writes some log files and working files in the build folder.
- Creates a folder dist in the same folder as the script if it does not exist.
- Writes the myscript executable folder in the dist folder.
In the dist folder you find the bundled app you distribute to your users.
Normally you name one script on the command line. If you name more, all are analyzed and included in the output. However, the first script named supplies the name for the spec file and for the executable folder or file. Its code is the first to execute at run-time.
For certain uses you may edit the contents of myscript.spec (described under Using Spec Files ). After you do this, you name the spec file to PyInstaller instead of the script:
The myscript.spec file contains most of the information provided by the options that were specified when pyinstaller (or pyi-makespec) was run with the script file as the argument. You typically do not need to specify any options when running pyinstaller with the spec file. Only a few command-line options have an effect when building from a spec file.
You may give a path to the script or spec file, for example
Options
General Options
| -h , —help | show this help message and exit |
| -v , —version | Show program version info and exit. |
| —distpath DIR | Where to put the bundled app (default: ./dist) |
| —workpath WORKPATH | |
| Where to put all the temporary work files, .log, .pyz and etc. (default: ./build) | |
| -y , —noconfirm | |
| Replace output directory (default: SPECPATH/dist/SPECNAME) without asking for confirmation | |
| —upx-dir UPX_DIR | |
| Path to UPX utility (default: search the execution path) | |
| -a , —ascii | Do not include unicode encoding support (default: included if available) |
| —clean | Clean PyInstaller cache and remove temporary files before building. |
| —log-level LEVEL | |
| Amount of detail in build-time console messages. LEVEL may be one of TRACE, DEBUG, INFO, WARN, ERROR, CRITICAL (default: INFO). | |
What to generate
| -D , —onedir | Create a one-folder bundle containing an executable (default) |
| -F , —onefile | Create a one-file bundled executable. |
| —specpath DIR | Folder to store the generated spec file (default: current directory) |
| -n NAME , —name NAME | |
| Name to assign to the bundled app and spec file (default: first script’s basename) | |
What to bundle, where to search
| —add-data | |
| Additional non-binary files or folders to be added to the executable. The path separator is platform specific, os.pathsep (which is ; on Windows and : on most unix systems) is used. This option can be used multiple times. | |
| —add-binary | |
| Additional binary files to be added to the executable. See the —add-data option for more details. This option can be used multiple times. | |
| -p DIR , —paths DIR | |
| A path to search for imports (like using PYTHONPATH). Multiple paths are allowed, separated by ‘:’, or use this option multiple times | |
| —hidden-import MODULENAME , —hiddenimport MODULENAME | |
| Name an import not visible in the code of the script(s). This option can be used multiple times. | |
| —additional-hooks-dir HOOKSPATH | |
| An additional path to search for hooks. This option can be used multiple times. | |
| —runtime-hook RUNTIME_HOOKS | |
| Path to a custom runtime hook file. A runtime hook is code that is bundled with the executable and is executed before any other code or module to set up special features of the runtime environment. This option can be used multiple times. | |
| —exclude-module EXCLUDES | |
| Optional module or package (the Python name, not the path name) that will be ignored (as though it was not found). This option can be used multiple times. | |
| —key KEY | The key used to encrypt Python bytecode. |
How to generate
Provide assistance with debugging a frozen application, by specifying one or more of the following choices.
- all: All three of the below options; this is the default choice, unless one of the choices below is specified.
- imports: specify the -v option to the underlying Python interpreter, causing it to print a message each time a module is initialized, showing the place (filename or built-in module) from which it is loaded. See https://docs.python.org/3/using/cmdline.html#id4.
- bootloader: tell the bootloader to issue progress messages while initializing and starting the bundled app. Used to diagnose problems with missing imports.
- noarchive: instead of storing all frozen Python source files as an archive inside the resulting executable, store them as files in the resulting output directory.
| -s , —strip | Apply a symbol-table strip to the executable and shared libs (not recommended for Windows) |
| —noupx | Do not use UPX even if it is available (works differently between Windows and *nix) |
Windows and Mac OS X specific options
| -c , —console , —nowindowed | |
| Open a console window for standard i/o (default) | |
| -w , —windowed , —noconsole | |
| Windows and Mac OS X: do not provide a console window for standard i/o. On Mac OS X this also triggers building an OS X .app bundle. This option is ignored in *NIX systems. | |
| -i , —icon | |
| FILE.ico: apply that icon to a Windows executable. FILE.exe,ID, extract the icon with ID from an exe. FILE.icns: apply the icon to the .app bundle on Mac OS X | |
Windows specific options
| —version-file FILE | |
| add a version resource from FILE to the exe | |
| -m , —manifest | |
| add manifest FILE or XML to the exe | |
| -r RESOURCE , —resource RESOURCE | |
| Add or update a resource to a Windows executable. The RESOURCE is one to four items, FILE[,TYPE[,NAME[,LANGUAGE]]]. FILE can be a data file or an exe/dll. For data files, at least TYPE and NAME must be specified. LANGUAGE defaults to 0 or may be specified as wildcard * to update all resources of the given TYPE and NAME. For exe/dll files, all resources from FILE will be added/updated to the final executable if TYPE, NAME and LANGUAGE are omitted or specified as wildcard *.This option can be used multiple times. | |
| —uac-admin | Using this option creates a Manifest which will request elevation upon application restart. |
| —uac-uiaccess | Using this option allows an elevated application to work with Remote Desktop. |
Windows Side-by-side Assembly searching options (advanced)
| —win-private-assemblies | |
| Any Shared Assemblies bundled into the application will be changed into Private Assemblies. This means the exact versions of these assemblies will always be used, and any newer versions installed on user machines at the system level will be ignored. | |
| —win-no-prefer-redirects | |
| While searching for Shared or Private Assemblies to bundle into the application, PyInstaller will prefer not to follow policies that redirect to newer versions, and will try to bundle the exact versions of the assembly. | |
Mac OS X specific options
| —osx-bundle-identifier BUNDLE_IDENTIFIER | |
| Mac OS X .app bundle identifier is used as the default unique program name for code signing purposes. The usual form is a hierarchical name in reverse DNS notation. For example: com.mycompany.department.appname (default: first script’s basename) | |
Rarely used special options
| —runtime-tmpdir PATH | |
| Where to extract libraries and support files in onefile -mode. If this option is given, the bootloader will ignore any temp-folder location defined by the run-time OS. The _MEIxxxxxx -folder will be created here. Please use this option only if you know what you are doing. | |
| —bootloader-ignore-signals | |
| Tell the bootloader to ignore signals rather than forwarding them to the child process. Useful in situations where e.g. a supervisor process signals both the bootloader and child (e.g. via a process group) to avoid signalling the child twice. | |
Shortening the Command
Because of its numerous options, a full pyinstaller command can become very long. You will run the same command again and again as you develop your script. You can put the command in a shell script or batch file, using line continuations to make it readable. For example, in Linux:
Or in Windows, use the little-known BAT file line continuation:
Running PyInstaller with Python optimizations
When using this feature, you should be aware of how the Python bytecode optimization mechanism works. When using -O , __debug__ is set to False and assert statements are removed from the bytecode. The -OO flag additionally removes docstrings.
Using this feature affects not only your main script, but all modules included by PyInstaller . If your code (or any module imported by your script) relies on these features, your program may break or have unexpected behavior.
PyInstaller can be run with Python optimization flags ( -O or -OO ) by executing it as a Python module, rather than using the pyinstaller command:
Or, by explicitly setting the PYTHONOPTIMIZE environment variable to a non-zero value:
You can use any PyInstaller options that are otherwise available with the pyinstaller command. For example:
Alternatively, you can also use the path to pyinstaller:
Using UPX
UPX is a free utility available for most operating systems. UPX compresses executable files and libraries, making them smaller, sometimes much smaller. UPX is available for most operating systems and can compress a large number of executable file formats. See the UPX home page for downloads, and for the list of supported executable formats.
A compressed executable program is wrapped in UPX startup code that dynamically decompresses the program when the program is launched. After it has been decompressed, the program runs normally. In the case of a PyInstaller one-file executable that has been UPX-compressed, the full execution sequence is:
- The compressed program start up in the UPX decompressor code.
- After decompression, the program executes the PyInstaller bootloader, which creates a temporary environment for Python.
- The Python interpreter executes your script.
PyInstaller looks for UPX on the execution path or the path specified with the —upx-dir option. If UPX exists, PyInstaller applies it to the final executable, unless the —noupx option was given. UPX has been used with PyInstaller output often, usually with no problems.
Encrypting Python Bytecode
To encrypt the Python bytecode modules stored in the bundle, pass the —key= key-string argument on the command line.
For this to work, you must have the PyCrypto module installed. The key-string is a string of 16 characters which is used to encrypt each file of Python byte-code before it is stored in the archive inside the executable file.
Defining the Extraction Location
In rare cases, when you bundle to a single executable (see Bundling to One File and How the One-File Program Works ), you may want to control the location of the temporary directory at compile time. This can be done using the —runtime-tmpdir option. If this option is given, the bootloader will ignore any temp-folder location defined by the run-time OS. Please use this option only if you know what you are doing.
Supporting Multiple Platforms
If you distribute your application for only one combination of OS and Python, just install PyInstaller like any other package and use it in your normal development setup.
Supporting Multiple Python Environments
When you need to bundle your application within one OS but for different versions of Python and support libraries – for example, a Python 3 version and a Python 2.7 version; or a supported version that uses Qt4 and a development version that uses Qt5 – we recommend you use virtualenv. With virtualenv you can maintain different combinations of Python and installed packages, and switch from one combination to another easily. (If you work only with Python 3.4 and later, python3 -m venv does the same job, see module venv.)
- Use virtualenv to create as many different development environments as you need, each with its unique combination of Python and installed packages.
- Install PyInstaller in each environment.
- Use PyInstaller to build your application in each environment.
Note that when using virtualenv, the path to the PyInstaller commands is:
- Windows: ENV_ROOT\Scripts
- Others: ENV_ROOT/bin
Under Windows, the pip-Win package installs virtualenv and makes it especially easy to set up different environments and switch between them. Under Linux and Mac OS, you switch environments at the command line.
See PEP 405 for more information about Python virtual environments.
Supporting Multiple Operating Systems
If you need to distribute your application for more than one OS, for example both Windows and Mac OS X, you must install PyInstaller on each platform and bundle your app separately on each.
You can do this from a single machine using virtualization. The free virtualBox or the paid VMWare and Parallels allow you to run another complete operating system as a “guest”. You set up a virtual machine for each “guest” OS. In it you install Python, the support packages your application needs, and PyInstaller.
The Dropbox system is useful with virtual machines. Install a Dropbox client in each virtual machine, all linked to your Dropbox account. Keep a single copy of your script(s) in a Dropbox folder. Then on any virtual machine you can run PyInstaller thus:
PyInstaller reads scripts from the common Dropbox folder, but writes its work files and the bundled app in folders that are local to the virtual machine.
If you share the same home directory on multiple platforms, for example Linux and OS X, you will need to set the PYINSTALLER_CONFIG_DIR environment variable to different values on each platform otherwise PyInstaller may cache files for one platform and use them on the other platform, as by default it uses a subdirectory of your home directory as its cache location.
It is said to be possible to cross-develop for Windows under Linux using the free Wine environment. Further details are needed, see How to Contribute.
Capturing Windows Version Data
A Windows app may require a Version resource file. A Version resource contains a group of data structures, some containing binary integers and some containing strings, that describe the properties of the executable. For details see the Microsoft Version Information Structures page.
Version resources are complex and some elements are optional, others required. When you view the version tab of a Properties dialog, there’s no simple relationship between the data displayed and the structure of the resource. For this reason PyInstaller includes the pyi-grab_version command. It is invoked with the full path name of any Windows executable that has a Version resource:
The command writes text that represents a Version resource in readable form to standard output. You can copy it from the console window or redirect it to a file. Then you can edit the version information to adapt it to your program. Using pyi-grab_version you can find an executable that displays the kind of information you want, copy its resource data, and modify it to suit your package.
The version text file is encoded UTF-8 and may contain non-ASCII characters. (Unicode characters are allowed in Version resource string fields.) Be sure to edit and save the text file in UTF-8 unless you are certain it contains only ASCII string values.
Your edited version text file can be given with the —version-file= option to pyinstaller or pyi-makespec . The text data is converted to a Version resource and installed in the bundled app.
In a Version resource there are two 64-bit binary values, FileVersion and ProductVersion . In the version text file these are given as four-element tuples, for example:
The elements of each tuple represent 16-bit values from most-significant to least-significant. For example the value (2, 0, 4, 0) resolves to 0002000000040000 in hex.
You can also install a Version resource from a text file after the bundled app has been created, using the pyi-set_version command:
The pyi-set_version utility reads a version text file as written by pyi-grab_version , converts it to a Version resource, and installs that resource in the executable_file specified.
For advanced uses, examine a version text file as written by pyi-grab_version . You find it is Python code that creates a VSVersionInfo object. The class definition for VSVersionInfo is found in utils/win32/versioninfo.py in the PyInstaller distribution folder. You can write a program that imports versioninfo . In that program you can eval the contents of a version info text file to produce a VSVersionInfo object. You can use the .toRaw() method of that object to produce a Version resource in binary form. Or you can apply the unicode() function to the object to reproduce the version text file.
Building Mac OS X App Bundles
Under Mac OS X, PyInstaller always builds a UNIX executable in dist . If you specify —onedir , the output is a folder named myscript containing supporting files and an executable named myscript . If you specify —onefile , the output is a single UNIX executable named myscript . Either executable can be started from a Terminal command line. Standard input and output work as normal through that Terminal window.
If you specify —windowed with either option, the dist folder also contains an OS X application named myscript.app .
As you probably know, an application is a special type of folder. The one built by PyInstaller contains a folder always named Contents which contains:
- A folder Frameworks which is empty.
- A folder Resources that contains an icon file.
- A file Info.plist that describes the app.
- A folder MacOS that contains the the executable and supporting files, just as in the —onedir folder.
Use the icon= argument to specify a custom icon for the application. It will be copied into the Resources folder. (If you do not specify an icon file, PyInstaller supplies a file icon-windowed.icns with the PyInstaller logo.)
Use the osx-bundle-identifier= argument to add a bundle identifier. This becomes the CFBundleIdentifier used in code-signing (see the PyInstaller code signing recipe and for more detail, the Apple code signing overview technical note).
You can add other items to the Info.plist by editing the spec file; see Spec File Options for a Mac OS X Bundle below.
Platform-specific Notes
GNU/Linux
Making Linux Apps Forward-Compatible
Under Linux, PyInstaller does not bundle libc (the C standard library, usually glibc , the Gnu version) with the app. Instead, the app expects to link dynamically to the libc from the local OS where it runs. The interface between any app and libc is forward compatible to newer releases, but it is not backward compatible to older releases.
For this reason, if you bundle your app on the current version of Linux, it may fail to execute (typically with a runtime dynamic link error) if it is executed on an older version of Linux.
The solution is to always build your app on the oldest version of Linux you mean to support. It should continue to work with the libc found on newer versions.
The Linux standard libraries such as glibc are distributed in 64-bit and 32-bit versions, and these are not compatible. As a result you cannot bundle your app on a 32-bit system and run it on a 64-bit installation, nor vice-versa. You must make a unique version of the app for each word-length supported.
Windows
For Python >= 3.5 targeting Windows .spec -file to include the required DLLs, see “Distributing Software that uses the Universal CRT“ in the above-mentioned link, number 6.
If you think, PyInstaller should do this by itself, please help improving PyInstaller .
Mac OS X
Making Mac OS X apps Forward-Compatible
In Mac OS X, components from one version of the OS are usually compatible with later versions, but they may not work with earlier versions.
The only way to be certain your app supports an older version of Mac OS X is to run PyInstaller in the oldest version of the OS you need to support.
For example, to be sure of compatibility with “Snow Leopard” (10.6) and later versions, you should execute PyInstaller in that environment. You would create a copy of Mac OS X 10.6, typically in a virtual machine. In it, install the desired level of Python (the default Python in Snow Leopard was 2.6, which PyInstaller no longer supports), and install PyInstaller , your source, and all its dependencies. Then build your app in that environment. It should be compatible with later versions of Mac OS X.
Building 32-bit Apps in Mac OS X
Older versions of Mac OS X supported both 32-bit and 64-bit executables. PyInstaller builds an app using the the word-length of the Python used to execute it. That will typically be a 64-bit version of Python, resulting in a 64-bit executable. To create a 32-bit executable, run PyInstaller under a 32-bit Python.
Python as installed in OS X will usually be executable in either 64- or 32-bit mode. To verify this, apply the file command to the Python executable:
The OS chooses which architecture to run, and typically defaults to 64-bit. You can force the use of either architecture by name using the arch command:
Apple’s default /usr/bin/python may circumvent the arch specification and run 64-bit regardless. (That is not the case if you apply arch to a specific version such as /usr/bin/python2.7 .) To make sure of running 32-bit in all cases, set the following environment variable:
Getting the Opened Document Names
Support for OpenDocument events is broken in PyInstaller 3.0 owing to code changes needed in the bootloader to support current versions of Mac OS X. Do not attempt to use this feature until it has been fixed. If this feature is important to you, follow and comment on the status of PyInstaller Issue #1309.
When a user double-clicks a document of a type your application supports, or when a user drags a document icon and drops it on your application’s icon, Mac OS X launches your application and provides the name(s) of the opened document(s) in the form of an OpenDocument AppleEvent. This AppleEvent is received by the bootloader before your code has started executing.
The bootloader gets the names of opened documents from the OpenDocument event and encodes them into the argv string before starting your code. Thus your code can query sys.argv to get the names of documents that should be opened at startup.
OpenDocument is the only AppleEvent the bootloader handles. If you want to handle other events, or events that are delivered after the program has launched, you must set up the appropriate handlers.
© Copyright This document has been placed in the public domain.. Revision 0f31b35f .


