- Работа с файлами в Python с помощью модуля OS
- Вывод текущей директории
- Создание папки
- Изменение директории
- Создание вложенных папок
- Создание файлов
- Переименование файлов
- Перемещение файлов
- Список файлов и директорий
- Удаление файлов
- Удаление директорий
- Получение информации о файлах
- Working With Files in Python
- Python’s “with open(…) as …” Pattern
- Getting a Directory Listing
- Directory Listing in Legacy Python Versions
- Directory Listing in Modern Python Versions
- Listing All Files in a Directory
- Listing Subdirectories
- Getting File Attributes
- Making Directories
- Creating a Single Directory
- Creating Multiple Directories
- Filename Pattern Matching
- Using String Methods
- Simple Filename Pattern Matching Using fnmatch
- More Advanced Pattern Matching
- Filename Pattern Matching Using glob
- Traversing Directories and Processing Files
- Making Temporary Files and Directories
- Deleting Files and Directories
- Deleting Files in Python
- Deleting Directories
- Deleting Entire Directory Trees
- Copying, Moving, and Renaming Files and Directories
- Copying Files in Python
- Copying Directories
- Moving Files and Directories
- Renaming Files and Directories
- Archiving
- Reading ZIP Files
- Extracting ZIP Archives
- Extracting Data From Password Protected Archives
- Creating New ZIP Archives
- Opening TAR Archives
- Extracting Files From a TAR Archive
- Creating New TAR Archives
- Working With Compressed Archives
- An Easier Way of Creating Archives
- Reading Multiple Files
- Conclusion
Работа с файлами в Python с помощью модуля OS
Обработка файлов в Python с помощью модуля os включает создание, переименование, перемещение, удаление файлов и папок, а также получение списка всех файлов и каталогов и многое другое.
В индустрии программного обеспечения большинство программ тем или иным образом обрабатывают файлы: создают их, переименовывают, перемещают и так далее. Любой программист должен обладать таким навыком. С этим руководством вы научитесь использовать модуль os в Python для проведения операций над файлами и каталогами вне зависимости от используемой операционной системы.
Важно знать, что модуль os используется не только для работы с файлами. Он включает массу методов и инструментов для других операций: обработки переменных среды, управления системными процессами, а также аргументы командной строки и даже расширенные атрибуты файлов, которые есть только в Linux.
Модуль встроенный, поэтому для работы с ним не нужно ничего устанавливать.
Вывод текущей директории
Для получения текущего рабочего каталога используется os.getcwd() :
os.getcwd() возвращает строку в Юникоде, представляющую текущий рабочий каталог. Вот пример вывода:
Создание папки
Для создания папки/каталога в любой операционной системе нужна следующая команда:
После ее выполнения в текущем рабочем каталоге тут же появится новая папка с названием «folder».
Если запустить ее еще раз, будет вызвана ошибка FileExistsError , потому что такая папка уже есть. Для решения проблемы нужно запускать команду только в том случае, если каталога с таким же именем нет. Этого можно добиться следующим образом:
Функция os.path.isdir() вернет True , если переданное имя ссылается на существующий каталог.
Изменение директории
Менять директории довольно просто. Проделаем это с только что созданным:
Еще раз выведем рабочий каталог:
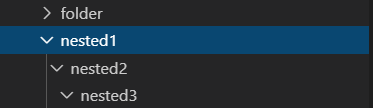
Создание вложенных папок
Предположим, вы хотите создать не только одну папку, но и несколько вложенных:
Это создаст три папки рекурсивно, как показано на следующем изображении:
Создание файлов
Для создания файлов в Python модули не нужны. Можно использовать встроенную функцию open() . Она принимает название файла, который необходимо создать в качестве первого параметра и желаемый режим открытия — как второй:
w значит write (запись), a — это appending (добавление данных к уже существующему файлу), а r — reading (чтение). Больше о режимах открытия можно почитать здесь.
Переименование файлов
С помощью модуля os достаточно просто переименовать файл. Поменяем название созданного в прошлом шаге.
Функция os.rename() принимает 2 аргумента: имя файла или папки, которые нужно переименовать и новое имя.
Перемещение файлов
Функцию os.replace() можно использовать для перемещения файлов или каталогов:
Стоит обратить внимание, что это перезапишет путь, поэтому если в папке folder уже есть файл с таким же именем ( renamed-text.txt ), он будет перезаписан.
Список файлов и директорий
Функция os.listdir() возвращает список, который содержит имена файлов в папке. Если в качестве аргумента не указывать ничего, вернется список файлов и папок текущего рабочего каталога:
А что если нужно узнать состав и этих папок тоже? Для этого нужно использовать функцию os.walk() :
os.walk() — это генератор дерева каталогов. Он будет перебирать все переданные составляющие. Здесь в качестве аргумента передано значение «.», которое обозначает верхушку дерева:
Метод os.path.join() был использован для объединения текущего пути с именем файла/папки.
Удаление файлов
Удалим созданный файл:
os.remove() удалит файл с указанным именем (не каталог).
Удаление директорий
С помощью функции os.rmdir() можно удалить указанную папку:
Для удаления каталогов рекурсивно необходимо использовать os.removedirs() :
Это удалит только пустые каталоги.
Получение информации о файлах
Для получения информации о файле в ОС используется функция os.stat() , которая выполняет системный вызов stat() по выбранному пути:
Это вернет кортеж с отдельными метриками. В их числе есть следующие:
-
- st_size — размер файла в байтах
- st_atime — время последнего доступа в секундах (временная метка)
- st_mtime — время последнего изменения
- st_ctime — в Windows это время создания файла, а в Linux — последнего изменения метаданных
Для получения конкретного атрибута нужно писать следующим образом:
Источник
Working With Files in Python
Table of Contents
Watch Now This tutorial has a related video course created by the Real Python team. Watch it together with the written tutorial to deepen your understanding: Practical Recipes for Working With Files in Python
Python has several built-in modules and functions for handling files. These functions are spread out over several modules such as os , os.path , shutil , and pathlib , to name a few. This article gathers in one place many of the functions you need to know in order to perform the most common operations on files in Python.
In this tutorial, you’ll learn how to:
- Retrieve file properties
- Create directories
- Match patterns in filenames
- Traverse directory trees
- Make temporary files and directories
- Delete files and directories
- Copy, move, or rename files and directories
- Create and extract ZIP and TAR archives
- Open multiple files using the fileinput module
Free Bonus: 5 Thoughts On Python Mastery, a free course for Python developers that shows you the roadmap and the mindset you’ll need to take your Python skills to the next level.
Python’s “with open(…) as …” Pattern
Reading and writing data to files using Python is pretty straightforward. To do this, you must first open files in the appropriate mode. Here’s an example of how to use Python’s “with open(…) as …” pattern to open a text file and read its contents:
open() takes a filename and a mode as its arguments. r opens the file in read only mode. To write data to a file, pass in w as an argument instead:
In the examples above, open() opens files for reading or writing and returns a file handle ( f in this case) that provides methods that can be used to read or write data to the file. Check out Reading and Writing Files in Python and Working With File I/O in Python for more information on how to read and write to files.
Getting a Directory Listing
Suppose your current working directory has a subdirectory called my_directory that has the following contents:
The built-in os module has a number of useful functions that can be used to list directory contents and filter the results. To get a list of all the files and folders in a particular directory in the filesystem, use os.listdir() in legacy versions of Python or os.scandir() in Python 3.x. os.scandir() is the preferred method to use if you also want to get file and directory properties such as file size and modification date.
Directory Listing in Legacy Python Versions
In versions of Python prior to Python 3, os.listdir() is the method to use to get a directory listing:
os.listdir() returns a Python list containing the names of the files and subdirectories in the directory given by the path argument:
A directory listing like that isn’t easy to read. Printing out the output of a call to os.listdir() using a loop helps clean things up:
Directory Listing in Modern Python Versions
In modern versions of Python, an alternative to os.listdir() is to use os.scandir() and pathlib.Path() .
os.scandir() was introduced in Python 3.5 and is documented in PEP 471. os.scandir() returns an iterator as opposed to a list when called:
The ScandirIterator points to all the entries in the current directory. You can loop over the contents of the iterator and print out the filenames:
Here, os.scandir() is used in conjunction with the with statement because it supports the context manager protocol. Using a context manager closes the iterator and frees up acquired resources automatically after the iterator has been exhausted. The result is a print out of the filenames in my_directory/ just like you saw in the os.listdir() example:
Another way to get a directory listing is to use the pathlib module:
The objects returned by Path are either PosixPath or WindowsPath objects depending on the OS.
pathlib.Path() objects have an .iterdir() method for creating an iterator of all files and folders in a directory. Each entry yielded by .iterdir() contains information about the file or directory such as its name and file attributes. pathlib was first introduced in Python 3.4 and is a great addition to Python that provides an object oriented interface to the filesystem.
In the example above, you call pathlib.Path() and pass a path argument to it. Next is the call to .iterdir() to get a list of all files and directories in my_directory .
pathlib offers a set of classes featuring most of the common operations on paths in an easy, object-oriented way. Using pathlib is more if not equally efficient as using the functions in os . Another benefit of using pathlib over os is that it reduces the number of imports you need to make to manipulate filesystem paths. For more information, read Python 3’s pathlib Module: Taming the File System.
Running the code above produces the following:
Using pathlib.Path() or os.scandir() instead of os.listdir() is the preferred way of getting a directory listing, especially when you’re working with code that needs the file type and file attribute information. pathlib.Path() offers much of the file and path handling functionality found in os and shutil , and it’s methods are more efficient than some found in these modules. We will discuss how to get file properties shortly.
Here are the directory-listing functions again:
| Function | Description |
|---|---|
| os.listdir() | Returns a list of all files and folders in a directory |
| os.scandir() | Returns an iterator of all the objects in a directory including file attribute information |
| pathlib.Path.iterdir() | Returns an iterator of all the objects in a directory including file attribute information |
These functions return a list of everything in the directory, including subdirectories. This might not always be the behavior you want. The next section will show you how to filter the results from a directory listing.
Listing All Files in a Directory
This section will show you how to print out the names of files in a directory using os.listdir() , os.scandir() , and pathlib.Path() . To filter out directories and only list files from a directory listing produced by os.listdir() , use os.path :
Here, the call to os.listdir() returns a list of everything in the specified path, and then that list is filtered by os.path.isfile() to only print out files and not directories. This produces the following output:
An easier way to list files in a directory is to use os.scandir() or pathlib.Path() :
Using os.scandir() has the advantage of looking cleaner and being easier to understand than using os.listdir() , even though it is one line of code longer. Calling entry.is_file() on each item in the ScandirIterator returns True if the object is a file. Printing out the names of all files in the directory gives you the following output:
Here’s how to list files in a directory using pathlib.Path() :
Here, you call .is_file() on each entry yielded by .iterdir() . The output produced is the same:
The code above can be made more concise if you combine the for loop and the if statement into a single generator expression. Dan Bader has an excellent article on generator expressions and list comprehensions.
The modified version looks like this:
This produces exactly the same output as the example before it. This section showed that filtering files or directories using os.scandir() and pathlib.Path() feels more intuitive and looks cleaner than using os.listdir() in conjunction with os.path .
Listing Subdirectories
To list subdirectories instead of files, use one of the methods below. Here’s how to use os.listdir() and os.path() :
Manipulating filesystem paths this way can quickly become cumbersome when you have multiple calls to os.path.join() . Running this on my computer produces the following output:
Here’s how to use os.scandir() :
As in the file listing example, here you call .is_dir() on each entry returned by os.scandir() . If the entry is a directory, .is_dir() returns True , and the directory’s name is printed out. The output is the same as above:
Here’s how to use pathlib.Path() :
Calling .is_dir() on each entry of the basepath iterator checks if an entry is a file or a directory. If the entry is a directory, its name is printed out to the screen, and the output produced is the same as the one from the previous example:
Getting File Attributes
Python makes retrieving file attributes such as file size and modified times easy. This is done through os.stat() , os.scandir() , or pathlib.Path() .
os.scandir() and pathlib.Path() retrieve a directory listing with file attributes combined. This can be potentially more efficient than using os.listdir() to list files and then getting file attribute information for each file.
The examples below show how to get the time the files in my_directory/ were last modified. The output is in seconds:
os.scandir() returns a ScandirIterator object. Each entry in a ScandirIterator object has a .stat() method that retrieves information about the file or directory it points to. .stat() provides information such as file size and the time of last modification. In the example above, the code prints out the st_mtime attribute, which is the time the content of the file was last modified.
The pathlib module has corresponding methods for retrieving file information that give the same results:
In the example above, the code loops through the object returned by .iterdir() and retrieves file attributes through a .stat() call for each file in the directory list. The st_mtime attribute returns a float value that represents seconds since the epoch. To convert the values returned by st_mtime for display purposes, you could write a helper function to convert the seconds into a datetime object:
This will first get a list of files in my_directory and their attributes and then call convert_date() to convert each file’s last modified time into a human readable form. convert_date() makes use of .strftime() to convert the time in seconds into a string.
The arguments passed to .strftime() are the following:
- %d : the day of the month
- %b : the month, in abbreviated form
- %Y : the year
Together, these directives produce output that looks like this:
The syntax for converting dates and times into strings can be quite confusing. To read more about it, check out the official documentation on it. Another handy reference that is easy to remember is http://strftime.org/ .
Making Directories
Sooner or later, the programs you write will have to create directories in order to store data in them. os and pathlib include functions for creating directories. We’ll consider these:
| Function | Description |
|---|---|
| os.mkdir() | Creates a single subdirectory |
| pathlib.Path.mkdir() | Creates single or multiple directories |
| os.makedirs() | Creates multiple directories, including intermediate directories |
Creating a Single Directory
To create a single directory, pass a path to the directory as a parameter to os.mkdir() :
If a directory already exists, os.mkdir() raises FileExistsError . Alternatively, you can create a directory using pathlib :
If the path already exists, mkdir() raises a FileExistsError :
To avoid errors like this, catch the error when it happens and let your user know:
Alternatively, you can ignore the FileExistsError by passing the exist_ok=True argument to .mkdir() :
This will not raise an error if the directory already exists.
Creating Multiple Directories
os.makedirs() is similar to os.mkdir() . The difference between the two is that not only can os.makedirs() create individual directories, it can also be used to create directory trees. In other words, it can create any necessary intermediate folders in order to ensure a full path exists.
os.makedirs() is similar to running mkdir -p in Bash. For example, to create a group of directories like 2018/10/05 , all you have to do is the following:
This will create a nested directory structure that contains the folders 2018, 10, and 05:
.makedirs() creates directories with default permissions. If you need to create directories with different permissions call .makedirs() and pass in the mode you would like the directories to be created in:
This creates the 2018/10/05 directory structure and gives the owner and group users read, write, and execute permissions. The default mode is 0o777 , and the file permission bits of existing parent directories are not changed. For more details on file permissions, and how the mode is applied, see the docs.
Run tree to confirm that the right permissions were applied:
This prints out a directory tree of the current directory. tree is normally used to list contents of directories in a tree-like format. Passing the -p and -i arguments to it prints out the directory names and their file permission information in a vertical list. -p prints out the file permissions, and -i makes tree produce a vertical list without indentation lines.
As you can see, all of the directories have 770 permissions. An alternative way to create directories is to use .mkdir() from pathlib.Path :
Passing parents=True to Path.mkdir() makes it create the directory 05 and any parent directories necessary to make the path valid.
By default, os.makedirs() and Path.mkdir() raise an OSError if the target directory already exists. This behavior can be overridden (as of Python 3.2) by passing exist_ok=True as a keyword argument when calling each function.
Running the code above produces a directory structure like the one below in one go:
I prefer using pathlib when creating directories because I can use the same function to create single or nested directories.
Filename Pattern Matching
After getting a list of files in a directory using one of the methods above, you will most probably want to search for files that match a particular pattern.
These are the methods and functions available to you:
- endswith() and startswith() string methods
- fnmatch.fnmatch()
- glob.glob()
- pathlib.Path.glob()
Each of these is discussed below. The examples in this section will be performed on a directory called some_directory that has the following structure:
If you’re following along using a Bash shell, you can create the above directory structure using the following commands:
This will create the some_directory/ directory, change into it, and then create sub_dir . The next line creates file1.py and file2.py in sub_dir , and the last line creates all the other files using expansion. To learn more about shell expansion, visit this site.
Using String Methods
Python has several built-in methods for modifying and manipulating strings. Two of these methods, .startswith() and .endswith() , are useful when you’re searching for patterns in filenames. To do this, first get a directory listing and then iterate over it:
The code above finds all the files in some_directory/ , iterates over them and uses .endswith() to print out the filenames that have the .txt file extension. Running this on my computer produces the following output:
Simple Filename Pattern Matching Using fnmatch
String methods are limited in their matching abilities. fnmatch has more advanced functions and methods for pattern matching. We will consider fnmatch.fnmatch() , a function that supports the use of wildcards such as * and ? to match filenames. For example, in order to find all .txt files in a directory using fnmatch , you would do the following:
This iterates over the list of files in some_directory and uses .fnmatch() to perform a wildcard search for files that have the .txt extension.
More Advanced Pattern Matching
Let’s suppose you want to find .txt files that meet certain criteria. For example, you could be only interested in finding .txt files that contain the word data , a number between a set of underscores, and the word backup in their filename. Something similar to data_01_backup , data_02_backup , or data_03_backup .
Using fnmatch.fnmatch() , you could do it this way:
Here, you print only the names of files that match the data_*_backup.txt pattern. The asterisk in the pattern will match any character, so running this will find all text files whose filenames start with the word data and end in backup.txt , as you can see from the output below:
Filename Pattern Matching Using glob
Another useful module for pattern matching is glob .
.glob() in the glob module works just like fnmatch.fnmatch() , but unlike fnmatch.fnmatch() , it treats files beginning with a period ( . ) as special.
UNIX and related systems translate name patterns with wildcards like ? and * into a list of files. This is called globbing.
For example, typing mv *.py python_files/ in a UNIX shell moves ( mv ) all files with the .py extension from the current directory to the directory python_files . The * character is a wildcard that means “any number of characters,” and *.py is the glob pattern. This shell capability is not available in the Windows Operating System. The glob module adds this capability in Python, which enables Windows programs to use this feature.
Here’s an example of how to use glob to search for all Python ( .py ) source files in the current directory:
glob.glob(‘*.py’) searches for all files that have the .py extension in the current directory and returns them as a list. glob also supports shell-style wildcards to match patterns:
This finds all text ( .txt ) files that contain digits in the filename:
glob makes it easy to search for files recursively in subdirectories too:
This example makes use of glob.iglob() to search for .py files in the current directory and subdirectories. Passing recursive=True as an argument to .iglob() makes it search for .py files in the current directory and any subdirectories. The difference between glob.iglob() and glob.glob() is that .iglob() returns an iterator instead of a list.
Running the program above produces the following:
pathlib contains similar methods for making flexible file listings. The example below shows how you can use .Path.glob() to list file types that start with the letter p :
Calling p.glob(‘*.p*’) returns a generator object that points to all files in the current directory that start with the letter p in their file extension.
Path.glob() is similar to os.glob() discussed above. As you can see, pathlib combines many of the best features of the os , os.path , and glob modules into one single module, which makes it a joy to use.
To recap, here is a table of the functions we have covered in this section:
| Function | Description |
|---|---|
| startswith() | Tests if a string starts with a specified pattern and returns True or False |
| endswith() | Tests if a string ends with a specified pattern and returns True or False |
| fnmatch.fnmatch(filename, pattern) | Tests whether the filename matches the pattern and returns True or False |
| glob.glob() | Returns a list of filenames that match a pattern |
| pathlib.Path.glob() | Finds patterns in path names and returns a generator object |
Traversing Directories and Processing Files
A common programming task is walking a directory tree and processing files in the tree. Let’s explore how the built-in Python function os.walk() can be used to do this. os.walk() is used to generate filename in a directory tree by walking the tree either top-down or bottom-up. For the purposes of this section, we’ll be manipulating the following directory tree:
The following is an example that shows you how to list all files and directories in a directory tree using os.walk() .
os.walk() defaults to traversing directories in a top-down manner:
os.walk() returns three values on each iteration of the loop:
The name of the current folder
A list of folders in the current folder
A list of files in the current folder
On each iteration, it prints out the names of the subdirectories and files it finds:
To traverse the directory tree in a bottom-up manner, pass in a topdown=False keyword argument to os.walk() :
Passing the topdown=False argument will make os.walk() print out the files it finds in the subdirectories first:
As you can see, the program started by listing the contents of the subdirectories before listing the contents of the root directory. This is very useful in situations where you want to recursively delete files and directories. You will learn how to do this in the sections below. By default, os.walk does not walk down into symbolic links that resolve to directories. This behavior can be overridden by calling it with a followlinks=True argument.
Making Temporary Files and Directories
Python provides a handy module for creating temporary files and directories called tempfile .
tempfile can be used to open and store data temporarily in a file or directory while your program is running. tempfile handles the deletion of the temporary files when your program is done with them.
Here’s how to create a temporary file:
The first step is to import TemporaryFile from the tempfile module. Next, create a file like object using the TemporaryFile() method by calling it and passing the mode you want to open the file in. This will create and open a file that can be used as a temporary storage area.
In the example above, the mode is ‘w+t’ , which makes tempfile create a temporary text file in write mode. There is no need to give the temporary file a filename since it will be destroyed after the script is done running.
After writing to the file, you can read from it and close it when you’re done processing it. Once the file is closed, it will be deleted from the filesystem. If you need to name the temporary files produced using tempfile , use tempfile.NamedTemporaryFile() .
The temporary files and directories created using tempfile are stored in a special system directory for storing temporary files. Python searches a standard list of directories to find one that the user can create files in.
On Windows, the directories are C:\TEMP , C:\TMP , \TEMP , and \TMP , in that order. On all other platforms, the directories are /tmp , /var/tmp , and /usr/tmp , in that order. As a last resort, tempfile will save temporary files and directories in the current directory.
.TemporaryFile() is also a context manager so it can be used in conjunction with the with statement. Using a context manager takes care of closing and deleting the file automatically after it has been read:
This creates a temporary file and reads data from it. As soon as the file’s contents are read, the temporary file is closed and deleted from the file system.
tempfile can also be used to create temporary directories. Let’s look at how you can do this using tempfile.TemporaryDirectory() :
Calling tempfile.TemporaryDirectory() creates a temporary directory in the file system and returns an object representing this directory. In the example above, the directory is created using a context manager, and the name of the directory is stored in tmpdir . The third line prints out the name of the temporary directory, and os.path.exists(tmpdir) confirms if the directory was actually created in the file system.
After the context manager goes out of context, the temporary directory is deleted and a call to os.path.exists(tmpdir) returns False , which means that the directory was succesfully deleted.
Deleting Files and Directories
You can delete single files, directories, and entire directory trees using the methods found in the os , shutil , and pathlib modules. The following sections describe how to delete files and directories that you no longer need.
Deleting Files in Python
To delete a single file, use pathlib.Path.unlink() , os.remove() . or os.unlink() .
os.remove() and os.unlink() are semantically identical. To delete a file using os.remove() , do the following:
Deleting a file using os.unlink() is similar to how you do it using os.remove() :
Calling .unlink() or .remove() on a file deletes the file from the filesystem. These two functions will throw an OSError if the path passed to them points to a directory instead of a file. To avoid this, you can either check that what you’re trying to delete is actually a file and only delete it if it is, or you can use exception handling to handle the OSError :
os.path.isfile() checks whether data_file is actually a file. If it is, it is deleted by the call to os.remove() . If data_file points to a folder, an error message is printed to the console.
The following example shows how to use exception handling to handle errors when deleting files:
The code above attempts to delete the file first before checking its type. If data_file isn’t actually a file, the OSError that is thrown is handled in the except clause, and an error message is printed to the console. The error message that gets printed out is formatted using Python f-strings.
Finally, you can also use pathlib.Path.unlink() to delete files:
This creates a Path object called data_file that points to a file. Calling .remove() on data_file will delete home/data.txt . If data_file points to a directory, an IsADirectoryError is raised. It is worth noting that the Python program above has the same permissions as the user running it. If the user does not have permission to delete the file, a PermissionError is raised.
Deleting Directories
The standard library offers the following functions for deleting directories:
To delete a single directory or folder, use os.rmdir() or pathlib.rmdir() . These two functions only work if the directory you’re trying to delete is empty. If the directory isn’t empty, an OSError is raised. Here is how to delete a folder:
Here, the trash_dir directory is deleted by passing its path to os.rmdir() . If the directory isn’t empty, an error message is printed to the screen:
Alternatively, you can use pathlib to delete directories:
Here, you create a Path object that points to the directory to be deleted. Calling .rmdir() on the Path object will delete it if it is empty.
Deleting Entire Directory Trees
To delete non-empty directories and entire directory trees, Python offers shutil.rmtree() :
Everything in trash_dir is deleted when shutil.rmtree() is called on it. There may be cases where you want to delete empty folders recursively. You can do this using one of the methods discussed above in conjunction with os.walk() :
This walks down the directory tree and tries to delete each directory it finds. If the directory isn’t empty, an OSError is raised and that directory is skipped. The table below lists the functions covered in this section:
| Function | Description |
|---|---|
| os.remove() | Deletes a file and does not delete directories |
| os.unlink() | Is identical to os.remove() and deletes a single file |
| pathlib.Path.unlink() | Deletes a file and cannot delete directories |
| os.rmdir() | Deletes an empty directory |
| pathlib.Path.rmdir() | Deletes an empty directory |
| shutil.rmtree() | Deletes entire directory tree and can be used to delete non-empty directories |
Copying, Moving, and Renaming Files and Directories
Python ships with the shutil module. shutil is short for shell utilities. It provides a number of high-level operations on files to support copying, archiving, and removal of files and directories. In this section, you’ll learn how to move and copy files and directories.
Copying Files in Python
shutil offers a couple of functions for copying files. The most commonly used functions are shutil.copy() and shutil.copy2() . To copy a file from one location to another using shutil.copy() , do the following:
shutil.copy() is comparable to the cp command in UNIX based systems. shutil.copy(src, dst) will copy the file src to the location specified in dst . If dst is a file, the contents of that file are replaced with the contents of src . If dst is a directory, then src will be copied into that directory. shutil.copy() only copies the file’s contents and the file’s permissions. Other metadata like the file’s creation and modification times are not preserved.
To preserve all file metadata when copying, use shutil.copy2() :
Using .copy2() preserves details about the file such as last access time, permission bits, last modification time, and flags.
Copying Directories
While shutil.copy() only copies a single file, shutil.copytree() will copy an entire directory and everything contained in it. shutil.copytree(src, dest) takes two arguments: a source directory and the destination directory where files and folders will be copied to.
Here’s an example of how to copy the contents of one folder to a different location:
In this example, .copytree() copies the contents of data_1 to a new location data1_backup and returns the destination directory. The destination directory must not already exist. It will be created as well as missing parent directories. shutil.copytree() is a good way to back up your files.
Moving Files and Directories
To move a file or directory to another location, use shutil.move(src, dst) .
src is the file or directory to be moved and dst is the destination:
shutil.move(‘dir_1/’, ‘backup/’) moves dir_1/ into backup/ if backup/ exists. If backup/ does not exist, dir_1/ will be renamed to backup .
Renaming Files and Directories
Python includes os.rename(src, dst) for renaming files and directories:
The line above will rename first.zip to first_01.zip . If the destination path points to a directory, it will raise an OSError .
Another way to rename files or directories is to use rename() from the pathlib module:
To rename files using pathlib , you first create a pathlib.Path() object that contains a path to the file you want to replace. The next step is to call rename() on the path object and pass a new filename for the file or directory you’re renaming.
Archiving
Archives are a convenient way to package several files into one. The two most common archive types are ZIP and TAR. The Python programs you write can create, read, and extract data from archives. You will learn how to read and write to both archive formats in this section.
Reading ZIP Files
The zipfile module is a low level module that is part of the Python Standard Library. zipfile has functions that make it easy to open and extract ZIP files. To read the contents of a ZIP file, the first thing to do is to create a ZipFile object. ZipFile objects are similar to file objects created using open() . ZipFile is also a context manager and therefore supports the with statement:
Here, you create a ZipFile object, passing in the name of the ZIP file to open in read mode. After opening a ZIP file, information about the archive can be accessed through functions provided by the zipfile module. The data.zip archive in the example above was created from a directory named data that contains a total of 5 files and 1 subdirectory:
To get a list of files in the archive, call namelist() on the ZipFile object:
This produces a list:
.namelist() returns a list of names of the files and directories in the archive. To retrieve information about the files in the archive, use .getinfo() :
Here’s the output:
.getinfo() returns a ZipInfo object that stores information about a single member of the archive. To get information about a file in the archive, you pass its path as an argument to .getinfo() . Using getinfo() , you’re able to retrieve information about archive members such as the date the files were last modified, their compressed sizes, and their full filenames. Accessing .file_size retrieves the file’s original size in bytes.
The following example shows how to retrieve more details about archived files in a Python REPL. Assume that the zipfile module has been imported and bar_info is the same object you created in previous examples:
bar_info contains details about bar.py such as its size when compressed and its full path.
The first line shows how to retrieve a file’s last modified date. The next line shows how to get the size of the file after compression. The last line shows the full path of bar.py in the archive.
ZipFile supports the context manager protocol, which is why you’re able to use it with the with statement. Doing this automatically closes the ZipFile object after you’re done with it. Trying to open or extract files from a closed ZipFile object will result in an error.
Extracting ZIP Archives
The zipfile module allows you to extract one or more files from ZIP archives through .extract() and .extractall() .
These methods extract files to the current directory by default. They both take an optional path parameter that allows you to specify a different directory to extract files to. If the directory does not exist, it is automatically created. To extract files from the archive, do the following:
The third line of code is a call to os.listdir() , which shows that the current directory has only one file, data.zip .
Next, you open data.zip in read mode and call .extract() to extract file1.py from it. .extract() returns the full file path of the extracted file. Since there’s no path specified, .extract() extracts file1.py to the current directory.
The next line prints a directory listing showing that the current directory now includes the extracted file in addition to the original archive. The line after that shows how to extract the entire archive into the zip_extract directory. .extractall() creates the extract_dir and extracts the contents of data.zip into it. The last line closes the ZIP archive.
Extracting Data From Password Protected Archives
zipfile supports extracting password protected ZIPs. To extract password protected ZIP files, pass in the password to the .extract() or .extractall() method as an argument:
This opens the secret.zip archive in read mode. A password is supplied to .extractall() , and the archive contents are extracted to extract_dir . The archive is closed automatically after the extraction is complete thanks to the with statement.
Creating New ZIP Archives
To create a new ZIP archive, you open a ZipFile object in write mode ( w ) and add the files you want to archive:
In the example, new_zip is opened in write mode and each file in file_list is added to the archive. When the with statement suite is finished, new_zip is closed. Opening a ZIP file in write mode erases the contents of the archive and creates a new archive.
To add files to an existing archive, open a ZipFile object in append mode and then add the files:
Here, you open the new.zip archive you created in the previous example in append mode. Opening the ZipFile object in append mode allows you to add new files to the ZIP file without deleting its current contents. After adding files to the ZIP file, the with statement goes out of context and closes the ZIP file.
Opening TAR Archives
TAR files are uncompressed file archives like ZIP. They can be compressed using gzip, bzip2, and lzma compression methods. The TarFile class allows reading and writing of TAR archives.
Do this to read from an archive:
tarfile objects open like most file-like objects. They have an open() function that takes a mode that determines how the file is to be opened.
Use the ‘r’ , ‘w’ or ‘a’ modes to open an uncompressed TAR file for reading, writing, and appending, respectively. To open compressed TAR files, pass in a mode argument to tarfile.open() that is in the form filemode[:compression] . The table below lists the possible modes TAR files can be opened in:
| Mode | Action |
|---|---|
| r | Opens archive for reading with transparent compression |
| r:gz | Opens archive for reading with gzip compression |
| r:bz2 | Opens archive for reading with bzip2 compression |
| r:xz | Opens archive for reading with lzma compression |
| w | Opens archive for uncompressed writing |
| w:gz | Opens archive for gzip compressed writing |
| w:xz | Opens archive for lzma compressed writing |
| a | Opens archive for appending with no compression |
.open() defaults to ‘r’ mode. To read an uncompressed TAR file and retrieve the names of the files in it, use .getnames() :
This returns a list with the names of the archive contents.
Note: For the purposes of showing you how to use different tarfile object methods, the TAR file in the examples is opened and closed manually in an interactive REPL session.
Interacting with the TAR file this way allows you to see the output of running each command. Normally, you would want to use a context manager to open file-like objects.
The metadata of each entry in the archive can be accessed using special attributes:
In this example, you loop through the list of files returned by .getmembers() and print out each file’s attributes. The objects returned by .getmembers() have attributes that can be accessed programmatically such as the name, size, and last modified time of each of the files in the archive. After reading or writing to the archive, it must be closed to free up system resources.
Extracting Files From a TAR Archive
In this section, you’ll learn how to extract files from TAR archives using the following methods:
To extract a single file from a TAR archive, use extract() , passing in the filename:
The README.md file is extracted from the archive to the file system. Calling os.listdir() confirms that README.md file was successfully extracted into the current directory. To unpack or extract everything from the archive, use .extractall() :
.extractall() has an optional path argument to specify where extracted files should go. Here, the archive is unpacked into the extracted directory. The following commands show that the archive was successfully extracted:
To extract a file object for reading or writing, use .extractfile() , which takes a filename or TarInfo object to extract as an argument. .extractfile() returns a file-like object that can be read and used:
Opened archives should always be closed after they have been read or written to. To close an archive, call .close() on the archive file handle or use the with statement when creating tarfile objects to automatically close the archive when you’re done. This frees up system resources and writes any changes you made to the archive to the filesystem.
Creating New TAR Archives
Here’s how you do it:
First, you make a list of files to be added to the archive so that you don’t have to add each file manually.
The next line uses the with context manager to open a new archive called packages.tar in write mode. Opening an archive in write mode( ‘w’ ) enables you to write new files to the archive. Any existing files in the archive are deleted and a new archive is created.
After the archive is created and populated, the with context manager automatically closes it and saves it to the filesystem. The last three lines open the archive you just created and print out the names of the files contained in it.
To add new files to an existing archive, open the archive in append mode ( ‘a’ ):
Opening an archive in append mode allows you to add new files to it without deleting the ones already in it.
Working With Compressed Archives
tarfile can also read and write TAR archives compressed using gzip, bzip2, and lzma compression. To read or write to a compressed archive, use tarfile.open() , passing in the appropriate mode for the compression type.
For example, to read or write data to a TAR archive compressed using gzip, use the ‘r:gz’ or ‘w:gz’ modes respectively:
The ‘w:gz’ mode opens the archive for gzip compressed writing and ‘r:gz’ opens the archive for gzip compressed reading. Opening compressed archives in append mode is not possible. To add files to a compressed archive, you have to create a new archive.
An Easier Way of Creating Archives
The Python Standard Library also supports creating TAR and ZIP archives using the high-level methods in the shutil module. The archiving utilities in shutil allow you to create, read, and extract ZIP and TAR archives. These utilities rely on the lower level tarfile and zipfile modules.
Working With Archives Using shutil.make_archive()
shutil.make_archive() takes at least two arguments: the name of the archive and an archive format.
By default, it compresses all the files in the current directory into the archive format specified in the format argument. You can pass in an optional root_dir argument to compress files in a different directory. .make_archive() supports the zip , tar , bztar , and gztar archive formats.
This is how to create a TAR archive using shutil :
This copies everything in data/ and creates an archive called backup.tar in the filesystem and returns its name. To extract the archive, call .unpack_archive() :
Calling .unpack_archive() and passing in an archive name and destination directory extracts the contents of backup.tar into extract_dir/ . ZIP archives can be created and extracted in the same way.
Reading Multiple Files
Python supports reading data from multiple input streams or from a list of files through the fileinput module. This module allows you to loop over the contents of one or more text files quickly and easily. Here’s the typical way fileinput is used:
fileinput gets its input from command line arguments passed to sys.argv by default.
Using fileinput to Loop Over Multiple Files
Let’s use fileinput to build a crude version of the common UNIX utility cat . The cat utility reads files sequentially, writing them to standard output. When given more than one file in its command line arguments, cat will concatenate the text files and display the result in the terminal:
Running this on two text files in my current directory produces the following output:
fileinput allows you to retrieve more information about each line such as whether or not it is the first line ( .isfirstline() ), the line number ( .lineno() ), and the filename ( .filename() ). You can read more about it here.
Conclusion
You now know how to use Python to perform the most common operations on files and groups of files. You’ve learned about the different built-in modules used to read, find, and manipulate them.
You’re now equipped to use Python to:
- Get directory contents and file properties
- Create directories and directory trees
- Find patterns in filenames
- Create temporary files and directories
- Move, rename, copy, and delete files or directories
- Read and extract data from different types of archives
- Read multiple files simultaneously using fileinput
Watch Now This tutorial has a related video course created by the Real Python team. Watch it together with the written tutorial to deepen your understanding: Practical Recipes for Working With Files in Python
Get a short & sweet Python Trick delivered to your inbox every couple of days. No spam ever. Unsubscribe any time. Curated by the Real Python team.

About Vuyisile Ndlovu

Django developer and open source enthusiast.
Each tutorial at Real Python is created by a team of developers so that it meets our high quality standards. The team members who worked on this tutorial are:


![]()
Master Real-World Python Skills With Unlimited Access to Real Python

Join us and get access to hundreds of tutorials, hands-on video courses, and a community of expert Pythonistas:
Master Real-World Python Skills
With Unlimited Access to Real Python
Join us and get access to hundreds of tutorials, hands-on video courses, and a community of expert Pythonistas:
What Do You Think?
Real Python Comment Policy: The most useful comments are those written with the goal of learning from or helping out other readers—after reading the whole article and all the earlier comments. Complaints and insults generally won’t make the cut here.
What’s your #1 takeaway or favorite thing you learned? How are you going to put your newfound skills to use? Leave a comment below and let us know.
Related Tutorial Categories: basics python
Источник


