- How do you run a Python script as a service in Windows?
- 13 Answers 13
- GUI approach
- Scripting approach (no GUI)
- Method 1: Use instsrv and srvany from rktools.exe
- Method 2: Use ServiceInstaller for Windows NT
- A complete pywin32 example using loop or subthread
- update:
- Как управлять службами в Powershell командлетами Service
- Получение списка служб
- Остановка, перезапуск и запуск служб
- Восстановление и приостановка работ служб
- Изменение с Set-Service
- Создание сервисов с New-Service
- Получение с помощью WMI класса
- Изменение с помощью WMI класса
How do you run a Python script as a service in Windows?
I am sketching the architecture for a set of programs that share various interrelated objects stored in a database. I want one of the programs to act as a service which provides a higher level interface for operations on these objects, and the other programs to access the objects through that service.
I am currently aiming for Python and the Django framework as the technologies to implement that service with. I’m pretty sure I figure how to daemonize the Python program in Linux. However, it is an optional spec item that the system should support Windows. I have little experience with Windows programming and no experience at all with Windows services.
Is it possible to run a Python programs as a Windows service (i. e. run it automatically without user login)? I won’t necessarily have to implement this part, but I need a rough idea how it would be done in order to decide whether to design along these lines.
Edit: Thanks for all the answers so far, they are quite comprehensive. I would like to know one more thing: How is Windows aware of my service? Can I manage it with the native Windows utilities? What is the equivalent of putting a start/stop script in /etc/init.d?
13 Answers 13
Yes you can. I do it using the pythoncom libraries that come included with ActivePython or can be installed with pywin32 (Python for Windows extensions).
This is a basic skeleton for a simple service:
Your code would go in the main() method—usually with some kind of infinite loop that might be interrupted by checking a flag, which you set in the SvcStop method
Although I upvoted the chosen answer a couple of weeks back, in the meantime I struggled a lot more with this topic. It feels like having a special Python installation and using special modules to run a script as a service is simply the wrong way. What about portability and such?
I stumbled across the wonderful Non-sucking Service Manager, which made it really simple and sane to deal with Windows Services. I figured since I could pass options to an installed service, I could just as well select my Python executable and pass my script as an option.
I have not yet tried this solution, but I will do so right now and update this post along the process. I am also interested in using virtualenvs on Windows, so I might come up with a tutorial sooner or later and link to it here.
The simplest way is to use the: NSSM — the Non-Sucking Service Manager. Just download and unzip to a location of your choosing. It’s a self-contained utility, around 300KB (much less than installing the entire pywin32 suite just for this purpose) and no «installation» is needed. The zip contains a 64-bit and a 32-bit version of the utility. Either should work well on current systems (you can use the 32-bit version to manage services on 64-bit systems).
GUI approach
1 — install the python program as a service. Open a Win prompt as admin
2 — On NSSM´s GUI console:
Startup directory: C:\Python27
3 — check the created services on services.msc
Scripting approach (no GUI)
This is handy if your service should be part of an automated, non-interactive procedure, that may be beyond your control, such as a batch or installer script. It is assumed that the commands are executed with administrative privileges.
For convenience the commands are described here by simply referring to the utility as nssm.exe . It is advisable, however, to refer to it more explicitly in scripting with its full path c:\path\to\nssm.exe , since it’s a self-contained executable that may be located in a private path that the system is not aware of.
1. Install the service
You must specify a name for the service, the path to the proper Python executable, and the path to the script:
Alternatively you may want your Python app to be started as a Python module. One easy approach is to tell nssm that it needs to change to the proper starting directory, as you would do yourself when launching from a command shell:
This approach works well with virtual environments and self-contained (embedded) Python installs. Just make sure to have properly resolved any path issues in those environments with the usual methods. nssm has a way to set environment variables (e.g. PYTHONPATH) if needed, and can also launch batch scripts.
2. To start the service
3. To stop the service
4. To remove the service, specify the confirm parameter to skip the interactive confirmation.

The simplest way to achieve this is to use native command sc.exe:
References:
There are a couple alternatives for installing as a service virtually any Windows executable.
Method 1: Use instsrv and srvany from rktools.exe
For Windows Home Server or Windows Server 2003 (works with WinXP too), the Windows Server 2003 Resource Kit Tools comes with utilities that can be used in tandem for this, called instsrv.exe and srvany.exe. See this Microsoft KB article KB137890 for details on how to use these utils.
For Windows Home Server, there is a great user friendly wrapper for these utilities named aptly «Any Service Installer».
Method 2: Use ServiceInstaller for Windows NT
There is another alternative using ServiceInstaller for Windows NT (download-able here) with python instructions available. Contrary to the name, it works with both Windows 2000 and Windows XP as well. Here are some instructions for how to install a python script as a service.
Installing a Python script
Run ServiceInstaller to create a new service. (In this example, it is assumed that python is installed at c:\python25)
After installing, open the Control Panel’s Services applet, select and start the PythonTest service.
After my initial answer, I noticed there were closely related Q&A already posted on SO. See also:
Step by step explanation how to make it work :
1- First create a python file according to the basic skeleton mentioned above. And save it to a path for example : «c:\PythonFiles\AppServerSvc.py»
2 — On this step we should register our service.
Run command prompt as administrator and type as:
sc create TestService binpath= «C:\Python36\Python.exe c:\PythonFiles\AppServerSvc.py» DisplayName= «TestService» start= auto
the first argument of binpath is the path of python.exe
second argument of binpath is the path of your python file that we created already
Don’t miss that you should put one space after every «=» sign.
Then if everything is ok, you should see
Now your python service is installed as windows service now. You can see it in Service Manager and registry under :
3- Ok now. You can start your service on service manager.
You can execute every python file that provides this service skeleton.
Example script to run as a service taken from pythonhosted.org:
Create and start service
Stop and delete service
nssm in python 3+
(I converted my .py file to .exe with pyinstaller)
nssm: as said before
- run nssm install
On NSSM´s console:
path: path\to\your\program.exe
Startup directory: path\to\your\ #same as the path but without your program.exe
Arguments: empty
If you don’t want to convert your project to .exe
- create a .bat file with python <
> - and set the path to the .bat file
I started hosting as a service with pywin32.
Everything was well but I met the problem that service was not able to start within 30 seconds (default timeout for Windows) on system startup. It was critical for me because Windows startup took place simultaneous on several virtual machines hosted on one physical machine, and IO load was huge. Error messages were:
Error 1053: The service did not respond to the start or control request in a timely fashion.
Error 7009: Timeout (30000 milliseconds) waiting for the service to connect.
I fought a lot with pywin, but ended up with using NSSM as it was proposed in this answer. It was very easy to migrate to it.
A complete pywin32 example using loop or subthread
After working on this on and off for a few days, here is the answer I would have wished to find, using pywin32 to keep it nice and self contained.
This is complete working code for one loop-based and one thread-based solution. It may work on both python 2 and 3, although I’ve only tested the latest version on 2.7 and Win7. The loop should be good for polling code, and the tread should work with more server-like code. It seems to work nicely with the waitress wsgi server that does not have a standard way to shut down gracefully.
I would also like to note that there seems to be loads of examples out there, like this that are almost useful, but in reality misleading, because they have cut and pasted other examples blindly. I could be wrong. but why create an event if you never wait for it?
That said I still feel I’m on somewhat shaky ground here, especially with regards to how clean the exit from the thread version is, but at least I believe there are nothing misleading here.
To run simply copy the code to a file and follow the instructions.
update:
Use a simple flag to terminate thread. The important bit is that «thread done» prints.
For a more elaborate example exiting from an uncooperative server thread see my post about the waitress wsgi server.
The accepted answer using win32serviceutil works but is complicated and makes debugging and changes harder. It is far easier to use NSSM (the Non-Sucking Service Manager). You write and comfortably debug a normal python program and when it finally works you use NSSM to install it as a service in less than a minute:
From an elevated (admin) command prompt you run nssm.exe install NameOfYourService and you fill-in these options:
- path: (the path to python.exe e.g. C:\Python27\Python.exe )
- Arguments: (the path to your python script, e.g. c:\path\to\program.py )
By the way, if your program prints useful messages that you want to keep in a log file NSSM can also handle this and a lot more for you.

This answer is plagiarizer from several sources on StackOverflow — most of them above, but I’ve forgotten the others — sorry. It’s simple and scripts run «as is». For releases you test you script, then copy it to the server and Stop/Start the associated service. And it should work for all scripting languages (Python, Perl, node.js), plus batch scripts such as GitBash, PowerShell, even old DOS bat scripts. pyGlue is the glue that sits between Windows Services and your script.
Now there’s a bit of editing and you don’t want all your services called ‘pyGlue’. So there’s a script (build.sh) to plug in the bits and create a customized ‘pyGlue’ and create an ‘.exe’. It is this ‘.exe’ which gets installed as a Windows Service. Once installed you can set it to run automatically.
Installation — copy the ‘.exe’ the server and the script to the specified folder. Run the ‘.exe’, as Administrator, with the ‘install’ option. Open Windows Services, as Adminstrator, and start you service. For upgrade, just copy the new version of the script and Stop/Start the service.
Как управлять службами в Powershell командлетами Service
30 сентября 2019
Для управления службами в Powershell есть восемь команд с помощью которых мы можем контролировать весь процесс работы сервисов и создавать новые. Что бы увидеть весь список команд созданных в PS для работы с сервисами нужно выполнить:
Мы увидим следующие командлеты:
- Get-Service — получение списка служб в Powershell.
- New-Service — создание нового сервиса.
- Restart-Service — перезапуск службы.
- Resume-Service — восстанавливает работу остановленного сервиса.
- Set-Service — изменение настроек.
- Start-Service — запуск службы в Powershell.
- Stop-Service — остановка.
- Suspend-Service — приостановка работы (пауза).
Учитывайте, что в виде команд делается не полное управление сервисами. Например удаление делается через WMI, которое тоже будут рассмотрены.
Навигация по посту
Получение списка служб
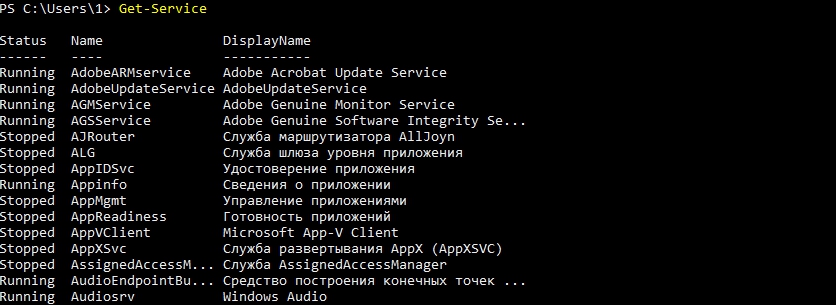
Узнать статус всех служб можно так:
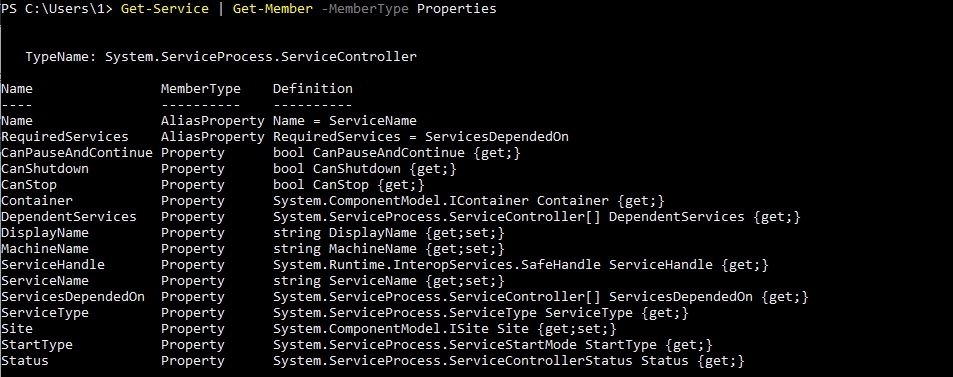
Каждый результат выдаваемый командами в PS представляет собою объект. Этот объект содержит разные свойства и методы. Свойства — это например имя или статус. По умолчанию мы видим не все свойства. Что бы узнать какие еще свойства есть у команды нужно выполнить следующее:
Часть свойств реализована в виде ключей. Попробуем вывести сразу все свойства всех сервисов, но в таком случая вывод будет сложно читаемый:
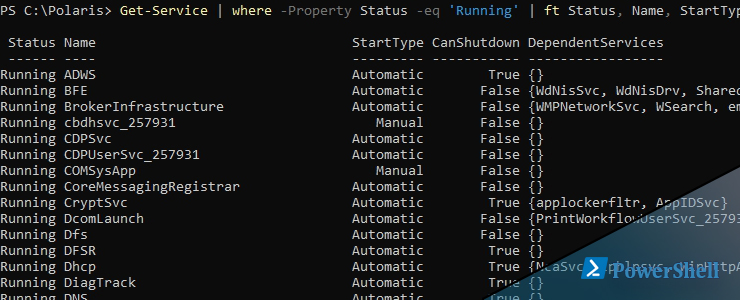
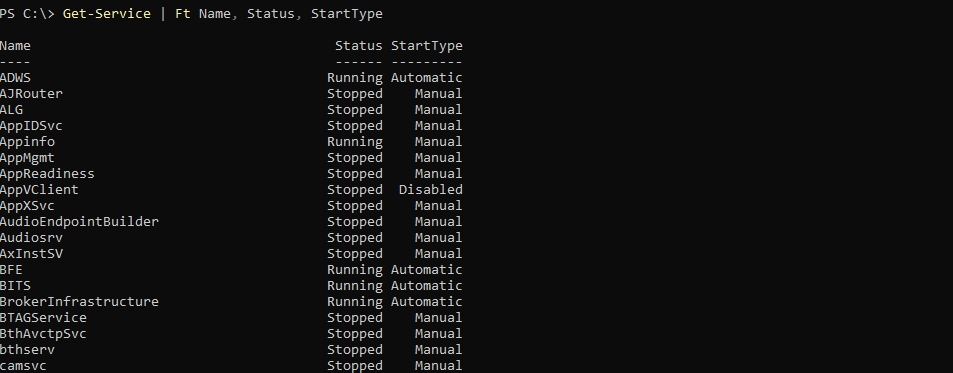
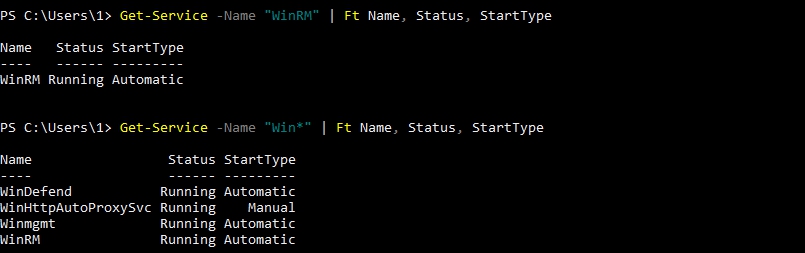
Возможно вывести только имена, статус и тип запуска:
Или выведем информацию по одному сервису:
У сервисов есть короткое имя и отображаемое. Так мы выведем оба:

В именах мы можем использовать маски, а это значит что мы можем не знать полное название и использовать знак * в том месте, где не уверены в названии или написании:
Не желательно указывать отображаемое имя так как язык операционных систем может быть разным и если вы выполняете командлеты удаленно, вероятно будут ошибки:
- Cannot find any service with service name
- Cannot find any service with display name
- Не удается найти службу с отображаемым именем
Кроме этого есть два ключа, которые тоже поддерживают маски:
- Include — включают поиск по какой-то маске или точному соответствию.
- Exclude — исключает упоминание.
Можно сравнить разницу с прошлым примером:
 У сервисов несколько статусов:
- Running — запущен.
- Stopped — остановлен.
- Paused — приостановлен (пауза).
По каждому из них мы можем отфильтровать результат:

Кроме этого есть 3 типа запуска:
- Automatic — автоматический запуск вместе с системой.
- AutomaticDelayedStart — запуск после загрузки системы.
- Manual — ручной запуск.
- Disabled — отключенный.
Допустим, что у нас есть какая-то проблема в операционной системе и мы хотим проверить все сервисы, который автоматически запускаются при включении ОС. Для этого нам нужно использовать несколько условий, где статус не равен Running и тип запуска равен Automatic:

Службы могут быть зависимы от других и для проверки этих свойств есть два параметра:
- DependentServices — кто зависит от этого сервиса.
- RequiredServices — от кого зависит этот сервис.
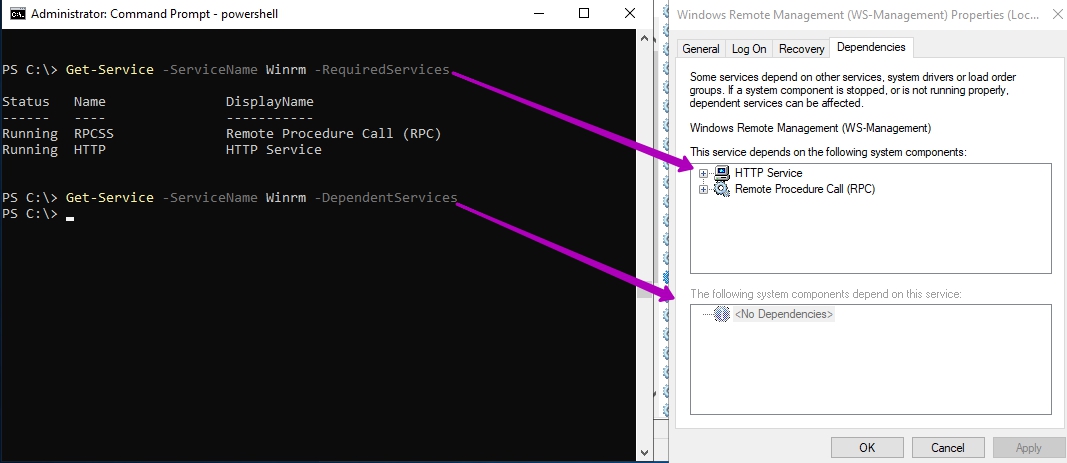
Аналогично параметрам команды выше есть свойства DependentServices и ServicesDependedOn (RequiredServices). Они выводят одно и то же.
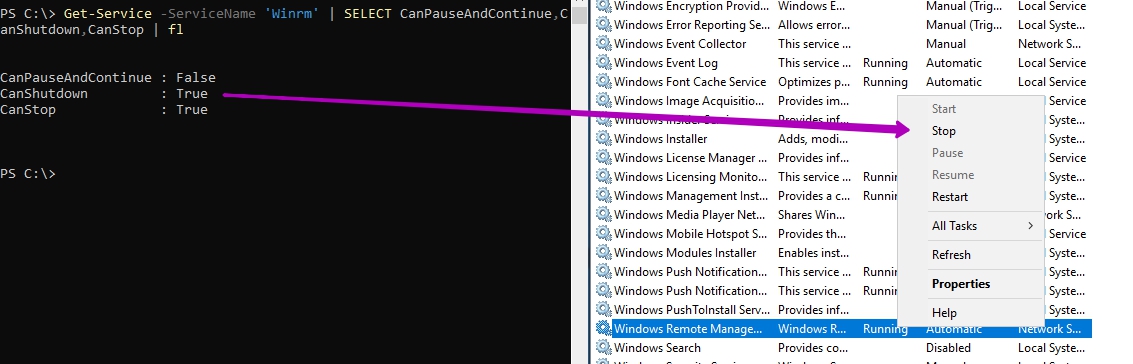
Есть несколько свойств, которые не выведены в параметры — это:
- CanPauseAndContinue — можно ли приостановить работу сервиса и возобновить.
- CanShutdown — может ли быть выключен.
- CanStop — может ли быть полностью остановлен.
Эти свойства так же можно увидеть в GUI. В командлете ниже я использую алиас gsv (короткое имя Get-Service):
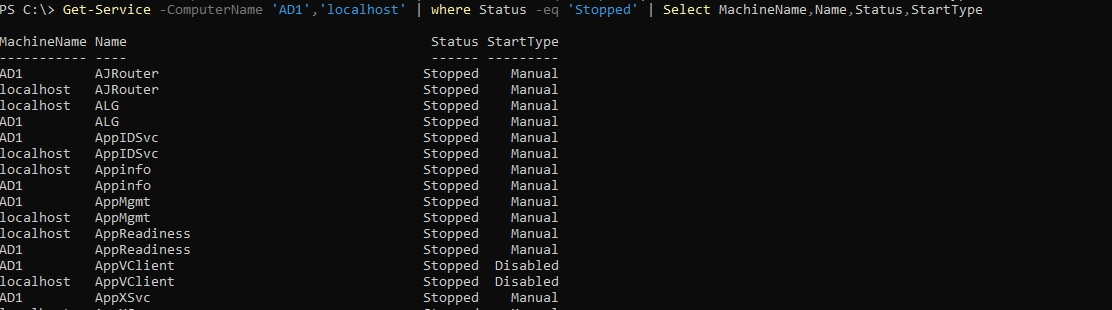
Каждая команда PS, где присутствует параметр ComuterName, может быть выполнена удаленно. Для удаленного управления в Powershell нужны дополнительные настройки, которые уже описывались в предыдущей статье.
Имена всех компьютеров, с которых мы хотим получить имена сервисов, можно указать через запятую:
Как отослать сообщение через Powershell
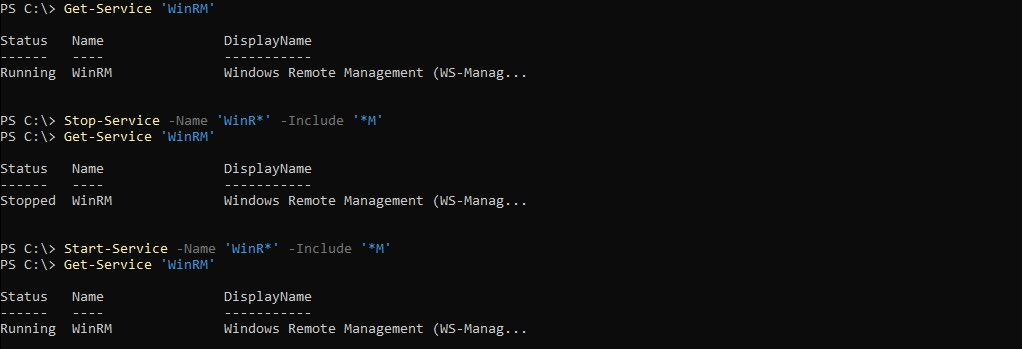
Остановка, перезапуск и запуск служб
Чтобы в Powershell запустить службу и остановить достаточно указать только имя. Причем можно указывать как короткое и отображаемое имя:
Можно выполнить получение, остановку и запуск в одну команду:
Во большинстве командлетах PS, которые делают изменения, можно увидеть два параметра. Первый — это WhatIf, который покажет результат выполнения командлета, но не попытается ее выполнить. Такие параметры удобно использовать при выполнении сложных задач типа кластеров. Второй параметр Confirm, который потребует подтверждение перед выполнением. Вместе эти параметры не работают:
В запуске и остановке так же можно использовать параметры фильтрации, которые вы видели при получении статусов выше. Будьте осторожны перед выполнением так как вы можете остановить все службы:
Если с сервисом работает другой сервис, то мы не завершим его работу и нужно указать дополнительный ключ Force:
Если он не стоит появится ошибка:
- Cannot stop service ‘Remote Procedure Call (RPC) (RpcSs)’ because it has dependent services. It can only be stopped if the Force flag is set.
- Не удается получить доступ к зависимым службам «Удаленный вызов процедур (RPC) (RpcSs)».
Как уже было описано выше сервисы могут быть зависимы от других и в таком случае запуск может не получится. На примере ниже я получил все родительские сервисы (от которых зависит Spooler) и запустил их, а затем запустил требуемый:
Перезапуск сервисов работает так же со всеми параметрами:
Удаленный запуск и остановка командлетами не предусмотрена, но это исправляется стандартными методами:
Восстановление и приостановка работ служб
Не каждую службу можно приостановить (Pause) и восстанавливть. Что бы увидеть все службы, у которых есть такая возможность, выполните:

Командой ниже мы получи, нажмем паузу и восстановим работу сервиса Winmgmt:
Ошибки, если мы попытаемся остановить службу у которых нет такой возможности:
- Service ‘Windows Remote Management (WS-Management)’ cannot be suspended because the service does not support beingsuspended or resumed.
- Не удается приостановить службу «Spooler», так как этой службой не поддерживается приостановка или возобновление.
В этих командах так же можно использовать параметры Include и Exclude, с масками.
На скрипте ниже показана проверка возможности приостановки сервиса, если у него есть такая возможность. Если ее нет, то сервис остановит свою работу:
Изменение с Set-Service
Командлетом ниже я изменил тип запуска сервиса с отключенного на автоматический:
В случае изменения сервисов нельзя использовать маски *.
В документации Microsoft говориться про возможность изменения на четыре режима со следующими названиями:
- Automatic
- AutomaticDelayedStart
- Disabled
- Manual
Во первых половина называется иначе и изменение не срабатывает. Возможно изменение не срабатывает из-за багов Windows Server 2019,может из-за зависимостей (в GUI все работает), но скорее всего дело в PS. При работе с WMI все срабатывает. Реальные варианты запуска такие:
Через эту команду можно так же выполнить запуск и остановку:
Все возможные значения:
Можно изменить описание сервиса:
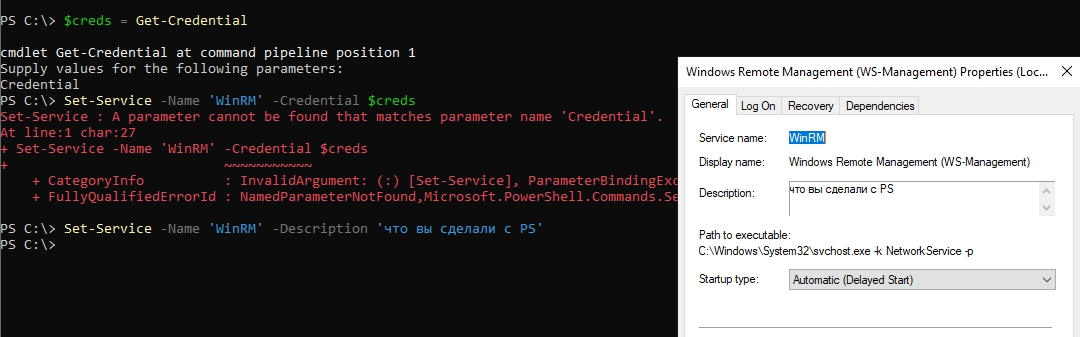
Команды изменения можно выполнять удаленно:
Создание сервисов с New-Service
Для создания сервиса необходимо указать два параметра — это имя и путь до бинарного файла:
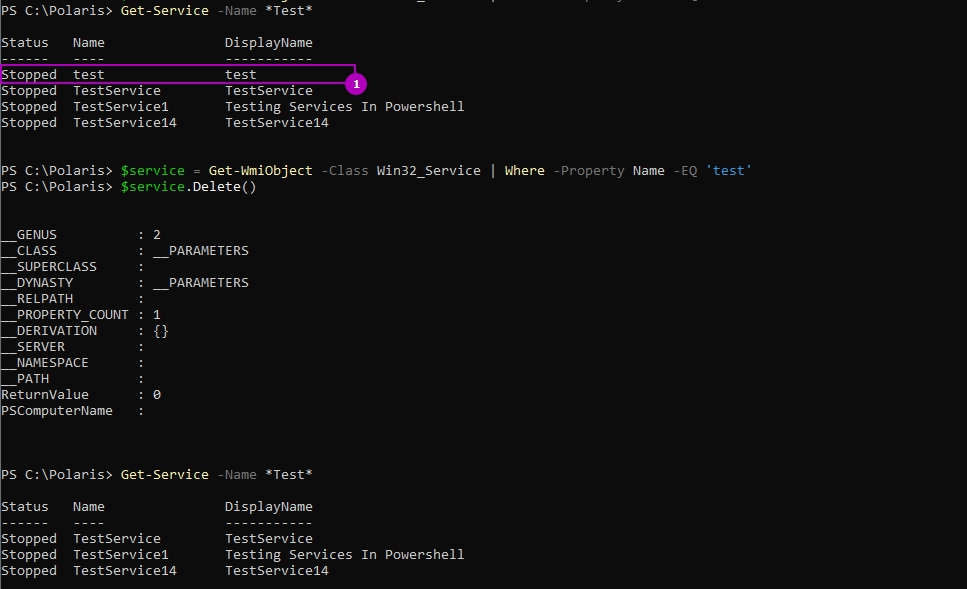
В PS 5.1 не предусмотрена команда удаления, она появилась в версии 6.1, которая устанавливается отдельно и может работать иначе. Для удаления сервисов, а так же частичного изменения, используется WMI. Указывайте все возможные параметры, что бы в последующем не лезть в WMI.
Параметры, которые в последующем нельзя будет изменить через PS:
- DisplayName — полное отображаемое имя.
- Credential — учетная запись, под которой будет происходить запуск.
- DependsOn — от кого будет зависеть.
При объявлении переменной $credential у нас запросятся учетные данные (логин/пароль). По умолчанию сервис работает под текущим аккаунтом. Я создавал сервис на доменном компьютере и пока я не ввел FQDN вид user@domain.local я получал ошибку:
- Service ‘Testing Services In Powershell (TestService1)’ cannot be created due to the following error: The account name is invalid or does not exist, or the password is invalid for the account name specified
Кроме этого есть параметры, которые возможно изменить через команды выше:
- Description — описание.
- StartupType — тип запуска.
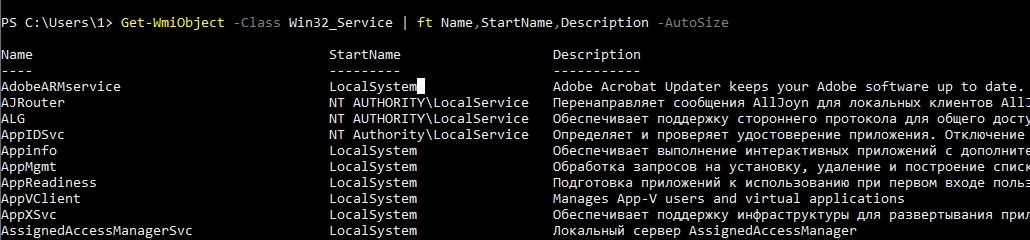
Получение с помощью WMI класса
За работу со службами в WMI отвечает класс win32_service. Преимущества такого подхода в том, что тут можно посмотреть и изменить все детали работы сервисов. Более подробно WMI в Powershell мы уже рассматривали.
Что бы получить список аналогичный Get-Service выполните:
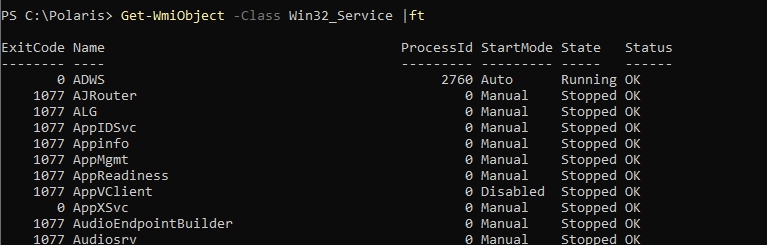
В классе WMI можно увидеть больше свойств, которые можно использовать:
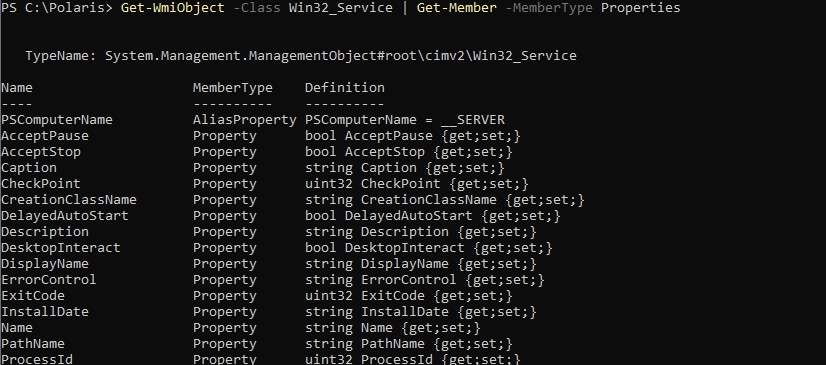
Одно из преимуществ использования в WMI это то, что мы можем увидеть идентификатор процесса под которым работает сервис. Если сервис остановлен, то его идентификатор 0. Так мы увидим идентификатор процесса с именем WinRM и получим всю информацию по процессу:
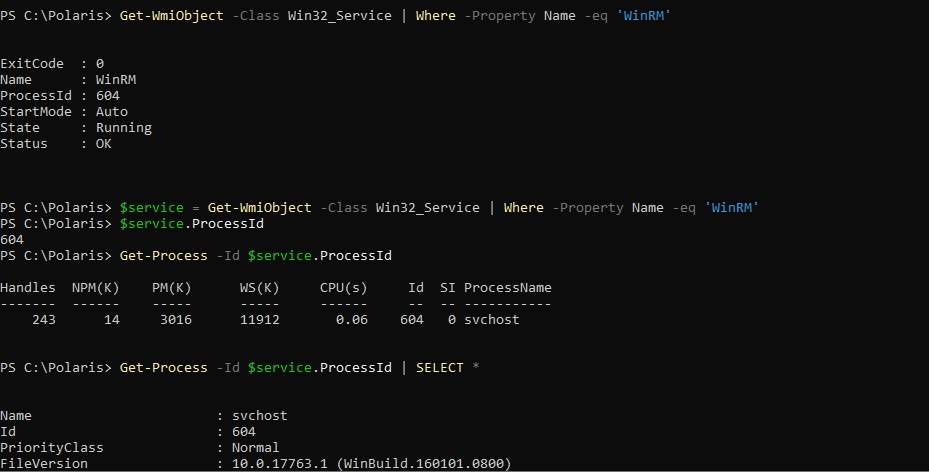
О том как работать с процессами в Powershell мы писали в прошлой статье.
С помощью WMI мы можем вернуть имя аккаунта, под которым запущена служба и ее описание. Используя параметр ComputerName это можно сделать удаленно на множестве компьютеров:
Изменение с помощью WMI класса
Для управления в WMI существую методы. Все методы класса можно получить так:

Удалим сервис, который создавался через New-Service:
Для изменения паролей нужно использовать следующую конструкцию. После выполнения команды сервис нужно перезапустить:
$null установлены у всех параметров, которые мы не хотим изменять. В нашем случае нужно изменить только логин и пароль и они указаны в переменных. Увидеть какие параметры не меняются с $null можно так:


