- Installing Python 3 on Mac OS X
- Doing it Right
- Working with Python 3
- Pipenv & Virtual Environments
- O’Reilly Book
- 5. Using Python on a Mac
- 5.1. Getting and Installing MacPython
- 5.1.1. How to run a Python script
- 5.1.2. Running scripts with a GUI
- 5.1.3. Configuration
- 5.2. The IDE
- 5.3. Installing Additional Python Packages
- 5.4. GUI Programming on the Mac
- 5.5. Distributing Python Applications on the Mac
- 5.6. Other Resources
- Какая версия Python находится на моем Mac?
- Как скачать и установить Python на Mac OC X
- Какая версия python установлена по умолчанию
- Установка Xcode и Homebrew
- Установка Python 3 на MAC OC X
- [Бонус] Первый код в IDLE python для новичков
Installing Python 3 on Mac OS X

Mac OS X comes with Python 2.7 out of the box.
You do not need to install or configure anything else to use Python 2. These instructions document the installation of Python 3.
The version of Python that ships with OS X is great for learning, but it’s not good for development. The version shipped with OS X may be out of date from the official current Python release, which is considered the stable production version.
Doing it Right
Let’s install a real version of Python.
Before installing Python, you’ll need to install GCC. GCC can be obtained by downloading Xcode, the smaller Command Line Tools (must have an Apple account) or the even smaller OSX-GCC-Installer package.
If you already have Xcode installed, do not install OSX-GCC-Installer. In combination, the software can cause issues that are difficult to diagnose.
If you perform a fresh install of Xcode, you will also need to add the commandline tools by running xcode-select —install on the terminal.
While OS X comes with a large number of Unix utilities, those familiar with Linux systems will notice one key component missing: a package manager. Homebrew fills this void.
To install Homebrew, open Terminal or your favorite OS X terminal emulator and run
The script will explain what changes it will make and prompt you before the installation begins. Once you’ve installed Homebrew, insert the Homebrew directory at the top of your PATH environment variable. You can do this by adding the following line at the bottom of your
If you have OS X 10.12 (Sierra) or older use this line instead
Now, we can install Python 3:
This will take a minute or two.
Homebrew installs pip pointing to the Homebrew’d Python 3 for you.
Working with Python 3
At this point, you have the system Python 2.7 available, potentially the Homebrew version of Python 2 installed, and the Homebrew version of Python 3 as well.
will launch the Homebrew-installed Python 3 interpreter.
will launch the Homebrew-installed Python 2 interpreter (if any).
will launch the Homebrew-installed Python 3 interpreter.
If the Homebrew version of Python 2 is installed then pip2 will point to Python 2. If the Homebrew version of Python 3 is installed then pip will point to Python 3.
The rest of the guide will assume that python references Python 3.
Pipenv & Virtual Environments
The next step is to install Pipenv, so you can install dependencies and manage virtual environments.
A Virtual Environment is a tool to keep the dependencies required by different projects in separate places, by creating virtual Python environments for them. It solves the “Project X depends on version 1.x but, Project Y needs 4.x” dilemma, and keeps your global site-packages directory clean and manageable.
For example, you can work on a project which requires Django 1.10 while also maintaining a project which requires Django 1.8.
This page is a remixed version of another guide, which is available under the same license.
This opinionated guide exists to provide both novice and expert Python developers a best practice handbook to the installation, configuration, and usage of Python on a daily basis.
O’Reilly Book
This guide is now available in tangible book form!
All proceeds are being directly donated to the DjangoGirls organization.
Источник
5. Using Python on a Mac
Python on a Mac running macOS is in principle very similar to Python on any other Unix platform, but there are a number of additional features such as the IDE and the Package Manager that are worth pointing out.
5.1. Getting and Installing MacPython
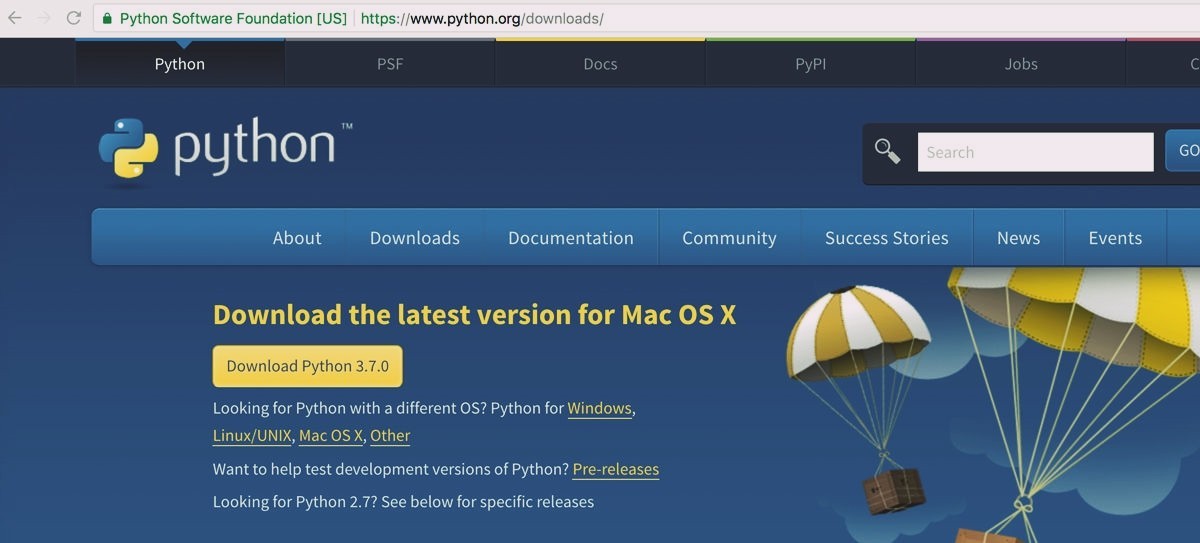
macOS since version 10.8 comes with Python 2.7 pre-installed by Apple. If you wish, you are invited to install the most recent version of Python 3 from the Python website (https://www.python.org). A current “universal binary” build of Python, which runs natively on the Mac’s new Intel and legacy PPC CPU’s, is available there.
What you get after installing is a number of things:
A Python 3.9 folder in your Applications folder. In here you find IDLE, the development environment that is a standard part of official Python distributions; and PythonLauncher, which handles double-clicking Python scripts from the Finder.
A framework /Library/Frameworks/Python.framework , which includes the Python executable and libraries. The installer adds this location to your shell path. To uninstall MacPython, you can simply remove these three things. A symlink to the Python executable is placed in /usr/local/bin/.
The Apple-provided build of Python is installed in /System/Library/Frameworks/Python.framework and /usr/bin/python , respectively. You should never modify or delete these, as they are Apple-controlled and are used by Apple- or third-party software. Remember that if you choose to install a newer Python version from python.org, you will have two different but functional Python installations on your computer, so it will be important that your paths and usages are consistent with what you want to do.
IDLE includes a help menu that allows you to access Python documentation. If you are completely new to Python you should start reading the tutorial introduction in that document.
If you are familiar with Python on other Unix platforms you should read the section on running Python scripts from the Unix shell.
5.1.1. How to run a Python script
Your best way to get started with Python on macOS is through the IDLE integrated development environment, see section The IDE and use the Help menu when the IDE is running.
If you want to run Python scripts from the Terminal window command line or from the Finder you first need an editor to create your script. macOS comes with a number of standard Unix command line editors, vim and emacs among them. If you want a more Mac-like editor, BBEdit or TextWrangler from Bare Bones Software (see http://www.barebones.com/products/bbedit/index.html) are good choices, as is TextMate (see https://macromates.com/). Other editors include Gvim (http://macvim-dev.github.io/macvim/) and Aquamacs (http://aquamacs.org/).
To run your script from the Terminal window you must make sure that /usr/local/bin is in your shell search path.
To run your script from the Finder you have two options:
Drag it to PythonLauncher
Select PythonLauncher as the default application to open your script (or any .py script) through the finder Info window and double-click it. PythonLauncher has various preferences to control how your script is launched. Option-dragging allows you to change these for one invocation, or use its Preferences menu to change things globally.
5.1.2. Running scripts with a GUI
With older versions of Python, there is one macOS quirk that you need to be aware of: programs that talk to the Aqua window manager (in other words, anything that has a GUI) need to be run in a special way. Use pythonw instead of python to start such scripts.
With Python 3.9, you can use either python or pythonw.
5.1.3. Configuration
Python on macOS honors all standard Unix environment variables such as PYTHONPATH , but setting these variables for programs started from the Finder is non-standard as the Finder does not read your .profile or .cshrc at startup. You need to create a file
/.MacOSX/environment.plist . See Apple’s Technical Document QA1067 for details.
For more information on installation Python packages in MacPython, see section Installing Additional Python Packages .
5.2. The IDE
MacPython ships with the standard IDLE development environment. A good introduction to using IDLE can be found at http://www.hashcollision.org/hkn/python/idle_intro/index.html.
5.3. Installing Additional Python Packages
There are several methods to install additional Python packages:
Packages can be installed via the standard Python distutils mode ( python setup.py install ).
Many packages can also be installed via the setuptools extension or pip wrapper, see https://pip.pypa.io/.
5.4. GUI Programming on the Mac
There are several options for building GUI applications on the Mac with Python.
PyObjC is a Python binding to Apple’s Objective-C/Cocoa framework, which is the foundation of most modern Mac development. Information on PyObjC is available from https://pypi.org/project/pyobjc/.
The standard Python GUI toolkit is tkinter , based on the cross-platform Tk toolkit (https://www.tcl.tk). An Aqua-native version of Tk is bundled with OS X by Apple, and the latest version can be downloaded and installed from https://www.activestate.com; it can also be built from source.
wxPython is another popular cross-platform GUI toolkit that runs natively on macOS. Packages and documentation are available from https://www.wxpython.org.
PyQt is another popular cross-platform GUI toolkit that runs natively on macOS. More information can be found at https://riverbankcomputing.com/software/pyqt/intro.
5.5. Distributing Python Applications on the Mac
The standard tool for deploying standalone Python applications on the Mac is py2app. More information on installing and using py2app can be found at http://undefined.org/python/#py2app.
5.6. Other Resources
The MacPython mailing list is an excellent support resource for Python users and developers on the Mac:
Another useful resource is the MacPython wiki:
Источник
Какая версия Python находится на моем Mac?
У меня есть Mac, когда я делаю:
но когда я добрался до:
где находится 2.7.6? любой совет, что мне делать?
в редакторе PyCharm интерпретатор настроек по умолчанию показывает:

У вас может быть несколько версий Python в вашей macOS.
Вы можете проверить это с помощью команды command , type или which , например:
Или введите python в Терминале и несколько раз нажмите Tab для автоматического завершения, что эквивалентно:
По умолчанию команды python / pip указывают на первый двоичный файл, найденный в переменной среды PATH , в зависимости от того, что фактически установлено. Поэтому, перед установкой пакетов Python с Homebrew, Python по умолчанию устанавливается в /usr/bin , который поставляется вместе с вашей MacOS (например, Python 2.7.10 в High Sierra). Любые версии, найденные в /usr/local (например, /usr/local/bin ), предоставляются внешними пакетами.
Обычно рекомендуется, чтобы при работе с несколькими версиями для Python 2 вы могли использовать команду python2 / pip2 , соответственно, для Python 3 вы можете использовать python3 / pip3 , но это зависит от вашей конфигурации, какие команды доступны.
Также стоит отметить, что после выпуска Homebrew 1.5. 0+ (19 января 2018 года) формула python была обновлена до Python 3.x, а формула python@2 будет быть добавленным для установки Python 2.7. Ранее формула python указывала на Python 2.
Например, если вы установили другую версию через Homebrew, попробуйте следующую команду:
он покажет вам все файлы Python, установленные вместе с пакетом.
В качестве альтернативы вы можете использовать команду apropos или locate python , чтобы найти больше файлов, связанных с Python.
Чтобы проверить все переменные среды, связанные с Python, выполните:
Для решения ваших проблем:
Error: No such keg: /usr/local/Cellar/python
Означает, что у вас не установлен Python через Homebrew. Однако дважды проверьте, указав только один пакет за раз (например, brew list python python2 python3 ).
База данных locate ( /var/db/locate.database ) не существует.
Следуй советам и беги:
После восстановления базы данных вы можете использовать команду locate .
Чтобы проверить третью версию, мы можем использовать python3 —version
Используйте команду ниже, чтобы увидеть все установки python:
Используйте which command . Он покажет вам путь
Версия в /System/Library/Frameworks/Python.framework установлена Apple и используется системой. Это версия 3.3 в вашем случае. Вы можете получить доступ к этому интерпретатору Python и использовать его, но вы не должны пытаться его удалить, и это может быть не тот, который появляется при вводе “Python” в терминале или щелкните значок, чтобы запустить его.
В какой-то момент вы должны установить другую версию Python (2.7), и теперь это тот, который запускается по умолчанию.
Как указывали другие ответы, вы можете использовать команду which python на своем терминале, чтобы найти путь к этой другой установке.
Источник
Как скачать и установить Python на Mac OC X
Это краткий туториал покажет вам, как правильно установить Python 3 на Mac OS X. Существует несколько способов установки Python 3, включая скачивание с [официального сайта Python] (https://www.python.org/downloads/), однако я настоятельно рекомендую вместо этого использовать менеджер пакетов, такой как Homebrew для управления всеми вашими зависимостями в будущем. Это сделает вашу жизнь намного проще.
Какая версия python установлена по умолчанию
Хотя Python 2 установлен по умолчанию на компьютерах Apple, Python 3 — нет. Вы можете проверить это, набрав в Терминале python —version и нажав return:
Чтобы проверить, установлен ли Python 3, попробуйте запустить команду python3 —version . Скорее всего, вы увидите сообщение об ошибке, но стоит проверить. Даже если у вас есть версия Python 3, мы обновим ее до самой последней версии, которая на данный момент в 2019 году 3.7.2.
Установка Xcode и Homebrew
Мы будем использовать менеджер пакетов Homebrew для установки Python 3 — это общая практика. Homebrew необходим пакет Xcode Apple, поэтому для его установки выполните следующую команду:
Нажимайте далее или подтвердить (Xcode — большая программа, ее установка может занять некоторое время).
Далее установите Homebrew:
Чтобы проверить правильность установки Homebrew, выполните следующую команду:
Установка Python 3 на MAC OC X
Чтобы скачать и установить последнюю версию Python, выполните следующую команду:
Подождите пока установятся все зависимости и сам python 3
Теперь давайте подтвердим, какая версия установилась:
Что бы писать код Python 3 из командной строки, введите python3:
Если вы хотите выйти, введите exit() и return или Ctrl-D (одновременно клавиши Control и D).
Что бы запустить оболочку Python 2, просто вводите python :
[Бонус] Первый код в IDLE python для новичков
Теперь Python 3 установлен на ваш Mac, пора приступить к конкретному написанию первого кода. В Python большинство команд основано на контекстных словах в английском языке. Если в C# потребовалось бы ввести команду Console.WriteLine , чтобы вывести запись на экран, в Python это простая команда print .
Я покажу 3 простые задачи, которые есть в каждом коде:
- вывод данных
- операция сложения
- использование условного оператора if
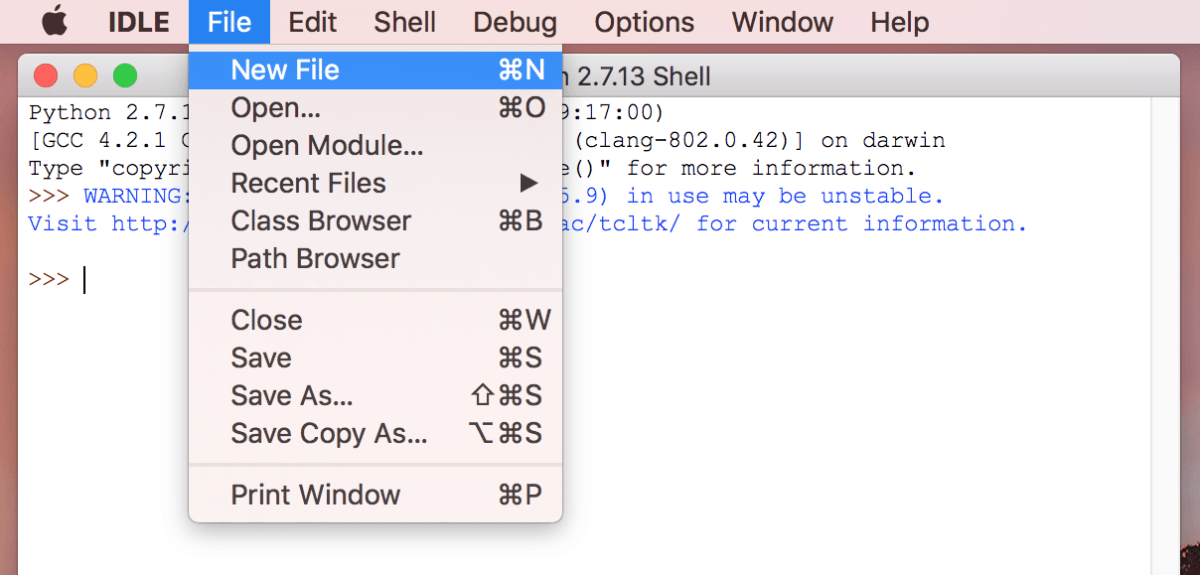
Для нашей первой задачи мы будем использовать IDLE. Это простой редактор кода, поставляется вместе с Python при его установке. Воспользуйтесь поиском и откройте IDLE.
Откроется окно, которое мы называем “оболочкой”. Там отображается результат выполнения кода, но писать код мы будем отдельно. Для этого нам нужно создать новый файл. Мы можем сделать это, нажав File > New File в верхнем меню. Откроется новый пустой файл.
Сохраните файл. Выберите File > Save As , затем сохраните его как helloworld.py . Обычно, в качестве первой программы используют вывод «Hello World» на экран.
Команда, которую мы собираемся использовать, является командой вывода данных в оболочку. Эта команда выглядит следующим образом. В скобках в кавычках находится текст, который мы выведем на экран.
После того, как вы ввели этот код в файл , выберите File > Save в меню, чтобы сохранить обновленную программу, а затем нажмите Run > Run Module из меню. Ваш вывод появится в окне оболочки. Это должно выглядеть примерно так.

Попробуйте распечатать разные фразы на экране, чтобы привыкнуть к коду.
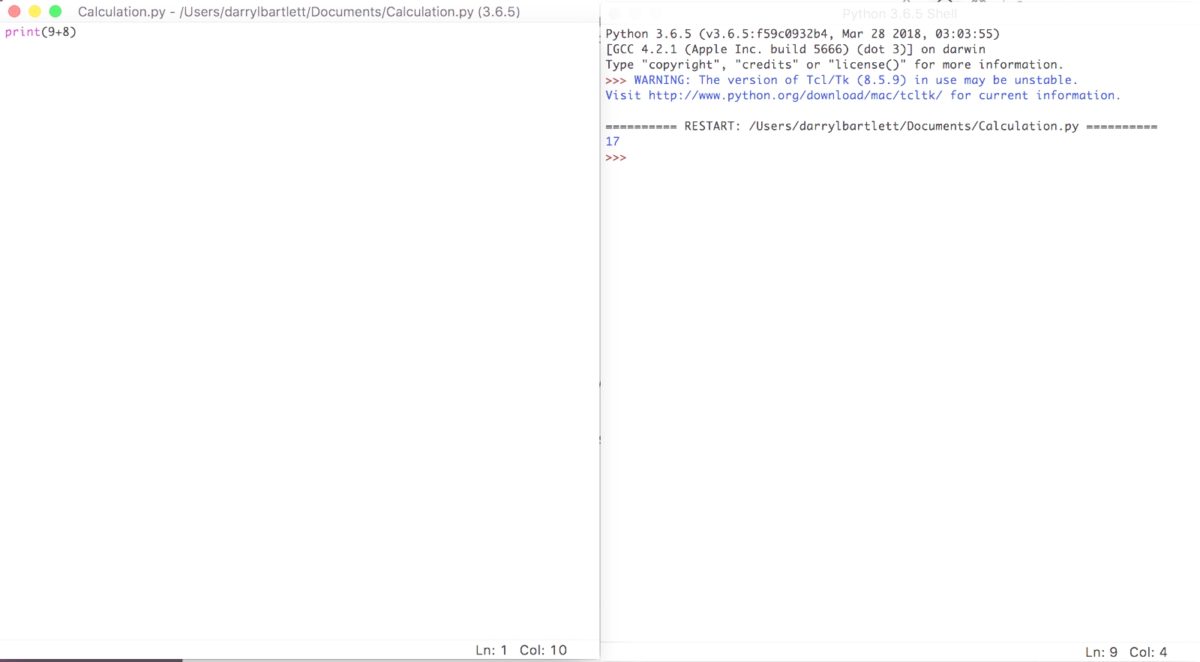
Наша вторая задача — заставить Python считать за нас. Создайте новый файл Calculation.py. На этот раз мы выведем результат сложения двух чисел. Прибавим 9 к 8, для этого нам нужно ввести в наш новый файл команду print , которая выглядит следующим образом.
Как только вы это сделаете, нужно сохранить и затем запустить программу, нажав Run > Run Module . В оболочке появится результат вычислений, вот так:
Попробуйте различные вычисления, чтобы привыкнуть, помните, что вокруг чисел не нужны кавычки. Если вы еще не знакомы с операторами python, рекомендую прочить эту статью.
Наконец, мы создадим еще одну базовую программу, которая будет выводить результат в зависимости от входных данных, с помощью оператора if . Давайте снова откроем новый файл и выпишем следующий синтаксис:
Здесь мы объявляем переменную my_number равную 100, затем создаем конструкцию if-else , чтобы проверить, больше ли my_number числа 50. Если утверждение верно, мы получим «Это большое число», в противном случае мы увидим «Это небольшое число». ». Не забудьте сохранить и запустить программу, как вы это делали в предыдущих примерах.
Вы заметите, что программа печатает «Это большое число», потому что наш номер превышает 50. Попробуйте поменять номер и посмотрите, какой результат получите. Например, что выведет скрипт, если my_number = 50 ?
Источник


