- Файлы в python, ввод-вывод
- Файлы Python
- Текстовые файлы
- Бинарные файлы
- Открытие файла
- Метод open()
- Пример
- Закрытие файла
- Метод close()
- Инструкция with
- Чтение и запись файлов в Python
- Функция read()
- Функция readline()
- Функция write()
- Переименование файлов в Python
- Функция rename()
- Текущая позиция в файлах Python
- Writing to file in Python
- Access mode
- Opening a File
- Reading and Writing Files in Python (Guide)
- What Is a File?
- File Paths
- Line Endings
- Character Encodings
- Opening and Closing a File in Python
- Text File Types
- Buffered Binary File Types
- Raw File Types
- Reading and Writing Opened Files
- Iterating Over Each Line in the File
- Working With Bytes
- A Full Example: dos2unix.py
- Tips and Tricks
- __file__
- Appending to a File
- Working With Two Files at the Same Time
- Creating Your Own Context Manager
- Don’t Re-Invent the Snake
- You’re a File Wizard Harry!
Файлы в python, ввод-вывод
Эта статья посвящена работе с файлами (вводу/выводу) в Python: открытие, чтение, запись, закрытие и другие операции.
Файлы Python
Файл — это всего лишь набор данных, сохраненный в виде последовательности битов на компьютере. Информация хранится в куче данных (структура данных) и имеет название «имя файла» (filename).
В Python существует два типа файлов:
Текстовые файлы
Это файлы с человекочитаемым содержимым. В них хранятся последовательности символов, которые понимает человек. Блокнот и другие стандартные редакторы умеют читать и редактировать этот тип файлов.
Текст может храниться в двух форматах: ( .txt ) — простой текст и ( .rtf ) — «формат обогащенного текста».
Бинарные файлы
В бинарных файлах данные отображаются в закодированной форме (с использованием только нулей (0) и единиц (1) вместо простых символов). В большинстве случаев это просто последовательности битов.
Они хранятся в формате .bin .
Любую операцию с файлом можно разбить на три крупных этапа:
- Открытие файла
- Выполнение операции (запись, чтение)
- Закрытие файла
Открытие файла
Метод open()
В Python есть встроенная функция open() . С ее помощью можно открыть любой файл на компьютере. Технически Python создает на его основе объект.
- file_name = имя открываемого файла
- access_mode = режим открытия файла. Он может быть: для чтения, записи и т. д. По умолчанию используется режим чтения ( r ), если другое не указано. Далее полный список режимов открытия файла
| Режим | Описание |
|---|---|
| r | Только для чтения. |
| w | Только для записи. Создаст новый файл, если не найдет с указанным именем. |
| rb | Только для чтения (бинарный). |
| wb | Только для записи (бинарный). Создаст новый файл, если не найдет с указанным именем. |
| r+ | Для чтения и записи. |
| rb+ | Для чтения и записи (бинарный). |
| w+ | Для чтения и записи. Создаст новый файл для записи, если не найдет с указанным именем. |
| wb+ | Для чтения и записи (бинарный). Создаст новый файл для записи, если не найдет с указанным именем. |
| a | Откроет для добавления нового содержимого. Создаст новый файл для записи, если не найдет с указанным именем. |
| a+ | Откроет для добавления нового содержимого. Создаст новый файл для чтения записи, если не найдет с указанным именем. |
| ab | Откроет для добавления нового содержимого (бинарный). Создаст новый файл для записи, если не найдет с указанным именем. |
| ab+ | Откроет для добавления нового содержимого (бинарный). Создаст новый файл для чтения записи, если не найдет с указанным именем. |
Пример
Создадим текстовый файл example.txt и сохраним его в рабочей директории.
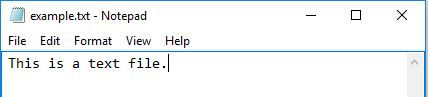
Следующий код используется для его открытия.
В этом примере f — переменная-указатель на файл example.txt .
Следующий код используется для вывода содержимого файла и информации о нем.
Стоит обратить внимание, что в Windows стандартной кодировкой является cp1252 , а в Linux — utf-08 .
Закрытие файла
Метод close()
После открытия файла в Python его нужно закрыть. Таким образом освобождаются ресурсы и убирается мусор. Python автоматически закрывает файл, когда объект присваивается другому файлу.
Существуют следующие способы:
Способ №1
Проще всего после открытия файла закрыть его, используя метод close() .
После закрытия этот файл нельзя будет использовать до тех пор, пока заново его не открыть.
Способ №2
Также можно написать try/finally , которое гарантирует, что если после открытия файла операции с ним приводят к исключениям, он закроется автоматически.
Без него программа завершается некорректно.
Вот как сделать это исключение:
Файл нужно открыть до инструкции try , потому что если инструкция open сама по себе вызовет ошибку, то файл не будет открываться для последующего закрытия.
Этот метод гарантирует, что если операции над файлом вызовут исключения, то он закроется до того как программа остановится.
Способ №3
Инструкция with
Еще один подход — использовать инструкцию with , которая упрощает обработку исключений с помощью инкапсуляции начальных операций, а также задач по закрытию и очистке.
В таком случае инструкция close не нужна, потому что with автоматически закроет файл.
Вот как это реализовать в коде.
Чтение и запись файлов в Python
В Python файлы можно читать или записывать информацию в них с помощью соответствующих режимов.
Функция read()
Функция read() используется для чтения содержимого файла после открытия его в режиме чтения ( r ).
Синтаксис
- file = объект файла
- size = количество символов, которые нужно прочитать. Если не указать, то файл прочитается целиком.
Пример
Интерпретатор прочитал 7 символов файла и если снова использовать функцию read() , то чтение начнется с 8-го символа.
Функция readline()
Функция readline() используется для построчного чтения содержимого файла. Она используется для крупных файлов. С ее помощью можно получать доступ к любой строке в любой момент.
Пример
Создадим файл test.txt с нескольким строками:
Посмотрим, как функция readline() работает в test.txt .
Обратите внимание, как в последнем случае строки отделены друг от друга.
Функция write()
Функция write() используется для записи в файлы Python, открытые в режиме записи.
Если пытаться открыть файл, которого не существует, в этом режиме, тогда будет создан новый.
Синтаксис
Пример
Предположим, файла xyz.txt не существует. Он будет создан при попытке открыть его в режиме чтения.
Переименование файлов в Python
Функция rename()
Функция rename() используется для переименовывания файлов в Python. Для ее использования сперва нужно импортировать модуль os.
- src = файл, который нужно переименовать
- dest = новое имя файла
Пример
Текущая позиция в файлах Python
В Python возможно узнать текущую позицию в файле с помощью функции tell() . Таким же образом можно изменить текущую позицию командой seek() .
Источник
Writing to file in Python
Python provides inbuilt functions for creating, writing and reading files. There are two types of files that can be handled in python, normal text files and binary files (written in binary language, 0s and 1s).
- Text files: In this type of file, Each line of text is terminated with a special character called EOL (End of Line), which is the new line character (‘\n’) in python by default.
- Binary files: In this type of file, there is no terminator for a line and the data is stored after converting it into machine-understandable binary language.
Note: To know more about file handling click here.
Attention geek! Strengthen your foundations with the Python Programming Foundation Course and learn the basics.
To begin with, your interview preparations Enhance your Data Structures concepts with the Python DS Course. And to begin with your Machine Learning Journey, join the Machine Learning — Basic Level Course
Access mode
Access modes govern the type of operations possible in the opened file. It refers to how the file will be used once it’s opened. These modes also define the location of the File Handle in the file. File handle is like a cursor, which defines from where the data has to be read or written in the file. Different access modes for reading a file are –
- Write Only (‘w’) : Open the file for writing. For an existing file, the data is truncated and over-written. The handle is positioned at the beginning of the file. Creates the file if the file does not exist.
- Write and Read (‘w+’) : Open the file for reading and writing. For an existing file, data is truncated and over-written. The handle is positioned at the beginning of the file.
- Append Only (‘a’) : Open the file for writing. The file is created if it does not exist. The handle is positioned at the end of the file. The data being written will be inserted at the end, after the existing data.
Note: To know more about access mode click here.
Opening a File
It is done using the open() function. No module is required to be imported for this function.
Syntax:
The file should exist in the same directory as the python program file else, full address of the file should be written on place of filename.
Note: The r is placed before filename to prevent the characters in filename string to be treated as special character. For example, if there is \temp in the file address, then \t is treated as the tab character and error is raised of invalid address. The r makes the string raw, that is, it tells that the string is without any special characters. The r can be ignored if the file is in same directory and address is not being placed.
Источник
Reading and Writing Files in Python (Guide)
Table of Contents
Watch Now This tutorial has a related video course created by the Real Python team. Watch it together with the written tutorial to deepen your understanding: Reading and Writing Files in Python
One of the most common tasks that you can do with Python is reading and writing files. Whether it’s writing to a simple text file, reading a complicated server log, or even analyzing raw byte data, all of these situations require reading or writing a file.
In this tutorial, you’ll learn:
- What makes up a file and why that’s important in Python
- The basics of reading and writing files in Python
- Some basic scenarios of reading and writing files
This tutorial is mainly for beginner to intermediate Pythonistas, but there are some tips in here that more advanced programmers may appreciate as well.
Free Bonus: Click here to get our free Python Cheat Sheet that shows you the basics of Python 3, like working with data types, dictionaries, lists, and Python functions.
Take the Quiz: Test your knowledge with our interactive “Reading and Writing Files in Python” quiz. Upon completion you will receive a score so you can track your learning progress over time:
What Is a File?
Before we can go into how to work with files in Python, it’s important to understand what exactly a file is and how modern operating systems handle some of their aspects.
At its core, a file is a contiguous set of bytes used to store data. This data is organized in a specific format and can be anything as simple as a text file or as complicated as a program executable. In the end, these byte files are then translated into binary 1 and 0 for easier processing by the computer.
Files on most modern file systems are composed of three main parts:
- Header: metadata about the contents of the file (file name, size, type, and so on)
- Data: contents of the file as written by the creator or editor
- End of file (EOF): special character that indicates the end of the file

What this data represents depends on the format specification used, which is typically represented by an extension. For example, a file that has an extension of .gif most likely conforms to the Graphics Interchange Format specification. There are hundreds, if not thousands, of file extensions out there. For this tutorial, you’ll only deal with .txt or .csv file extensions.
File Paths
When you access a file on an operating system, a file path is required. The file path is a string that represents the location of a file. It’s broken up into three major parts:
- Folder Path: the file folder location on the file system where subsequent folders are separated by a forward slash / (Unix) or backslash \ (Windows)
- File Name: the actual name of the file
- Extension: the end of the file path pre-pended with a period ( . ) used to indicate the file type
Here’s a quick example. Let’s say you have a file located within a file structure like this:
Let’s say you wanted to access the cats.gif file, and your current location was in the same folder as path . In order to access the file, you need to go through the path folder and then the to folder, finally arriving at the cats.gif file. The Folder Path is path/to/ . The File Name is cats . The File Extension is .gif . So the full path is path/to/cats.gif .
Now let’s say that your current location or current working directory (cwd) is in the to folder of our example folder structure. Instead of referring to the cats.gif by the full path of path/to/cats.gif , the file can be simply referenced by the file name and extension cats.gif .
But what about dog_breeds.txt ? How would you access that without using the full path? You can use the special characters double-dot ( .. ) to move one directory up. This means that ../dog_breeds.txt will reference the dog_breeds.txt file from the directory of to :
The double-dot ( .. ) can be chained together to traverse multiple directories above the current directory. For example, to access animals.csv from the to folder, you would use ../../animals.csv .
Line Endings
One problem often encountered when working with file data is the representation of a new line or line ending. The line ending has its roots from back in the Morse Code era, when a specific pro-sign was used to communicate the end of a transmission or the end of a line.
Later, this was standardized for teleprinters by both the International Organization for Standardization (ISO) and the American Standards Association (ASA). ASA standard states that line endings should use the sequence of the Carriage Return ( CR or \r ) and the Line Feed ( LF or \n ) characters ( CR+LF or \r\n ). The ISO standard however allowed for either the CR+LF characters or just the LF character.
Windows uses the CR+LF characters to indicate a new line, while Unix and the newer Mac versions use just the LF character. This can cause some complications when you’re processing files on an operating system that is different than the file’s source. Here’s a quick example. Let’s say that we examine the file dog_breeds.txt that was created on a Windows system:
This same output will be interpreted on a Unix device differently:
This can make iterating over each line problematic, and you may need to account for situations like this.
Character Encodings
Another common problem that you may face is the encoding of the byte data. An encoding is a translation from byte data to human readable characters. This is typically done by assigning a numerical value to represent a character. The two most common encodings are the ASCII and UNICODE Formats. ASCII can only store 128 characters, while Unicode can contain up to 1,114,112 characters.
ASCII is actually a subset of Unicode (UTF-8), meaning that ASCII and Unicode share the same numerical to character values. It’s important to note that parsing a file with the incorrect character encoding can lead to failures or misrepresentation of the character. For example, if a file was created using the UTF-8 encoding, and you try to parse it using the ASCII encoding, if there is a character that is outside of those 128 values, then an error will be thrown.
Opening and Closing a File in Python
When you want to work with a file, the first thing to do is to open it. This is done by invoking the open() built-in function. open() has a single required argument that is the path to the file. open() has a single return, the file object:
After you open a file, the next thing to learn is how to close it.
Warning: You should always make sure that an open file is properly closed.
It’s important to remember that it’s your responsibility to close the file. In most cases, upon termination of an application or script, a file will be closed eventually. However, there is no guarantee when exactly that will happen. This can lead to unwanted behavior including resource leaks. It’s also a best practice within Python (Pythonic) to make sure that your code behaves in a way that is well defined and reduces any unwanted behavior.
When you’re manipulating a file, there are two ways that you can use to ensure that a file is closed properly, even when encountering an error. The first way to close a file is to use the try-finally block:
If you’re unfamiliar with what the try-finally block is, check out Python Exceptions: An Introduction.
The second way to close a file is to use the with statement:
The with statement automatically takes care of closing the file once it leaves the with block, even in cases of error. I highly recommend that you use the with statement as much as possible, as it allows for cleaner code and makes handling any unexpected errors easier for you.
Most likely, you’ll also want to use the second positional argument, mode . This argument is a string that contains multiple characters to represent how you want to open the file. The default and most common is ‘r’ , which represents opening the file in read-only mode as a text file:
Other options for modes are fully documented online, but the most commonly used ones are the following:
| Character | Meaning |
|---|---|
| ‘r’ | Open for reading (default) |
| ‘w’ | Open for writing, truncating (overwriting) the file first |
| ‘rb’ or ‘wb’ | Open in binary mode (read/write using byte data) |
Let’s go back and talk a little about file objects. A file object is:
“an object exposing a file-oriented API (with methods such as read() or write() ) to an underlying resource.” (Source)
There are three different categories of file objects:
- Text files
- Buffered binary files
- Raw binary files
Each of these file types are defined in the io module. Here’s a quick rundown of how everything lines up.
Text File Types
A text file is the most common file that you’ll encounter. Here are some examples of how these files are opened:
With these types of files, open() will return a TextIOWrapper file object:
This is the default file object returned by open() .
Buffered Binary File Types
A buffered binary file type is used for reading and writing binary files. Here are some examples of how these files are opened:
With these types of files, open() will return either a BufferedReader or BufferedWriter file object:
Raw File Types
A raw file type is:
“generally used as a low-level building-block for binary and text streams.” (Source)
It is therefore not typically used.
Here’s an example of how these files are opened:
With these types of files, open() will return a FileIO file object:
Reading and Writing Opened Files
Once you’ve opened up a file, you’ll want to read or write to the file. First off, let’s cover reading a file. There are multiple methods that can be called on a file object to help you out:
| Method | What It Does |
|---|---|
| .read(size=-1) | This reads from the file based on the number of size bytes. If no argument is passed or None or -1 is passed, then the entire file is read. |
| .readline(size=-1) | This reads at most size number of characters from the line. This continues to the end of the line and then wraps back around. If no argument is passed or None or -1 is passed, then the entire line (or rest of the line) is read. |
| .readlines() | This reads the remaining lines from the file object and returns them as a list. |
Using the same dog_breeds.txt file you used above, let’s go through some examples of how to use these methods. Here’s an example of how to open and read the entire file using .read() :
Here’s an example of how to read 5 bytes of a line each time using the Python .readline() method:
Here’s an example of how to read the entire file as a list using the Python .readlines() method:
The above example can also be done by using list() to create a list out of the file object:
Iterating Over Each Line in the File
A common thing to do while reading a file is to iterate over each line. Here’s an example of how to use the Python .readline() method to perform that iteration:
Another way you could iterate over each line in the file is to use the Python .readlines() method of the file object. Remember, .readlines() returns a list where each element in the list represents a line in the file:
However, the above examples can be further simplified by iterating over the file object itself:
This final approach is more Pythonic and can be quicker and more memory efficient. Therefore, it is suggested you use this instead.
Note: Some of the above examples contain print(‘some text’, end=») . The end=» is to prevent Python from adding an additional newline to the text that is being printed and only print what is being read from the file.
Now let’s dive into writing files. As with reading files, file objects have multiple methods that are useful for writing to a file:
| Method | What It Does |
|---|---|
| .write(string) | This writes the string to the file. |
| .writelines(seq) | This writes the sequence to the file. No line endings are appended to each sequence item. It’s up to you to add the appropriate line ending(s). |
Here’s a quick example of using .write() and .writelines() :
Working With Bytes
Sometimes, you may need to work with files using byte strings. This is done by adding the ‘b’ character to the mode argument. All of the same methods for the file object apply. However, each of the methods expect and return a bytes object instead:
Opening a text file using the b flag isn’t that interesting. Let’s say we have this cute picture of a Jack Russell Terrier ( jack_russell.png ):
You can actually open that file in Python and examine the contents! Since the .png file format is well defined, the header of the file is 8 bytes broken up like this:
| Value | Interpretation |
|---|---|
| 0x89 | A “magic” number to indicate that this is the start of a PNG |
| 0x50 0x4E 0x47 | PNG in ASCII |
| 0x0D 0x0A | A DOS style line ending \r\n |
| 0x1A | A DOS style EOF character |
| 0x0A | A Unix style line ending \n |
Sure enough, when you open the file and read these bytes individually, you can see that this is indeed a .png header file:
A Full Example: dos2unix.py
Let’s bring this whole thing home and look at a full example of how to read and write to a file. The following is a dos2unix like tool that will convert a file that contains line endings of \r\n to \n .
This tool is broken up into three major sections. The first is str2unix() , which converts a string from \r\n line endings to \n . The second is dos2unix() , which converts a string that contains \r\n characters into \n . dos2unix() calls str2unix() internally. Finally, there’s the __main__ block, which is called only when the file is executed as a script. Think of it as the main function found in other programming languages.
Tips and Tricks
Now that you’ve mastered the basics of reading and writing files, here are some tips and tricks to help you grow your skills.
__file__
The __file__ attribute is a special attribute of modules, similar to __name__ . It is:
“the pathname of the file from which the module was loaded, if it was loaded from a file.” (Source
Note: To re-iterate, __file__ returns the path relative to where the initial Python script was called. If you need the full system path, you can use os.getcwd() to get the current working directory of your executing code.
Here’s a real world example. In one of my past jobs, I did multiple tests for a hardware device. Each test was written using a Python script with the test script file name used as a title. These scripts would then be executed and could print their status using the __file__ special attribute. Here’s an example folder structure:
Running main.py produces the following:
I was able to run and get the status of all my tests dynamically through use of the __file__ special attribute.
Appending to a File
Sometimes, you may want to append to a file or start writing at the end of an already populated file. This is easily done by using the ‘a’ character for the mode argument:
When you examine dog_breeds.txt again, you’ll see that the beginning of the file is unchanged and Beagle is now added to the end of the file:
Working With Two Files at the Same Time
There are times when you may want to read a file and write to another file at the same time. If you use the example that was shown when you were learning how to write to a file, it can actually be combined into the following:
Creating Your Own Context Manager
There may come a time when you’ll need finer control of the file object by placing it inside a custom class. When you do this, using the with statement can no longer be used unless you add a few magic methods: __enter__ and __exit__ . By adding these, you’ll have created what’s called a context manager.
__enter__() is invoked when calling the with statement. __exit__() is called upon exiting from the with statement block.
Here’s a template that you can use to make your custom class:
Now that you’ve got your custom class that is now a context manager, you can use it similarly to the open() built-in:
Here’s a good example. Remember the cute Jack Russell image we had? Perhaps you want to open other .png files but don’t want to parse the header file each time. Here’s an example of how to do this. This example also uses custom iterators. If you’re not familiar with them, check out Python Iterators:
You can now open .png files and properly parse them using your custom context manager:
Don’t Re-Invent the Snake
There are common situations that you may encounter while working with files. Most of these cases can be handled using other modules. Two common file types you may need to work with are .csv and .json . Real Python has already put together some great articles on how to handle these:
Additionally, there are built-in libraries out there that you can use to help you:
- wave: read and write WAV files (audio)
- aifc: read and write AIFF and AIFC files (audio)
- sunau: read and write Sun AU files
- tarfile: read and write tar archive files
- zipfile: work with ZIP archives
- configparser: easily create and parse configuration files
- xml.etree.ElementTree: create or read XML based files
- msilib: read and write Microsoft Installer files
- plistlib: generate and parse Mac OS X .plist files
There are plenty more out there. Additionally there are even more third party tools available on PyPI. Some popular ones are the following:
You’re a File Wizard Harry!
You did it! You now know how to work with files with Python, including some advanced techniques. Working with files in Python should now be easier than ever and is a rewarding feeling when you start doing it.
In this tutorial you’ve learned:
- What a file is
- How to open and close files properly
- How to read and write files
- Some advanced techniques when working with files
- Some libraries to work with common file types
If you have any questions, hit us up in the comments.
Take the Quiz: Test your knowledge with our interactive “Reading and Writing Files in Python” quiz. Upon completion you will receive a score so you can track your learning progress over time:
Watch Now This tutorial has a related video course created by the Real Python team. Watch it together with the written tutorial to deepen your understanding: Reading and Writing Files in Python
Get a short & sweet Python Trick delivered to your inbox every couple of days. No spam ever. Unsubscribe any time. Curated by the Real Python team.

About James Mertz

James is a passionate Python developer at NASA’s Jet Propulsion Lab who also writes on the side for Real Python.
Each tutorial at Real Python is created by a team of developers so that it meets our high quality standards. The team members who worked on this tutorial are:
![]()

![]()
Master Real-World Python Skills With Unlimited Access to Real Python

Join us and get access to hundreds of tutorials, hands-on video courses, and a community of expert Pythonistas:
Master Real-World Python Skills
With Unlimited Access to Real Python
Join us and get access to hundreds of tutorials, hands-on video courses, and a community of expert Pythonistas:
What Do You Think?
Real Python Comment Policy: The most useful comments are those written with the goal of learning from or helping out other readers—after reading the whole article and all the earlier comments. Complaints and insults generally won’t make the cut here.
What’s your #1 takeaway or favorite thing you learned? How are you going to put your newfound skills to use? Leave a comment below and let us know.
Related Tutorial Categories: intermediate python
Источник


