- QEMU/Networking
- Contents
- User mode networking [ edit | edit source ]
- Redirecting ports [ edit | edit source ]
- TAP interfaces [ edit | edit source ]
- TAP/TUN device [ edit | edit source ]
- qemu-ifup [ edit | edit source ]
- qemu-ifdown [ edit | edit source ]
- Allowing users to call the scripts [ edit | edit source ]
- Starting QEMU with a TAP interface [ edit | edit source ]
- Windows Vista and later – Network Location [ edit | edit source ]
- Sockets [ edit | edit source ]
- SMB server [ edit | edit source ]
- How to Set up Virtual machines with QEMU GUI on Windows 10
- Qemu installation on Windows 10 with Qtemu GUI
- Step 1: Download Qemu for Windows
- Step 2: Install Qemu
- Step 3: Install GUI for QEMU on Windows 10
- Step 4: Setup QEMU manager Qtemu GUI
- Step 5: Create a Virtual machine
- Step 6: Set bootable medium CD/DVD
- Step 7: Insert ISO file in QEMU via Qtemu GUI
- Step 8: Boot Qemu Virtual Machine via GUI
QEMU/Networking
QEMU supports networking by emulating some popular network cards (NICs), and establishing virtual LANs (VLAN). There are four ways how QEMU guests can be connected then: user mode, socket redirection, Tap and VDE networking.
Contents
User mode networking [ edit | edit source ]
If no network options are specified, QEMU will default to emulating a single Intel e1000 PCI card with a user-mode network stack that bridges to the host’s network. The following three command lines are equivalent:
To use this network setup with the Linux kernel, you must set the configuration option CONFIG_E1000=y when compiling.
The -net option is superseded by -netdev in newer QEMU versions. [1]
The guest OS will see an E1000 NIC with a virtual DHCP server on 10.0.2.2 and will be allocated an address starting from 10.0.2.15. A virtual DNS server will be accessible on 10.0.2.3, and a virtual SAMBA file server (if present) will be accessible on 10.0.2.4 allowing you to access files on the host via SAMBA file shares.
User mode networking is great for allowing access to network resources, including the Internet. In particular, it allows ssh from the guest to the host. By default, however, it acts as a firewall and does not permit any incoming traffic. It also doesn’t support protocols other than TCP and UDP — so, for example, ping and other ICMP utilities won’t work.
Redirecting ports [ edit | edit source ]
To allow network connections to the guest OS under user mode networking, you can redirect a port on the host OS to a port on the guest OS. This is useful for supporting file sharing, web servers and SSH servers from the guest OS.
Here is how to set up QEMU with a Windows XP guest sharing files and web pages under user mode networking. TCP port 5555 on the host is redirected to the guest’s port 80 (the web server) and TCP port 5556 on the host is redirected to the guest’s port 445 (Windows networking):
NB: When sharing folders from guest to host via Windows networking, you must specify a password for the user that mount will use to login; if you try to use no password, mount will fail with an I/O error.
TAP interfaces [ edit | edit source ]
QEMU can use TAP interfaces to provide full networking capability for the guest OS. This can be useful when the guest OS is running several network services and must be connected to via standard ports; where protocols other than TCP and UDP are required; and where multiple instances of QEMU need to connect to each other (although this can also be achieved in user mode networking via port redirects, or via sockets).
In QEMU 1.1 and newer the network bridge helper can set tun/tap up for you without the need for additional scripting.
For older versions, setting up a TAP interface is a bit more complicated than user mode networking. It requires installing virtual private networking (VPN) on the host OS, and then establishing a bridge between the host’s networking and the virtual network.
Here’s how to do it on Fedora 8 with static IP address assignment. The procedure should be very similar on other Linux distros, and probably not too different on other *nix systems.
TAP/TUN device [ edit | edit source ]
According to tuntap.txt, we create the TAP/TUN device first:
qemu-ifup [ edit | edit source ]
First, set up a script to create the bridge and bring up the TAP interface. We’ll call this script /etc/qemu-ifup .
qemu-ifdown [ edit | edit source ]
You will also need a script to reset your networking after QEMU exits. To be consistent, we’ll call it /etc/qemu-ifdown .
Allowing users to call the scripts [ edit | edit source ]
In qemu 1.1 and above just use the helper program, which doesn’t require any scripts and can be setuid root.
For older versions, the two scripts above need to be run as the superuser, so that they can modify the network settings of the system. The most convenient way to achieve that is to permit users of QEMU to call the scripts using the sudo command. To set this up, add the following to the file /etc/sudoers :
Starting QEMU with a TAP interface [ edit | edit source ]
Now create a script to start QEMU with a VLAN, and clean up after itself when it exits. This one uses tap0. Specifying script=no tells QEMU to just use the tap device without calling the scripts — we do this so that QEMU can be run as a regular user, not root.
Run that script, and it will create a TAP interface, bridge it to eth0, run QEMU, and drop the bridge and TAP interface again on exit.
Windows Vista and later – Network Location [ edit | edit source ]
Windows Vista and later classify network connections as either public or private. The classification determines the firewall rules that will be applied to that connection. Windows maintains a list of known connections and if it finds a network connection which is not in that list it will prompt the user to indicate whether this is a «Home», «Work» or «Public» network. The network is identified by the MAC address of its default gateway, which QEMU seems to allocate randomly each time it starts. The result is that every time a Windows session is started with QEMU it pops up a window asking you to indicate the «network location». This is not normally a serious problem, but it can be annoying.
The solution is to force the netdev interface to always use the same MAC address. QEMU does not appear to provide an option to set this, but it can be set in the ifup script. Using Iproute2, which has superceded ifconfig, the command:
will change the MAC address of the host-side interface to that given, which could be any legal MAC address that is unique within the local network.
Sockets [ edit | edit source ]
QEMU can connect multiple QEMU guest systems on a VLAN using TCP or UDP sockets.

To do:
complete this section
SMB server [ edit | edit source ]
If the host system has a SMB server installed (SAMBA/CIFS on *nix), QEMU can emulate a virtual SMB server for the guest system using the -smb option. Specify the folder to be shared, and it will be available to the guest as \\10.0.2.4\qemu (or you can put 10.0.2.4 into the hosts or lmhosts file as smbserver and map to \\smbserver\qemu).
This isn’t strictly necessary, because guests in QEMU can typically access SMB servers in the host environment. It can be quite useful, however, for setting up independent workspaces for each QEMU guest without needing to configure SMB shares for each one.
How to Set up Virtual machines with QEMU GUI on Windows 10
Qemu is an open source software for virtualization on Windows 10/8/7, Linux and macOS but with a command-line interface, lightweight and low hardware requirements.
QEMU stands for “Quick Emulator” and is the standard tool for virtualization and CPU emulation under Linux, Windows and macOS. On Linux systems, QEMU uses the functions of the Linux kernel for virtualization (KVM- Kernel Virtual Machine), which are not available under Windows.
Thus, the binaries of Qemu’s ported version for Windows by Stefan Weil couldn’t provide the performance as it gives on Linux OS with KVM. Thus VirtualBox or Vmware player will be the best alternative options; still, if you want to try then here in this Qemu tutorial, we will let know the way to download, install and use Qemu on Windows 10 or 7 using its GUI VM manager Qtemu, an open-source software.
Qemu installation on Windows 10 with Qtemu GUI
Step 1: Download Qemu for Windows
From the official website of the Qemu, we can download it easily even the source code. Visit it and click on the Windows tab, it will take you to another page https://qemu.weilnetz.de to download 32 bit or 64 bit of this virtualization platform. Here we are getting the 64 bit.
Step 2: Install Qemu
Now, like any other Windows 10/7 software, just double click on the downloaded setup of Qemu and follow the installation wizard.
- Accept the suggested language setting, by default it will be English. Select the “OK” button.
- Press the NEXT button.
- Confirm the usual license terms (GNU General Public License) with “Accept“.
- All modules required for QEMU have already been selected in the “Select components” dialogue. Confirm with “Next”.
- Check the suggested destination folder and go to “Install“.
- Click on “Finish” to complete the setup of QEMU.
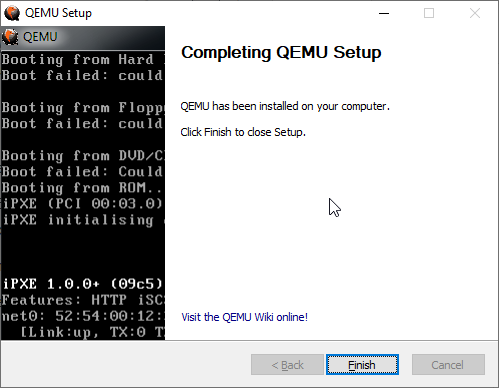
Qemu install & setup on windows
Step 3: Install GUI for QEMU on Windows 10
As we know the QEMU uses the command line to create virtual machines by default. But it would be not feasible for standard computer users using CLI to manage virtual machines, thus we install another open source application to provide Graphical user interface (GUI) to QEMU. This program is known as Qtemu which is a fork of a dead project available at https://qtemu.org.
Here are the links to download an active Qtemu project for Windows 10/8/7 available on Gitlab.
If you don’t want to install it, go for the portable version.
Gitlab Page Link of the project.
Step 4: Setup QEMU manager Qtemu GUI
After the installation of Qtemu run it from the Windows Start menu.
- In the first column “QEMU binaries path” copy-paste this: C:\Program Files\qemu\ Or enter the path where you have installed the QEMU.
- For the second column enter the path of Qemu-img file that is: C:\Program Files\qemu\qemu-img.exe
- Now create a folder anywhere on your computer where you want to save the virtual machines created by QEMU. And click on the folder icon given in the front of the third column to select that particular folder.
Note: You can change this configuration any time from the Qtemu Settings.

QTEMU GUI for QEMU on Windows 10 configuration
After that click on the Finish button.
Step 5: Create a Virtual machine
Now, from Qemu GUI manager Qtemu, simply click on Machine and select New Machine.
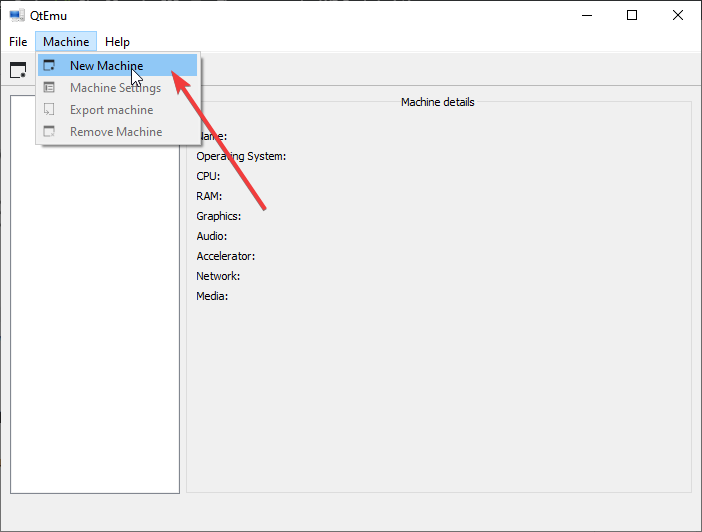
Create New Virtual machine
Leave the Machine which is meant to select some particular motherboard chipset.
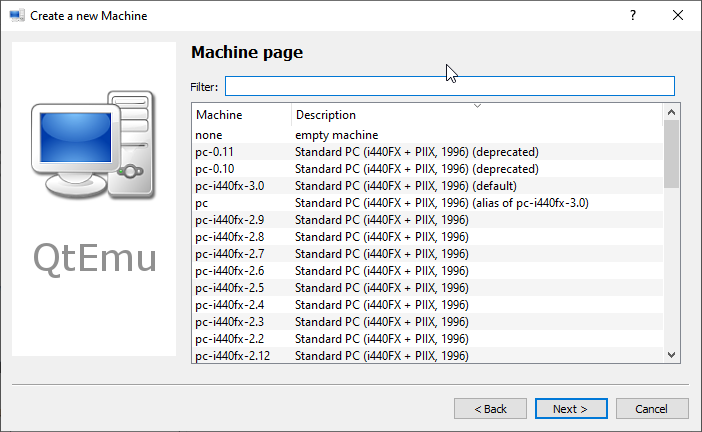
QTEMU Machine page
Configure the Virtual Machine hardware, select the CPU type such as Core 2 Duo, Base or any CPU that Qemu would be able to emulate on your system whereas set the CPU count, cores, Thread as shown in below screenshot.
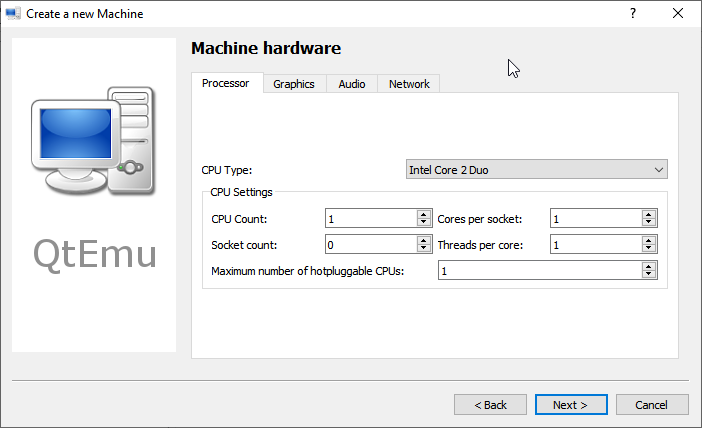
Set CPU in QTemu
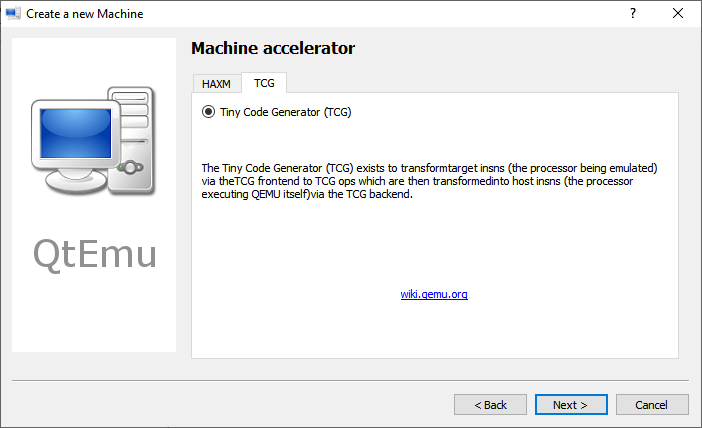
Accelerator Tiny code generator
Set the amount of RAM you want to assign to your VM.
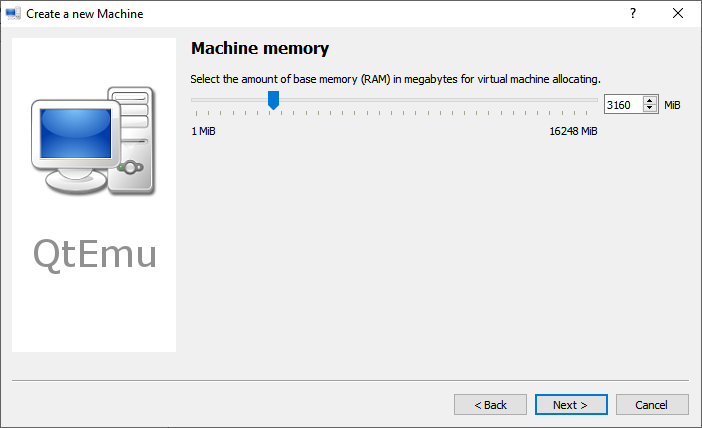
Set Qemu GUI RAM Memory
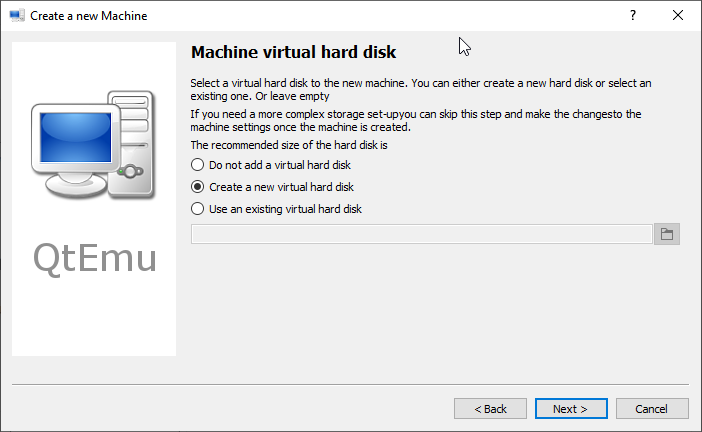
Create new hard disk on Qemu

Set Qemu hard disk
Step 6: Set bootable medium CD/DVD
Now, everything is ready, we have created a Virtual machine, its time to set a bootable medium to CD; so that our ISO file could be used while booting the QEMU VM.
For that right-click on the created VM on the QTEMU interface and select Machine Settings.
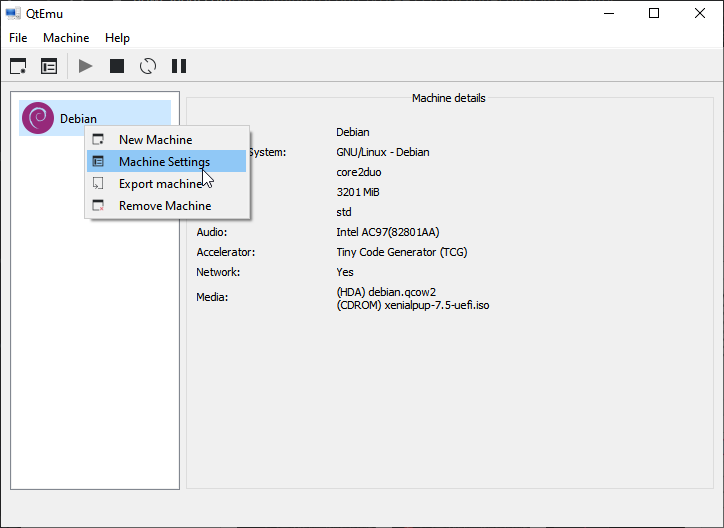
VM machine Settings
There select the Boot options from the right-side panel and after that check the “Enable boot menu” and then CD ROM option following the Save button.
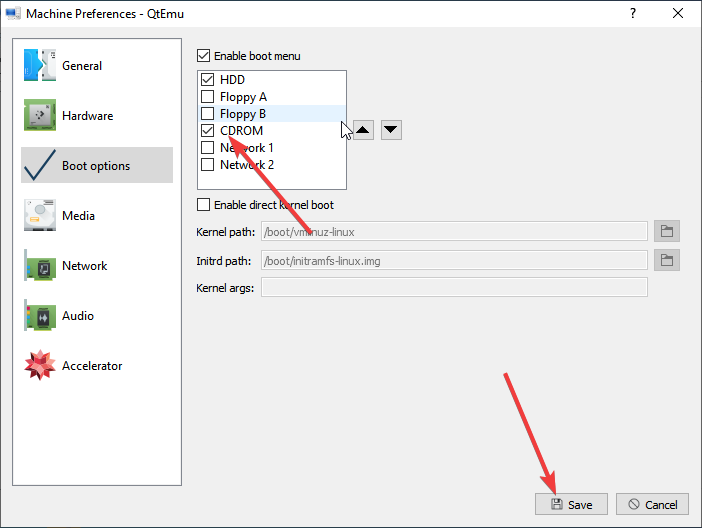
Set bootable medium in Qtemu
Step 7: Insert ISO file in QEMU via Qtemu GUI
Under the Machine settings, go to Media menu and click on the CD icon. This will open the Windows file explorer, navigate to ISO file of the OS which you want to boot with-in QEMU and click on the Save button.

Select ISO file as a bootable medium
Step 8: Boot Qemu Virtual Machine via GUI
Now, on the main interface of the Qtemu GUI, select the created VM and click on the start button. This will open the boot screen.
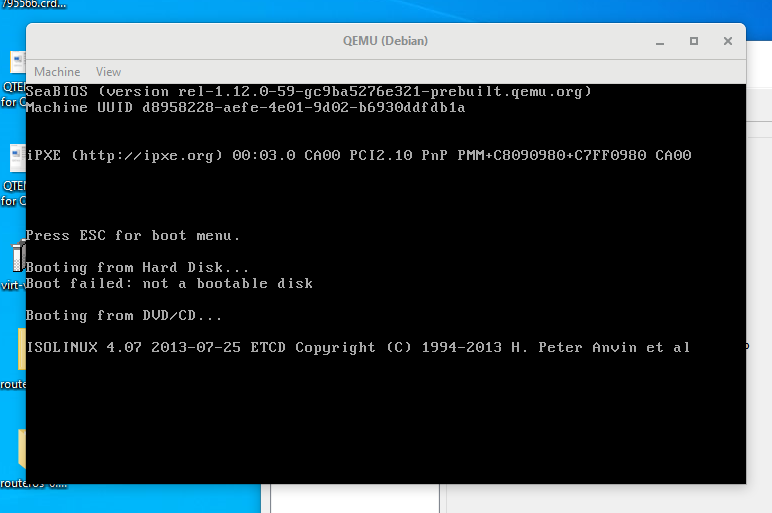
Boot QEMU virtual machine
Wait for a few minutes depending upon the OS distribution you are using, it will show the LIVE screen of the same. However, I tried to boot and install Windows 10 on Qemu using the GUI but it was quite sluggish and slow.
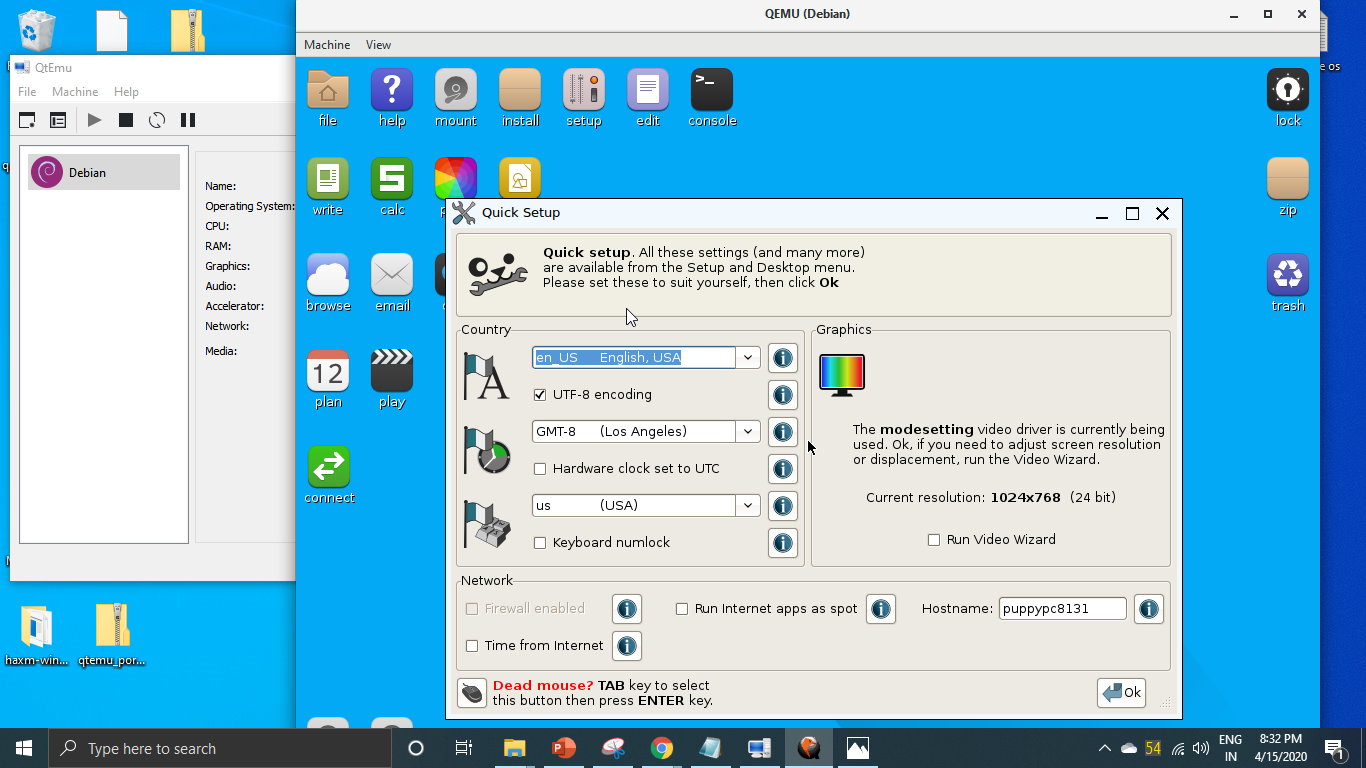
Qemu installation on Windows 10 with Qtemu GUI
Verdict:
Although the CLI can be used to create and manage Virtual machine on Windows 10 using the QEMU, with Qtemu GUI tool it becomes quite easy, however, in my case it worked well with Lightweight Linux Distros but for Windows guest VMs quite slow and low performance. I recommend using VirtualBox instead. Yet, if someone wants to experience Qemu on Windows 10 this is the easiest possible way. Still, be cautious with Qtemu hardware configuration because slight here and there will not let you boot the VM.


