- Qt Documentation
- Contents
- Supported Configurations
- Requirements for Development Host
- Debian/Ubuntu (apt-get)
- Fedora/RHEL/CentOS (yum)
- openSUSE (zypper)
- Building Qt 5 from Source
- Deployment and Other Issues
- Where to Go from Here
- Offline Qt Downloads
- Qt6 Source Packages
- Qt 6.2.0 Source Packages:
- Older Qt Versions
- Qt 5.15.x Source Packages
- 5.12.x Offline Installers
- Qt Creator
- Pre-releases
- Qt Creator — A Cross-platform IDE for Application Development
- Getting Started With Qt and Qt Creator on Linux
- Assumptions and Prerequisites
- Installation Steps
- Summary
- About the author
- Jeff Tranter
- Урок №1. Введение в Qt и установка Qt Creator
- Введение в Qt
- Установка Qt Creator в Linux
- Установка Qt Creator через командную строку в Linux
- Установка Qt Creator в Windows
- Создание проекта
Qt Documentation
Contents
Qt’s support for different Linux platforms is extensive and mature.
To download and install Qt for Linux, follow the instructions on the Getting Started with Qt page.
Supported Configurations
The following configurations are supported.
| Distribution | Architecture | Compiler | Notes |
|---|---|---|---|
| openSUSE 15.1 | x86_64 | GCC 5 or later, GCC 7, ICC 19.1 | |
| SUSE Linux Enterprise Server | x86_64 | GCC 5 or later, GCC 10 | |
| Red Hat Enterprise Linux 7.6 | x86_64 | GCC 5.3.1 via devtoolset-4 | |
| Ubuntu 18.04 | x86_64 | GCC 5 or later, GCC 9 | |
| Generic Linux | x86 and x86_64 | GCC (5 or later), ICC 18.x |
Requirements for Development Host
The Qt installers for Linux assume that a C++ compiler, debugger, make, and other development tools are provided by the host operating system. In addition, building graphical Qt applications requires OpenGL libraries and headers installed. Most Linux distributions do not install all of these by default, but setting up a development environment is still straightforward.
Use the following commands to install the basic requirements for building Qt applications:
Debian/Ubuntu (apt-get)
Fedora/RHEL/CentOS (yum)
openSUSE (zypper)
Building Qt 5 from Source
You can also build Qt 5 from the source package and configure it according to your target platform. The source packages are obtained from http://www.qt.io/download/.
Below, you will find more information about building Qt from source.
Deployment and Other Issues
The pages below covers specific issues and recommendations for creating Linux/X11 applications.
Where to Go from Here
We invite you to explore the rest of Qt. We prepared overviews which help you decide which APIs to use and our examples demonstrate how to use our API.
- Qt Overviews — list of topics about application development
- Examples and Tutorials — code samples and tutorials
- Qt Reference Pages — a listing of C++ and QML APIs
- Qt X11 Extras — provides additional APIs for X11
Qt’s vibrant and active community site, http://qt.io houses a wiki, a forum, and additional learning guides and presentations.
В© 2021 The Qt Company Ltd. Documentation contributions included herein are the copyrights of their respective owners. The documentation provided herein is licensed under the terms of the GNU Free Documentation License version 1.3 as published by the Free Software Foundation. Qt and respective logos are trademarks of The Qt Company Ltd. in Finland and/or other countries worldwide. All other trademarks are property of their respective owners.
Источник
Offline Qt Downloads
We recommend you use the Qt Online Installer for first time installations and the Qt Maintenance Tool for changes to a current install.
- Qt6 source packages
- 5.15.x source packages
- 5.12.x Offline Installers
- Qt Creator
- Other downloads
- Pre-releases
Qt6 Source Packages
Qt 6.2.0 Source Packages:
The source code is available:
- For Windows users as a single zip file (1.0 G) ( Info )
- For Linux/macOS users as a tar.xz file (636 MB) ( Info )
You can get split source packages from here. Or visit the repository at code.qt.io.
Older Qt Versions
All older versions of Qt are available in the archive .
Qt 5.15.x Source Packages
The source code is available:
- For Windows users as a single zip file (962 MB) ( Info )
- For Linux/macOS users as a tar.xz file (560 MB) ( Info )
You can get split source packages from here. Or visit the repository at code.qt.io.
5.12.x Offline Installers
Qt offline installer is a stand-alone binary package including Qt libraries and Qt Creator.
Source packages & Other releases
The source code is available:
- For Windows users as a single zip file (831 MB) ( Info )
- For Linux/macOS users as a tar.xz file (486 MB) ( Info )
You can get split source packages from here. Or visit the repository at code.qt.io.
Qt Creator
Qt Creator 5.0.2 is released and it is available via Qt online installer. If you need a standalone installer, please select the file according to your operating system from the list below to get the latest Qt Creator for your computer.
The source code is available as a zip (69 MB) ( Info ) or a tar.gz (55 MB) ( Info ). Or visit the repository at code.qt.io.
Be sure to check if Qt is supported on your platform and read the installation notes that are located in the Qt Documentation .
Please check the individual downloads for licensing information.
Pre-releases
Looking for Qt 6.2.0 RC? Source packages are here.
Источник
Qt Creator — A Cross-platform IDE for Application Development
Qt Creator is a cross-platform integrated development environment (IDE) built for the maximum developer experience. Qt Creator runs on Windows, Linux, and macOS desktop operating systems, and allows developers to create applications across desktop, mobile, and embedded platforms.
SOPHISTICATED CODE EDITOR
Qt Creator’s advanced code editor lets you code in C++, QML, JavaScript, Python and other languages. It features code completion, syntax highlighting, refactoring and has built-in documentation at your fingertips.
VERSION CONTROL
Qt Creator integrates with most popular version control systems, including Git, Subversion, Perforce, and Mercurial.
INTEGRATED UI DESIGN
Integrated visual editors for building C++ widget-based applications or fluid Qt Quick-based animated UIs with ready-made controls.
PROJECT & BUILD MANAGEMENT
Import an existing project or create one from scratch – Qt Creator generates all the necessary files. Support for Cmake and cross-compiling with qmake is included.
MULTIPLE TARGETS
Build for and run your software on desktop, mobile and embedded operating systems. The build settings allow you to easily switch between targets.
Qt DEVICE EMULATOR
Test and debug applications in conditions practically identical to those on your target device.
Qt QUICK COMPILER
Compile source code into native machine code, accelerate start-up time and UI performance, and protect your source code and intellectual property.
Источник
Getting Started With Qt and Qt Creator on Linux
My recent blog post covered how to set up Qt and Qt Creator on a Windows 10 system. In this post I’ll look at how to configure a Linux system for Qt desktop development.
Since the set up process on Linux is almost identical to that on Windows, rather than repeat the information I refer you to that blog. (Keep it handy, you’ll need it later.) In this post, I’ll cover the differences.
Assumptions and Prerequisites
For this example I will assume you want to install Qt 5.6.0 or 5.7.0 on a recent release of Ubuntu Desktop Linux. The procedure will be similar with other Linux distributions. As in the blog for Windows, we will use Qt’s online installer.
It should be noted that many Linux distributions already have Qt and Qt Creator available as standard distribution packages. This is often the easiest way to set up a Qt development environment. On Ubuntu Linux, for example, you can install Qt Creator using the command:
A downside of this approach is that the versions of Qt and Creator packaged for your Linux distribution may not be the latest versions, and you are typically only offered one particular Qt version. Using the Qt online installer as I describe here will allow you to install the latest Qt release or one or more older releases, as well as install optional modules that may not be available as packages for your Linux distribution.
The Qt installer for Linux does not include a C++ compiler. You will need to separately install the GNU gcc compiler, make program, and other packages for software development. In addition, building graphical Qt applications requires OpenGL libraries and headers installed. On Ubuntu and other Debian-based Linux systems you can get OpenGL and the minimal set of development tools by installing the packages libgl1-mesa-dev and build-essential, i.e. by running this command:
This is the bare minimum needed for software development. You will typically also want to install the gdb debugger (packaged as gdb on Ubuntu) and possibly some optional tools like git, clang, etc. Qt Creator will make use of these if present and you can install them any time after installing Qt Creator, if desired.
Installation Steps
The first step is to download the online installer. You can directly download the latest installer from http://download.qt.io/official_releases/online_installers/
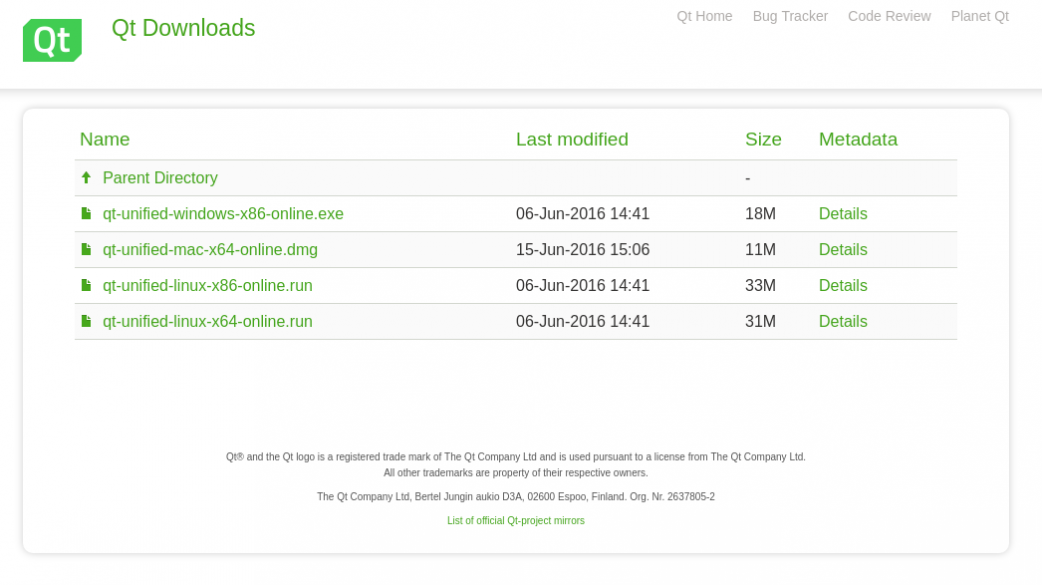
You need to select either the 32-bit or 64-bit installer, depending on the architecture of your system. The file qt-unified-linux-x86-online.run is the 32-bit installer and qt-unified-linux-x64-online.run is the 64-bit version. If you are unsure what architecture your system is running, you can run the Linux command arch and examine the output. An output of «i686» indicates 32-bit and «x86_64» is 64-bit on Intel-compatible systems.
Select and download the appropriate installer. Your web browser probably won’t let you directly run it until you make the file executable. You can do that by opening a terminal window, navigating to the downloads directory, and using the chmod command. Here is an example:
You are now ready to run the installer. You have two options. If you run it as a normal user, it will be installed in the current user’s home directory, making the install suitable for use only by the user who installed it. If you run the installer as root, it will be installed globally and be available to all users on the machine.
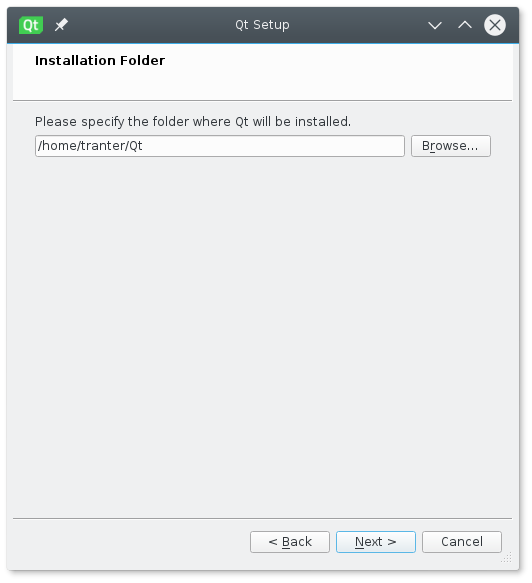
For the per user install, the default installation will be a subdirectory called Qt in the current working directory. For the global install, the default location is /opt/Qt.
Determine whether you want to install per user or global and then run the installer. For a per user install, just run it as the current user, e.g.
For the global install you can run it as root using the sudo command, e.g.
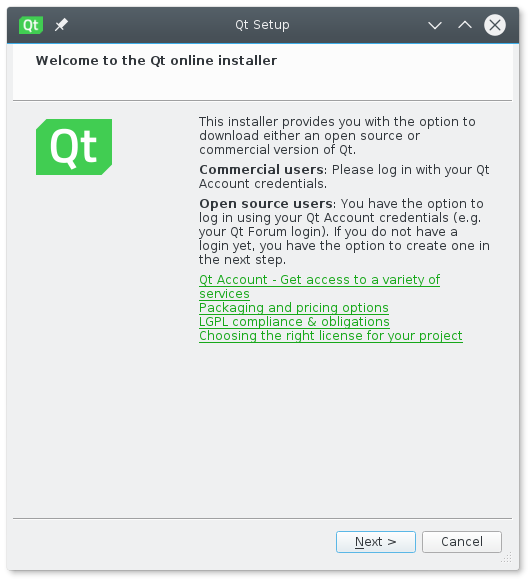
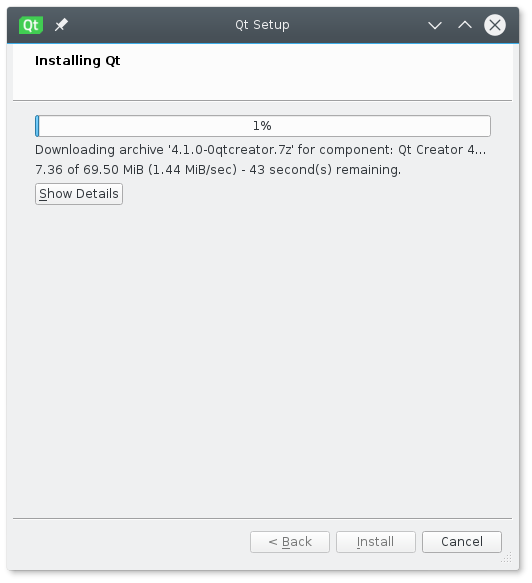
The installer should now launch. The steps will be the same as on Windows. The previous blog post provided screen shots and described each step in the installer process in detail.
Once done, you can launch Qt Creator.

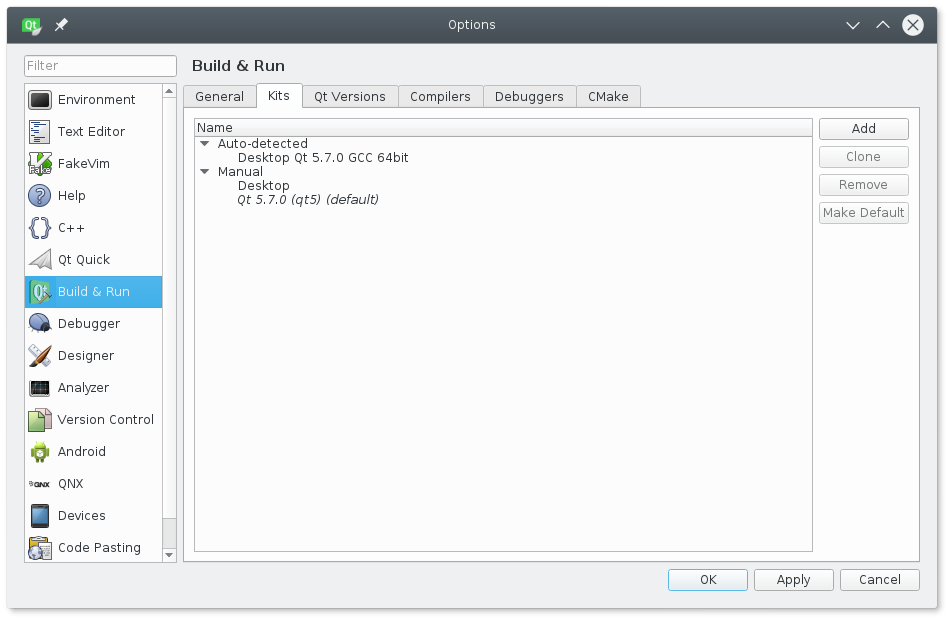
You should check that it correctly set up at least one auto-detected kit, compiler, Qt version, and debugger (if present):
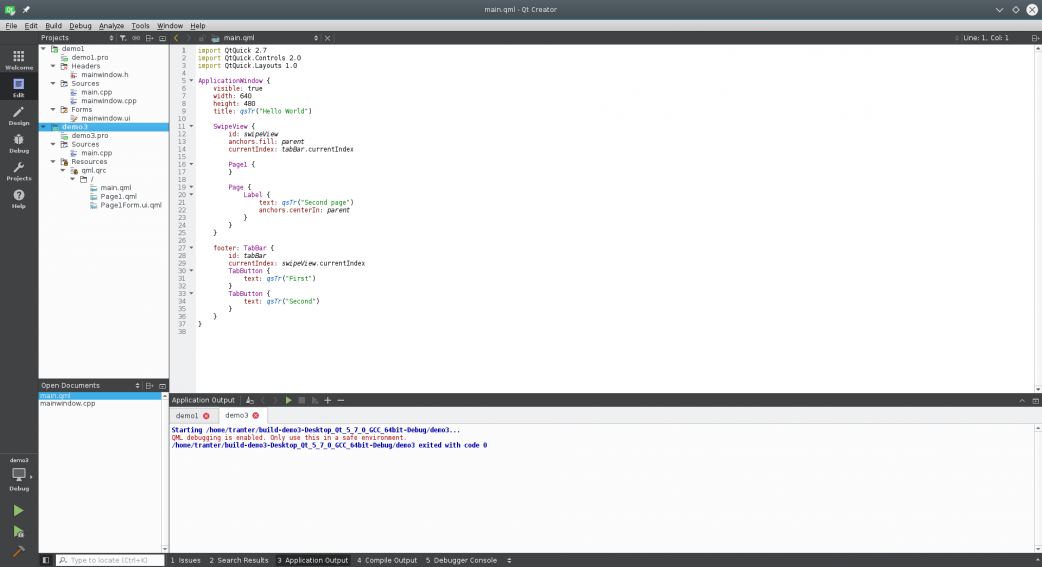
As I suggested in the other blog, this would be a good time to create some sample projects to test your installation. Use the New Project Wizard and confirm that you can create the project, build it and run the application. Testing both widget and QML-based projects is recommended.
You are now ready for Qt software development!
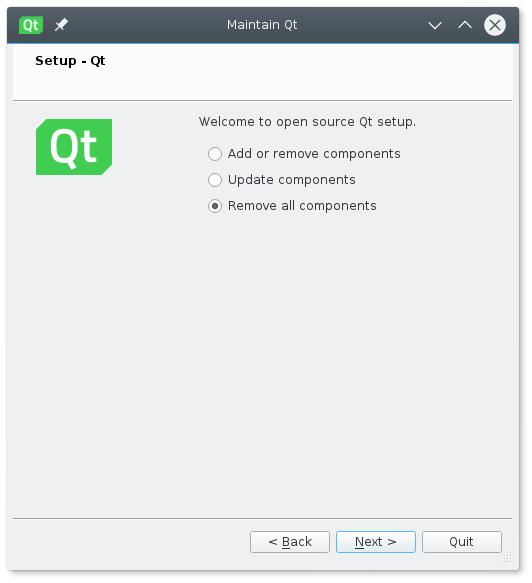
If you want to update, add or remove any components, you can run the maintenance tool, which can be found under the install directory as MaintenanceTool.
Summary
As on Windows, it’s easy to install a Qt development environment on desktop Linux.
We didn’t cover the Mac desktop platform, but it is much the same as Linux. However, you need to install Apple’s XCode IDE to get the C++ compiler and other necessary development tools.
For the most flexibility, you may want to build Qt yourself from source code. This offers a number of advantages, including ability to run Alpha and Beta versions of Qt before they are officially released. I’ll cover this in a future post.
About the author

Jeff Tranter
Jeff Tranter is a Qt Consulting Manager at ICS. He oversees the architectural and high-level design of software systems for clients. Jeff’s leadership organizes global teams of developers on desktop and embedded applications. He has been published in Electronic Design magazine.
Источник
Урок №1. Введение в Qt и установка Qt Creator
Обновл. 16 Сен 2021 |
На этом уроке мы познакомимся с кроссплатформенным фреймворком Qt и установим IDE для работы с ним.
Введение в Qt
Qt является кроссплатформенным (не зависящим от платформы/ОС) фреймворком для разработки приложений на языке С++. С помощью Qt были разработаны такие известные приложения, как: KDE, Opera, Google Earth и Skype. Впервые Qt был опубликован в мае 1995 года.
Qt5 подразумевает двойное лицензирование, а это означает, что Qt может быть использован в некоммерческих целях для создания приложений с открытым исходным кодом, а также как лицензия для коммерческих клиентов. За счет использования собственного фреймворка и мощного инструментария Qt позволяет быстро и удобно создавать собственные кроссплатформенные приложения. Кроме того, команды разработчиков получают возможность работать на разных платформах, используя при этом общие инструменты для разработки и отладки. Весь инструментарий Qt с открытым исходным кодом вы можете найти на сайте qt.io.
Изначально Qt был разработан норвежской компанией по разработке программного обеспечения Trolltech. В 2008 году компанию приобрела Nokia. Спустя четыре года в августе 2012 программные технологии Qt выкупила финская компания-разработчик Digia. Сейчас Qt развивается компанией QT Company, которая является дочерней компанией Digia, и как проект Qt под открытым исходным кодом с участием отдельных разработчиков и фирм.
Установка Qt Creator в Linux
Шаг №1: Мы будем устанавливать IDE с открытым исходным кодом. Для этого переходим по ссылке и выбираем самую свежую версию (на момент написания данной статьи — это Qt 5.13):

На этих уроках используется операционная система Linux (Debian 9.x 64-bit), поэтому мы скачиваем qt-opensourse-linux-x64-5.13.0.run , но вы также можете использовать соответствующие файлы Qt для Windows или macOS:

После окончания загрузки переходим в папку с необходимым нам файлом, нажимаем на него правой кнопкой мыши и выбираем «Свойства» . На вкладке «Основные» видим «Имя» , «Тип» , «Размер файла» , а также наименование родительской папки:

Переходим на вкладку «Права» и ставим галочку возле пункта «Разрешить выполнение файла как программы» :

Закрываем «Свойства» и запускаем программу.
Шаг №2: На следующем этапе установщик сообщает, что нам предоставлена версия с открытым исходным кодом Qt 5.13.0. Дальнейшая установка Qt предполагает регистрацию в Qt и создание Qt Account, который предоставляет доступ ко всем возможностям Qt. Кроме того, данное действие необходимо для проверки лицензии (коммерческая/некоммерческая). Если у вас уже есть учетная запись в Qt Account, то используйте кнопку «Next» .
Если учетной записи в Qt Account у вас еще нет, то её можно создать сейчас: для этого перейдите по соответствующей ссылке в установщике, и вы будете перенаправлены на сайт qt.io в соответствующий раздел, или просто используйте кнопку «Next» — вы сможете это сделать на следующем шаге:

Шаг №3: Здесь необходимо ввести логин и пароль от Qt Account или создать Qt Account, если его у вас еще нет. Кнопка «Next» переводит нас на следующий этап:

Добро пожаловать в настройки Qt 5.13.0! Для перехода к следующему шагу нажимаем «Далее >» :

Шаг №4: Выбираем каталог для установки Qt 5.13.0. Обратите внимание, адрес каталога указывается латинскими буквами (без кириллицы) и без пробелов! После того, как выбрали каталог, нажимаем «Далее >» :

Шаг №5: Выбираем компоненты, которые хотим установить. Если на данном этапе у вас нет уверенности в выборе конкретных компонентов, то добавление и удаление можно будет сделать позже, после установки программы:

Шаг №6: Принимаем лицензионное соглашение:

И нажимаем на кнопку «Установить» :

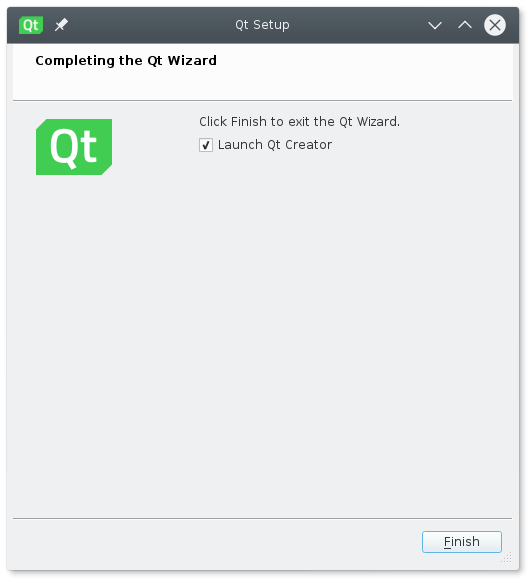
Для завершения установки нажимаем «Завершить» . После завершения установки Qt Creator запустится самостоятельно (для этого необходимо поставить галочку возле пункта «Launch Qt Creator» ):

Вот примерно следующее вы должны увидеть при запуске Qt Creator:

Поздравляем! Qt Creator установлен.
Установка Qt Creator через командную строку в Linux
Еще одним альтернативным и простым способом установки Qt Creator в Linux на основе Debian является установка из пакетов. Если при работе с Linux вы используете терминал, то перед скачиванием и установкой Qt Creator программа запросит пароль пользователя root (команда sudo без дополнительных опций). Только после этого начнется скачивание и извлечение файлов. Обычно, пакеты Linux не содержат последней версии Qt и их необходимо обновить. Ниже приведен алгоритм действий, позволяющий за 4 шага установить Qt Creator через терминал в Linux.
Шаг №1: Обновление набора утилит для установки, удаления, обновления, поиска пакетов в Linux.
$ sudo apt update
Шаг №2: Скачивание и установка Qt.
$ sudo apt install qt5-default
Шаг №3: Установка Qt Creator.
$ sudo apt install qtcreator
Шаг №4: Установка тестовых программ.
$ sudo apt install qtbase5-examples qtdeclarative5-examples
Установка Qt Creator в Windows
Сначала нам нужно скачать установочный пакет Qt. Вы можете это сделать, обратившись к оф. сайту qt.io. Либо же воспользоваться альтернативным вариантом и скачать с какого-нибудь «зеркала» (например, c этого, полный список всех «зеркал» находится здесь):

Нажимаем на official_releases/ и переходим к online_installers/ :

Нажимаем на online_installers/ и скачиваем файл qt-unified-windows-x86-online.exe :

Запустив скачанный файл, видим перед собой приветствие «Qt Online Installer». Нажимаем «Next» :

Далее у нас спросят о наличии Qt Account. Можно смело нажимать «Skip» и двигаться дальше:

Затем снова «Далее» :

Теперь нам нужно указать путь установки Qt. Для простоты я выбрал C:\Qt :

На следующем шаге нам нужно выбрать набор компиляторов, которыми мы будем пользоваться на данных уроках. Я предлагаю ограничиться выбором пакета MinGW 7.3.0 32-bit , а остальные метки поставить так, как указано на скриншоте ниже:

После того, как инсталлятор скачает и установит все необходимые компоненты, можно будет перейти к непосредственному написанию кода для нашего приложения.
Создание проекта
Вначале нам необходимо создать проект. Сразу скажу, что наша программа будет консольным приложением. Для этого выберите «Файл» > «Создать файл или проект…» или можно воспользоваться сочетанием клавиш Ctrl+N :

Перед вами появится «Мастер настройки проектов». В левой колонке отметьте пункт «Приложение» , а затем в правой — «Консольное приложение Qt» :

На следующем шаге нужно будет указать имя для нашей будущей программы и папку, где будут располагаться файлы проекта. У меня это My_QtApplication и C:\dev\Qt_Project соответственно:

На следующем шаге без изменений, поэтому просто нажимаем кнопку «Далее» :

Теперь нам нужно выбрать набор компиляторов, который мы будем использовать для сборки нашего проекта. Я настоятельно рекомендую выбрать Desktop Qt 5.13.0 MinGW 32-bit (сняв при этом отметки с остальных, если они у вас есть):

На последнем шаге нажимаем «Завершить» :

Теперь вы можете увидеть автоматически сгенерированный Qt-проект консольного приложения. Давайте рассмотрим его детально:
Источник


