- Thread: MaintenanceTool
- MaintenanceTool
- Re: MaintenanceTool
- Re: MaintenanceTool
- Qt Maintenance Tool won’t launch
- 5 Answers 5
- Установка и настройка Qt Creator
- Что такое Qt Creator
- Установка Qt Creator
- Настройка Qt Creator
- Установка компонентов Qt Creator
- Работа с Qt Creator — первый проект
- Выводы
- Qt Documentation
- Contents
- Get and install Qt
- 1. Create a Qt Account
- 2. Download the Installer
- 3. Install Qt
- Updating or Removing Components
- Create Your First Applications
- Explore Qt
- Setting Up Projects
- Developing with Qt Creator
- Platform Requirements
- Reference Documentation
- Participate in the Qt Community
Thread: MaintenanceTool
Thread Tools
Search Thread
Display
MaintenanceTool
Is there a Maintenance Tool that is downloadable everywhere-open-source, even source, for Qt 5.5.1? It works just fine in the Debian Jessie for AMD64 desktop from the Debian packages, but trying to get it (AND QT ITSELF. ) to install and run on a Raspberry Pi 2 does not even load source or executable for MaintenanceTool. What gives?
So FREAKIN’ many problems getting Qt 5.5.1 and QtCreator to work on an RPi2, it’s driving me mad. A very old version of QtCreator works sorta, but it does not have the functionality that the new Creator does. If one loads the package from Debian, you get 5.3.2 and a QtCreator that works with that, sorta, kinda, maybe, a little bit.
I need to learn Qt for the desktop as well as embedded.
Re: MaintenanceTool
if you can make actual Debian run on the device then you could use the «unstable» or «testing» branches, which usually have current versions.
(Debian unstable on my machine here has QtCreator 3.6, Qt 5.5.1)
If the device has a compiler, you can obviously always build Qt yourself.
If you have just started learning Qt then any version of Qt 5 will do.
If you are planning to do embedded development across several different devices then it will be a good idea to invest some time into learning about cross-compilation.
Re: MaintenanceTool
All good advice, anda_skoa. I’ve not tried the unstable versions yet.
Yes, the device has a full complement of Linux/UNIX tools. Building Qt myself is not viable either and what I am asking about in this thread, and specifically the Qt tool — Maintenance Tool, a clever utility that apparently does not come with qt-open-everywhere (the version that you build yourself.)
I don’t need embedded development across several devices. Yes, I’m already learning about cross-compilation. However, it appears one cannot build Qt itself, nor QtCreator, via cross-compilation as the tools don’t exist apparently.
It’s weird that Qt everywhere compiled, apparently without reported error the first time I tried it. However, it did not create and install qmake, and a couple of libraries were missing. Took 20 hours for the compile. So a week of research and I *think* I found the missing libraries. Ran ‘make -clean’ and compiled again and got stopped with several errors! So, ‘make clean’ again, then untarred the everywhere-source blob, and compiled yet again. This time, qmake was compiled (but not put into /usr/bin) but yet again, stopped partway through with compile errors due to stuff missing. I’m about ready to declare Qt not ready for prime time and move on to find a better development product.
Qt Maintenance Tool won’t launch
Launching the tool from the Start menu does nothing.
From the command line, I get the following error when running Qt’s MaintenanceTool.exe —verbose :
Anyone know how to fix it? I promise I didn’t delete that file, though it is correct in saying it doesn’t exist. I only have MaintenanceTool.ini . The installation log file doesn’t mention any .dat files or give any errors at the end.
Edit: Seems to be a bug in Qt. I’d still like to know how to work around it though.

5 Answers 5
This is indeed a bug, like you pointed out, and I just ran into it. Thanks for the bug report link. There’s not a good workaround that I’m aware of within Qt; hopefully, they’ll patch it soon.
However, on Windows, your machine will probably have a shadow copy of MaintenanceTool.dat , created when you ran Windows Update. To restore a shadow copy:
- Right click on the C:\Qt folder (or wherever you installed Qt) and choose Properties.
- Click the Previous Versions tab.
- In reverse age order (newest first), open the various copies of the Qt folder, and see if they have MaintenanceTool.dat .

- Once you find one, drag it into your real Qt folder alongside MaintenanceTool.exe , where it belongs.
The Maintenance Tool will complain about a «corrupt installation,» but it seems to operate just fine.
Установка и настройка Qt Creator
С каждым годом становится все больше операционных систем, и потому разработчикам все труднее удовлетворять потребности пользователей. Три самые популярные компьютерные платформы — Windows, Linux и Mac OS, а также три мобильные — Android, iOS и Windows Mobile — продолжают активно бороться между собой. А это значит, что качественное приложение должно работать на всех основных платформах.
Справиться с этой проблемой помогает кроссплатформенная разработка. Об одной из самых популярных кроссплатформенных сред разработки — Qt Creator — и пойдёт речь в этой статье. Мы рассмотрим как выполняется установка и настройка Qt Creator, а также как работать в Qt Creator.
Что такое Qt Creator
Qt Creator (не так давно имевший название Greenhouse) — это одна из самых распространенных кроссплатформенных IDE. Ее плюсы — удобство, быстрота работы, а также — свободность, так как это ПО с открытым исходным кодом. Поддерживаются такие языки, как C, С++, QML.
Программа была написана компанией под названием Trolltech, которая в полной мере выполнила цель создания среды — работу с графическим фреймворком Qt. Удобный графический интерфейс с поддержкой Qt Widgets и QML, а также большое число поддерживаемых компиляторов позволяют быстро и удобно создать свое кроссплатформенное приложение.
Главная задача этой IDE — обеспечить наиболее быструю кроссплатформенную разработку, используя собственный фреймворк. Благодаря этому разработчики получают прекрасную возможность не писать приложения нативно (т. е. отдельно под каждую платформу), а создать общий код, и, возможно, подогнать его под особенности используемых ОС.
Qt Creator также включает в себя утилиту Qt Designer, что позволяет обработать внешний вид окна приложения, добавляя и перетаскивая элементы (аналогично Windows Forms в Visual Studio). В качестве систем сборки используются qmake, cmake и autotools.
Установка Qt Creator
Итак, пора рассмотреть как установить Qt Creator. Если для Windows разработчики позаботились и сделали оффлайн-установщик, то в Linux 32-bit этой возможности не предусмотрено. Поэтому во время установки вам может потребоваться стабильное интернет-соединение (
20-30 минут). Для начала скачаем установщик:
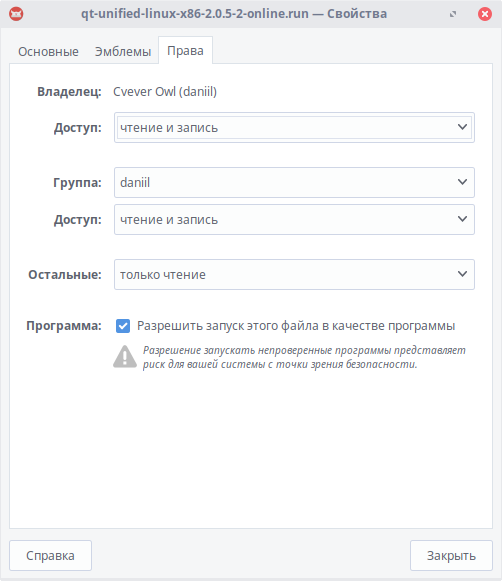
После окончания загрузки переходим в папку с файлом, нажимаем правой кнопкой мыши и выбираем пункт «Свойства».

Теперь перейдем на вкладку «Права» и поставим галочку «Разрешить запуск этого файла в качестве программы».
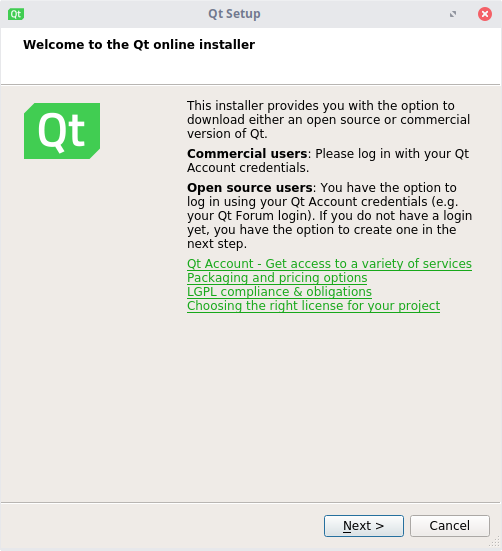
Теперь нажимаем «Next».
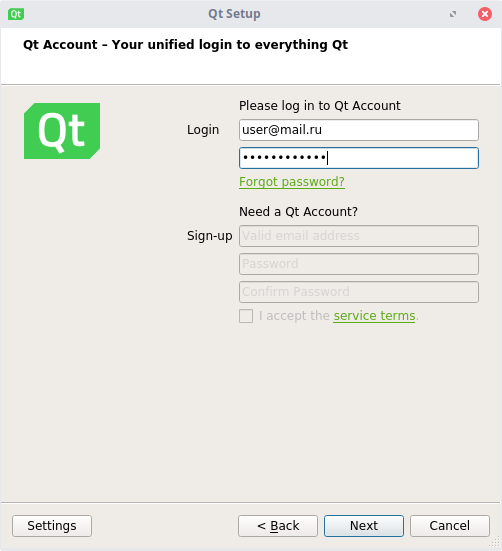
Здесь необходимо выбрать существующий аккаунт или создать его. Данное действие необходимо для проверки лицензии (коммерческой или некоммерческой).

Нажимаем «Next».
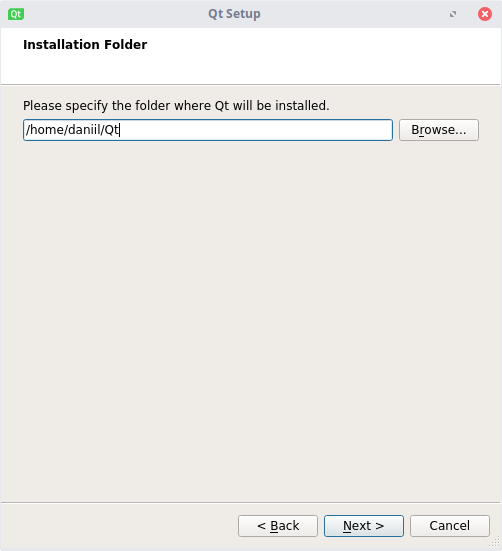
Выбираем директорию, в которой будет находиться Qt. Важно, чтобы в пути не было кириллицы и пробелов!
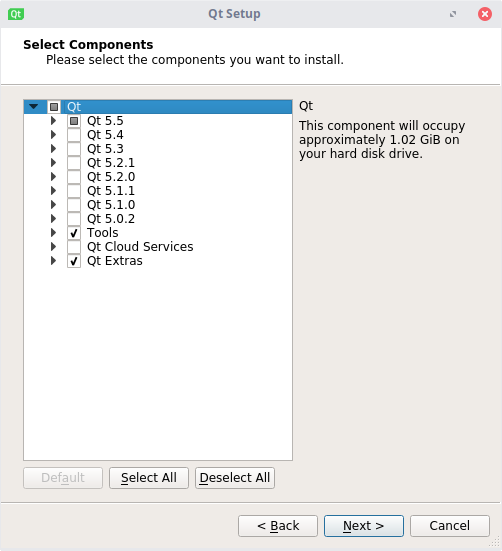
В этом меню находится выбор компонентов. К примеру, можно выбрать установку инструментов для разработки на Android, или же исходных компонентов (это нужно для статической сборки, если кому-то это нужно — напишите в комментариях, и я напишу отдельную статью). Если Вы не уверены, нужны Вам эти компоненты или нет, оставьте их пока так — даже после установки Qt будет возможным удаление и добавление элементов.
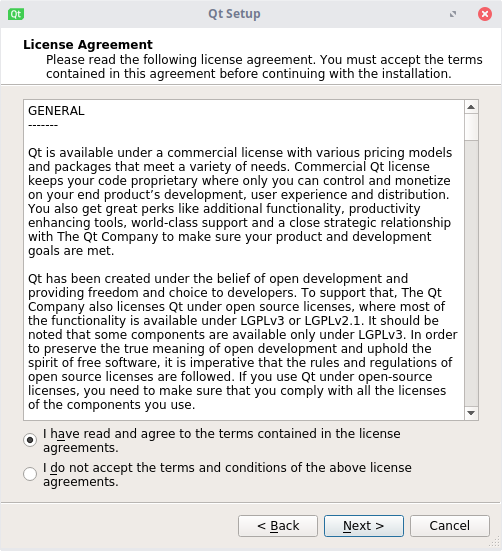
В этом окне принимаем лицензию. Жмем «Next».
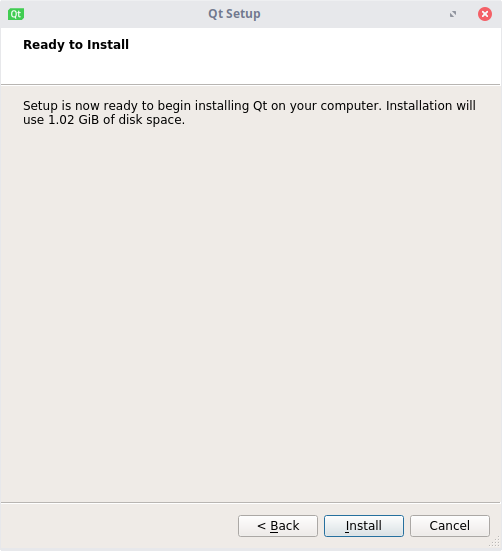
Если Вы готовы, начинайте установку. У Вас запросят пароль суперпользователя (sudo), после чего начнется скачивание и извлечение файлов. Альтернативный способ — установка через терминал. Для начала необходимо обновить список пакетов.
sudo apt update
Скачиваем и устанавливаем Qt:
sudo apt install qt5-default
Теперь установка Qt Creator:
sudo apt install qtcreator
И, если нужно, исходники.
sudo apt install qtbase5-examples qtdeclarative5-examples
Настройка Qt Creator
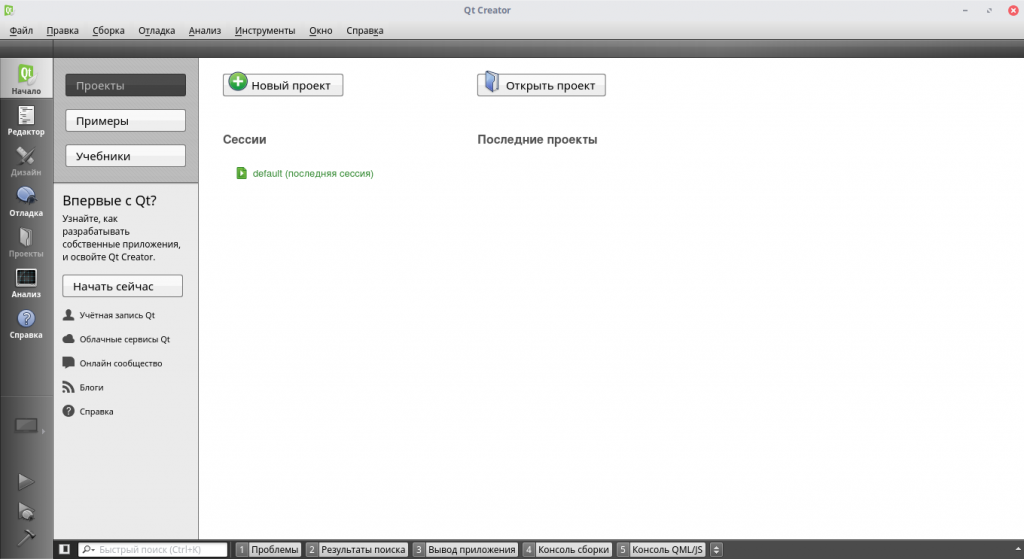
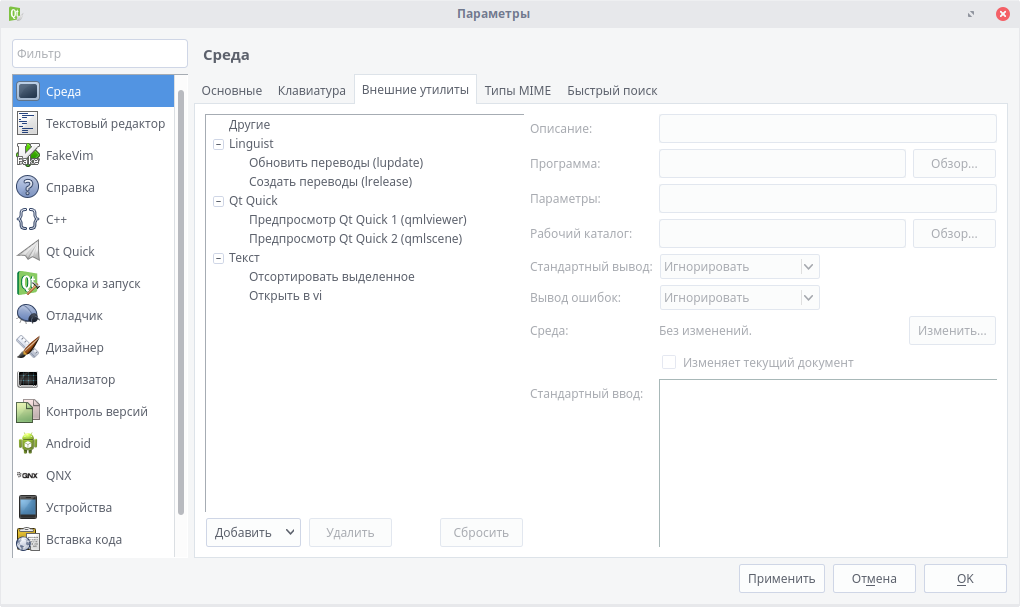
После окончания установки перезагрузите компьютер и запустите Qt Creator. Перейдите в меню «Инструменты» -> «Параметры».
Здесь следует рассмотреть несколько вкладок.
1. Среда — это настройка внешнего вида самой IDE, а также изменение сочетаний клавиш и управление внешними утилитами.
2. Текстовый редактор — здесь идет настройка внешнего вида, шрифтов и расцветки редактора.

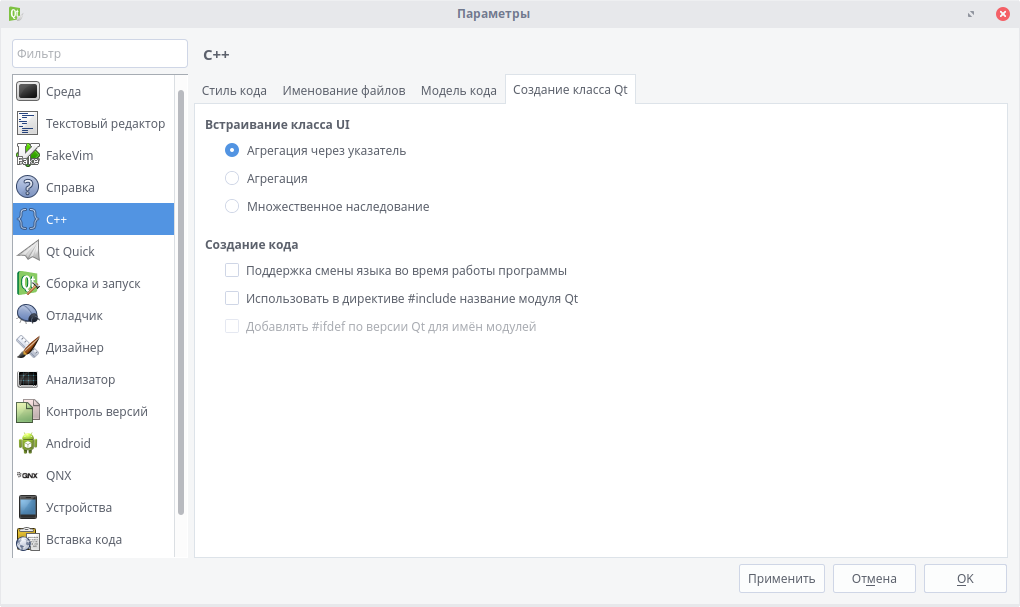
3. C++ — подсветка синтаксиса, работа с расширениями файлов и UI (т. е. формами).
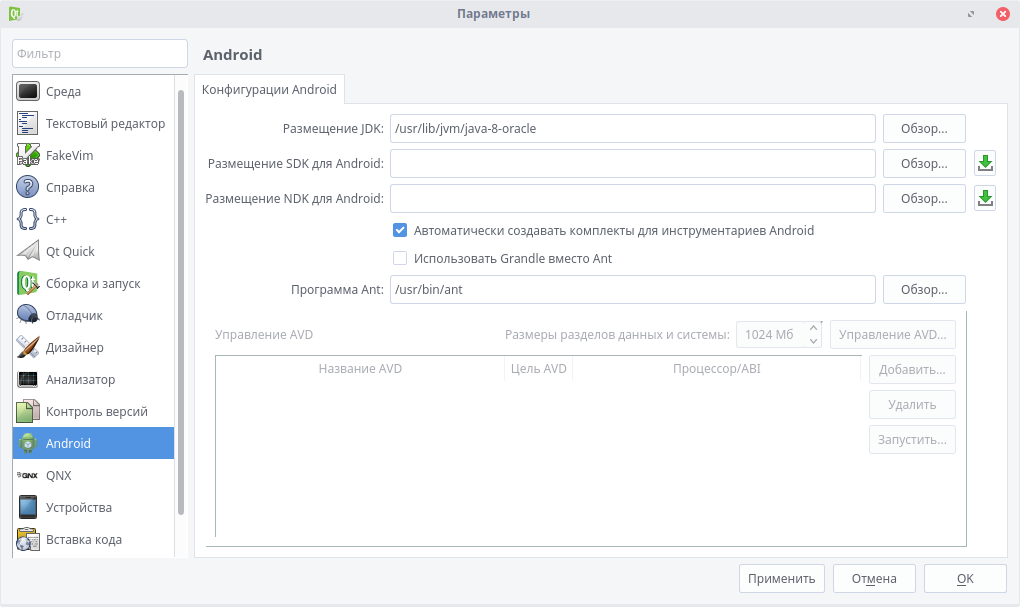
4. Android — здесь собраны пути к необходимым инструментам, а также в этом меню настраиваются подключаемые или виртуальные устройства.
Установка компонентов Qt Creator
Если вдруг так случилось, что Вы забыли установить какой-то компонент, или, наоборот, хотите его удалить, то на помощь придет Qt Maintenance Tool. Это инструмент, позволяющий управлять всеми компонентами Qt Creator.
Чтобы запустить его, перейдите в меню приложений, выберите пункт «Разработка» -> «Qt Maintenance Tool».
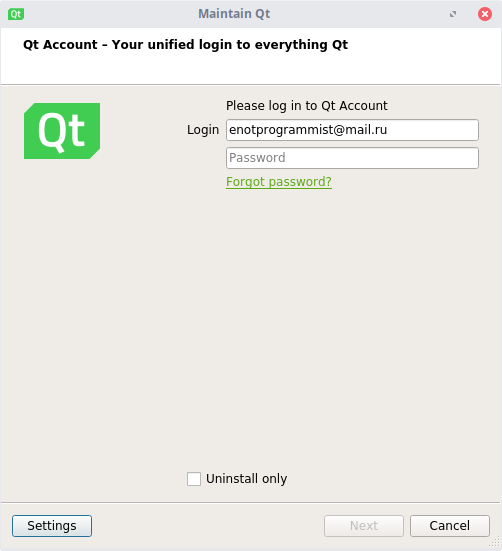
Выберите необходимый пункт (Удалить/добавить компоненты, обновить компоненты или удалить Qt). После выполните необходимые операции и закройте окно.
Работа с Qt Creator — первый проект
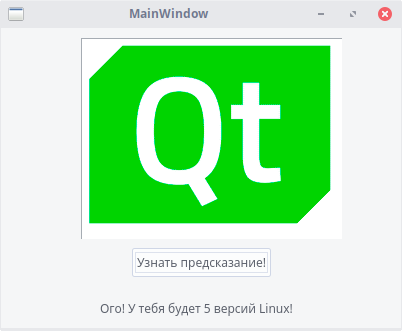
Ну что же, час пробил! Установка Qt Creator завершена. Пора сделать свое первое кроссплатформенное приложение на Linux, а затем скомпилировать его на Windows. Пусть это будет. программа, выводящая иконку Qt, кнопку и надпись, на которую по нажатию кнопки будет выводиться случайная фраза. Проект несложный, и, конечно же, кроссплатформенный!
Для начала откроем среду разработки. Нажмем «Файл» -> «Создать файл или проект. «. Выберем приложение Qt Widgets — его быстро и удобно сделать. А название ему — «Cross-Platphorm». Вот как!
Комплект — по умолчанию. Главное окно тоже оставляем без изменений. Создаем проект.
Для начала необходимо настроить форму — главное окно приложения. По умолчанию оно пустое, но это не останется надолго.
Перейдем в папку «Формы» -> «mainwindow.ui». Откроется окно Qt Designer:

Удаляем панель меню и панель инструментов на форму, нажав правой кнопкой мыши и выбрав соответствующий пункт. Теперь перетаскиваем элементы Graphics View, Push Button и Label таким образом:
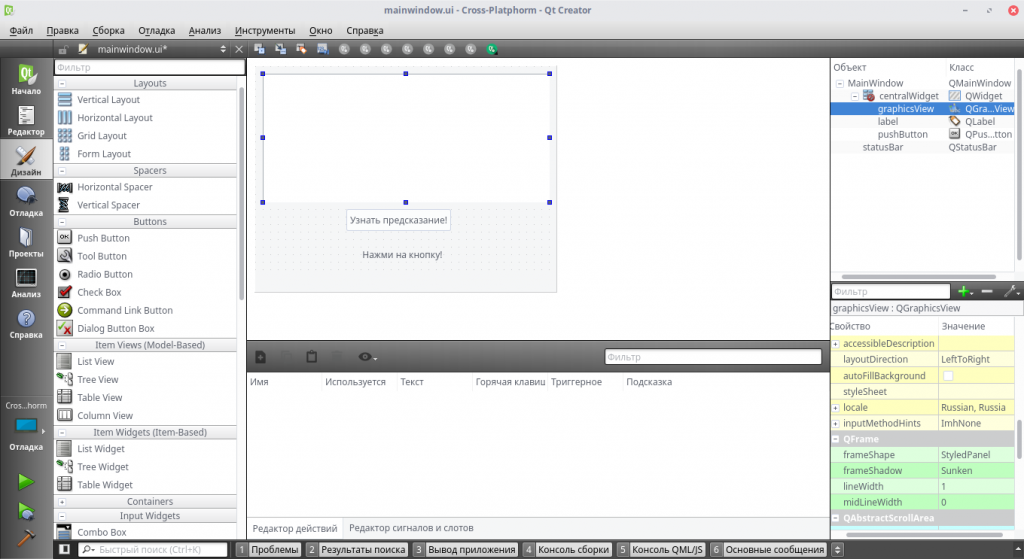
Чтобы изменить текст, дважды кликните по элементу. В свойствах Label (справа) выбираем расположение текста по вертикали и по горизонтали — вертикальное.
Теперь пора разобраться с выводом иконки. Перейдем в редактор, слева кликнем по любой папке правой кнопкой мыши и выберем «Добавить новый. «. Теперь нажимаем «Qt» -> «Qt Resource File». Имя — res. В открывшемся окне нажимаем «Добавить» -> «Добавить префикс», а после добавления — «Добавить файлы». Выбираем файл, а в появившемся окне «Неверное размещение файла» кликаем «Копировать».
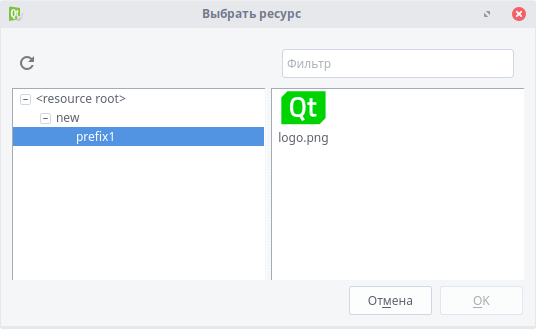
Получилось! Сохраняем все. Снова открываем форму. Кликаем правой кнопкой мыши по Graphics View, выбираем «styleSheet. » -> «Добавить ресурс» -> «background-image». В левой части появившегося окна выбираем prefix1, а в правой — нашу картинку. Нажимаем «ОК». Настраиваем длину и ширину.
Все! Теперь можно приступать к коду. Клик правой кнопкой мыши по кнопке открывает контекстное меню, теперь надо нажать «Перейти к слоту. » -> «clicked()». В окне набираем следующий код:
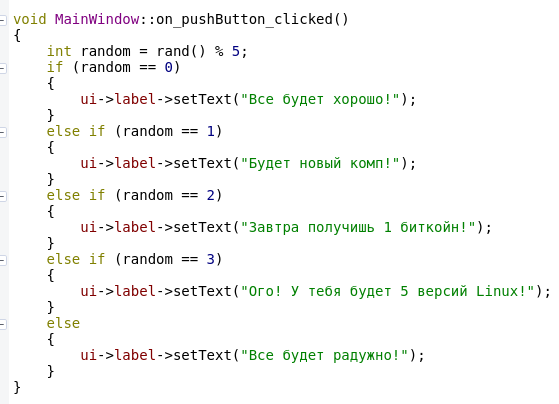
Или вы можете скачать полный проект на GitHub. Работа с Qt Creator завершена, нажимаем на значок зеленой стрелки слева, и ждем запуска программы (если стрелка серая, сначала нажмите на значок молотка). Запустилось! Ура!
Выводы
Установка и настройка Qt Creator завершена. Теперь вы сможете создавать свои программы под огромное число платформ, оставляя код нетронутым! Кстати, установив Qt на Windows, вы сможете скомпилировать этот проект и там. Удачи вам!
Qt Documentation
Contents
This guide shows how to get started developing with Qt.
Get and install Qt
The installation process is straightforward. The Qt Online Installer gives you the choice of installing only the modules and tools you need.
1. Create a Qt Account
To begin, create a Qt Account. This account gives you access to a web portal to manage your licenses and access to the forums and wikis. Also, make sure you read the Qt Licensing page regarding your chosen license.
2. Download the Installer
Download the installer from the Downloads page. With the Qt Online Installer, you can install both commercial or open source versions of Qt, development tools, and other components. The online installer requires your Qt Account. The installer retrieves the license attached to the account from a server and provides a list of available components corresponding to the license.
3. Install Qt
To complete the installation, select the components that you want to install and follow the instructions of the installation program.
The following YouTube video gives a complete walk-through of the installation process:

Updating or Removing Components
Once Qt is installed, you can use the Maintenance Tool under to add components, update, or remove installed components.
Create Your First Applications
Learn the basics of Qt and Qt Quick development by following the two tutorials below that illustrate how to create simple applications and build and run them on target platforms:
Qt Widgets provides a library of UI elements which allow you to create classic desktop-style user interfaces. Qt Quick is a library providing types and functionalities for building modern, fluid, animated UIs.
For a more thorough walkthrough of the different aspects of developing applications with Qt, see the QML Book. It focuses on Qt Quick, but also provides the information needed to use QML together with C++.
Explore Qt
We invite you to explore the rest of Qt. We prepared overviews which help you decide which APIs to use and our examples demonstrate how to use them.
To view a list of all Qt examples, visit the List of Qt Examples page.
Setting Up Projects
Developing with Qt Creator
Platform Requirements
There are pecific requirements and instructions for developing applications on different platforms are covered in the platform pages.
For more information, visit the supported platforms page.
Reference Documentation
- Qt Overviews — list of topics about application development
- Examples and Tutorials — code samples and tutorials
- Qt Reference Pages — a listing of C++ and QML APIs
Participate in the Qt Community
Qt’s vibrant and active community site http://qt.io, houses a wiki, a forum, and additional learning guides and presentations.
В© 2021 The Qt Company Ltd. Documentation contributions included herein are the copyrights of their respective owners. The documentation provided herein is licensed under the terms of the GNU Free Documentation License version 1.3 as published by the Free Software Foundation. Qt and respective logos are trademarks of The Qt Company Ltd. in Finland and/or other countries worldwide. All other trademarks are property of their respective owners.


