- Текущие плагины и программы для Mozilla Firefox ® и др.
- Главное меню
- Ссылки на ресурсы
- Навигация по сайту
- Мультимедийный проигрыватель Apple QuickTime Player 7.х.x.
- QuickTime Player поддерживает следующие форматы для проигрывания:
- QuickTime Plug-in.
- Основные сведения о проигрывателе Apple QuickTime.
- Основные возможности Apple QuickTime Player :
- QuickTime Plugin for Chrome/Firefox/Internet Explorer (IE)
- Contents
- Part 1: QuickTime Plugin for Google Chrome
- Download QuickTime plugin for Chrome
- How to enable or disable the QuickTime plugin on Chrome
- Part 2: QuickTime Plugin for Firefox
- Download QuickTime plugin for Firefox
- Enable or Disable QuickTime plugin for Firefox
- Configure the QuickTime Plugin for Firefox
- Part 3: QuickTime Plugin for Internet Explorer (IE)
- Download QuickTime plugin for IE (Internet Explorer)
- Enable or disable Internet Explorer QuickTime plugin
Текущие плагины и программы для Mozilla Firefox ® и др.
Главное меню
Ссылки на ресурсы
Навигация по сайту
| Мультимедийные плагины QuickTime Player. |
| Pale Moon и Firefox. Плагины для браузера. — Плагины для Firefox, Opera, Safari, Chrome, IE | |
Мультимедийный проигрыватель Apple QuickTime Player 7.х.x.Медийный проигрыватель видео, аудио, панорам и 3D-объктов (QTVR) Apple QuickTime Player При инсталляции, программа QuickTime устанавливает для веб-браузера (ОС Mac и Windows) модули (плагины), позволяющие на текущей веб-странице просматривать медийный контент, в том числе и потоковое видео. Программа QuickTime Player многоязычная, имеет русский интерфейс. Лицензия — коммерческая (QuickTime Pro) и бесплатная. QuickTime Player поддерживает следующие форматы для проигрывания:Видео файлы: MOV, MPEG-1, MPEG-2, 1 MPEG-4, 3GPP, 3GPP2, JPEG, DV, видео JPEG, AVI, MQV, H.264 Аудио форматы: AIFF/AIFC, Audio CD, CAF, MOV, MP3, MPEG-4, AU, WAV, iTunes аудио Графические: BMP, GIF, JPEG/JFIF, JPEG 2000, PDF, MacPaint, PICT, PNG, Photoshop (включая слои), SGI, Targa, FlashPix (включая слои), TIFF (включая слои). Примечание. Слои будут видны, если файл был сохранен в режиме совместимости файлов. Другие форматы: GIF, FLC, Flash, PICS,: KAR (караоке), MIDI, QuickDraw GX, QuickTime Image File, QuickTime VR, Текст. QuickTime Plug-in.Текущие плагины QuickTime Plug-in — предназначены для просмотра видео высокой четкости в популярных браузерах. Рис.1 Проигрыватель Apple QuickTime Player.
Все плагины, по умолчанию, устанавливаются в папку: C:\Program Files\QuickTime\Plugins\ Таблица устанавливаемых плагинов QuickTime Plug-in для Mozilla Firefox (Windows) и соответствие расширений файлов для этих модулей (QuickTime версий 7.7.х, установки по умолчанию). | |
| npqtplugin7.dll | jp2 |
| npqtplugin6.dll | m4v, pntg, pnt, mac, pict, pic, pct, qtif, qti, sgi, rgb, targa, tga |
| npqtplugin5.dll | 3gp, 3gpp, 3g2, 3gp2, sdv, amc, mp4, m4a, m4p, m4b |
| npqtplugin4.dll | mpeg, mpg ,m1s, m1v, m1a, m75, m15, mp2, mpm, mpv, mpa, 3gp, 3gpp |
| npqtplugin3.dll | gsm, amr, aac, adts, caf, ac3, mpeg, mpg, m1s, m1v, m1a, m75, m15, mp2, mpm, mpv, mpa |
| npqtplugin2.dll | aiff, aif, aifc, cdda, au, snd, ulw, mid, midi, smf, kar, qcp |
| npqtplugin.dll | sdp, rtsp, rts, mov, qt, mqv, flc, fli, cel, wav, bwf |

Данные MIME-типов прописываются в файл профиля Mozilla Firefox (Pale Moon) — «mimeTypes.rdf».
Более подробную информацию об установленных текущих плагинах, можно всегда посмотреть на странице браузера Firefox (Pale Moon) — about:plugins
Проверить актуальность текущих установленных версий плагинов, в том числе и QuickTime Plug-in, Вы можете на странице: Cервис Mozilla
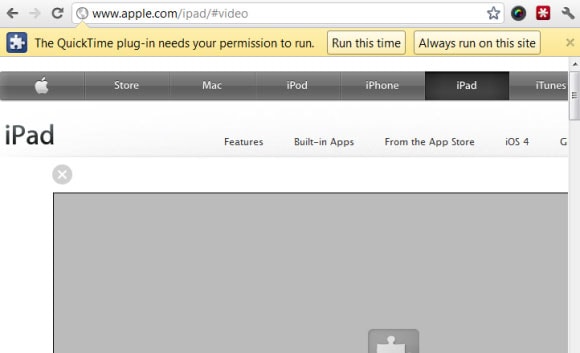
Проверить возможность веб-браузера проигрывать в плеере QuickTime, можно на официальной странице: http://www.apple.com/support/quicktime/
Если на тестовой странице под надписью «QuickTime«, вы увидели логотип проигрывателя, то у вас все в порядке, если логотип анимирован — ещё лучше, Ваша система поддерживает потоковое видео.
Основные сведения о проигрывателе Apple QuickTime.
Бесплатная версия проигрывателя QuickTime функционально ограничена по сравнению с коммерческой версией QuickTime Pro, но тем не менее, всё необходимое в плеере для просмотра медиа-форматов: видео, аудио и растровых изображений присутствует.
Установка программы стандартная, осуществляется запуском на выполнение файла QuickTimeInstaller.exe.
После окончания инсталляции программы, будет предложено изменить настройки установленные по умолчанию.
Если есть необходимость изменить ассоциации файлов с программой QuickTime, то нажав на «Конфигурация файлов и MIME-типов«, Вы попадете в настройки, где определитесь с форматами файлов, которые будут открываться именно этой программой.
Для настройки ассоциации онлайн-файлов для Firefox, откройте вкладку MIME-типы и введите необходимые изменения.
В дальнейшем, после установки программы, Вы можете настроить проигрыватель по своему усмотрению, перейдя в «Панель управления» (Windows) и запустив при помощи ярлыка «QuickTime» программу настройки, а на вкладке «Браузер» настроить проигрывание онлайн — медиа в браузере перейдя в п. «MIME — настройки. «
Рис.2 Дополнительная настройка QuickTime

Минимальные требования к компьютеру
- Процессор класса Intel Pentium 233 МГц и и выше
- Не менее 128 МБ ОЗУ.
- Windows XP (SP2 и выше), Windows Vista, Windows 7, Windows 8.
Основные возможности Apple QuickTime Player :
- Поддержка видео в формате H.264.
- Изменение размера окна во время воспроизведения.
- Автоопределение и регулировка оптимальной скорости интернет-соединения.
- Воспроизведение объёмного звука (аудио по 24 каналам).
- Настройки — контроллер Jog-shuttle, скорость воспроизведения, бас, высокие звуковые частоты и баланс.
- Плавающие элементы управления — пауза, воспроизведение, ускоренная перемотка вперед и назад.
- Просмотр панорам и 3D- изображений формата QTVR (QuickTime Virtual Reality).
Проигрыватель QuickTime имеет стандартную панель управления при просмотре видео, аудио или графических файлов.
Рис.3 Вид Apple QuickTime при просмотре графического файла.

Для просмотра графических файлов, Apple QuickTime устанавливает просмотровщик Apple PictureViewer, хотя проигрыватель Apple QuickTime, спокойно загружает для просмотра графику.
Никаких функций в Apple PictureViewer кроме, как открыть файл, распечатать, скопировать изображение в буфер обмена, повернуть или отразить, программа не имеет.
Рис.4 Просмотр графических файлов Apple PictureViewer.

В меню проигрывателя, пункты которые присутствуют в коммерческой версии, маркированы значком PRO и в бесплатной не работают.
Рис.5 Меню «Правка» плеера Apple QuickTime.

Настройки плеера находятся в меню «Правка» — » Настройки». Здесь можно определить функции проигрывания видео и аудио файлов.
Рис.6 Меню «Настройки» для плеера Apple QuickTime.

Примечание. Не устанавливайте совместно QuickTime Lite и программу iTunes.
Текущая версия Apple QuickTime Player для загрузки на официальном сайте — apple.com
На официальном сайте Apple (http://www.apple.com/itunes/download/), можно также скачать бесплатный медийный проигрыватель видео, аудио, Е-книг — iTunes под Windows /XP/ Vista/ 7/ 8 и Mac с поддержкой популярных цифровых устройств.
Вся подробная документация, находится на сайте корпорации по адресу: http://www.apple.com/ru/support/
Статья подготовлена с использованием материалов Apple и Mozilla
QuickTime Plugin for Chrome/Firefox/Internet Explorer (IE)
Contents
One of the most prominent media players, QuickTime has quickly become quite famous for its ease of use and the functionality that it provides. Simply put, QuickTime is a media player that was created by Apple and allows users to play back audio and video. The program has become quite popular, and plugins are also available, which can be installed on your browser and can be used accordingly. In case there are any videos on a web page that have been embedded with the QuickTime format, the program can be used accordingly in order to run those videos. Usually, QuickTime comes installed on all Mac computers, while those who are using Windows computers can download and install the plugins for their respective browsers. Here’s a brief guide on how to install and use QuickTime Plugin for the three major browsers in use today: Mozilla Firefox, Google Chrome and Internet Explorer.
Part 1: QuickTime Plugin for Google Chrome
Download QuickTime plugin for Chrome
1. The first step you need to take is to visit the official website of the Apple QuickTime Player and download the installer file from there.
2. Once the installer file has been downloaded, just click on the downloaded file, which will be showing at the horizontal download bar at the bottom of your browser.
3. Just follow the instructions on screen in order to finish the installation. Once the installation has been completed, you need to shut off Chrome and restart it in order to finish the installation.
How to enable or disable the QuickTime plugin on Chrome
In order to enable or disable the QuickTime Plugin for Google Chrome, the process is actually quite simple. By default, the plugin is enabled in Google Chrome, which means all videos compatible with the QuickTime format will play automatically. If you wish to disable it however, just write the following content in your address bar (you can choose either of them):
* chrome://plugins (or chrome:plugins)
* about://plugins (or about:plugins)
Then browse down till you find ‘QuickTime’. You will see a button alongside it. If you wish to disable the program, just press ‘Disable’. If you wish to re- enable the plugin, just press ‘Enable’.

Tips: Configure the QuickTime Plugin for Google Chrome
You can configure the QuickTime Plugin for your Google Chrome browser to a certain extent only. Since Google Chrome has a preset number of guidelines, you can’t individually decide whether the QuickTime Plugin will be able to run with a certain number of file types or not. Instead, you only have the flexibility of enabling or disabling the plugin at your behest.
Part 2: QuickTime Plugin for Firefox
Download QuickTime plugin for Firefox
The first thing that you need to do is to install QuickTime plugin for Firefox. In order to do that, you need to visit the official Apple QuickTime website and download the QuickTime installer file from there. Once the download has completed, you need to shut off Firefox. Then, browse over to the file you just downloaded, and run it, which will initiate the installation for the QuickTime plugin.
Enable or Disable QuickTime plugin for Firefox
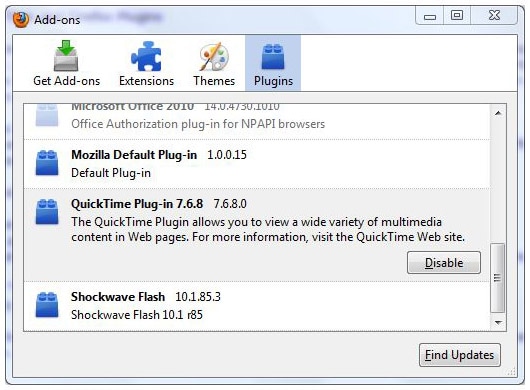
In order to enable or disable the QuickTime Plugin for Mozilla Firefox, the first thing you need to do is to click on the «Firefox» button on the right-top of the window, and then select «Add-ons». Find the «Plugins» from the Add-ons Manager, and then you can enable or disable the plugin now.
Configure the QuickTime Plugin for Firefox
In order to use or configure the QuickTime plugin according to your needs, there are a number of things that you can do. First of all, you can put a check on the types of media files that the plugin can be configured to use. For instance, when you click a download link for a media file which can be handled directly by the QuickTime plugin, it will automatically open the file using the plugin. You can alter those settings. The Firefox QuickTime plugin can also be altered to select which types of files open with the plugin and which are ignored by the plugin.
Troubleshooting
If you find that the Firefox QuickTime plugin is not working, you need to first make sure that all the files are available. To check that, the best way is to first delete the plugin and re- install it. Often times, an incomplete installation might be the reason. If your installation is proper, try enabling or disabling the plugin and restarting Firefox.
Part 3: QuickTime Plugin for Internet Explorer (IE)
Download QuickTime plugin for IE (Internet Explorer)
1. If you wish to install the QuickTime Plug in for Internet Explorer, the first step you need to take is to download the QuickTime Installer file using Internet Explorer. Fire up a new window, and open the official Apple QuickTime page, from where you can get the installer file. You will then get a message which will ask you whether you wish to ‘run or save the file?’.
2. I suggest you choose ‘Run’. Wait until the download is completed, after which a new dialog box will open up with two buttons; Run and Don’t Run. Choose the former.
3. Follow the on screen instructions in order to complete the download of the QuickTime installer. This will also install the QuickTime Plugin for your Internet Explorer.

Enable or disable Internet Explorer QuickTime plugin
— If you wish to enable or disable the QuickTime Plugin for Internet Explorer, there’s a very simple way to do so. Open up your Internet Explorer, and click on the small gear button located on the top right. A drop down menu will open, from where you need to click on ‘Manage Add Ons’.
— A new window will open up, which will include details of all the plugins and extensions that have been downloaded and are operable with Internet Explorer. Browse through the list until you find the QuickTime Plugin. You can then right click on it in order to enable or disable it as per your wishes.
Tips: Unfortunately, you can’t configure the QuickTime Plugin for Internet Explorer to work with certain file types. You can only enable or disable it.
Troubleshooting
To test the plugin, first open a new window:
* Find the QuickTime Sample movie (found in the QuickTime folder), and keep both windows adjacent.
* Drag the video to the browser video.
Then, a new window shall open up and the video shall start to play. If nothing plays, then you need to recopy the files in to the browser’s folders in order to make sure all files are in the right place.


