- Хочу играть на маке! Красивое решение всех проблем
- Review: $399 Razer Core X Chroma — a ‘light’ upgrade for the Mac’s best eGPU [Video]
- What’s new with Razer Core X Chroma
- About Gigabit Ethernet
- Razer Core X Chroma eGPU video walkthrough
- Chroma RGB Lighting
- Specifications
- A slightly better Razer Core X
- Internals
- Performance
- Power delivery
- Upgradability
- 9to5Mac’s Take
Хочу играть на маке! Красивое решение всех проблем
Хотите поиграть на маке, но не знаете, как быть с этим? Вариант один — брать внешнюю графику. Благо, хватает современных решений, которые превращают ноутбук в игровую станцию. При этом вы не таскаете с собой громоздкий геймерский ноутбук, но и не приходится жертвовать развлечениями. В общем, удобный вариант и для игроков, и для тех, кому просто нужен более мощный ноутбук, чем обычно: это касается обработки графики или вычислительных задач.
Рассмотрим это дело на примере Razer Core. Почему именно такая игровая станция? Кроме более производительной видео системы ещё и получаем набор из дополнительных разъемов: 4 USB-порта, Ethernet и зарядка для макбука впридачу. Плюс она хорошо выглядит и достаточно легко настраивается!
[creativ_media type=»youtube» url=»https://www.youtube.com/watch?v=DndRuTHUb60″]
Какую графику выбрать? Тут вы решаете сами, потому что в корпус Razer Core ставите карту по своему желанию, опыт показывает, что практичнее установить решение NVIDIA. Правда, пока у карт 1000-у серии проблемы с драйверами, приходится ограничиться GTX 980 Ti, она хорошо сбалансирована по цене и качеству.
Для работы такой связки нужен макбук с macOS или с Windows, установленной через boot camp. С macOS все просто, установка графики под Windows будет чуть сложнее. Вот более подробная инструкция для установки.
Как это сделать на macOS?
- в данных о системе увидите «Core — Unsupported» в разделе System Information > Hardware > Thunderbolt
- запускаете скрипт TB3-enabler и перезагружаетесь
- исчезает уведомление о том, что Core не поддерживается
- запускаете скрипт automate-eGPU для установки драйверов NVIDIA
- выбираете автоматический режим
- перезагружаетесь, видео карта должна заработать
Примечание: вы должны подключить Core к макбуку, пока работает macOS, а перезагружать, не отключать Core.
Как это сделать на Windows?
- через Диспетчер устройств проверить, определяет ли система Core
- установить Razer Synapse для изменения настроек
- установить драйвера карты с сайта NVIDIA для вашей графики
- проверить в Диспетчере устройств нет ли ошибок. Например, error-12 свидетельствует о том, что есть проблемы с работоспособностью. Судя по всему, это возникает, когда у видеокарты больше 4 ГБ оперативной памяти, поэтому нужна 64-битная, а не 32-битная система
- для решения проблемы необходимо отредактировать DSDT
- всё должно заработать после перезагрузки
Решение проблемы с памятью, способ взять на eGPU.io:
- качаете DSDT Editor
- запускаете DSDT Editor.bat
- File > Extract DSDT после этого ждёте
- листаете до тех пор, пока не найдёте DWordMemory, это 32bit
- после последнего DWordMemory добавляете QWordMemory, вот это уже 64bit QWordMemory (ResourceProducer, PosDecode, MinFixed, MaxFixed, Cacheable, ReadWrite, 0x0000000000000000, // Granularity 0x0000000C20000000, // Range Minimum, set it to 48.5GB 0x0000000E0FFFFFFF, // Range Maximum, set it to 56.25GB 0x0000000000000000, // Translation Offset 0x00000001F0000000, // Length calculated by Range Max — Range Min. ,, , AddressRangeMemory, TypeStatic)
- IASL > Compile
- если будут ошибки, возможно, вы допустили опечатки, перепроверяйте указанные данные
- IASL > Сохранить как DSDToverride.aml и File > Сохранить как DSDToverride.dsl
- запускаете командную строку с админскими правами и переходите в загруженную папку
- загружаете новую конфигурацию asl /loadtable DSDToverride.aml
- применяете настройки bcdedit -set TESTSIGNING ON
- перезагружаетесь и проверяете, всё ли в порядке, идёте таким путём: Device Manager > Resources by Connection > Memory
Примечание: вы должны отключить и подключить Core после того, как загрузилась Windows, чтобы система заново определила устройство, используя весь объём памяти.
Возможные неполадки
- если включен режим FileVault, то macOS не загрузится will not load until after logging in and therefore cause screen tearing upon log in
- если закрываете крышку макбука, то система не приостанавливает работу, даже если экран погас, поэтому приходится отключать вручную
- если выдернуть блок Core с графикой, пока работает макбук, это может привести к поломке ноутапривести Unplugging the Core on macOS will crash the MBP
- под Windows могут не работать UBS и Ethernet-порты
В целом, несмотря на баги и некоторые трудности, это очень здорово. Теперь макбук можно превратить в игровую систему. Да, это будет относительно дорого, зато вы получаете универсальный ноутбук, который можно дополнить крупным монитором и графикой на ваш вкус.
Источник
Review: $399 Razer Core X Chroma — a ‘light’ upgrade for the Mac’s best eGPU [Video]
— May. 3rd 2019 11:58 am PT
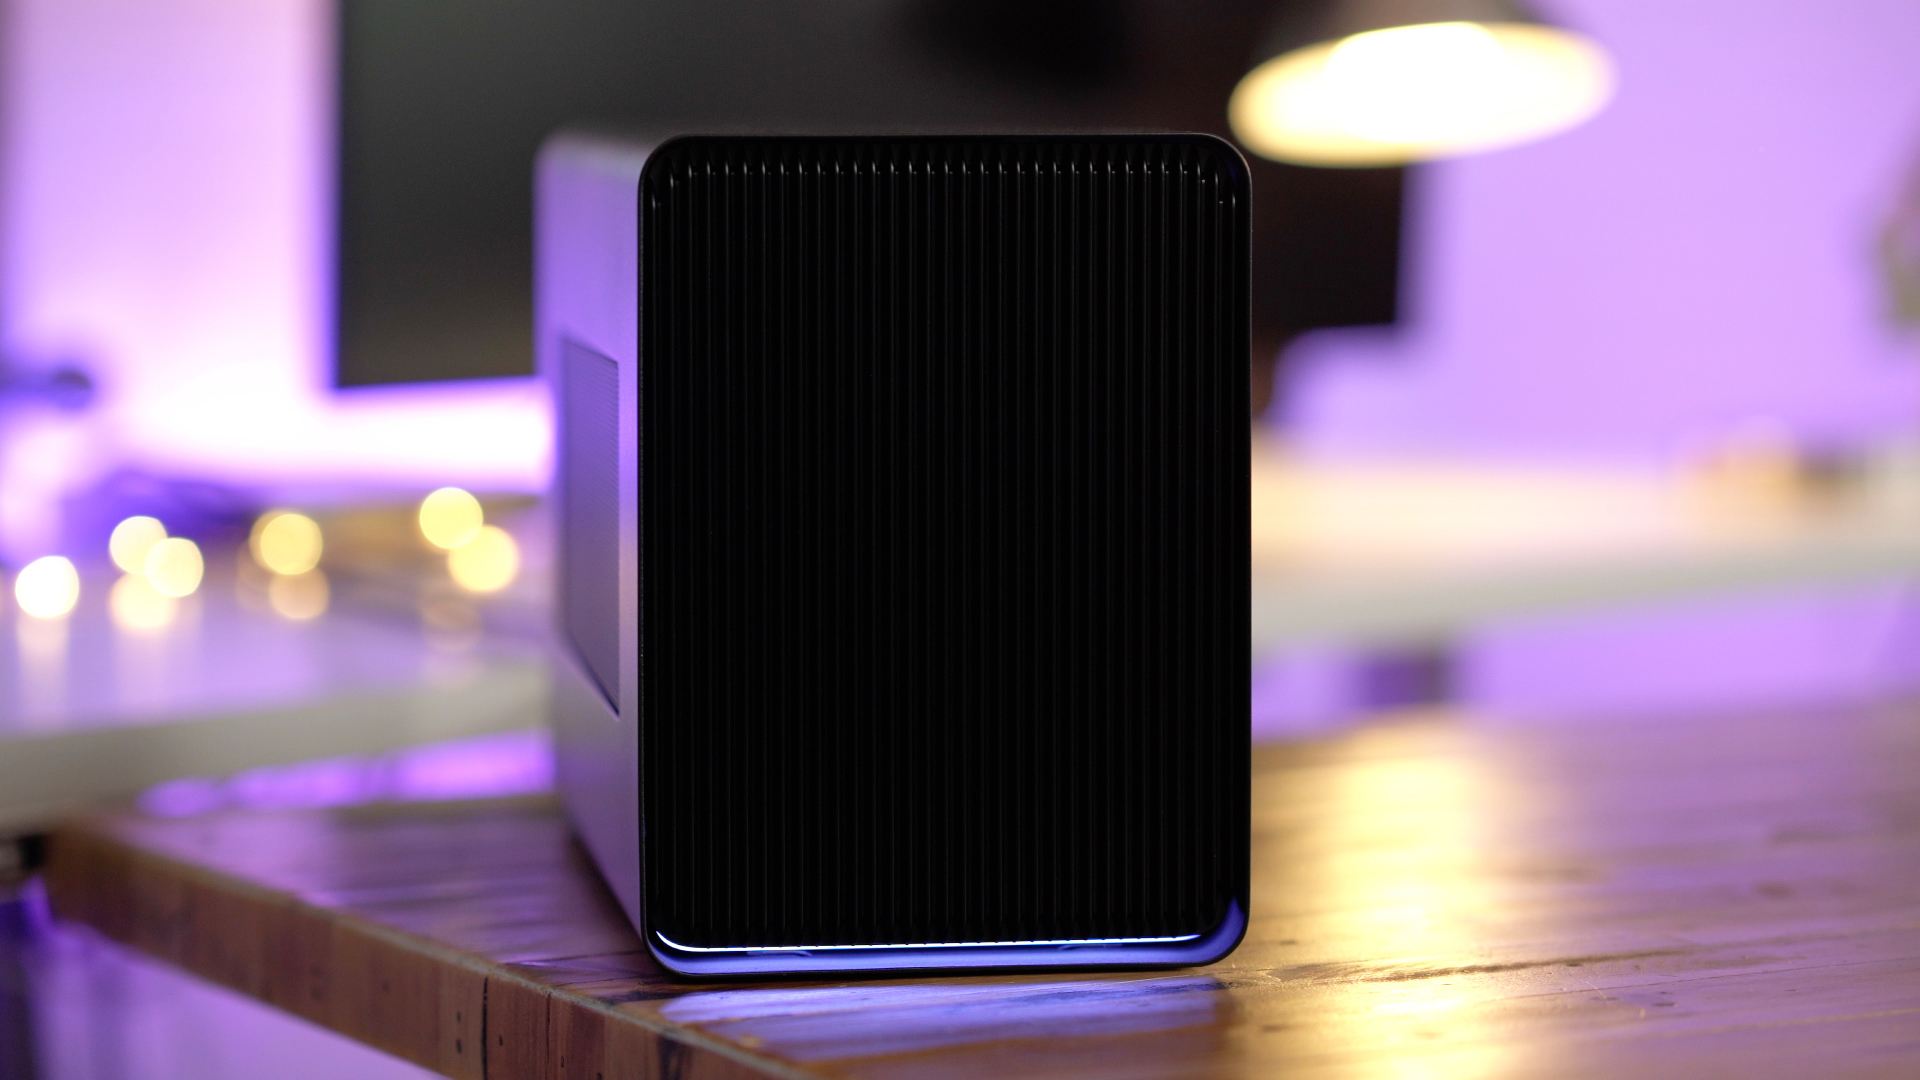
Today we went hands-on with Razer’s new $399 Core X Chroma eGPU enclosure. The Chroma is based closely on the original Razer Core X, but there are several new enhancements, such as RGB lighting, Gigabit Ethernet, and USB ports. Watch our full video walkthrough for the details.
What’s new with Razer Core X Chroma
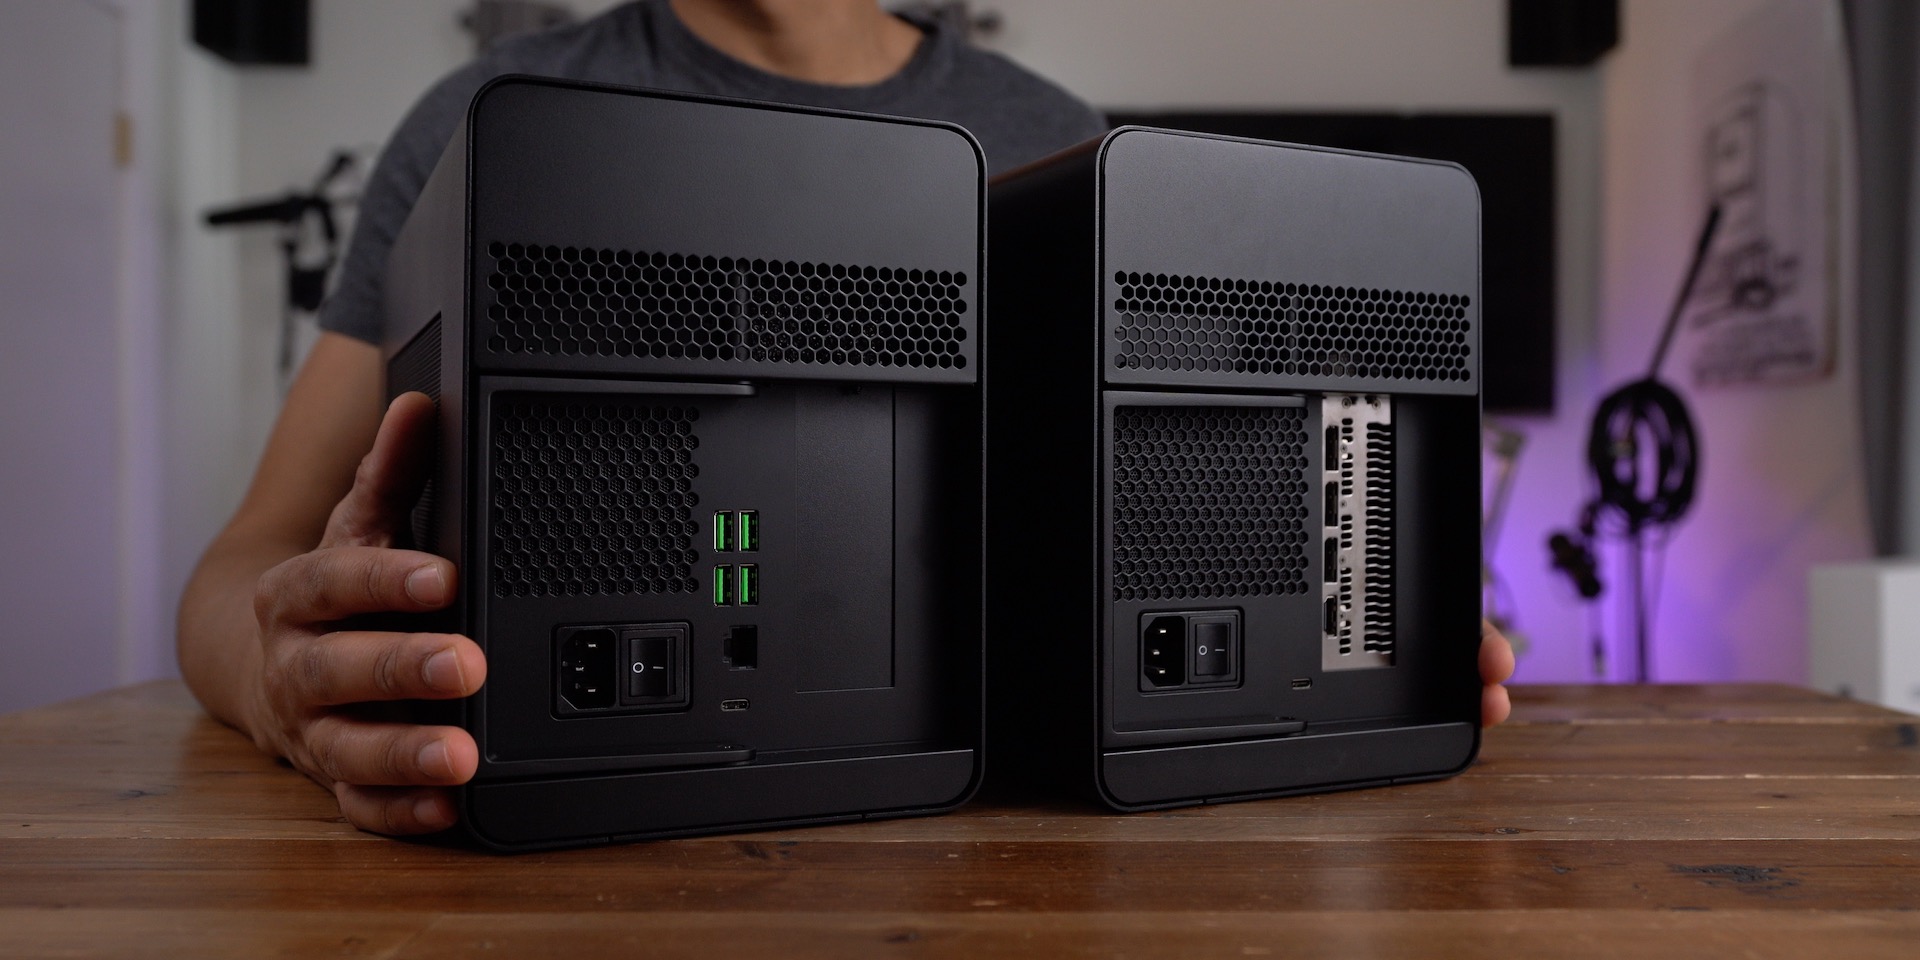
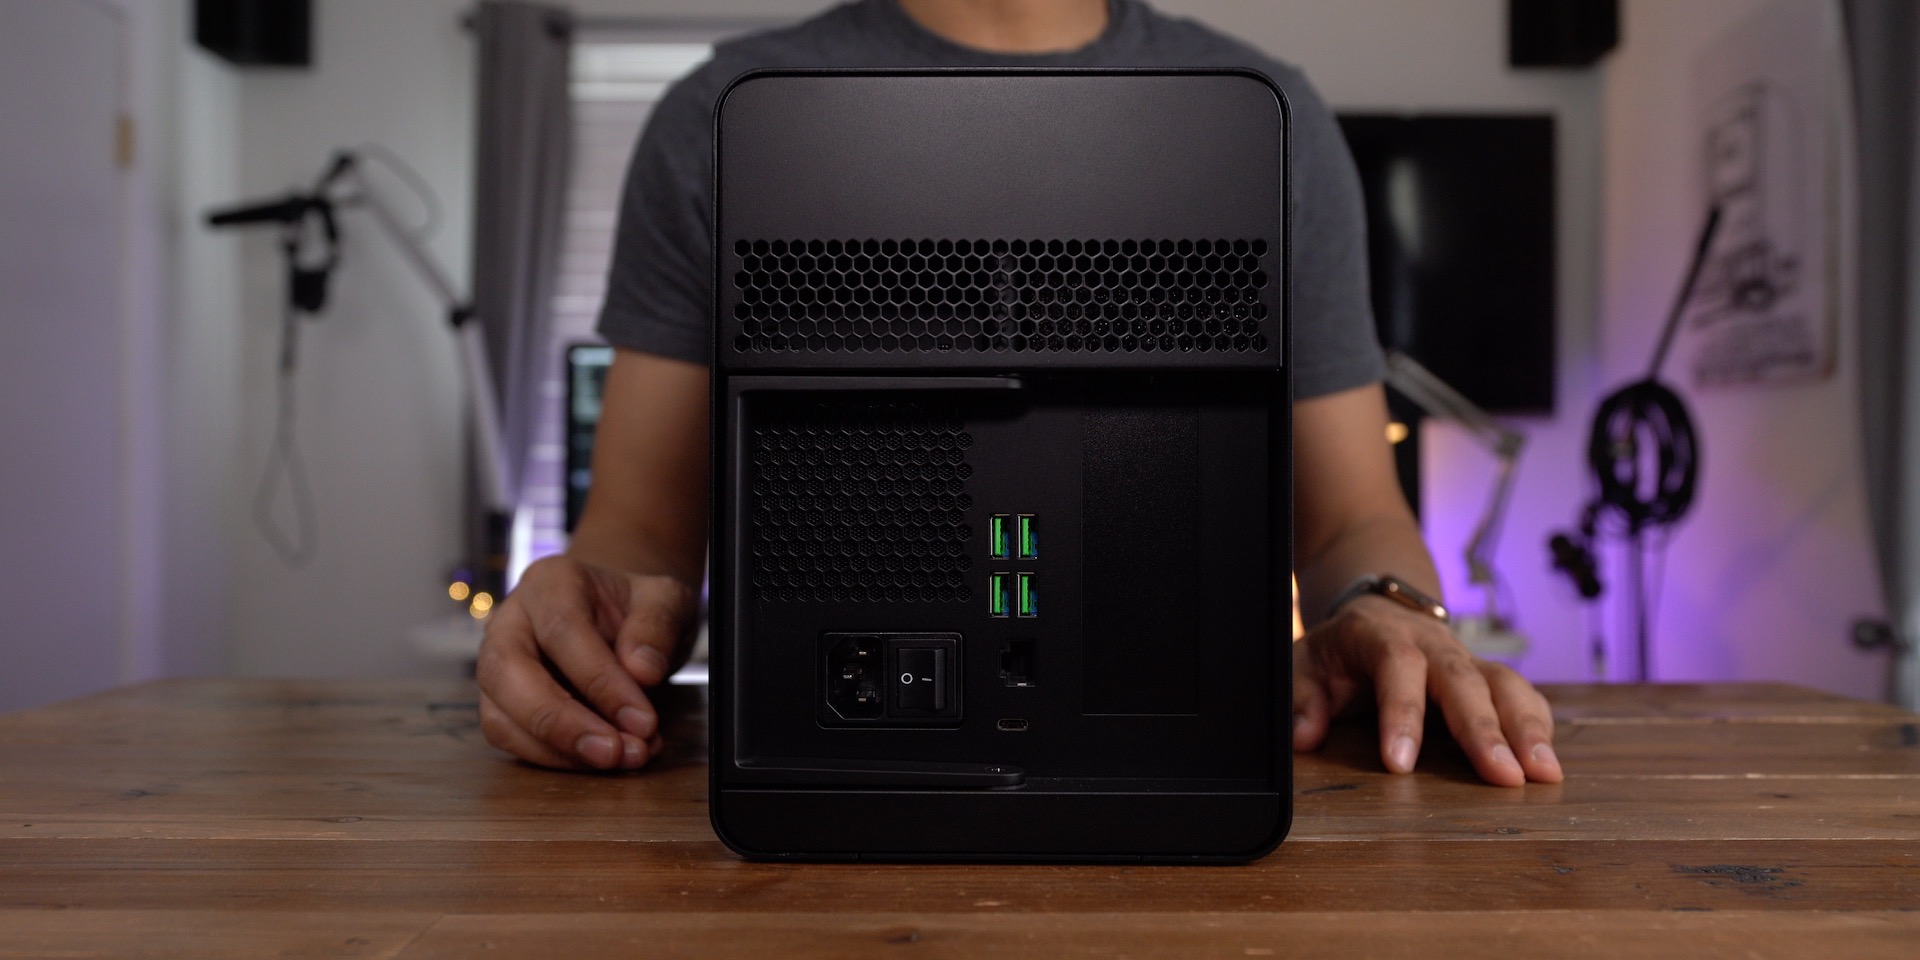
First and foremost, the new Razer Core X Chroma eGPU includes four USB-A ports for connecting external peripherals. There’s also a built-in Gigabit Ethernet port for connecting to a hard-wired network.
The 650W power supply from the original Razer Core X has been upgraded to a 700W power supply on the Razer Core X Chroma, but GPU Max Power support remains at 500W.
About Gigabit Ethernet
I want to note at the outset that I was unable to get Ethernet working when connected to the Razer Core X Chroma. I connected to no less than four different Macs, and could never acquire Ethernet connectivity.
After speaking with Razer representatives, they informed me that it should work as soon as a Thunderbolt 3 connection is established. This indicates that the connectivity problem may be just with my individual unit. I’ll update this post with more details as I work with Razer to get to the bottom of it.
Update: Razer has acknowledged the issue, and provided me with an Ethernet driver for macOS. I installed the driver, and can confirm it now works. Razer says that it will update its support page with a driver download for Mac users.
Razer Core X Chroma eGPU video walkthrough
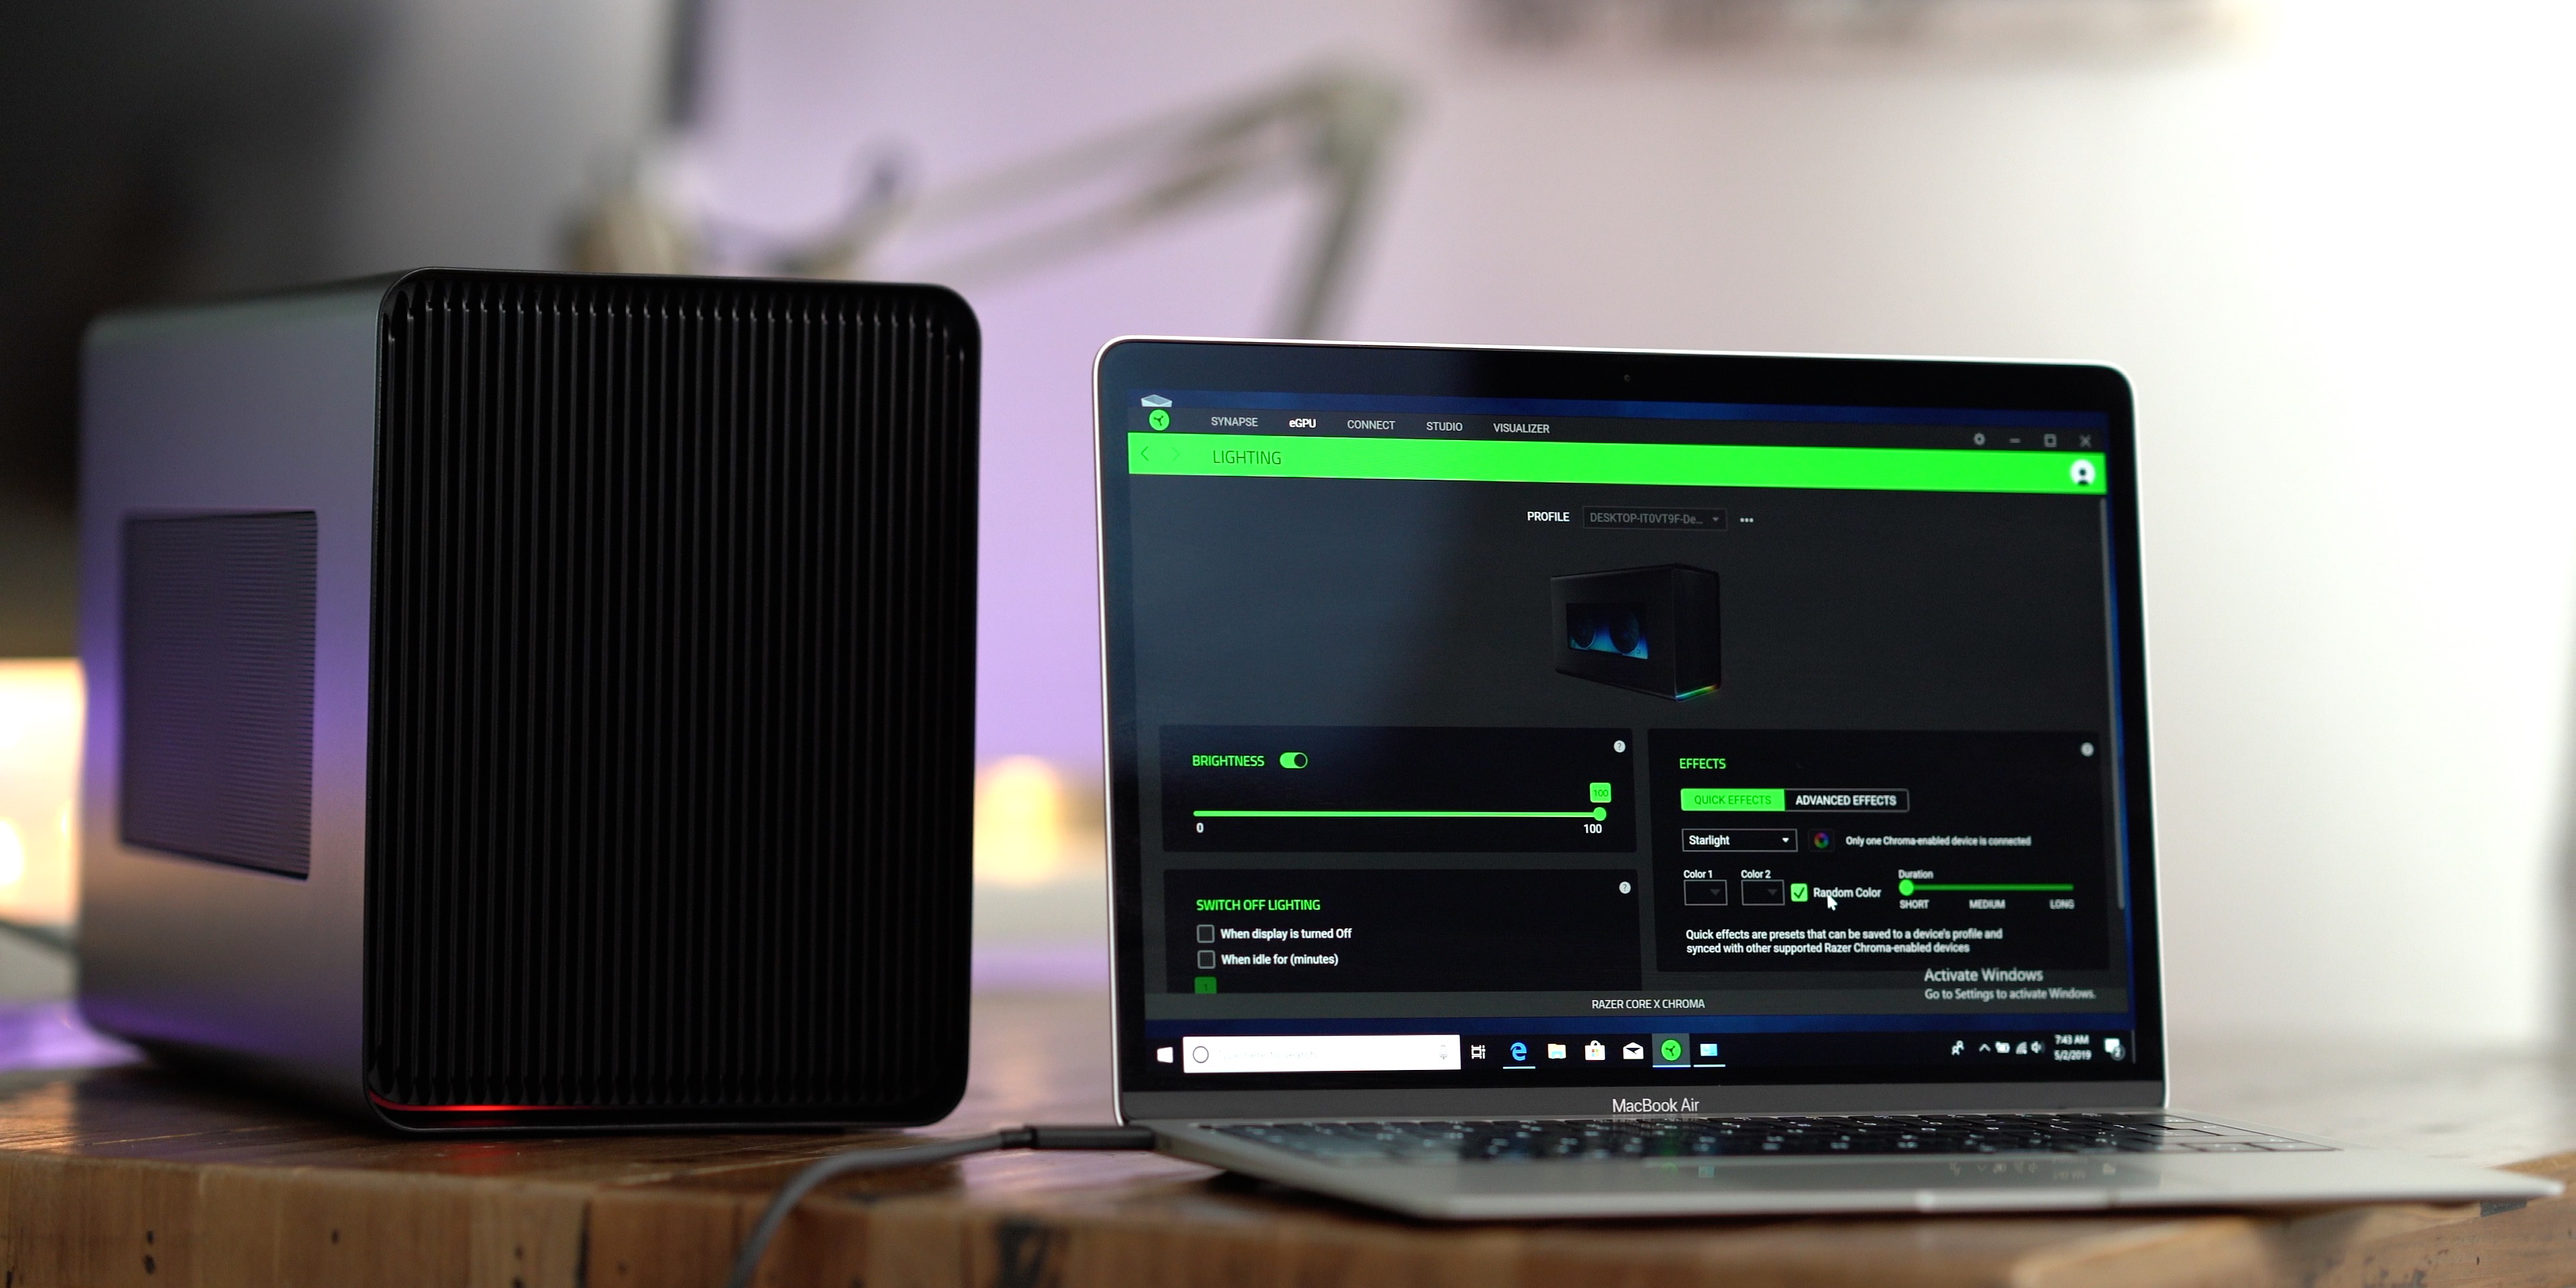
Chroma RGB Lighting
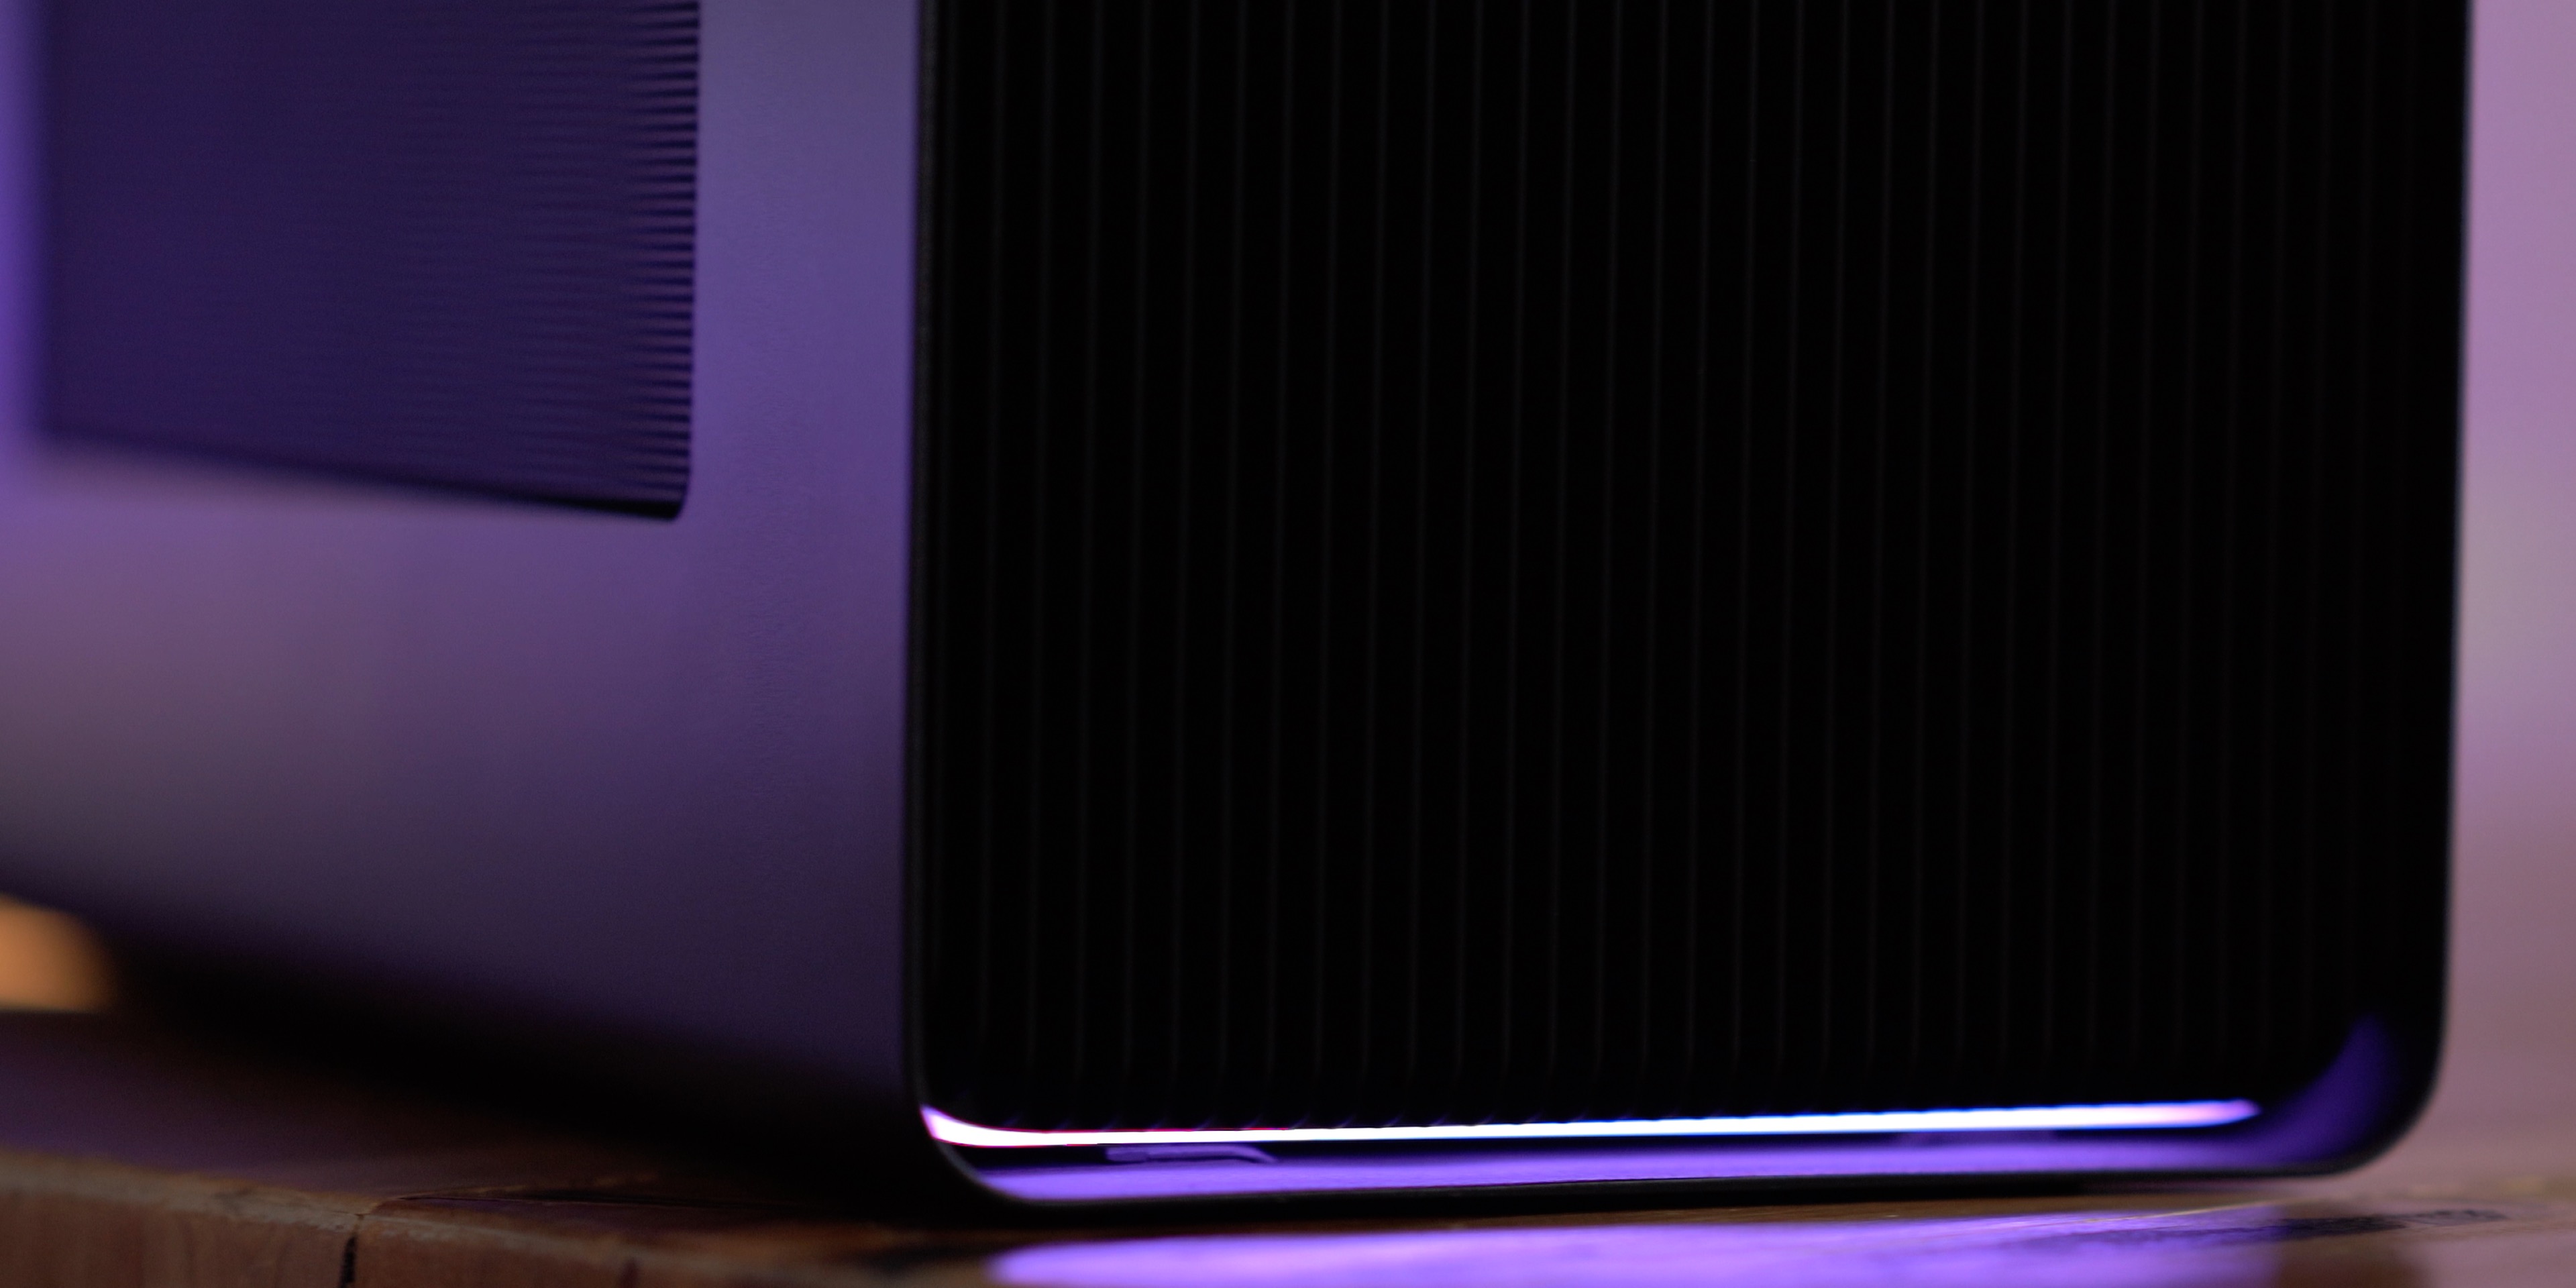
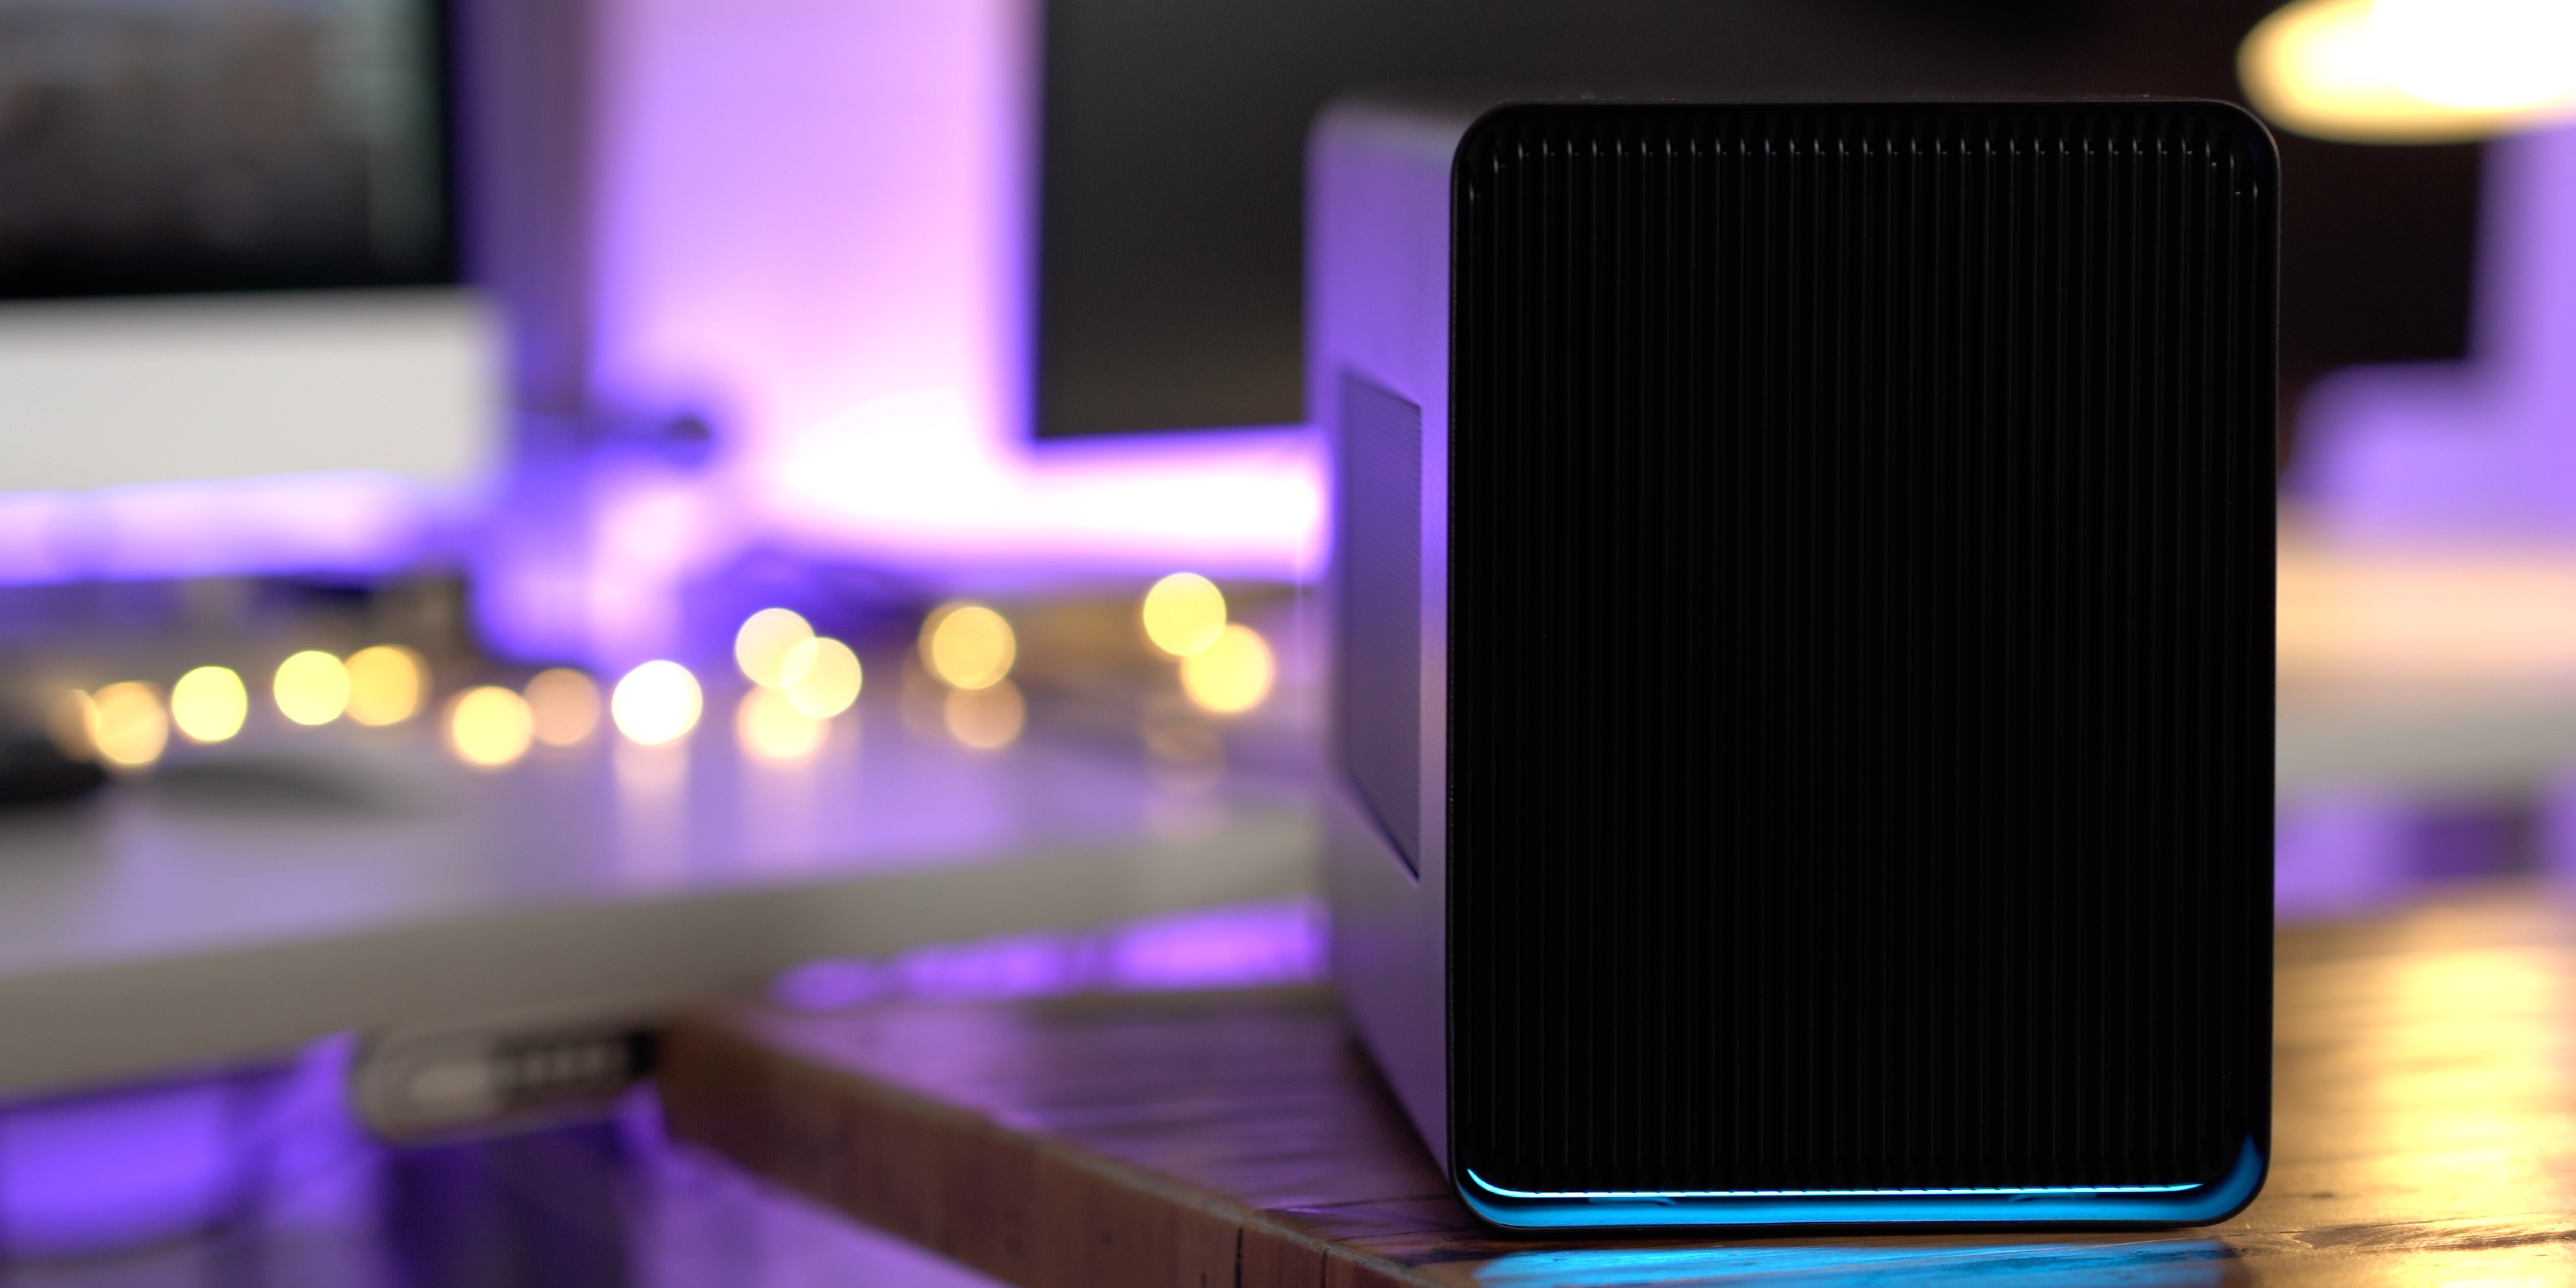
Like other Razer products, the Core X Chroma adds support for RGB underflow and internal lighting. Razer has a lot of experience with RGB lighting and it shows. It’s not just about having lighting, but it’s the way that lighting is presented. The diffusion and reflection techniques that Razer incorporates within its case allows the light to be presented in a soft manner that’s pleasant to look at.
Unfortunately for Mac users, there currently exists no option to configure the lighting, so it remains on the default Spectrum Cycling pattern. Spectrum is a simple pattern that slowly cycles through each color without too much fanfare.
I installed Synapse via a Windows Boot Camp installation, and although I was able to customize the lighting patterns, these customizations appeared to rely on the Synapse software to work and weren’t persistent after disconnecting the eGPU.
Without access to Razer’s Synapse 3 software, which is not supported on macOS, configuration of the lighting for Mac users is not possible at this time. Hopefully Razer will offer a way for Mac users to configure the lighting in the future, since it’s arguably the biggest reason to purchase a Razer Core X Chroma over the original model.
Specifications
- Thunderbolt 3 eGPU
- Compatible with PCI-Express graphics cards
- Up to 3-Slot wide, full-length, PCI-Express x16 graphics card
- 4 X USB 3.1 Type-A
- Gigabit Ethernet
- Razer Chroma RGB Lighting
- Plug and play
- 700W ATX power supply
- 500W GPU power support
- Charges USB-C laptops with up to 100W Power Delivery
- Mac and Windows compatible
- Tool-less design with quick release lever
- Includes power cable and Thunderbolt 3 cable
- Price: $399.99
Outer dimensions
- 6.61-inch / 168 mm (Width) x 14.72-inch / 374 mm (Depth) x 9.06-inch / 230 mm (Height)
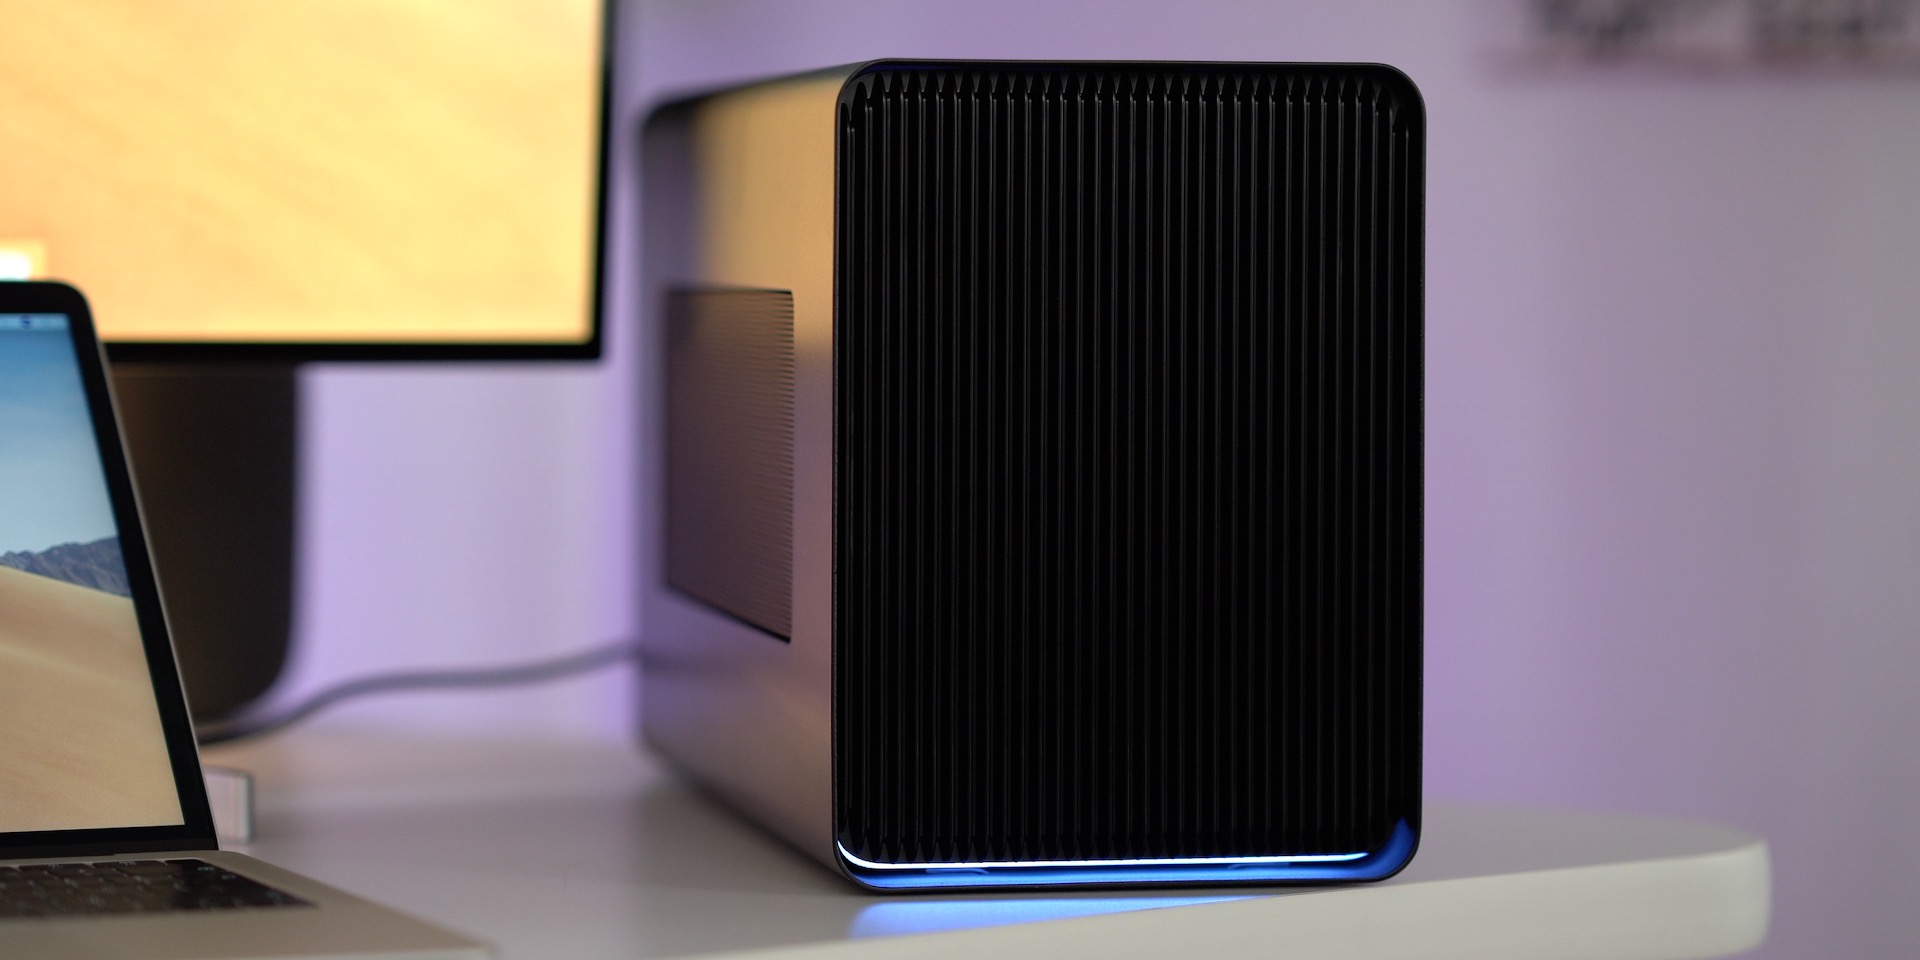
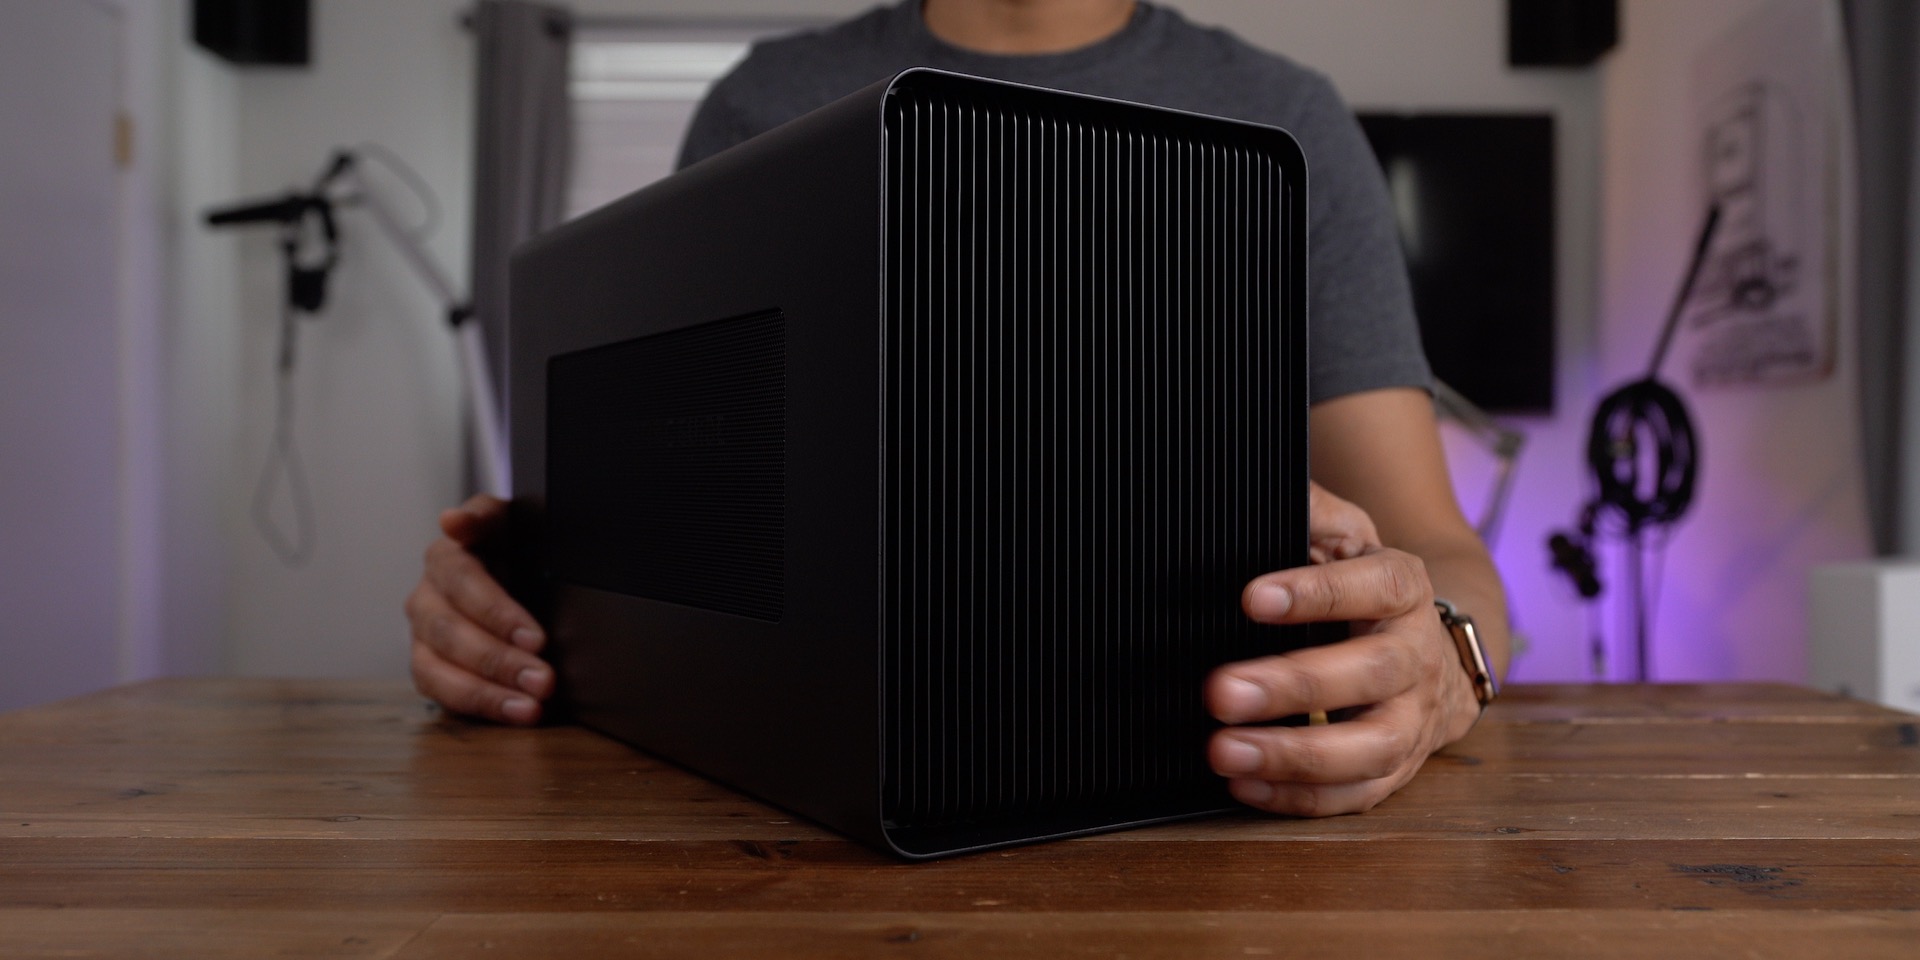
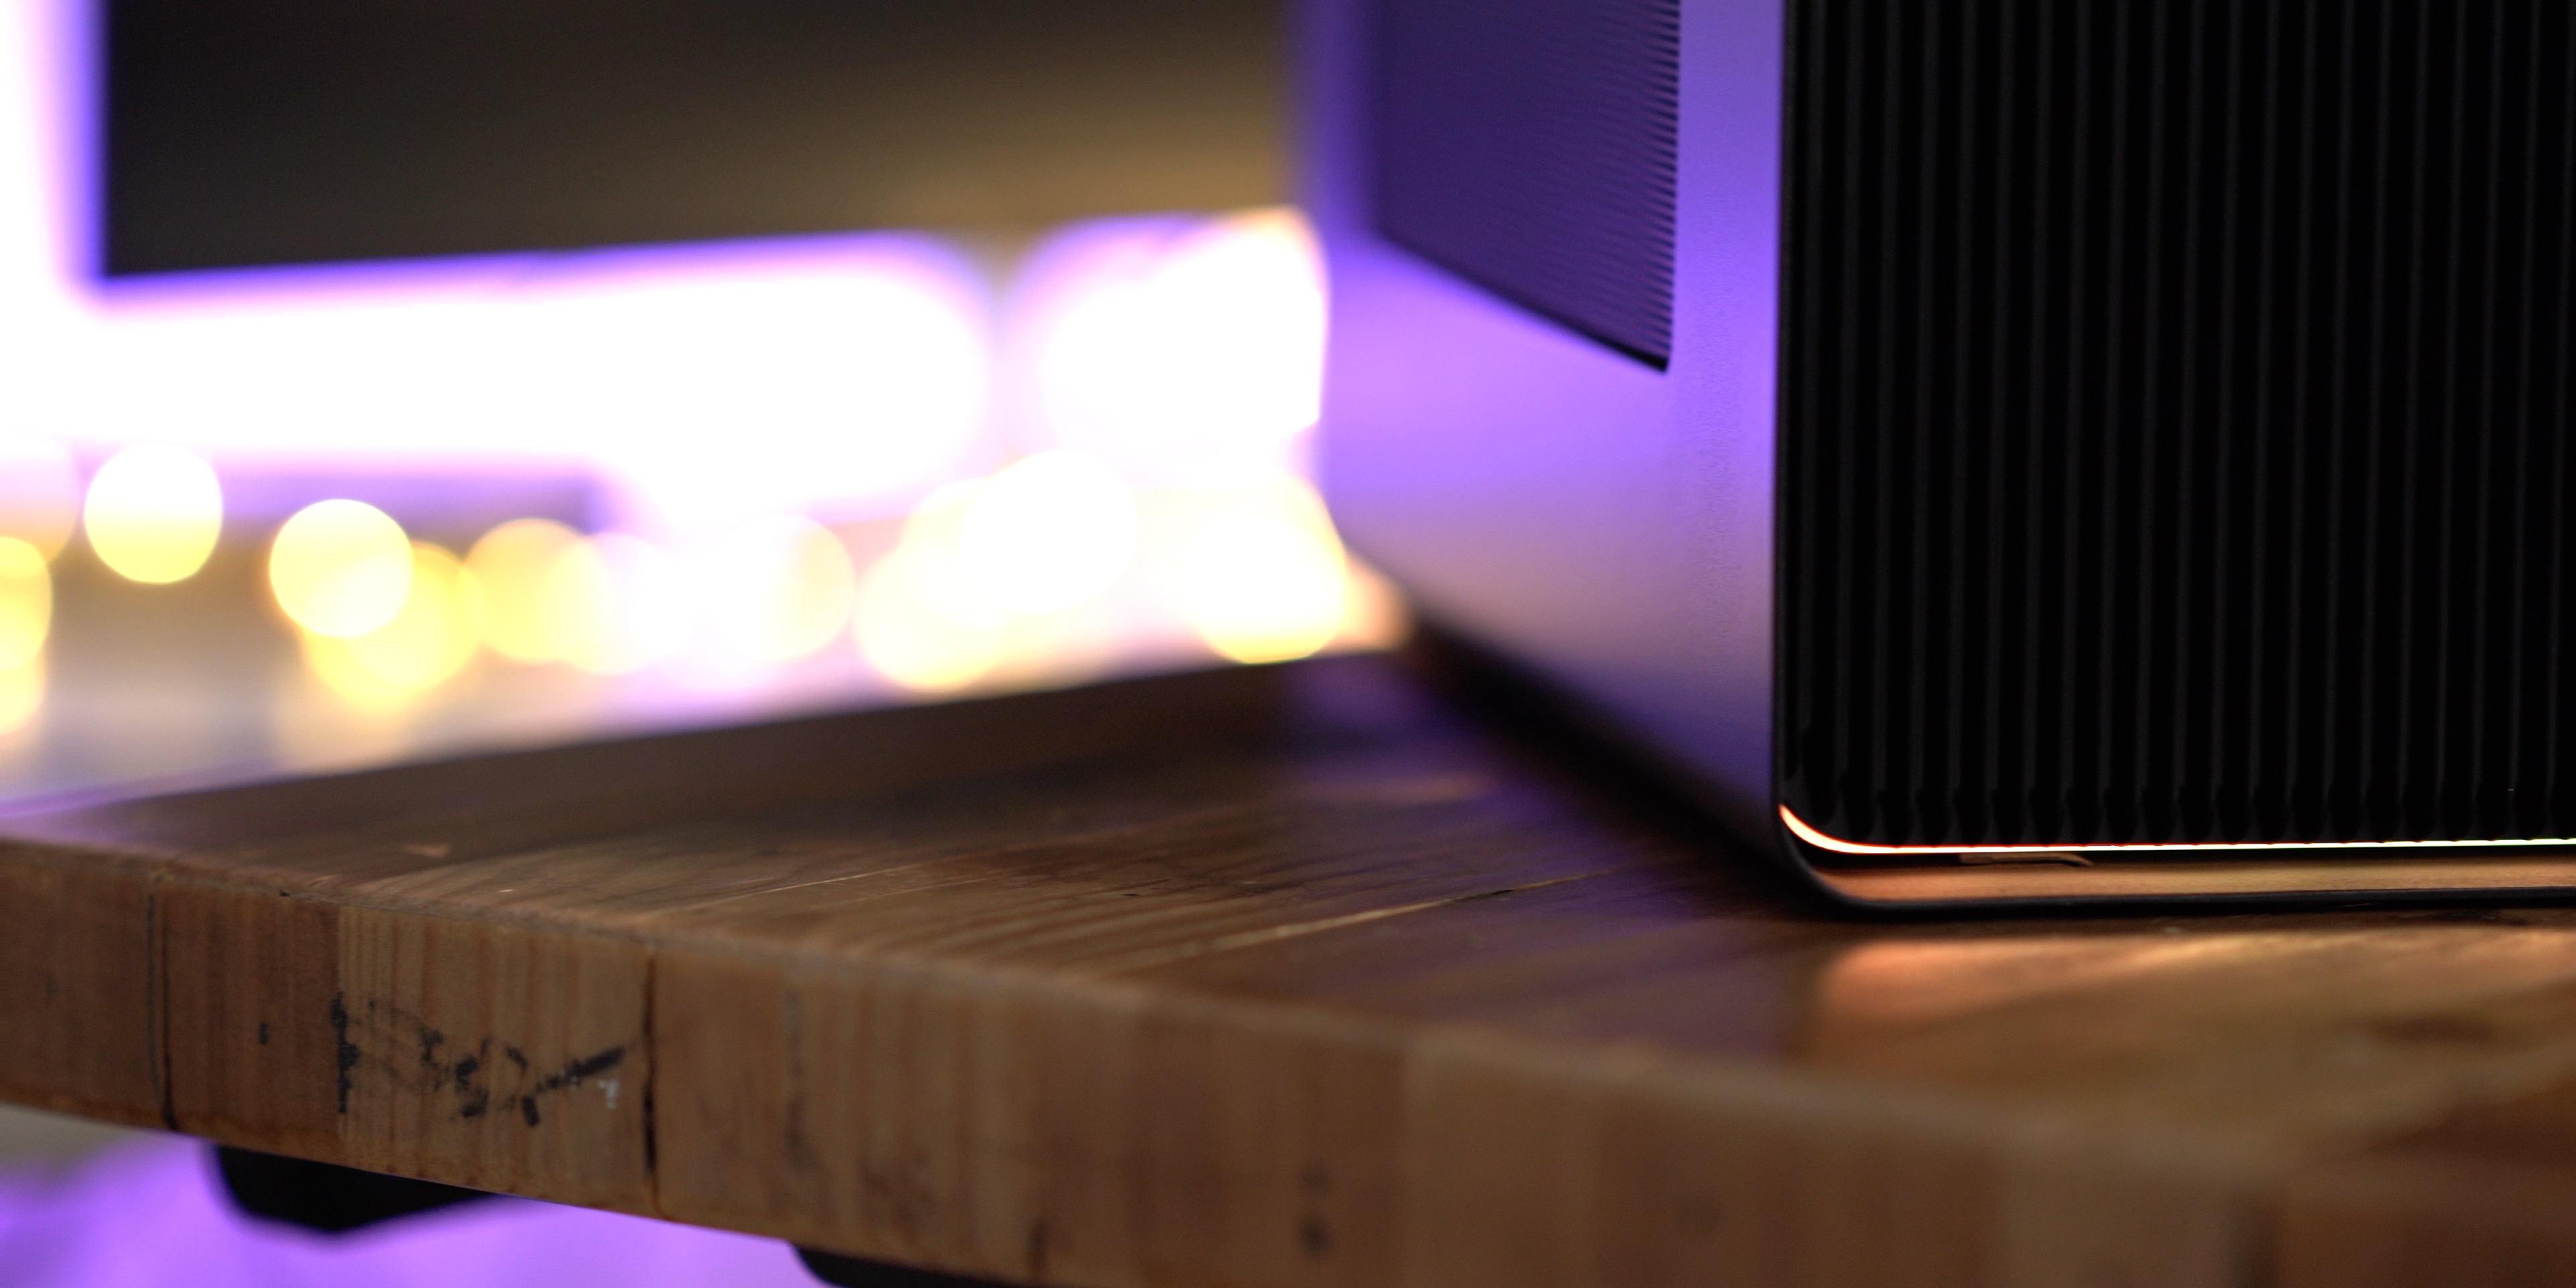
A slightly better Razer Core X
Outside of those primary changes, everything else about the Razer Core X Chroma is basically the same as the original. Users who inspect the units closely will notice subtle differences, but it’s essentially a slightly upgraded Razer Core X, which is overall a good thing.
The original Razer Core X featured a thoughtful design that allowed users to access and change out the GPU inside with minimal effort, and that remains true for the upgraded model. Razer engineered a track-based system that allows the internal chassis to slide quietly inside the external chassis without metal rubbing against metal. This design, along with the hideaway quick release lever, lets users open and access the contents of the enclosure without any tools.
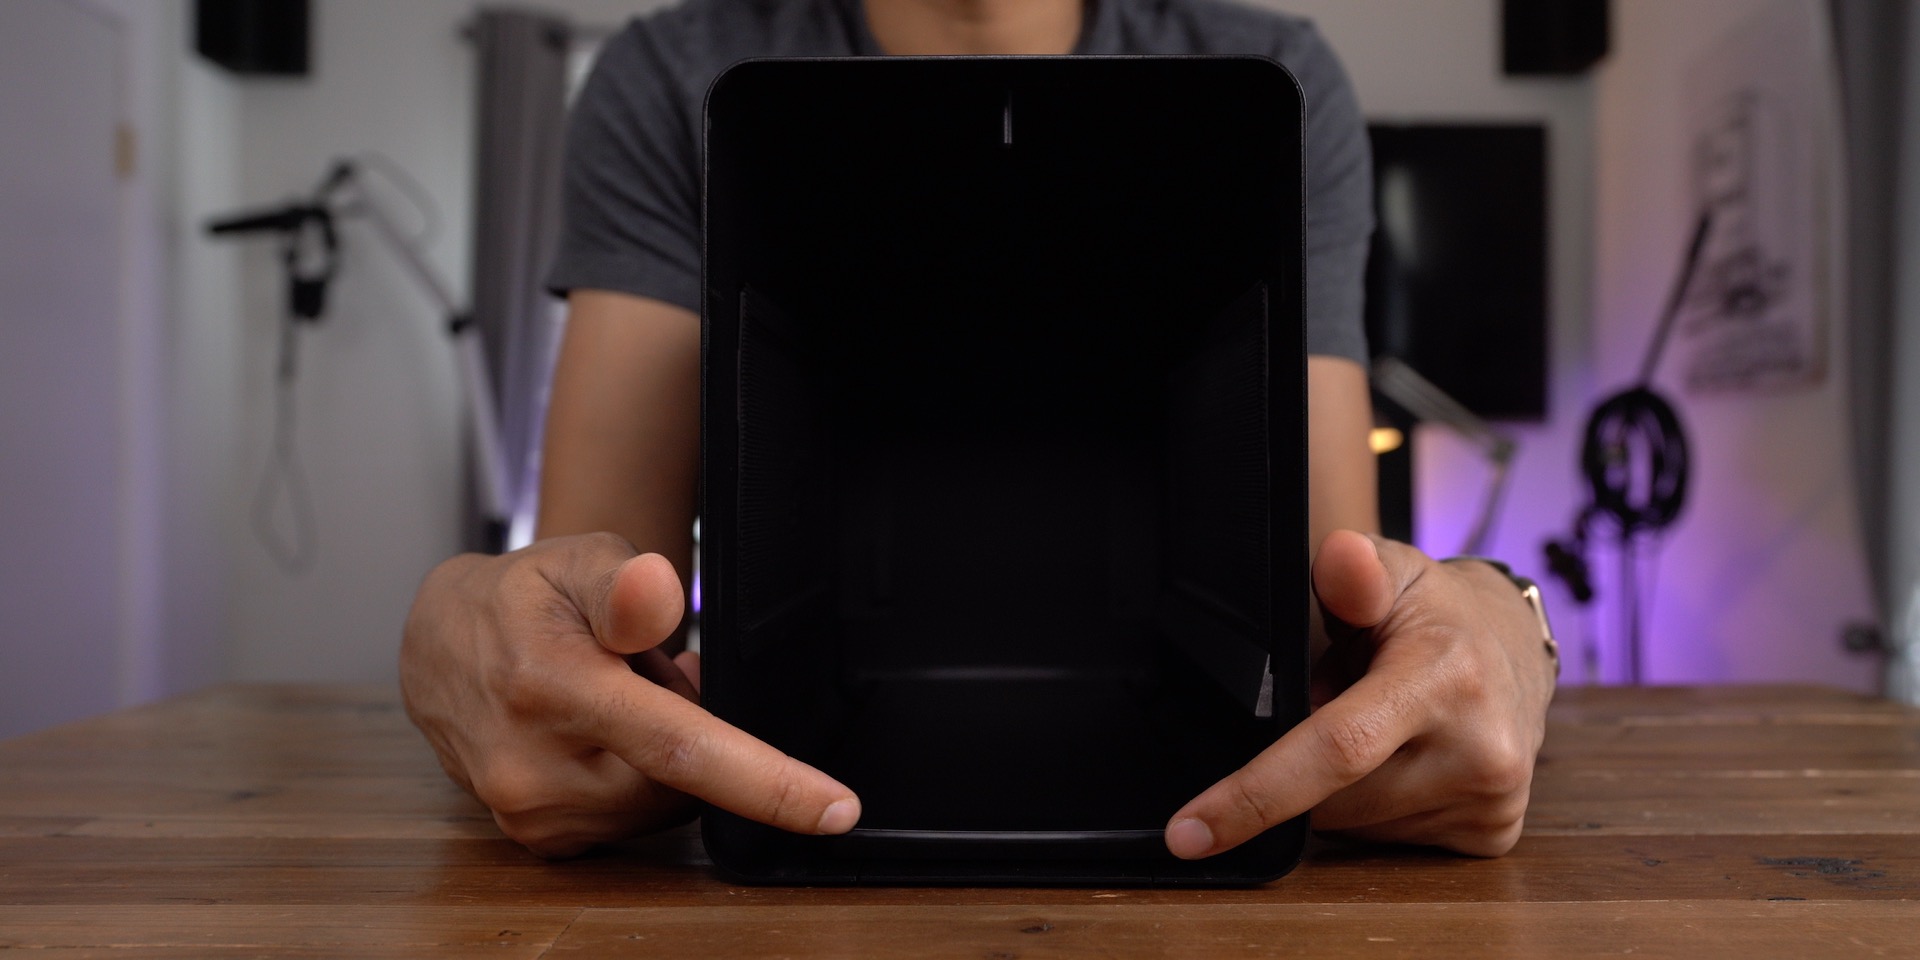
On the bottom of the external chassis is a large non-slip strip to keep the eGPU firmly planted on a desktop. This design allows users to easily remove the internal chassis and access the GPU inside with one hand.
The front of the external portion of the box is still a ridged black plastic material, meaning my primary design gripe from the original model remains the same on the Razer Core X Chroma.
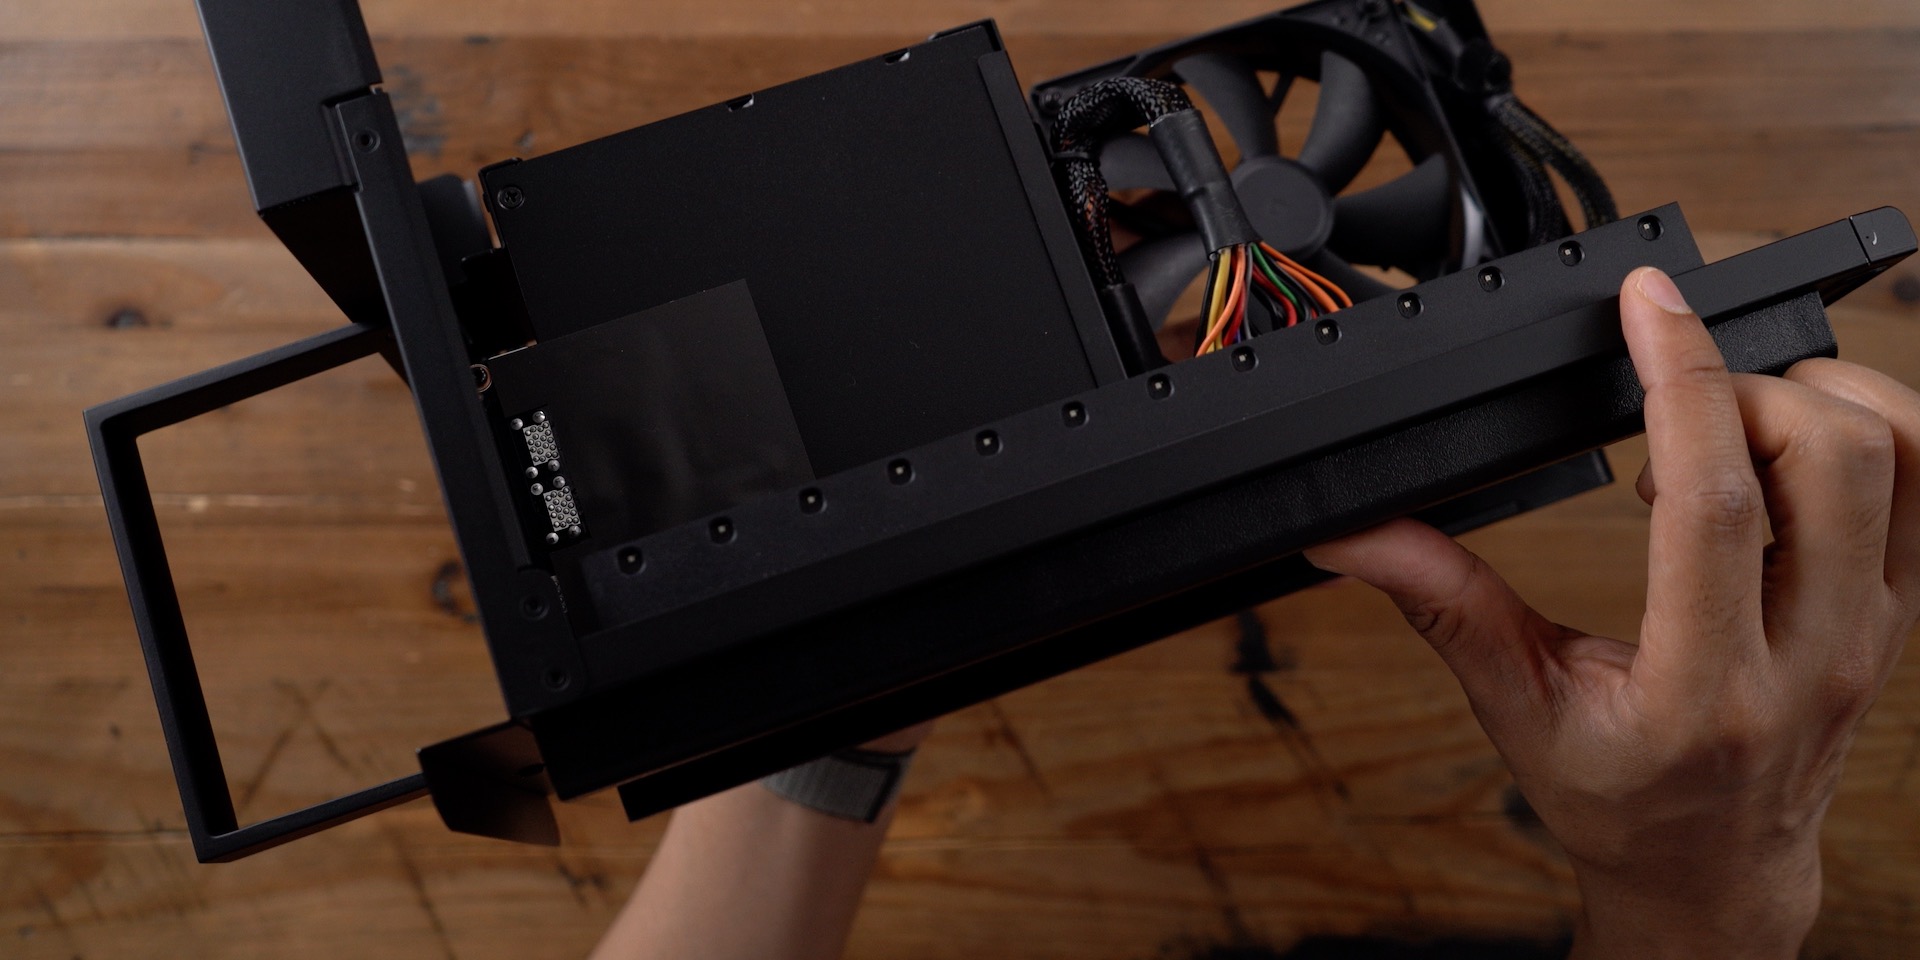
Internals
Like its predecessor, the Razer Core X Chroma can accommodate up to a three-slot wide, full-length, PCI-Express x16 graphics card. This means that any Mac-compatible GPU in existence should fit comfortably inside.

One change that you’ll notice on the Chroma compared to the original is that the release lever for the PCIe socket has been eliminated. Now it’s just a matter of pulling up on the GPU to release it from the slot.
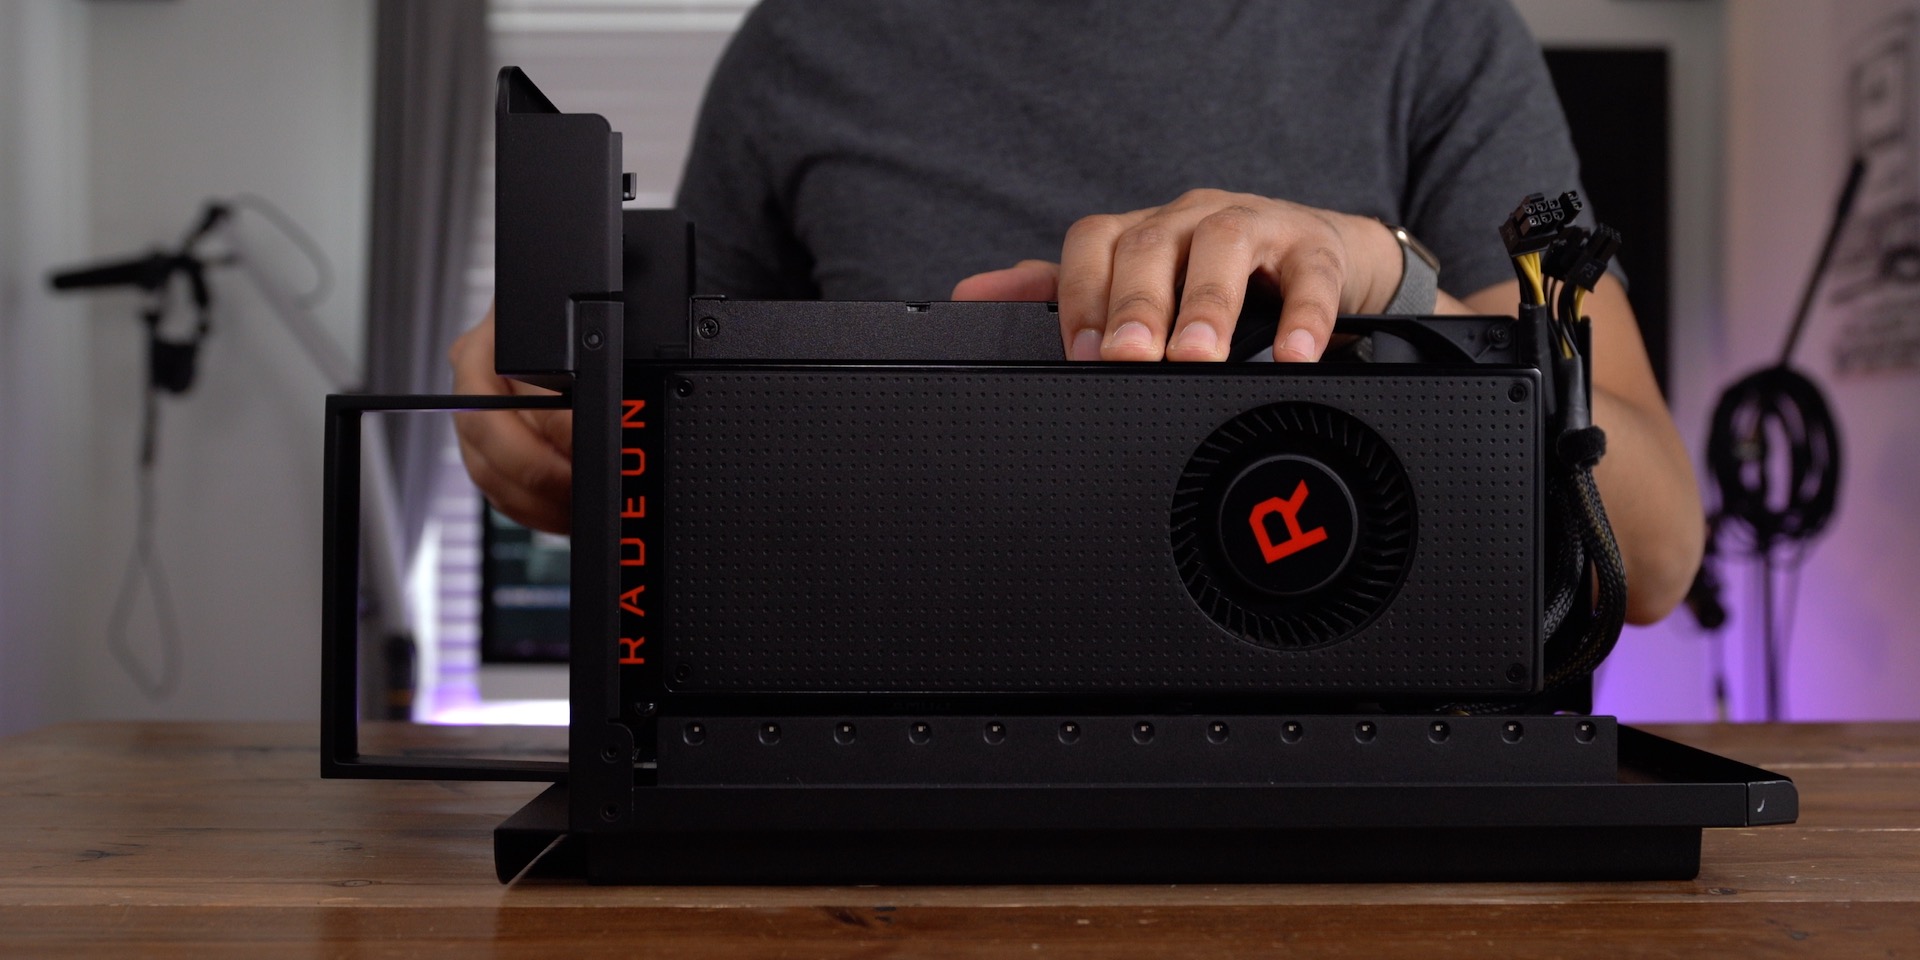
A secondary slot can now be found on the main board for a separate card housing the USB-A and Gigabit Ethernet ports. Razer has provided an upgraded PSU, going from 650W to 700W, likely with the addition of this new I/O board in mind.

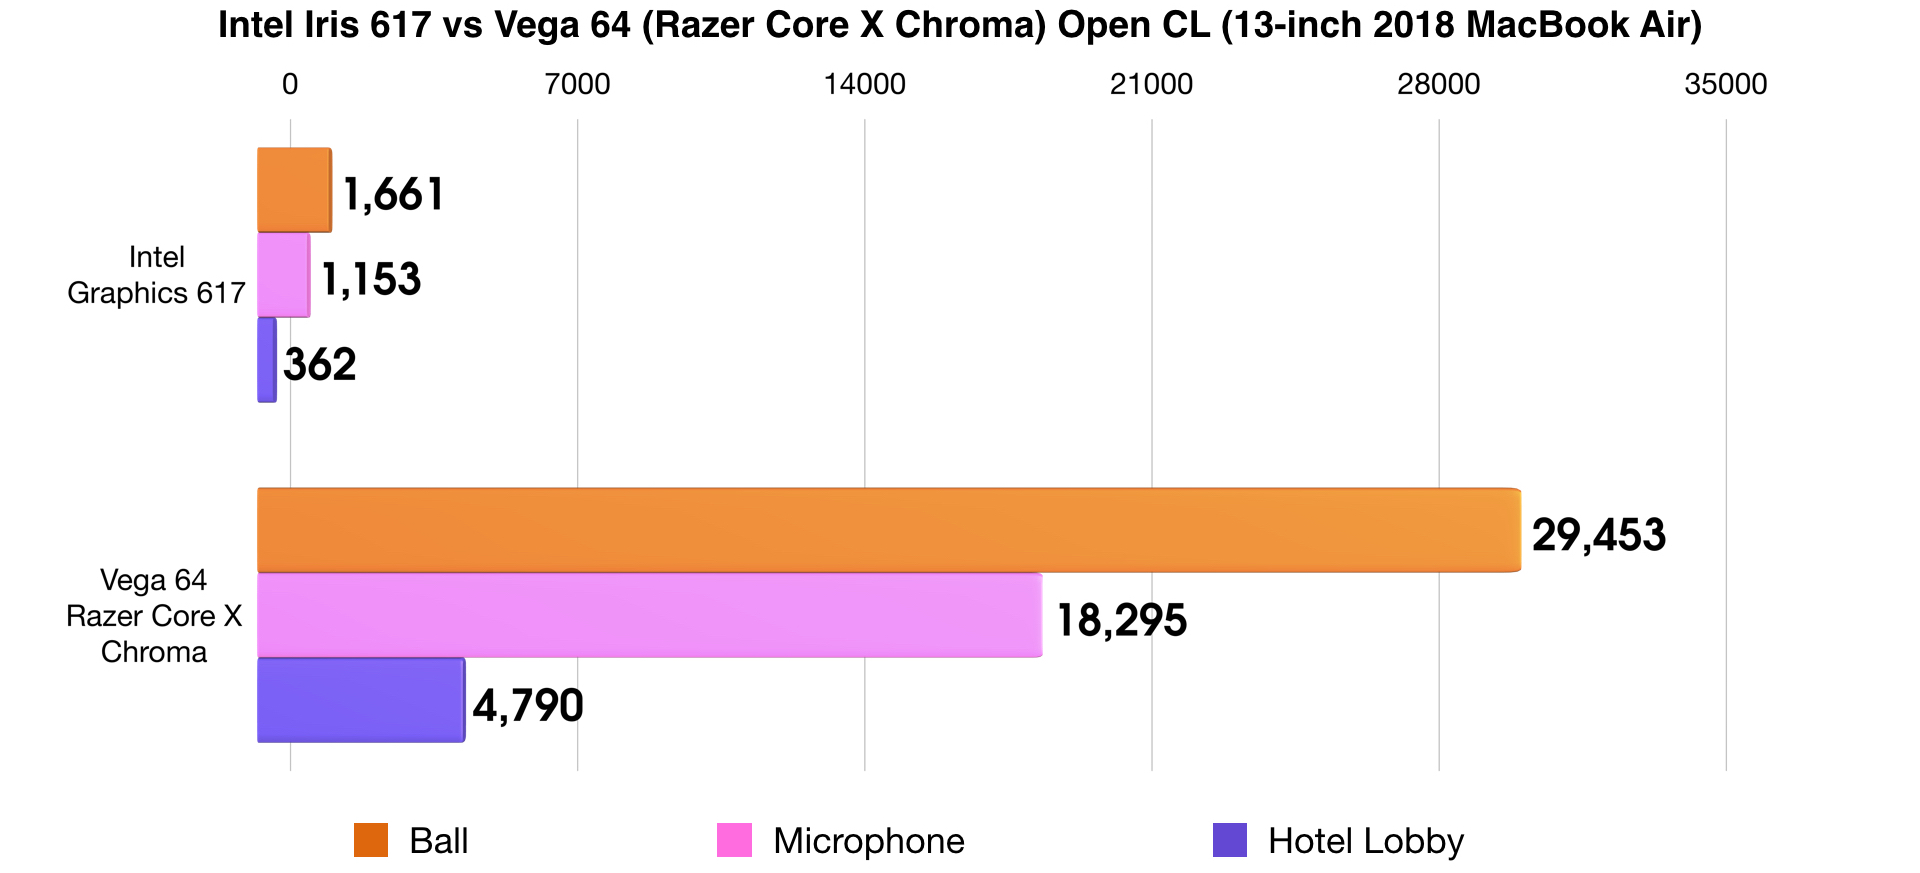
Performance
Performance will largely depend on the machine you connect to, and the GPU that you install inside the Razer Core X Chroma. Like I did for our review of the original Razer Core X, I opted to install an AMD Vega 64 GPU inside.
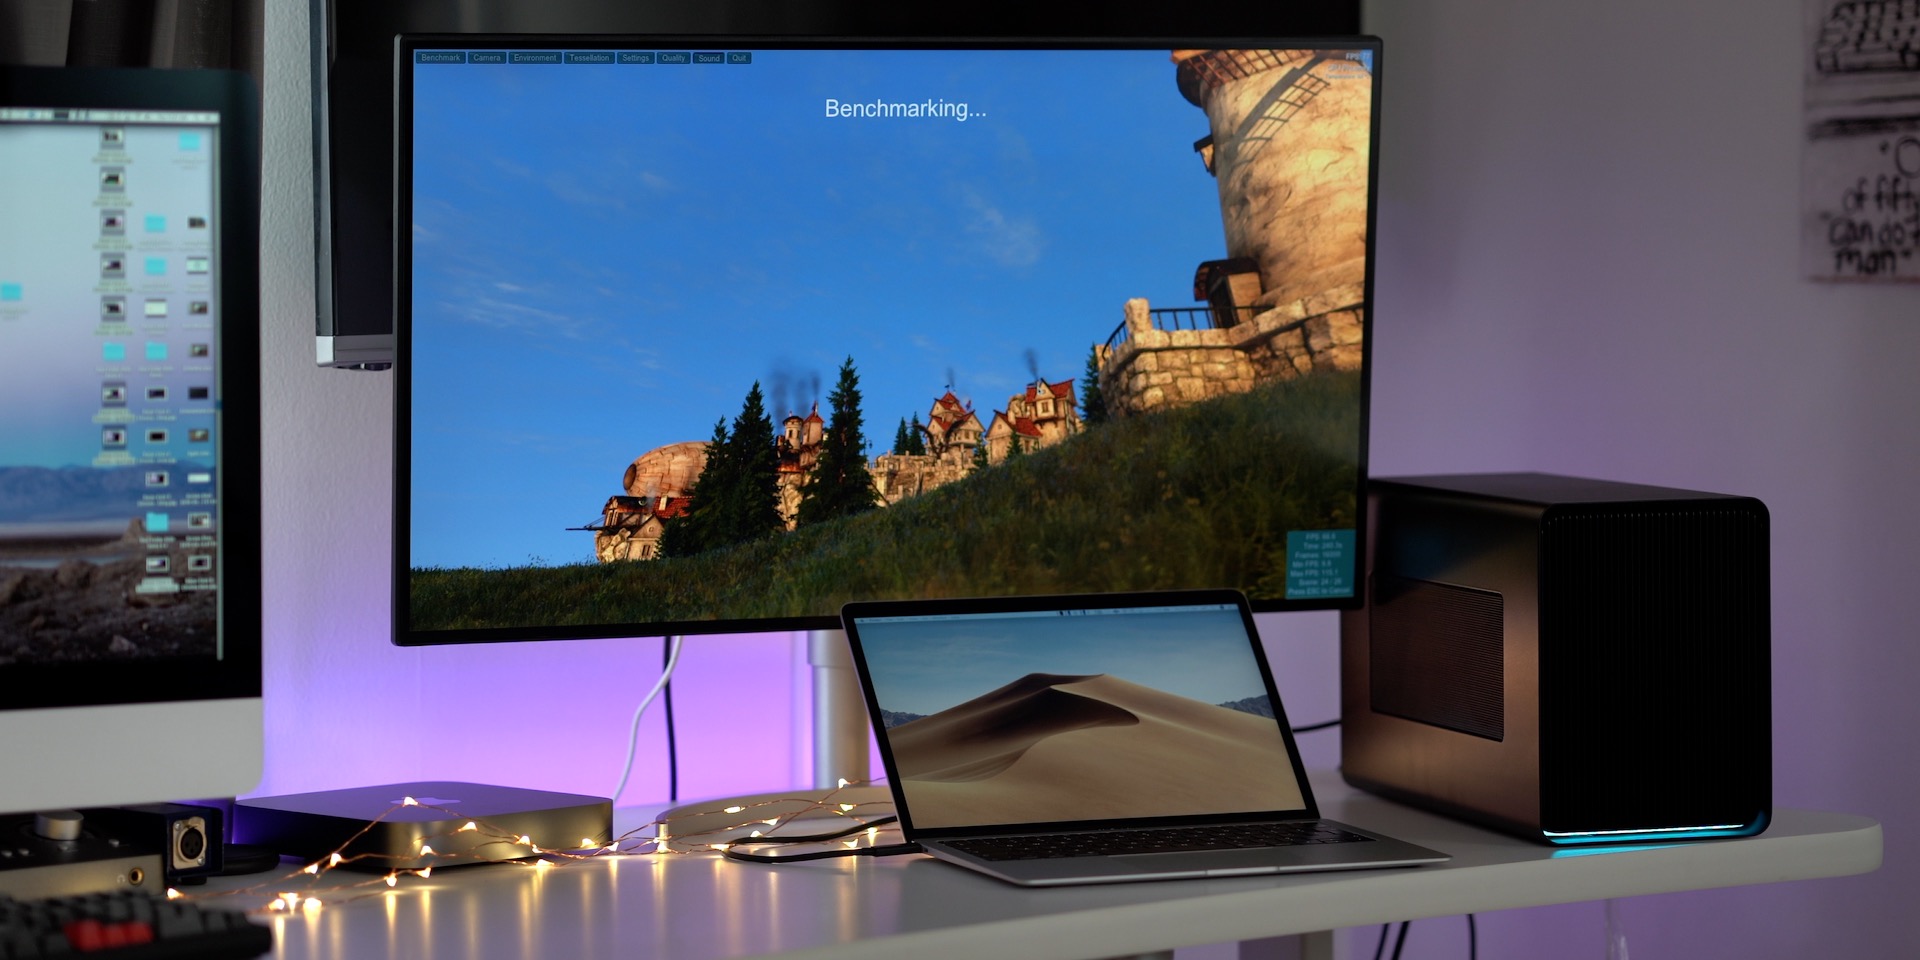
Instead of pairing that combination with a 2017 MacBook Pro, I connected to a MacBook Air, which was upgraded with Thunderbolt 3 support back in the fall of 2018. I opted to use an external display, the 31.5-inch LG UltraFine 4K Display, over HDMI in order to derive the best performance.
As you can see from the following benchmarks, the MacBook Air, with its integrated Intel Graphics 617 GPU, benefits greatly from an eGPU. Not to say that any of this is surprising in 2019…
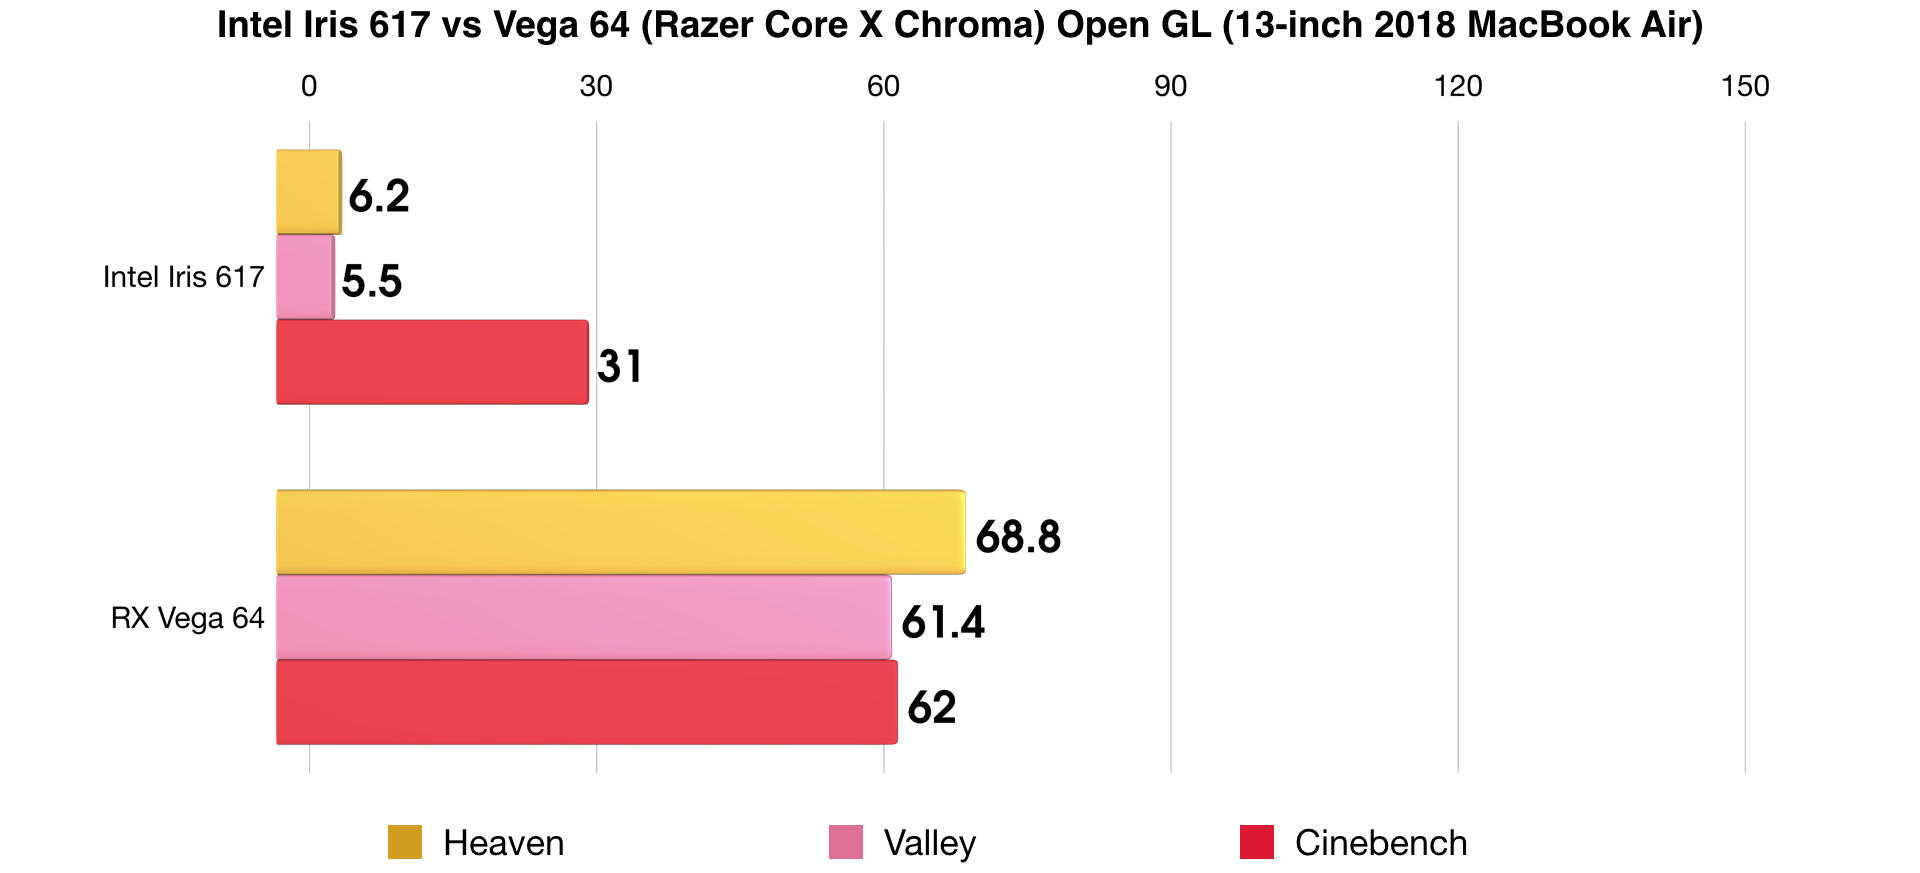
As you can see, the Vega 64 easily outmatches the integrated graphics, which is to be expected.
One thing that you’ll want to keep in mind is that connecting peripherals to the Razer Core X Chroma’s USB ports may affect performance. For example, if you connect an SSD and begin transferring a large file, you may notice reduced performance for the duration of that file transfer. I noticed significantly reduced benchmark performance while simultaneously running a speed test on an attached USB SSD. As soon as I stopped the speed test the expected benchmark results returned to normal.
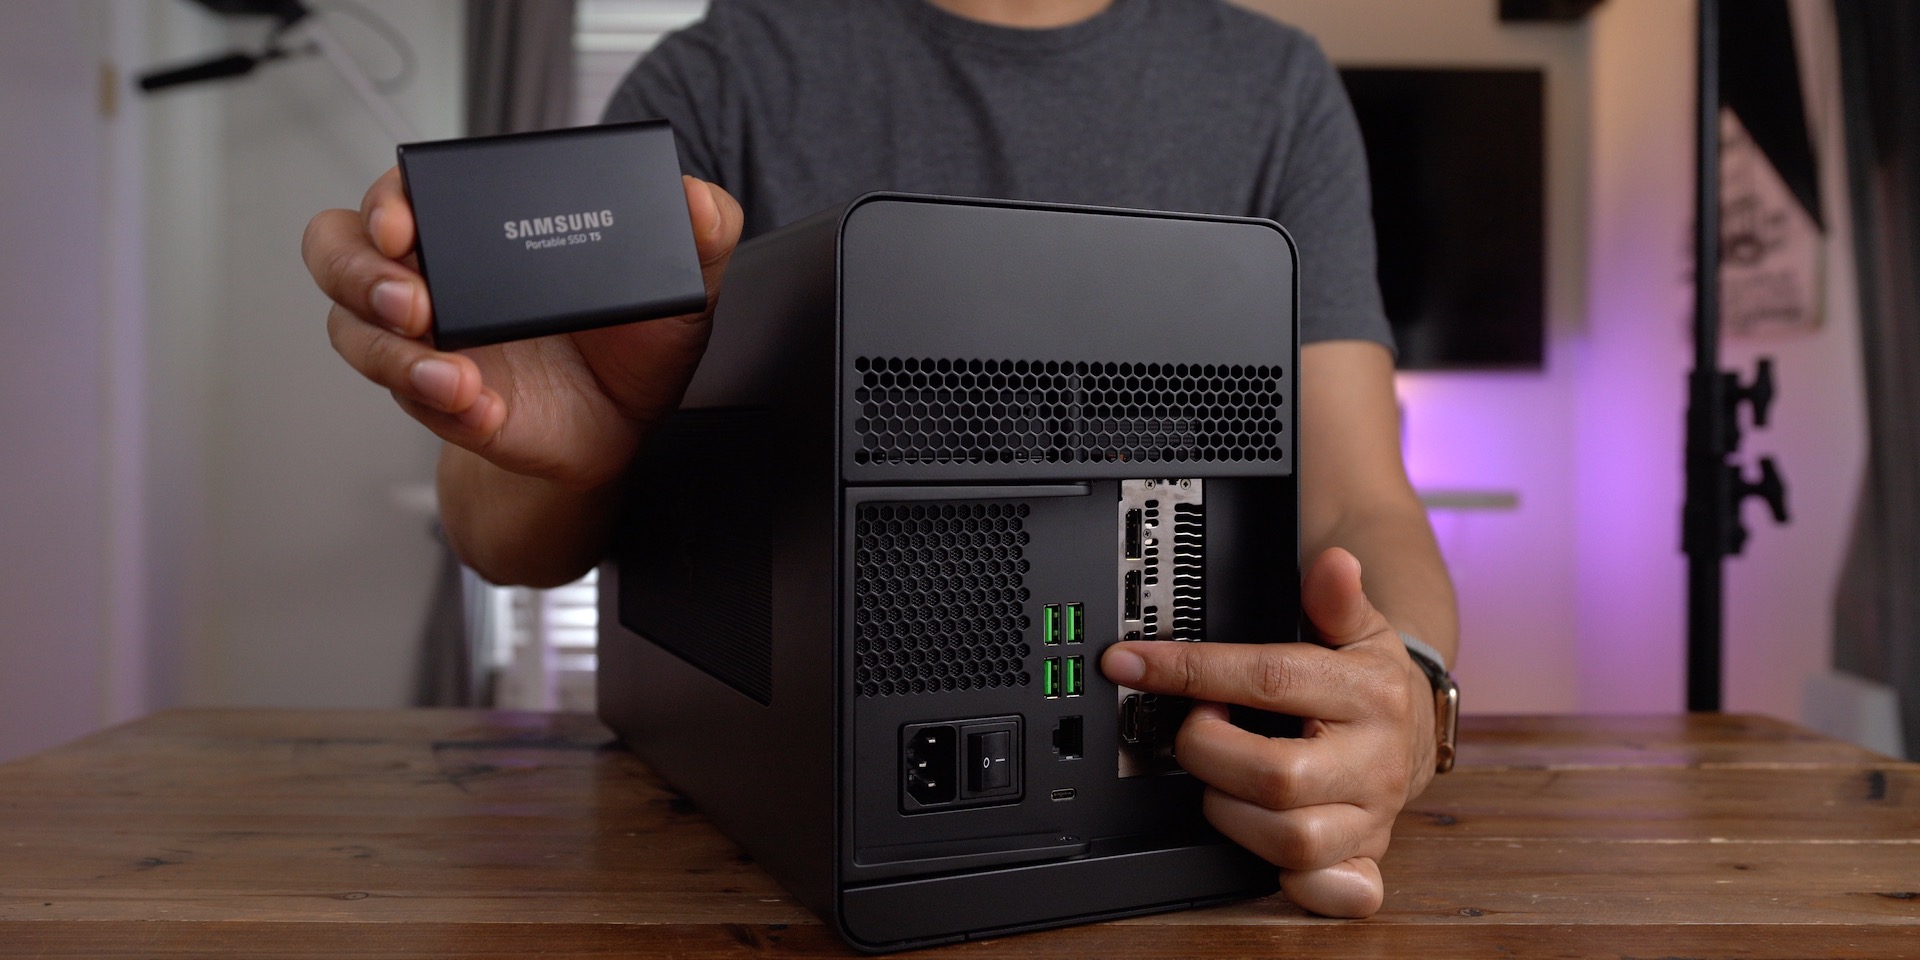
In other words, it’s probably not a good idea to store a Final Cut Pro X library on an external SSD connected to the eGPU. On the other hand, accessories like mice, keyboards, and the like should have no noticeable effect on performance.
Power delivery
One of the great things about Thunderbolt 3 is that connected devices can deliver power back to your MacBook. The Razer Core X Chroma, like its forerunner, is able to deliver 100W of power via a single Thunderbolt 3 cable. That means that it’s able to recharge Apple’s beefiest MacBook, the 15-inch MacBook Pro, at full speed, let alone the MacBook Air.
Upgradability
Unlike Blackmagic’s eGPU and eGPU Pro releases, one of the main benefits of using an eGPU like the Razer Core X is its upgradability. It’s up to the end-user to decide what kind of GPU to install inside of the Razer Core X Chroma, and that GPU can always be replaced by a more powerful version later on down the line.
In other words, I could easily remove my Vega 64 and install a Radeon VII sometime later if I desired to do so. With Blackmagic’s offerings, you’re stuck with either the Radeon Pro 580 or the RX Vega 56 for the lifetime of the device.
9to5Mac’s Take
The new Razer Core X Chroma is for all intents and purposes, a slightly upgraded take on the original. The original $299 Razer Core X is still the best eGPU for most Mac users, and the Chroma builds incrementally upon the original.
That said, it’s not necessary for most users to spend the extra $100 for the Chroma if all you care about is basic eGPU performance. If you plan on using your eGPU the majority of the time while using your Mac, then it might be worth considering the Chroma for its additional I/O.
But perhaps the biggest reason to upgrade to the Razer Core X Chroma is right there in the product’s name. The addition of Razer’s Chroma lighting does a lot to spruce up the look of the somewhat boring-looking Razer Core X, but as mentioned, Mac users are stuck with the default Synapse lighting pattern.
Razer clearly designed this eGPU with PC users in mind first and foremost. That makes sense, considering that Razer is largely a company focused on Windows-based PCs. Hopefully the company receives enough feedback from Mac users to help it to see that we’d enjoy these features as well. At any rate, it makes the $100 price premium over the original Razer Core X a bit more difficult to swallow seeing as Mac users can’t make use of all of the added features. If you’re a Mac user in the market for the best overall eGPU, I recommend sticking with Razer’s original Razer Core X for $299.
What are your thoughts about the Razer Core X Chroma? Sound off down below in the comments.
FTC: We use income earning auto affiliate links. More.

Источник


