- Question: Q: Read-only file system external drive
- All replies
- How To Fix Read-Only File System Error When Run Mkdir Command On MacOS
- 1. Fix MacOS Read-Only File System Error Steps.
- 2. Resolve Read-only File System Error When Remove Files.
- 3. Question & Answer.
- 3.1 Python script meets read-only file system error on macOS.
- Quick Tip: Solving “Read Only” External Drive Problems on Your Mac
- The Cause of «Read Only» Disk Errors
- Correcting the «Read Only» Disk Error
- Conclusion
- Question: Q: Read-Only File System after updating OSX
- All replies
Question: Q: Read-only file system external drive
Problem: Two of my external Western Digital drives have suddenly and simultaneously been designated as «read-only file systems.» Consequently, I cannot access them, even with sudo.
Need: I want to mount the drives with read-write access.
This problem renders Time Machine useless and means I have to (occasionally) spend hours manually copying files back and forth using the terminal, as the Finder is never capable of doing so without an error.
At the very least, I would like a workaround to remove whatever marker the OS uses to designate the drives as read-only. Compared to copying hundreds of GB for no reason, I’d be happy to execute a Terminal command or two.
I suspect the problem is caused because WD drives spin down regularly and take longer than macOS would like to spin back up. They are then designated as read-only because the OS has had difficulties accessing them multiple times.
This Mac is running a pristine version of Sierra, installed about two weeks ago after erasing the internal drive. I do not manually change system files or install programs which modify system files (cache-cleaners, etc.).
The drives are not damaged. I have checked them many times on multiple computers. Unfortunately, this is not the first time I’ve been locked out. Please let us work on the assumption that they are in good working order.
The drives appear in the finder on restart only.
Once unmounted (ejected), I cannot remount them using:
- the GUI Disk Utility
- diskutil
- mount (the -uw option doesn’t work on hfs as demonstrated with -dv), or
- mount_hfs
I can read from the drives.
I tried Nicholas Vahalik’s idea of turning off journaling with hfs.util and running fsck_hfs. hfs.util worked, but the disk wasn’t journaled. fsck_hfs was unable to write to the drive.
I am unable to change permissions using the Finder or the shell, but they appear to be set correctly for my user to have read/write access anyway.
Both drives contain some hidden files in their root directories. I suspect one (or more) may have locked the file system. In other words, when the OS goes to use the drive, if it sees one of these files present, it designates it as read-only. The suspect files are:
- .apdisk (apparently a new apple fs?)
- .fseventsd (a directory, but may contain something pertinent)
- two others I’ll need to reboot to see again. Something like .diskID and .diskIDx2
However, I cannot access the above files to move or delete them for testing purposes.
There is something «higher-level» going on that prevents write access on the drives. Any help determining what that is, would be appreciated!
Mac mini, macOS Sierra (10.12.1)
Posted on Oct 26, 2016 9:24 AM
All replies
Loading page content
Page content loaded
How are they formatted?
Oct 26, 2016 9:27 AM
Oct 27, 2016 8:57 AM
Thats correct (except for the lack of journaling), but doesn’t explain why they don’t write. Can you temporarily move the content of one of them off the drive and reformat it correctly?
Oct 27, 2016 9:01 AM
$ diskutil info disk3s2
has revealed that the drives are «Read-Only Volumes,» but I haven’t been able to discover why this is the case or how they were designated as such.
I have found that the following commands save me from having to restart the Mac to remount the drive each time:
$ sudo mkdir /Volumes/BackupDrive
$ sudo /System/Library/Filesystems/hfs.fs/Contents/Resources/hfs.util -m disk3s2 /Volumes/BackupDrive fixed readonly nosuid nodev
The fixed flag came from the diskutil info command above. The readonly flag appears to be required, as writeable (or «writable» in the error message, also see man entry) will not work.
The fact that the writeable flag will not work makes me think that the file system has been set to read-only in some other way. It is not simply a matter of deliberately mounting it rw. I have tried chmod, xattr, and attempted to change the UUID (hfs.util -s) of the partition in the hope that this would separate the drive info from whatever is designating it read-only. This was unsuccessful.
I suspect this is less complicated than it seems, but no solution yet.
This does seem to be a common problem, and has been for many versions of macOS.
Источник
How To Fix Read-Only File System Error When Run Mkdir Command On MacOS
When I run command mkdir in mac os to create a folder, it gives me an error message mkdir: /data: Read-only file system like below. This article will tell you how to fix it.
1. Fix MacOS Read-Only File System Error Steps.
- Restart macOS, press Command+R to go to macOS utilities window.
- Click menu item Utilities —> Terminal at top menu bar.
- Then input command csrutil disable in the popup terminal window. This command will disable the System Integrity Protection.
- Click Mac Logo —> Restart menu item at the top left corner to restart the macOS.
- After restart macOS, run the command sudo mount -uw / .
- Now you can create a directory successfully with the command mkdir .
- If you want to check whether System Integrity Protection is enabled or disabled, you can run command csrutil status in a terminal.
- If you want to enable System Integrity Protection, you can restart the macOS and press Command + R to go to the macOS utilities window again to enable it with command csrutil enable in terminal.
2. Resolve Read-only File System Error When Remove Files.
Now we can create a directory in the macOS system. But when I want to remove files, it also shows me below error messages.
To fix this issue, you should run command sudo mount -uw / , after that, you can remove files as you want.
3. Question & Answer.
3.1 Python script meets read-only file system error on macOS.
- In my python script, I want to use the python os module’s system function to execute a zip command to make a zip file like below.
But when I run the python script, it shows a permission denied error like below.
I have run the command csrutil disable to disable the System Integrity Protection on my macOS, but it still throws the error when I run the python script.
Источник
Quick Tip: Solving “Read Only” External Drive Problems on Your Mac
More and more people are finding themselves using both Macs and Windows based PCs. While compatibility is almost a non-issue now days between Macs and PCs, as well as Macs and third party peripherals, there is one area that may still cause confusion. In this tutorial I will explain the “Read Only” error you may run into while using external storage devices, and also show you how simple it is to fix.
Quick Tip: Solving “Read Only” External Drive Problems on Your Mac
The Cause of «Read Only» Disk Errors
I have a USB drive that I purchased and use with various PCs at work and school. I am able to open the drive and can even copy files from the drive. But if I attempt to copy a file to the drive on my Mac, I get an icon telling me that I am not able to copy the file. If I try to delete a file, by pressing Command+Delete, nothing happens and, if I right click the file, the option to move it to the trash can is missing. Something is obviously not right with the storage drive.


Trying to copy a file to my USB drive gives an icon indicating that you cannot copy files to the volume.
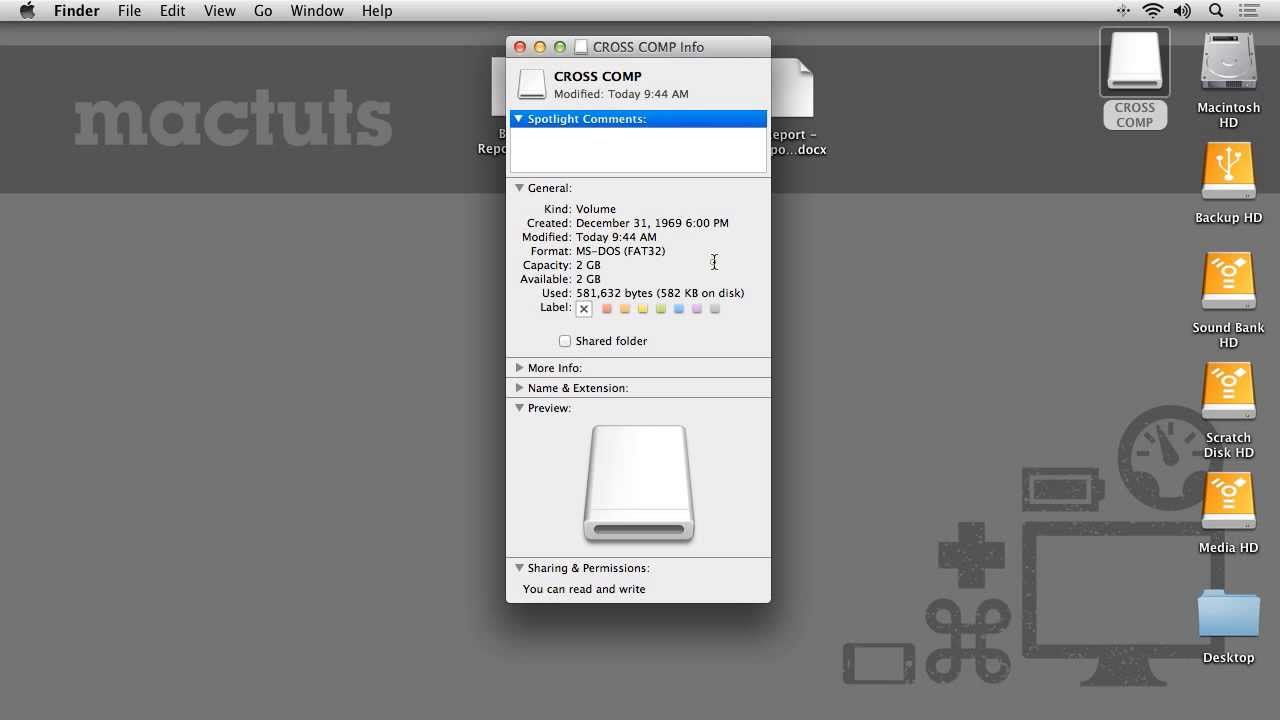
If you right click the drive and select Get Info, you can see at the bottom of the info window under the sharing and permissions twirl down, you only have permission to read from this drive and nothing else.


Looking in the info window you can see that the permissions for the drive only allow for reading.
The cause of this is due to the filing system the storage device is formatted in. If you look in the general twirl-down under format you can see that this drive is formatted in the windows NT file system. The NTFS file system is a system specifically optimized for Windows in the way that it organizes the data on the drive. While this file system is readable on Macs because OS X can rearrange the data as it is reading it, the way that NTFS writes the files to the storage device is not; hence, you can read, but not write.


The cause of the «Read Only» behavior is due to the format of the file system.
Many storage devices such as USB drives and external hard disk drives come pre-formatted in NTFS because a larger number of consumers are using them on PCs. However, making your storage device Mac compatible, and even cross compatible with Macs and PCs, is as simple as reformatting the drive.
Correcting the «Read Only» Disk Error
First and foremost before proceeding any further, you are about to format your storage device. Be sure to copy any and all file from the drive as all the data on the drive will be erased. This can be a simple task or a long undertaking depending on the size and usage of the storage device, but is a necessary and important step.
You can reformat a hard drive on Mac OS X by using Disk Utility. In the left-hand side inside of Disk Utility you will see a list of all the connected hard drives. Each physical drive is shown with the partitions of that drive nested below. Highlight the physical drive you wish to reformat and on the menu at the top to the right select erase.
You are about to format your storage device. Be sure to copy any and all file from the drive as all the data on the drive will be erased.
You will see two fields where you can choose a file system format and a field to name the new partition you are going to create. If you are just going to use your drive on Mac computers, you can select one of the Mac OS options. If you wish to create a partition that is cross compatible with Mac computers as well as PCs, you can select either the MS-DOS Fils System format or the exFAT format. You can rename the hard drive to whatever descriptive name you like then click erase and now the drive is formatted in a cross compatible filing system. If you click on the drive and select get info you can now see that the permissions are set to read and write.


Showing the info of the newly formatted drive, you can see the disc is now set to read and write.
Conclusion
The NTFS file system format is a great format to use if you are using your drive solely on Windows based PCs. But if you need to use your drive on Mac OS, or on both PCs and Mac OS, NTFS will unfortunately not be the best format to use. In this tutorial I’ve identified the cause of the “read only” error that Mac users may find when using external storage devices, and also how to easily fix the problem by reformatting your drive to a fully Mac OS compatible format.
Источник
Question: Q: Read-Only File System after updating OSX
I just updated my iMac’s OSX to 10.11.4, and now my FCPX project on an external drive keeps getting a «Read-Only File System» message! Anybody else have this issue? Wondering if I should roll-back my OS to the previous version, where I had no problems accessing my Library.
iMac, OS X El Capitan (10.11.4)
Posted on Apr 28, 2016 11:14 AM
All replies
Loading page content
Page content loaded
Get info (command+i) on your external Volume and check to see if the checkbox at the bottom of the window («Ignore ownership on this Volume») is UN-checked.
Apr 28, 2016 11:28 AM
How is the disk drive formatted?
Apr 28, 2016 11:34 AM
I looked in the Info window, but nothing appeared below «Sharing & Permissions: You can only read». Is this a feature of the new update?
I restored to my previous version of El Capitan and everything works again.
Thanks for the info.
Apr 29, 2016 10:23 AM
Yeah, I was just using the Tuxera NTFS format that it came with.
I restored to previous version of El Capitan, and everything’s working. I’ll look for another drive large enough to hold it all, format it with Mac OS, and transfer everything over before I update the OS again.
Apr 29, 2016 10:25 AM
OS X is able to read NTFS but needs third party software in order to be able to write to it. The El Capitan upgrade to OS X broke many of the third party NTFS software and need. so the third party NTFS software needed to be upgraded to work with El Capitan.
For that reason plus the fact that many applications do work properly with NTFS even with up today third party NTFS software, I have always refused to have anything to do with disk drives that were format with NTFS.
Источник


