- 5+ best sound & voice recording apps for Windows 10
- What are the best free sound recorders for Windows 10?
- Adobe Audition
- Adobe Audition
- Recorder Ones
- Audio Recorder
- NowSmart Sound Recorder
- Run a System Scan to discover potential errors
- Audacity 2
- Lucky Recorder
- Lexis Audio Editor
- Windows 10’s built-in Voice Recorder
- How To Record PC Screen with Audio Audio Sound Recording (Computer Sound, Microphone)
- Audio Sound Recording in Windows Vista, 7, 8 and 10
- 1. How to record «computer sound» in Windows Vista/7/8/10
- 2. How to record «your voice» in Windows Vista/7/8/10
- 3. How to record «computer sound» and «your voice» at the same time in Windows Vista/7/8/10
- Audio Sound Recording in Windows XP
- 1. How to record «computer sound» in Windows XP (Stereo Mix)
- 2. How to record «your voice» in Windows XP
- 3. How to record «computer sound» and «your voice» at the same time in Windows XP
- Can You Record with 2 USB Microphones into 1 Computer?
- Best Options for Recording 2 or More People
- Option 1 – Use a USB Audio Interface
- Set your Podcast free with Launch Essentials
- Option 2 – Use a Digital Recorder
- Just Tell Me How To Record With 2 USB Microphones
- Option 1 – VoiceMeeter/Audacity (Free)
- Option 2 – ASIO4ALL/Adobe Audition
- Tutorial Transcription: Record With 2 USB Microphones Into Adobe Audition
- Option 3 – Use Separate Laptops
- Summary: Should I Record With 2 USB Microphones?
- Need More Help?
5+ best sound & voice recording apps for Windows 10

- In order to successfully edit audio and voice on your PC, you will need specialized sound and voice recording apps.
- You have a good voice recorder in Windows 10 but the solutions below have a lot more features.
- The best audio recorder for Windows 10 on our list is a complete solution from Adobe.
- You should also check our other suggestions as you will also find a free voice recorder with automatic OneDrive upload .

- Download Restoro PC Repair Tool that comes with Patented Technologies (patent available here).
- Click Start Scan to find Windows issues that could be causing PC problems.
- Click Repair All to fix issues affecting your computer’s security and performance
- Restoro has been downloaded by 0 readers this month.
I remember that among the first things that I did when I got my first computer was to play around with the sound recorder function.
With the coming of Windows 10, we kept this secret passion and whenever we have a free moment, we start singing and then laugh listening to what we just recorded with our beautiful voices.
Microsoft has a pretty Voice Recorder app inside Windows 10, but it’s rather basic, with a simple and clean interface.
We will talk about Windows’ own sound and voice recorder options and we will also bring up a short list of apps from the Microsoft Store that can do just the same, and maybe with some added features.
What are the best free sound recorders for Windows 10?
Adobe Audition
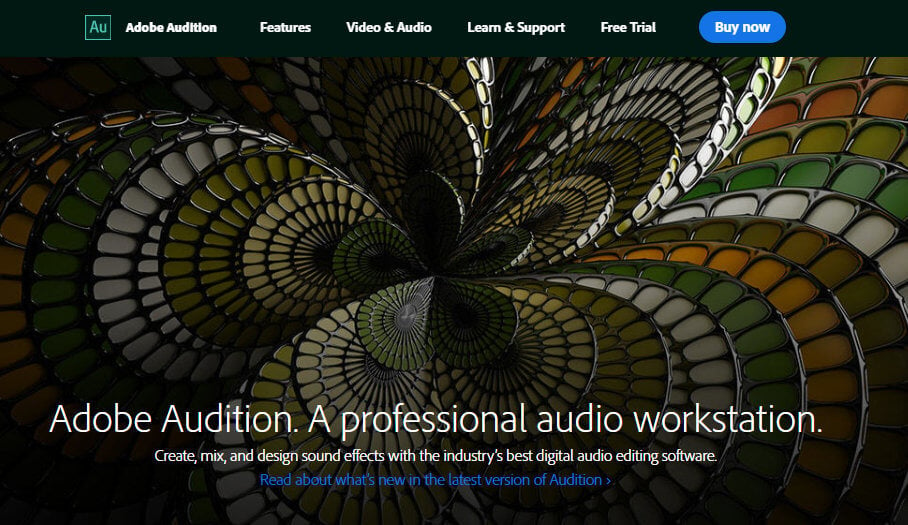
Adobe Audition is our top pick in this guide as it provides a varied array of sound and voice recording features, and everything is packed in a visually pleasing user interface.
What really makes Audition stand out from the crowd is the fast processing speeds it offers, and also the variety of other useful features.
Adobe Audition also comes packed with a variety of sound effects that can be customized to suit your needs.
Here are the key features found in Adobe Audition:
- Wide range of tutorials online that cover a vast array of utilities
- Easy to record audio and voice with just a few clicks of the mouse
- Works perfectly with Adobe Premiere Pro
- Real-time clip stretching for fast and efficient previews
- Non-destructive editing at its best
- Great plug-in support
Adobe Audition
Recorder Ones

This app supports long recordings, so it’s perfect if you need to record long conferences, for example.
Other features include: WAV/M4A format support, auto-saving, fast navigation during playback, OneDrive support so you can save your audio files in the cloud.
⇒ Get Recorder Ones
Audio Recorder
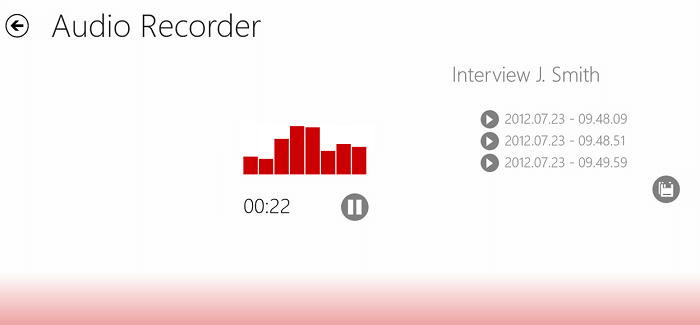
With Audio Recorder, you can easily record and replay audio files. You can also enable automatic OneDrive upload and access your audio files on all your devices.
Of course, you can also choose to store the recorded files in your local file system. The app allows you to jump to specific positions or loop parts of your audio files and quickly access particular pieces of information.
⇒ Get Audio Recorder
NowSmart Sound Recorder
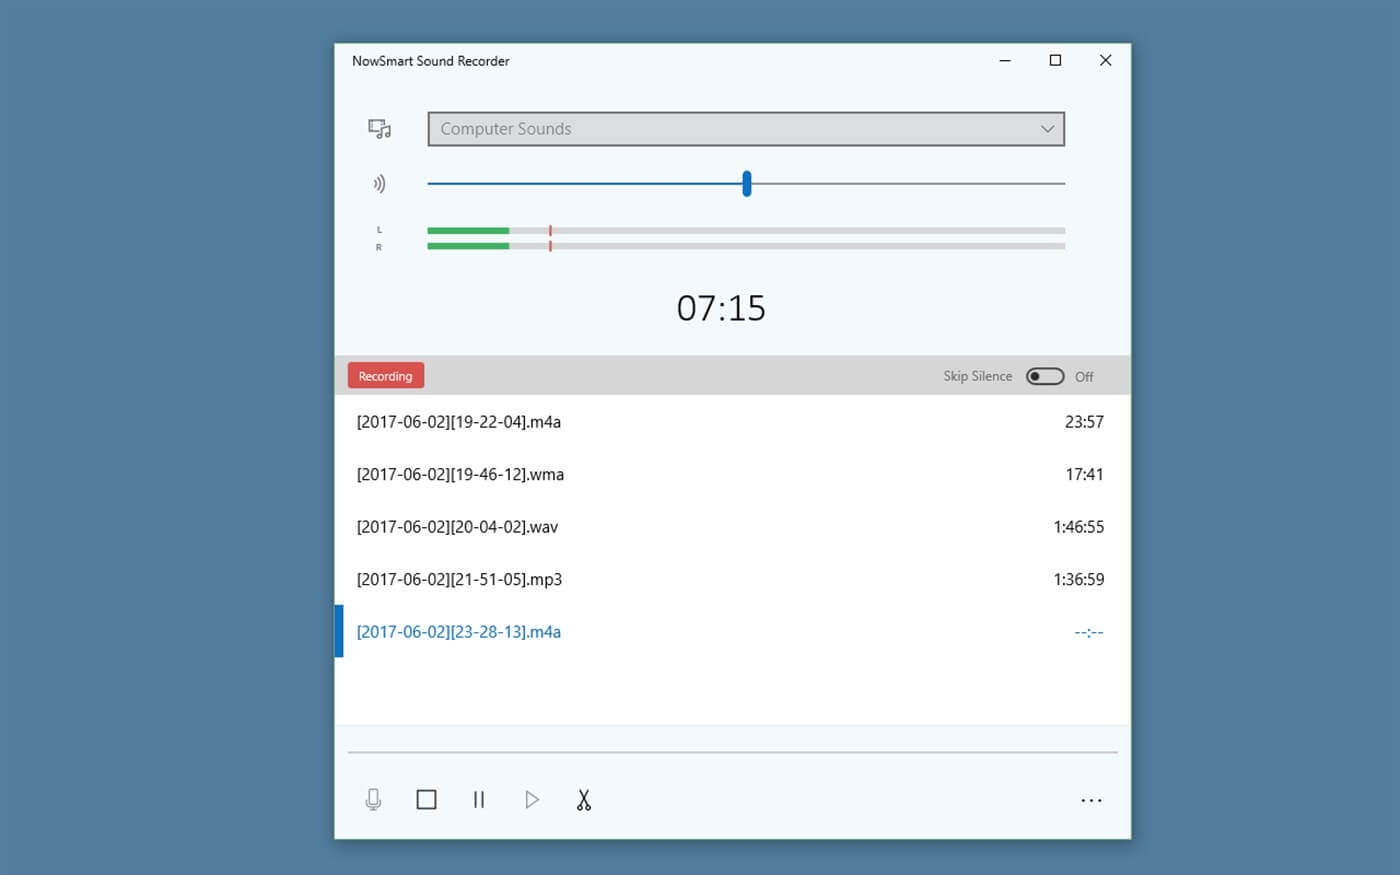
NowSmart Sound Recorder is an easy to use app to record other apps, web pages, and many more.
Unfortunately, NowSmart Sound Recorder does NOT save recording history, but you can find previous recordings by clicking on Settings (the three dots) and then Open Storage Location.
The app is free and you can download it from the Microsoft Store.
Run a System Scan to discover potential errors


Audacity 2
Audacity 2 is an open source app developed by a group of volunteers. It has a simple interface and it’s easy to use.
The app includes a multi-track audio editor and recorder that works on Windows, Mac OS X, GNU/Linux, and other operating systems. Audacity 2 is free, and you can download it from the Microsoft Store.
⇒ Get Audacity 2
Lucky Recorder
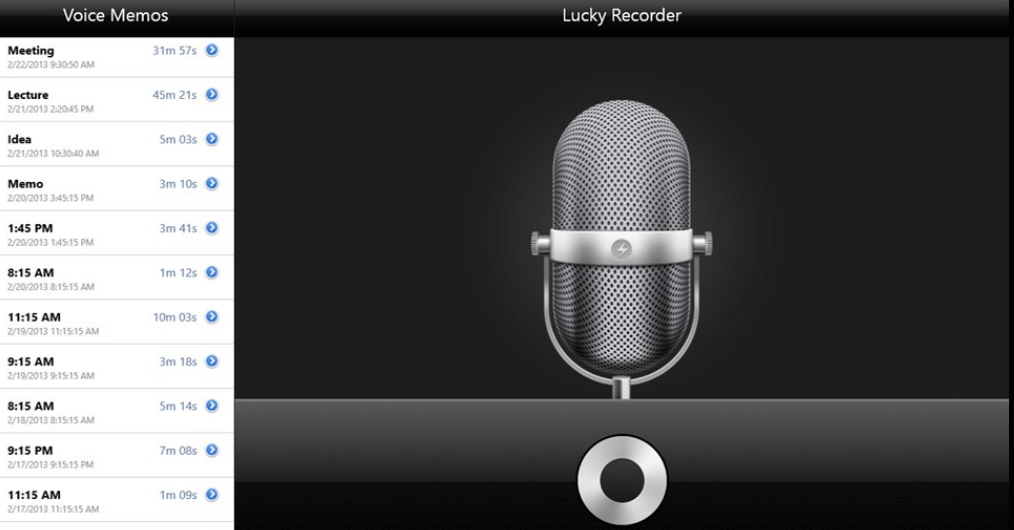
If you’re looking for a professional audio recording app, then Lucky Recorder is the right tool for you. It features a simple and intuitive user interface.
You can use this app to record meetings, lectures, personal notes, and more. If you need to listen to particular recording parts, you can always play back your audio files and then share them.
⇒ Get Lucky Recorder
Lexis Audio Editor
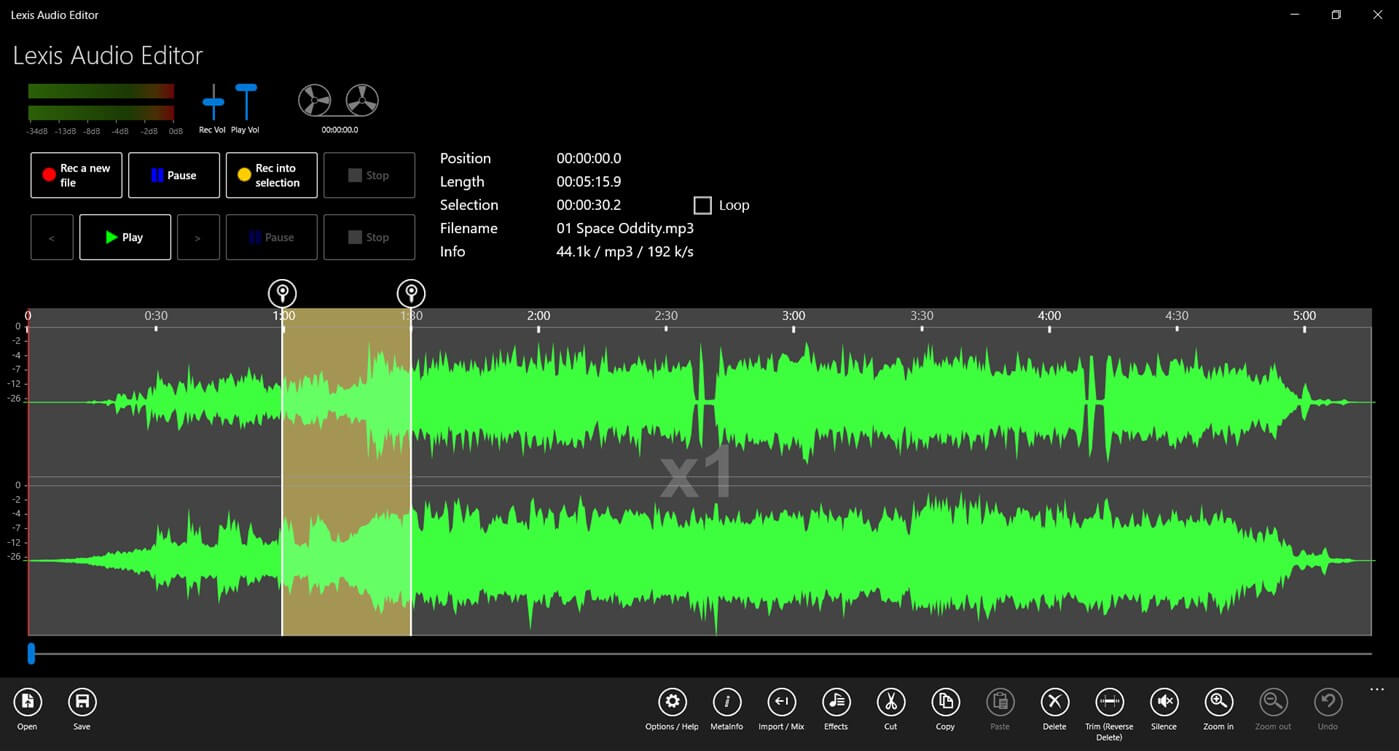
Lexis Audio Editor is an audio recorder an editor with lots of features.
You can create or edit audio files, and then save them in multiple formats. Other features include normalizing, noise reduction, record and import into existing file, and 10 band equalizer.
You can also change the tempo, speed, and pitch, then save the recordings in mp3 (-320kb/s), wav (16 Bit PCM), wma (-192kb/s) and m4a (-192kb/s).
Lexis Audio Editor has a free version and a paid one, the only difference between them being that saving in mp3 format is only available in the paid version.
⇒ Get Lexis Audio Editor
Windows 10’s built-in Voice Recorder

Inside Windows 10, there used to have been two solutions for you to record sounds or just your voice: the old Sound Recorder and the new, official app of Voice Recorder.
Now you can only access Voice Recorder by going to the search charm and typing there voice recorder.
The Voice Recorder app for Windows 10 is quite fun and incredibly simple. After recording your voice or the sounds around you, you can then choose to play, trim, delete or rename the file.
The recordings are saved in the Voice Recorder app menu. On Windows 10, Voice Recorder has a brand-new interface that is much lighter and simpler than the one available on Windows 8.
That’s it for our list with the best sound & voice recording apps for Windows 10. We hope that you found the perfect tool that you were looking for.
If you have any other suggestions or questions, don’t hesitate to leave them in the comments section below and we’ll be sure to check them out.
How To Record PC Screen with Audio
Audio Sound Recording (Computer Sound, Microphone)
Bandicam is a great capture program as it will allow you to easily record the computer screen, computer sound and microphone all together. If you want to record the system audio and/or your voice, please see the tutorials below:
Audio Sound Recording in Windows Vista, 7, 8 and 10
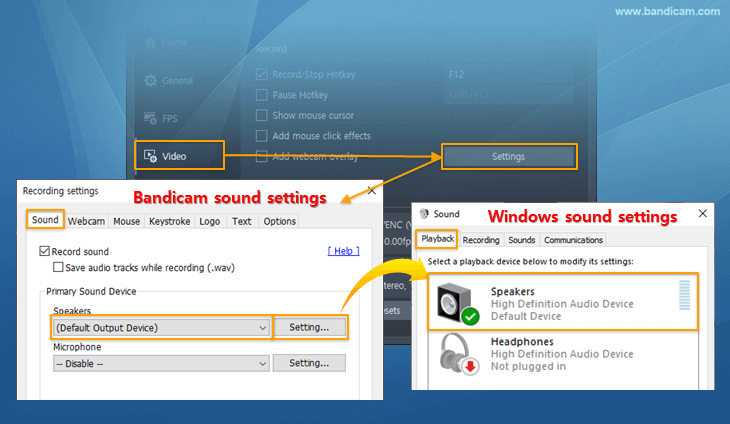
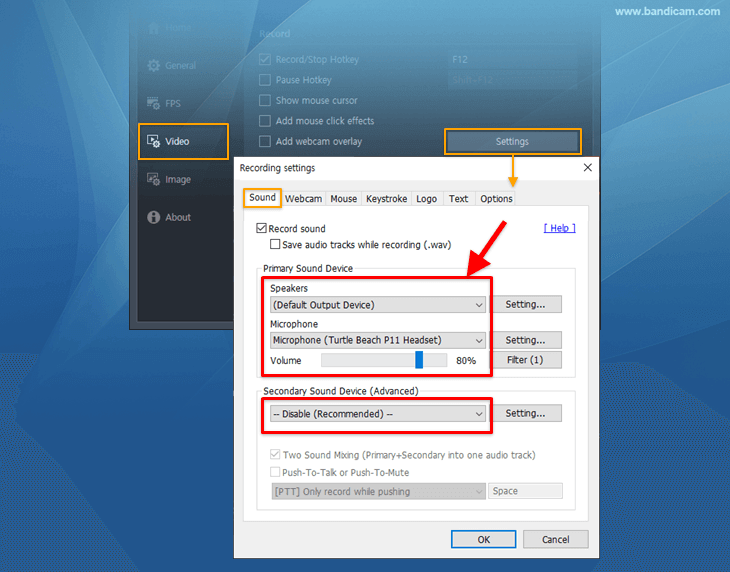
To record computer sound and your voice at the same time in Windows Vista, 7, 8 and 10, start Bandicam -> Video -> Settings -> and choose «(Default Sound Device)» and «Microphone» at the Recording settings, and then check the «Two Sound Mixing» option.
1. How to record «computer sound» in Windows Vista/7/8/10
To record «computer sound», choose «(Default Sound Device)» as the Primary Sound Device. » See more
* Tip) If you can’t see «(Default Sound Device)«, Properties > Compatibility > and then—> uncheck the Run this program in compatibility mode for: option.
2. How to record «your voice» in Windows Vista/7/8/10
To record your voice, you have to choose the «Microphone» device in the Sound settings window. » See more
3. How to record «computer sound» and «your voice» at the same time in Windows Vista/7/8/10
To record «computer sound» and «your voice» at the same time, choose «(Default Sound Device)» and «Microphone«, and then check the «Two Sound Mixing» option. » See more
Audio Sound Recording in Windows XP
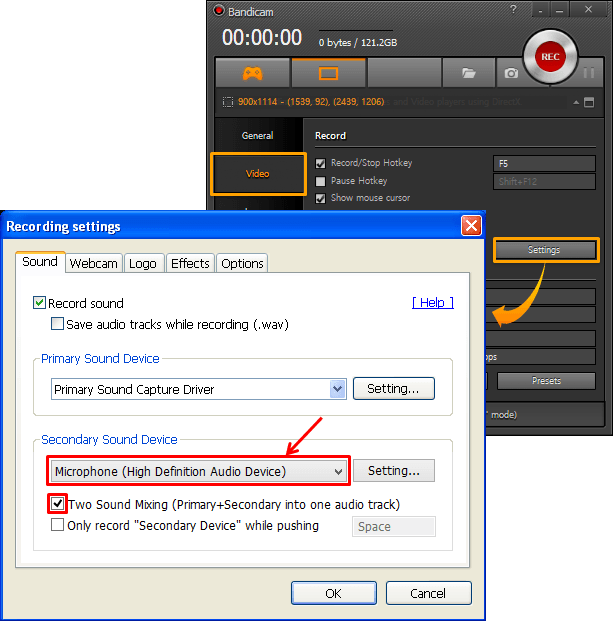
To record computer sound and your voice at the same time in Windows XP, start Bandicam -> Video -> Settings -> and choose «Primary Sound Capture Driver» and «Microphone» at the Recording settings, and then check the «Two Sound Mixing» option.
1. How to record «computer sound» in Windows XP (Stereo Mix)
If there is no sound for the captured video in Windows XP, you have to enable «Stereo Mix» in Volume Control and change the sound device in the Recording settings of Bandicam. » See more
2. How to record «your voice» in Windows XP
To record your voice in Windows XP, you have to enable «Microphone» in Volume Control and select «your microphone». » See more
3. How to record «computer sound» and «your voice» at the same time in Windows XP
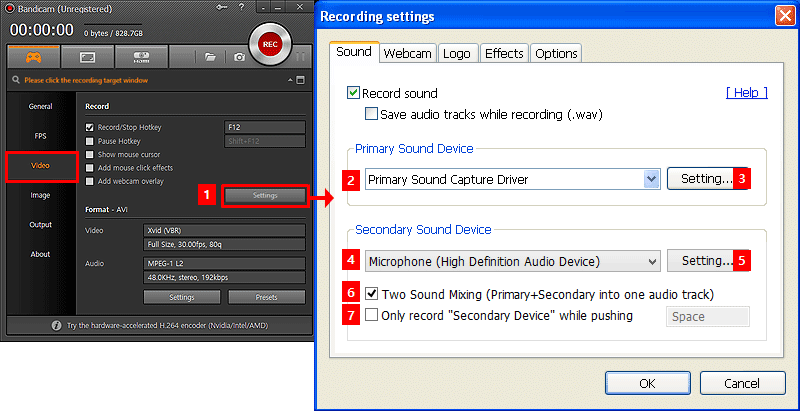
To record «computer sound» and «your voice» at the same time in Windows XP, choose «Primary Sound Capture Driver» as the primary sound device, select «your microphone» as the secondary sound device and then check the «Two Sound Mixing» option. » See more
Can You Record with 2 USB Microphones into 1 Computer?

Here’s how to record your podcast with 2 USB microphones (or more!). On top of that, we suggest some more optimal setups.
Can you record with 2 USB microphones at the same time? Yes!
Should you record with 2 USB microphones at the same time? To be honest, probably not.
Recording with a USB microphone is a really simple way to podcast. They’re quick and simple to set up and use.
Adding in a second one can complicate things though. Yes, it can be done – and we’ll show you how in this article – but it’s never an optimal setup.
So first, let’s look at a couple of better solutions.

Best Options for Recording 2 or More People
If you want to record yourself and a co-host or interview guest in the same room, then here are a couple of great options. Both of them streets ahead of trying to record with 2 USB microphones.
Option 1 – Use a USB Audio Interface
If you like the simplicity of USB, then you might want to get your hands on something like the Focusrite Scarlett 2i2.
It’s a great little audio interface that lets you plug in 2 XLR mics and run them straight into your computer.
Set your Podcast free with Launch Essentials
We’ll show you the exact steps, from recording, to editing, to release!
You can use any type of XLR mic with the 2i2. Check out our best mics for podcasting roundup to explore your choices on that front.
With this option, you’ll be able to record both of you on separate audio tracks, which will give you a bit more flexibility in post-production.
The 2i2 is brilliant, but there are other top USB audio interface options on the market right now, too.
Option 2 – Use a Digital Recorder
Why not take the computer out the equation altogether and use a digital recorder like the Zoom H5, Zoom H6, or Zoom PodTrak P4?
These recorders let you plug multiple XLR mics into them and record on individual audio tracks.
This setup works great in-house or in-studio, but its strength is in its flexibility. You can go out in the field or on location and record great audio, without being burdened by a tonne of gear.
With the Zoom H6, you can record up to 6 independent tracks simultaneously. With the PodTrak P4 you can plug in 4 XLR mics AND use it to record online calls.
Check out our best digital recorders roundup if you’d like to look into this option a little more.
Just Tell Me How To Record With 2 USB Microphones
Alright then! If you’ve got your heart set on recording with 2 USB mics, here’s 3 different options for you.
One thing I’ll say up front too – this is often easier if you have 2 different models of USB mic. Sometimes having 2 of the same (eg; 2 Blue Yeti‘s) can confuse the computer. This doesn’t always happen, but it can. If you’re having trouble, I’ll again refer you to the (much better) options above.
Incidentally, if you want to buy a second USB mic, then you can’t go wrong with the Samson Q2U. It’s a brilliant microphone that works as both a USB and XLR model.
Anyway, about those options…
Option 1 – VoiceMeeter/Audacity (Free)

A common way of recording 2 USB mics on the Windows platform, is with VoiceMeeter. This is a free virtual audio mixer that lets you set up a range of different input options.
Once downloaded, you can select and manage separate USB mics inside VoiceMeeter’s control panel.
Next, you’d create an Input and Output source called “VoiceMeeter”, which can then be selected inside Audacity.
Now, you can record with both of your USB mics at the same time.
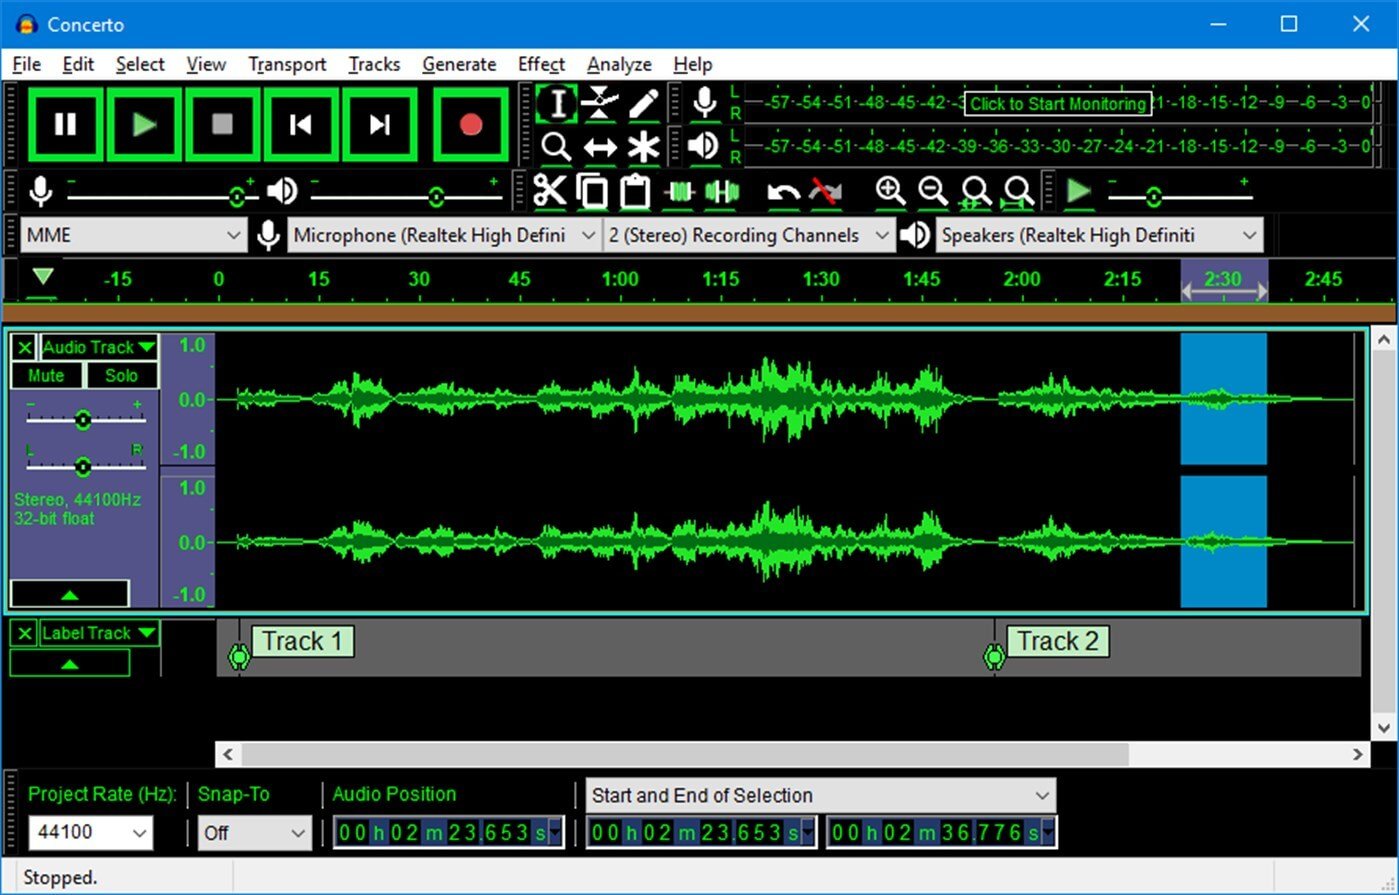
The slight catch is that it’ll record both mics onto the same audio track (whether that’s in mono or joint-stereo) inside Audacity.

You can see how this appears in the image on the right. The left and right tracks are exactly the same, containing the input from both USB mics.
The ideal situation is that we can get one microphone on the left track, and the other on the right, but combining them in this way isn’t a massive problem. It just means that you’ll have a little less control over your audio in the post-production phase, since you can’t edit and process each voice separately.
If you do want that level of control, let’s look at how to record 2 USB mics on separate tracks.
Option 2 – ASIO4ALL/Adobe Audition
This option is slightly more complicated. Here, you’ll need recording/editing software such as Adobe Audition or Reaper, which are paid programmes.
With this setup, you’d also be using a free audio driver called ASIO4ALL.
It helps if you have 2 different models of USB mics too, as I’ve already mentioned.
I’ve put together a video tutorial of how to set this up with Adobe Audition. I used the Blue Yeti and Shure MV5 USB mics.
Check out our Best USB microphones roundup, if you’re still looking around for a good USB mic.
I’m adding in a transcription of the tutorial too, in case you need to return to this in the future…
Tutorial Transcription: Record With 2 USB Microphones Into Adobe Audition
Here’s how to use audio recording and editing software, Adobe Audition, to run two different USB mics into the PC at the same time.
I’m going to use the Shure MV5 and the Blue Yeti as my two USB mics. It’s better to use two different models of mic here, as it might not work if you have two of the exact same.
I’ll also need to go to asio4all.com to download and install an audio driver called ASIO4ALL.
ASIO stands for Audio Stream Input Output. And ASIO4ALL basically powers up your computer’s sound card, giving it access to multiple inputs and outputs independently at the same time.
Next, when you open up Adobe Audition, go to File, then Preferences.
Set your device class to ASIO and ASIO4All v2 as your device.
Open up Settings to the right of device drop-down menu. Inside this control panel, you’ll see a list titled WDM Device List, and you want to click and activate the little power buttons besides your USB mics.
Come out of Settings after that and go to Audio Channel Mapping. Select both your USB mics as your left and right channels.
Leave the Preferences section and start a new multi-track session. On track one and two, use the input drop-down menus titled Default Stereo Input to select both your USB mics. Hit the R on both tracks to arm each one to record. And when you hit record, that’s you up and running with two USB mics at the same time.
In these setups we used the Blue Yeti, the Shure MV5 and the Samson Meteor.
Option 3 – Use Separate Laptops
If you and your multiple co-hosts all own USB mics, you probably all own laptops.
With this option, you’d just get together in the same room and record your own individual audio into Audacity, each on your own computer.
A couple of loud claps before the episode starts will give you a good marker to then sync the different audio tracks together in post-production.
Summary: Should I Record With 2 USB Microphones?
So it’s definitely doable, but far from optimal.
If you’re podcasting regularly and don’t plan on stopping, then it’s worth considering an investment in something like the Focusrite Scarlett 2i2 or Zoom PodTrak P4.
Yes you can muddle by with either of the 3 options for recording with 2 USB microphones. But long term, they’re going to make life awkward, and could even start to hold you back. The easier your podcast is to record, the easier it’s going to be to stick with it, to keep putting out new episodes, and to grow your audience.
Need More Help?
We’re always available in The Podcast Host Academy if you need more help getting this set up, or want access to all of our equipment courses.
We’ve got courses on all aspects of podcasting in there. From planning and launching, to promotion and monetisation.
On top of that, we run weekly live Q&A sessions. It’s the ideal place to find the resources, help, support, advice, and motivation you need to stay on track and keep moving forwards.


