- How To Recover Deleted Files In Linux [Beginner’s Guide]
- How to recover deleted files in Linux using TestDisk
- Step 1
- Step 2
- Step 3
- Step 4
- Step 5
- Step 6
- Step 7
- Step 8
- Step 9
- Step 10
- A few tips on recovering deleted files in Linux using TestDisk
- Dave Merritt
- Recover deleted files on Linux (Beginners Tutorial)
- Recover files from deleted partition
- Recover deleted files from an external drive
- Recover deleted files from SD card
- Recover deleted files from NTFS
- Recover Files from FAT32
- Recover on memory files (Using inode)
- Recover Deleted Files from EXT4 (Using extundelete)
- Using debugfs
- Using ext4magic
- Recover overwritten files (Using Scalpel)
- Recover files from a non-bootable system
- Conclusion
How To Recover Deleted Files In Linux [Beginner’s Guide]
Last updated October 29, 2020 By Community 108 Comments
Brief: This article shows you how to recover deleted files in Linux using command line tool Test Disk. It’s an easy to use tool that almost anyone can use to recover lost files in Ubuntu or other Linux distributions.
Have you ever gotten that horrible feeling? The one you get when you realize that you accidentally deleted files and it’s not even in the trash? Often it is immediately preceded by denial: I know I have another copy of it somewhere.
But rather than going through all the stages of grief, don’t worry. And remember you’re not alone; sooner or later everyone does this.
“Don’t worry?” you counter, “I just erased the only copy of my resume!”
No really, don’t worry. All that’s happened is that it’s been bumped off a list. So long as you don’t write onto the drive, it absolutely still exists. In fact, depending on the size of the file and the free space on your drive deleted files can persist indefinitely—even if you do write on the drive.
“Yes, fine” you say, “I’ll rest easy knowing my resume ‘exists’ in some abstract sense. But so far as I’m concerned if I can’t open, edit or print from it, it doesn’t exist in any practical sense. What would really help would be a way to ‘un-delete’ files. And one that doesn’t require an IT forensics lab.”
Really, don’t worry—you don’t need a lab to recover the deleted files. Furthermore, if you can get past using a primitive GUI, it’s actually easy to do! I’ll show you how to use TestDisk to recover deleted files.
How to recover deleted files in Linux using TestDisk

Let me present a simplified example: I took a clean thumb drive added some files, then deleted one. Now, my system has a feature which will directly delete files from removable media, by-passing the “trash” altogether; that is if I choose to “right” click on a file and then choose “delete”. It still presents a warning, but one click on the “yes” button and the file is gone forever. Or appears to be.
But this time I didn’t get that horrible feeling. And no, not because this is a cooked up scenario. I knew that all I had to do was open the terminal type “testdisk” and hit “enter”. When I did this for the first time I had one of my “Linux moments”. Because if you don’t have it—and I didn’t—it tells you how to get it! Just type “sudo apt install testdisk” and enter and you’ll have it in about 10 seconds.
If you prefer videos, you can watch this video of the same tutorial on It’s FOSS YouTube channel:
Step 1
You need to install TestDisk tool first. Most Linux distributions already have this tool in their official repository. In Ubuntu and other Ubuntu based Linux distributions such as Linux Mint, elementary OS etc, you can use the command below to install TestDisk:
sudo apt install testdisk
Arch Linux users can install it from AUR. You can download it for other Linux distributions from the link below:
Though I am using Ubuntu in this tutorial, this doesn’t mean it is only to recover deleted files in Ubuntu Linux. The instructions presented here works for other distributions as well.
Step 2
Run TestDisk in the terminal using the command below:
Step 3
When you open it, you’ll see something that looks like this. Be patient! The interface is actually straightforward but you do have to carefully read the text. Use the arrow keys to navigate and “enter” to select.
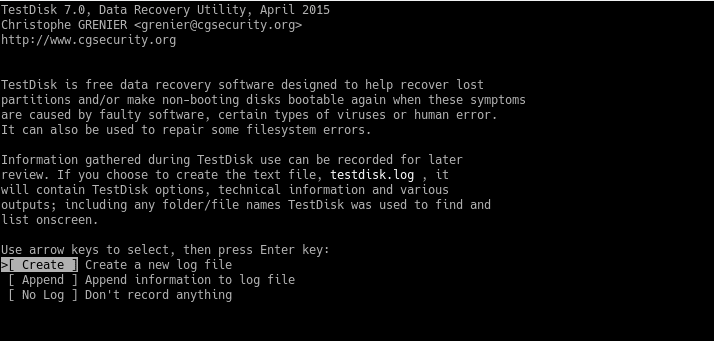
Screens that have extra commands will tell you so. Also note that TestDisk 7.0 tends to highlight the next reasonable step. It’s almost always right but do read the screen, since it can’t read your mind. In any case, when it wants you to let it create a log file, indulge it. It’s about to pull you out of a hole.
Step 4
Now, at this point, if you’re lucky, you should see your drive. And you can proceed to the last steps. But let’s assume you’re not, that you have, say, a multi-boot machine. In this case, ownerships can get blurry, and Testdisk needs your permission to open them. You’ll see something like this:
Select “sudo” and enter your password. Hit “enter” and “enter” again on the next screen to create another log file.
Step 5
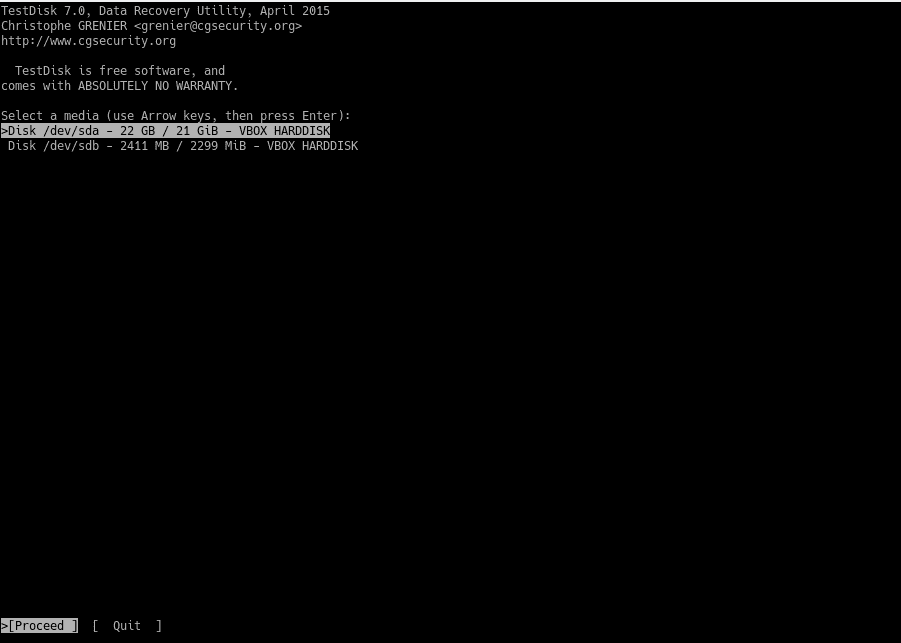
This time Testdisk displays all your drives. Arrow key to the drive in question and hit enter.
Step 6
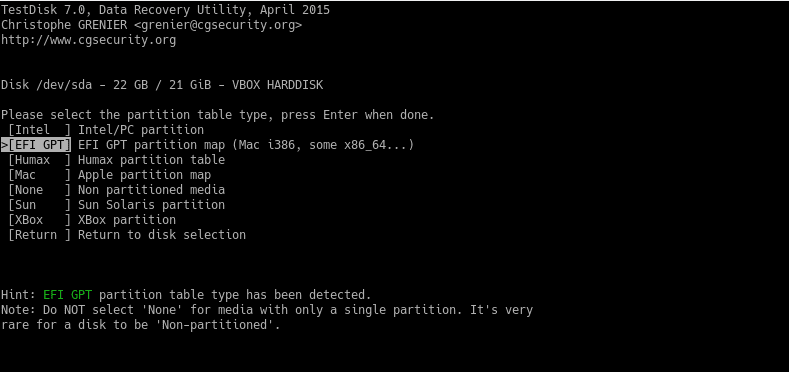
Testdisk has again selected the correct setting. This makes sense since a simple storage device is seldom partitioned. Again hit enter:

Step 7
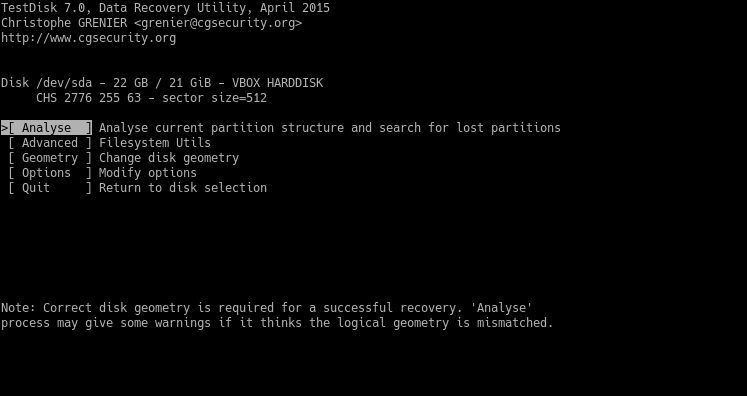
And finally we have to do a little thinking to do. If you read the first screen—and I’ll bet you didn’t—this program isn’t just for recovering deleted files. It’s a powerful disk utility. But if we remember what we’re trying to do the choice is fairly obvious: we’re not trying to fix a disk, we’re trying to recover a file. Select “Advanced” and hit “enter”.
Step 8
At the bottom of the page choose “Undelete” and get ready to see a ghost!
Step 9
Testdisk will scan for files and produce a list of deleted files highlighted in red. Arrow down to it and carefully read the choices at the bottom.

Step 10
Again, bear in mind that Testdisk is a multi-function tool. Most of these options deal with groups of files; we only want our damn resume back! So hit “c”.
As you can see from the scoreboard, we’ve won 1-0. After hitting “c” there are options about where you might want to recover the file to, but it defaults to your home folder. And again this is generally the best thing to do. Navigating in Testdisk is a little tricky, whereas dragging and dropping after the fact is a breeze.
A few tips on recovering deleted files in Linux using TestDisk
First, if you find yourself somewhere you don’t want to be, hit “q” for quit. This won’t close the program, instead, it will act like the “back” button on a program with a full blown GUI, and put you back a page. And just like a “back” button repeating will eventually lead you back to the beginning.
Second, as with anything, the fewer the distractions, the easier it is to find what you’re looking for. In other words, physically detach all other storage drives. In graphically simple environments simplicity is your friend.
Finally, Testdisk can also help you retrieve files that have become inaccessible for other reasons. In fact, this is why I started using the program in the first place. I was trying to save files from a corrupted drive that could not be made to boot. Normally it’s simply a matter of removing said drive any hooking it up to a USB adapter. You can then mount it on another PC and copy the files where ever you want.
But what if the drive is formatted to LVM? This was my problem because a mounted LVM drive looks nothing like a normal Linux OS. None of the usual files appear, and hunting around simply doesn’t help. This, among other reasons, is because most Linux file managers can no longer read ext.2 file systems.
Nevertheless, after a few false starts, I was able to find and save the missing files. Note, however, that the sequence of steps here will be a little different, you may need to use the “analyze” option for Testdisk to make sense of the drive and you may have to poke around a little to find the “home” folder once you do. Furthermore, the files you’re looking for will not appear in red since they were never deleted in the first place. But once you do find them, the copying procedure is basically the same.
With Testdisk and a little luck, you may never lose your resume again as you can always recover deleted files in Linux.
Disclaimer: This tutorial is a reader submission.

Dave Merritt
I’m a 59 years old, fulltime landscaper and parttime PCmedic. I’ve been an avid Linux user for over ten years. In that time, I do not claim to have made every possible mistake, only most of them. I’m a big fan of prog rock, avant jazz and J S Bach, and enjoy reading Neal Stevenson and anything to do with the foundational problems in modern physics.
Like what you read? Please share it with others.
Источник
Recover deleted files on Linux (Beginners Tutorial)
Have you ever deleted any important files by mistake? Who doesn’t! Okay, but can I recover them? In this post, you will learn how to recover deleted files on Linux using various programs on different file systems.
You will see how to recover deleted files from SD cards, HDDs, and deleted partitions on different Linux file systems such as EXT3, EXT4, and even from Windows file systems such as FAT32 & NTFS.
Table of Contents
Recover files from deleted partition
This is quite a problem. Often, Linux users frequently install several systems at the same time, and they may delete a partition by mistake during the installation process.
However, how to recover files from those deleted partitions? For this, we need to recover the partition using a tool called TestDisk.
Testdisk is a powerful partition analysis and data recovery utility. Most Linux distributions such as Debian and Ubuntu comes with TestDisk.
On the other hand, the application is cross-platform and supports a large number of partition tables such as Intel, MSDOS, and Mac. These are the most popular partition tables.
Also, it supports many file systems such as NTFS, EXT4, and other nonpopular file systems such as BeOS and ReiserFS.
When you delete a file, the list of clusters occupied by the file is deleted, marking those sectors available for the use. If the clusters have not been overwritten, TestDisk can recover the files.
First, start the application like this:
Next, you have the option to create a new file for the logs. If you want to create one, choose the create option and press Enter. If you don’t want a log file, select the No Log option.
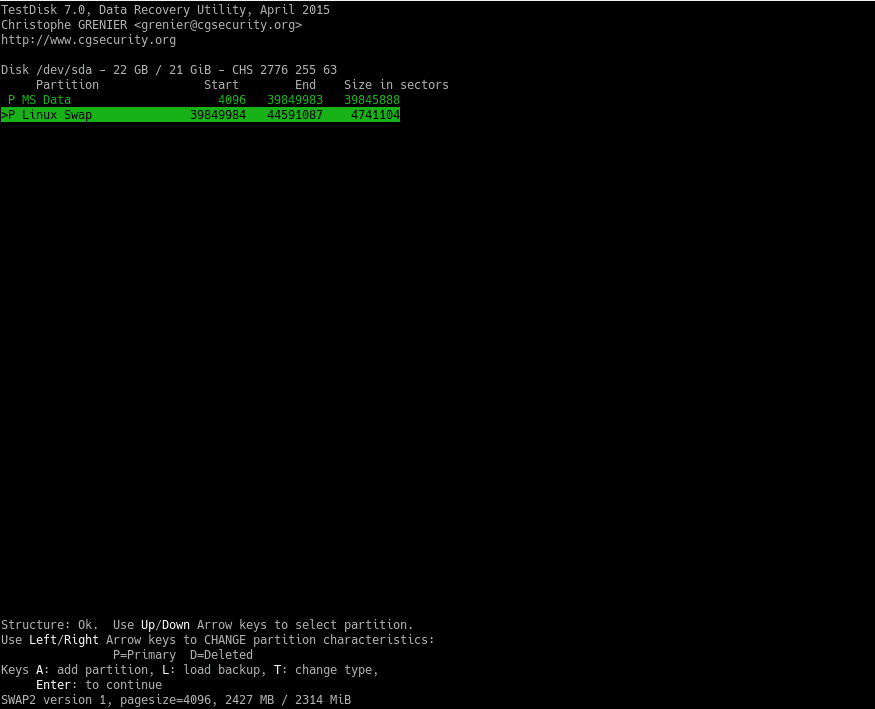
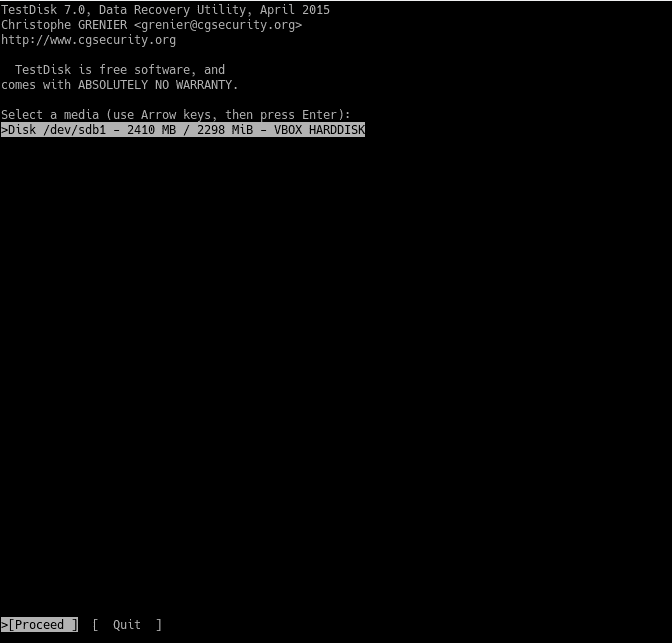
Next, the disks or partitions recognized by the system will be scanned. In this particular case, sda is the partition we want to recover.
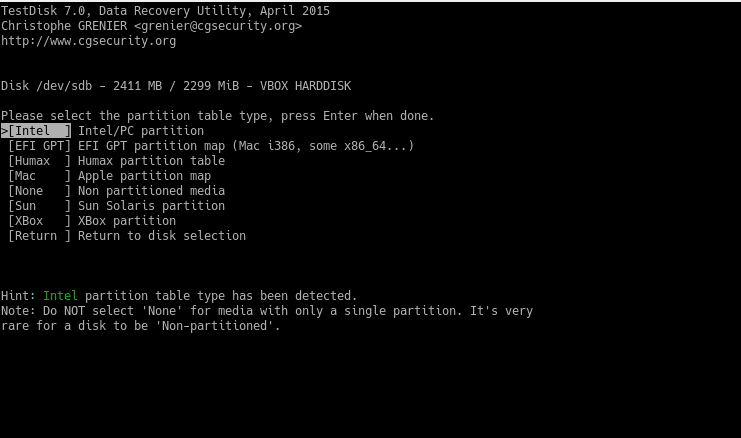
TestDisk recognizes various types of partition tables. It is usually Intel unless you are using a specialized one.
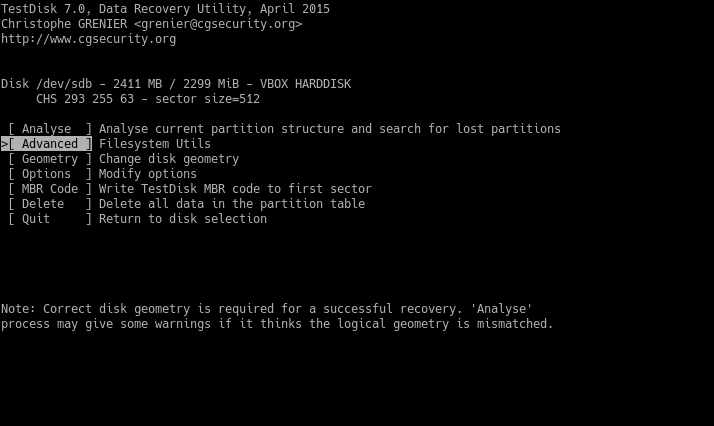
In the next screen, you will see a series of options that the program has. For this particular case, we need to choose the Analyse option.
With this option, the program will exhaustively analyze the disk to find the structure.
Then, it will ask about the type of search you wish to do. Usually, choose the Quick Search option.

If you are lucky, you will see the deleted partition. If not, you will have to choose a deeper search.
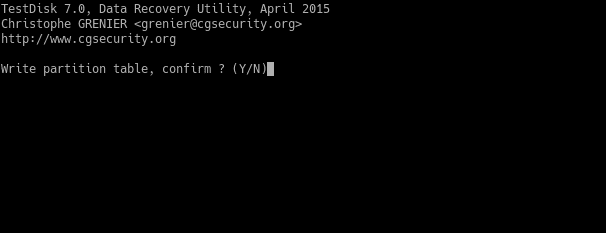
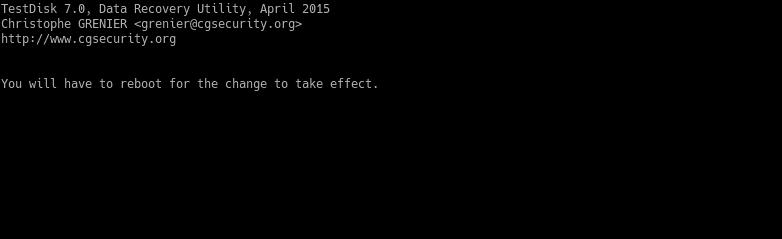
Then, choose the Write option to write the partition table. When finished, restart the system, and you will have your partition back!
Note that during these steps, it may take a long time. It depends on the disk size.
According to the type of file system, this partition may have, particular instructions will be followed. They will be detailed later.
Recover deleted files from an external drive
Now let us imagine we have an external flash drive, and by mistake, you have deleted some files from it. How to restore them?
Thanks to TestDisk, the process becomes quite similar to that of a deleted partition. But there are some differences.
To start the program, we will use the testdisk command. Also, we can add the flash drive as a parameter like this:
Next, select proceed. Then, choose the partition table type.
Then, select the Advanced options to recover files.
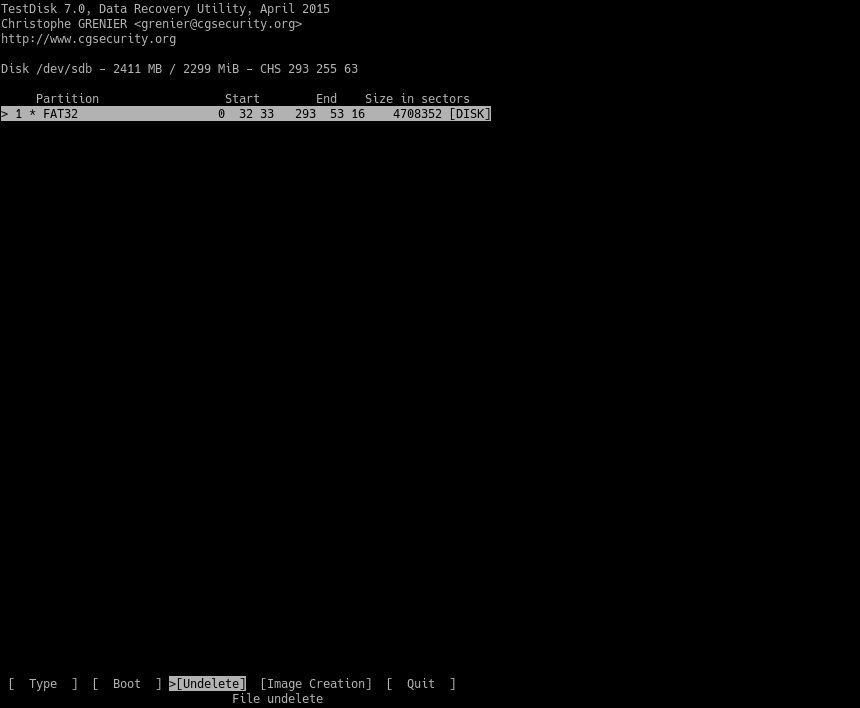
The next step is selecting the partition and the Undelete option.
Then, you will see all the deleted files on the partition.
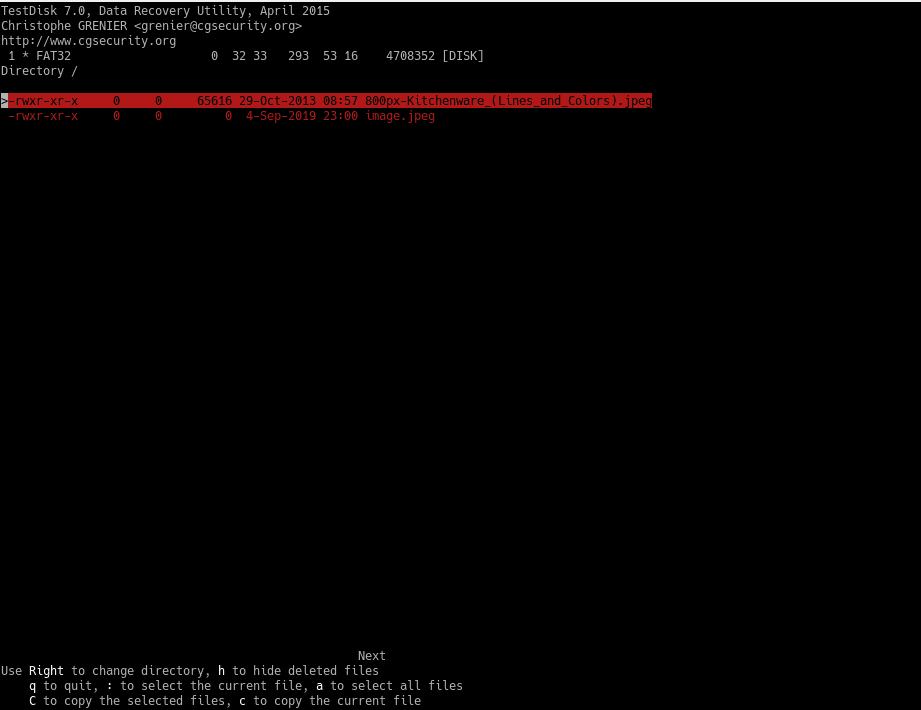
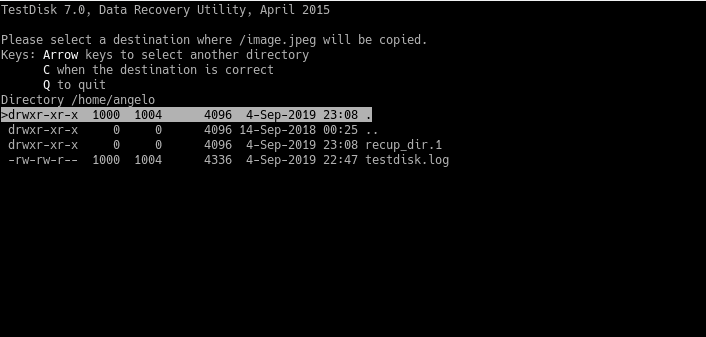
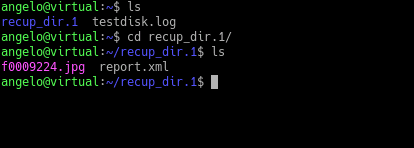
Now, select the destination folder to place the recovered files. You need to press C on the first option to place the files on the current directory.
Finally, you will see this message:
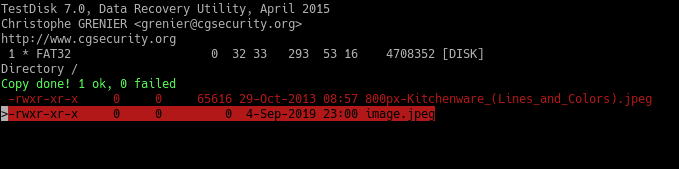
Congratulations! Files restored.
Recover deleted files from SD card
Usually, on an SD card, it is common to notice that they are used for multimedia files. Therefore, it is advisable to use a more specialized program for these files.
In this case, we will use the application called Photorec that comes incorporated in TestDisk.
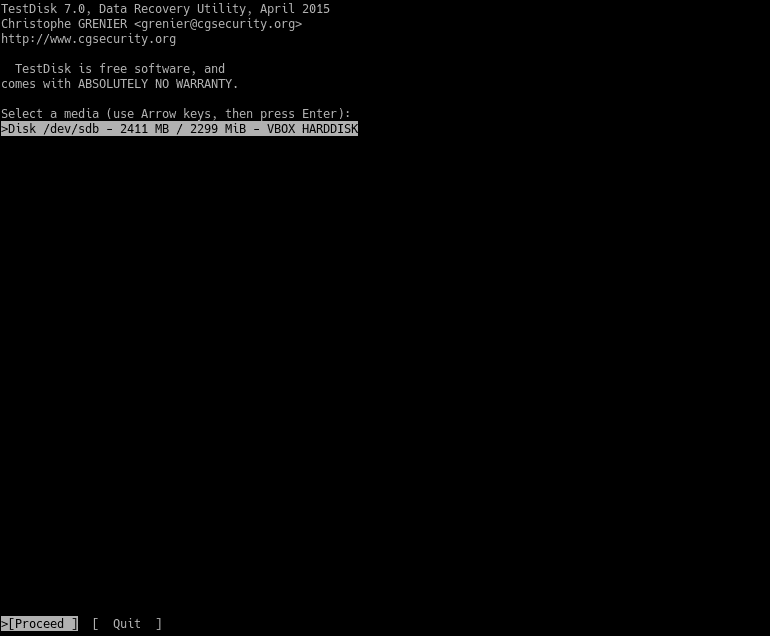
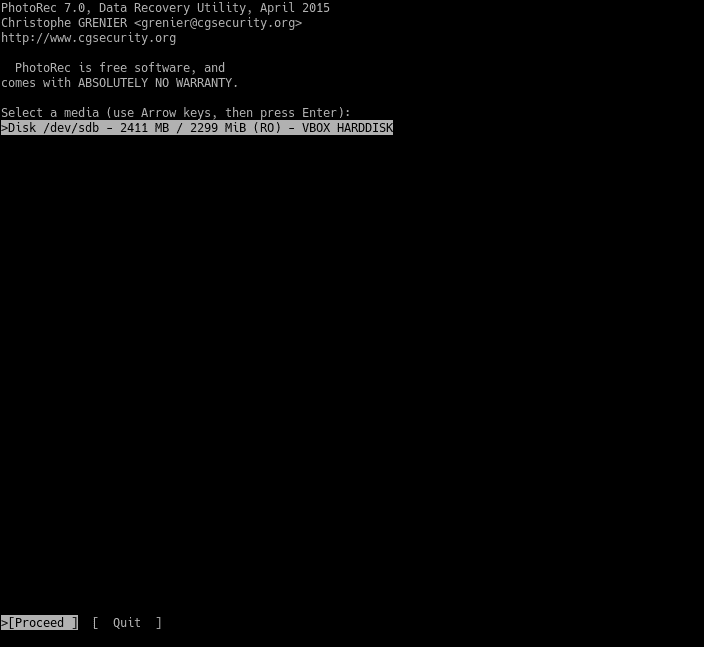
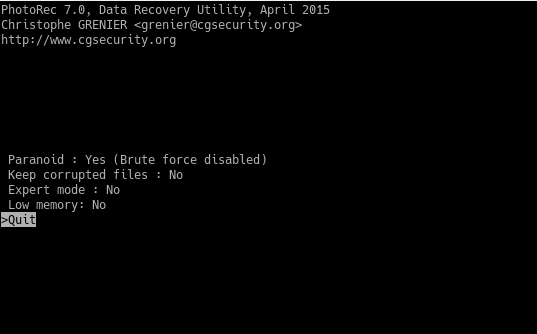
First, insert the SD card on the PC. Next, run photorec as root:
Then, you will see the following image. Select the media and proceed and press Enter.
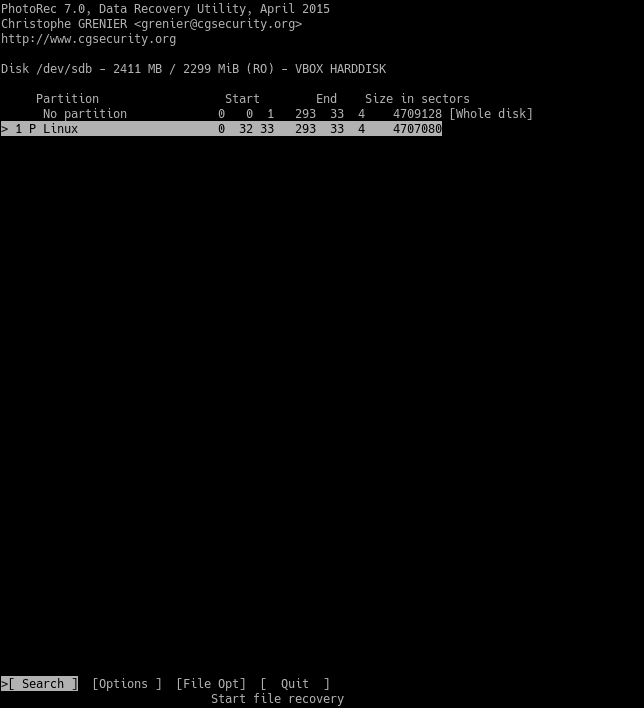
Next, select the partition. And select Options and press enter.
There you will see the recovery options:
Press q to return to the previous screen. It is necessary to choose the types of files that we want to recover. This is achieved by selecting the File Opt option.
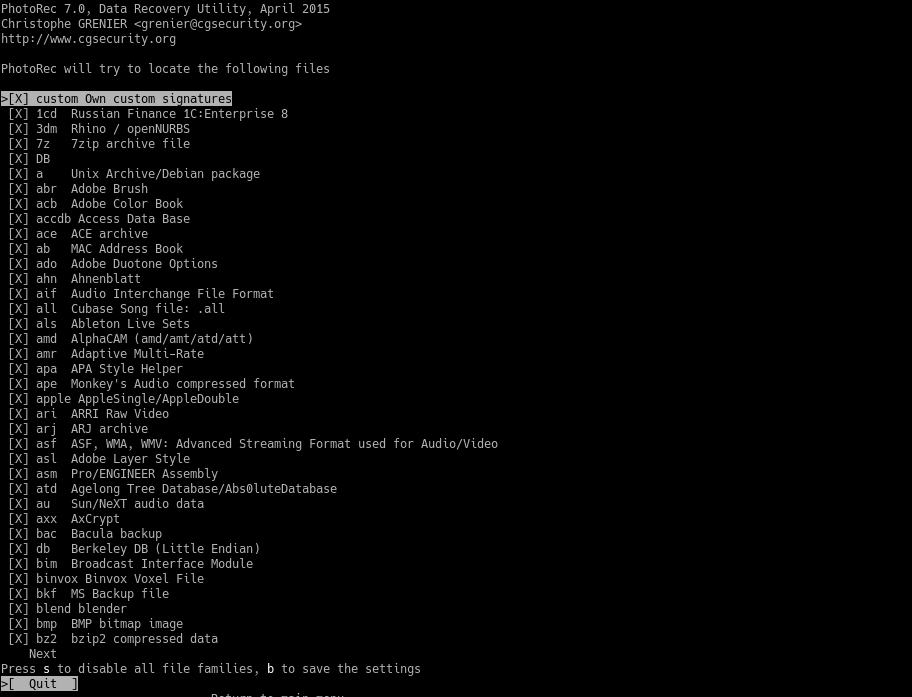
Press the s key to select and deselect all formats. You can also select the types of files you want to recover using the right key. To save the selected options, press the b key. Return to the main menu using the q key.
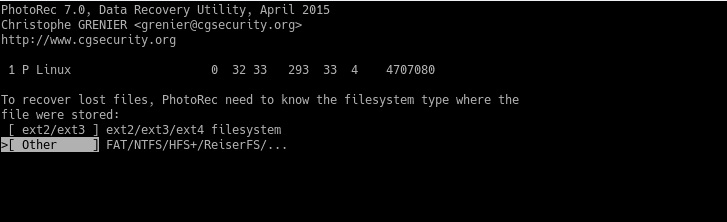
Then, on the main menu, choose the Search option to start the process. And choose the file system.
You will then be presented with two options. Free and Whole. Normally, Free is enough. If you want to do a deep analysis, choose Whole, but keep in mind that it will slow down the process.
Now, it is necessary to choose the location where the files will be saved. To do this, press the c key.

After choosing the destination, the recovery process will start. Remember that the system will collapse and freeze. So be patient.
In the end, you will see a message informing you of everything that has happened.
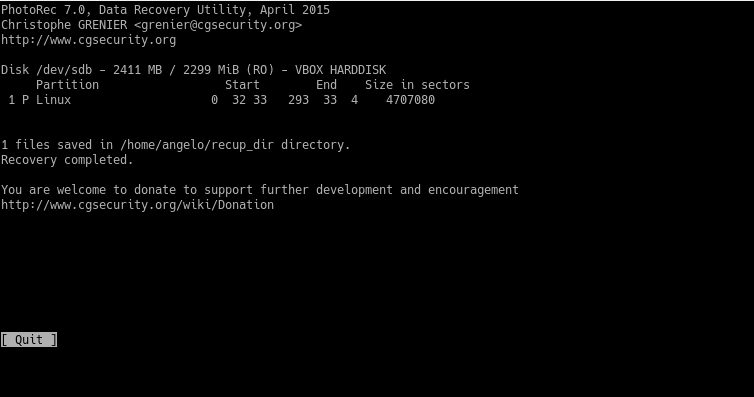
Next, check the results.
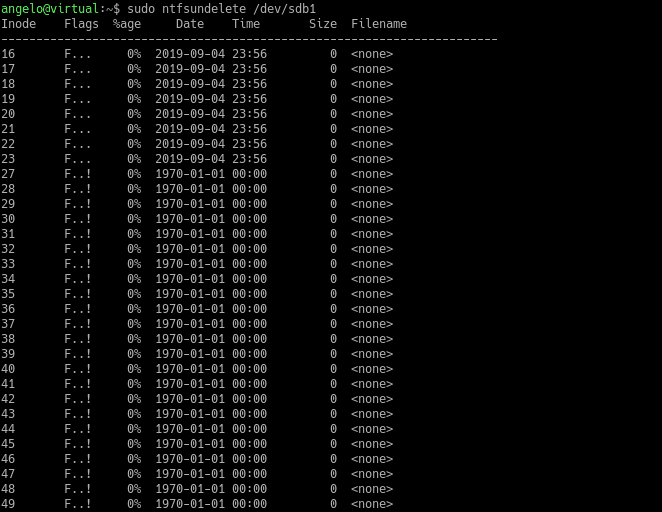
Recover deleted files from NTFS
NTFS is a Windows file system. If you are one of those who use both systems on the computer, then you may need to restore deleted files from a Windows partition with this file system.
To do this, we have a tool called ntfsundelete that is quite simple to use.
First, you need to scan the disk or partition. For example:
Then, we will be able to recover the deleted file with the following command:
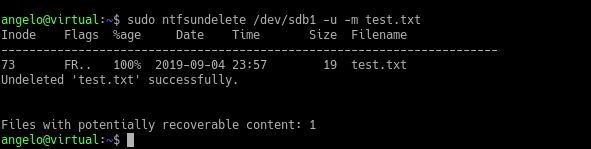
The recovered files now belong to the root user. The last step is to change the permissions and owners of the files using the chown command.
Recover Files from FAT32
Another common Windows file system is FAT32. You can recover files from FAT32 is by using TestDisk.
So again run testdisk as root user and pass the disk as a parameter:
Then continue the steps as described above to restore the files.
Recover on memory files (Using inode)
If you delete a file that is used by another process, you can restore it from memory using inode.
Some initial conditions must be established. First, the deleted file MUST remain open by another process. Then you have to verify the process and finally recover it and change its permissions.
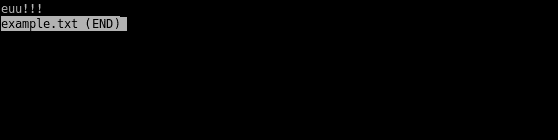
In this case, I will create a file called example.txt using the nano editor and add some text:
Then save the changes and open another terminal window and use the file. For example, with the less command.
Open another terminal session, delete the file and make sure it’s deleted:

As you can see, the file no longer exists. But we will be able to recover it. To do this, let’s get the number of the process associated with the inode of the file.

You will notice the process and command that is using the file (the less command). From that image, we have to pay attention to the second and fourth values. These are the PID of the process and the descriptor of the file respectively.
Then, recover it with the following command:

Then copy it to whatever location you want, and that is enough to recover it.
Next, check the results and open the file:
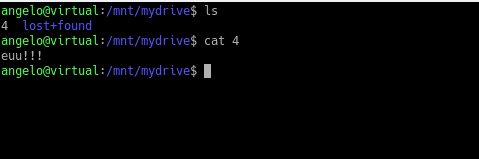
This way, we can recover a deleted file that still on memory and used by a process with the inode.
Recover Deleted Files from EXT4 (Using extundelete)
EXT4 is the default file system on most Linux distributions. It is quite fast and with technical features that are very well taken advantage of by the Linux kernel.
One of the used tools to recover files from the EXT4 filesystem is extundelete.
Extundelete is an open-source application that allows recovering deleted files from a partition or a disk with the EXT3 or EXT4 file system. It is simple to use and comes by default installed on most Linux distributions.
To recover a certain file, just use the following command:
If you want to recover all the files in a folder, use the wildcard character:
But if you want to restore all files on the partition or disk, the next command would suffice:
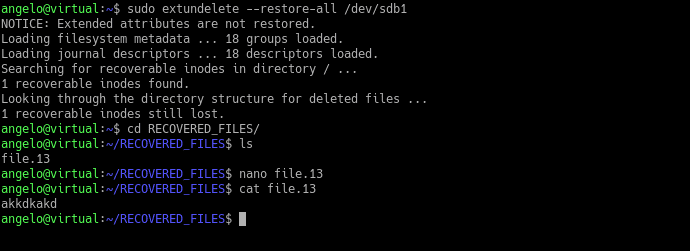
So, the recovered files will be on the RECOVERED_FILES directory. So this way, you can recover deleted files using extundelete.
Using debugfs
It is also possible to use the debugfs tool to recover deleted files. This tool also uses the inode number of the deleted file. However, it only works on EXT4 file systems.
Its operation is quite simple, too. First, you have to enter the partition or device.
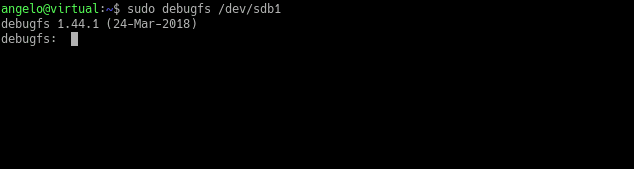
Then, after a while, you will be able to login to the debugfs console to search for recently deleted files.
In the first column, you will see the inode number of the deleted files in that device. Then, restore it with the following command:
And that is it. It is quite easy.
Using ext4magic
Another alternative way to recover deleted files on a disk with an Ext4 file system is to use Ext4magic. This application is also quite simple to use.
The most basic syntax of the application is the following:
If I wanted to recover the deleted files from a folder called files, the command would be similar to this one:
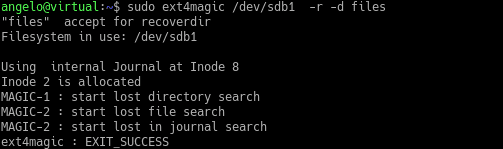
That is how easy it is to use ext4magic. All this thanks to the fact that Ext4 is a community and open source file system.
Recover overwritten files (Using Scalpel)
Scapel is another open-source tool that allows you to recover files from formatted drives, overwritten files, and even damaged drives. It is well known for its speed and efficiency. In this sense, it emerges as an alternative to consider.
Scalpel carves files without the help of filesystems. It tries to extract headers and footers of files and tries to guess the entire file structure using some well-designed algorithms.
Like TestDisk, it is available in the official repositories of most Linux distributions. Therefore, its installation is reduced to the use of the terminal and the package manager of the distribution.
The fastest and easiest way to use Scapel is as follows:
The output_folder specifies where scapel will place all recovered files. Note that Scalpel will create the output directory itself.
But how does Scapel know which files to recover? Well, that is defined in the application configuration file.
This configuration file is usually located at the following location:
And you can open it with your favorite text editor, and there you will only have to uncomment the lines to define the file formats to search.
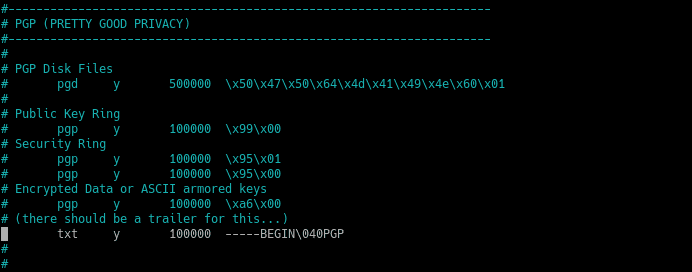
The file formats you uncomment, Scalpel will search for it.
Next, run the full Scalpel command, and in the output folder, you will see the recovered files.
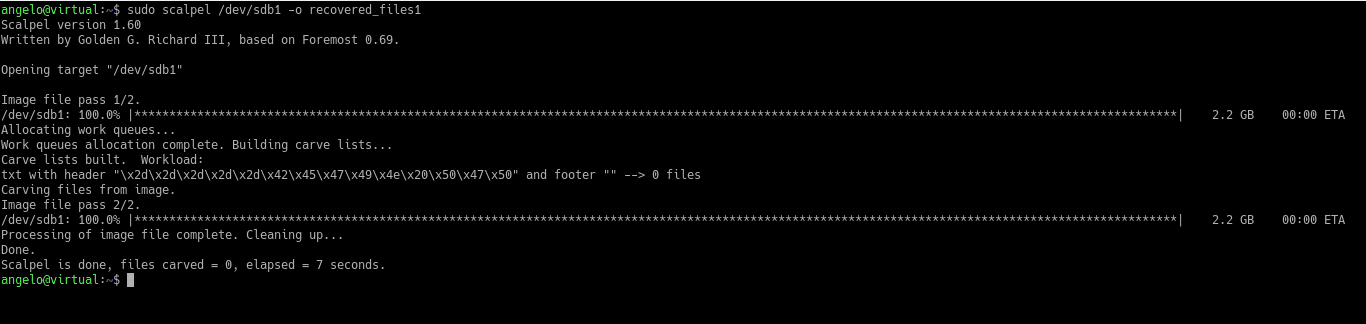
Sometimes, Scalpel restores parts of the file. That depends on the health of the drive and how much data has been corrupted.
Also, there are many craving algorithms you can use, but we discussed here the basic way of craving data.
Recover files from a non-bootable system
This is a delicate case because we need to access from a Live cd of Ubuntu or another similar Linux distribution. Once we have boot, we could use TestDisk to try to recover the data.
In this case, we would have to use an external drive where to save the data. On the other hand, in case TestDisk can’t do the job, we can also try extundelete or ext4magic as long as the partition is Ext4.
If it does not work, you could try regenerating the partition using TestDisk as explained above.
Conclusion
It is possible to delete files accidentally. The idea is to know the appropriate tools and techniques to recover these files.
In this post, we have covered several circumstances and different file systems that could help avoid such problems.
Источник


