- Zeta Systems Blog
- Installing Virtio Drivers In Windows On KVM
- 3rd July 2018
- Download ISO
- Machine Configuration
- Attach ISO
- Begin Install
- Storage Driver
- Post Install
- Guest Agent
- Device Manager
- Generic Bus
- Virtio Ethernet Adapter
- Virtio Balloon Driver
- Virtio Input Driver
- Virtio Serial Driver
- QXL Video Driver
- Cursor Tweak
- Драйверы VirtIO для виртуальной машины Windows. KVM, CentOS
- Установка драйверов VirtIO в Microsoft Windows
Zeta Systems Blog
Insights, comments, tips and random ramblings.


Installing Virtio Drivers In Windows On KVM
3rd July 2018
Virtio drivers are paravirtualized device drivers for KVM virtual machines.
Paravirtualized drivers enhance the performance of machines, decreasing I/O latency and increasing throughput to near bare-metal levels.
It is recommended to use the paravirtualized drivers for fully virtualized machines.
Most Linux distributions include the virtio drivers as standard. This guide explains how to install them in Windows.
This guide was written for Zetastack users but applies to any Windows guest VM running on a KVM host.
This includes Nutanix, Red Hat Virtualization (RHEV), Proxmox VE, oVirt and OpenStack.

If your device manager looks like this, then this guide will help you.
Download ISO
We recommend the stable release, the same as what is shipped with Red Hat Enterprise Linux.
This is the link to download:
Download and add the ISO to your virtualization platform.
In Zetastack this is done in Settings Import.
Machine Configuration
Edit the machine configuration and set these:
- Disk bus: Virtio SCSI pass-through controller
- NIC model: Virtio Ethernet
- Video model: QXL
- Video RAM: 32MB
Attach ISO
This bit depends on whether you are installing a new Windows VM or you already have an existing Windows VM.
If you are installing a new Windows VM, set the ISO to be the 2nd CD-ROM drive leaving the Windows install ISO as the 1st CD-ROM drive.
Begin Install
If you are not installing a new Windows VM, you can skip this section.
Storage Driver
At the disk detection stage, the Windows installer cannot detect any disks for installation.

This is expected behaviour, since the virtio drivers have not been loaded yet and are not included by Microsoft in the installation media.
Click «Load driver» and select «CD Drive (E:) virtio-win-0.1.1»

The driver required is the «VirtIO SCSI pass-through controller» located at:
For other editions of Windows, the driver will be located in the relevant directory on the ISO.
Select the driver and click «Next».

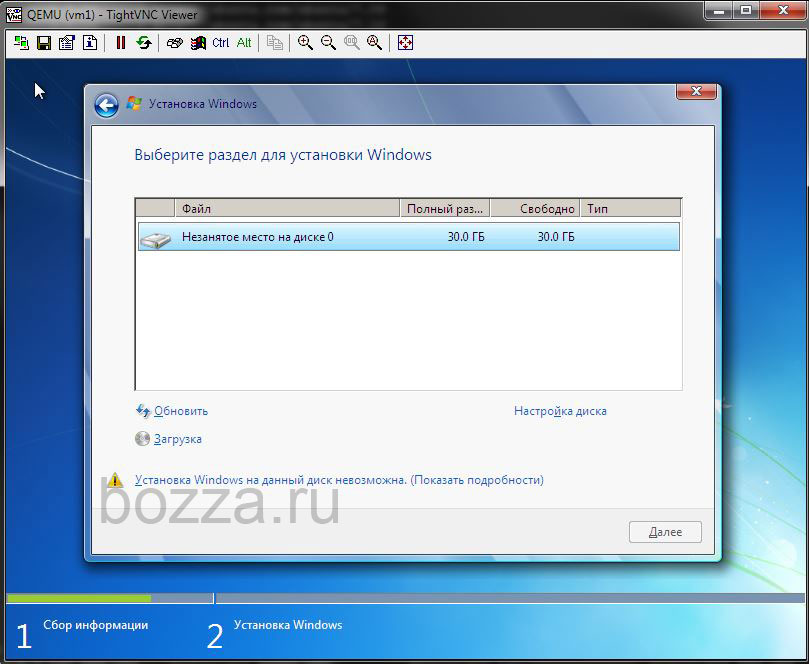
The driver is loaded and the and the disk is now detected.
Select the disk for installation and click «Next».

Post Install
Once the installation is complete and the VM has booted, the next steps are to install the guest agent and resolve any missing drivers.
Guest Agent
It is essential the guest agent is installed.
The guest agent is used by the hypervisor to communicate directly with the VM.
The guest agent is required for clean VM shutdown and to enable live snapshots of the VM images.
On the task bar click «File Explorer».

Select «This PC» then double click «CD Drive (E:) virtio-win-0.1.1».

Open the «guest-agent» folder.
Right click the «qemu-ga-x64» file and select «Install».

The QEMU guest agent will now install.

Once installed the VM must be completely shutdown before the agent can run.
When the VM is started again, the guest agent service will automatically start.
Device Manager
In Device Manager we can see the following unconfigured devices.

This table lists the devices and the drivers required.
| Device | Driver |
|---|---|
| Storage controller | Virtio SCSI pass-through controller (already installed) |
| Ethernet controller | Virtio Ethernet adapter |
| PCI device | Virtio balloon driver |
| PCI input device | Virtio input driver |
| PCI simple communications controller | Virtio serial driver |
| Display adapter | QXL video driver |
| HID button over interrupt driver | Generic bus |
The procedure is simple but repetitive.
Generic Bus
This is a Microsoft bug which is easily resolved.
Right click on «HID Button over Interrupt Driver» and select «Update Driver Software. «

Select «Browse my computer for driver software».

Select «Let me pick from a list of device drivers on my computer».

Select the model «Generic Bus».

This resolves the bug, and removes the driver warning.

Virtio Ethernet Adapter
This is a high speed driver capable of 10GbE and better.
Right click on «Ethernet Controller» and select «Update Driver Software. «.

Select «Browse my computer for driver software».

Select «CD Drive (E:) virtio-win-0.1.1» and click OK.

Device Manager will automatically find the correct driver. The path to the driver does not need to be specified.
At the prompt click «Install».

The driver is installed.

The device description has now changed in Device Manager.

Virtio Balloon Driver
The balloon driver allows the memory in the VM to be changed dynamically.
Right click on «PCI Device» and select «Update Driver Software. «.

Follow the same steps for the Ethernet adapter above to complete the driver installation.
Virtio Input Driver
This provides accurate mouse tracking within the console.
Right click on «PCI Input Device» and select «Update Driver Software. «.
![]()
Follow the same steps for the Ethernet adapter above to complete the driver installation.
Virtio Serial Driver
This is a virtual serial port for communication between the hypervisor and the VM.
Right click on «PCI Simple Communications Controller» and select «Update Driver Software. «.

Follow the same steps for the Ethernet adapter above to complete the driver installation.
QXL Video Driver
This is a video driver that improves performance and allows for higher resolutions.
It also provides a seamless cursor when using the console to manage the VM.
Right click on «Microsoft Basic Display Adapter» and select «Update Driver Software. «.

Follow the same steps for the Ethernet adapter above to complete the driver installation.
Cursor Tweak
When using the QXL driver, the mouse cursor needs to be tweaked.
This will provide a seamless cursor in web based VM consoles.
On the start menu click «Settings».


Click «Mouse & touchpad».

Click «Additional mouse options».

In the Pointers tab, enable «Enable pointer shadow» and click OK to update.

This allows the use of black and extra large cursors.
Драйверы VirtIO для виртуальной машины Windows. KVM, CentOS

Что делать, если Windows не видит диск KVM VirtIO? Драйверы VirtIO для KVM дадут возможность создавать более быстрые виртуальные сетевые адаптеры, подключать диски типа virtio к VM. Можно и без них, но зачем делать хуже, если можно лучше? На примере виртуальной машины Windows 7, устанавливаемой на хост KVM (CentOS 7), посмотрим, как подключить такие драйверы при установке гостевой операционной системы.
Была создана виртуальная машина Windows 7:
Подключаюсь к консоли TightVNC, начинаю установку — установщик не видит диск. 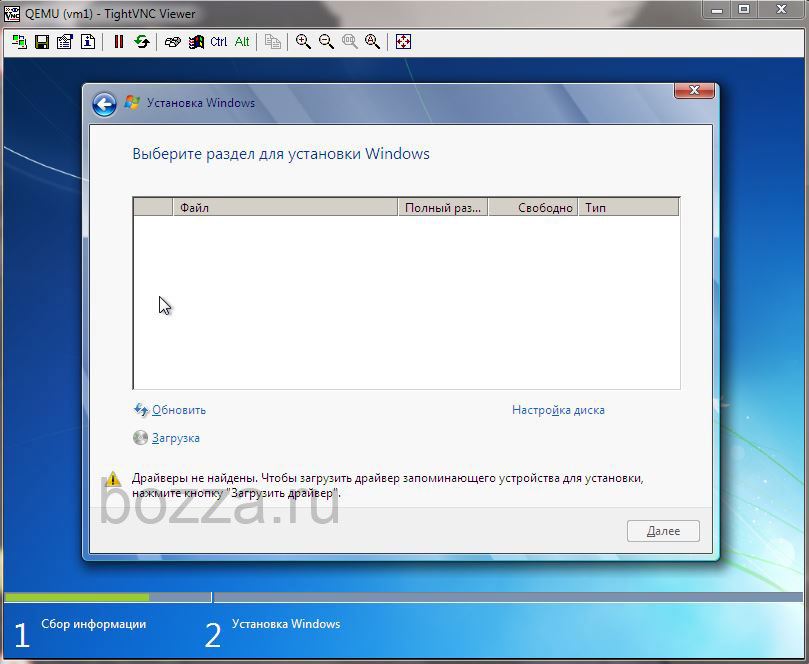
Тип диска был указан virtio. Нужно подсунуть этот драйвер установщику.
# wget https://fedorapeople.org/groups/virt/virtio-win/virtio-win.repo -O /etc/yum.repos.d/virtio-win.repo
# yum install virtio-win
Подключаю к VM диск с драйверами:
# virsh attach-disk vm1 /usr/share/virtio-win/virtio-win-0.1.141.iso hda —type cdrom —mode readonly
Disk attached successfully
Теперь выбираем драйвер: 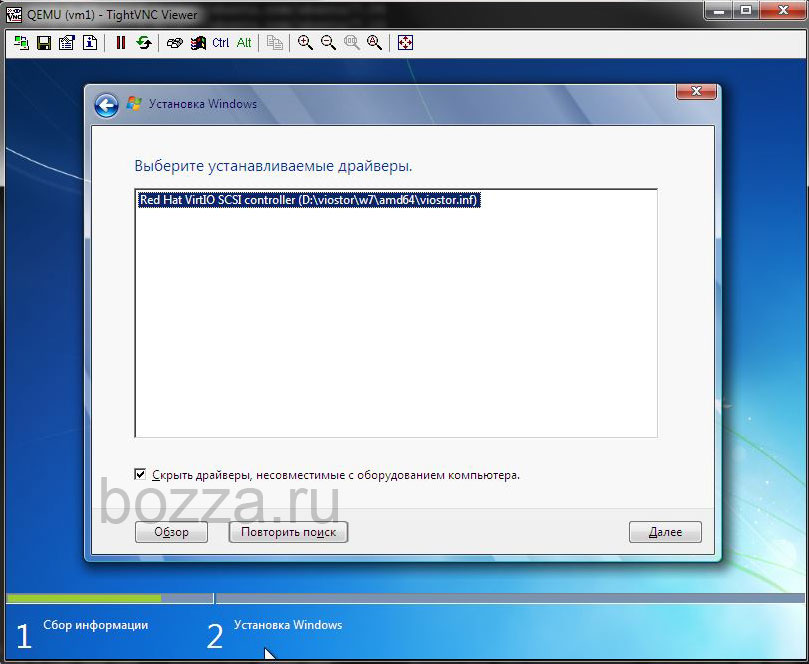
Подключаем снова установочный диск:
# virsh attach-disk vm1 /data/vms-iso/Windows-7-64-prof-from-orig-dvd.iso hda —type cdrom —mode readonly
Disk attached successfully
и продолжаем установку Windows 7.
Аналогичным способом диск с драйверами подключается после установки, для устройств типа сетевых карт и др.
Установка драйверов VirtIO в Microsoft Windows
В данной статье мы проиллюстрируем пошаговую установку драйверов VirtIO на примере операционной системы Microsoft Windows Server.
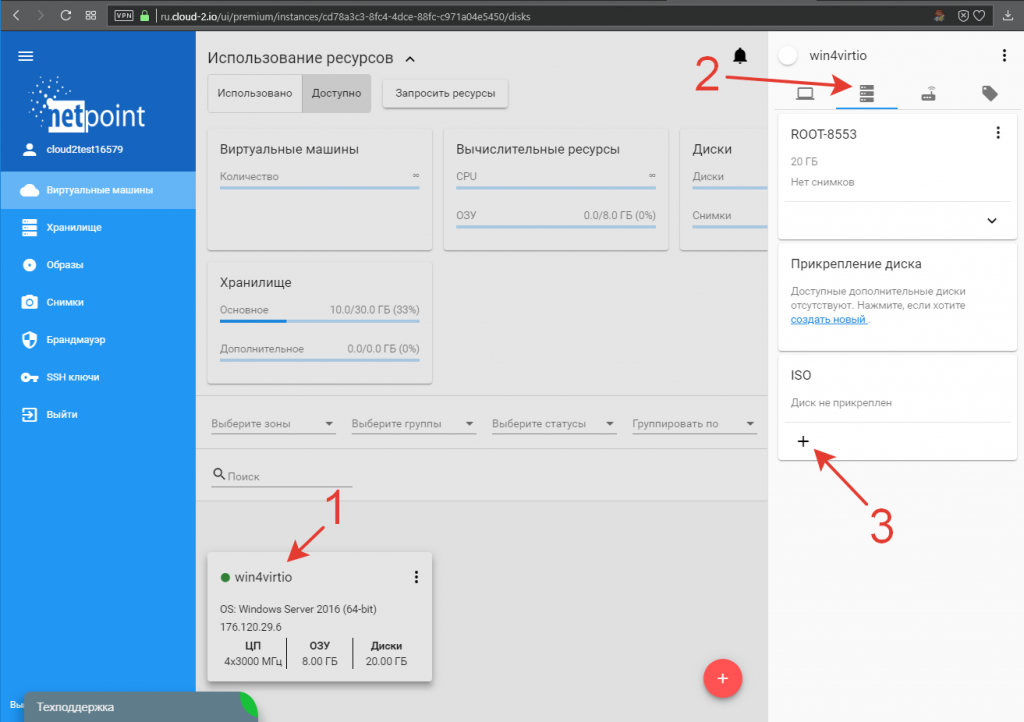
Для начала авторизуйтесь в панели управления Cloud2 для присоединения ISO-образа диска с драйверами VirtIO к существующей виртуальной машине:
1. Авторизуемся в панели управления по адресу: https://ru.cloud-2.io/ui/premium/
2. Выбираем нужную виртуальную машину кликая по её названию (1). В открывшейся панели управления переходим во вкладку устройств (2) и нажимаем стилизованную под плюс кнопку подключения ISO-образа (3):
 Подключаем ISO-образ в меню устройств виртуальной машины
3. В открывшемся окне прикрепления ISO-образа указываем тип операционной системы Windows (1), отмечаем образ диска с драйверами VirtIO (2) и подключаем его к нашей машине (3):
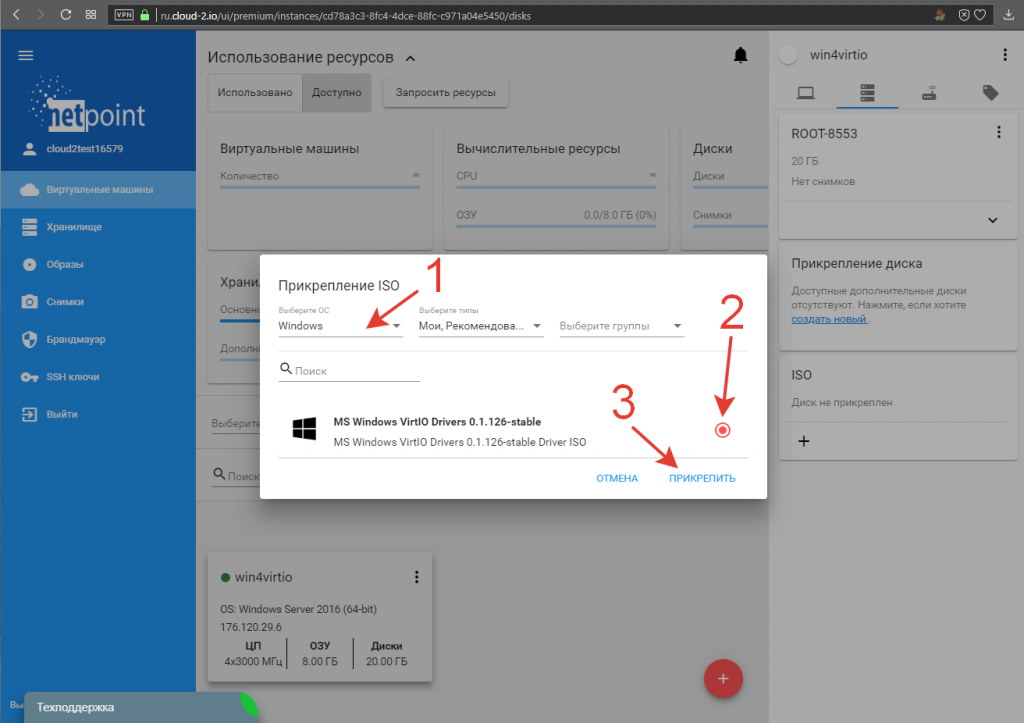 Выбираем ISO-образ из библиотеки
4. Переходим в операционную систему. Для этого подключаемся к машине по RDP или используем встроенную консоль панели управления. Для этого кликаем по стилизованной под три точки кнопке меню виртуальной машины (1) и выбираем пункт «Доступ к ВМ» (2):
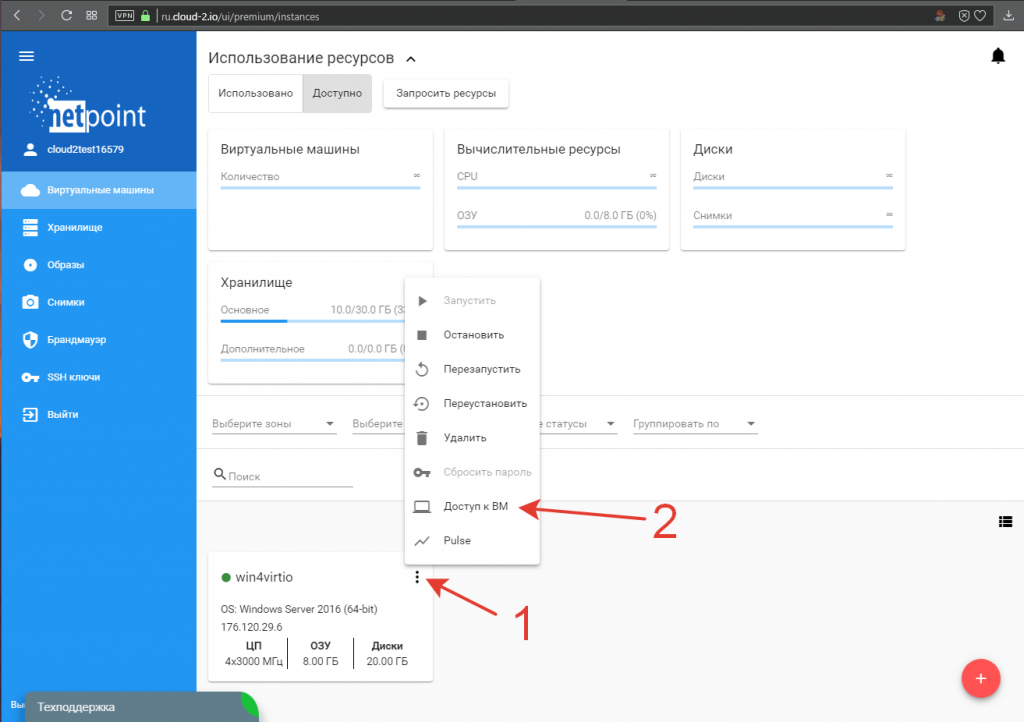 Открываем пункт Доступ к ВМ
В открывшемся окне нажимаем ссылку «Открыть VNC консоль» (1):
 Запускаем консоль
5. В операционной системе с помощью проводника Windows проверяем наличие присоединённого нужного образа с драйверами:
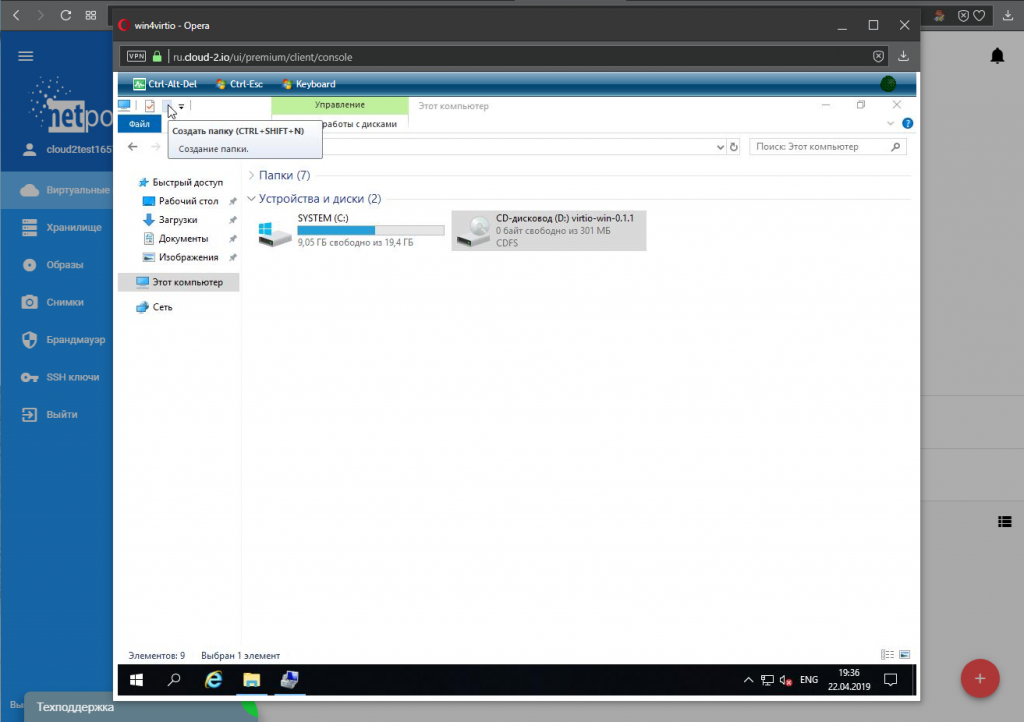 Наличие ISO-образа в виртуальном приводе
В контекстном меню (правая кнопка мыши) кнопки «Пуск» выбираем пункт «Управление компьютером»:
 Запускаем Управление компьютером
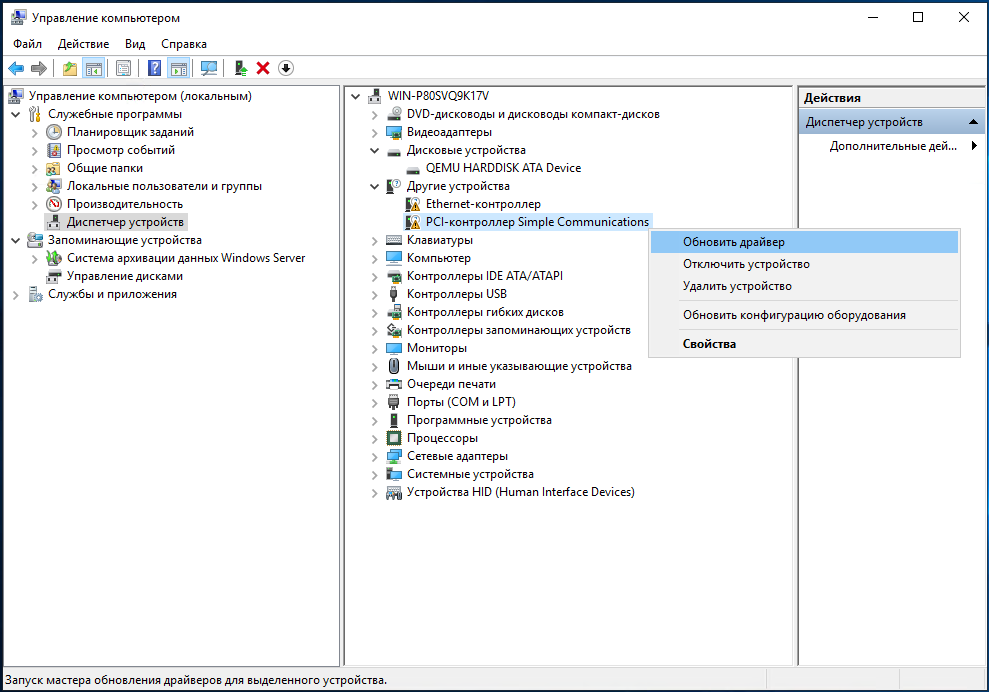
6. В открывшейся панели переходим в Диспетчер устройств (1), где наблюдаем ряд неизвестных нашей системе девайсов (2), которые нам предстоит инициализировать:
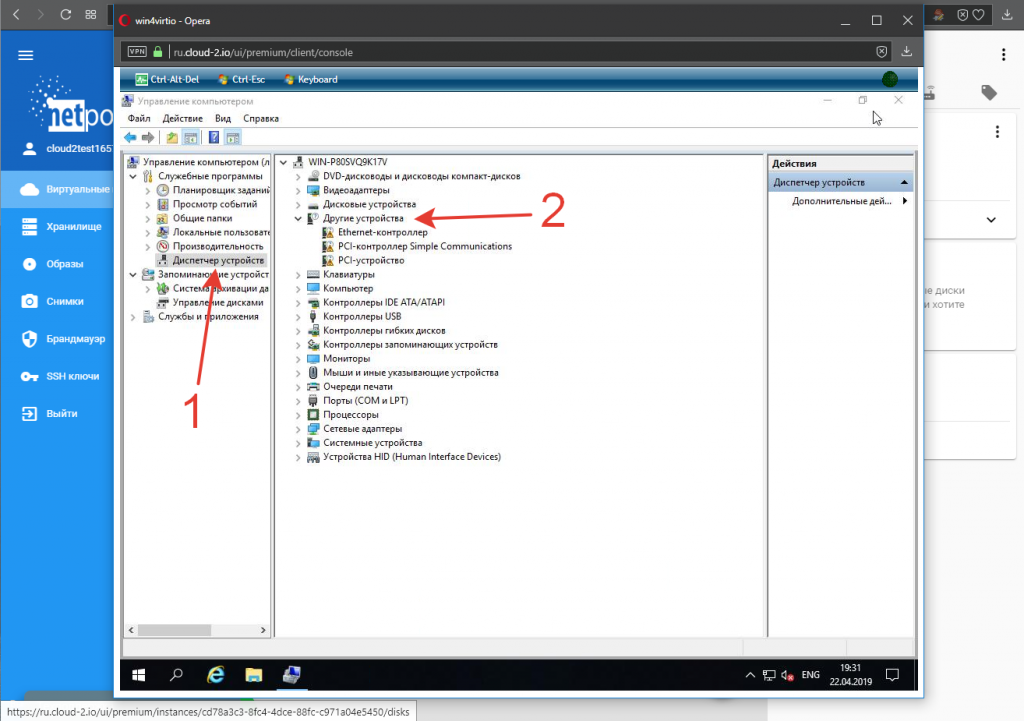 Переходим в диспетчер устройств
7. Поочерёдно устанавливаем драйвера на каждое устройство с подключенного диска. Устанавливаем драйвер устройства Virtio RNG Device:
 Контекстное меню на неизвестном устройстве -> Обновить драйвер
 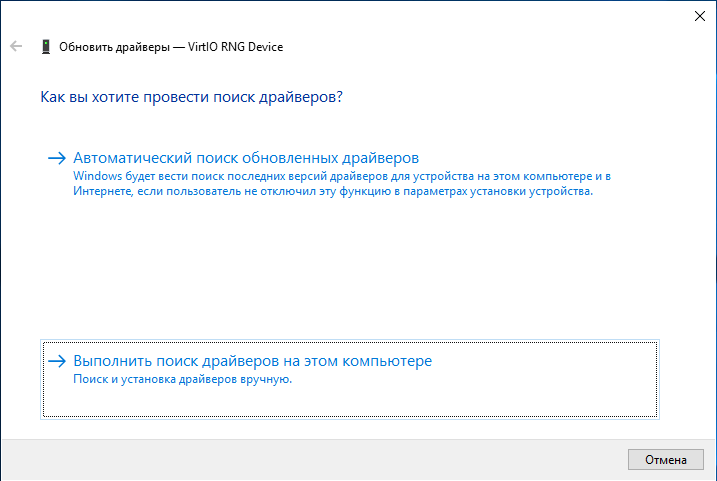 Выбираем поиск драйвера на текущем компьютере
  Указываем диск подключенного образа с драйверами, в нашем примере это диск D, отмечаем галочкой поиск по вложенным папкам
 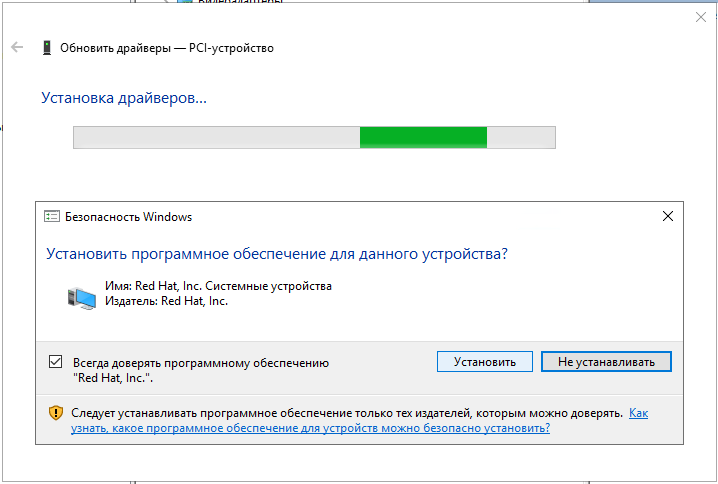 Соглашаемся доверять ПО от Red Hat 😉 — устанавливаем драйвер
 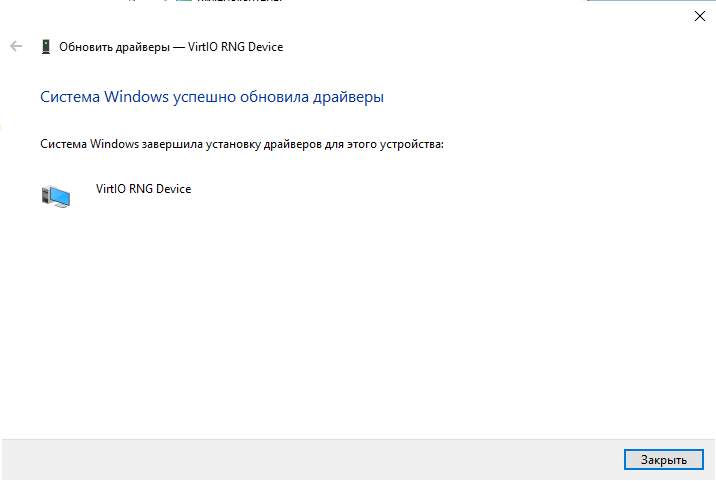 Получаем искомый результат
  Новое устройство появляется в списке
Аналогично устанавливаем последующие драйвера устройств VirtIO Serial Driver и Red Hat VirtIO Ethernet Adapter:
 Запускам процедуру обновления драйвера устройства
 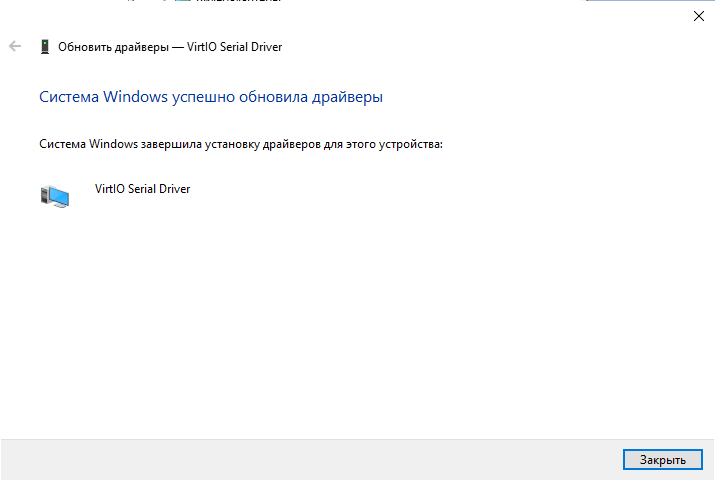 Сообщение об успешно установленном драйвере
 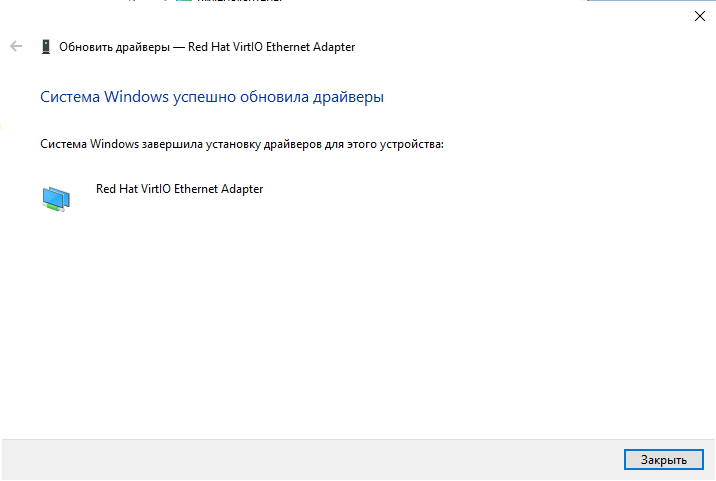 То же самое проделываем с сетевым устройством
В результате проделанных манипуляций мы получаем полностью установленные VirtIO устройства в нашей системе. Не забудьте отключить ISO в самой системе или в панели управления виртуальной машиной по окончании работ.


