- Remmina
- Интерфейс
- Возможности
- Установка Remmina и плагинов в Ubuntu Linux
- How to install Remmina
- Flatpak
- Ubuntu
- Debian
- 10 Buster (stable), Bullseye (testing), and Sid (unstable)
- 9 Stretch (oldstable)
- Raspberry Pi
- Fedora and Red Hat
- Red Hat/CentOS
- Remmina – A Feature Rich Remote Desktop Sharing Tool for Linux
- Remmina Features
- Prerequisites
- How to Install Remmina Desktop Sharing Tool in Linux
- Connecting to Remote Machine Using sFTP
- Connect to Remote Machine Using SSH
- Connect to Remote Machine Using VNC
- If You Appreciate What We Do Here On TecMint, You Should Consider:
- Remmina
- Содержание
- Установка [ править ]
- Запуск [ править ]
- Использование [ править ]
- Создание профиля подключения [ править ]
- Создание подключения [ править ]
Remmina
Remmina — программа-клиент удаленного рабочего стола. Позволяет получить доступ к рабочему столу удаленного компьютера.
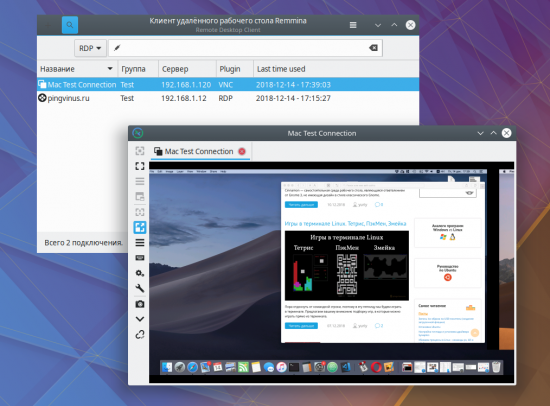
Интерфейс
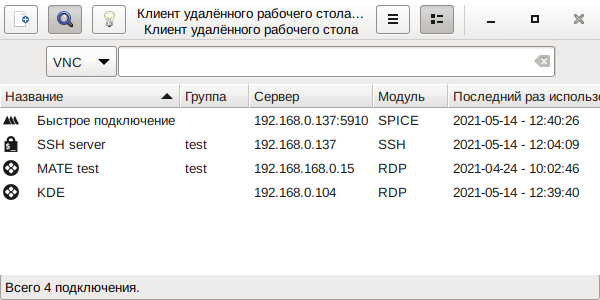
Remmina имеет простой графический интерфейс. На главном окне размещена таблица со списком ваших подключений (можно переключаться между классическим и древовидным списком). Сверху расположена строка для ввода адреса или поиска по списку, выпадающий список для выбора протокола, кнопка для создания нового подключения и кнопка для открытия меню. Также в панель уведомлений (трей) добавляется иконка приложения.
Возможности
Remmina работает под Linux и позволяет получить удаленный доступ к Windows, MacOS и Linux.
Основные возможности программы Remmina:
- Remmina поддерживает целый ряд протоколов: VNC, RDP, SSH, NX, SPICE, XDMCP, EXEC.
- Импорт и экспорт списка соединений.
- Расширение возможностей с использованием плагинов. С помощью плагинов можно добавлять поддержку дополнительных протоколов.
- Настраиваемое качество картинки и разрешение.
- Возможность масштабирования рабочего стола. Сохранение пропорций, растяжение/сжатие картинки.
- Полноэкранный и оконный режимы просмотра.
- Поддержка горячих клавиш.
- Настройки внешнего вида и поведения.
- Открытие выбранного списка соединений из файла при старте программы (используется аргумент командной строки -c ).
Установка Remmina и плагинов в Ubuntu Linux
В Ubuntu программу можно установить из штатных репозиториев, выполнив команду:
Скорее всего в штатном репозитории будет старая версия, поэтому для установки свежей версии, рекомендуется использовать PPA-репозиторий.
Для установки Remmina, используя PPA-репозиторий, выполните в терминале следующие команды:
Дополнительные плагины находятся в пакетах с именами remmina-plugin-* . Их можно доустанавливать отдельно.
Программа написана с использованием библиотек GTK+.
Источник
How to install Remmina
Usually Remmina is included in your distribution, or in an external repository you can add.
![]()
Flatpak
This is a system agnostic package that works on just about every distribution.
If you use SSH agent (https://github.com/flatpak/flatpak/issues/1438 )
Flatpak stores data for installed applications (the XDG config/data folders) under $HOME/.var If you have previously installed Remmina with another package manager, you will have to transfer what was under $HOME/.config/remmina and $HOME/.local/share/remmina under, respectively
This also is a system agnostic package that works on many distributions, but mainly Ubuntu.
If you run into issues, try something else first, and then report the issues. Our Snap package does not work on Ubuntu 17.10 if you use Wayland, see issue #1414._
First make sure you have snapd installed. Then install the last release from the Ubuntu Software Center by looking for Remmina , or install it from a terminal with:
The Snap subsystem has limitations, so some features, for example password storage via keyring is missing and must be fixed manually:
Some features just don’t work on Snap, for example accessing your personal
/.ssh directory is not possible. You have to manually copy your
If you want to install the latest Git revision of Remmina as Snap, get it from the edge channel:
Or, update your Remmina Snap install with your channel of choice:
Snaps are updated with the system and include both latest FreeRDP Git and the latest libssh 0.7 release (for better security).
Ubuntu
Remmina will no longer be available as a PPA package after the release of version 1.4.8.
We may release new versions from time to time (as of writing is 1.4.11), Remmina can be installed by copying and pasting this in a terminal:
Make sure Remmina is not running. Either close it, reboot, or kill it by pasting this in a terminal:
List available plugins with apt-cache search remmina-plugin . By default RDP, SSH and SFTP are installed. To test a daily built development version, do the above, but start with
Debian
10 Buster (stable), Bullseye (testing), and Sid (unstable)
Remmina is in the official stable, testing and unstable repositories.
9 Stretch (oldstable)
Here Remmina can be installed from backports by copying and pasting this in a terminal:
Raspberry Pi
ATTENTION: We do not (or rarely) update this repository anymore. Maintainers are welcome if any.
Remmina operates its own package repository for Raspbian Buster (10.x) you can install by copying and pasting this in a terminal:
(Tested on RPi 3B and 3B+) It is strongly advised to also install gnome-keyring to let Remmina save encrypted passwords in a safer place than .remmina textfiles in the /home user folder.
(The remmina-next PPA can be used on Raspberry Pi 2 and 3, provided you are running one of the supported *buntu derivatives.)
Fedora and Red Hat
As of March 2018 Remmina is available on most Fedora testing and stable, we still have a (not updated) Copr provided by Hubbitus (Pavel Alexeev), to install, paste this in a terminal as root:
Red Hat/CentOS
Install Remmina from the EPEL repository by pasting this in a terminal:
A more updated version is available thanks to @castorsky through a COPR repo
To install Remmina on RHEL/CentOS 8 enable EPEL and COPR repo then install package with following commands:
Источник
Remmina – A Feature Rich Remote Desktop Sharing Tool for Linux
Remmina is a is free and open-source, feature-rich and powerful remote desktop client for Linux and other Unix-like systems, written in GTK+3. It’s intended for system administrators and travelers, who need to remotely access and work with many computers.
It supports several network protocols in a simple, unified, homogeneous and easy-to-use user interface.
Remmina Features
- Supports RDP, VNC, NX, XDMCP and SSH.
- Enables users to maintain a list of connection profiles, organized by groups.
- Supports quick connections by users directly putting in the server address.
- Remote desktops with higher resolutions are scrollable/scalable in both window and fullscreen mode.
- Supports viewport fullscreen mode; here the remote desktop automatically scrolls when the mouse moves over the screen edge.
- Also supports floating toolbar in fullscreen mode; enables you to switch between modes, toggle keyboard grabbing, minimize and beyond.
- Offers tabbed interface, optionally managed by groups.
- Also offers tray icon, allows you to quickly access configured connection profiles.
In this article, we will show you how to install and use Remmina with a few supported protocols in Linux for desktop sharing.
Prerequisites
- Allow desktop sharing in remote machines (enable remote machines to permit remote connections).
- Setup SSH services on the remote machines.
How to Install Remmina Desktop Sharing Tool in Linux
Remmina and its plugin packages are already provided in the official repositories of the all if not most of the mainstream Linux distributions. Run the commands below to install it with all supported plugins:
Once you have installed it, search for remmina in the Ubuntu Dash or Linux Mint Menu, then launch it:
![]() Remmina Desktop Sharing Client
Remmina Desktop Sharing Client
You can perform any configurations via the graphical interface or by editing the files under $HOME/.remmina or $HOME/.config/remmina .
To setup a new connection to a remote server press [Ctrl+N] or go to Connection -> New, configure the remote connection profile as shown in the screenshot below. This is the basic settings interface.
![]() Remmina Basic Desktop Preferences
Remmina Basic Desktop Preferences
Click on Advanced from the interface above to configure advanced connection settings.
![]() Remmina Advance Desktop Settings
Remmina Advance Desktop Settings
To configure SSH settings, click on the SSH from the profile interface above.
![]() Remmina SSH Settings
Remmina SSH Settings
Once you have configured all the necessary settings, save the settings by clicking on Save button and from the main interface, you’ll be able to view all your configured remote connection profiles as shown below.
![]() Remmina Configured Servers
Remmina Configured Servers
Connecting to Remote Machine Using sFTP
Choose the connection profile and edit the settings, choose SFTP – Secure File Transfer from the Protocols down menu. Then set a startup path (optional) and specify the SSH authentication details. Lastly, click Connect.
![]() Remmina sftp Connection
Remmina sftp Connection
Enter your SSH user password here.
![]() Enter SSH Password
Enter SSH Password
If you see the interface below, then the SFTP connection is successful, you can now transfer files between your machines.
![]() Remmina Remote sFTP Filesystem
Remmina Remote sFTP Filesystem
Connect to Remote Machine Using SSH
Select the connection profile and edit the settings, then choose SSH – Secure Shell from the Protocols down menu and optionally set a startup program and SSH authentication details. Lastly, click Connect, and enter the user SSH password.
![]() Remmina SSH Connection
Remmina SSH Connection
When you see the interface below, it means your connection is successful, you can now control the remote machine using SSH.
![]() Remmina Remote SSH Connection
Remmina Remote SSH Connection
Connect to Remote Machine Using VNC
Choose the connection profile from the list and edit the settings, then select VNC – Virtual Network Computing from the Protocols down menu. Configure basic, advanced and ssh settings for the connection and click Connect, then enter the user SSH password.
![]() Remmina VNC Connection
Remmina VNC Connection
Once you see the following interface, it implies that you have successfully connected to the remote machine using VNC protocol.
Enter the user login password from the desktop login interface as shown in the screenshot below.
![]() Remmina Remote Desktop Login
Remmina Remote Desktop Login ![]() Remmina Remote Desktop Sharing
Remmina Remote Desktop Sharing
Simply follow the steps above to use the other remaining protocols to access remote machines, it’s that simple.
That’s all! In this article, we showed you how to install and use Remmina remote connection client with a few supported protocols in Linux. You can share any thoughts in the comments via the feedback form below.
If You Appreciate What We Do Here On TecMint, You Should Consider:
TecMint is the fastest growing and most trusted community site for any kind of Linux Articles, Guides and Books on the web. Millions of people visit TecMint! to search or browse the thousands of published articles available FREELY to all.
If you like what you are reading, please consider buying us a coffee ( or 2 ) as a token of appreciation.

We are thankful for your never ending support.
Источник
Remmina
Remmina — программа-клиент удаленного рабочего стола. Remmina поддерживает протоколы RDP, VNC, NX, XDMCP, SPICE и SSH, что позволяет подключаться к рабочим столам как Windows, так и Linux. Список поддерживаемых протоколов можно расширить с помощью внешних модулей плагинов (plugins).
Содержание
Установка [ править ]
Установить пакет remmina :
Дополнительные плагины находятся в пакетах с именами remmina-plugins-*. Их можно установить отдельно, или все вместе, установив пакет remmina-plugins :
Запуск [ править ]
Запустить Remmina можно из «Меню запуска приложений» («Интернет/Сеть» → «Клиент удалённого рабочего стола Remmina») или из командной строки:
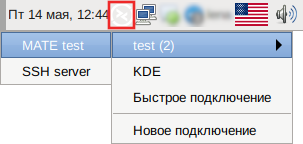
Запустить Remmina в трее:
Можно добавить Remmina в автозапуск (командой remmina -i ), чтобы она появлялась запущенным апплетом в трее.
Использование [ править ]
Создание профиля подключения [ править ]
После запуска Remmina можно создавать профили удалённых подключений:
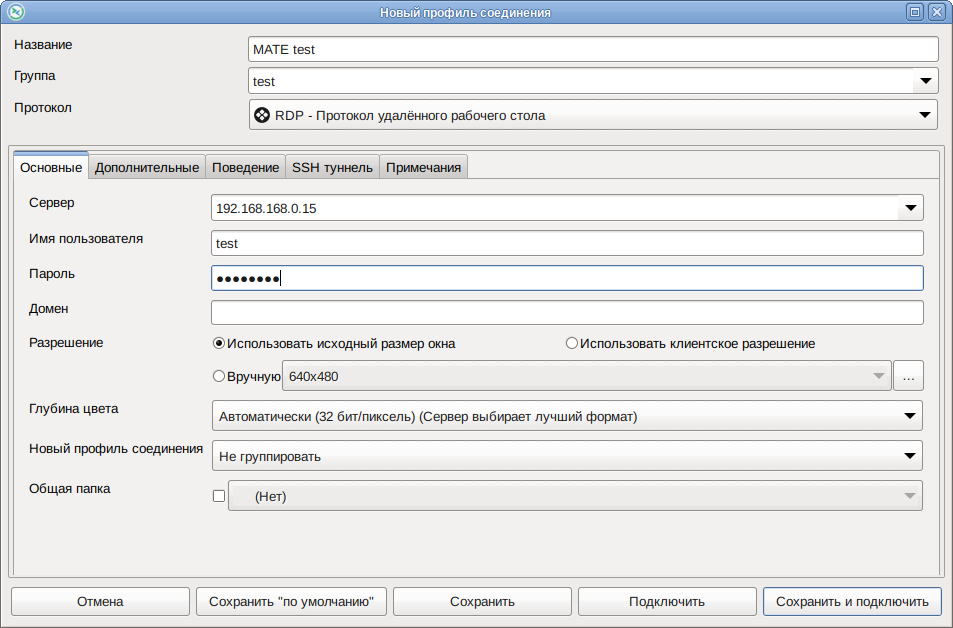
В окне «Новый профиль подключения» следует задать параметры соединения. Добавляемые для удаленного подключения компьютеры можно объединять в группы, например, по типу соединения или разновидности операционной системы.
Создание подключения [ править ]
Создать новое подключения можно, выбрав соответствующий профиль подключения в основном окне программы, или в контекстном меню в трее.
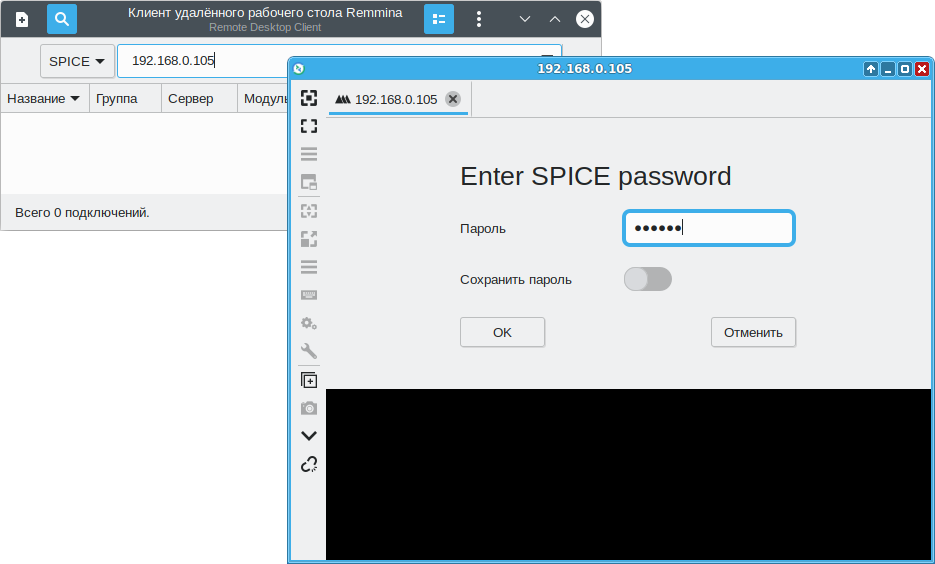
Также можно создать подключение, не создавая профиль. Пример создания подключения по протоколу SPICE:
- В выпадающем меню выбрать протокол SPICE, указать IP-адрес компьютера и порт на котором работает сервер SPICE.
- Нажать клавишу .
- Ввести пароль подключения и нажать кнопку «ОК».
Пример создания подключения из командной строки:
Источник


