- How to Remotely Access and Control Your Mac
- What is Mac remote access?
- How to allow remote access on your Mac
- Access your Mac from another Mac on the same network
- Сonnect to your Mac from a non-Mac device over your local network
- How to remotely access your Mac from any device over the internet
- How to use Mac remote access securely
- Should you use Apple Remote Desktop?
- Can you use VNC over the internet?
- How can I remote control my Mac if it’s not turned on?
- Should I use SSH to remotely access my Mac?
- VNC from Mac to Linux
- Как подключиться к VDS с macOS
- Как подключиться к VDS с macOS по SSH через терминал
- VDS с бесплатным администрированием и поддержкой 24/7. Дарим 200 рублей на тест
- Как подключиться к VDS с Windows Server через графический интерфейс
- How to Remote Access Linux Computers with Splashtop
- How To Set Up Linux Remote Access
- Remote Access Windows to Linux
- Remote Access Mac to Linux
- Remote Access iOS to Linux
- Remote Access Android to Linux
- Remote Access Chromebook to Linux
- The Best Linux Remote Desktop Solutions – Splashtop
How to Remotely Access and Control Your Mac
Remotely accessing your Mac enables you to operate it from anywhere. You can do it over a local network or the internet. And you can use a variety of different devices to access your Mac. But what’s the most effective way to remotely control a Mac? And how do you do it without compromising your digital security?
Read on to find out.
What is Mac remote access?
The term “remote access” can mean a few different things. Here are the most common meanings:
- Browsing and accessing files via a shared folder or FTP (File Transfer Protocol)
- Using a mobile device like a smartphone as a remote control for your Mac
- Screen sharing, where you can see your Mac’s screen but can’t control the computer itself
- A full remote desktop for your Mac, where you can see whatever is displayed on your remote Mac and take complete control of it
This article is all about the last of these — ways in which you can connect to and take full control of your Mac from a remote location.
How to allow remote access on your Mac
If your Mac is running OS X 10.5 (Leopard) or later, it will include Screen Sharing as standard. That makes it easy to remotely access your Mac from another Mac on the same network. It’s also compatible with VNC (Virtual Network Computing), an open standard for remote access. That means you can also connect using any other device that can run a VNC app.
Access your Mac from another Mac on the same network
1. Go to Preferences > Sharing
2. Enable Screen Sharing by clicking the relevant tickbox
3. Under Allow access for decide who you want to be able to access your Mac
4. Take note of your Mac’s IP address
5. On the other Mac, open a Finder window. From the top menu, select Go > Connect to Server
6. Enter the IP address for the first Mac, and click Connect
You should now be able to view and remotely control your Mac in the Screen Sharing app on the second Mac.
Сonnect to your Mac from a non-Mac device over your local network
There are a couple of things you need to do differently here:
1. As before, go to System Preferences > Sharing, but this time, click Computer Settings
2. Enable VNC viewers may control screen with password. Enter a password, and click OK
3. Under Allow access for, select All users or choose specific users
4. Take note of your Mac’s IP address
5. Enter your Mac’s IP into a VNC app on the remote device. Use the password you set to log in
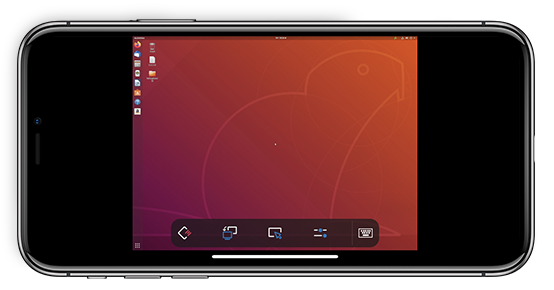
The screenshot here is from VNC Viewer for Android, but there are VNC apps for practically every operating system. So you can remotely access your Mac from an iPhone, an iPad, a Linux PC or a Windows system, as long as you have the right app.
How to remotely access your Mac from any device over the internet
By far the easiest way to remotely log into and control your Mac is to use a third-party remote desktop solution. These vary, of course, but the process is generally something like this:
- Install the remote desktop software on your Mac
- Create an account, setting your username and password
- On the remote device, install the relevant app from the same software provider
- Log in using the details you created, and look for your Mac. It will need to be turned on
- Connect to your Mac
It’s really that simple, and you have numerous options when it comes to choosing a remote desktop solution for your Mac. Some of the best ones include:
- TeamViewer
- Splashtop
- Zoho Assist
- LogMeIn
- RemotePC
Most of them have some kind of free tier, as well as paid packages.
How to use Mac remote access securely
By definition, by enabling remote access on your Mac you open a door to the outside. And whenever you do that, there’s always a potential risk that you could let in someone you don’t want to. That’s even more likely when you enable your Mac to be remotely controlled over the internet.
If you only want to remotely access your Mac from a device on the same network, it makes sense to use the built-in screen sharing, rather than a third-party tool. You can also use settings to define which users on your network can access your Mac.
Whether you want to connect to your Mac from the same network or over the internet, be sure to set strong passwords, according to current advice about cybersecurity. And never give remote access to your Mac to anyone you don’t know and don’t trust.
Should you use Apple Remote Desktop?
Apple Remote Desktop is a more advanced app, which Apple sells separately. It’s designed to give you more control over your remote controlled Macs that Screen Sharing does. Under System Preferences > Sharing, you’ll find an option for Remote Management. It’s also compatible with other VNC software, and you can set very specific permissions about what remote users can do.
Apple Remote Desktop is quite expensive, though, and it really isn’t required for most Mac users.
Can you use VNC over the internet?
Yes, you can use VNC to access your Mac over the internet. However, it requires more setting up than VNC over a local network or an internet-based remote desktop app. You also need to have a static IP address, which many home internet connections don’t provide.
There are ways to make VNC work with a dynamic IP address, but it barely seems worth it when there are so many free remote desktop apps for Mac.
How can I remote control my Mac if it’s not turned on?
Like Windows and Linux PCs, Macs can be woken up or turned on remotely. There are various sleep modes on Macs, and they can be set up to allow for Wake On Lan (WOL). You can even set this up to work over the internet.
If you don’t have WOL set up, you won’t be able to remotely access your Mac unless it’s powered up already.
Should I use SSH to remotely access my Mac?
SSH (Secure Shell) enables you to remotely access the files on your Mac, but it’s not generally used for a full Mac remote desktop. It can be used with FTP (File Transfer Protocol) apps to remotely browse, upload and download files to and from your Mac. If that’s all you want to do, then SSH is a good, secure method for your purposes. But if you want a full remote desktop experience, where you can see your desktop and interact with it, use one of the other methods in this article.
Read more guides:
With over 5 years of supporting Mac users, Ruslana lives and breathes everything Mac. Tech expert, Apple lover, and well, a cutie. Say hi on LinkedIn!
With over 5 years of supporting Mac users, Ruslana lives and breathes everything Mac. Tech expert, Apple lover, and well, a cutie. Say hi on LinkedIn!
Источник
VNC from Mac to Linux
Connecting using VNC from a Mac computer to a Linux server
VNC allows you to remotely start a desktop environment on a computer, and interact with that desktop from your local machine. Unfortunately, VNC doesn’t have built-in encryption, which means that all information sent through VNC can be caught by dubious third parties. One solution to this problem comes from utilizing ssh (The Secure Shell) to encrypt the traffic between you and your remote host.
This tutorial will cover the basics of starting a VNC server, wrapping it in ssh, and connecting to your remote desktop securely. In the following examples we will be connecting to mo.ece.pdx.edu using display 44, which means my port number will be 5944 (VNC port numbers are equal to 5900 plus the display number). Where ever mo.ece.pdx.edu is mentioned, one could also use any Ubuntu or Redhat/Centos Linux machine in MCECS.
If you are attempting to make a VNC connection to a firewalled Linux computer, you will need to make sure that your Mac is connected to one of our VPNs. Popular Linux hosts that are firewalled include:
- auto.ece.pdx.edu and mo.ece.pdx.edu
- Computers in the CS Particle Lab (FAB 88-09)
There are many other Linux computers that do not require you to use a VPN.
Step 1 – Starting the VNC Server on the remote computer
Before we can connect to the remote desktop, we need to start the VNC server on the remote machine. In order to do this, ssh in to the machine where you’ll be accessing the remote desktop. In a terminal, run the following command:
This will start the VNC server on the machine and tell it to only accept connections from the localhost, which is to say from users logged into the machine hosting the VNC server. You will be prompted for a password to log you into your VNC session (This is _not_ like logging in with your MCECS account. This password is arbitrarily chosen by you. It is _strongly_ advised that you not use your MCECS account password here!)
NOTE: This password must be at least 6 characters long!
It will also ask if you want to assign a view-only password. This would be a password you would give to someone if you wanted them to observe your VNC session without being able to interact the desktop. Afterwards, you should receive some output that looks like this:
NOTE: The display number is where your VNC session funneling your desktop. My server was started on display number 44, as it was the next display available. In theory, the display number can be anywhere from 1 to 9999. (for reference, :0 is considered the root display, for displays physically connected to the machine).
Troubleshooting: If you have forgotten your vnc password, or wish to change it use the vncpasswd command. It will prompt you for a new vncpassword and immediately change the vncpassword.
Step 2 – Creating the SSH Tunnel from your computer
Now that we have the VNC server running, we need to create the ssh tunnel from your local machine to the remote host. Log out of your ssh session (don’t worry about vncserver dying when you quit, it’s backgrounded) and reconnect to the same machine with the following commands in a terminal window:
Where cecsuser would be replaced with your MCECS account username.
NOTE: The syntax -L 5944:localhost:5944 is what is responsible for creating the ssh tunnel VNC will be using between your local host and the remote host. In essence, what it’s saying is take everything that is being sent through the remote computer’s port 5944 (the second number) and funnel it into the local computer’s port 5944 (the first number).
Step 3 – Connecting to Linux with VNC
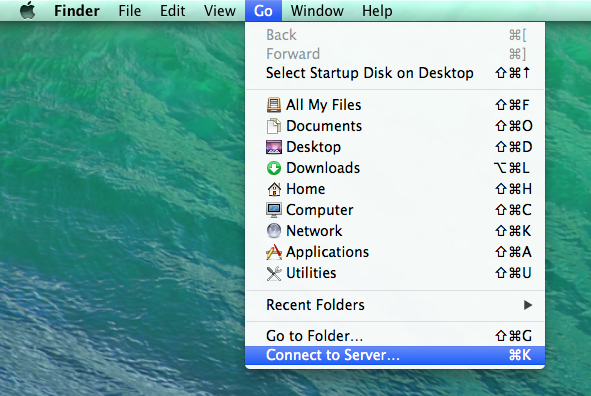
To connect to the VNC session we setup, follow these steps. First, click on the “Go” menu and choose connect to server.
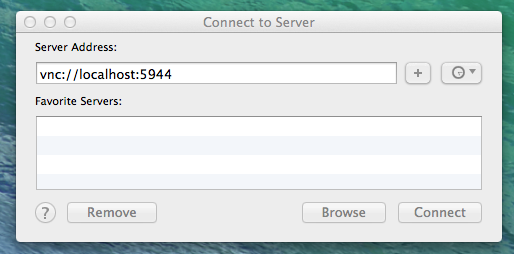
MacOS has a VNC Viewer already built into it. For the Server Address, type vnc://localhost:5944 where 5944 was the port we forwarded above.
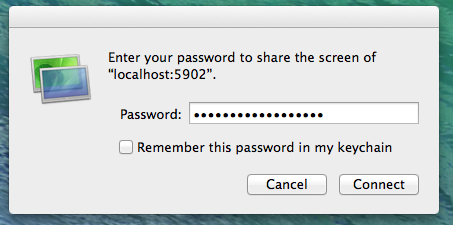
If you set up a password for your VNC session (and you should!) it will prompt you to enter it now.
Remember again, this password should be at least 6 characters!
That’s it! You are now connected to a Linux machine via VNC.
Источник
Как подключиться к VDS с macOS
В этой статье поговорим о том, как подключиться к виртуальному выделенному серверу с компьютеров Apple. Рассмотрим вариант настройки через командную строку и с помощью программного обеспечения для дистанционного управления компьютерами.
Как подключиться к VDS с macOS по SSH через терминал
В macOS для удаленного входа на виртуальный сервер на базе Linux не нужно стороннее программное обеспечение. Достаточно ввести одну команду во встроенном терминале и через утилиту SSH получить доступ к VDS.
Чтобы это сделать, открываем поисковую систему Spotlight, одновременно нажав Alt + Пробел (или Cmd + Пробел в новых версиях ОС). Вводим туда слово «Терминал», а потом нажимаем Enter.
Оказавшись в терминале, вводим команду в формате ssh имя пользователя@IP-адрес сервера.
Например, я ввожу ssh root@89.223.127.80, чтобы подключиться к своему VDS. Узнать IP-адрес можно в панели управления хостинга.
ОС потребует подтвердить намерение выйти на связь по указанному адресу. Для этого надо ввести в терминал слово yes и нажать Enter. Тогда macOS добавит введенный IP-адрес в список доверенных.
Потом сервер потребует авторизоваться. Для этого введем пароль, который пришлет хостинг сразу после регистрации.
Сразу отмечу, что пароль надо вводить вручную, скопировать и вставить его не получится. Терминал просто отзовется ошибкой permission denied и потребует авторизоваться заново. А еще во время ввода пароля на экране не будут отображаться точки или звездочки. Это нормально для unix-подобных систем. Придется вводить вслепую.
После правильного ввода пароля можно управлять вашим виртуальным PC через командную строку.
VDS с бесплатным администрированием и поддержкой 24/7. Дарим 200 рублей на тест
Протестируй VDS Timeweb бесплатно: закажи сервер, сообщи поддержке промокод community200 и получи 200 рублей на баланс.
Как подключиться к VDS с Windows Server через графический интерфейс
Серверами на базе Windows можно управлять с помощью графических утилит. Их основное преимущество — полный доступ к интерфейсу операционной системы вместо управления только через командную строку.
Для доступа к удаленной «машине» зачастую используют следующие программы:
Источник
How to Remote Access Linux Computers with Splashtop
Quickly and easily access your remote Linux computers at any time from any Windows, Mac, iOS, Android, and Chromebook device. Learn how to set up and get started with Splashtop.

In addition to Windows and Mac, you can now remote control your Linux computers from any device with Splashtop! No end-user needed on the remote Linux computer. Just set up Splashtop on the Linux computers you need access to and then enjoy unlimited, anytime remote access to those machines.
With Splashtop, business professionals can work remotely but still feel as if they’re sitting right in front of their Linux system, even while remote accessing from a tablet or mobile device. IT and MSPs can remote connect and control their clients’ Linux computers to provide support, even without the user present.
Find out how to set up remote access to Linux with Splashtop, and which Splashtop solutions enable you to do so.
How To Set Up Linux Remote Access
Splashtop makes it easy to set up remote access your Linux computers:
- Get started with the Splashtop solution of your choice (see list below) and create your Splashtop account.
- Deploy the Splashtop Streamer to the Linux computers you want access to*. After installing the streamer, be sure to launch it (afterwards, the streamer will auto-launch whenever the computer is turned on).
- Install the Splashtop Business App on the computers, tablets, and smartphone devices you want to use to access your Linux desktop.
- You’re done setting up! Simply open the Splashtop Business App and select your Linux computer to launch the remote session.
*The Splashtop Linux Streamer officially supports Ubuntu Desktop 16.04, 18.04, and 20.04. You may also try it with other Linux distributions that are not currently supported.
Unattended remote access (meaning no end-user needed on the computer being remoted into) is made possible by Splashtop’s remote desktop client, the Splashtop Streamer. Once installed on your remote machines, you’ll be able to access that computer from any other device through the Splashtop Business App (available for Windows, Mac, iOS, and Android).
When you deploy the Splashtop Streamer through your Splashtop account, that streamer is tied to your account. Then, whenever you log into your account in the Splashtop Business App on another device, you’ll see the list of computers with your streamer installed that you have access to.
This makes it easy to quickly launch a remote desktop connection. No need to memorize and enter the ip address of the remote computer.
Here’s a look at how remote access to Linux looks when connecting from different operating systems and devices. Also, see the list of Splashtop solutions that enable remote access to Linux at the bottom of this article.
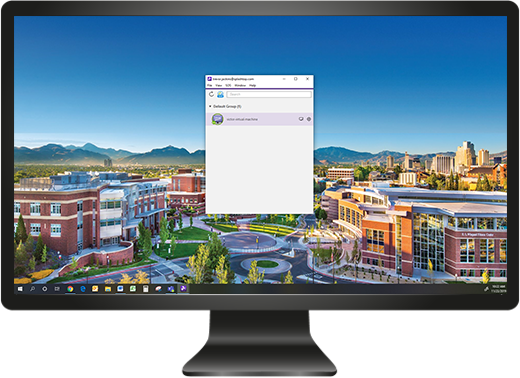
Remote Access Windows to Linux
After you’ve deployed the Splashtop Streamer, make sure you download the Windows version of the Splashtop Business App on your computer.
After you select your Linux computer, a window will open up and display the remote Linux computer’s screen in real time. From there, you can use the mouse and keyboard on your local machine to control the Linux computer. Open any files and use any application you please.
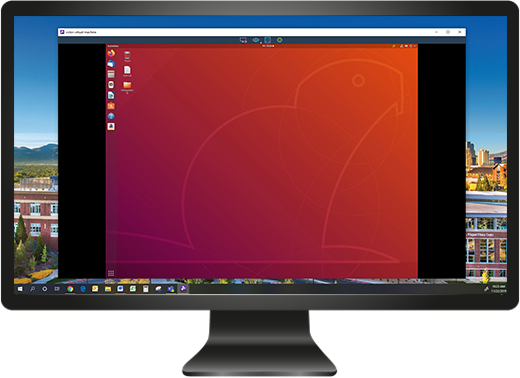
Windows computer remoting into a Linux computer
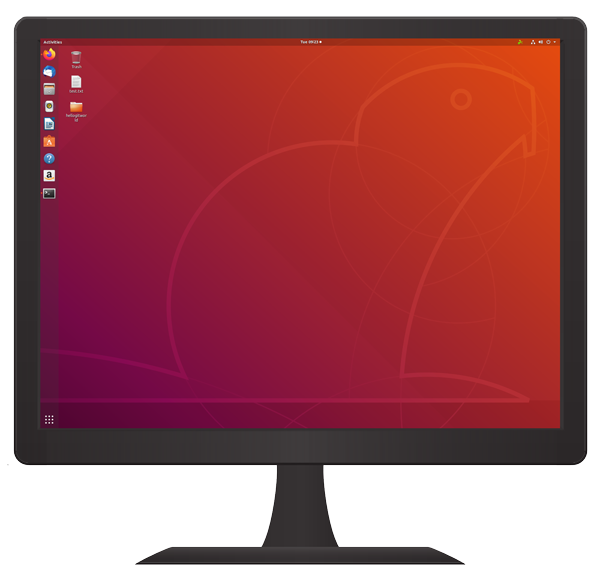
The remote Linux computer
Remote Access Mac to Linux
Make sure the Mac version of the Splashtop Business App is installed on your local computer, and your remote Linux computer has the Splashtop Streamer installed.
From there, it’s as easy as opening the Splashtop Business App and selecting your Linux computer for instant remote access.
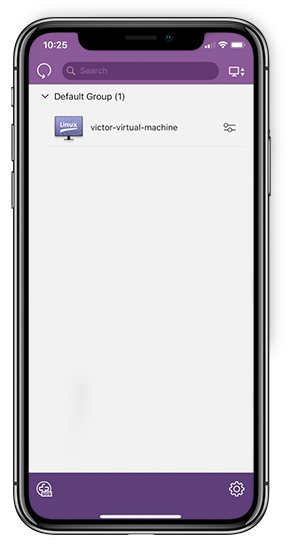
Remote Access iOS to Linux
Similar to accessing from Windows or Mac, but instead you need to the iOS version of the Splashtop Business App on your Apple device. Then you’ll be able to remote access Linux from iPad and iPhones.
Remote Access Android to Linux
The Splashtop Business App for Android devices will work the same way the app works on the other devices listed above. After setting up, open the app on your Android device, select your remote Linux computer, and then enjoy fast remote access and control to your computer.
Remote Access Chromebook to Linux
There is not an app for Chromebook devices. However, through the Splashtop Business Chrome Extension, you’ll be able to log into your Splashtop account, see your list of remote computers, and select the one you want to remote into.
The Splashtop Business Chrome Extension makes it easy for you to remote control your Linux computers from a Chromebook device.
The Best Linux Remote Desktop Solutions – Splashtop
Splashtop offers the best-value remote desktop software for business professionals, IT teams, MSPs, and help desk professionals.
The below solutions offer unattended access to Linux, Windows, and Mac computers (and in some cases Android as well). Select the solution that’s right for you. You can start a free trial now and start remote accessing your Linux computers!
Splashtop Business Access: for business professionals and small teams who want remote access to their computers. LEARN MORE | FREE TRIAL
Splashtop Remote Support: for MSPs and IT teams who want unattended remote access to their users’ computers to provide remote support. LEARN MORE | FREE TRIAL
Splashtop SOS: for IT, support, and help desk teams who need an attended, quick support solution to provide on-demand remote support to their users’ devices. LEARN MORE | FREE TRIAL
Источник


