- How to Completely Remove Built-in Apps from Windows 10.
- How to Completely Remove the Built Apps in Windows 10.
- How to Uninstall Programs on Windows 10 That Won’t Uninstall
- Method 1: Use the uninstaller that came with the application
- Method 2: Remove the program from your computer using the Registry Editor
- Method 3: Uninstall the target application with your computer in Safe Mode
- Method 4: Use a third-party uninstallation program to uninstall the target application
How to Completely Remove Built-in Apps from Windows 10.
As you may know, Windows 10 comes with many apps preinstalled. Some of these preinstalled apps (also known as built in apps), can be easily uninstalled from the system, by right clicking on them and choosing uninstall, but many built in apps cannot be uninstalled by using this way, and you have to uninstall them by using PowerShell commands.
In Windows 10/8.1 OS, there is also another problem: When you uninstall a built in app, the uninstall process does not completely remove the app from the system, because the app’s installation files (aka «Provisioned Packages») and its leftovers, are not deleted during the uninstall.
In this tutorial you will find detailed instructions on how to uninstall the built in apps and to completely remove their leftovers from Windows 10.
How to Completely Remove the Built Apps in Windows 10.
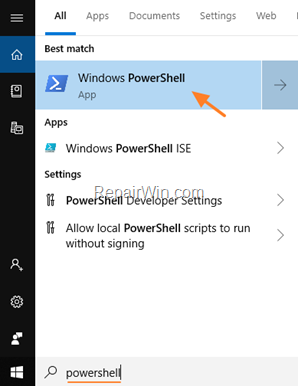
1. Open PowerShell as Administrator. To do that:
-
- At Cortana‘s search box, type powershell
- Right click on Windows PowerShell result and select Run as administrator.
2. Follow the instructions below, to remove the built in apps:
Part 1. How to Uninstall all Built in Apps in Windows 10.
To Remove all the built in apps from the current user account in Windows 10:
Info: The below command, will simply uninstall all the built in apps, from the active user account, without removing the installation files. *
- Get-AppXPackage | Remove-AppxPackage
* Note: Its not recommended to uninstall all the built in apps. Some apps (like the Microsoft Store), is essential for Windows 10 to work smoothly.
To Remove the Built in Apps (Provisioned) from the System Account:
Info: The below command, will prevent Windows 10 to install the removed built in apps, on the new users.
- Get-AppXProvisionedPackage -online | Remove-AppxProvisionedPackage -online
To Remove all the built in apps from all the user accounts in Windows 10:
Info: The below command, will completely uninstall all the built in apps from Windows 10 (from all user accounts), and will remove their installation files. *
- Get-AppxPackage -allusers | Remove-AppxPackage
* Note: In Windows 10 version 1809 and later, the above command doesn’t work anymore (doesn’t remove the apps in other accounts). So, if you want to uninstall all the built-in apps from all the other user accounts, login in separately to each other account and give the command: «Get-AppXPackage | Remove-AppxPackage».
Part 2. How to Uninstall or Completely Remove Specific Built in apps in Windows 10
1. Get a list of all the installed apps:
Info: The above command, shows a list of all the installed apps in Windows 10.
- Get-AppxPackage | Select Name, PackageFullName
2. From the list, note the app’s Name (at left column) and the PackageFullName (at right column), of the app that you want to remove.

3. Then according your will, give the corresponding command:
To Simply Uninstall a Specific Built in App from the current user account in Windows 10:
Info: The below command, will uninstall the selected built app from the active account, without removing the app’s installation package and its leftovers.
- Get-AppxPackage * Name * | Remove-AppxPackage
e.g. To remove the «Microsoft Photos» app from the current user, type this command:
- Get-AppxPackage *Microsoft.Windows.Photos* | Remove-AppxPackage
To Completely Remove a Specific Built in App from Windows 10:
Info: Use one of the below commands to remove a specific built in app from all the user accounts, and to delete the installation files and the leftovers of the uninstalled app.
- Get-AppxPackage * Name * | Remove-AppxPackage -allusers
- Remove-AppxPackage -AllUsers -Package » PackageFullName «
e.g. To completely remove the «Microsoft Photos» app and its installation files, give one of the following commands:
- Get-AppxPackage *photos* | Remove-AppxPackage -allusers
OR…
- Remove-AppxPackage -AllUsers -Package «Microsoft.Windows.Photos_2019.19041.16510.0_x86__8wekyb3d8bbwe»
* Note: If you want to reinstall the removed app, open the Microsoft store app on your PC, search for the app, and download and install it from scratch! (you have to do that, for every user account on the PC).
Part 3. List of PowerShell Commands to Uninstall the Built in Apps in Windows 10. *
You can use any of the below commands to just uninstall a particular app from the current user account in Windows 10.
If you want to completely uninstall a built in app from Windows 10, and to completely delete its installation files and leftovers, add the «-allusers» parameter at the end of the uninstall command. (see the example above)
To uninstall 3D Bulider:
- Get-AppxPackage *3dbuilder* | Remove-AppxPackage
To uninstall uninstall Alarms and Clock:
- Get-AppxPackage *windowsalarms* | Remove-AppxPackage
To uninstall Calculator:
- Get-AppxPackage *windowscalculator* | Remove-AppxPackage
To uninstall Mail & Calendar:
- Get-AppxPackage *windowscommunicationsapps* | Remove-AppxPackage
To uninstall Camera:
- Get-AppxPackage *windowscamera* | Remove-AppxPackage
To uninstall Get Office:
- Get-AppxPackage *officehub* | Remove-AppxPackage
To uninstall Groove music (Zune).
- Get-AppxPackage *zunemusic* | Remove-AppxPackage
To uninstall Maps.
- Get-AppxPackage *windowsmaps* | Remove-AppxPackage
Uninstall Microsoft Solitaire Collection:
- Get-AppxPackage *solitaire* | Remove-AppxPackage
To uninstall Money:
- Get-AppxPackage *bingfinance* | Remove-AppxPackage
To uninstall Movies & TV:
- Get-AppxPackage *zunevideo* | Remove-AppxPackage
To uninstall News:
- Get-AppxPackage *bingnews* | Remove-AppxPackage
To uninstall OneNote:
- Get-AppxPackage *onenote* | Remove-AppxPackage
To uninstall People:
- Get-AppxPackage *people* | Remove-AppxPackage
To uninstall Phone:
- Get-AppxPackage *CommsPhone* | Remove-AppxPackage
To uninstall Phone Companion:
- Get-AppxPackage *windowsphone* | Remove-AppxPackage
To uninstall Photos:
- Get-AppxPackage *photos* | Remove-AppxPackage
To uninstall Skype app:
- Get-AppxPackage *skypeapp* | Remove-AppxPackage
To uninstall Sports app:
- Get-AppxPackage *bingsports* | Remove-AppxPackage
To uninstall Voice Recorder:
- Get-AppxPackage *soundrecorder* | Remove-AppxPackage
To uninstall Weather:
- Get-AppxPackage *bingweather* | Remove-AppxPackage
To uninstall Windows Store:
- Get-AppxPackage *windowsstore* | Remove-AppxPackage
To uninstall Xbox:
- Get-AppxPackage *xbox* | Remove-AppxPackage
That’s all folks! Did it work for you? Please leave a comment in the comment section below or even better: like and share this blog post in the social networks to help spread the word about this solution.
How to Uninstall Programs on Windows 10 That Won’t Uninstall
Uninstalling a third-party application or program on Windows 10, the latest and greatest in the long line of Windows Operating Systems is pretty easy. All you need to do is:
- Open the Start Menu.
- Search for “add or remove programs“.
- Click on the search result titled Add or remove programs.
- Look through the list of programs installed on your computer and locate and right-click on the program you want to uninstall.
- Click on Uninstall in the resulting context menu.
- Go through the uninstallation utility by following the onscreen instructions, and the program will be uninstalled.
Alternatively, you can also:
- Open the Start Menu.

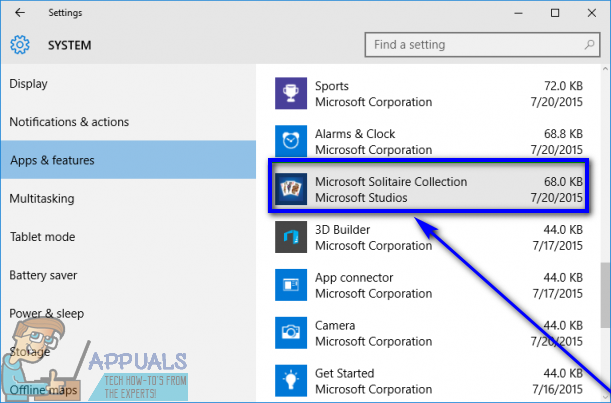
- Click on Settings.
- Click on System.
- Click on Apps & features in the left pane of the window.
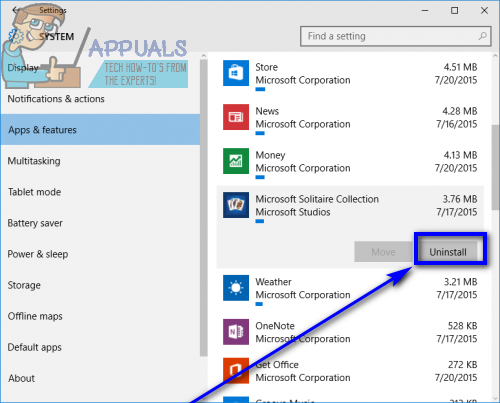
- In the right pane, locate and click on the application you want to uninstall to select it.
- Click on Uninstall.
- Click on the Uninstall button that pops up.
- Go through the uninstallation utility by following the onscreen instructions, and the program will be uninstalled.


However, unfortunately for Windows 10 users, sometimes the Operating System fails to uninstall certain third-party programs. When a Windows 10 user fails to uninstall an application they themselves installed on their computer, they can end up being taken aback (understandably so) and wondering what they should do next.
Well, thankfully for Windows 10 users, failing to uninstall a third-party program or application through the Add or remove programs utility and the Settings app is not the end of the line – there are a wide variety of different methods that can be used to uninstall programs on Windows 10 that could not be uninstalled using conventional means. While there are a lot of different methods that you can use to try and uninstall a program on a Windows 10 computer that could not be uninstalled using the Add or remove programs utility and the Settings app, the following are the absolute most effective ones:
Method 1: Use the uninstaller that came with the application
Most (not all) third-party programs and applications come with their very own uninstaller. This is an executable utility located in their root folder that is basically an uninstallation wizard – this utility can be used to uninstall the program it belongs to from the computer it is installed on. To use this method, simply:
- Navigate to the directory on your computer where the program or application in question is installed. For example, the default directory for most third-party programs is X:\Program Files\(Name of application) or X:\Program Files (x86)\(Name of application), X in both directories being the letter corresponding to the partition of your computer’s hard drive that Windows 10 is installed on.
- Look through the contents of the directory for an executable uninstallation utility. This utility is usually named uninstaller.exe or uninstall.exe (or something similar.
- Once you have located the executable uninstallation utility, double-click on it to launch it.
- Follow the onscreen instructions all the way to the end of the uninstallation wizard, at which point the wizard will uninstall the program that you were unable to uninstall using conventional methods.
Method 2: Remove the program from your computer using the Registry Editor
Every third-party program or application you install on your computer develops a significant presence in your computer’s Registry. If you delete all traces of an application from your computer’s Registry, you basically remove it from your computer, effectively uninstalling it. If you’re having trouble uninstalling an application via the usual methods, you can simply remove the target program from your computer using the Registry Editor. To do so, you need to:
- Press the Windows Logo key + R to open a Run dialog.
- Type regedit into the Run dialog and press Enter to launch the Registry Editor.
- In the left pane of the Registry Editor, navigate to the following directory:
HKEY_LOCAL_MACHINE >SOFTWARE >Microsoft >Windows >CurrentVersion >Uninstall. - In the left pane of the Registry Editor, locate the sub-key pertaining to the program or application you want to uninstall from your computer under the Uninstall key.
- Once you have located the sub-key belonging to the program or application you want to uninstall (it might not have the exact same name as the target application), right-click on it and click on Delete in the resulting context menu.
- Click on Yes in the resulting popup to confirm the action.
- Once the sub-key belonging to the target application has been successfully deleted, close the Registry Editor and restart your computer.


When the computer boots up, check to see whether or not the target application has been successfully removed from your computer.
Method 3: Uninstall the target application with your computer in Safe Mode
If you are having trouble uninstalling an application on Windows 10, the cause of your troubles might be some third-party interference. The best way to get rid of any and all kinds of interference on a Windows computer is to boot it into Safe Mode. While in Safe Mode, the only things allowed to run on a Windows computer are stock applications and services – even internet access and the Command Prompt and disabled in some versions of Safe Mode. You might just be able to uninstall an application you otherwise couldn’t using conventional methods while your computer is in Safe Mode. If you would like to use this method, you need to:
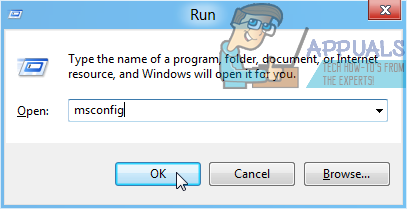
- Press the Windows Logo key + R to open a Run dialog.
- Type msconfig into the Run dialog and press Enter to launch the System Configuration utility.
- Navigate to the Boot tab of the System Configuration utility.
- Enable the Safe boot option under the Boot options section by checking the checkbox located directly beside it.
- Click on Apply and then on OK.
- Click on Restart in the dialog box that pops up to immediately restart your computer.


When the computer boots up, it will be in Safe Mode. While the computer is in Safe Mode, use either set of steps listed and described at the very beginning of this guide to try and uninstall the target application from your computer and check to see if the uninstallation succeeds.
Method 4: Use a third-party uninstallation program to uninstall the target application
If all else fails and none of the methods listed and described above work for you, you can still try to uninstall the target application using a third-party uninstallation program. There are a multitude of different third-party programs for Windows 10 that are designed specifically to make it not only possible but also easier for users to uninstall applications, and Revo Uninstaller happens to be one of the very best ones. To uninstall the target application using Revo Uninstaller, you need to:
- Make sure the application you want to uninstall is not running in any capacity (pressing Ctrl + Shift + Esc to bring up the Task Manager, locating and right-clicking on the process belonging to the target application in the Processes tab and clicking on End task in the resulting context menu should get the job done).
- Go hereand click on Free Download to download the installer for Revo Uninstaller.
- Once the installer for the program has been downloaded, navigate to where you saved it, locate it and double-click on it to run it.
- Follow the onscreen instructions and go through the installer until the program has been successfully installed.
- Launch Revo Uninstaller.
- When Revo Uninstaller opens up, it will be displaying all of the third-party applications installed on your computer. Locate the application you want to uninstall from your computer in this list and double-click on it.
- Click on Yes in the resulting dialog box to confirm that you indeed want to uninstall the target application.
- In the dialog box that opens up, Revo Uninstaller will provide you with four different Uninstall Modes that you can choose from. Built-in mode only uses the uninstaller the target application came with to try and uninstall it, Safe mode has all of Built-in mode’s features combined with light scans of the computer’s registry and hard drive for files and registry entries left behind by the target program, Moderate mode’s combines Safe mode with an extended scan for leftover files and registry entries, and Advanced mode does everything Moderate mode does with the addition of a deep and thorough scan of the Registry and hard drive for remnants left behind by the targe application. It is recommended that you select Advanced mode and click on Next.
- Wait for Revo Uninstaller to create a system restore point and make other arrangements, and once it is done, click on Next.
- Click on Uninstall.
- Once the uninstallation process has been completed, click on Close to close the uninstallation wizard.

When Revo Uninstaller is entirely done uninstalling the target application and removing all of its files and registry entries from your computer, you can close Revo Uninstaller, restart your computer and, once it boots up, check to make sure that the target application has indeed been fully uninstalled.


