- Delete files and folders on Mac
- Delete an item from your Mac or iCloud Drive
- Empty the Bin
- Prevent the Bin warning message from appearing
- If you change your mind before emptying the Bin
- Remove items from the Bin automatically after 30 days
- Remove directory in Terminal & other ways to delete files and folders on Mac
- Before we start
- How to remove directory with Terminal
- Why delete file command line feature is important
- Tip: Delete unneeded system files on Mac
- How to use delete file command line feature
- How to make command line delete directory
- Delete large and old folders using CleanMyMac X
- Other ways to delete files and folders on Mac
- How to Use “Delete Immediately” on Files to Bypass Trash in Mac OS X
- How to Delete Files Immediately with a Keyboard Shortcut on Mac
- How to Access Delete Immediately from Mac Finder
Delete files and folders on Mac
At any time, you can get rid of files, folders and other items that you no longer need. You start by dragging items to the Bin in the Dock, but the items aren’t deleted until you empty the Bin.

Note: If you turned off Time Machine or haven’t backed up your files recently, you may want to store a backup copy on a storage device, just in case you change your mind and want the item later.
Delete an item from your Mac or iCloud Drive
On your Mac drag the item to the Bin in the Dock or select the item, then press Command-Delete. If an item is locked, click Continue to confirm you want to move the locked item to the Bin.
To search for and locate files you want to delete, see Narrow your search results on Mac.
If an item is locked, you need to confirm you want to move it to the Bin, or unlock the item before putting it in the Bin. To unlock the item first, select it, choose File > Get Info (or press Command-I), then unselect the Locked tick box. If you’re not logged in as an administrator, you may need to click the lock  to unlock it, then enter an administrator name and password (or use Touch ID or your Apple Watch).
Empty the Bin
On your Mac, click the Bin icon in the Dock.
In the window that appears, do one of the following:
Empty one item from the Bin: Control-click the item you want to delete, then choose Delete Immediately.
In the warning message that appears, click Delete.
Empty all of the Bin: Click the Empty button in the upper-right corner of the Finder window. You can also click the Finder icon  in the Dock, then choose Finder > Empty Bin.
In the warning message that appears, click Empty Bin.
Items that you move to the Bin from your Mac remain until you empty the Bin. You can choose to automatically empty the Bin in Finder preferences.
Items that you move to the Bin from iCloud Drive are automatically emptied from the Bin after 30 days, regardless of Finder preferences. You can choose to empty the Bin sooner than 30 days.
WARNING: Any items emptied from the Bin are no longer available.
Prevent the Bin warning message from appearing
To prevent the Bin warning message from appearing, do one of the following:
Once: Press the Option key when you click Empty or choose Empty Bin.
Always: Turn off the warning in the Advanced pane of Finder preferences. In the Finder , choose Finder > Preferences, click Advanced, then unselect “Show warning before emptying the Bin.”
If you change your mind before emptying the Bin
On your Mac, click the Bin icon in the Dock.
Drag the item out of the Bin, or select the item, then choose File > Put Back.
Remove items from the Bin automatically after 30 days
In the Finder on your Mac, choose Finder > Preferences, then click Advanced.
Select “Remove items from the Bin after 30 days.”
Источник
Remove directory in Terminal & other ways to delete files and folders on Mac

Before we start
Having spent some years coding applications for macOS we’ve created a tool that everybody can use. The all-round problem fixer for Mac.

So here’s a tip for you: Download CleanMyMac to quickly solve some of the issues mentioned in this article. But to help you do it all by yourself, we’ve gathered our best ideas and solutions below.
Features described in this article refer to the MacPaw site version of CleanMyMac X.
One of the most basic computer functions — deleting files and folders — is also one of the most essential. If you never get rid of anything, soon enough all those extra gigabytes will take a toll on your Mac’s processing power, RAM, and hard drive, not to mention your digital life will resemble a dreadful episode of Hoarders.
So deleting files is good and healthy. But how do you do that? Most people right-click on what they need gone and choose Move to Trash from the menu or use the File option in the menu bar. Others employ the ⌘ + Delete shortcut, which works across the system (even within dialog windows). Experts, however, often find themselves defaulting to the command line delete directory feature. Let’s see how and why you should learn it too.
How to remove directory with Terminal
Since macOS is a Unix-based system, nearly all system tasks you do every day with the help of its graphic interface can also be performed via the command line tool called Terminal.
Why delete file command line feature is important
With regards to delete file or delete folder command line functionality, Terminal lets you:
- Effortlessly erase one or multiple files, folders, and apps, bypassing any error messages you can get when you go the traditional route.
- Remove files from Trash, including ones you can’t delete by simply emptying the trash.
- Get rid of files that are invisible to you within Finder (usually system or root files, for example, .htaccess).
- Delete files and folders in cases when Finder is unresponsive.
Note: The Mac command line delete file feature is final and irreversible. While it lets you avoid any error messages, it also removes the files completely, without any possibility of retrieving them later on.
Tip: Delete unneeded system files on Mac
Some files are hard to delete in a normal way because they sit deeply in system folders. These are such files as logs, broken downloads, caches, remains of old apps, etc. Still, deleting them could give your Mac an extra boost — that’s because they are outdated and clutter your macOS.
To dig these files out, try a free version of CleanMyMac X. Among other things, this app has an impressive System Junk detector. When you download CleanMyMac X (this free version is notarized by Apple), you need to click on System Junk.
Just take a look at the sheer amount of files it unearthed. To delete them, click on Clean.

How to use delete file command line feature
Removing files from your Mac forever using Terminal is deceptively simple: just use the rm command followed by the name of the file. Here’s how it works in practice:
- Launch Terminal from your Utilities folder in Applications.
- Check which directory you’re in by typing ls -la
- Then navigate down a directory with cd [directoryname] or up a directory with cd ../
- When you’re in the same directory as the file you want to delete, type rm [filename.extension]
- If you want to delete multiple files at once, list them all, but make sure there’s a space between each one.
- Press Enter to execute the command.
Now all the files you specified after rm are gone for good. Navigate directories in your Mac and repeat the process as many times as you want.
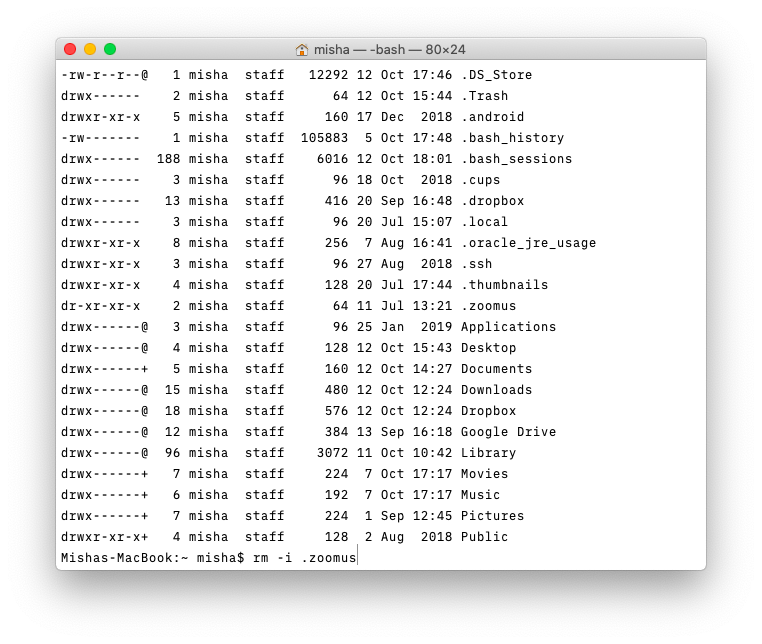
Surprised there was no confirmation before your files were deleted? Luckily there’s a way to add one as a safeguard for not deleting the wrong file by accident. Just use -i after the rm but before the first filename, like this: rm -i [filename.extension]. Terminal will then ask you whether you’re sure you want to delete the file. Reply y or yes followed by Enter and the file will be gone. This also works for multiple files, but you’ll have to confirm the removal of each one separately.
How to make command line delete directory
Surprisingly, you can’t delete a folder using the rm command because it has its own: rmdir.
Otherwise, rmdir works exactly the same as rm:
- Navigate to the appropriate directory using Terminal.
- Type rmdir [directoryname]
- Hit Enter.
Sadly, you can’t use the -i hack when you’re deleting folders, so be extra careful!
Another thing to keep in mind is that rmdir only deletes the directory, but can’t delete any files or folders located within that directory.
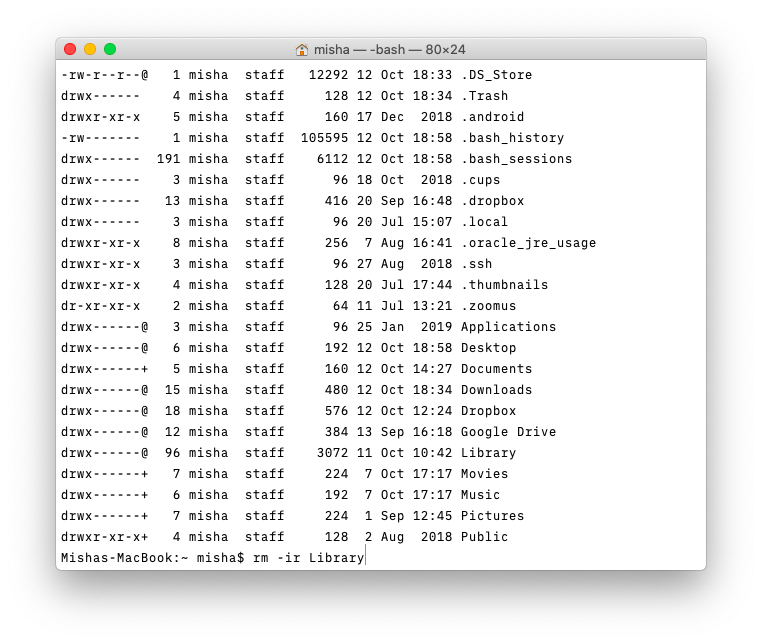
To delete a folder with everything in it, you need to use rm -r followed by the folder’s name. Using -i to create a warning here is possible and done like this: rm -ir [foldername].
When it’s too difficult to find a folder or file via Terminal, but you can detect them in Finder, simply drag and drop the file onto the Terminal window to generate its path.
Delete large and old folders using CleanMyMac X
As it happens with folders, they are easy to mess up and lose track of. That’s why many apps provide an alternative interface for searching and deleting files which is more flexible than the Finder. For example, using CleanMyMac X (the app we’ve mentioned above) you can find massive folders that might have been evading you. You also can filter them by file type and other criteria.
The latest released version of this tool looks like this:

This app by developer MacPaw is available for a free download here. Using this app, files are removed for good, and as far as we know, it’s irreversible.

Other ways to delete files and folders on Mac
The shortcut combination
We are sure you know how to drag your files to the Trash. But here is an alternative way that deletes files at once, bypassing the Trash. There’s one less step involved (you don’t have to empty the bin). And you cannot reverse this action.
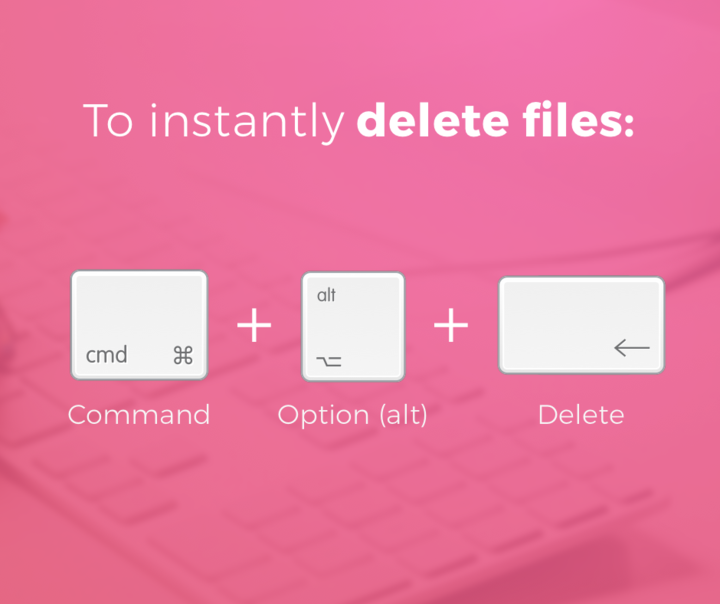
Select a file, and press [Option + ⌘ + Delete]
Delete hidden folders on Mac
Some folders on your Mac are made invisible to protect them from accidental deletion. They are system and support files you would ignore most of the time. But what if a folder seems empty but still takes up space? You can apply another shortcut combination to highlight these unseen objects. Then, you can delete them at your own risk.
To highlight hidden folders: [Press Shift + ⌘ + . dot key]
This best works if you open some system folder, like Library
_1598521196.png)
Again, delete these folders only if you are sure what they are.
That was how to remove files and folders on your Mac, shown in multiple ways. Want to know more? Explore our blog for a whole universe of Mac tips!
Источник
How to Use “Delete Immediately” on Files to Bypass Trash in Mac OS X

The latest versions of Mac OS X include a new ability to immediately delete a file or folder from the Mac, bypassing the Trash can. Essentially how the “Delete Immediately” feature works is by circumventing the Trash and rather than waiting for user action to remove the files, it just deletes the file(s) instantaneously from the Mac, making the delete immediately function faster than the typical manner of removing a file in Mac OS X.
Delete Immediately is a handy feature if you want to rid a file or folder from the Mac right away and without having to manually empty the Trash, it effectively skips the Trash function and just deletes the files. This is not intended to be a replacement for secure empty Trash, however and doesn’t offer the same rewrite function.
There are two ways to access and use Delete Immediately in Mac OS X, with a quick access keystroke and from the File menu.
There is no way to undo this action so only use Delete Immediately if you really truly do want to vanquish a file from the Mac.
How to Delete Files Immediately with a Keyboard Shortcut on Mac
The quickest way to access the Delete Immediately function in Mac OS X is through a keyboard shortcut:
- Select the file(s) or folder(s) you wish to instantly and permanently delete and hit the following keystroke sequence: Option + Command + Delete
- Confirm with the dialog that you wish to delete the files permanently and immediately
This just circumvents placing the files into the Trash, it deletes the file(s) immediately from the Mac.
How to Access Delete Immediately from Mac Finder
You can also access the Delete Immediately option and skip the Trash by using the File menu in the Mac file system:
- Select the file(s) or folder(s) you wish to instantly and permanently delete then hold the OPTION key as you access the “File” menu from the Finder
- Choose “Delete Immediately” from the File menu
Again, this skips the Trash, and the files are instantly deleted. The same as using the keyboard shortcut.
Similar to using the Trash is that if a file is locked or in use the Trash action will be prevented, and if you encounter a “item can’t be moved” error, you’ll likely need to quit apps and relaunch the Finder first.
Источник


