- How to Remove a Microsoft Account from Windows 10
- Solution 1: Disconnect from Work or School Access Tab in the System’s Settings
- Solution 2: Reset the Mail App to Defaults
- Solution 3: Remove the Problematic Account from the System’s Registry
- Solution 4: Convert your Existing Microsoft Account into a Local User Account
- Solution 5: Log in to another Administrator account and remove the Microsoft account
- Removing Microsoft Account
- Replies (3)
- How to close your Microsoft account
- Before you close your account
How to Remove a Microsoft Account from Windows 10
When you create a user account on a Windows 10 computer, you can either create a local user account (which requires a combination of a username and password to log in) or a Microsoft account (which is tethered to the email address you use to create it and which requires the email address you created the account with and the password to log in). Having a Microsoft account on a Windows 10 computer not only guarantees security (you can’t have a Microsoft account on Windows 10 without a password) but also allows for seamless integration with Microsoft products and services.
 Cannot Remove Microsoft Account
However, some users would much rather have a local user account on their computer than a user account that is not only tethered to their Microsoft account but also requires their Microsoft account to log in. Fortunately, there is no requirement for you to have a Microsoft account on Windows 10 to be able to use it – you can still use Windows 10 in all of its glory if you have a local user account. That being the case, it is entirely possible to remove a Microsoft account from Windows 10.
Note: This article also targets cases where you don’t have access to the user accounts (also the case where the user account is a work/school account not in your reach).
Solution 1: Disconnect from Work or School Access Tab in the System’s Settings
Many users tend to remove the work or school account (they have no access to) from the Email & Accounts tab but that option requires them to sign-in to the account that has to be removed (which is not possible). In this context, disconnecting the problematic account in the work or school access tab may solve the problem (as it will not require sign-in). But this may not work if the problematic account is the only or primary account on the PC.
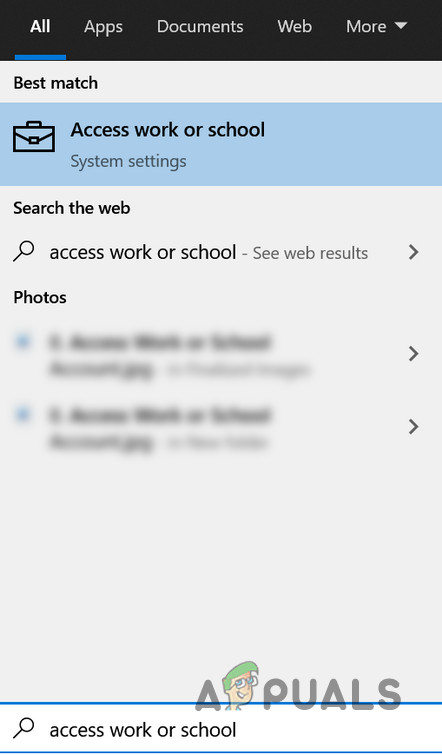
- Hit the Windows key and in the Windows Search, type “Access Work or School” and select it.
 Open Access Work or School Settings
 - Now, in the right pane, expand the problematic account and click on the Disconnect button. Disconnect Work or School Account
- Then confirm to disconnect the account and check if the issue is resolved (you may have to restart your PC).
 Open Access Work or School Settings
 Disconnect Work or School Account
Solution 2: Reset the Mail App to Defaults
If you could not disconnect the problematic account from the Work or School tab, then resetting the Mail app to its defaults will clear out all the email accounts from the PC and thus solve the problem. But keep in mind that all the app data will be lost.
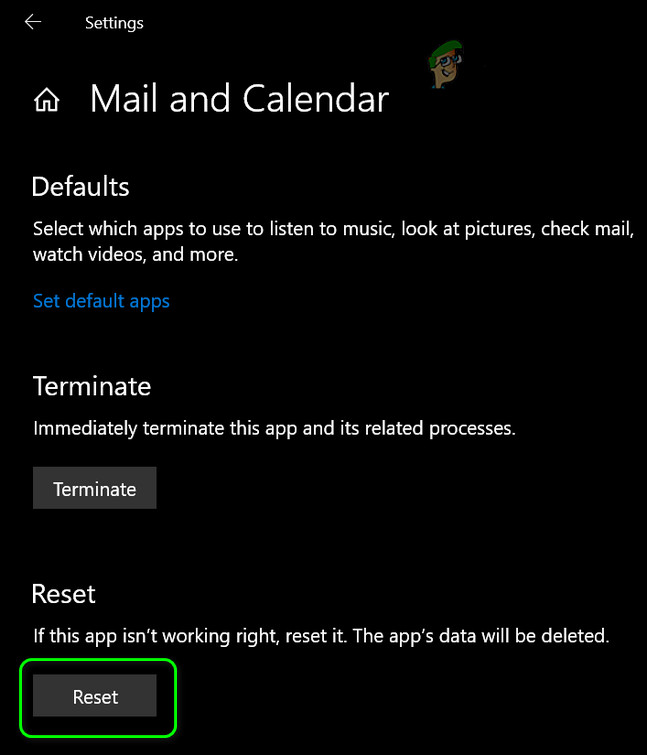
- Hit the Windows key and type Mail. Then right-click on the Mail app and choose App Settings.
- Then scroll down and click on the Reset button. Reset the Mail App to Defaults
- Now confirm to Reset the Mail app and then reboot your PC.
- Upon reboot, check if the problematic account is removed from the PC.
- If not, then check if disconnecting the problematic account from the Work or School tab in Settings (solution 1) resolves the issue.
 Reset the Mail App to Defaults
Solution 3: Remove the Problematic Account from the System’s Registry
You may fail to remove the problematic account if the system’s registry entry relevant to that account is corrupt. In this case, deleting the registry entry relevant to the problematic account may solve the problem.
Warning: Proceed further at your own risk as registry editing requires a certain level of proficiency and if done wrong, you may cause everlasting damage to your PC/data.
- Create a backup of your system’s registry.
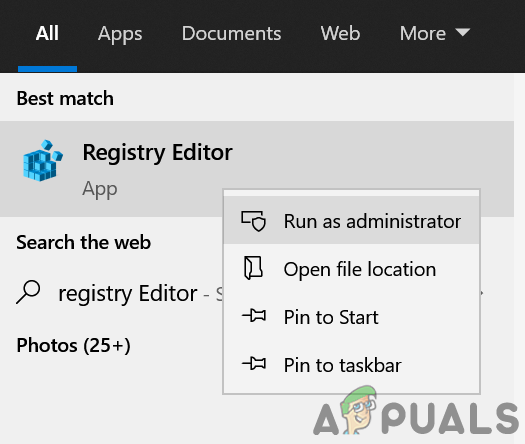
- Hit the Windows key and in the Windows Search bar, type Registry Editor. Then, in the search results shown, right-click on the result of Registry Editor and choose Run as Administrator. Open Registry Editor as Administrator
- Now navigate to the following (you may copy the path and paste it into the address bar of the Registry Editor):
- Then, in the left pane, expand the key of StoredIdentities and right-click on the key related to the problematic account.
- Now, in the context menu, select Delete and then confirm to delete the key. Delete the Problematic Account from the System’s Registry
- Then reboot your PC and check if the account issue is resolved.
 Open Registry Editor as Administrator
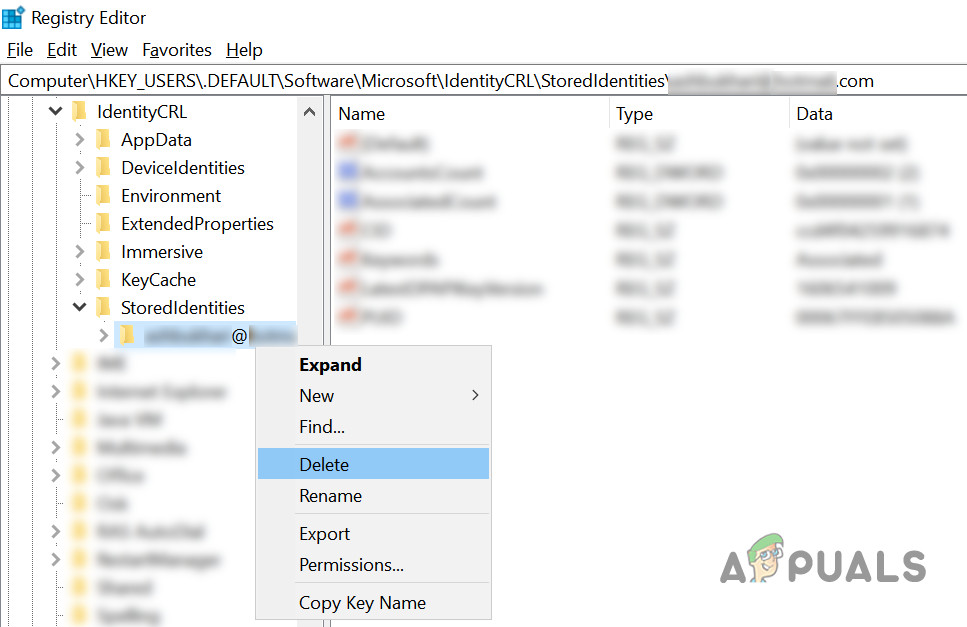 Delete the Problematic Account from the System’s Registry
Solution 4: Convert your Existing Microsoft Account into a Local User Account
An existing Microsoft account on a Windows 10 computer can simply be converted into a local user account. This is the ideal course of action for Windows 10 users with just one Microsoft account on their computers or users who want to remove their Microsoft account from within the Microsoft account itself. To use this method to remove a Microsoft account from Windows 10, you need to:
- Open the Start Menu.
- Click on Settings.
- Click on Accounts.
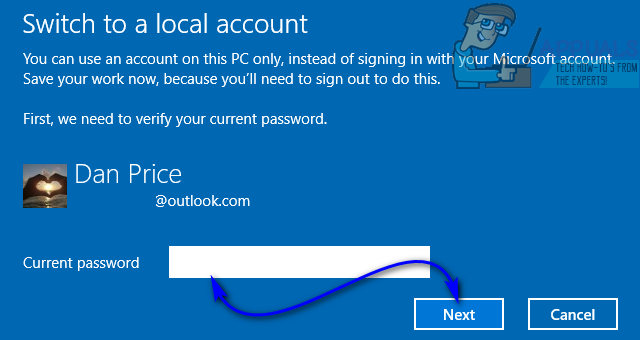
- Locate and click on Sign in with a local account instead in the right pane of the window.
- Type in your password, click on Next and follow the rest of the onscreen instructions to convert the Microsoft account into a local user account.
- Repeat steps 1–3.
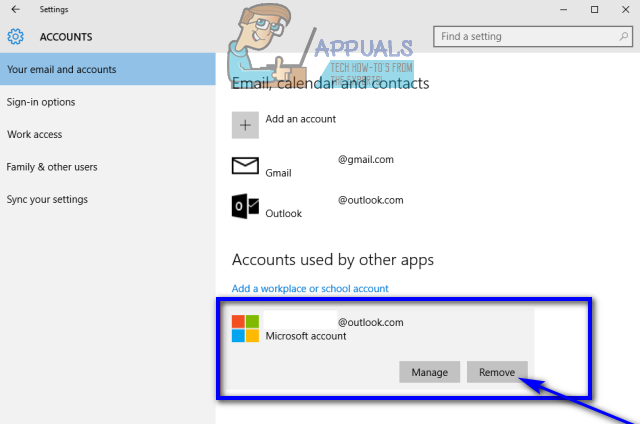
- In the right pane of the window, scroll down to the Other accounts you use section and locate and click on the Microsoft account you want to remove from your computer to select it.
- Click on Remove.
- Follow the onscreen instructions and prompts to remove the Microsoft account from your computer.


Solution 5: Log in to another Administrator account and remove the Microsoft account
You can also remove a Microsoft account from Windows 10 if you simply log in to an account on your computer that is not the Microsoft account you want to remove (any user account – Microsoft account or local user account, doesn’t really matter – will do, as long as it is an Administrator account and not a Standard User account). If you would like to use this method, simply log in to an Administrator account on your computer that is not the Microsoft account you want to remove, and then:
- Open the Start Menu.
- Click on Settings.
- Click on Accounts.
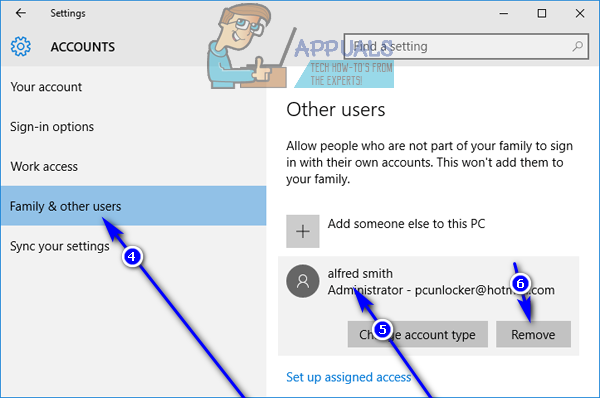
- In the left pane of the window, click on Family & other users.
- In the right pane of the window, locate and click on the Microsoft account you want to remove from your computer to select it.
- Click on Remove.
- Follow the onscreen instructions, and on the “Delete account and data?” screen, click on Delete account and data to confirm the removal of the Microsoft account from your computer.
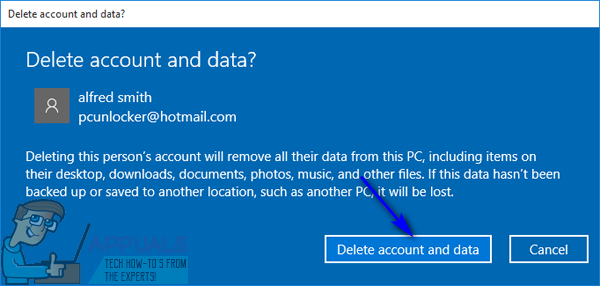
As soon as you do so, the target Microsoft account will be successfully and completely removed from your computer. Be warned, however – the Microsoft account will take all of its secrets to the grave, meaning that any data stored on the account at the time of removal will be gone forever once the Microsoft account has been removed.
Removing Microsoft Account
Replies (3)
I’m an Independent Advisor and consumer of Microsoft products just like you. Let me help you with your concern.
In reference to the link below, the following are the steps to remove a Microsoft account from your Windows 10 PC:
1. Click the Start button, and then click Settings.
2. Click Accounts, scroll down, and then click the Microsoft account you would like to delete.
3. Click Remove, and then click Yes.
42 people found this reply helpful
Was this reply helpful?
Sorry this didn’t help.
Great! Thanks for your feedback.
How satisfied are you with this reply?
Thanks for your feedback, it helps us improve the site.
How satisfied are you with this reply?
Thanks for your feedback.
Before you delete you Microsoft account you have to create first a local account.
To create a local account on your Windows 10 PC:
1. Press the Windows key + R.
2. Type netplwiz, and then click OK.
3. Click Add.
4. Click Sign in without a Microsoft account (not recommended).
5. Click Local account, type a username, and a password (if you’d like one).
6. Click Next, and then click Finish.
7. Sign out of the Microsoft account you want to delete, sign in using the local account you created, and then remove the account you want to delete.
To remove a Microsoft account from your Windows 10 PC:
1. Click the Start button, and then click Settings.
2. Click Accounts, scroll down, and then click the Microsoft account you would like to delete.
3. Click Remove, and then click Yes.
In your case, since you will be returning the PC, the best way is to do Factory Reset. In this way, any personal files or settings will also be wiped out.
Reset your PC from Settings
1. Select the Start button, then select Settings > Update & Security > Recovery .
2. Under Reset this PC, select Get started and then choose «Remove everything».
Reset your PC from the sign-in screen
If you can’t open Settings, you can reset your PC from the sign-in screen.
1. Press Windows logo key + L to get to the sign-in screen, and then restart your PC by pressing the Shift key while you select the Power button > Restart in the lower-right corner of the screen.
2. Your PC will restart in the Windows Recovery Environment (WinRE) environment.
3. On the Choose an option screen, select Troubleshoot > Reset this PC, and then choose «Remove everything».
How to close your Microsoft account
When you close a Microsoft account, whether because you no longer need it or because it’s a duplicate account, Microsoft wants to make sure of two things:
First, that it’s really you, not someone else trying to close your account.
Second, that you’re not leaving anything important behind that you’re going to need later.
To protect your account from accidentally being closed, we may ask you to prove your identity and intent. For example, if you forgot your account info and had to reset your security info, you must wait 60 days before closing your account.
If you’re sure you want to close your Microsoft account:
Expand the text headings below to learn more about the things you should check first.
Go through the process for how to close your account.
Find out what happens after you close your account.
Before you close your account
Closing a Microsoft account means you won’t be able to use it to sign in to the Microsoft products and services you’ve been using. It also deletes all the services associated with it, including your:
Outlook.com, Hotmail, Live, and MSN email accounts
Xbox Live data and GamerTag
Skype ID and contacts
Office digital perpetual licenses, like Office 2019 Home and Student
Account balance, unused Reward points and Microsoft Certification, including passed exams and associated transcripts.
You can’t delete just one of these services and keep the others.
So, before you close your account, take some time to tie up loose ends, cancel subscriptions, and make sure you don’t leave anything important behind—like files, money from gift cards, or emails. And don’t forget to consider less common services where you use your account. For example, use your remaining Online Commercial Support benefit and for developers, transfer any packages you saved on NuGet.org.
Before deleting your account, you may also want to review these articles: Close your Outlook.com account and Can I use Skype without my Microsoft account?
Select any heading below to learn more about what to do before closing your account:
Spend any remaining money in your Microsoft account by buying digital content from Microsoft Store.
To see how much money is in your Microsoft account, sign in to the Microsoft account website. You should also check your Skype account balance to make sure you don’t have unused credits—after deleting an account, you can’t get those credits back.
If you have subscriptions to services like Microsoft 365, OneDrive, Xbox Live Gold, or an ad-free Outlook.com account, you won’t be able to access them anymore.
If you have subscription or services outside of Microsoft that are associated with this account, we’re unable to cancel those on your behalf.
We strongly recommend that you don’t close this account until you’ve made sure you have no personal or organizational subscriptions or outstanding balances associated with this account.
To cancel most Microsoft subscriptions:
Sign in to Services & subscriptions on the Microsoft account website.
For each paid subscription, go to the subscription you want to cancel and select Payment & billing which appears under the name of the subscription you want to cancel. Select Cancel and follow the remaining instructions.
For any subscription not listed there, go to the service itself (or to the retailer, if you bought the subscription from a retailer) to cancel. For example, if you have a Skype subscription, go to the Skype support page and search for cancellation info.
If the email address associated with your Microsoft account ends in @outlook.com, @hotmail.com, @live.com, or @msn.com, closing the Microsoft account deletes any email stored with it after the 60-day waiting period. During the waiting period, however, your inbox will continue to receive email messages. If the email associated with your Microsoft account is from a different provider like @gmail.com, you can skip this section because your email address won’t be affected.
You can set up an automatic reply to let everyone know that the account is going to be closed, and tell them where to send email to you in the future.
Sign in to your Outlook.com inbox. Select the Options icon, and then select Options.
Under Managing your account, select Sending automated vacation replies and then follow the instructions.
You can also choose Email forwarding under Managing your account to have email you receive sent to a different email address. However, both automatic replies and email forwarding will stop working when your Microsoft account is closed permanently after the 60-day waiting period.
If you’ve used a Microsoft service to store any file or info associated with your closed account, you won’t be able to access it. If there’s anything you want to keep, you must save a copy. For example:
Email, documents, and photos you’ve stored in Outlook.com, Hotmail, or OneDrive.
Personal data you’ve stored on HealthVault.
Purchasing info at Microsoft.com.
Portfolio data on MSN Money.
Messenger contacts added to Skype. For more info about backing up your contact list, search the Skype support page.
Product keys for any products you’ve purchased with this Microsoft account. (Your installed software will continue to work, but you’ll need the product key if you ever want to reinstall the software, or install it on a new device.)
There is some data you can’t save when you close your Microsoft account. You’ll no longer be able to access music you’ve downloaded using an Xbox Music Pass. (Music and videos you’ve purchased outright will still be playable but can’t be transferred to another device.) Your game progress, Gamerscore, and Gamertag on Xbox Live will be lost.
Devices like Windows phones, computers running Windows 8.1 or later, Surface tablets, and Xbox consoles all work best with a Microsoft account. Some of these devices will still work—to a degree—but you won’t be able to use all their apps and features. Before you close your account, consider setting these devices up with a different Microsoft account so that you can still sign in.
If you manage a child’s Microsoft account, their account stays open when yours is closed. However, after your Microsoft account is closed, your child will be stopped when they try to sign in to Xbox, computers running Windows 8 or later, or Windows phones, until they get consent from another parent account.
If you’ve purchased Online Commercial Support using this Microsoft account, you must use any remaining benefits or they’ll be lost. There are two types of support benefit packages available:
Single incident support. Go to My Support Requests and look at your case history.
If your case is closed, you can close your Microsoft account.
If your case is still open, you should wait until it’s closed before you close your account. If you close your account too soon, you won’t be able to get any potential refunds.
Five-pack incident support. Go to My Professional Support 5-packs and look at your case history.
If you’ve used all the cases, or it the package expired, you can close your Microsoft account.
If you’re eligible for a refund, you must request it before you close your Microsoft account.
If you have any remaining or open cases, you should use the rest of your package before you close your Microsoft account. If you don’t use the package before you close the account, you’ll lose any unused cases and you won’t be able to get a refund.
If you’re a developer and you want to retain control of any packages you own on NuGet.org, be sure to first transfer the ownership of these packages to a different account before deleting the existing account. For more information about how to do this, see How to delete my NuGet.org account.
To close your account
When you’re sure you’re ready:
When you’re prompted to sign in to your account, double-check that it’s the account you want to delete. If not, select Sign in with a different Microsoft account. If you’re having trouble signing in to the account you want to close, see When you can’t sign in to your Microsoft account for help fixing the problem.
Check that the page shows the correct Microsoft account, and then select Next.
Read the list, and select the checkboxes to acknowledge you’ve read each item.
In the Select a reason drop-down list, choose the reason you’re closing the account.
Select Mark account for closure.
A note about Skype accounts
Skype accounts must be associated with a Microsoft account before they can be closed. Follow the previous steps to close an account, and sign in with your Skype account. You are prompted to add an email address to create a Microsoft account. Make sure to use an email address that isn’t already associated with a Microsoft account. Once that is complete, you can continue with the steps to close your account.
You can also remove an account from your device. This doesn’t delete the account, but it does remove email and other content associated with the account from your device.
To remove an email account:
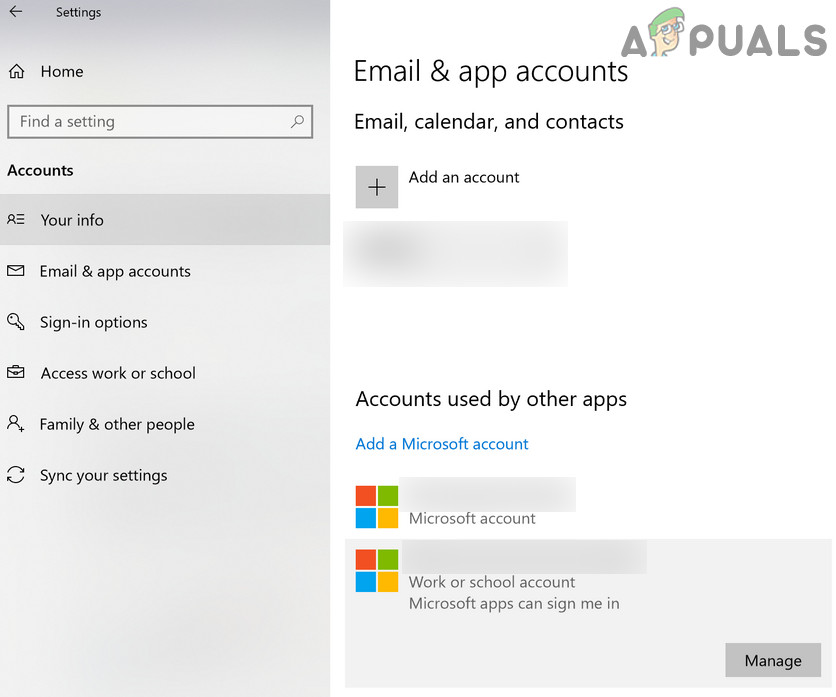
Select the Start button, and then select Settings > Accounts > Email & accounts .
Under Accounts used by email, calendar, and contacts, select the account you want to remove, and then select Manage.
Select Delete account from this device.
Select Delete to confirm.
To remove an account used by apps:
Select the Start button, and then select Settings > Accounts > Email & accounts .
Under Accounts used by other apps, select the account you want to remove, and then select Remove.
Select Yes to confirm.
After you close your account
When you select the Mark account for closure button, we wait 60 days before permanently deleting your Microsoft account in case you change your mind or need to access something on the account before it’s gone forever.
During the waiting period, your account is marked for closure but it still exists. If you want to reopen your Microsoft account, just sign in again within that 60 days. We’ll cancel the account closure, and everything will be just as you left it.
If you’re having issues signing in to your Microsoft account, or forgot or want to change your password, see Microsoft account help.
You can’t use your old account name to create a new account after the account-deletion wait period expires.


