- How to Manually Remove Programs from the Add/Remove Programs List
- Summary
- More Information
- How to add, modify, or delete registry subkeys and values by using a .reg file
- IN THIS TASK
- Summary
- How to uninstall programs using Registry in Windows 10
- Uninstall programs using Registry
- How to remove software leftovers on Windows?
- Why should you keep your PC clean?
- Why does your computer become cluttered?
- Ways how to remove apps’ leftovers from your PC
- Employ a special tool
- Wipe software leftovers off your PC manually
- Step 1. Use Control Panel to uninstall a program
- Step 2. Check the Program Files and AppData folders
- Step 3. Clean your Windows Registry
- Step 4. Remove the temporary files left on your computer
How to Manually Remove Programs from the Add/Remove Programs List
This article applies to Windows 2000. Support for Windows 2000 ends on July 13, 2010. The Windows 2000 End-of-Support Solution Center is a starting point for planning your migration strategy from Windows 2000. For more information see the Microsoft Support Lifecycle Policy.
Summary
This article describes how to manually remove items from the Add/Remove Programs tool if the item is still displayed after you try to remove the item from Add/Remove Programs.
More Information
Important This section, method, or task contains steps that tell you how to modify the registry. However, serious problems might occur if you modify the registry incorrectly. Therefore, make sure that you follow these steps carefully. For added protection, back up the registry before you modify it. Then, you can restore the registry if a problem occurs. For more information about how to back up and restore the registry, click the following article number to view the article in the Microsoft Knowledge Base:
322756 How to back up and restore the registry in Windows
Programs that are compatible with Windows may have an uninstallation program or feature. The Add/Remove programs tool lists all of the Windows-compatible programs that have an uninstall program or feature. You may need to manually remove the program from the Add/Remove Programs list if you uninstall a program and the registry key that is used to display the program name is not removed correctly:
Click Start, click Run, type regedit in the Open box, and then press ENTER.
Locate and click the following registry key:
After you click the Uninstall registry key, click Export Registry File on the Registry menu.
In the Export Registry File dialog box, click Desktop in the Save in box, type uninstall in the File name box, and then click Save.
Each key under Uninstall represents a program that appears in Add/Remove Programs. To determine which program that each key represents, click the key, and then view the following values:
DisplayName — the value data for the DisplayName key is the name that is listed in Add/Remove Programs
UninstallString — the value data for the UninstallString key is the program that is used to uninstall the program
After you identify the registry key that represents the program that is still in Add/Remove Programs, right-click the key, and then click Delete.
After you delete the key, click Start, point to Settings, and then click Control Panel.
In Control Panel, double-click Add/Remove Programs.
In Add/Remove Programs, verify that the program for which you deleted the registry key is not listed.
How to add, modify, or delete registry subkeys and values by using a .reg file
This article is intended for advanced users, administrators, and IT Professionals.
Importing Registration Entries (.reg) files is a feature of Regedit.exe and is not supported by Regedt32.exe. You can use Regedit.exe to make some changes to the registry on a Windows NT 4.0-based or Windows 2000-based computer, but some changes require Regedt32.exe. For example, you cannot add or change REG_EXPAND_SZ or REG_MULTI_SZ values with Regedit.exe on a Windows NT 4.0-based or Windows 2000-based computer. Regedt32.exe is the primary Registry Editor for Windows NT 4.0 and Windows 2000. If you must use Regedt32.exe, you cannot use Registration Entries (.reg) files to modify the registry. For more information about the differences between Regedit.exe and Regedt32.exe, click the following article number to view the article in the Microsoft Knowledge Base:
141377 Differences between Regedit.exe and Regedt32.exe
IN THIS TASK
Summary
Important This section, method, or task contains steps that tell you how to modify the registry. However, serious problems might occur if you modify the registry incorrectly. Therefore, make sure that you follow these steps carefully. For added protection, back up the registry before you modify it. Then, you can restore the registry if a problem occurs. For more information about how to back up and restore the registry, click the following article number to view the article in the Microsoft Knowledge Base:
322756 How to back up and restore the registry in Windows This step-by-step article describes how to add, modify, or delete registry subkeys and values by using a Registration Entries (.reg) file. Regedit.exe uses .reg files to import and export registry subkeys and values. You can use these .reg files to remotely distribute registry changes to several Windows-based computers. When you run a .reg file, the file contents merge into the local registry. Therefore, you must distribute .reg files with caution.
A .reg file has the following syntax:
RegistryEditorVersion
Blank line
[ RegistryPath1]
» DataItemName1«=» DataType1: DataValue1»
DataItemName2«=» DataType2: DataValue2»
Blank line
[ RegistryPath2]
» DataItemName3«=» DataType3: DataValue3«
RegistryEditorVersion is either «Windows Registry Editor Version 5.00» for Windows 2000, Windows XP, and Windows Server 2003, or «REGEDIT4» for Windows 98 and Windows NT 4.0. The «REGEDIT4» header also works on Windows 2000-based, Windows XP-based, and Windows Server 2003-based computers.
Blank line is a blank line. This identifies the start of a new registry path. Each key or subkey is a new registry path. If you have several keys in your .reg file, blank lines can help you to examine and to troubleshoot the contents.
RegistryPathx is the path of the subkey that holds the first value you are importing. Enclose the path in square brackets, and separate each level of the hierarchy by a backslash. For example:
[ HKEY_LOCAL_ MACHINE\SOFTWARE\Policies\Microsoft\Windows\System] A .reg file can contain several registry paths. If the bottom of the hierarchy in the path statement does not exist in the registry, a new subkey is created. The contents of the registry files are sent to the registry in the order you enter them. Therefore, if you want to create a new subkey with another subkey below it, you must enter the lines in the correct order.
DataItemNamex is the name of the data item that you want to import. If a data item in your file does not exist in the registry, the .reg file adds it (with the value of the data item). If a data item does exist, the value in your .reg file overwrites the existing value. Quotation marks enclose the name of the data item. An equal sign (=) immediately follows the name of the data item.
How to uninstall programs using Registry in Windows 10
Not many may know, but there are different ways to uninstall a program in Windows 10/8/7. You can uninstall programs using the Control Panel and navigating to the Programs & Features applet, or you can use the Program’s own uninstaller, which you can find in the Program folder, should the need to do so, ever arise. But if the program’s entry is missing in the Control Panel or the Uninstaller is not available, or these ways do not work for some reason, you can also use the Windows Registry.
Uninstall programs using Registry

To uninstall a program via the Windows Registry, open regedit and navigate to the following key:
You will see many keys there. These represent the installed programs. They may have long numbers or names.
In case they have names, they would be easy to identify, and in most cases, its UninstallString would point to its un-installers path.
In case they have long numbers, click on each of them till you are able to find the program which you want to uninstall.
Having done that, in the right pane, search for a string value called UninstallString.
Double-click on it. From the dialog box which opens, copy its value.
It will look something like this :
Next, open command prompt ( cmd ), paste the value, and hit Enter.
If you see a Value data like say –
You may also open the Run box, copy-paste this value, and hit Enter.
The program will commence uninstallation.
If this does not help, you may also try one of these free Uninstallers for Windows.
UPDATE: Bill Pytlovany adds in the comments.
If you have a 64-bit version of Windows, 32 bits apps may be redirected here:
How to remove software leftovers on Windows?
‘If you’ve got time to lean, you’ve got time to clean’
Ray Kroc
Why should you keep your PC clean?
We are pretty sure a computer is an environment that must be kept neat and tidy – otherwise, it may fall apart from neglect. Indeed, junk makes your PC slow, unresponsive, and even vulnerable to multiple threats. Thus, if your machine seems suspiciously sluggish and acts weird, the chances are it is stuffed full of clutter.
Why does your computer become cluttered?
But where does that all garbage come from? Surprising though it may sound, your software generates it. The point is, the unwanted programs you delete do not vanish into thin air: their leftovers stay behind and clog your operating system, which turns your computer into a total mess.
Undoubtedly, such an outcome is undesirable, since your PC is not a rubbish dump. Thus, it is essential to know how to remove apps’ leftovers from your computer. The good news is, you have come to the right place: we will help you declutter your device and skyrocket its performance.
P.S. If you don’t want to read the full article, you may simply watch a short video showing a quick fix here:
Ways how to remove apps’ leftovers from your PC
To begin with, there are basically two ways to sweep out the software debris from your machine. First, you can use special software to automate the process. Another method is to do the cleaning manually.
Employ a special tool
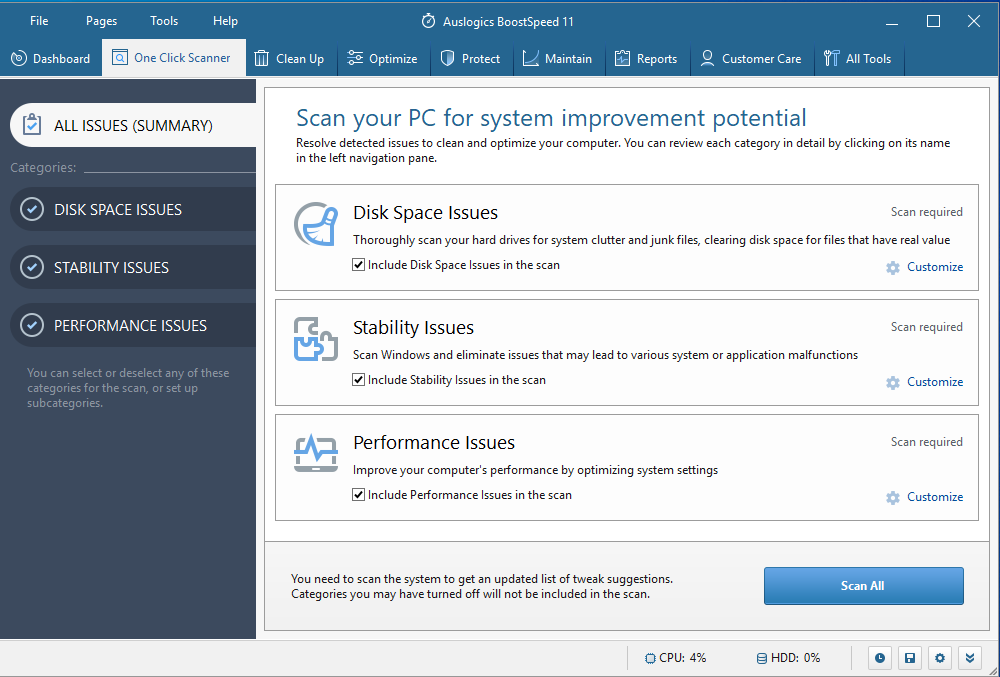
This approach will save you a lot of time and effort, as a thorough clean-up requires skill, precision, and a lot of resources. As such, we recommend you to find a reliable third-party tool for this purpose. For example, you can use Auslogics BoostSpeed: this powerful utility will check your Windows for junk, registry problems, speed-reducing issues, and vulnerabilities, and then it will tweak your OS for maximum performance.
Wipe software leftovers off your PC manually
If you want to take matters into your own hands, you are free to clean up your system yourself. Here is our detailed guide on how to delete software leftovers:
Step 1. Use Control Panel to uninstall a program
- Open your Start menu and locate the Control Panel option.
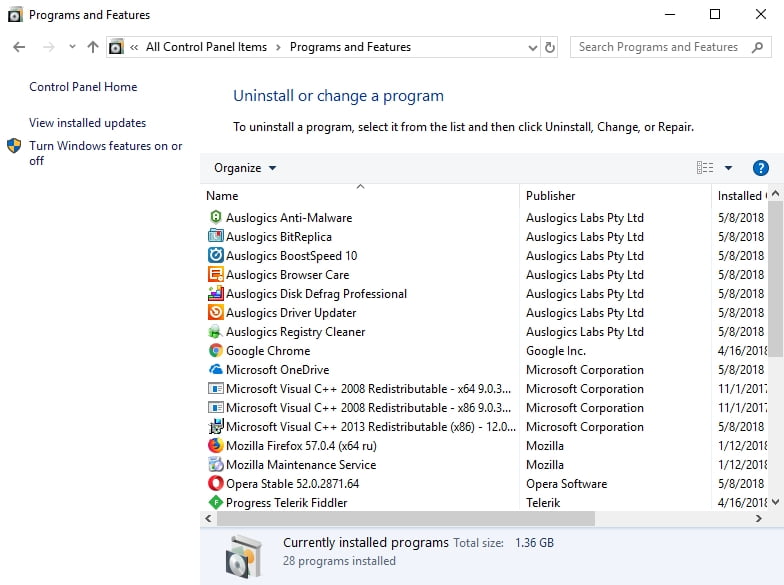
- Click on Control Panel. Navigate to Programs.
- Click on Programs and Features.
- Locate the piece of software you wish to uninstall.

- Click on Uninstall. Wait for the uninstallation process to finish.
- Get the all-clear to proceed and exit Control Panel.
Step 2. Check the Program Files and AppData folders
- Press the Windows logo key + S shortcut on your keyboard.
- Type %programfiles% into the Search box.
- The Program Files folder will open.
- See if there are any folders there that have the name of the uninstalled software. Delete such folders.
- Insert %appdata% into Search. You will be taken to the AppData folder.
- Repeat the step 4 from this list.
Step 3. Clean your Windows Registry
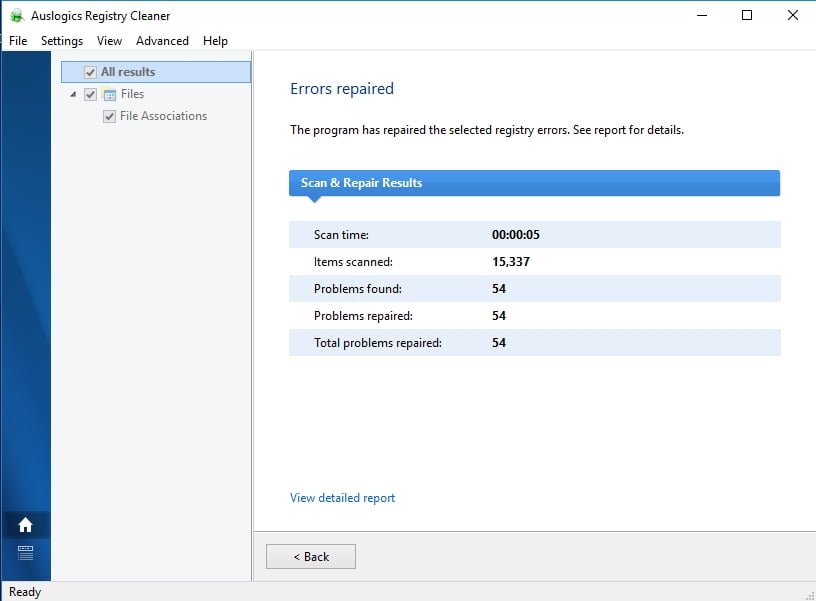
Please keep in mind that you should be very careful when modifying your registry, since one false move is enough to cause your system to go haywire. Therefore, we strongly advise you to use a reliable registry care utility. For instance, Auslogics Registry Cleaner is a free tool that will remove all the leftover keys and entries from your system registry so that you can enjoy a noticeably faster computer.
Nonetheless, if you still wish to edit the registry yourself, make sure to back up all your important data – just in case. Saving your files to an external storage device or migrating them to another computer are among the easiest ways to prevent permanent data loss.
You should also back up your registry – things do not always go as planned, you know. Here is how you can perform a registry backup:
- Press the Windows logo and S keys simultaneously.
- Type ‘regedit.exe’ (without quotes) into Search. Then Press Enter.
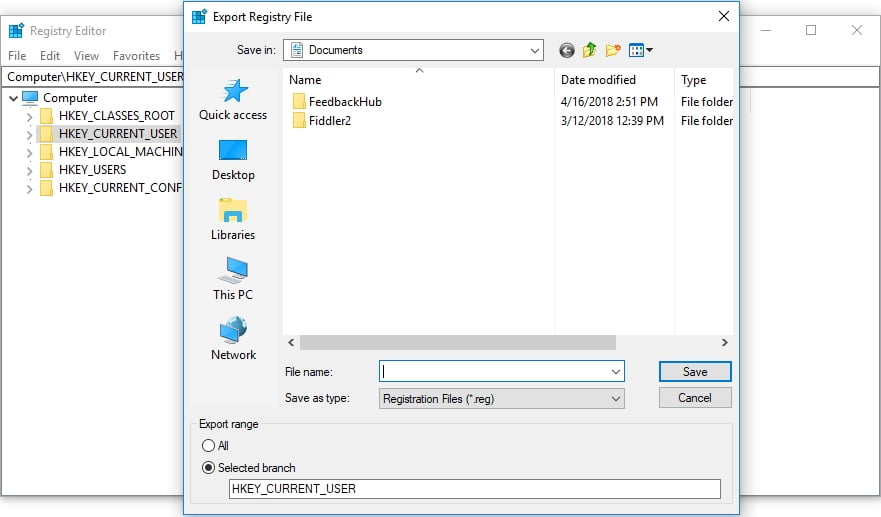
- Once you are in Registry Editor, select what you want to back up.
- Click on File. Then select Export.
- You should give your backup file a name.
- Choose the location to which you wish to save the file.
To restore your registry, do the following:
- Go to your Registry Editor and click on File.
- Select the Import option. Locate and restore your backup file.
Now it is time to remove unneeded keys from your Windows Registry:
- Open your Registry Editor.
- Locate the following keys:
- HKEY_CURRENT_USER\Software
- HKEY_LOCAL_MACHINE\SOFTWARE
- HKEY_USERS\.DEFAULT\Software
- If your PC runs a 64-bit version of Windows, you will need to check the HKEY_LOCAL_MACHINE\SOFTWARE\Wow6432Node key as well.
- Explore the keys mentioned above and see if you can find any keys with the name of the program you uninstalled. Delete such keys.
When trying to delete a key in Registry Editor, you may receive the following message: “Cannot delete key: Error while deleting key”. Do not worry, since you can easily tackle this issue. What you need to do is take the ownership of the key in question, and we will show you how to do that:
- Right-click on the key you failed to delete and select Permissions.
- Then select the Advanced option.
- If you are a Windows 7 user:
- Go to the Owner tab.
- Locate the ‘Change owner to:’ section and select your username.
- In addition, check ‘Replace owner on subcontainers and objects’.
- Click Apply and OK to save your changes.
- Those who run Windows 10:
- Navigate to the Owner section and click on Change.
- Once in the Select user or group window, go to the ‘Enter the object name to select’ area and enter your username.
- Make sure to click on the Check Names button. Then click OK.
- The Permissions for Display window will open. Once in the Security tab, go to the Group or user names box and select your username from the list.
- Go to the Permissions for Administrators section. Check Allow for Full Control.
- Click Apply and OK to save the changes.
Now you can delete the registry key you have taken the ownership of.
Step 4. Remove the temporary files left on your computer
To do this, you should empty the Temp folders:
- Open the Search box by pressing the Windows logo key + S shortcut.
- Type ‘%temp%’ (without quotes) into Search. Press Enter. Empty the folder.
- Then type ‘temp’ (no quotes) into the Search bar. Hit Enter. Empty this folder as well.
- This is it. There are no traces of the deleted software left in your system.
Have our tips proved useful?
We are looking forward to your feedback!


