- Clean install of windows 10 OS on new SSD-best procedure for eliminating current windwos 10 OS on old hard drive
- Guide to install or uninstall Windows Subsystem for Linux on Windows 10 Anniversary Update and Creators Update
- Uninstalling/Removing the legacy distro
- Manually deleting the legacy distro
- How to Remove Linux and Install Windows on Your Computer
- Summary
- More Information
- Examples of Linux Partition Tables
- Single SCSI drive
- Multiple SCSI drives
- Single IDE drive
- Multiple IDE drives
- Инструкции по установке или удалению подсистемы Windows для Linux в Windows 10 годовщина обновления и создателей Guide to install or uninstall Windows Subsystem for Linux on Windows 10 Anniversary Update and Creators Update
- Удаление устаревших дистрибутив Uninstalling/Removing the legacy distro
- Удаление устаревшей дистрибутив вручную Manually deleting the legacy distro
Clean install of windows 10 OS on new SSD-best procedure for eliminating current windwos 10 OS on old hard drive
Don’t try to copy the old OS from the HDD, it is much better to clean install Windows 10 on the SSD
If you do not have Windows 10 Installation Media Click HERE to download the Media Creation Tool (Click on Download Tool Now), with that you can download the latest Windows 10 ISO (Select Create Installation Media for Another PC), you can create a bootable USB flash drive (min 4GB) using that tool or create the ISO file which you can later burn to DVD
Once you have the bootable installation media created:
- Shut down your system. remove the old HDD and install the SSD (there should be only the SSD attached to your system during the installation process)
- Insert the Bootable Installation Media
- Go into your BIOS and if SATA Mode is not set to AHCI, change it
- Change the boot order so the Installation Media is top of the boot order
- Save changes to BIOS and Reboot your system
- The Installation should start
- During the installation process skip the steps which ask for a product key and select the option ‘I am Reinstalling Windows 10 on this PC’, and activation will not be an issue, your PC will have a digital entitlement stored on the Microsoft Servers
- D uring the installation process, your system will reboot, at that point, you may need to go into your BIOS and change the boot order so your system boots from your Hard Drive, otherwise the installation may start all over again — do not remove the installation media at this point
- When Window 10 has finished installing and the desktop appears, shut your system down
- If you have a second HDD bay install the old HDD into it and start your system
- Make sure you can see both drives in Windows File Explorer, if not you may need to restart a couple of times for Windows to recognise both drives
- Install any required drivers (can be obtained from the support page on the Website of the manufacturer of your system
- When your system is up and running,
- copy your data (files, images, music . . . etc.) from the old HDD into a temporary folder in the SSD
- format the old HDD and name it Data Drive
- copy the files back onto the old HDD
- Delete the temporary folder from the SSD
Power to the Developer!
MSI GV72 — 17.3″, i7-8750H (Hex Core), 32GB DDR4, 4GB GeForce GTX 1050 Ti, 256GB NVMe M2, 2TB HDD
Guide to install or uninstall Windows Subsystem for Linux on Windows 10 Anniversary Update and Creators Update
If you’re running Windows 10 Creators Update or later, please follow the Windows 10 installation instructions.
The following instructions are for users running Windows 10 Anniversary Update or Windows 10 Creators Update
Prior to Windows 10 Fall Creators Update (version 1709), WSL was released as a beta feature and installed a single Ubuntu instance when «Bash on Ubuntu on Windows» (or Bash.exe) was first run.
While you CAN use WSL on earlier Windows 10 releases, this beta «legacy distro» is now considered obsolete. We strongly encourage you to run the most recent version of Windows 10 available. Each new Windows 10 release includes many hundreds of fixes and improvements in WSL alone, allowing ever more Linux tools and apps to run correctly on WSL.
If you cannot upgrade to Fall Creators Update or later, follow the steps below to enable and use WSL:
Turn on Developer Mode To run WSL on Windows 10 Anniversary Update or Creators Update, you must enable Developer Mode:
Open Settings -> Update and Security -> For developers
Select the Developer Mode radio button 
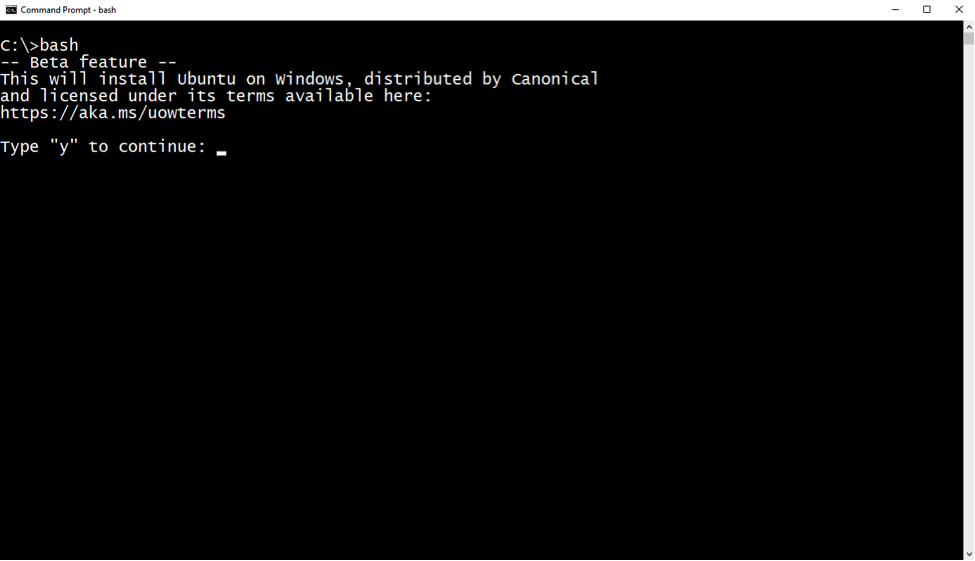
Open a command prompt. Type bash and hit enter
The first time you run Bash on Ubuntu on Windows, you’ll be prompted to accept Canonical’s license. Once accepted, WSL will download and install the Ubuntu instance onto your machine, and a «Bash on Ubuntu on Windows» shortcut will be added to your start menu.
The first time you run Bash on Ubuntu on Windows, you will be prompted to create a UNIX username and password. Follow the new distro instance instructions to complete your installation
Launch a new Ubuntu shell by either:
- Running bash from a command-prompt
- Clicking the start menu «Bash on Ubuntu on Windows» shortcut
Uninstalling/Removing the legacy distro
If you upgrade to Windows 10 Fall Creators Update from an earlier Windows 10 release upon which you installed WSL, your existing distro will remain intact. However, we STRONGLY encourage you to install a new Store-delivered distro ASAP, and migrate any necessary files, data, etc. from your legacy distro to your new distro.
To remove the legacy distro from your machine, run the following from a Command Line or PowerShell instance:
If you are not using Windows Version 1903 or higher, you may need to run wslconfig /u Legacy or lxrun /uninstall /full instead.
Manually deleting the legacy distro
If you wish, you can manually delete your legacy instance. This may be required if you encounter issues uninstalling the legacy distro using lxrun.exe , or are running Windows 10 Spring 2018 Update (or later) which do not ship with lxrun.exe .
To forcefully delete your legacy WSL distro, delete the %localappdata%\lxss\ folder (and all it’s sub-contents) using Windows’ File Explorer, or the command-line:
How to Remove Linux and Install Windows on Your Computer
For a Microsoft Windows XP version of this article, see 314458.
Summary
This article describes how you can remove the Linux operating system from your computer, and install a Windows operating system. This article also assumes that Linux is already installed on the hard disk using Linux native and Linux swap partitions, which are incompatible with the Windows operating system, and that there is no free space left on the drive.
Windows and Linux can coexist on the same computer. For additional information, refer to your Linux documentation.
More Information
To install Windows on a system that has Linux installed when you want to remove Linux, you must manually delete the partitions used by the Linux operating system. The Windows-compatible partition can be created automatically during the installation of the Windows operating system.
IMPORTANT: Before you follow the steps in this article, verify that you have a bootable disk or bootable CD-ROM for the Linux operating system, because this process completely removes the Linux operating system installed on your computer. If you intend to restore the Linux operating system at a later date, verify that you also have a good backup of all the information stored on your computer. Also, you must have a full release version of the Windows operating system you want to install.
Linux file systems use a «superblock» at the beginning of a disk partition to identify the basic size, shape, and condition of the file system.
The Linux operating system is generally installed on partition type 83 (Linux native) or 82 (Linux swap). The Linux boot manager (LILO) can be configured to start from:
The hard disk Master Boot Record (MBR).
The root folder of the Linux partition.
The Fdisk tool included with Linux can be used to delete the partitions. (There are other utilities that work just as well, such as Fdisk from MS-DOS 5.0 and later, or you can delete the partitions during the installation process.) To remove Linux from your computer and install Windows:
Remove native, swap, and boot partitions used by Linux:
Start your computer with the Linux setup floppy disk, type fdisk at the command prompt, and then press ENTER.
NOTE: For help using the Fdisk tool, type m at the command prompt, and then press ENTER.
Type p at the command prompt, and then press ENTER to display partition information. The first item listed is hard disk 1, partition 1 information, and the second item listed is hard disk 1, partition 2 information.
Type d at the command prompt, and then press ENTER. You are then prompted for the partition number you want to delete. Type 1, and then press ENTER to delete partition number 1. Repeat this step until all the partitions have been deleted.
Type w, and then press ENTER to write this information to the partition table. Some error messages may be generated as information is written to the partition table, but they should not be significant at this point because the next step is to restart the computer and then install the new operating system.
Type q at the command prompt, and then press ENTER to quit the Fdisk tool.
Insert either a bootable floppy disk or a bootable CD-ROM for the Windows operating system on your computer, and then press CTRL+ALT+DELETE to restart your computer.
Install Windows. Follow the installation instructions for the Windows operating system you want to install on your computer. The installation process assists you with creating the appropriate partitions on your computer.
Examples of Linux Partition Tables
Single SCSI drive
Multiple SCSI drives
Single IDE drive
Multiple IDE drives
Also, Linux recognizes more than forty different partition types, such as:
FAT 16 > 32 M Primary (Type 06)
FAT 16 Extended (Type 05)
FAT 32 w/o LBA Primary (Type 0b)
FAT 32 w/LBA Primary (Type 0c)
FAT 16 w/LBA (Type 0e)
FAT 16 w/LBA Extended (Type 0f)
Note that there are other ways to remove the Linux operating system and install Windows than the one mentioned above. The preceding method is used in this article because the Linux operating system is already functioning and there is no more room on the hard disk. There are methods of changing partition sizes with software. Microsoft does not support Windows installed on partitions manipulated in this manner.
Another method of removing an operating system from the hard disk and installing a different operating system is to use an MS-DOS version 5.0 or later boot disk, a Windows 95 Startup disk, or a Windows 98 Startup disk that contains the Fdisk utility. Run the Fdisk utility. If you have multiple drives, there are 5 choices; use option 5 to select the hard disk that has the partition to be deleted. After that, or if you have only one hard disk, choose option 3 («Delete partition or logical DOS drive»), and then choose option 4 («Delete non-DOS partition»). You should then see the non-DOS partitions you want to delete. Typically, the Linux operating system has two non-DOS partitions, but there may be more. After you delete one partition, use the same steps to delete any other appropriate non-DOS partitions.
After the partitions are deleted, you can create partitions and install the operating system you want. You can only create one primary partition and an extended partition with multiple logical drives by using Fdisk from MS-DOS version 5.0 and later, Windows 95, and Windows 98. The maximum FAT16 primary partition size is 2 gigabytes (GB). The largest FAT16 logical drive size is 2 GB. For additional information, click the article number below to view the article in the Microsoft Knowledge Base:
105074 MS-DOS 6.2 Partitioning Questions and Answers
If you are installing Windows NT 4.0 or Windows 2000, the Linux partitions can be removed and new partitions created and formatted with the appropriate file system type during the installation process. Windows allows you to create more than one primary partition. The largest partition that Windows NT 4.0 allows you to create during installation is 4 GB because of the limitations of the FAT16 file system during installation. Also, the 4-GB partitions use 64-KB cluster sizes. MS-DOS 6.x and Windows 95 or Windows 98 do not recognize 64-KB cluster file systems, so this file system is usually converted to NTFS during installation. Windows 2000, unlike Windows NT 4.0, recognizes the FAT32 file system. During the installation of Windows 2000, you can create a very large FAT32 drive. The FAT32 drive can be converted to NTFS after the installation has completed if appropriate.
Инструкции по установке или удалению подсистемы Windows для Linux в Windows 10 годовщина обновления и создателей Guide to install or uninstall Windows Subsystem for Linux on Windows 10 Anniversary Update and Creators Update
Если вы используете Windows 10 для дизайнеров Update или более поздней версии, следуйте инструкциям по установке Windows 10. If you’re running Windows 10 Creators Update or later, please follow the Windows 10 installation instructions.
Приведенные ниже инструкции предназначены для пользователей, использующих Windows 10 с Годовщинным обновлением или Windows 10 Creators Update. The following instructions are for users running Windows 10 Anniversary Update or Windows 10 Creators Update
До выхода Windows 10 с обновлением для дизайнеров (версия 1709) WSL был выпущен как бета-версия и установил один экземпляр Ubuntu при первом запуске «Bash в Ubuntu в Windows» (или Bash.exe). Prior to Windows 10 Fall Creators Update (version 1709), WSL was released as a beta feature and installed a single Ubuntu instance when «Bash on Ubuntu on Windows» (or Bash.exe) was first run.
Хотя вы можете использовать WSL в предыдущих выпусках Windows 10, эта бета-версия «Legacy дистрибутив» теперь считается устаревшей. While you CAN use WSL on earlier Windows 10 releases, this beta «legacy distro» is now considered obsolete. Мы настоятельно рекомендуем использовать самую последнюю версию Windows 10. We strongly encourage you to run the most recent version of Windows 10 available. Каждый новый выпуск Windows 10 включает множество сотен исправлений и усовершенствований в WSL, позволяя правильно работать с WSL. Each new Windows 10 release includes many hundreds of fixes and improvements in WSL alone, allowing ever more Linux tools and apps to run correctly on WSL.
Если не удается выполнить обновление до последующего обновления или более поздней версии, выполните следующие действия, чтобы включить и использовать WSL: If you cannot upgrade to Fall Creators Update or later, follow the steps below to enable and use WSL:
Включите режим разработчика, чтобы запустить WSL в юбилейном обновлении или авторских обновлениях Windows 10, необходимо включить режим разработчика: Turn on Developer Mode To run WSL on Windows 10 Anniversary Update or Creators Update, you must enable Developer Mode:
Откройте Параметры -> обновление и безопасность -> для разработчиков Open Settings -> Update and Security -> For developers
Выберите переключатель режим разработчика Select the Developer Mode radio button 
Откройте командную строку. Open a command prompt. Введите bash и нажмите клавишу ВВОД Type bash and hit enter
При первом запуске Bash в системе Ubuntu в Windows вам будет предложено принять каноническую лицензию. The first time you run Bash on Ubuntu on Windows, you’ll be prompted to accept Canonical’s license. После принятия WSL загрузит и установит экземпляр Ubuntu на компьютере, и ярлык «Bash on Ubuntu on Windows» будет добавлен в меню «Пуск». Once accepted, WSL will download and install the Ubuntu instance onto your machine, and a «Bash on Ubuntu on Windows» shortcut will be added to your start menu.

При первом запуске Bash в системе Ubuntu в Windows вам будет предложено создать имя пользователя и пароль UNIX. The first time you run Bash on Ubuntu on Windows, you will be prompted to create a UNIX username and password. Выполните инструкции по новым экземплярам дистрибутив , чтобы завершить установку. Follow the new distro instance instructions to complete your installation
Запустите новую оболочку Ubuntu одним из следующих. Launch a new Ubuntu shell by either:
- Запуск bash из командной строки Running bash from a command-prompt
- Нажатие клавиши «Пуск» Bash в Ubuntu в Windows » Clicking the start menu «Bash on Ubuntu on Windows» shortcut
Удаление устаревших дистрибутив Uninstalling/Removing the legacy distro
Если вы обновляете Windows 10 до версии для дизайнеров, начиная с предыдущего выпуска Windows 10, на котором вы установили WSL, существующие дистрибутив останутся без изменений. If you upgrade to Windows 10 Fall Creators Update from an earlier Windows 10 release upon which you installed WSL, your existing distro will remain intact. Однако мы настоятельно рекомендуем вам установить новое хранилище дистрибутив ASAP и перенести необходимые файлы, данные и т. д. из устаревшей дистрибутив в новую дистрибутив. However, we STRONGLY encourage you to install a new Store-delivered distro ASAP, and migrate any necessary files, data, etc. from your legacy distro to your new distro.
Чтобы удалить устаревшие дистрибутив с компьютера, выполните следующую команду из командной строки или экземпляра PowerShell: To remove the legacy distro from your machine, run the following from a Command Line or PowerShell instance:
Если вы не используете Windows версии 1903 или более поздней, возможно, потребуется запустить wslconfig /u Legacy или lxrun /uninstall /full . If you are not using Windows Version 1903 or higher, you may need to run wslconfig /u Legacy or lxrun /uninstall /full instead.
Удаление устаревшей дистрибутив вручную Manually deleting the legacy distro
При необходимости можно вручную удалить устаревший экземпляр. If you wish, you can manually delete your legacy instance. Это может потребоваться при удалении устаревших дистрибутив с помощью lxrun.exe или при использовании обновления Windows 10 пружины 2018 (или более поздней версии), которые не входят в состав lxrun.exe . This may be required if you encounter issues uninstalling the legacy distro using lxrun.exe , or are running Windows 10 Spring 2018 Update (or later) which do not ship with lxrun.exe .
Чтобы принудительно удалить устаревшую WSL дистрибутив, удалите %localappdata%\lxss\ папку (и все ее вложенное содержимое) с помощью проводника Windows или командной строки: To forcefully delete your legacy WSL distro, delete the %localappdata%\lxss\ folder (and all it’s sub-contents) using Windows’ File Explorer, or the command-line:


