- Use the System File Checker tool to repair missing or corrupted system files
- Run the System File Checker tool (SFC.exe)
- More Information
- How to repair a corrupt Windows 7 installation
- Secret Windows Fixes
- Prepare Your PC for Windows 7
- How to repair corrupted files in Windows 10
- How do I fix corrupted files in Windows 10?
- 1. Use the SFC tool
- 2. Use the DISM tool
- 3. Run SFC scan from Safe Mode
- 4. Perform the SFC scan before Windows 10 starts
Use the System File Checker tool to repair missing or corrupted system files
If some Windows functions aren’t working or Windows crashes, use the System File Checker to scan Windows and restore your files.
Though the steps below might look complicated at first glance, just follow them in order, step-by-step, and we’ll try to get you back on track.
Run the System File Checker tool (SFC.exe)
To do this, follow these steps:
Open an elevated command prompt. To do this, do the following as your appropriate:
If you are running Windows 10, Windows 8.1 or Windows 8, first run the inbox Deployment Image Servicing and Management (DISM) tool prior to running the System File Checker. (If you are running Windows 7 or Windows Vista, skip to Step 3.)
Type the following command, and then press Enter. It may take several minutes for the command operation to be completed.
DISM.exe /Online /Cleanup-image /Restorehealth
Important: When you run this command, DISM uses Windows Update to provide the files that are required to fix corruptions. However, if your Windows Update client is already broken, use a running Windows installation as the repair source, or use a Windows side-by-side folder from a network share or from a removable media, such as the Windows DVD, as the source of the files. To do this, run the following command instead:
DISM.exe /Online /Cleanup-Image /RestoreHealth /Source: C:\RepairSource\Windows /LimitAccess
Note: Replace the C:\RepairSource\Windows placeholder with the location of your repair source. For more information about using the DISM tool to repair Windows, reference Repair a Windows Image.
At the command prompt, type the following command, and then press ENTER:
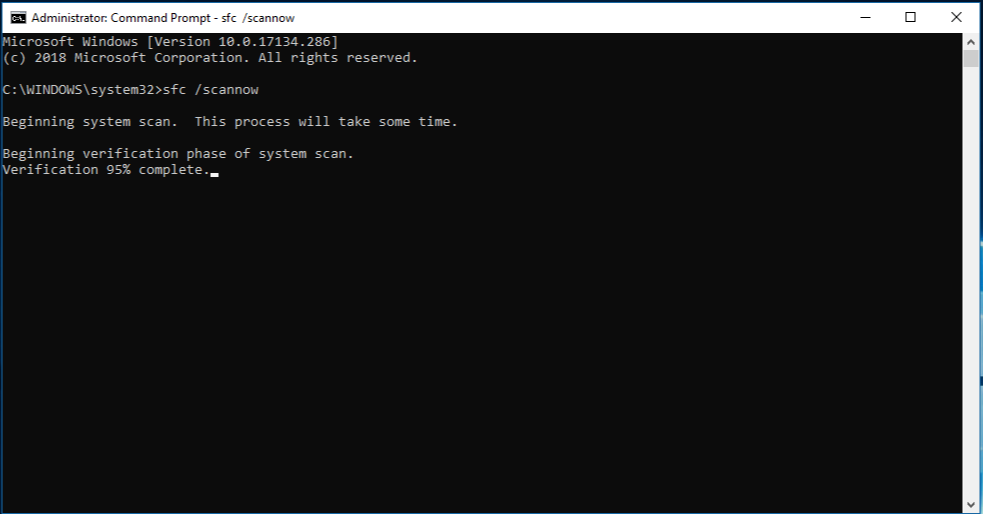
The sfc /scannow command will scan all protected system files, and replace corrupted files with a cached copy that is located in a compressed folder at %WinDir%\System32\dllcache.
The %WinDir% placeholder represents the Windows operating system folder. For example, C:\Windows.
Note Do not close this Command Prompt window until the verification is 100% complete. The scan results will be shown after this process is finished.
After the process is finished, you may receive one of the following messages:
Windows Resource Protection did not find any integrity violations.
This means that you do not have any missing or corrupted system files.
Windows Resource Protection could not perform the requested operation.
To resolve this problem, perform the System File Checker scan in safe mode, and make sure that the PendingDeletes and PendingRenames folders exist under %WinDir%\WinSxS\Temp.
Windows Resource Protection found corrupt files and successfully repaired them. Details are included in the CBS.Log %WinDir%\Logs\CBS\CBS.log.
To view the detail information about the system file scan and restoration, go to How to view details of the System File Checker process.
Windows Resource Protection found corrupt files but was unable to fix some of them. Details are included in the CBS.Log %WinDir%\Logs\CBS\CBS.log.
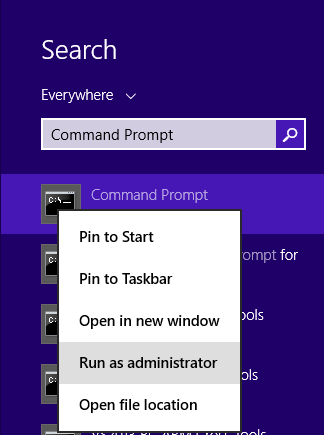
Swipe in from the right edge of the screen, and then tap Search. Or, if you are using a mouse, point to the lower-right corner of the screen, and then click Search. Type Command Prompt in the Search box, right-click Command Prompt, and then click Run as administrator. If you are prompted for an administrator password or for a confirmation, type the password, or click Allow.
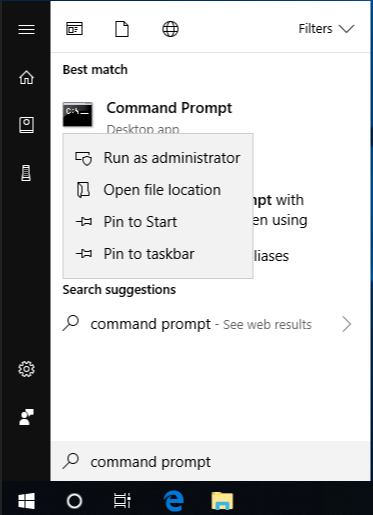
To do this, click Start, type Command Prompt or cmd in the Search box, right-click Command Prompt, and then click Run as administrator. If you are prompted for an administrator password or for a confirmation, type the password, or click Allow.
More Information
To view the details that included in the CBS.Log file, you can copy the information to the Sfcdetails.txt file by using the Findstr command, and then view the details in the Sfcdetails.txt. To do this, follow these steps:
Open an elevated command prompt as described in the previous step 1.
At the command prompt, type the following command, and then press ENTER:
Note The Sfcdetails.txt file contains details from every time that the System File Checker tool has been run on the computer. The file includes information about files that were not repaired by the System File Checker tool. Verify the date and time entries to determine the problem files that were found the last time that you ran the System File Checker tool.
Open the Sfcdetails.txt file from your desktop.
The Sfcdetails.txt file uses the following format:
Date/Time SFC detail The following sample log file contains an entry for a file that could not be repaired: 2007-01-12 12:10:42, Info CSI 00000008 [SR] Cannot repair member file [l:34<17>]»Accessibility.dll» of Accessibility, Version = 6.0.6000.16386, pA = PROCESSOR_ARCHITECTURE_MSIL (8), Culture neutral, VersionScope neutral, PublicKeyToken =
How to manually replace a corrupted system file with a known good copy of the file
After you determine which system file was corrupted and could not be repaired through the detail information in the Sfcdetails.txt file, find where the corrupted file located, and then manually replace the corrupted file with a known good copy of the file. To do this, follow these steps:
Note You may be able to get a known good copy of the system file from another computer that is running the same version of Windows with your computer. You may perform a System File Checker process on that computer to make sure the system file that you intend to copy is a good copy.
Take administrative ownership of the corrupted system file. To do this, at an elevated command prompt, copy and then paste (or type) the following command, and then press ENTER:
takeown /f Path_And_File_Name Note The Path_And_File_Name placeholder represents the path and the file name of the corrupted file. For example, type takeown /f C:\windows\system32\jscript.dll. 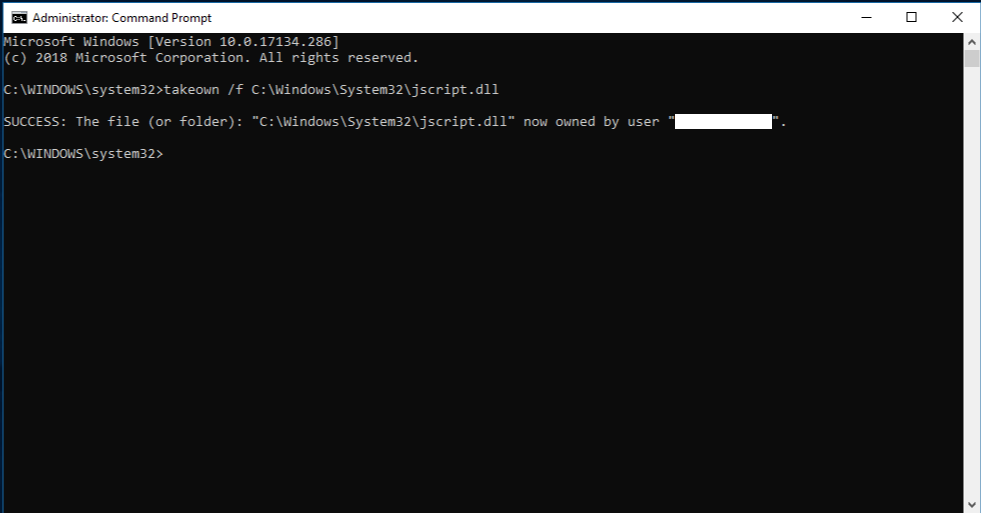
Grant administrators full access to the corrupted system file. To do this, copy and paste (or type) the following command, and then press ENTER:
icacls Path_And_File_Name /GRANT ADMINISTRATORS:F Note The Path_And_File_Name placeholder represents the path and the file name of the corrupted file. For example, type icacls C:\windows\system32\jscript.dll /grant administrators:F.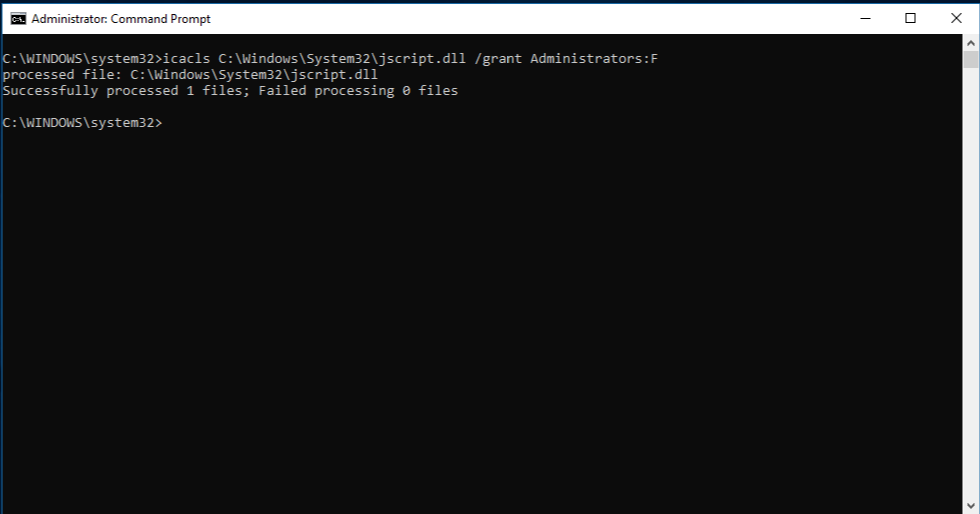
Replace the corrupted system file with a known good copy of the file. To do this, copy and paste (or type) the following command, and then press ENTER:
Copy Source_File Destination Note The Source_File placeholder represents the path and file name of the known good copy of the file on your computer, and the Destination placeholder represents the path and file name of the corrupted file. For example, type copy E:\temp\jscript.dll C:\windows\system32\jscript.dll.
If the steps above don’t work, you may need to reinstall Windows. For more info, see Windows 10 recovery options.
How to repair a corrupt Windows 7 installation


By Marco Chiapetta
Today’s Best Tech Deals
Picked by PCWorld’s Editors
Top Deals On Great Products
Picked by Techconnect’s Editors
Secret Windows Fixes
Every operating system needs an occasional repair job, and Windows 7 is no exception. Whether the source of the problem is corrupt data, a particularly brutal piece of malware, or some other serious issue, you’ll occasionally have to reinstall your copy of Windows.
Wiping your hard drive and performing a fresh installation can be a huge headache; but fortunately there’s a way to repair a corrupt Windows 7 installation while keeping all your programs, personal data, and user accounts intact. With Windows 7 you can perform an in-place upgrade installation to repair a flaky existing install. Though technically designed to upgrade older Windows operating systems like Vista, the in-place upgrade installation option can also be used to repair an existing installation of Windows 7.
The in-place Upgrade installation involves multiple stages, starting with copying installation files to the destination drive and gathering existing files and settings.
Note that you must perform the in-place upgrade process from within Windows; if your PC can’t fully boot to the Windows desktop, this repair guide is not for you. A few other limitations come up later in the article, so be sure to read the entire guide thoroughly before attempting to repair your corrupt copy of Windows 7. Performing a repair installation should be your last resort, and you should consider it only if you have already removed spyware from your PC, reinstalled your drivers, and unsuccessfully tried to restore from an earlier (working) version of Windows 7 using System Restore.
Prepare Your PC for Windows 7
Before performing a repair installation, you should take a few precautionary measures to ensure that the process goes smoothly. The first step is to back up all of your critical files to an external storage device. Though the repair process is unlikely to fail or to render any of your files unrecoverable, it’s always a smart idea to back up your data.
After you’ve backed up your system’s important data, we recommend uninstalling any third-party security software such as firewalls or antivirus applications. You can always reinstall them after completing the repair process; but since you’ll be initiating this process from within Windows, you need to remove any security applications that actively scan files. You should also download and store all of the drivers that your system needs to function—especially the network controller, which tells your network adapter how to access the Internet.
After backing up all of your drivers, clean out all of the temporary files and junk data that have accumulated in Windows 7 over the course of prolonged use. To do this, click the Start button, and in the Search field type Folder Options; then press Enter. In the Folder Options window, click the View tab and select Show hidden files, folders and drives; then click OK.
Next, initiate a Disk Cleanup by opening the Start menu and selecting Computer; right-click your primary drive (the C: drive by default) and open the Properties menu. Select the Disk Cleanup utility in the lower-right portion of the menu, and select Clean up system files. The Disk Cleanup utility should take a few moments to rescan the drive. Next, click the More Options tab, and select Clean Up in the ‘System Restore and Shadow Copies’ section at the bottom of the menu. In the dialog box that appears, click the Delete button; then navigate back to the Disk Cleanup tab, confirm that all items in the Files to Delete list are checked, and click OK. The Disk Cleanup utility should clear out outdated system files, temporary data, and other digital detritus. Depending on how much junk data is on your drive, this step may take anywhere from a few seconds to a few minutes.
After running the Disk Cleanup utility, you should clean out a few folders manually. Open the C: drive again, and double-click the Windows folder. Scroll down the list of folders and delete any files in the Prefetch and Temp folders. Be sure to delete only files within those two folders and not the folders themselves. Next, navigate back to the C: drive, and double-click the Users folder. Within the Users folder, double-click first the folder for your particular username, and then the AppData folder (if you don’t see the AppData folder, you must not have selected ‘Show hidden files, folders and drives’ earlier), the Local folder, and finally the Temp folder. Delete all of the files in this Temp folder as well; then restart your system.
How to repair corrupted files in Windows 10

- Corrupted files in Windows 10 may bring the system to a halt so it’s imperative to repair Windows 10.
- An important method is to use some important tools for fixing corrupted files.
- It’s also a good idea to try and run the tools in Safe Mode and even before Windows starts.
- You can attempt a W indows 10 repair by replacing the files manually by following our steps below.

- Download Restoro PC Repair Tool that comes with Patented Technologies (patent available here).
- Click Start Scan to find Windows issues that could be causing PC problems.
- Click Repair All to fix issues affecting your computer’s security and performance
- Restoro has been downloaded by 0 readers this month.
Many computer problems are caused by corrupted system files. If your Windows 10 installation is corrupted, you’ll encounter instability issues and all sorts of other problems.
Fortunately, there are few ways to fix corrupted system files on your system, and today we’re going to show you how to repair Windows 10.
How do I fix corrupted files in Windows 10?
- Use the SFC tool
- Use DISM tool
- Run SFC scan from Safe Mode
- Perform SFC scan before Windows 10 starts
- Replace the files manually
- Use System Restore
- Reset your Windows 10
1. Use the SFC tool
1.1 Run System File Checker
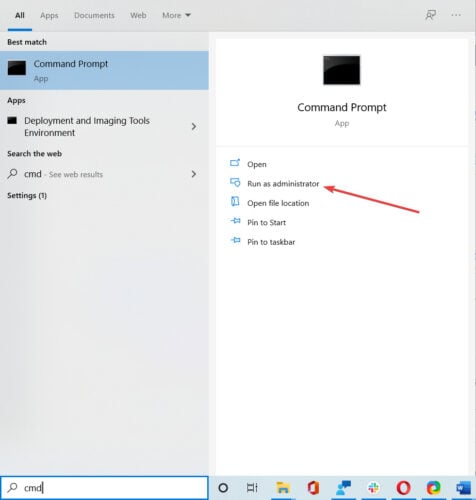
- Type cmd in the Search box and click on Run as Administrator to open an elevated Command Prompt window.

- When Command Prompt opens, enter sfc /scannow and press Enter.
- Don’t close Command Prompt or interrupt the repair process. It can take a while, so wait patiently while it completes.
After the repair process is finished, you’ll see Windows Resource Protection did not find any integrity violations message if your system files aren’t corrupted.
However, SFC tool can’t always fix corrupted files, so keep that in mind.
1.2 Check the SFC log
- Open Command Prompt as administrator as shown in the previous steps.
- Enter the following command and press Enter (By doing this, you’ll create a sfclogs.txt file on your Desktop): findstr /c:»[SR]» %windir%LogsCBSCBS.log >»%userprofile%Desktopsfclogs.txt»
- Open the sfclogs.txt and check the results of SFC scan.
Keep in mind that this log file contains only information related to SFC scan that is performed in Windows.
The SFC is a command line tool, and it will scan your PC and repair any corrupted system files. If you want to learn more about how to use it, read this comprehensive guide about the System File Checker.
2. Use the DISM tool
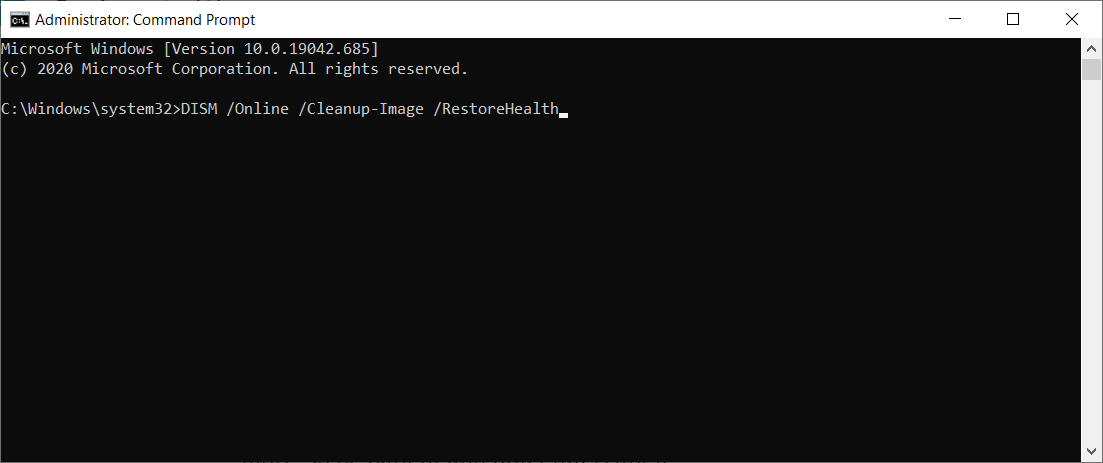
- Open Command Prompt as administrator as indicated at the first step.
- Enter the following command and press Enter: DISM /Online /Cleanup-Image /RestoreHealth
- The repair process can take 10 minutes or more, so be patient and don’t interrupt it.
- After DISM tool repairs your files, restart your PC.
When your PC restarts, you need to check if the problem is resolved. If the issue still persists, run SFC scan again.
If you can’t run SFC tool or if SFC can’t fix the problem, you can try using the DISM tool instead.
DISM stands for Deployment Image & Servicing Management tool, and it’s used to fix any corruption problems that can prevent SFC tool from running.
Just like SFC, DISM is a command-line tool that is used to repair system files.
3. Run SFC scan from Safe Mode
When Safe Mode starts, repeat the steps from Solution 1 to perform an SFC scan.
Sometimes SFC scan can’t repair your files from Windows, but if that happens, you can try running SFC tool from Safe Mode. Safe Mode is a special mode that uses only default drivers and applications.
By using the Safe Mode you’ll eliminate any possible interference from third-party apps.
4. Perform the SFC scan before Windows 10 starts

- Restart your PC by following the first three steps from the previous solution.
- When the list of options appears, select Troubleshoot.
- Choose Advanced options and select Command Prompt .
- When your PC restarts, you might be asked to enter your username and password, so be sure to do that.
- Find the letter of your Windows 10 drive. To do that, enter the following command and press Enter: wmic logicaldisk get deviceid, volumename, description
- Pay attention to Volume Name. In most cases Windows Volume Name will be assigned to the letter D. This is perfectly normal if you start Command Prompt before starting Windows, so no need to worry about it.
- Also check System Reserved drive. In most cases, it should be C.
- Enter the following command and press Enter (Be sure to use the letters that you got from the previous steps): sfc /scannow /offbootdir=C: /offwindir=D:Windows
- Wait while your system files are scanned.
- After the scan is completed, close Command Prompt and start Windows 10 normally.
Sometimes you need to scan and repair protected system files, but you can’t do that from Windows 10.


