- Windows Repair для Windows
- Use the System File Checker tool to repair missing or corrupted system files
- Run the System File Checker tool (SFC.exe)
- More Information
- Windows Repair (All In One)
- О программе
- Что нового
- Системные требования
- Полезные ссылки
- Подробное описание
- Основные возможности Windows Repair (All In One)
- Возможности Windows Repair (All In One) Pro-версии
- Использование Windows Repair (All In One)
Windows Repair для Windows
| Оценка: |
3.05 /5 голосов — 57 |
| Лицензия: | Бесплатная |
| Версия: | 4.11.2 | Сообщить о новой версии |
| Обновлено: | 18.03.2021 |
| ОС: | Windows 10, 8.1, 8, 7, XP |
| Интерфейс: | Английский |
| Разработчик: | Tweaking.com |
| Категории: | Реестр, Автозагрузка — Настройка, оптимизация |
| Загрузок (сегодня/всего): | 12 / 48 465 | Статистика |
| Размер: | 45,16 Мб |
| СКАЧАТЬ | |

Windows Repair — инструмент все-в-одном для ремонта системы. Предназначен для восстановления различных параметров Windows к их значениям по умолчанию. Помогает исправить большинство известных проблем, в том числе ошибки реестра и права доступа к файлам, а также проблемы с Internet Explorer, Windows Update, Windows Firewall и многое другое.
Перед запуском программы будет предложено выполнить 4 простых действия предупреждающие ошибки в работе системы: проверка на вирусы, проверка жесткого диска, проверка на поврежденные файлы системы и создание точки восстановления. Затем можно выбрать один из трех режимов Basic, Advanced и Custom, каждый из которых предлагает различные варианты ремонта системы.
Основные функции программы:
- Исправление ошибок реестра
- Исправление прав доступа к файлам
- Ремонт WMI
- Ремонт Windows Firewall
- Ремонт Internet Explorer
- Ремонт MDAC и MS Jet
- Ремонт Hosts файлов
- Удаление установленных вирусами ограничений
- Ремонт иконок
- Ремонт Winsock и DNS Cache
- Удаление временных файлов
- Исправление настроек Proxy
- Исправление Windows Updates и многое другое.
Use the System File Checker tool to repair missing or corrupted system files
If some Windows functions aren’t working or Windows crashes, use the System File Checker to scan Windows and restore your files.
Though the steps below might look complicated at first glance, just follow them in order, step-by-step, and we’ll try to get you back on track.
Run the System File Checker tool (SFC.exe)
To do this, follow these steps:
Open an elevated command prompt. To do this, do the following as your appropriate:
If you are running Windows 10, Windows 8.1 or Windows 8, first run the inbox Deployment Image Servicing and Management (DISM) tool prior to running the System File Checker. (If you are running Windows 7 or Windows Vista, skip to Step 3.)
Type the following command, and then press Enter. It may take several minutes for the command operation to be completed.
DISM.exe /Online /Cleanup-image /Restorehealth
Important: When you run this command, DISM uses Windows Update to provide the files that are required to fix corruptions. However, if your Windows Update client is already broken, use a running Windows installation as the repair source, or use a Windows side-by-side folder from a network share or from a removable media, such as the Windows DVD, as the source of the files. To do this, run the following command instead:
DISM.exe /Online /Cleanup-Image /RestoreHealth /Source: C:\RepairSource\Windows /LimitAccess
Note: Replace the C:\RepairSource\Windows placeholder with the location of your repair source. For more information about using the DISM tool to repair Windows, reference Repair a Windows Image.
At the command prompt, type the following command, and then press ENTER:
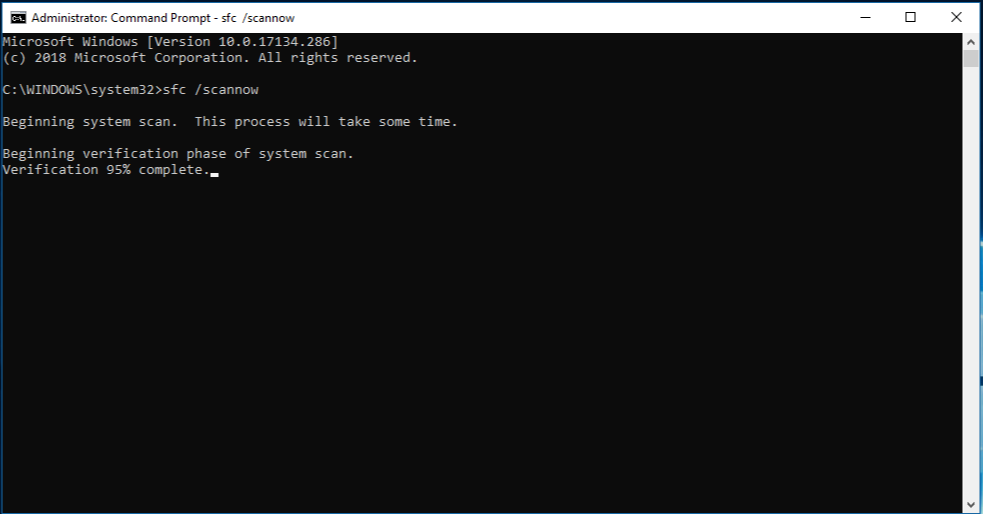
The sfc /scannow command will scan all protected system files, and replace corrupted files with a cached copy that is located in a compressed folder at %WinDir%\System32\dllcache.
The %WinDir% placeholder represents the Windows operating system folder. For example, C:\Windows.
Note Do not close this Command Prompt window until the verification is 100% complete. The scan results will be shown after this process is finished.
After the process is finished, you may receive one of the following messages:
Windows Resource Protection did not find any integrity violations.
This means that you do not have any missing or corrupted system files.
Windows Resource Protection could not perform the requested operation.
To resolve this problem, perform the System File Checker scan in safe mode, and make sure that the PendingDeletes and PendingRenames folders exist under %WinDir%\WinSxS\Temp.
Windows Resource Protection found corrupt files and successfully repaired them. Details are included in the CBS.Log %WinDir%\Logs\CBS\CBS.log.
To view the detail information about the system file scan and restoration, go to How to view details of the System File Checker process.
Windows Resource Protection found corrupt files but was unable to fix some of them. Details are included in the CBS.Log %WinDir%\Logs\CBS\CBS.log.
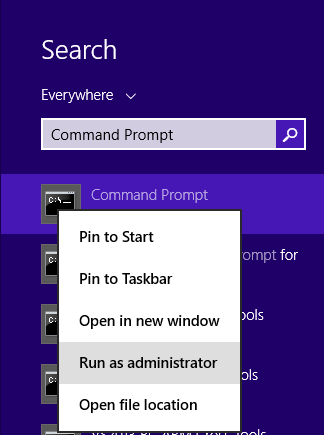
Swipe in from the right edge of the screen, and then tap Search. Or, if you are using a mouse, point to the lower-right corner of the screen, and then click Search. Type Command Prompt in the Search box, right-click Command Prompt, and then click Run as administrator. If you are prompted for an administrator password or for a confirmation, type the password, or click Allow.
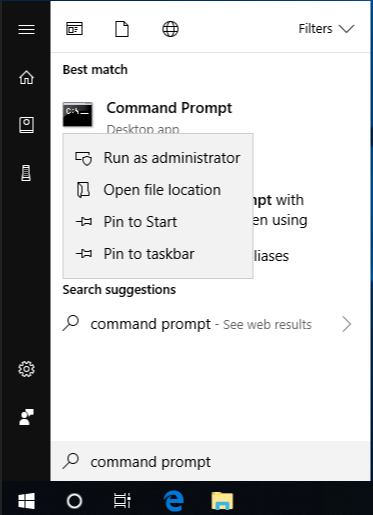
To do this, click Start, type Command Prompt or cmd in the Search box, right-click Command Prompt, and then click Run as administrator. If you are prompted for an administrator password or for a confirmation, type the password, or click Allow.
More Information
To view the details that included in the CBS.Log file, you can copy the information to the Sfcdetails.txt file by using the Findstr command, and then view the details in the Sfcdetails.txt. To do this, follow these steps:
Open an elevated command prompt as described in the previous step 1.
At the command prompt, type the following command, and then press ENTER:
Note The Sfcdetails.txt file contains details from every time that the System File Checker tool has been run on the computer. The file includes information about files that were not repaired by the System File Checker tool. Verify the date and time entries to determine the problem files that were found the last time that you ran the System File Checker tool.
Open the Sfcdetails.txt file from your desktop.
The Sfcdetails.txt file uses the following format:
Date/Time SFC detail The following sample log file contains an entry for a file that could not be repaired: 2007-01-12 12:10:42, Info CSI 00000008 [SR] Cannot repair member file [l:34<17>]»Accessibility.dll» of Accessibility, Version = 6.0.6000.16386, pA = PROCESSOR_ARCHITECTURE_MSIL (8), Culture neutral, VersionScope neutral, PublicKeyToken =
How to manually replace a corrupted system file with a known good copy of the file
After you determine which system file was corrupted and could not be repaired through the detail information in the Sfcdetails.txt file, find where the corrupted file located, and then manually replace the corrupted file with a known good copy of the file. To do this, follow these steps:
Note You may be able to get a known good copy of the system file from another computer that is running the same version of Windows with your computer. You may perform a System File Checker process on that computer to make sure the system file that you intend to copy is a good copy.
Take administrative ownership of the corrupted system file. To do this, at an elevated command prompt, copy and then paste (or type) the following command, and then press ENTER:
takeown /f Path_And_File_Name Note The Path_And_File_Name placeholder represents the path and the file name of the corrupted file. For example, type takeown /f C:\windows\system32\jscript.dll. 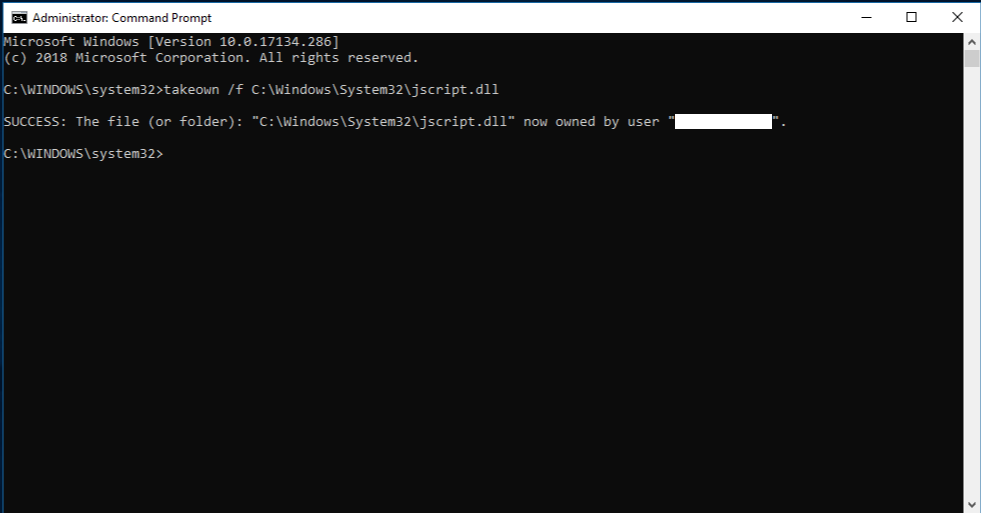
Grant administrators full access to the corrupted system file. To do this, copy and paste (or type) the following command, and then press ENTER:
icacls Path_And_File_Name /GRANT ADMINISTRATORS:F Note The Path_And_File_Name placeholder represents the path and the file name of the corrupted file. For example, type icacls C:\windows\system32\jscript.dll /grant administrators:F.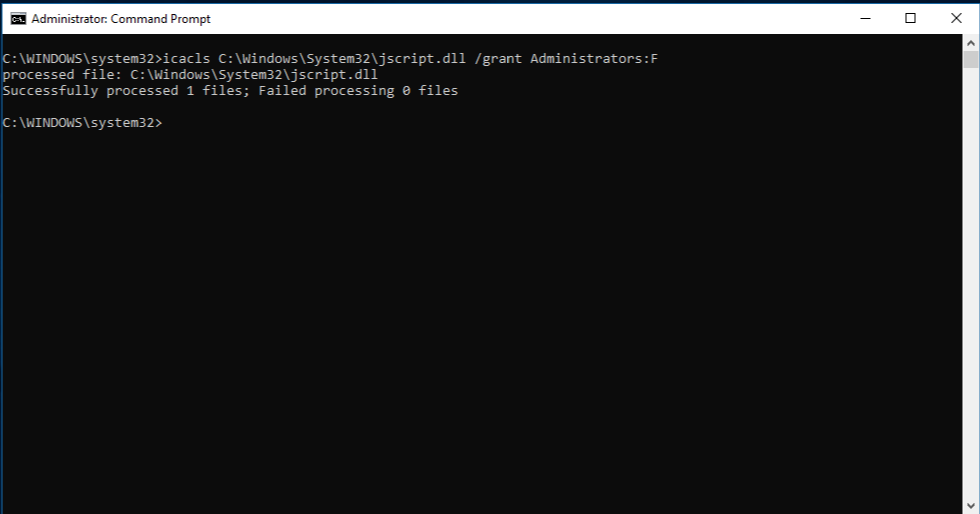
Replace the corrupted system file with a known good copy of the file. To do this, copy and paste (or type) the following command, and then press ENTER:
Copy Source_File Destination Note The Source_File placeholder represents the path and file name of the known good copy of the file on your computer, and the Destination placeholder represents the path and file name of the corrupted file. For example, type copy E:\temp\jscript.dll C:\windows\system32\jscript.dll.
If the steps above don’t work, you may need to reinstall Windows. For more info, see Windows 10 recovery options.
Windows Repair (All In One)


| Разработчик: | Tweaking.com |
| Лицензия: | Freeware (бесплатно)* |
| Версия: | 4.11.2 + Portable |
| Обновлено: | 2021-03-18 |
| Системы: | Windows / Windows Server |
| Интерфейс: | английский |
| Рейтинг: |  |
| Ваша оценка: | |
| Категория: | Настройка и оптимизация системы |
| Размер: | 43.6 MB / 43.3 MB (Portable) |
О программе
Что нового
Новое в версии 4.11.2:
- Обновлен Tweaking.com — Registry Backup до версии v4.0.0
- Обновлен код создания точки восстановления, чтобы выдавать сообщения об ошибках в случае сбоя создания точки восстановления.
- Обновлены реестр и права доступа к файлам по умолчанию для Windows 10 на 18 марта 2021 года
Системные требования
Полезные ссылки
Подробное описание
Windows Repair (All In One) — бесплатный инструмент восстановления все-в-одном, которые позволяет исправить большое количество известных проблем Windows, включая ошибки реестра и разрешения файлов, а также проблемы, связанные с веб-браузером Internet Explorer, обновлениями Windows Update, Брандмауэром Windows Firewall и многое другое.
Вредоносные программы и установленные приложения могут изменить настройки системы по умолчанию. С помощью Tweaking.com — Windows Repair можно восстановить первоначальные настройки ОС Windows.
Цель программы — предоставить инструмент восстановления, который может спасти пользователей от необходимости делать переустановку системы Windows. Инструмент помогает пользователям, которые не достаточно сильны в компьютерных технологиях, и, конечно, опытным пользователям и специалистам в их работе.
Основные возможности Windows Repair (All In One)
Возможности Windows Repair (All In One) Pro-версии
• Автоматические обновления программы.
• Расширенная очистка Windows.
• Твики производительности системы.
• Твики ускорения системных ярлыков.
• Добавление собственных пользовательских скриптов и файлов реестра для запуска после операции восстановления.
• Автоматическое применение системных твиков после завершения восстановления.
• Пожизненная лицензия в рамках основной версии. Например, для всех версий в рамках v3, а после выхода v4 будет предложена скидка на обновление.
• Доступ ко всем pro функциям, инструментам и возможностям, которые будут выпущены в будущем.
• Смена логотипа в главном окне на собственный логотип компании.
• Помощь в подготовке к бесплатному восстановлению.
Использование Windows Repair (All In One)
Внимание! Ознакомьтесь с данной инструкцией перед использованием утилиты Windows Repair (All In One).
При первом запуске программы вам будет предложен мастер, включающий 5 шагов, которые необходимо пройти до выполнения операции восстановления. Эти шаги рекомендуется пройти до запуска восстановления с помощью Windows Repair.
Шаг 1. Important — Сброс питания компьютерной системы
Важная инструкция по правильному сбросу питания для полного обесточивания компьютерной системы. Это позволяет очистить энергозависимую память и избавить систему Windows после запуска от возможной утечки памяти, недостатков ресурсов или других проблем, которые могут возникнуть перед восстановлением.
Правильный сброс питания сделать легко. Выключите компьютер / ноутбук и отключите кабель питания / вытащите батарею. После этого несколько раз нажмите кнопку включения — это позволит полностью обесточить оборудование. Подключите кабель / вставьте батарею и запустите компьютер / ноутбук.
Шаг 2. Clean Your System Of Infections — Очистка системы от заражений
Попытки исправить систему, которая в настоящее время является зараженной, очевидно, является очень плохой идеей и могут сделать только хуже. Активное вредоносное ПО может контролировать компьютер и препятствовать правильному выполнению ряда задач восстановления. Поскольку только часть задач восстановления будут выполнены, другие незавершенные операции в конечном итоге могут вызвать проблемы. Для начала убедитесь, что система чистая. Даже если вы думаете, что ваша система является не зараженной, рекомендуется сделать проверку, с помощью антивирусного сканера.
Шаг 3. Check File System — Проверка файловой системы
Необходимо сделать проверку жестких дисков на вашем компьютере. Функция после перезагрузки системы запустит инструмент Windows для проверки файловой системы на жестком диске и исправления любой найденной проблемы. Поврежденные файлы могут нарушить многие операции, в том числе восстановление. Таким образом, обязательны условием является проверка целостности файловой системы.
Шаг 4. System File Check (SFC) — Проверка системных файлов
Интегрированный в Windows инструмент проверки системных файлов проверяет файлы ОС Windows на целостность, возможные повреждения и правильность версий. Прежде чем делать восстановление системы, необходимо выполнить операцию для восстановления системных файлов, которые повреждены и могут помешать задачам восстановления.
Шаг 5. System Restore & Registry Backup — Создание точки восстановления системы и резервное копирование реестра
На данном этапе вы можете сделать точку восстановления системы, прежде чем выполнять какие-либо задачи исправления с помощью Windows Repair (All In One). Если возникнут любые непредвиденные проблемы после выполнения задач Windows Repair (All In One), вы сможете вернуть систему в первоначальное состояние с помощью созданной точки восстановления. Этот этап особенно рекомендуется.


