- Create a recovery drive
- Is there a common step to repair Windows Installer Service in Windows?
- How to Repair a Faulty Windows Installation Without Reformatting
- Corrupted system files don’t have to ruin your day
- Method 1: Repair Windows Even If You Can’t Get To Your Desktop
- Step 1: Insert the Install Disc and Reboot
- Step 2: Get to the Command Prompt
- Step 3: Scan Your System
- Method 2: Reinstall Windows Without Losing Any Data
- Step 1: Do Some Prep Work
- Step 2: Insert the Install Disc
- Step 3: Reinstall Windows
- How To Repair Windows 8.1 Installation (The Easy Way)
- Repair the Windows 8.1 installation
Create a recovery drive
It’s a good idea to create a recovery drive. That way, if your PC ever experiences a major issue such as hardware failure, you’ll be able to use the recovery drive to reinstall Windows 10. Windows updates to improve security and PC performance periodically so it is recommended to recreate the recovery drive annually. Personal files and any applications that did not come with your PC will not be backed up. You’ll need a USB drive that’s at least 16 gigabytes.
Warning: Use an empty USB drive because this process will erase any data that’s already stored on the drive.
To create a recovery drive in Windows 10:
In the search box next to the Start button, search for Create a recovery drive and then select it. You might be asked to enter an admin password or confirm your choice.
When the tool opens, make sure Back up system files to the recovery drive is selected and then select Next.
Connect a USB drive to your PC, select it, and then select Next.
Select Create. Many files need to be copied to the recovery drive, so this might take a while.
If you ever need to use the recovery drive to reinstall Windows 10 on your PC, see Recovery options in Windows 10 for further instructions. It’s a good idea to back up your files frequently because the recovery drive isn’t a system image. It doesn’t contain your personal files, settings, or programs.
Need more options for creating a recovery drive?
To download Windows 10 installation media, see Recovery options in Windows 10.
Is there a common step to repair Windows Installer Service in Windows?
You can try the registry fix from Winhelponline.com, however, I can’t speak for a 3rd party site since I haven’t used the solution before. You would have to try it at your own risk.
The following are steps I usually suggest for Windows Installer Errors troubleshooting. Some of them you may have tried before.
You may follow the steps from the below link: How to troubleshoot problems that may occur when you install, uninstall, or upgrade a program on a Windows-based computer: http://support.microsoft.com/kb/2438651
Step 1: Check the Windows Installer Service.
1. Click Start Orb, in the start search box, type Services and press Enter.
2. Scroll down and find the Windows Installer. Double-click “Windows Installer” in the Services list.
3. On the General tab, make sure the service is started under “Service status”.
4. If the service is not already running, under Service status, click Start, and then click OK.
Step 2: Unregister and re-register the Windows Installer
1. Click Start Orb, in the start search box, type MSIEXEC /UNREGISTER, and then click OK .
2. Click Start Orb, in the start search box, type MSIEXEC /REGSERVER, and then click OK . After you run this command, the operation is complete.
3. Now, try your installation again.
Step 3: Clean any pending installations
Check the following registry key and clean any entries in the key that you find:
Go to the Start Orb, type in Regedit and select enter.
If you get the User Account Control dialog box that states, Do you want to allow the following program to make changes to the is computer?, Click yes.
Modifying REGISTRY settings incorrectly can cause serious problems that may prevent your computer from booting properly. Microsoft cannot guarantee that any problems resulting from the configuring of REGISTRY settings can be solved. Modifications of these settings are at your own risk.
Scroll to: HKEY_LOCAL_MACHINE \Software\Microsoft\Windows\CurrentVersion\Installer\InProgress
Check the following registry key and clean any entries in the key that you find:
HKEY_LOCAL_MACHINE \System\CurrentControlSet\Control\Session Manager\PendingFileRenameOperations
Step 4: Check the permissions
Verify the System has Full Control on the following keys:
Next, restart your computer and try again.
If still having problems, then create a new Administrator User account and see if the problem could be a corrupt user account.
Please reply back and let us know if this helps with your Windows Installer Error.
How to Repair a Faulty Windows Installation Without Reformatting
Corrupted system files don’t have to ruin your day
Nothing will put a crimp in your computing style quite like a Windows error. Although Microsoft’s OS has gotten exponentially more stable over the years, it’s still very possible for Windows system files to become corrupt, which can cause your system to slow down, freeze, or (in the worst case) refuse to load your operating system at all.
When you encounter a Windows error, your first instinct may be to back up your data, grab the ol’ installation disk, and weep silently as you press the Reformat button. We’re here to tell you there’s another way. Still back up your data, of course, but by following this guide, you might well be able to repair your Windows install without dropping the nuke.
Note: Though these guides are written for Windows 7, a very similar process will work for Vista or XP.
Method 1: Repair Windows Even If You Can’t Get To Your Desktop
The first method will allow you to repair corrupt system files, even if the problem is so severe that you can’t boot all the way to your desktop. For this method, you’ll need a Windows installation DVD, so track down yours or borrow one from a friend—it doesn’t matter if the DVD’s version matches your license, as long as it’s the correct bit count.
Step 1: Insert the Install Disc and Reboot
If your system won’t boot into Windows, you’ll need to boot from somewhere else—in this case, the installation DVD. Your computer should be set up to boot from your optical drive before your hard drive, but if it’s not, you can always change the boot priority in the BIOS. When the system starts up, make sure you press a key when prompted to boot from the Windows installation disc. When you do, you’ll see the familiar Windows installation language-selection screen (image below).

Step 2: Get to the Command Prompt
The recovery tool we’re going to use is run from the command prompt, which can (thankfully) be accessed through the Windows installation disc. To get there, don’t click Install Now in the middle of the screen, but instead click Repair Your Computer in the lower left. Click Next on the first menu that pops up.
The next menu will have two radio buttons. Make sure the first one is selected, and note that in the text box, your System drive might not have the drive letter C. If that’s the case, make a note of the drive letter used. Click Next, and on the following screen (image above), select the bottom option, marked Command Prompt.
Step 3: Scan Your System
Finally you’re ready to scan your system files for errors. To do that simply run the following command:
sfc /scannow /offbootdir=[DRIVELETTER]:\ /offwindir=[DRIVELETTER]:\windows
Substitute the drive letter you noted earlier for [DRIVELETTER]. There should be no square brackets in the command (image below).
Windows will now attempt to find and repair any errors in your system files. If the scan finds errors, you may need to repeat the steps in this guide until it finds no more errors. To restart your computer, enter the exit command, then click the Restart button. When you’re ready to try booting into Windows again, remove the install disc and restart one final time.
Method 2: Reinstall Windows Without Losing Any Data
If you are still able to get to your desktop, you’ve got additional options. You can still use the command prompt to scan as in the previous method, but there’s another way that may be more thorough: reinstall Windows.
Wait, didn’t we say you wouldn’t have to reformat? We did, and you don’t. It’s possible to do an in-place, nondestructive reinstall of Windows, which will restore all your system files to pristine condition without damaging any of your personal data or installed programs. All you’ll need is a Windows install DVD and your Windows CD key. Hopefully you still have your key written down somewhere, but if you don’t, you’re not out of luck. You can use a program like ProduKey, available for free, to quickly recover your Windows product key from the registry.
Important: Before continuing this process, note that it can cause problems with your installed programs, so don’t do it just for fun, and make sure to back up your important data and create a restore point before continuing.
Step 1: Do Some Prep Work
Before you can get started, there’s one important consideration: You can’t repair a Windows 7 SP1 install with a pre-SP1 install disc. The ideal solution is to borrow a newer install disc with SP1 included (or download it, if you have access to a TechNet account), but it’s also possible to uninstall SP1. To do this, open the Control Panel, select Uninstall a Program, and then choose the option to view updates (image below). You can right-click the Service Pack update to uninstall it.
Step 2: Insert the Install Disc
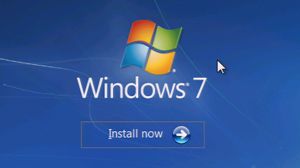
We’re once again using the Windows install disc, but this time we’re not going to boot from it. Simply insert the disc, and when the autorun menu pops up, choose to run setup.exe. Once again, you’ll find yourself staring at the Windows 7 install screen. This time, do click the Install now button (image below).
Step 3: Reinstall Windows
Finally, it’s time to get down to business. After the installer gets past the Copying Temporary Files… screen, you’ll be asked about getting updates for installation files. Go ahead and do this, as long as your computer’s network connection is still working.
When the installer asks what sort of installation you’d like to perform (image below), ignore your natural instinct to choose Custom, and instead click Upgrade. Sure, you’re not technically upgrading from one version of Windows to another, but we do want to do the kind of nondestructive install that the update option performs. Think of it as upgrading from a broken version to a non-broken version, if you must.
After that, all that’s left is to sit through the usual Windows 7 installation process, with its multiple reboots and endless progress bars. When it’s done, you’ll have to reactivate Windows by entering the product key that you found or wrote down earlier.
All that’s left to do is to let Windows install any security updates or service packs that it’s missing, and reboot. All your system files should now be fully restored!
How To Repair Windows 8.1 Installation (The Easy Way)
Last Updated on June 8, 2019 by admin 12 Comments
Windows XP, a version of the Windows operating system that is going strong thirteen years after its 2001 release, came with a handy feature to repair the corrupted Windows installation. If you ever installed or reinstalled Windows XP operating system, you probably remember the option titled Repair Windows installation that appeared during the install process.
The Repair Windows XP installation option was one of the best features of the Windows XP operating system as it allowed users to repair the installation without losing data and installed programs.

However, unlike Windows XP, its successors Windows Vista, Windows 7, Windows 8, and Windows 8.1 don’t feature Repair Windows installation option and instead offer a variety of other features to repair the Windows installation, including advanced commands.
While Windows 8 and 8.1 ship with Refresh PC feature, a handy feature to quickly reset Windows settings to their defaults, the downside of the feature is that it removes all desktop programs and you need to reinstall all desktop applications all over again after performing Refresh PC operation.
If you would like to repair your Windows 8.1 installation without losing files, Windows settings, and installed apps, you can follow the given below workaround to repair the installation by keeping files, Windows settings, and installed apps.
When you repair the Windows 8.1 installation by following the given below instructions, you’ll be able to retain all files, installed apps, and settings. For instance, all files and shortcuts on the desktop and all files in your Documents and pictures will be retained during the repair operation.
Warning: We recommend you back up important data before following our instructions even though the procedure doesn’t delete your data.
Repair the Windows 8.1 installation
Step 1: Turn on your PC and boot into Windows 8.1.
Step 2: Insert your Windows 8.1 DVD into the optical drive or connect your bootable Windows 8.1 USB. And if you have Windows 8.1 ISO file, browse to the file location, right-click on it, and then click Mount option to mount the ISO file.

Step 3: Open up the Windows 8.1 install DVD, USB, or mounted ISO in This PC (My Computer), and then double-click Setup.exe file to run the installer.

Step 4: When you see Get important updates screen, select the first option titled Download and install updates (recommended), and then click the Next button to check for updates and then install, if available. The setup might restart after installing updates.


Step 5: In the next screen, you’ll need to enter your Windows 8.1 product key. Enter the 25-character product key before clicking the Next button.

Step 6: Accept the license agreement by checking the option titled I accept the license terms and clicking the Accept button.
Step 7: This is an important step. Here, you need to select the first option titled Keep Windows settings, personal files and apps. Click the Next button to let the setup scan your computer for available disk space and other requirements.

If the free space available on your system drive (Windows 8.1 drive) is not sufficient for the operation, you’ll be asked to free up required space before continuing further.
As we mentioned earlier, when you repair your Windows 8.1 installation by following this method, you’ll be able to retain all files, installed apps from the Store, desktop programs and Windows settings.
Please close all running applications and save your work before proceeding to the next step.
Step 8: Here, simply click the Install button to begin installing (repairing) Windows 8.1 by keeping your Windows settings, personal files, and apps.


The install process might take a few minutes to hours, depending on your system configuration.
Step 9: Once setup completes installing, you’ll see the Settings screen. Here, you can either click Use express settings to go with the recommended settings or click Customize button to change default settings.
Step 10: In the next screen, you’ll be asked to enter the password of your Microsoft account that you’re using to sign-in to Windows 8.1. Type in the password and then click the Next button.

You might see Help us to protect your info screen where you need to select your alternate email address to receive a code that you need to enter to verify your Microsoft account.

Or, you can simply click I can’t do this right now option and then click the Next button to skip to the next step. You can verify your account later from PC settings.
Your PC might restart once again. That’s it! Your repaired Windows 8.1 installation is ready!


