- Замена повреждённых или удалённых системных файлов Windows вручную
- Replacing System files
- Replies (3)
- How to repair corrupted files in Windows 10
- How do I fix corrupted files in Windows 10?
- 1. Use the SFC tool
- 2. Use the DISM tool
- 3. Run SFC scan from Safe Mode
- 4. Perform the SFC scan before Windows 10 starts
- Replace Windows System files without Access Denied errors
- SysMate
Замена повреждённых или удалённых системных файлов Windows вручную

Для восстановления работоспособности Windows существует масса способов – точки отката, бэкап, бэкап и откат её реестра, восстановление целостности её файлов, переустановка Microsoft Visual C++ и прочих системных компонентов. Но только предварительно сделанный бэкап системы можно считать панацеей, универсальным «лекарством» от всех возможных проблем. Как быть, если нужно восстановить системные файлы, а у нас ни бэкапа нет, ни инструмент восстановления системных файлов не работает?
В таких случаях можно прибегнуть к замене системных файлов Windows, если они повреждены или удалены, вручную.
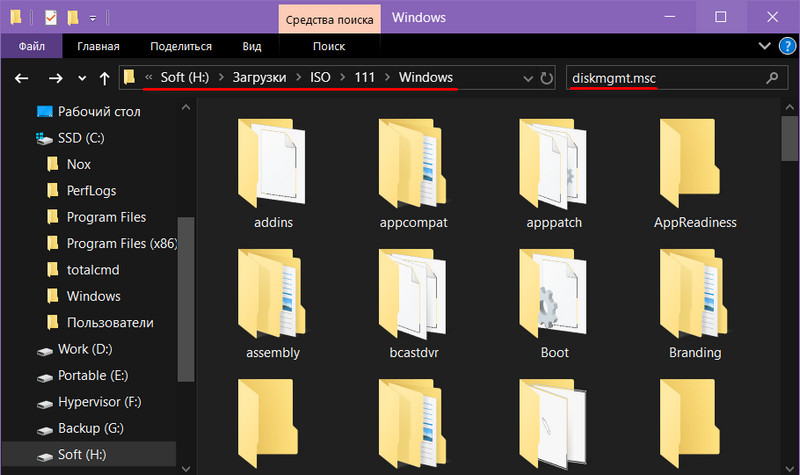
Замена системных файлов Windows вручную – операция, требующая определённых знаний и навыков в работе операционной системы от Microsoft. Нам нужно точно знать, какой файл системы повреждён или удалён, чтобы мы могли его заменить дубликатом. К примеру, если мы при открытии системного управления дисками видим уведомление типа этого,
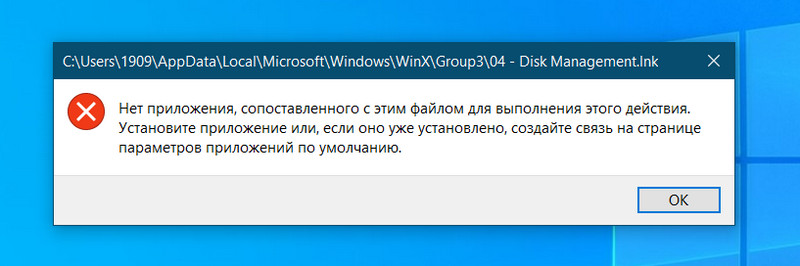
это значит, что повреждён или удалён файл diskmgmt.msc – файл запуска непосредственно утилиты управления дисками. В этом случае мы можем попытаться решить проблему путём восстановления целостности системных файлов, т.е. запустить в командной строке известную команду sfc/scannow . Но этот механизм системы не всегда даёт положительные результаты и часто завершается уведомлением о невозможности восстановления.
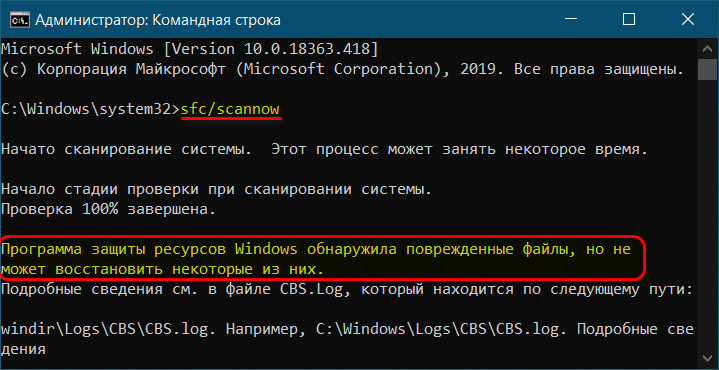
В таком случае далее нужно предпринимать действия по восстановлению хранилища системных ресурсов и потом снова запускать sfc/scannow . Ручная замена проблемных системных файлов – более топорная операция, плюс к этому, требующая, как упоминалось, чёткого понимания, какие именно файлы по какому пути нужно заменять. Но если эти файлы и пути известны, то это более быстрое и надёжное решение проблемы.
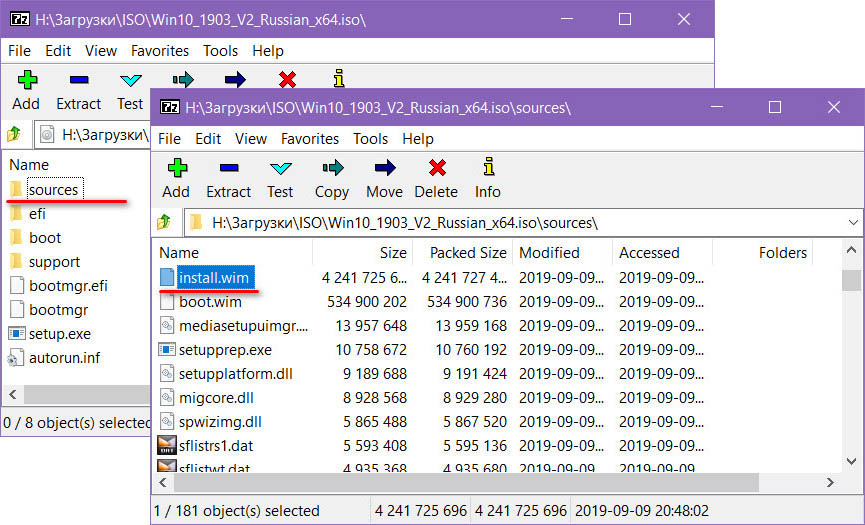
Что для этого необходимо? Нам понадобится установочный ISO нужной версии Windows. Открываем его архиватором 7-Zip.

Открываем папку «sources», далее – «install».
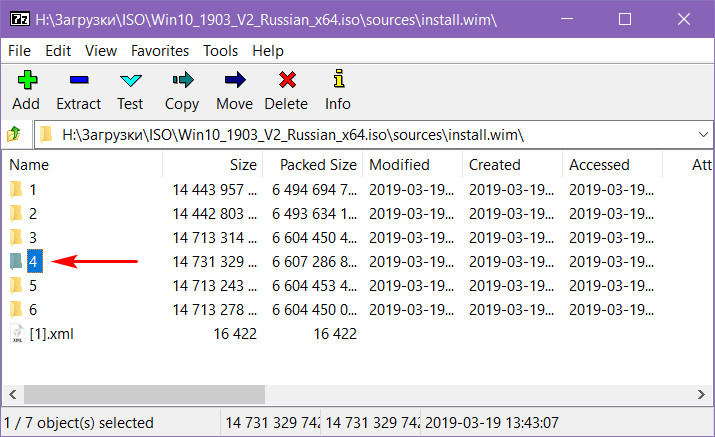
Внутри файла «install» выбираем папку с тем или иным порядковым номером. Порядковые номера – это индексы редакций Windows. Если, например, в нашем случае нужно восстановить файл diskmgmt.msc , нам без разницы редакция, эта системная утилита есть в любой редакции Windows. Поэтому мы просто выберем редакцию Pro , она идёт под номером 4.
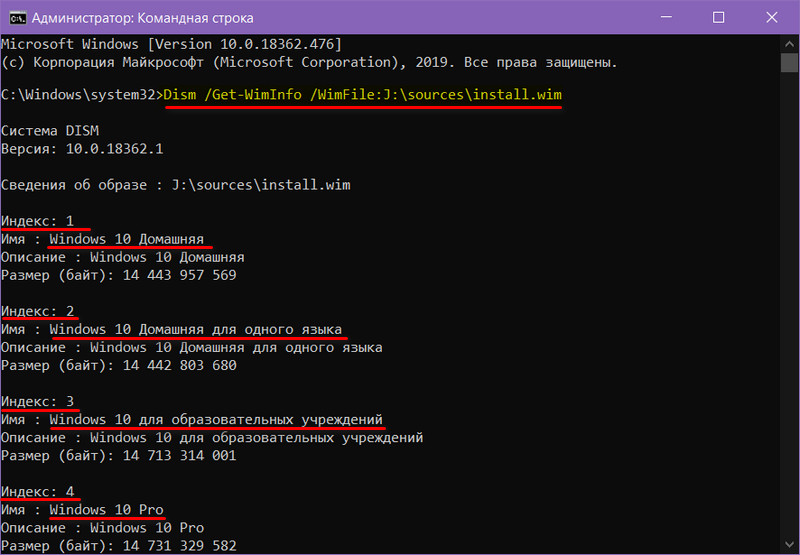
Но если файл нужного системного компонента есть только в определённой редакции, например, только в Pro, то необходимо указывать индекс конкретно этой редакции. А узнать индексы редакций в составе дистрибутива можно с помощью командной строки. Нужно подключить установочный ISO для отображения в системе и прописать в команде Dism путь к файлу install на борту этого ISO , вот так:
Dism /Get-WimInfo /WimFile:J:\sources\install.wim
Здесь вместо буквы J каждый должен подставить свою букву диска подключённого ISO . И если файл install имеет формат не «.wim», а «.esd», то, соответственно, в конце команды необходимо указать этот формат. В ответ на эту команду получим справку о соответствии индексам редакций Windows.
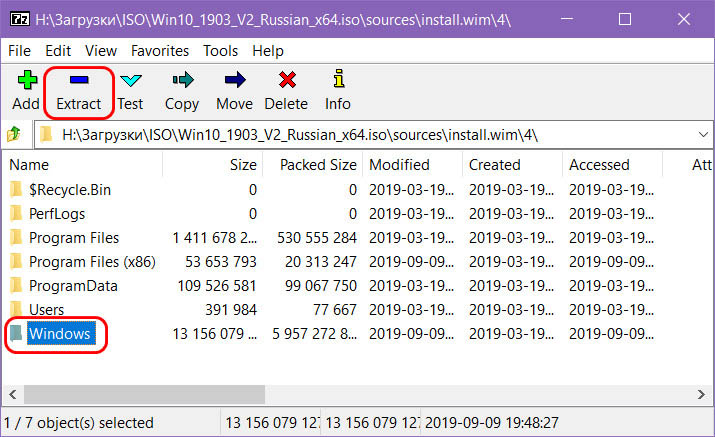
Определившись с редакцией, распаковываем нужный системный каталог. В нашем случае необходимо заменить файл утилиты diskmgmt.msc , следовательно, мы распаковываем каталог «Windows» . Кликаем его и жмём «Extract».
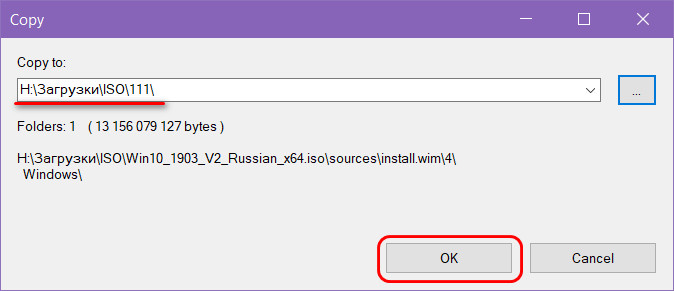
Указываем путь распаковки.
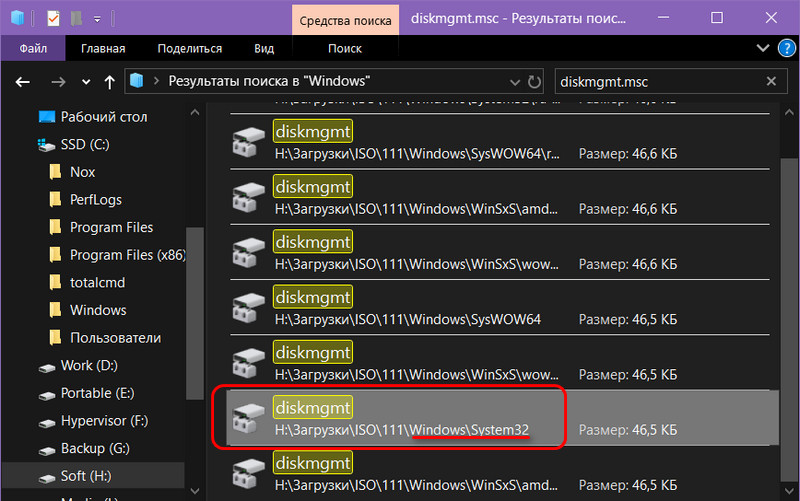
И после распаковки ищем файл утилиты diskmgmt.msc .
При поиске обнаружилось несколько дубликатов diskmgmt.msc – в оригинальном месте хранения файла, в хранилище системных ресурсов (т.е. в папке WinSxS) , в других системных подкаталогах. Мы берём файл, находящийся по исходному его пути хранения, в папке «System32» . Копируем его.
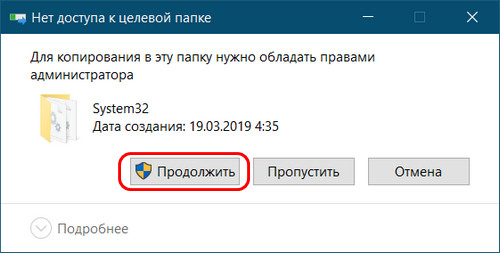
И помещаем этот файл в папку «System32» внутри каталога «Windows» на диске С текущей системы.
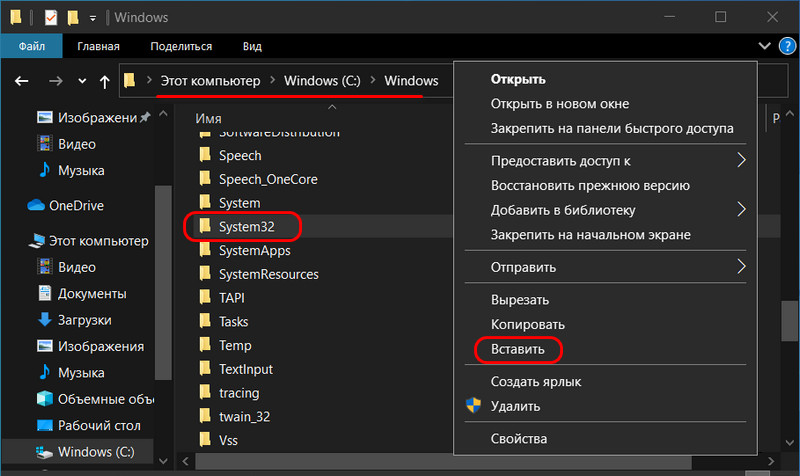
Подтверждаем вставку или замену файла.
Мы рассмотрели простейший пример замены системных файлов вручную, чтобы осветить сугубо механизм этой процедуры. Необходимо понимать, что не со всеми системными файлами процесс замены произойдёт так вот просто, могут возникнуть трудности. Некоторые файлы Windows в активном состоянии не захочет заменять, и потребуется либо получение прав TrustInstaller , либо работа с LiveDisk . Также нужно учитывать, что после замены некоторых файлов, например, файлов активных системных процессов, прежде лицезрения результата проделанной работы, необходимо перезагрузить Windows.
Ну и главный совет: приведённая выше процедура рисковая, ибо, по сути, является вмешательством в структуру данных системы, потому перед проведением этой процедуры необходимо создать точку отката. Но лучше, конечно же, сделать полноценный бэкап.
Replacing System files
How can I replace a System file from a Recovery Disk?
Replies (3)
![]()
If it is not an intrusion on your privacy, it would help to know what system files and, what happened to the old ones why you think they needs to be replaced.
If your system is having some issue, please do this:
Please provide additional information about your system:
What is your system make and model?
What is your XP Version and Service Pack?
Describe your current antivirus and anti malware situation: McAfee, Symantec, Norton, Spybot, AVG, Avira!, MSE, Panda, Trend Micro, CA, Defender, ZoneAlarm, PC Tools, Comodo, etc.
Was the issue preceded by a power interruption, aborted restart, or improper shutdown? (this includes plug pulling, power buttons, removing the battery, etc.)
Do you have a genuine bootable XP installation CD (this is not the same as any Recovery CDs that came with your system)?
What do you see that you don’t think you should be seeing?
What do you not see that you think you should be seeing?
Fill in the blank: My system was working fine until: ____________________________________________.
Do, or do not. There is no try.
Somebody please tell me how to prepare figgy pudding as these children keep saying they won’t go until they get some.
I decided to save up points for a new puppy instead of a pony!
How to repair corrupted files in Windows 10

- Corrupted files in Windows 10 may bring the system to a halt so it’s imperative to repair Windows 10.
- An important method is to use some important tools for fixing corrupted files.
- It’s also a good idea to try and run the tools in Safe Mode and even before Windows starts.
- You can attempt a W indows 10 repair by replacing the files manually by following our steps below.

- Download Restoro PC Repair Tool that comes with Patented Technologies (patent available here).
- Click Start Scan to find Windows issues that could be causing PC problems.
- Click Repair All to fix issues affecting your computer’s security and performance
- Restoro has been downloaded by 0 readers this month.
Many computer problems are caused by corrupted system files. If your Windows 10 installation is corrupted, you’ll encounter instability issues and all sorts of other problems.
Fortunately, there are few ways to fix corrupted system files on your system, and today we’re going to show you how to repair Windows 10.
How do I fix corrupted files in Windows 10?
- Use the SFC tool
- Use DISM tool
- Run SFC scan from Safe Mode
- Perform SFC scan before Windows 10 starts
- Replace the files manually
- Use System Restore
- Reset your Windows 10
1. Use the SFC tool
1.1 Run System File Checker
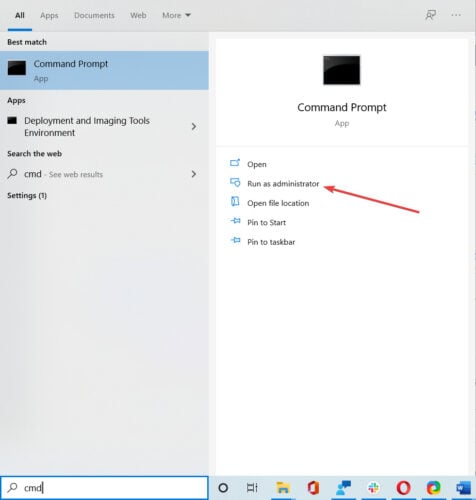
- Type cmd in the Search box and click on Run as Administrator to open an elevated Command Prompt window.

- When Command Prompt opens, enter sfc /scannow and press Enter.
- Don’t close Command Prompt or interrupt the repair process. It can take a while, so wait patiently while it completes.
After the repair process is finished, you’ll see Windows Resource Protection did not find any integrity violations message if your system files aren’t corrupted.
However, SFC tool can’t always fix corrupted files, so keep that in mind.
1.2 Check the SFC log
- Open Command Prompt as administrator as shown in the previous steps.
- Enter the following command and press Enter (By doing this, you’ll create a sfclogs.txt file on your Desktop): findstr /c:»[SR]» %windir%LogsCBSCBS.log >»%userprofile%Desktopsfclogs.txt»
- Open the sfclogs.txt and check the results of SFC scan.
Keep in mind that this log file contains only information related to SFC scan that is performed in Windows.
The SFC is a command line tool, and it will scan your PC and repair any corrupted system files. If you want to learn more about how to use it, read this comprehensive guide about the System File Checker.
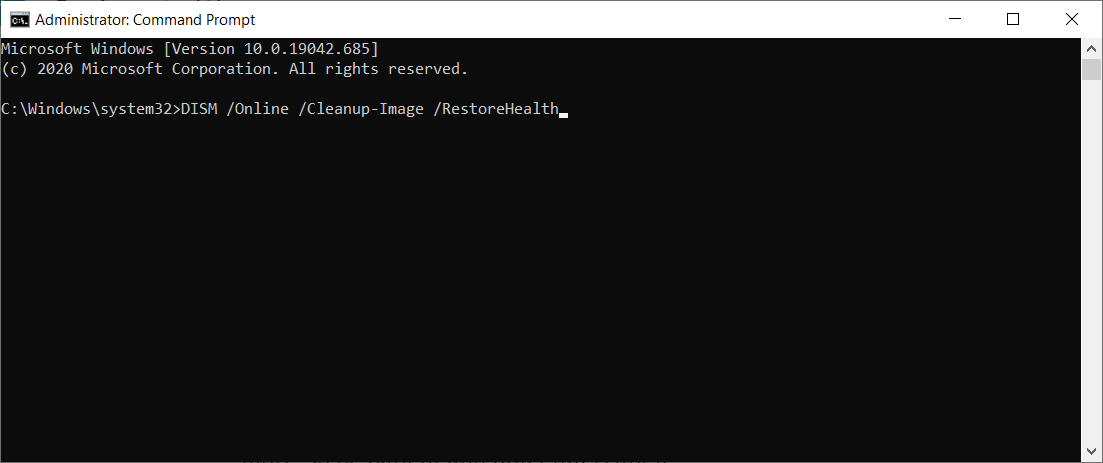
2. Use the DISM tool
- Open Command Prompt as administrator as indicated at the first step.
- Enter the following command and press Enter: DISM /Online /Cleanup-Image /RestoreHealth
- The repair process can take 10 minutes or more, so be patient and don’t interrupt it.
- After DISM tool repairs your files, restart your PC.
When your PC restarts, you need to check if the problem is resolved. If the issue still persists, run SFC scan again.
If you can’t run SFC tool or if SFC can’t fix the problem, you can try using the DISM tool instead.
DISM stands for Deployment Image & Servicing Management tool, and it’s used to fix any corruption problems that can prevent SFC tool from running.
Just like SFC, DISM is a command-line tool that is used to repair system files.
3. Run SFC scan from Safe Mode
When Safe Mode starts, repeat the steps from Solution 1 to perform an SFC scan.
Sometimes SFC scan can’t repair your files from Windows, but if that happens, you can try running SFC tool from Safe Mode. Safe Mode is a special mode that uses only default drivers and applications.
By using the Safe Mode you’ll eliminate any possible interference from third-party apps.
4. Perform the SFC scan before Windows 10 starts

- Restart your PC by following the first three steps from the previous solution.
- When the list of options appears, select Troubleshoot.
- Choose Advanced options and select Command Prompt .
- When your PC restarts, you might be asked to enter your username and password, so be sure to do that.
- Find the letter of your Windows 10 drive. To do that, enter the following command and press Enter: wmic logicaldisk get deviceid, volumename, description
- Pay attention to Volume Name. In most cases Windows Volume Name will be assigned to the letter D. This is perfectly normal if you start Command Prompt before starting Windows, so no need to worry about it.
- Also check System Reserved drive. In most cases, it should be C.
- Enter the following command and press Enter (Be sure to use the letters that you got from the previous steps): sfc /scannow /offbootdir=C: /offwindir=D:Windows
- Wait while your system files are scanned.
- After the scan is completed, close Command Prompt and start Windows 10 normally.
Sometimes you need to scan and repair protected system files, but you can’t do that from Windows 10.
Replace Windows System files without Access Denied errors
Core system files are protected by the Windows operating system so that they cannot be manipulated by users of the system or applications the user runs on the system that easily. That’s a good thing as it will not only prevent users from deleting files that are needed to operate the system, but also prevent — some — malware from doing the same.
Sometimes though you may need to modify a file manually that is protected by Windows. This can be quite the frustrating experience when you notice that you do not have control over some files on your system at all.
You cannot just copy a different file version to the location the protected version is stored by Windows, as you will get access denied errors when you try to do so.
There are a couple of ways around that, for instance to take ownership of files or to boot into another operating system to manipulate the files externally.
Access denied example when trying to replace the uxtheme.dll file in the system32 folder:
Destination Folder Access Denied
You’ll need to provide administrator permission to move to this folder.

You need permission to perform this action.

SysMate
The free program can be used to replace files in Windows that are protected by the operating system. It performs the operations that you would run manually to replace those files.

In particular, it does the following:
- Take ownership of the target file that you want to replace.
- Acquire permissions on the file.
- Backup the original file before the new file is moved.
- Replace the file.
To use it, simply select the original file and the replacement file in the program interface and hit the start button afterwards. The program handles everything on its own from that moment on.
Note: You need to run the program with elevated privileges. It will refuse to be started otherwise and displays a notification to you to inform you about that.
The program is really easy to use, and since it is creating a backup of the original file before it replaces it, it is relatively safe to use. You can open the backups folder of the application with a click on open backup folder in the program interface. It was located in c:\SysMate_Backup on my test system.
SysMate System File Walker is a handy program for the Windows operating system that helps you replace system protected files while the operating system is running. Note that it requires the Microsoft .Net Framework 2.0 or 4.0 (two versions are supplied.
It is compatible with all recent 32-bit and 64-bit versions of the Windows operating system.


