- How to quickly resize multiple images at once on Mac
- How to batch resize pictures on Mac
- How to Resize a Photo on Mac
- How to Resize a Photo on Mac
- Batch Resize Images on Mac with Preview
- How to Batch Resize Images in Mac OS X
- How to quickly resize images on Mac 2021
- How to resize images on Mac
- Resize multiple images at once
- Crop an image in Preview
- Bonus tip: Convert to any format & enhance your photo
- Bonus bonus tip: How to resize an image on a Mac without losing quality
- Conclusion
How to quickly resize multiple images at once on Mac

As a blogger, I manipulate a lot of photos and images. One of my daily routine consists in resizing some images we use on iDB to either reduce their size or simply make sure they fit right on the site.
There are many different ways you can quickly resize several images at once on your Mac. You can use an Automator workflow or download one of the many apps available to do that job. Or, if you want to quickly resize several images on the fly without too much trouble, you can simply do the following.
How to batch resize pictures on Mac
Step 1: Select all the images you want to resize.
Step 2: Right click on them and select “Open With Preview.”
Step 3: In Preview, go to Edit > Select All.
Step 4: Once all images are selected, go to Tools > Adjust Size.
Step 5: Enter the width or height value to resize your photos to your liking. If you’re only going to resize the width for example, make sure “Scale Proportionally” is selected. This will ensure that your images are proportionally resized.
Step 6: Save and close.
That’s all there is to it. If you’re batch resizing images on a regular basis, I’d really suggest either downloading an app to do the job for you, or simply create an Automator workflow on your Mac. That will save you the trouble of repetitive tasks.
Источник
How to Resize a Photo on Mac

Resizing a picture changes the resolution of the image, either increasing or decreasing it as desired by the user. On the Mac, one of the simplest ways to resize a photo is using the bundled Preview application, which is available in all versions of macOS and Mac OS X.
There are many reasons to resize pictures, whether to make them better fit into a document, webpage, email, as a wallpaper, or for many other purposes. Additionally, resizing a picture can be useful to shrink down the file size of an image as well, since a smaller resolution tends to have a smaller file size footprint. Whatever the purpose, we’ll show you the fastest way to resize a photo on the Mac using Preview.
Note the method we are covering here aims to resize a single picture file, if you have multiple images to resize into the same dimensions you’d likely want to use this batch resize method for Mac instead.
How to Resize a Photo on Mac
In this walkthrough we will take a wide panorama image from the Grand Canyon and resize it from a very large wide resolution to a smaller image resolution, reducing the image dimensions and file size in the process.
- Locate the picture in the Mac file system that you want to resize
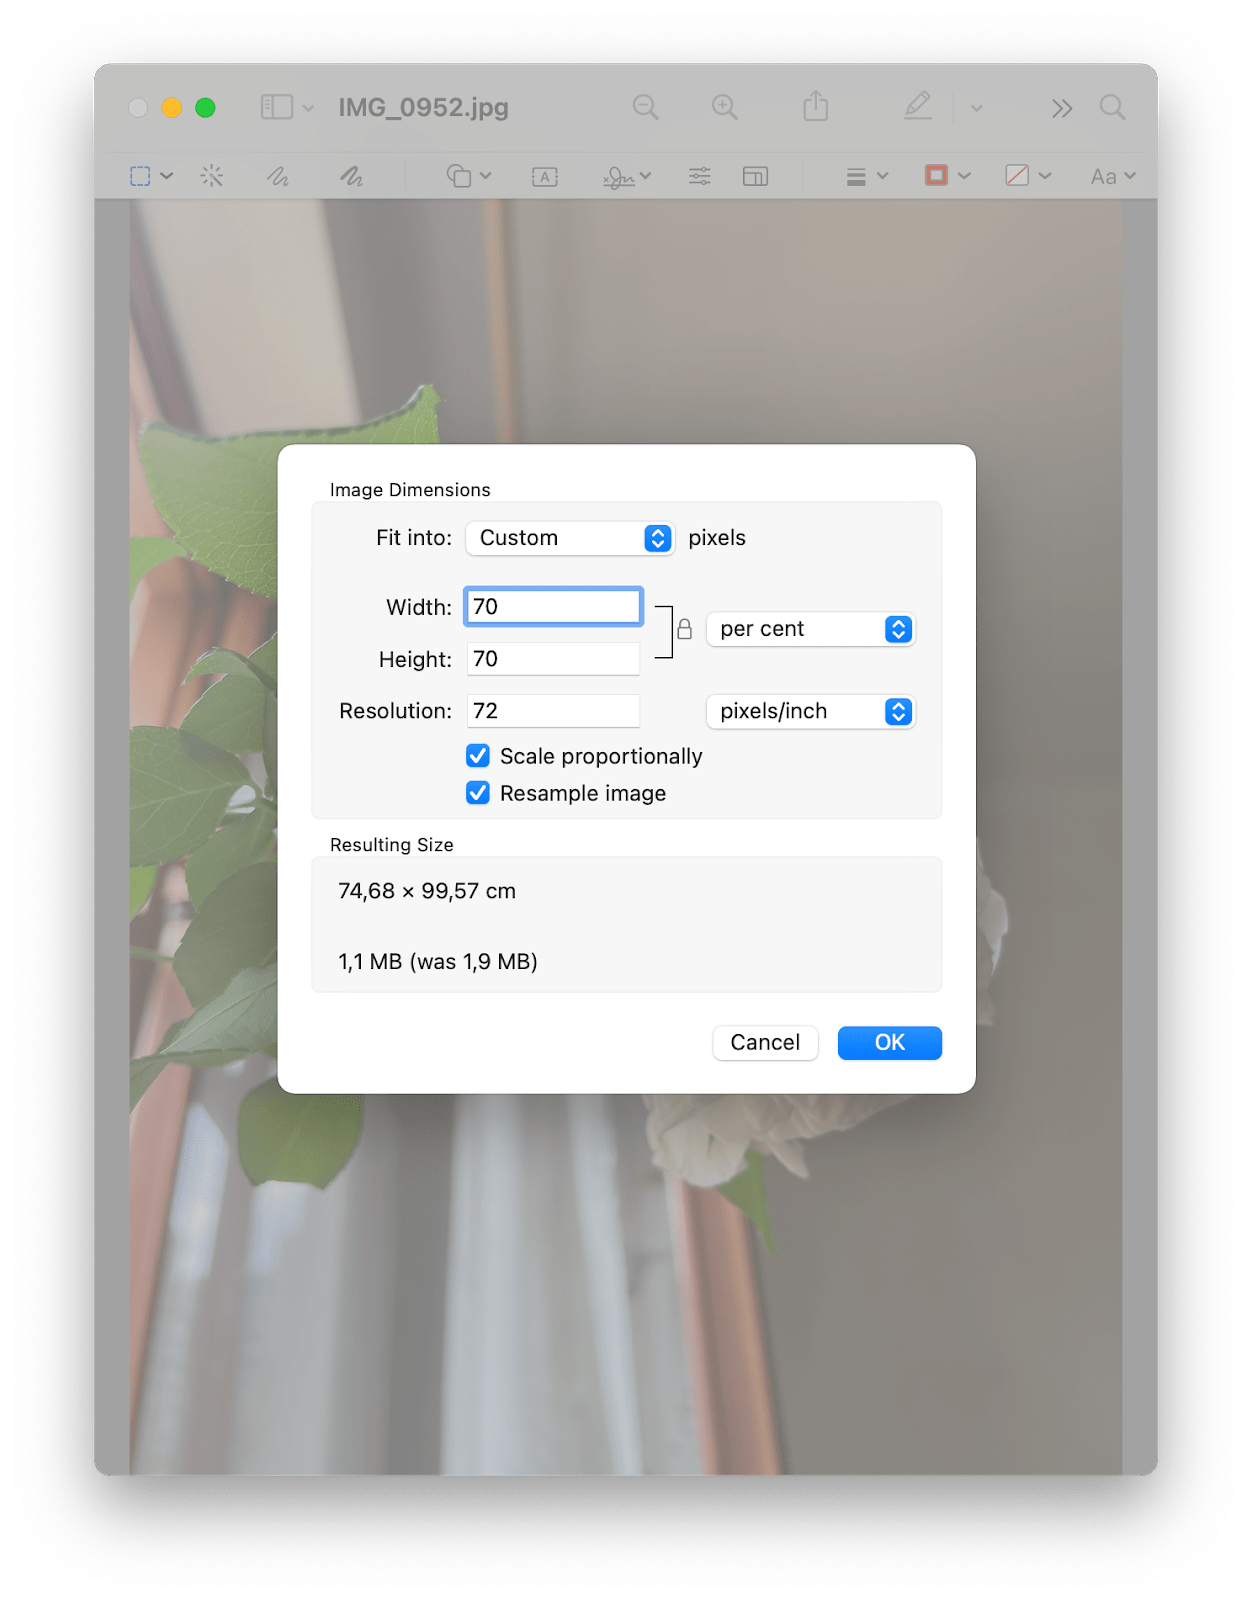
At the ‘Image Dimensions’ screen choose the new width and height in pixels (or inches, cm, mm, points, as a percent) to resize the picture to, to scale and resize proportionally be sure the “Scale proportionally” option is checked – click on “OK” when satisfied with the new image dimensions to resize to
The newly resized picture will be where you saved it to the Mac Finder, or it will be the old file if you saved over the existing image.
Remember you can both increase an image resolution or decrease an image resolution by resizing this way. If you increase an images dimensions, the file size increases, whereas if you decrease a picture dimension the file size typically decreases.
Note the ‘Fit into’ options give many default new file sizes to choose, but we opted for a custom image dimension to resize the picture to here. Similarly, you certainly don’t have to use the ‘Scale proportionally” option but since most users don’t want to skew their resized image it is typically recommended to use proportional resizing.
This method works to resize an image in every version of macOS or Mac OS X ever released, since Preview has shipped with the Mac since the beginning. The video below demonstrates image resizing in Preview for macOS Sierra but it exists in El Capitan, Yosemite, Mavericks, Snow Leopard, Tiger, and much more:
The Preview app is often under appreciated, it is impressively full featured though many Mac users write it off as a simple image viewer. In fact, Preview app for Mac has many advanced image adjustments and editing functionalities, including the ability to increase color saturation, convert images to black and white, crop pictures, batch resize multiple images, batch convert image file types, and much more. Users who want to delve deeper into the apps capabilities can browse our articles on Preview for Mac here.
Do you know of another better way to resize pictures on a Mac? Have any specific resizing tips? Let us know in the comments.
Источник
Batch Resize Images on Mac with Preview
You can easily batch resize groups of images within Mac OS X by using the included Preview app, that is, taking a group of pictures set at one or various resolutions, and collectively resize them all together in a group to a new resolution, outputting either as the same file or as a new file saved at the newly desired resolution. Long ago you had to buy expensive third party software for this purpose, but no longer is there a need for any additional downloads or expensive photo editing applications to perform these tasks on a Mac. Instead you only need Preview, which is free with every Mac and every version of Mac OS X!
Here is how to use Previews’ powerful yet easy batch image resize feature to change the resolution of multiple files in one fell swoop, all in a few simple steps.
How to Batch Resize Images in Mac OS X
You will need to launch Preview, which is in the /Applications/ folder, to get started. Preview is also usually the default image editor and can be typically opened by just opening any picture. Once Preview is open, proceed with the following simple directions:
- Select all the images you want resized in the Finder, and then open them within the Preview app
- From Preview, select all of the images that you want to batch resize from the left-side thumbnail drawer (Command+A will select them all)
- Now, go to the menu labeled “Tools”, and then choose “Adjust Size”
- Enter a value for what you want the new width and height to be
- Next, navigate to the ‘File’ menu and click “Save All” or, to save a NEW version that is resized, choose “Export Selected Images…” or “Save As”
If you “Save All”, all the images will instantly save resized over the existing versions. If you “Export” or “Save As”, you’ll create newly resized images in addition to the existing photos.
Choose a path to save the files in the Save dialog to if you’re exporting or using “Save As” features, then just wait for all of the images to finish resizing to their new resolutions. The batch resizing takes place fairly quick, but the precise speed is dependent on your available system resources and speed of the Mac.
This works in Preview that is included in virtually all versions of Mac OS X, learn it once and you’ll have the ability to resize large groups of photos and picture files easily in a batch process that is extremely easy.
The video tutorial below walks through the step-by-step process of using Preview to resize multiple images as opened from the Mac file system, as you’ll see it’s a piece of cake:
Updated: 5/14/2019 for clarification. Note the precise menu language varies slightly per version of Mac OS or Mac OS X, as older versions differ from the most modern incarnations of Mac OS X. Nonetheless, the procedure works in all Preview versions, whether it’s in MacOS Mojave, MacOS High Sierra, Sierra, Snow Leopard, OS X Lion, OS X Mountain Lion, OS X Mavericks, OS X Yosemite, El Capitan, and likely every version where Preview remains as a staple of the operating system.
Источник
How to quickly resize images on Mac 2021
Batch photo edits made easy
Looking for an image resizer on Mac? Whether you need to scale down a large image file for it to take up less space and be more sendable, need to resize to fit into a presentation without distortion and weighing down the file, or just need to compress your endless photo library, there are plenty of options for you to choose from.
In this post, we will look at the tools in the image resizing tools at your disposal and how to use them.
Bulk resizer for Mac: Edit, watermark, resize
PhotoBulk is a life-saver for when you need to change the size of multiple images. Drop them into the app and resize in a sec.
How to resize images on Mac
Let’s start with the basics. Macs actually have a built-in image editing software that can resize images on your Mac. If you go to Finder > Applications and scroll through the apps, you’ll find Preview, an image viewing and editing app that comes with your Mac. And yes, Preview can resize your image.
Here’s how to do it:
- Open an image in Preview (simply double-click on the file to open it and Preview is the default option in most cases).
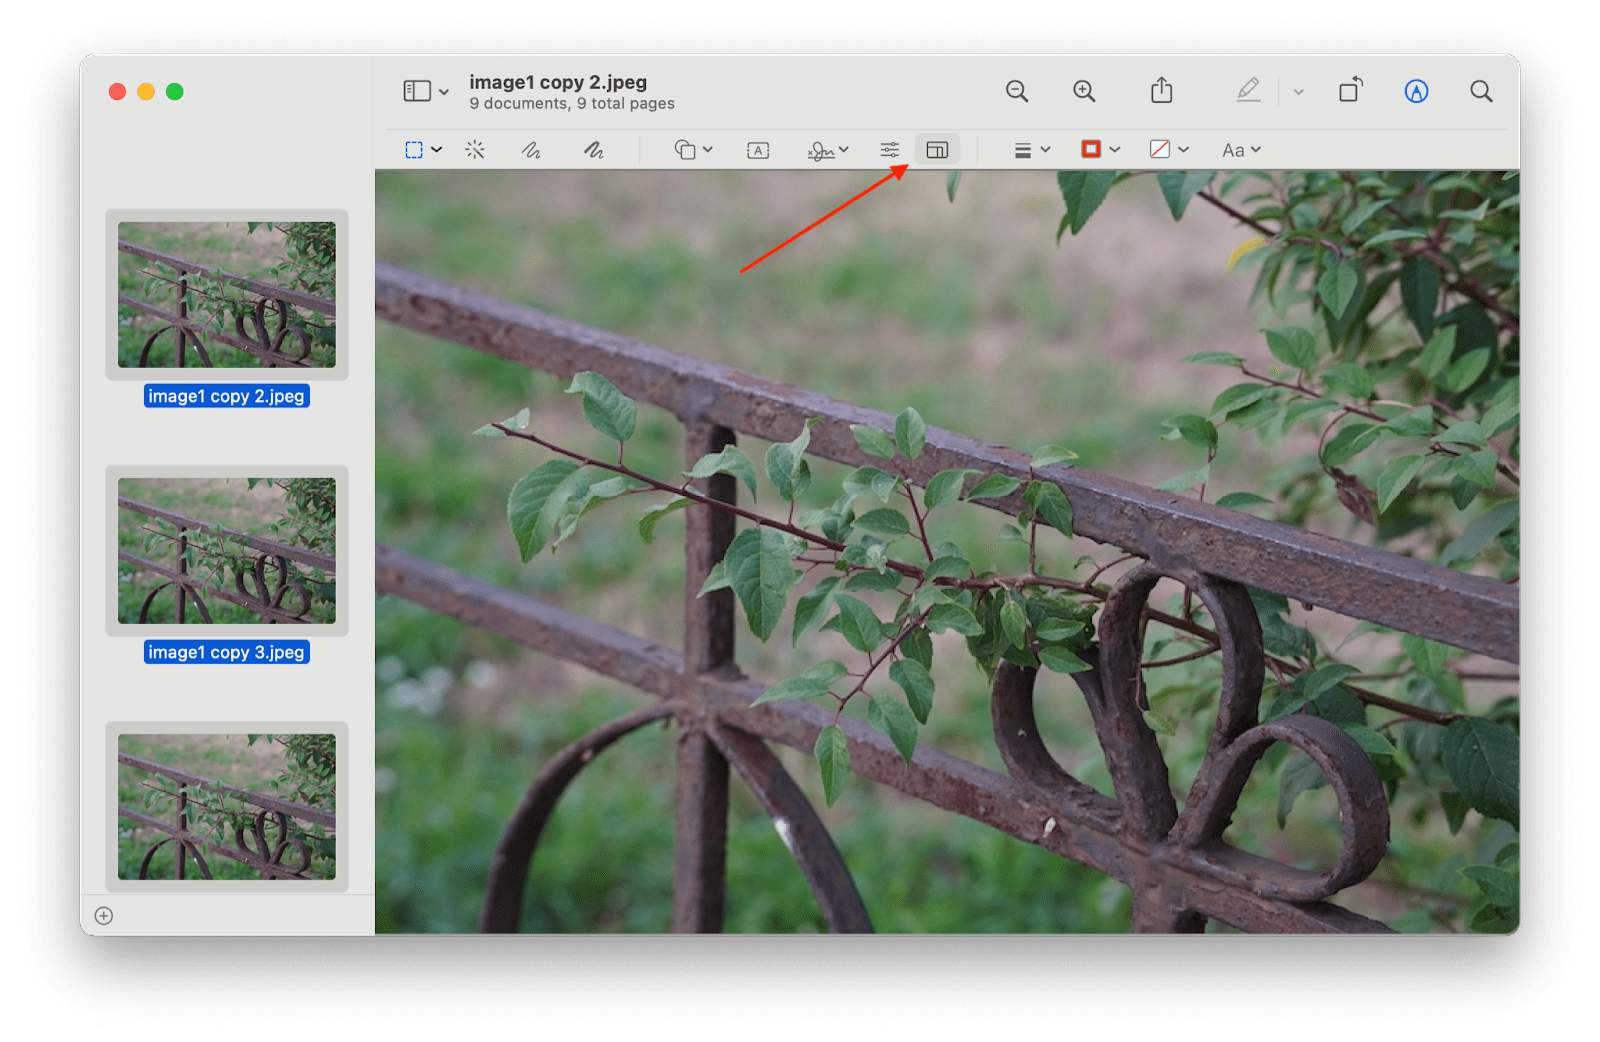
- Find Markup icon in the top menu bar of the Preview window (for narrow images, the icon often hides behind the >> .
- In the Markup mode, click Adjust Size icon:
In the pop-up window, set your desired image dimensions and click OK:
Note that by default, Preview saves all edits in the existing file. To keep both your original image and the resized (or otherwise edited) one, go to File > Export… and save your changes as a new file.
Resize multiple images at once
But you don’t have to go resizing your photo collection on Mac one by one. You can actually batch resize both with Preview or apps like batch editing and watermarking tool PhotoBulk.
Let’s start with Preview. Here’s a step-by-step for batch resize there:
- Select all images you want to resize in a Finder folder and right-click on them.
- Select Open With… and click on Preview.
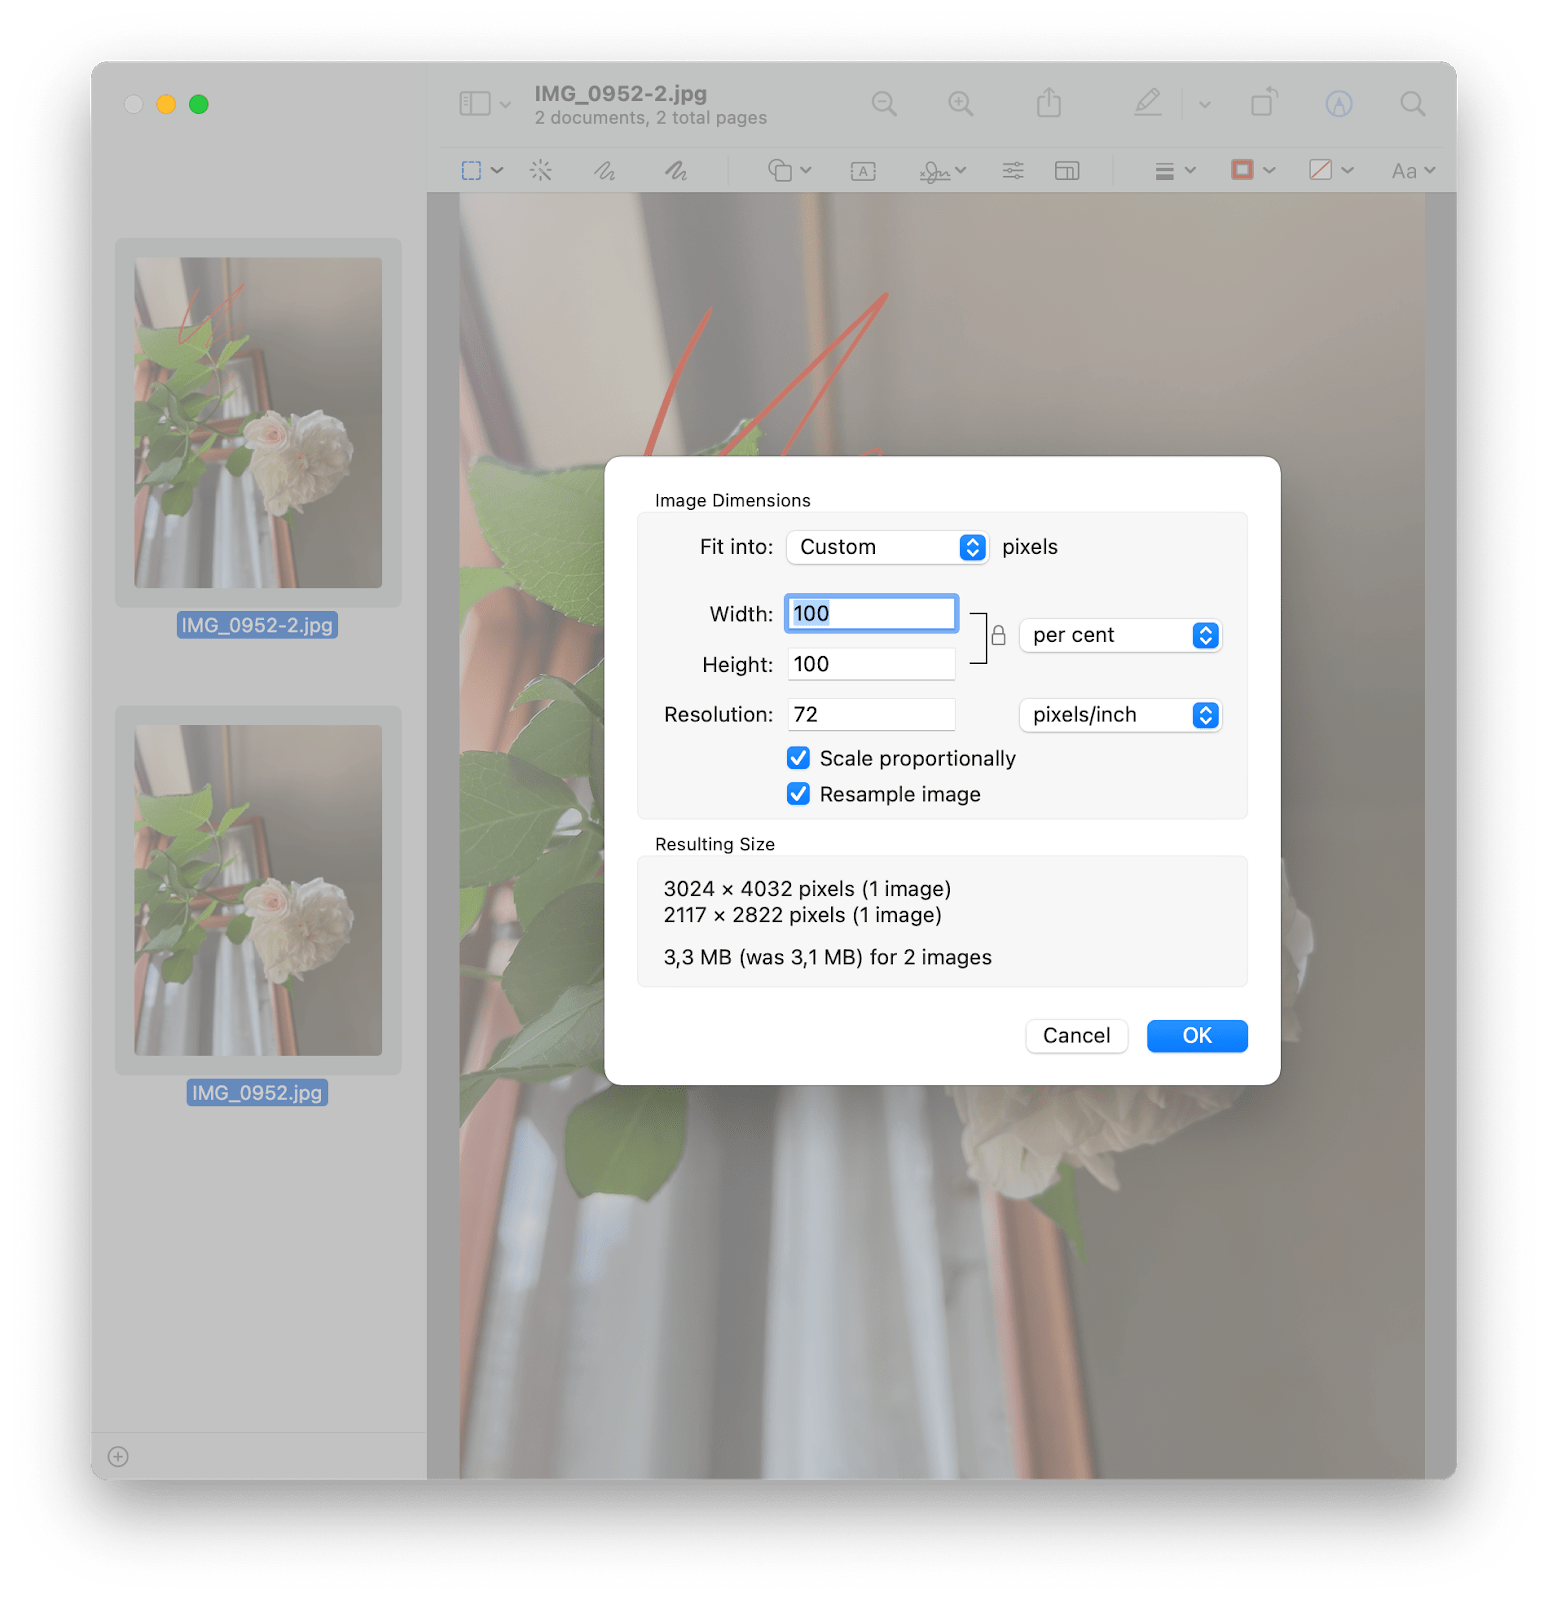
- As you get your images open in Preview, you’ll see one selected image in the center and the rest as thumbnails on the side. Select all thumbnails with Command + A.
- Click Tools in the Preview menu bar at the top and pick Adjust Size… option.
- Set your resize settings in the pop-up window and click OK:
Note that all images will be saved on top of your existing files, so if you want to only create resized copies, make sure you create copies first.
Now, let’s test multi image resize in PhotoBulk.

In the app, all you have to do is drag and drop your batch onto the window and then select your editing options.
In addition to resize, you can choose to optimize your images, delete or keep only part of the image metadata (can be useful if your phone records image location and you want to share an image online, as well as multiple other privacy uses), change image format, batch-rename, and watermark the image. Now, in our sample, we chose the script setting for watermarking, but you actually have a choice to set this up in other watermark formats, including just adding a date stamp, an image (like a logo), or a single watermark anywhere on your pic.
Crop an image in Preview
And since we’ve already got one foot in image editing, let’s also see how to crop an image on your Mac. After all, one answer to how to reduce image file size on Mac is simply cropping out the extra space in your pic — a space that in many cases can be very well done without.
Open your image in Preview and follow these steps to crop your photo or other visual:
- Find and click the Markup icon in the window Menu bar (may be hidden under the >> icon in narrow images).
- Select the area you want to keep (click, drag, and release to make the selection).
- Click the Crop to Selection icon that appears when you’ve made the selection:
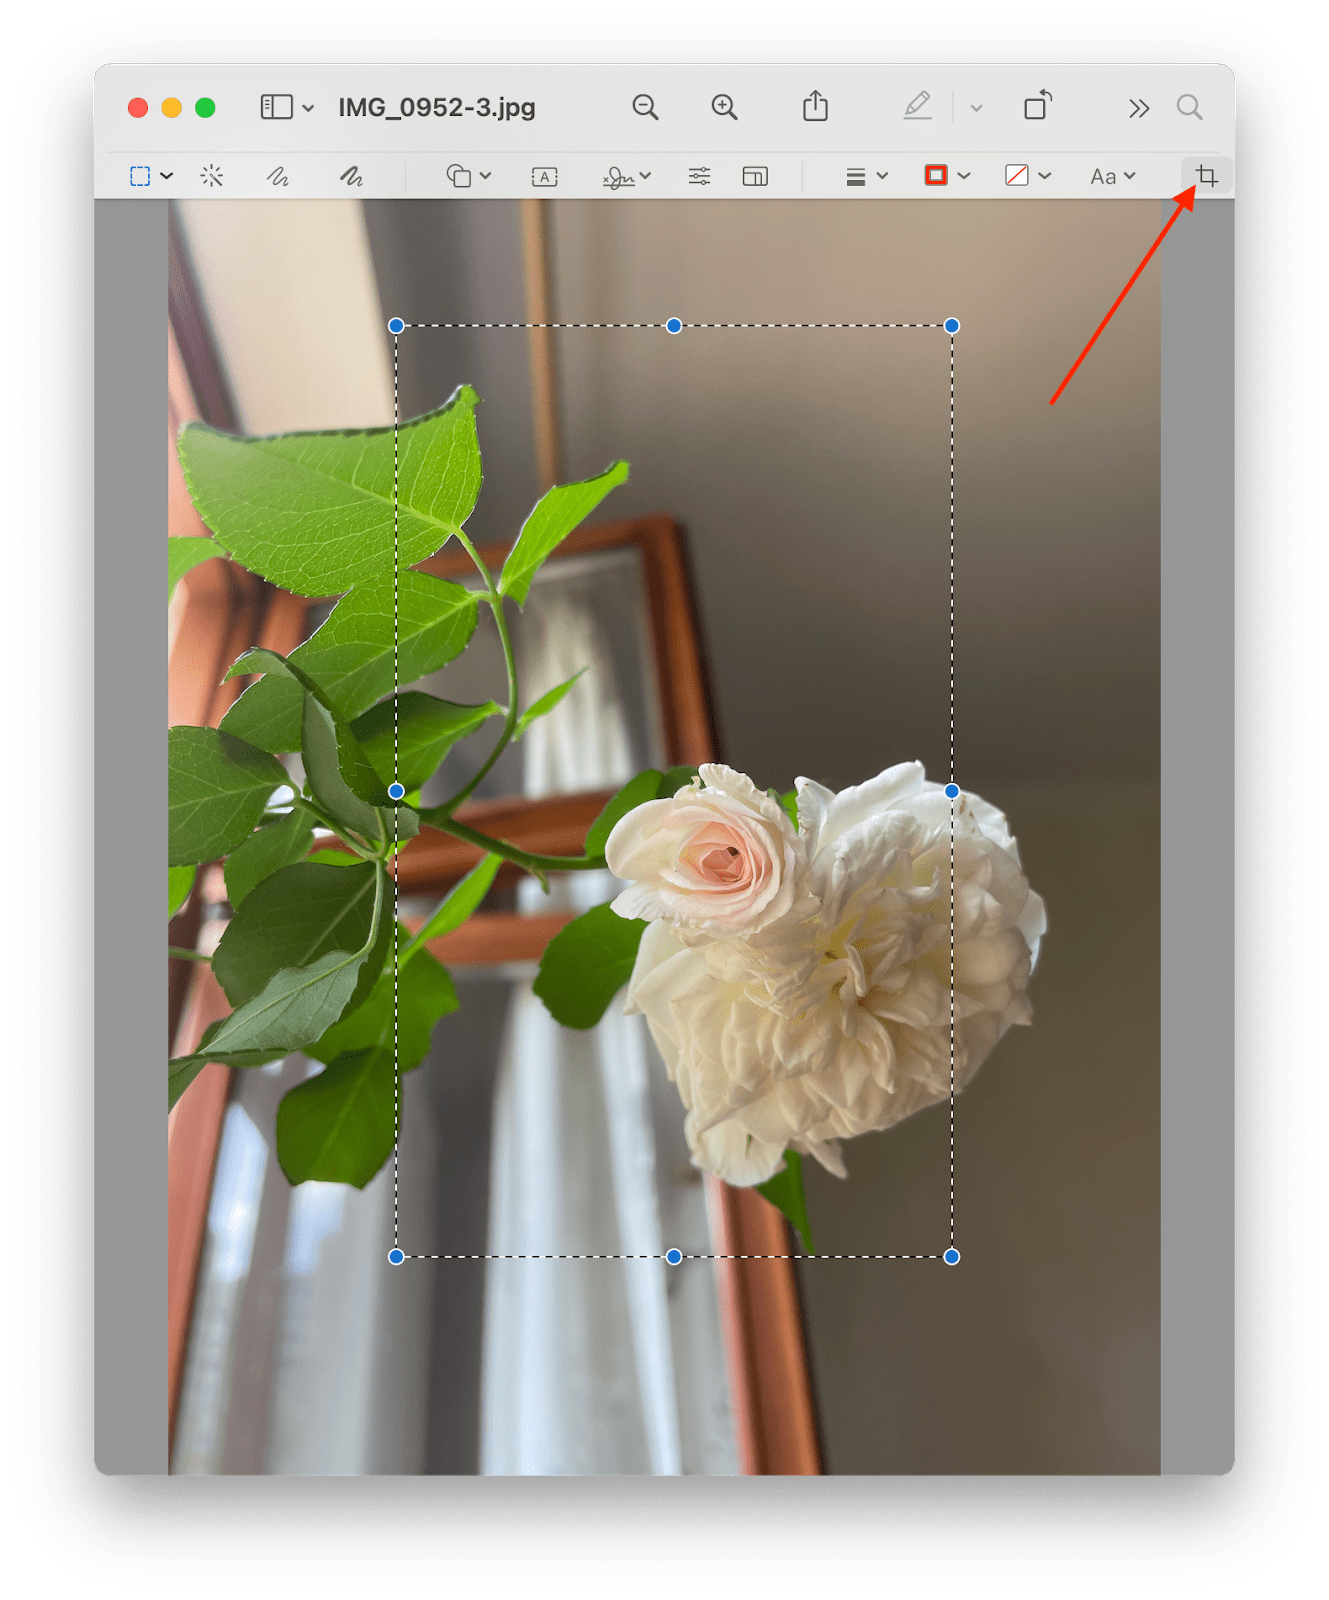
That’s it, your image gets cropped to your selected area!
Note that the edited photo gets saved instead of your original, so crop only the version you are ready to part with.
Bonus tip: Convert to any format & enhance your photo
Now that you know how to resize an image in Preview, as well as resize, watermark, and bulk edit images in PhotoBulk, let’s investigate how to convert your visuals to various formats and enhance them with filters and cool AI tools.
First off, Permute is a universal media converter that can help you convert images, video, and audio to a number of formats. Just drag and drop your images to the Permute window and select the format you want to convert them to — PDF, JPEG, PNG, HEIF, etc.
If the file format you want isn’t in the drop down menu of the converter, you can actually click Add Preset… > Add New Preset…, select Image, and add more formats, including BMP, GIF, TIFF.
And by the way, since we are talking about how to resize an image on Mac, Permute knows how to do that too — simply click the wheel icon in the top right corner and check the Resize option:

Luminar is another app you might find handy when working with photos. Just like Permute, we refrained from including this solution in our guide on how to resize a photo on Mac as the key function of this app is AI-enhanced image editing that can help turn your takes into something breathtaking. That said, since you are looking for a tool to reduce photo size on Mac, we’ll start with this feature of the app.
The resize works through export once you are done editing your shot. Find File > Export… in the app’s Menu bar at the very top of your Mac’s screen (as opposed to the top of the app window). And set your Resize settings in the respective field that pops up:
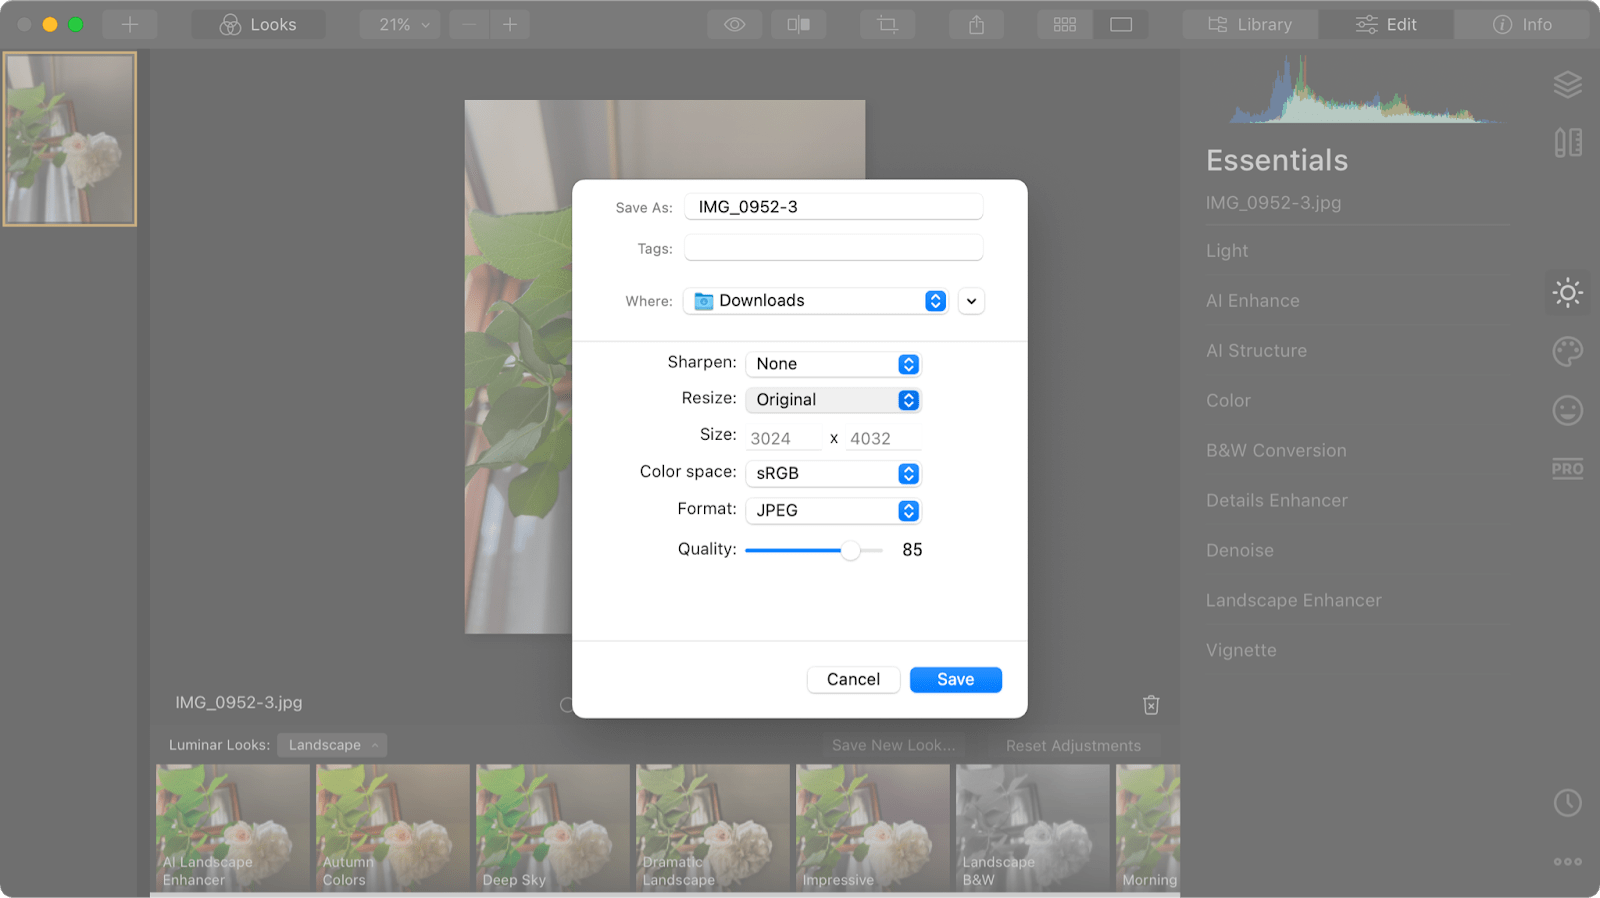
Luminar resize tool lets you set the pixel length of each side of the pic individually, as well as by long or short edge. Make the changes you want and click Save to export your edited visual.
Speaking of editing, we just have to talk about the best part about this photo editor — Luminar offers sets of AI-enhanced looks that can take your photos from good to breathtaking. These versatile presets can be used as is or adjusted to your individual image. You can also save your own settings to edit a bunch of images in the same (or similar) way.
Manage images with Setapp
Get one toolkit that covers it all — from professional image editing to converting media. 180+ apps for Mac, give it a try!
Luminar boasts a collection of really handy tools to turn your photo creations into impeccable masterpieces. Some of the amazing things in the toolkit include noise removal for zoomed-in or poorly lit shots, AI skin and portrait enhancement tools, smart contrast that enhances your image without making it unnatural or noisy, and much more.
Bonus bonus tip: How to resize an image on a Mac without losing quality
Psst! If you’ve read this far, you definitely deserve a treat. Okay, here we go. There’s actually a little secret to resizing images that you might not know. But here at Setapp we are trying to make your workflow as smooth as possible, so we just couldn’t keep it from you.
Thing is, you must realize that downsizing your image can lead to a poorer quality result. So how can you resize and keep the quality? Well, all you have to do is figure out your end use — what exact size you need for your project or use purposes?
If your file will be a tiny image displayed as part of a webpage or a presentation, just resize it to fit your dimensions. Also, make sure you don’t convert a smaller image into a larger size as that will definitely result in a pixelated mess.
And finally, along with the image size settings, you will often get image quality slider which is vital when adjusting the quality of your final image:

The same slider is available in Luminar during image export. In PhotoBulk, you can find it under Format.
Conclusion
Resizing images on your Mac does not have to be an ordeal. You can simply use the tools at your disposal that can take care of image resizing as well as image editing and much more. One such tool that you now know how to use is the built-in Preview app. This Mac app is easy to use and you already have it on your machine.
If you want to bulk edit and watermark images, use PhotoBulk. This simple editor can help you resize and watermark a lot of images in mere moments. Permute is an excellent solution if you want a versatile media converter. Not only can it mass convert and resize your images, you can also convert audio and video files with it. And finally, to add a few finishing touches to your photo works, try Luminar. This futuristic AI-powered image editor can enhance your shots and make them beyond amazing, while doing all the photo editing heavy lifting, like image resize, crop, flip, rotate, and more.
Explore these apps with your Setapp subscription and decide for yourself which works for you best (or just use them all!). Setapp is a suite of apps that help you tackle everyday tasks with no sweat and under a single subscription. Tempted to try? Start with Setapp 7-day free trial now and see for yourself!
Источник


