Restore previous version windows
 Добрый день! Уважаемые читатели и гости крупного IT блога pyatilistnik.org. Не так давно мы с вами разбирали, чистую установку Windows 10 1803 и обновление до него с предыдущих версий. К сожалению, нововведения и обновления не всегда могут понравиться конечному пользователю и не всегда работают без сбоев и нареканий. В таких ситуациях у рядового пользователя, может возникнуть желание вернуть предыдущую версию Windows 10 и остаться на ней до будущих времен. Сегодня мы и посмотрим процедуру и методы возврата, так чтобы у вас ничего не сломалось.
Что такое возврат к предыдущей версии?
Откат Windows 10, это процедура возвращения предыдущей версии операционной системы, до момента ее апгрейда, по правильному эта процедура называется даунгрейд (downgrade windows 10). Мы уже его производили, для возврата Windows 7 или 8.1, когда все только начиналось.
Как вернуть предыдущую версию после обновления Windows 10
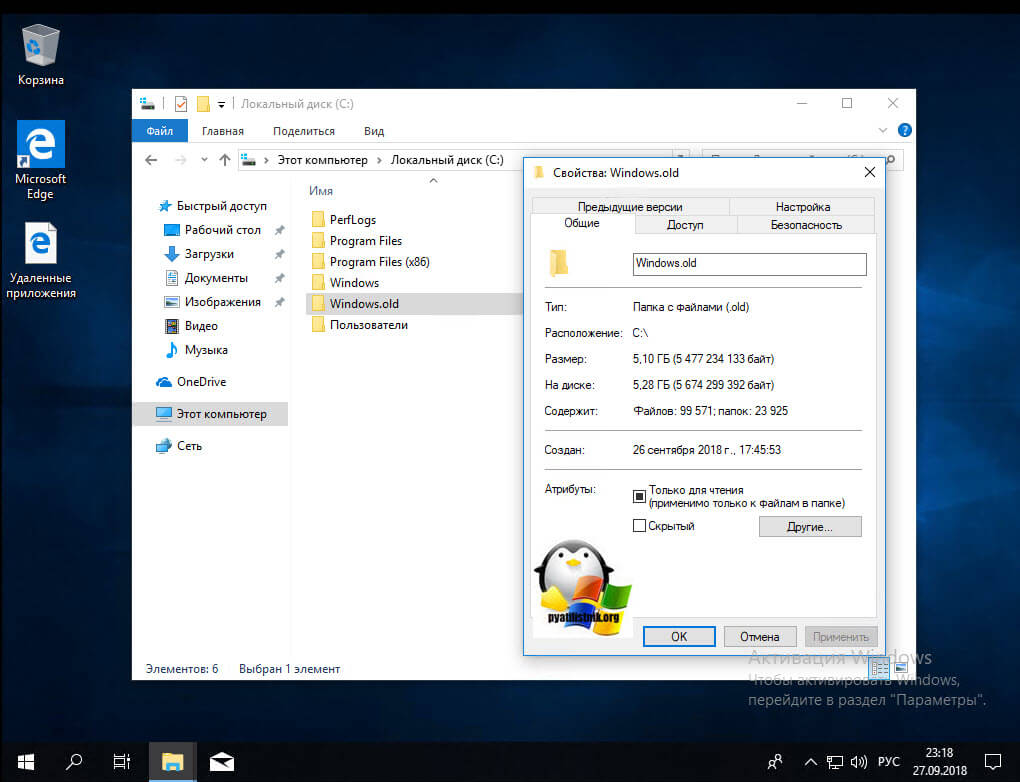
Когда вы успешно установили, последнюю версию виндоус 10, то у вас на откат, есть ровно 10 дней, после которых у вас пропадет возможность возврата. После установки обновленной версии, у вас на диске C:\ будет лежать папка Windows_old, в которой и хранится ваша предыдущая версия Windows 10, папка весит около 10-12 ГБ. Так, что если вы по каким-либо причинам удалили папку Windows old, то ваш возврат на предыдущую версию Windows 10, разобьется на мелкие кусочки и вы ничего не получите, даунгрейд будет не возможен.
Методы возврата Windows 10 к предыдущему выпуску
Я могу вам показать два рабочих метода, которые помогут вернуть предыдущую версию windows 10 после неудачного апгрейда, третий сомнительный:
- Встроенный функционал в самой операционной системе
- Второй, это функция в составе инструментов восстановления Windows 10
- Сомнительный ISO Rollback Windows 10
Давайте мы с вами рассмотрим все варианты.
1 Метод
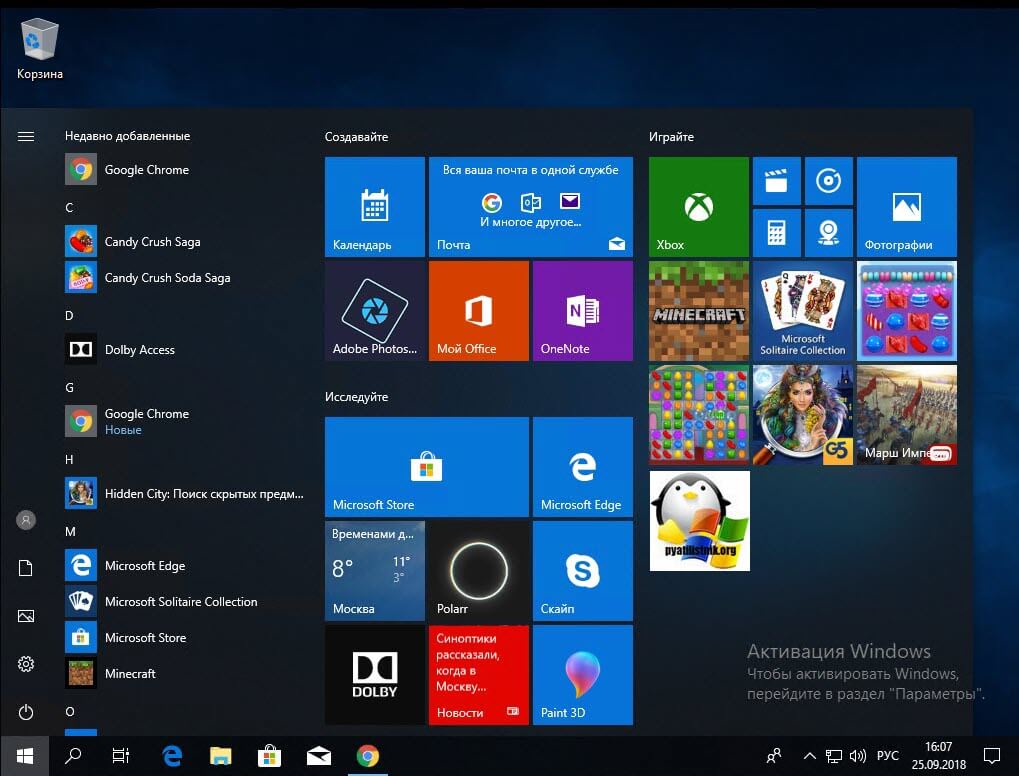
Проведем восстановление предыдущей версии Windows 10, через саму систему. Для этого мы открываем с вами параметры Windows, сделать это можно через горячие клавиши, нажав одновременно клавиши Win и I, либо, через меню пуск.
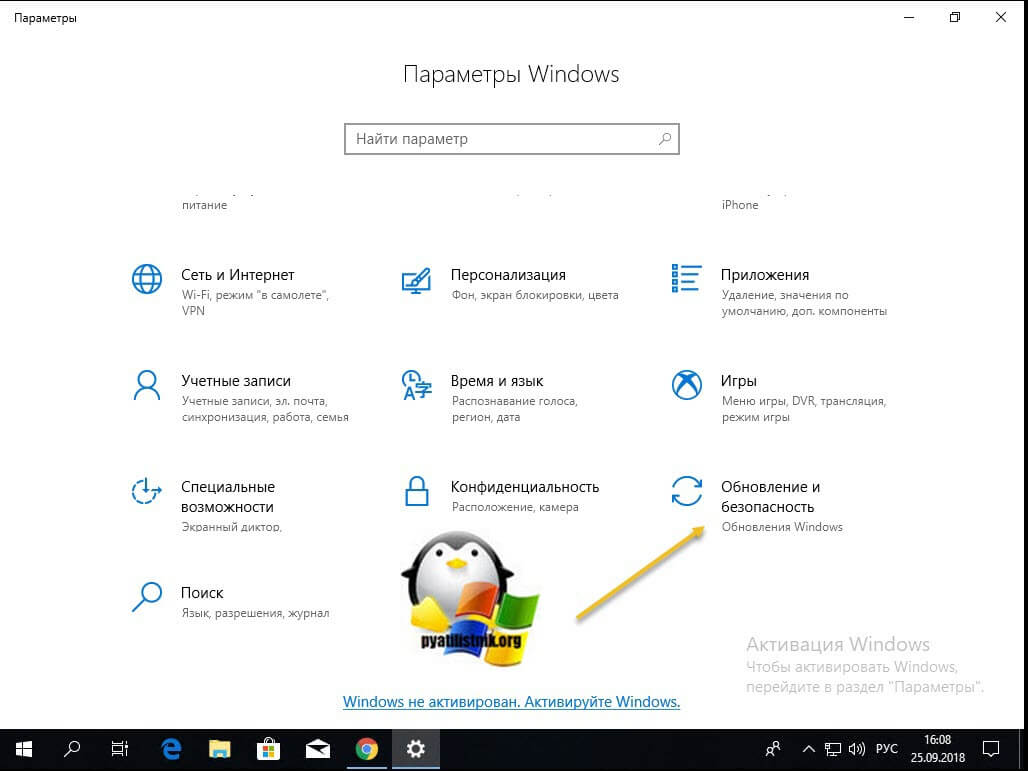
В открывшихся параметрах Windows, перейдите в пункт «Обновление и безопасность»
Далее выбираем пункт «Восстановление», в котором вы сразу можете обнаружить два пункта:
- Вернуть компьютер в исходное состояние
- Вернуться к предыдущей версии Windows 10
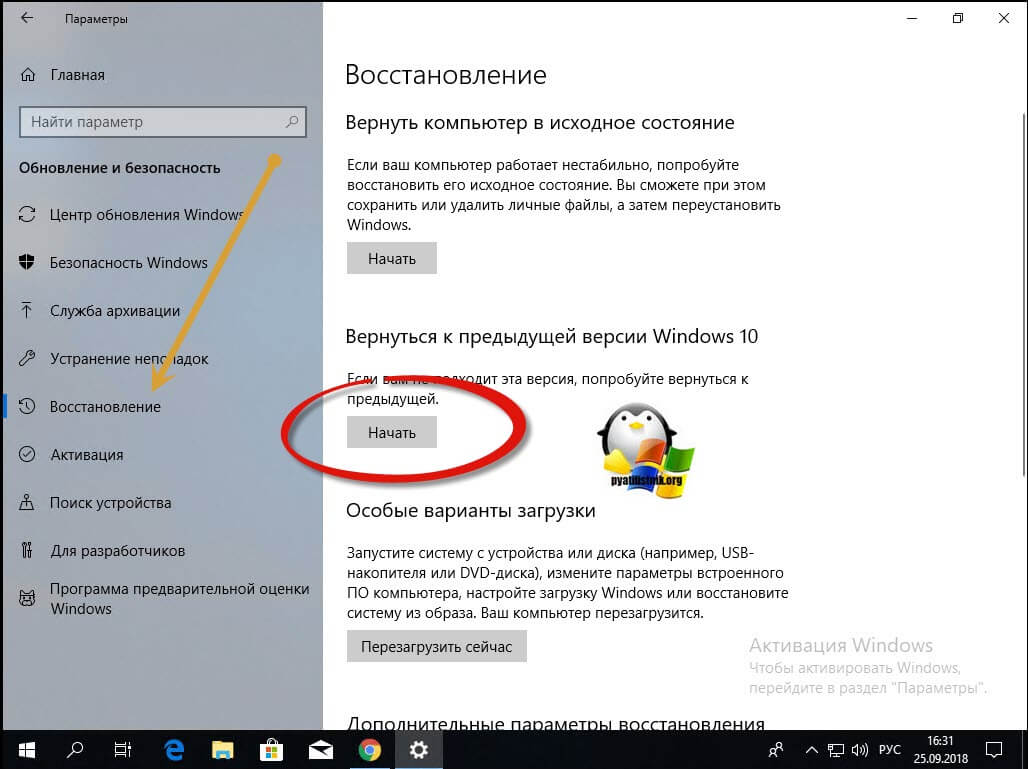
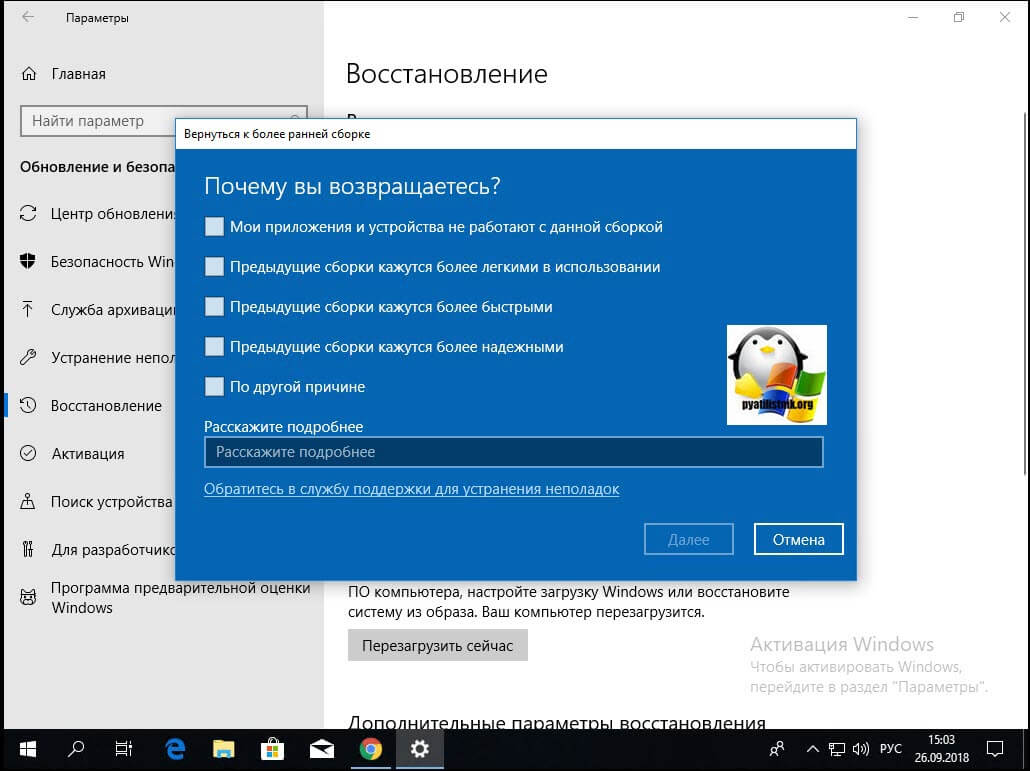
Нас интересует второй пункт, с помощью которого мы и произведем даунгрейд виндоус 10, до предыдущей версии. Нажимаем кнопку «Начать». У вас появится окно, в котором компания Microsoft попросит вас указать причину, по которой вы производите Rollback Windows 10, можете тут написать красным словцом, если накипело.
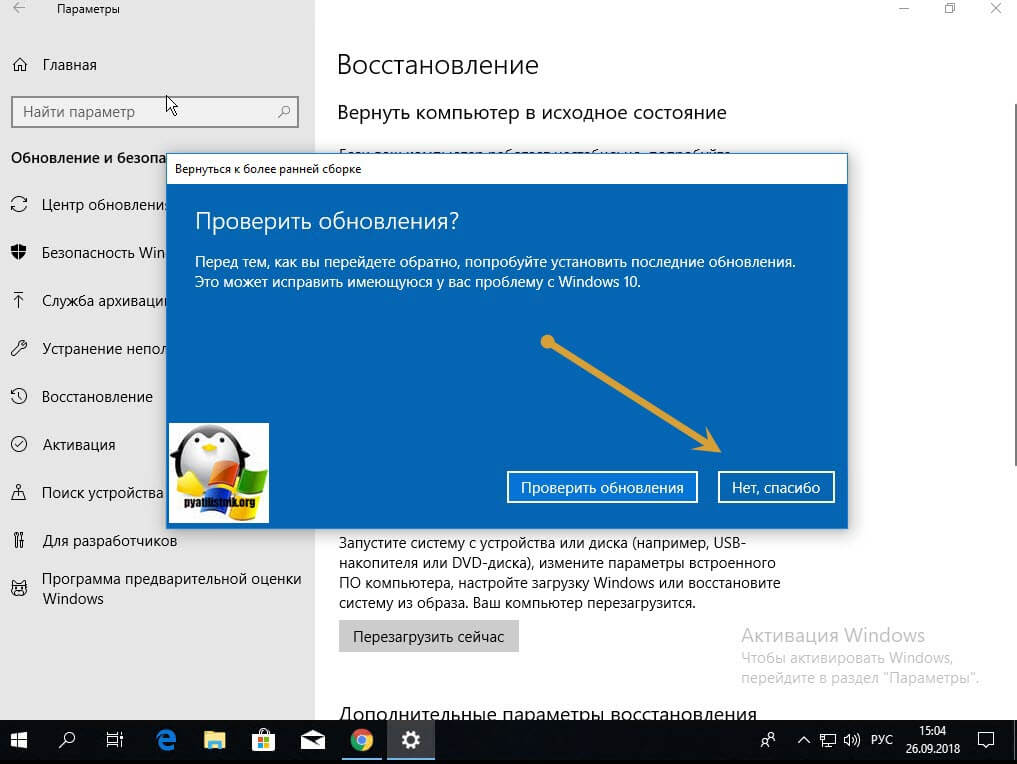
Обновления Windows 10, я не вижу смысла искать, и вообще не понимаю смысла данного окна, нам нужно вернуть предыдущую версию windows после пакета 10-ки, а они тут со своими обновлениями. Нажимаем «Нет, спасибо».
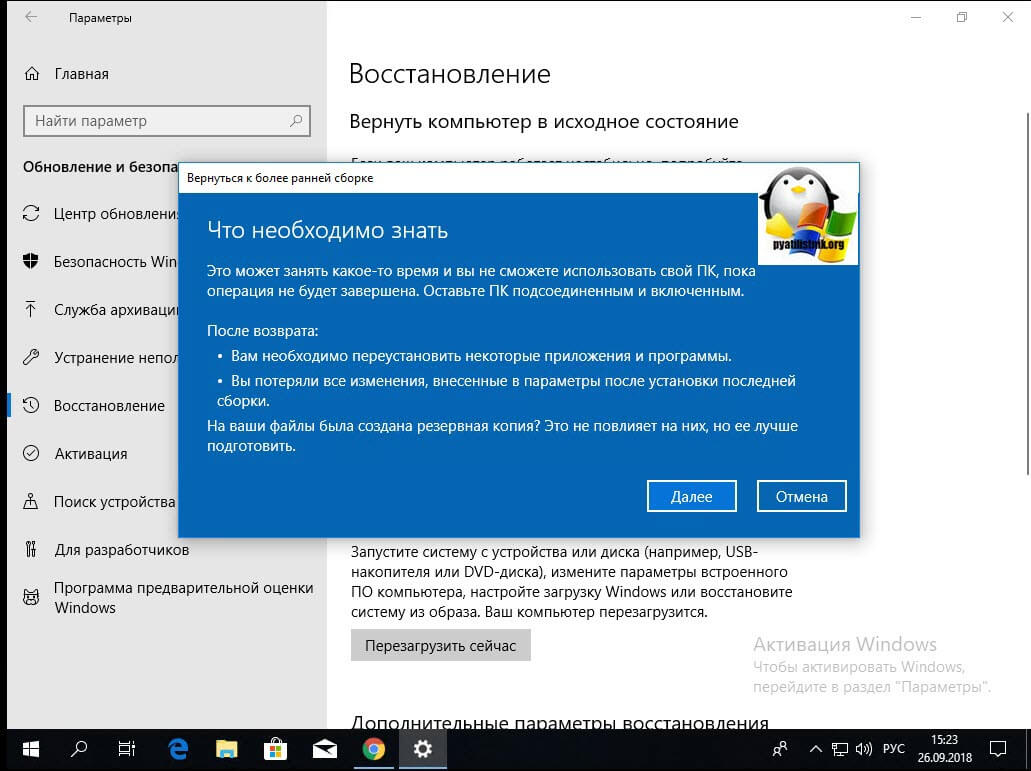
Вас уведомят, что после процедуры Downgrade Windows 10, вам может потребоваться переустановить некоторые программы, и заново настроить некоторые параметры, но самое главное, что все ваши персональные данные не пострадают и будут в исходном состоянии. Нажимаем «Далее».
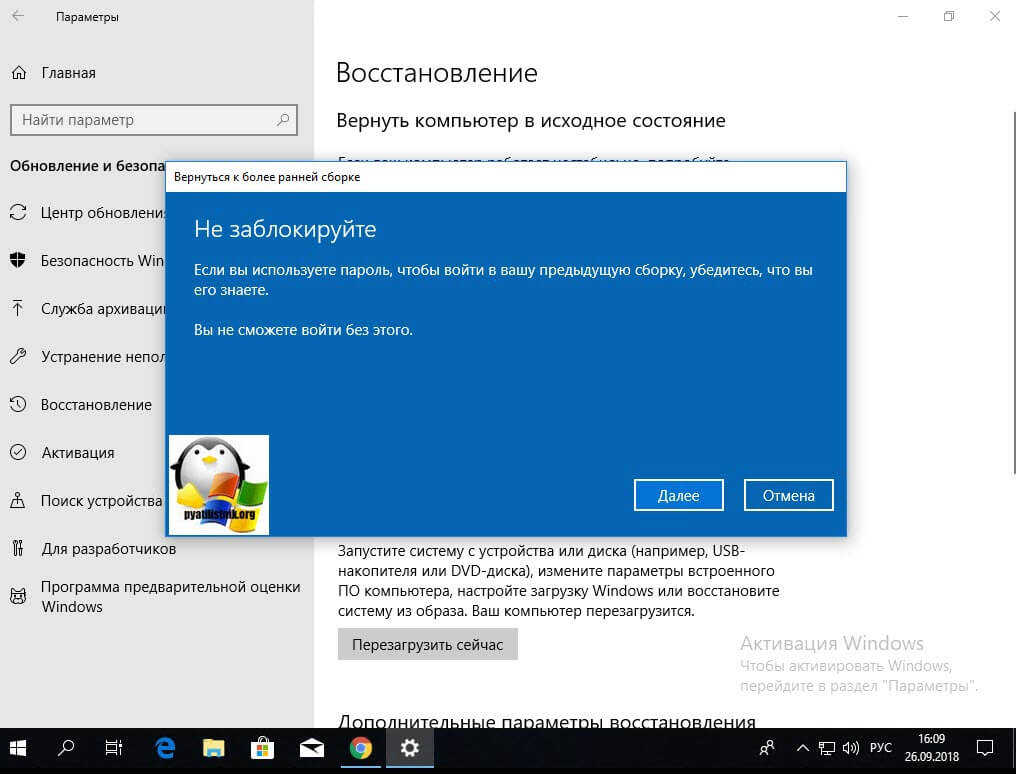
В окне «Не заблокируйте», вас предупреждают, что вы должны знать пароль администратора, от предыдущей версии, иначе вам придется принудительно производить сброс пароля Windows 10.
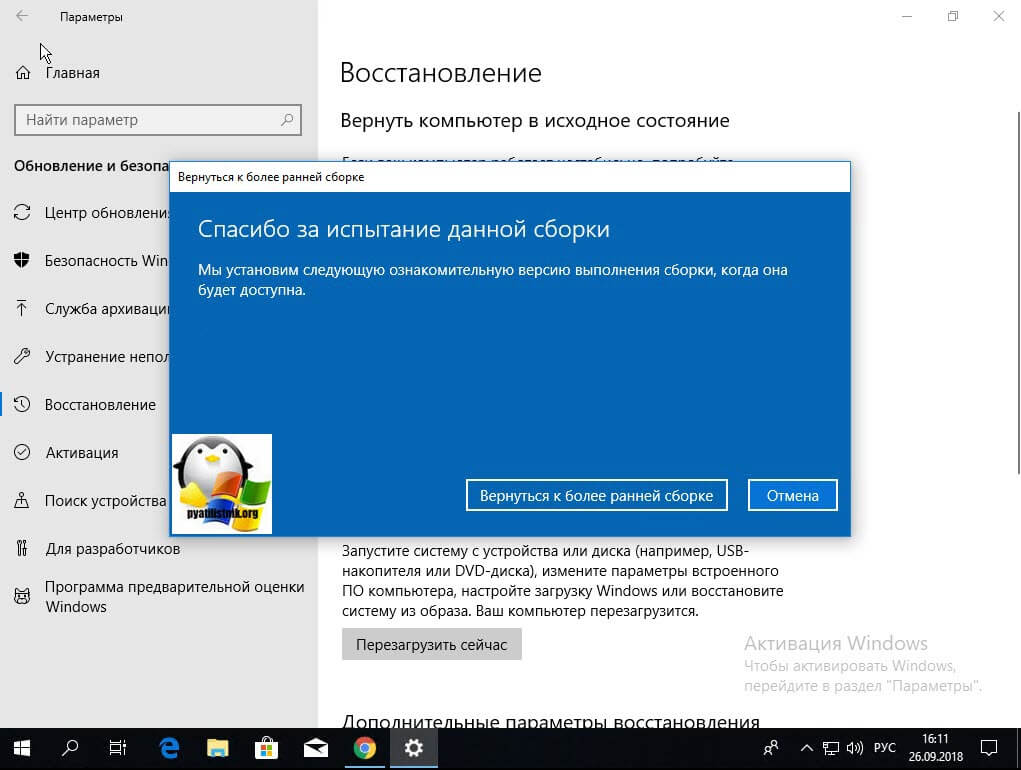
Видим еще одно окно с насмешкой от компании Microsoft:
Приступаем к выполнению процедуры отката виндоус 10. У вас система уйдет в перезагрузку, чтобы вернуть предыдущую версию.
У вас появится черный экран, на котором вы увидите, что идет восстановление предыдущей версии Windows. После нескольких перезагрузок вы получите прежнюю систему. В моем случае это Windows 10 Pro 1709. Теперь я думаю, вам понятен самый быстрый метод, как вернуть предыдущую версию после обновления, но как я и писал выше он не единственный, переходим ко второму.

2 Метод произвести даунгрейд Windows 10
В этом методе, компания Microsoft предлагает воспользоваться средствами восстановления системы, которые вы можете найти, либо на установочном носителе, либо воспользоваться встроенными. Чтобы в них попасть, сделайте вот что.
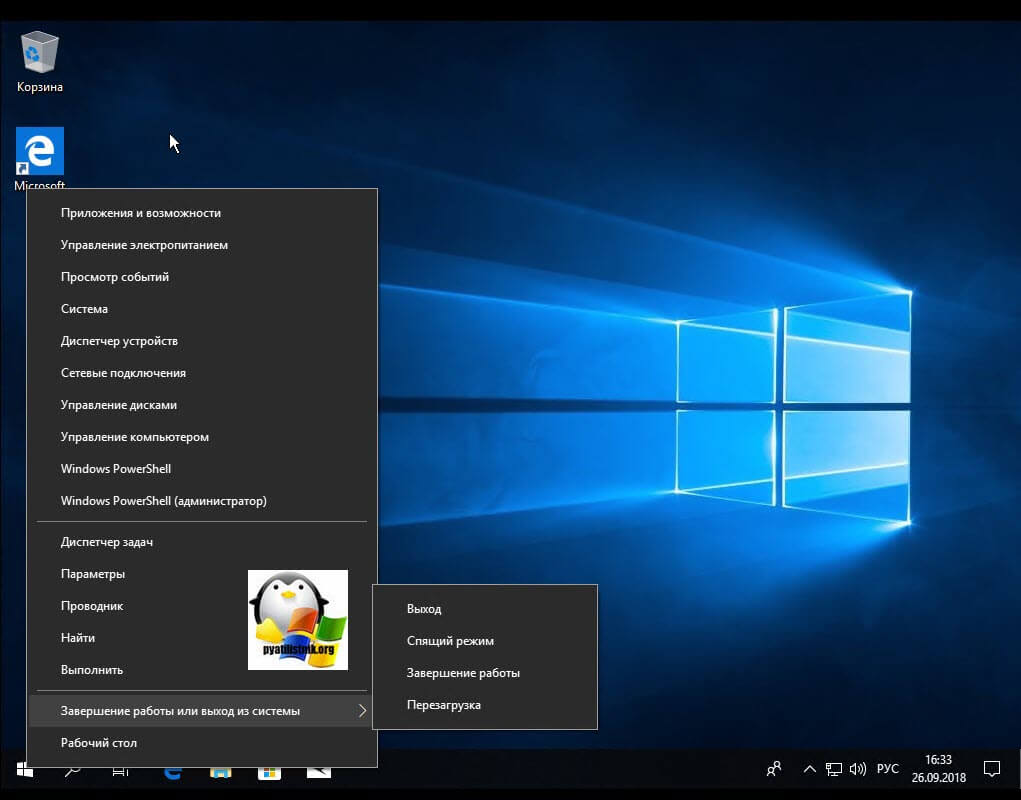
Зажмите и не отпускайте кнопку Shift , щелкните правым кликом по кнопке пуск, из контекстного меню выберите пункт «Завершение работы или выход из системы — Перезагрузка». Но тут фишка в том, что перезагрузка будет выполнена с последующей загрузкой утилит восстановления и диагностики, которые и помогут легко вернуть предыдущую версию виндовс 10.
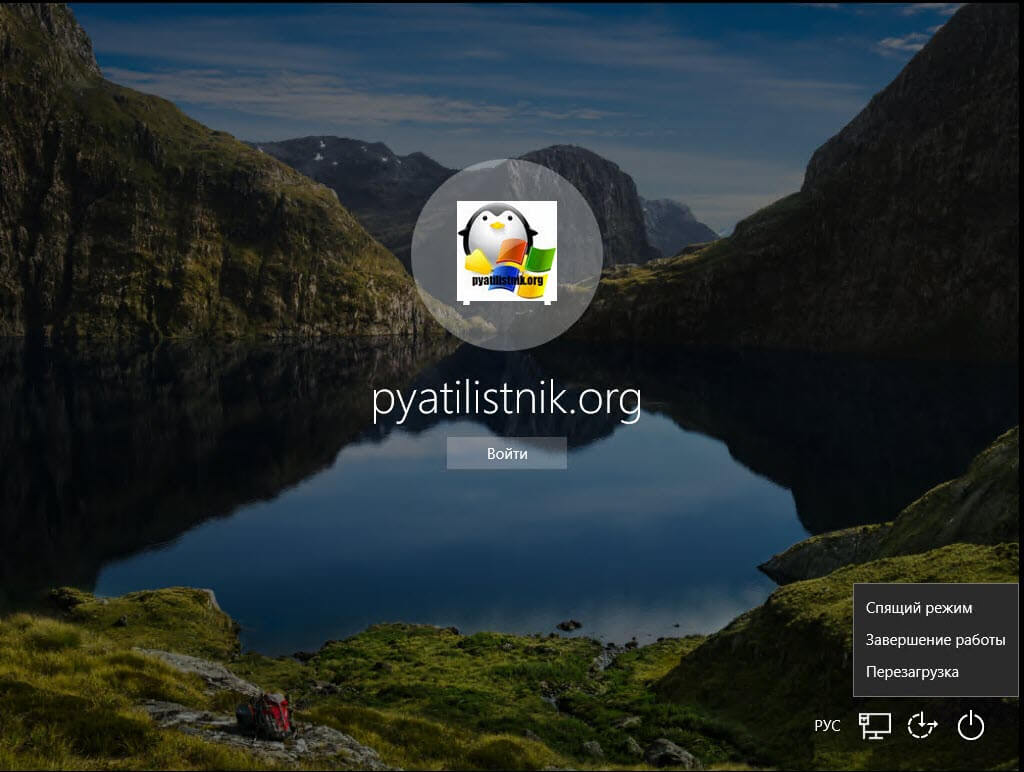
Либо то же самое можно сделать с экрана авторизации, так же зажав кнопку Shift и выбрав в правом нижнем значке, перезагрузку системы.
У вас откроется окно «Выбор действий», в котором вам необходимо выбрать пункт «Поиск и устранение неисправностей». Попадаем в окно «Диагностика», оно состоит из двух пунктов:
- Вернуть компьютер в исходное состояние. Вы сможете сохранить или удалить свои файлы и затем переустановить Windows.
- Дополнительные параметры
Нас интересует пункт «Дополнительные параметры»

Ну и пробуем вернуть предыдущие версию, через соответствующий пункт.
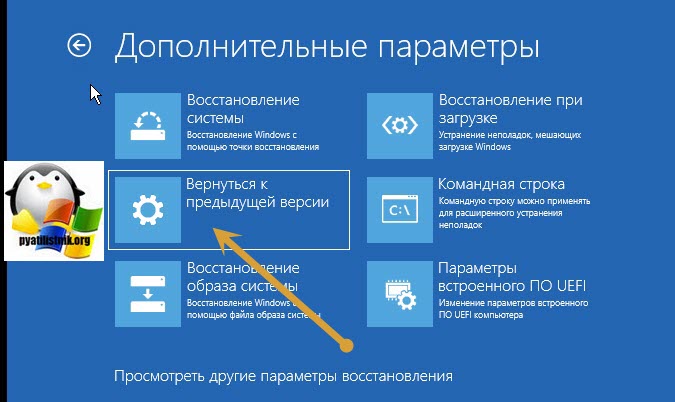
Откроется окно «Вернуться к предыдущей версии виндоусв 10», выбираем учетную запись пользователя, если вы забыли пароль, то это прискорбно.

Указываем пароль и нажимаем продолжить.

Вам опять напомнят, что все ваши файлы будут сохранены, говорим поехали и запускаем возврат на предыдущую версию windows 10.

Начнется подготовка к процедуре отката, по завершении которой, мастер нужно будет перезагрузить. Как видите возврат системы к предыдущей версии Windows 10, очень простое дело, если вы только не профукали момент в 10 дней. Как только
Recovery options in Windows 10
If you’re having problems with your PC, the following table can help you decide which recovery option to use.
See this section
Your PC isn’t working well and you recently installed an update.
Your PC isn’t working well and it’s been a while since you installed an app, driver, or update.
Your PC won’t start, you haven’t created a recovery drive, and resetting your PC didn’t work.
Your PC won’t start and you haven’t created a recovery drive.
Your PC won’t start and you’ve created a recovery drive.
You want to reinstall your previous operating system.
Your PC isn’t working well and you recently installed an app.
Click one of the recovery options below and follow the steps to try to get things working again.
If you’ve recently installed a Windows update, uninstall the update to try to resolve the issue.
Select the Start button, then select Settings > Update & Security > Windows Update > View your update history > Uninstall updates.
View update history settings
Right-click the update you want to remove, and then select Uninstall.
Important: If you’ve encrypted your device, you’ll need your BitLocker key to reset your PC If you don’t know your BitLocker key, see Find my BitLocker recovery key.
Resetting reinstalls Windows 10, but lets you choose whether to keep your files or remove them, and then reinstalls Windows. You can reset your PC from Settings, the sign-in screen, or by using a recovery drive or installation media.
Reset your PC from Settings
Select the Start button, then select Settings > Update & Security > Recovery .
Open Recovery settings
Under Reset this PC, select Get started and then choose from the options and/or settings in the table below.
Keep my files > Change settings > Preinstalled apps On
Reinstalls Windows 10 and keeps your personal files.
Removes apps and drivers you installed.
Removes changes you made to settings.
Restores any apps your PC manufacturer installed if your PC came with Windows 10.
Keep my files > Change settings > Preinstalled apps Off
Reinstalls Windows 10 and keeps your personal files.
Removes apps and drivers you installed.
Removes changes you made to settings.
Removes any apps your PC manufacturer installed.
Reinstalls Windows 10 and removes your personal files.
Removes apps and drivers you installed.
Removes changes you made to settings.
Removes any apps your PC manufacturer installed. (If your PC came with Windows 10, apps from your PC manufacturer will be reinstalled.)
Note: Remove everything > Change settings gives you two options.
Data erasure On removes files and cleans the drive. If you’re planning to donate, recycle, or sell your PC, use this option. This might take an hour or two, but it makes it harder for other people to recover files you’ve removed.
Data erasure Off just removes files. It takes less time, but is less secure.
Reset your PC from the sign-in screen
If you can’t open Settings, you can reset your PC from the sign-in screen. Here’s how:
Press Windows logo key + L to get to the sign-in screen, and then restart your PC by pressing the Shift key while you select the Power button > Restart in the lower-right corner of the screen.
Your PC will restart in the Windows Recovery Environment (WinRE) environment.
On the Choose an option screen, select Troubleshoot > Reset this PC, and then choose one of the options in the previous table.

Connect the installation media you created to your PC and reinstall Windows 10.
Open File Explorer and select the drive with the installation media.
From the root directory of the drive, double-click setup.exe, and then select Yes when asked if you’d like to allow the app to make changes to your device.
Select Change what to keep.
Select one of the following options, and then select Next:
Keep personal files and apps – This will preserve your personal data, apps, and settings.
Keep personal files only – This will preserve your personal data and settings, but all your apps will be removed.
Keep nothing – This will remove all personal data, settings, and apps.
Warning: You cannot undo a reinstallation of Windows 10. Be sure to back up your files first if you choose the Keep nothing option.
To finish, select Install to start reinstalling Windows 10 on your PC.
Your PC will restart several times during the resinstallation.
Important: If you’ve encrypted your device, you’ll need your BitLocker key to use a recovery drive to restore or reset your PC If you don’t know your BitLocker key, see Find my BitLocker recovery key.
If your PC won’t start and you haven’t created a recovery drive, download installation media and use it to restore from a system restore point or reset your PC.
Download the Windows 10 media creation tool and then run it.
Select Create installation media for another PC.
Choose a language, edition, and architecture (64-bit or 32-bit).
Follow the steps to create installation media, and then select Finish.
Connect the installation media you created to your nonfunctional PC, and then turn it on.
On the initial setup screen, enter your language and other preferences, and then select Next. If you don’t see the setup screen, your PC might not be set up to boot from a drive. Check your PC manufacturer’s website for info on how to change your PC’s boot order, and then try again.
Select Repair your computer.
On the Choose an option screen, select Troubleshoot. From there, you can:
Restore from a system restore point by selecting Advanced options > System Restore. This will remove recently installed apps, drivers, and updates that might be causing your PC problems. Restoring from a restore point won’t affect your personal files.
Important: If you’ve encrypted your device, you’ll need your BitLocker key to use a recovery drive to restore or reset your PC If you don’t know your BitLocker key, see Find my BitLocker recovery key.
If your PC won’t start, you can use a recovery drive to restore from a system restore point or recover your PC. For info on how to create a recovery drive on a working PC, see Create a recovery drive.
Note: If you are using a Surface, see Creating and using a USB recovery drive for Surface to download and create a USB recovery image specifically for your Surface device.
To restore or recover using the recovery drive:
Connect the recovery drive and turn on your PC.
Press Windows logo key + L to get to the sign-in screen, and then restart your PC by pressing the Shift key while you select the Power button> Restart in the lower-right corner of the screen.
Your PC will restart in the Windows Recovery Environment (WinRE) environment.
On the Choose an option screen, select Troubleshoot, and then select one of the following two options. (If you don’t see the Choose your option screen, your PC might not be set up to boot from a drive. Check your PC manufacturer’s website for info on how to change your PC’s boot order.)
To restore from a system restore point, select Advanced Options > System Restore. This won’t affect your personal files, but it will remove recently installed apps, drivers, and updates that might be causing your PC problems.
To reinstall Windows 10, select Advanced Options > Recover from a drive. This will remove your personal files, apps and drivers you installed, and changes you made to settings.
For a limited time after upgrading to Windows 10, you’ll be able to go back to your previous version of Windows by selecting the Start button, then select Settings > Update & Security > Recovery and then selecting Get started under Go back to the previous version of Windows 10. This will keep your personal files, but it’ll remove apps and drivers installed after the upgrade, as well as any changes you made to settings. In most cases, you’ll have 10 days to go back.
Open Recovery settings
To go back, you’ll need to:
Keep everything in the windows.old and $windows.
bt folders after the upgrade.
Remove any user accounts you added after the upgrade.
Know the password you used to sign in to Windows 7 or Windows 8.1 (if you used one).
Have the USB drive you used to upgrade to Windows 10 (if you used one).
Note: If you go back to Windows 8.1, some apps that came with Windows, like Mail and People, might not work anymore. To fix the apps, reinstall them from the Microsoft Store.
Note: The option in Settings to go back to your previous version of Windows is only available for a limited time after upgrading.
Info for Windows Insiders
If you’re an Insider and the current preview build isn’t working for you, select the Start button, then select Settings > Update & Security > Recovery . Under Go back to the previous version of Windows 10, select Get Started. This won’t remove your personal files, but it’ll remove recently installed apps and drivers, and change settings back to their defaults.
Going back to an earlier build won’t remove you from the Insider Program. When the next preview build is ready, it’ll be installed on your PC.
This option takes your PC back to an earlier point in time, called a system restore point. Restore points are generated when you install a new app or driver, and when you create a restore point manually. Restoring won’t affect your personal files, but it will remove apps, drivers, and updates installed after the restore point was made.
In the search box on the taskbar, type control panel,andthen choose it from the list of results
In the Control Panel search box, type recovery.
Select Recovery > Open System Restore.
In the Restore system files and setting box, select Next.
Select the restore point that you want to use in the list of results, and then select Scan for affected programs.
If you don’t see the restore point that you want to use, select the Show more restore points check box to see more restore points.
If you’re not seeing any restore points, it might be because system protection isn’t turned on. Here’s how to check:
In the search box on the taskbar, type control panel,andthen choose it from the list of results.
In the Control Panel search box, type recovery.
Select Recovery > Configure System Restore > Configure and see if the Turn on system protection option is selected.
If the Turn on system protection option is not selected, system protection isn’t turned on and there aren’t any restore points. In this scenario, you won’t be able to recovery your PC using a system restore point and will need to use one of the other recovery options listed on this page.
If the Turn on system protection option is selected, continue with step 6.
You’ll see a list of items that will be deleted if you remove this restore point. If you’re OK with the deletions, select Close> Next > Finish.


