- Восстановление удаленных файлов Linux
- Немного теории
- 1. Safecopy
- 2. TestDisk
- 3. PhotoRec
- Выводы
- How To Recover Deleted Files In Linux [Beginner’s Guide]
- How to recover deleted files in Linux using TestDisk
- Step 1
- Step 2
- Step 3
- Step 4
- Step 5
- Step 6
- Step 7
- Step 8
- Step 9
- Step 10
- A few tips on recovering deleted files in Linux using TestDisk
- Dave Merritt
Восстановление удаленных файлов Linux
Иногда случается, что мы случайно удаляем еще нужные нам файлы. Особенно это опасно в терминале Linux, поскольку здесь файлы удаляются не в корзину, а стираются с диска сразу и навсегда.
Понятно, что нужно аккуратно обращаться с командами удаления файлов, но что делать если уже все удалено, а файлы были важные и их нужно срочно восстановить? В некоторых случаях это возможно. В нашей сегодняшней статье мы рассмотрим восстановление удаленных файлов linux.
Немного теории
Каждый файл занимает определенное пространство на жестком диске, но файловая система для предоставления доступа к файлу дает нам ссылки на его начало, по которым любая программа может получить уже содержимое всего файла. Было бы неэффективно, если бы удаление файла приводило к полному перезаписыванию его области на диске.
Вместо этого, файловая система просто удаляет ссылку на эту область со своей базы, а затем помечает пространство, где находился файл, неразменным. Но на самом деле там еще остались все ваши файлы. Из этого делаем вывод, что если после удаления файловую систему очень быстро переключить в режим только для чтения, то все удаленные файлы могут быть восстановлены.
Если же вы работали с этой файловой системой и данные на диске были перезаписаны другими, то вы уже ничего сами не спасете. Возможно, вы слышали, что спецслужбы могут восстанавливать несколько раз перезаписанные данные по остаточному магнитному следу на диске. Это действительно так. Но для решения такой задачи нужно специальное оборудование, здесь недостаточно нескольких программ, нужен специальный лазер, который может считать магнитный след по краям дорожки и другая аппаратура. Так что про этот метод для себя можете забыть.
Ну а мы остановимся на программном восстановлении, когда данные были формально удалены, но физически еще находятся на диске в целостности и сохранности. Дальше рассмотрим несколько утилит, которые помогут восстановить удаленные файлы Linux.
1. Safecopy
Safecopy — это довольно простой инструмент для восстановления данных, который просто копирует данные из одного места в другое. Утилита, как таковая, не восстанавливает отдельные файлы. Она просто позволяет скопировать данные из поврежденного устройства на нормальное.
Разница между этой утилитой и другими программами копирования в том, что Safecopy не завершается при обнаружении каких-либо ошибок, будь то плохая операция чтения или поврежденный сектор. У нее есть множество дополнительных опций для настройки, а также возможность создания образа файловой системы из поврежденного носителя. Данные восстанавливаются тщательно и быстро, насколько это возможно.
Утилиту можно установить из официальных репозиториев вашего дистрибутива. Пользователи Ubuntu могут воспользоваться такой командой:
sudo apt install safecopy
Здесь вы не восстановите удаленные файлы, но вы можете скопировать поврежденные данные. Например, для видео несколько повреждений не играют большой роли. Для запуска восстановления файлов в linux с раздела /dev/sda1 выполните:
sudo safecopy /dev/sda1 /home/files/
Все файлы, которые удастся скопировать будут в /home/files/.
2. TestDisk
TestDisk — это очень мощный инструмент для восстановления данных. Он не пытается скопировать данные из поврежденного устройства, а позволяет исправить ошибки и проблемы на уровне разделов, которые могут мешать работе с вашими данными.
Утилита может восстанавливать потерянные разделы, исправлять таблицу разделов GPT и MBR, делать резервные копии дисков, восстанавливать загрузочные записи, а главное восстанавливать удаленные файлы с файловых систем NTFS, FAT, exFAT и файловых систем семейства Ext. Также вы можете копировать файлы даже с удаленных разделов для тех же файловых систем.
Способ работы утилиты очень сильно отличается в зависимости от нужного действия. Здесь вас ждет псевдографический мастер, который проведет вас через все шаги. Установить testdisk можно так же само из официальных репозиториев. В Ubuntu используйте для этого команду:
sudo apt install testdisk
Поскольку тема нашей статьи — восстановление файлов linux, рассмотрим как это делается с помощью этой утилиты. Запустите программу:
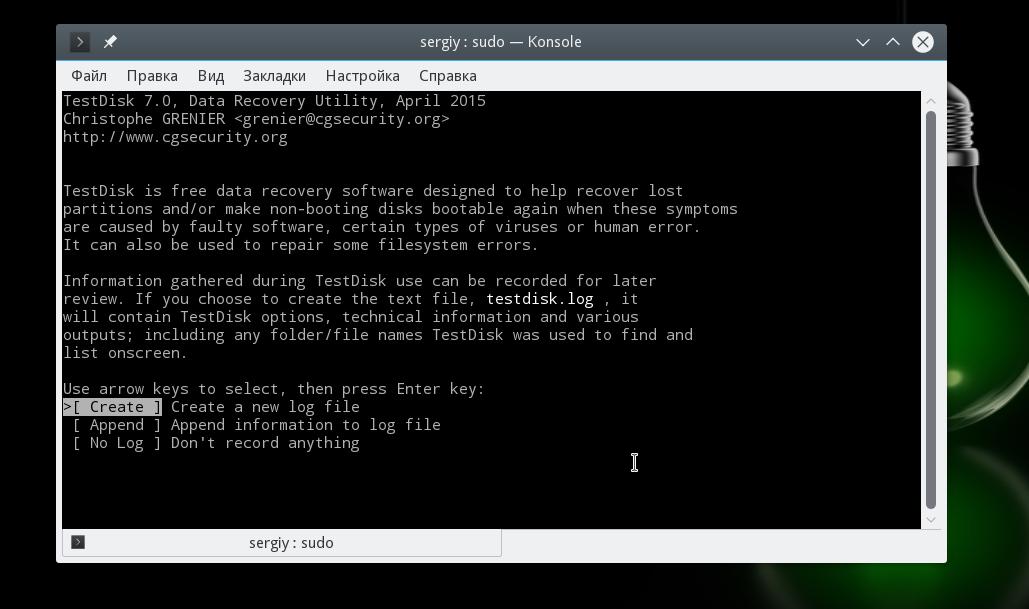
На первом шаге мастера выберите Create New Log:
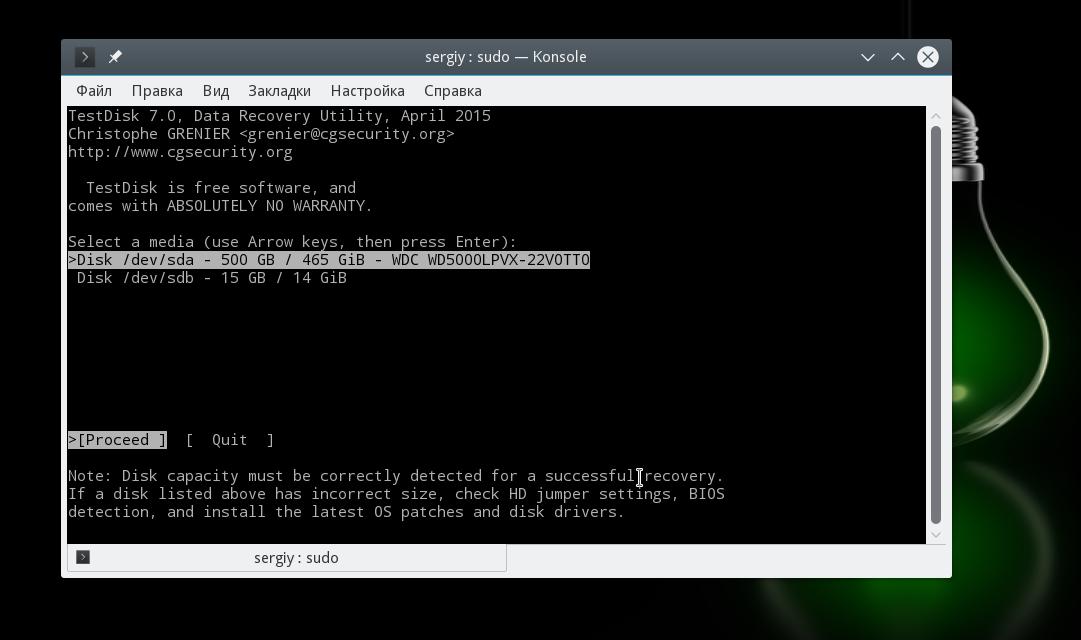
Дальше выберите диск, с которым будем работать:
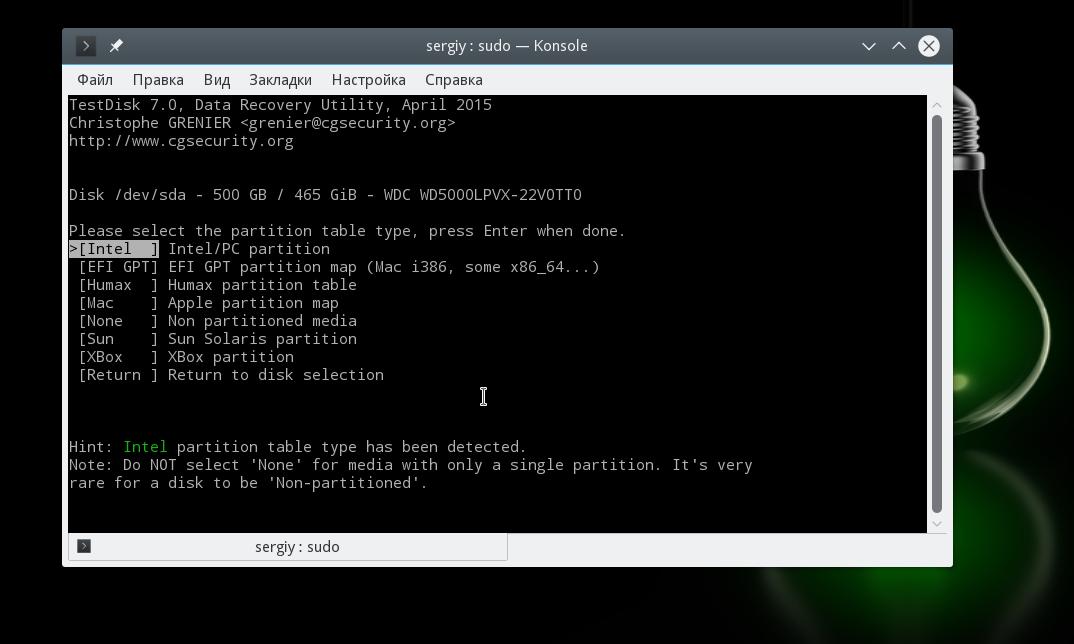
Выберите таблицу разделов на диске:
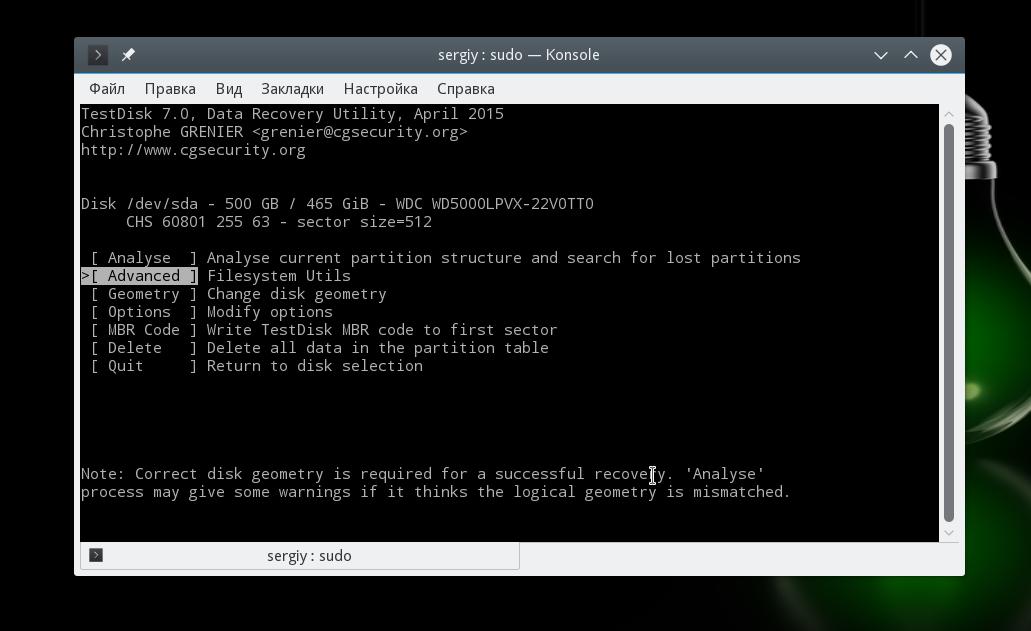
Для работы с файловой системой выберите пункт Advanced:
Далее выберите раздел, затем команду list:
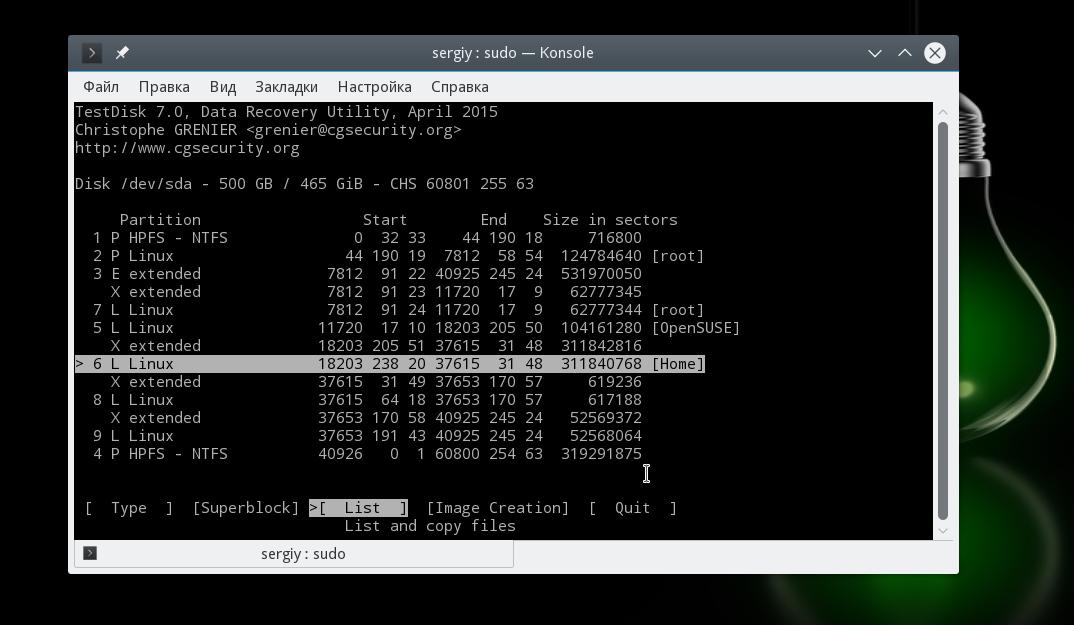
Тут вы увидите все файлы, которые есть на этом разделе. Удаленные, но подлежащие восстановлению файлы будут помечены красным.
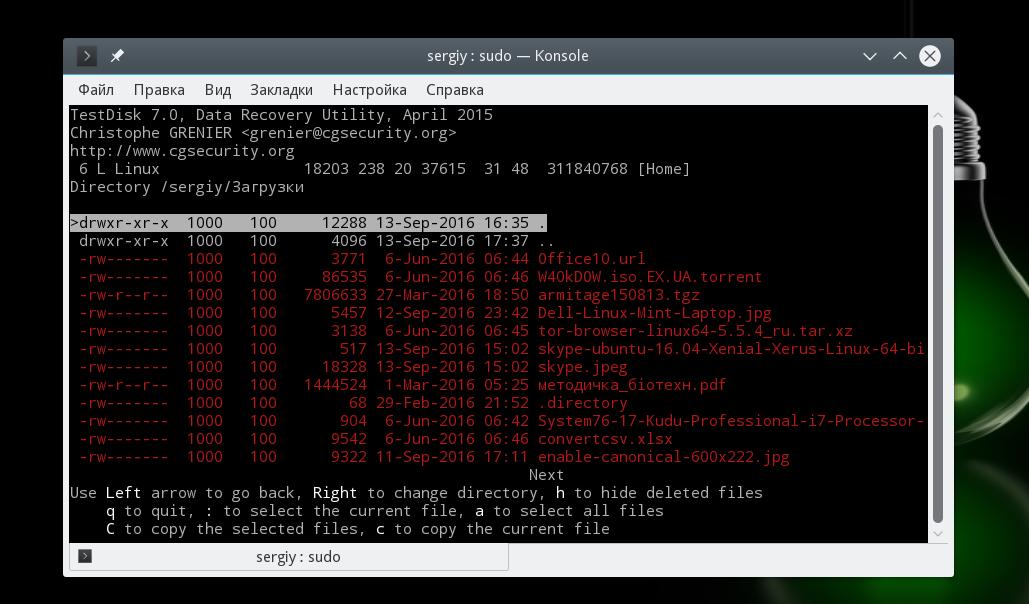
Работать с этой утилитой удобнее, чем с Photorec, потому что здесь вы можете выбрать только один нужный файл, а не восстанавливать сразу кучу мусора. Чтобы скопировать файл просто выберите его, нажмите c и выберите папку для сохранения. Правда, вы же понимаете, что для восстановления нужно, чтобы файлы были не перезаписаны, где-то чуть перезапишется и все.
3. PhotoRec
Наша последняя программа ориентирована в первую очередь на поиск и восстановление удаленных видео, фото, документов и архивов. Можно сказать, что это программа восстановления удаленных файлов linux. Преимущество PhotoRec заключается в том, что она полностью игнорирует файловую систему и смотрит на сырые данные, а это значит, что она все равно будет работать, даже если файловая система повреждена или переформатирована, но только в быстром режиме, там где стираются лишь заголовки.
Во избежание каких-либо проблем, здесь используется доступ только для чтения, этого вполне достаточно для восстановления данных. Но как я говорил раньше, вам нужно остановить все операции записи, как только вы поняли, что нужно восстановить файл. В противном случае нужные данные могут быть перезаписаны чем-то новым и вы уже не сможете их восстановить.
В утилиты есть несколько настроек. Вы можете указать расширения файлов, которые нужно найти, размер, дату изменения и так далее. Установить программу можно так же как и TestDisk — из официальных репозиториев.
Например, в Ubuntu выполните:
sudo apt install photorec
Что касается использования, то тут похожий на testdisk интерактивный интерфейс. Запустите утилиту командой:
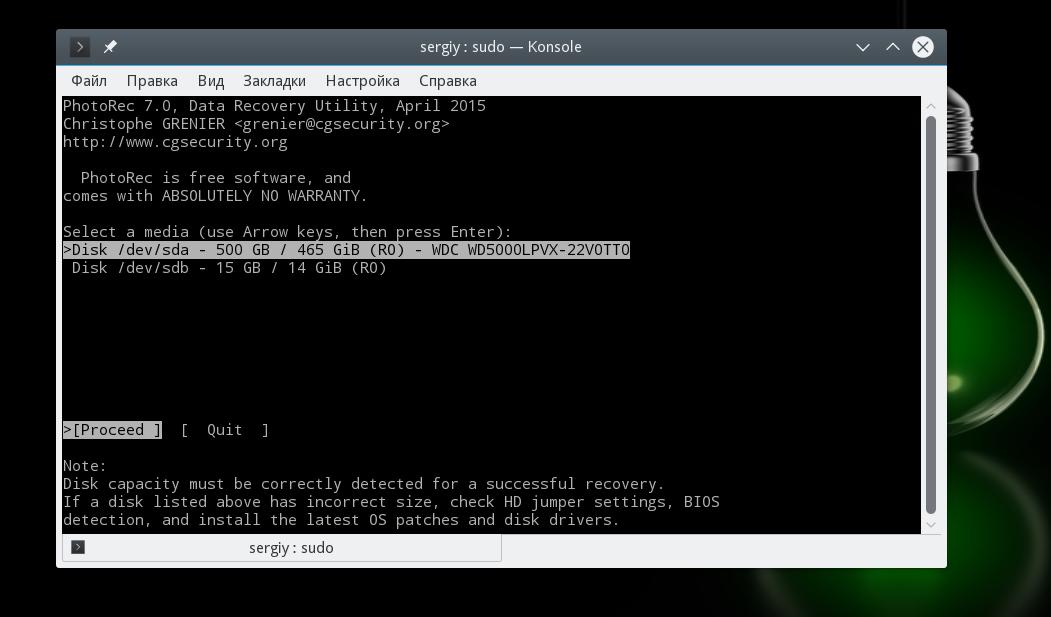
Выберите диск, с которым нужно работать:

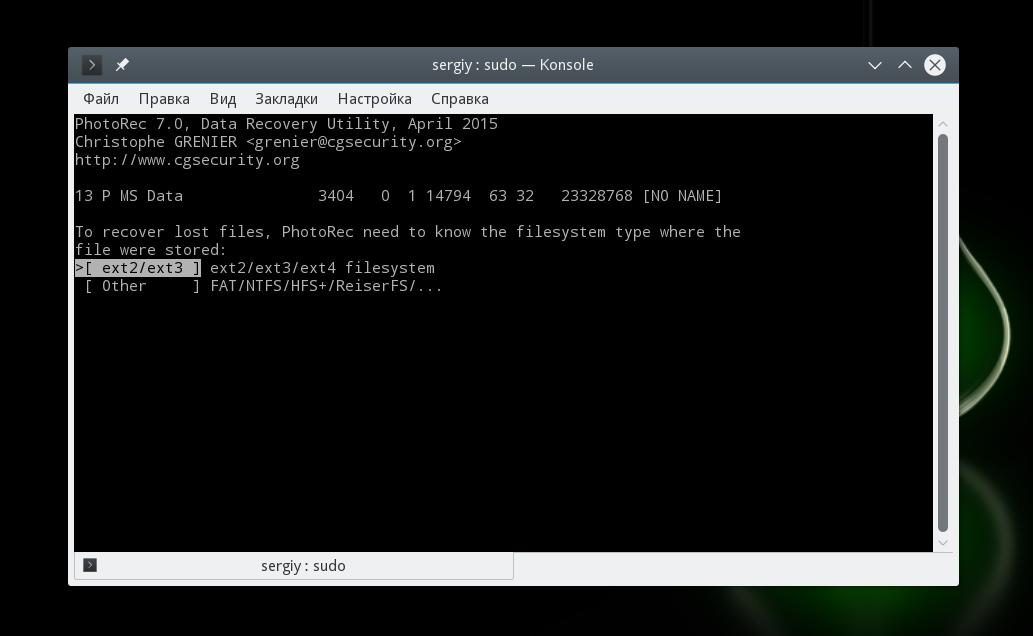
Выберите файловую систему:
Выберите способ сканирования (неразмеченное пространство/весь раздел) Затем выберите папку для сохранения результата:
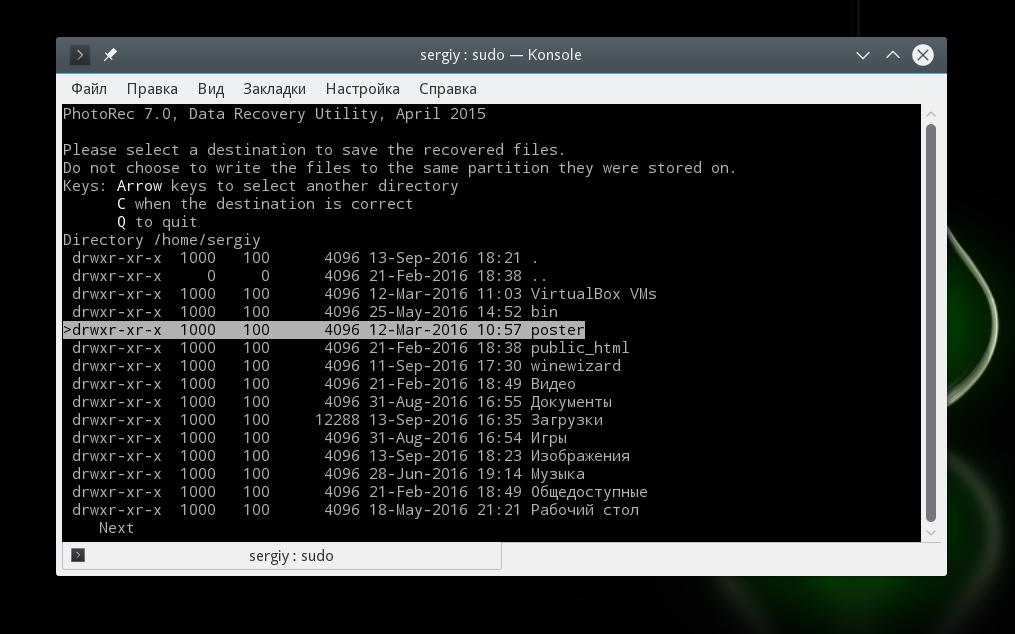
Дождитесь завершения процесса:
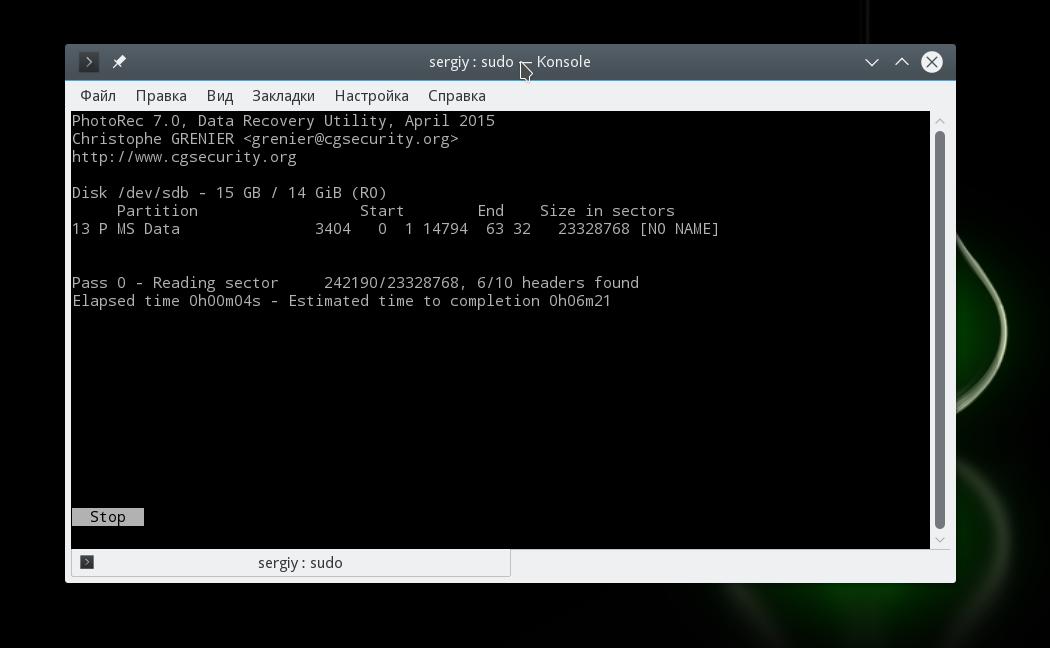
Программа восстановит много файлов, и скорее всего больше чем вам нужно. Причем главная ее проблема в том, что имена файлов не сохраняются и вам придется еще поискать, чтобы найти есть ли там то что нужно.
Выводы
Эти три инструмента охватывают широкий спектр задач по восстановлению файлов Linux. Здесь вы сможете выполнить не только восстановление удаленных файлов Linux из ext4, но и исправить жесткий диск или скопировать файлы с поврежденных носителей.
А какие ваши любимые утилиты для восстановления данных? Какими вы пользуетесь? Напишите в комментариях!
На десерт видео от Discovery о том, как работает жесткий диск:
Источник
How To Recover Deleted Files In Linux [Beginner’s Guide]
Last updated October 29, 2020 By Community 108 Comments
Brief: This article shows you how to recover deleted files in Linux using command line tool Test Disk. It’s an easy to use tool that almost anyone can use to recover lost files in Ubuntu or other Linux distributions.
Have you ever gotten that horrible feeling? The one you get when you realize that you accidentally deleted files and it’s not even in the trash? Often it is immediately preceded by denial: I know I have another copy of it somewhere.
But rather than going through all the stages of grief, don’t worry. And remember you’re not alone; sooner or later everyone does this.
“Don’t worry?” you counter, “I just erased the only copy of my resume!”
No really, don’t worry. All that’s happened is that it’s been bumped off a list. So long as you don’t write onto the drive, it absolutely still exists. In fact, depending on the size of the file and the free space on your drive deleted files can persist indefinitely—even if you do write on the drive.
“Yes, fine” you say, “I’ll rest easy knowing my resume ‘exists’ in some abstract sense. But so far as I’m concerned if I can’t open, edit or print from it, it doesn’t exist in any practical sense. What would really help would be a way to ‘un-delete’ files. And one that doesn’t require an IT forensics lab.”
Really, don’t worry—you don’t need a lab to recover the deleted files. Furthermore, if you can get past using a primitive GUI, it’s actually easy to do! I’ll show you how to use TestDisk to recover deleted files.
How to recover deleted files in Linux using TestDisk

Let me present a simplified example: I took a clean thumb drive added some files, then deleted one. Now, my system has a feature which will directly delete files from removable media, by-passing the “trash” altogether; that is if I choose to “right” click on a file and then choose “delete”. It still presents a warning, but one click on the “yes” button and the file is gone forever. Or appears to be.
But this time I didn’t get that horrible feeling. And no, not because this is a cooked up scenario. I knew that all I had to do was open the terminal type “testdisk” and hit “enter”. When I did this for the first time I had one of my “Linux moments”. Because if you don’t have it—and I didn’t—it tells you how to get it! Just type “sudo apt install testdisk” and enter and you’ll have it in about 10 seconds.
If you prefer videos, you can watch this video of the same tutorial on It’s FOSS YouTube channel:
Step 1
You need to install TestDisk tool first. Most Linux distributions already have this tool in their official repository. In Ubuntu and other Ubuntu based Linux distributions such as Linux Mint, elementary OS etc, you can use the command below to install TestDisk:
sudo apt install testdisk
Arch Linux users can install it from AUR. You can download it for other Linux distributions from the link below:
Though I am using Ubuntu in this tutorial, this doesn’t mean it is only to recover deleted files in Ubuntu Linux. The instructions presented here works for other distributions as well.
Step 2
Run TestDisk in the terminal using the command below:
Step 3
When you open it, you’ll see something that looks like this. Be patient! The interface is actually straightforward but you do have to carefully read the text. Use the arrow keys to navigate and “enter” to select.
Screens that have extra commands will tell you so. Also note that TestDisk 7.0 tends to highlight the next reasonable step. It’s almost always right but do read the screen, since it can’t read your mind. In any case, when it wants you to let it create a log file, indulge it. It’s about to pull you out of a hole.
Step 4
Now, at this point, if you’re lucky, you should see your drive. And you can proceed to the last steps. But let’s assume you’re not, that you have, say, a multi-boot machine. In this case, ownerships can get blurry, and Testdisk needs your permission to open them. You’ll see something like this:
Select “sudo” and enter your password. Hit “enter” and “enter” again on the next screen to create another log file.
Step 5
This time Testdisk displays all your drives. Arrow key to the drive in question and hit enter.
Step 6
Testdisk has again selected the correct setting. This makes sense since a simple storage device is seldom partitioned. Again hit enter:

Step 7
And finally we have to do a little thinking to do. If you read the first screen—and I’ll bet you didn’t—this program isn’t just for recovering deleted files. It’s a powerful disk utility. But if we remember what we’re trying to do the choice is fairly obvious: we’re not trying to fix a disk, we’re trying to recover a file. Select “Advanced” and hit “enter”.
Step 8
At the bottom of the page choose “Undelete” and get ready to see a ghost!
Step 9
Testdisk will scan for files and produce a list of deleted files highlighted in red. Arrow down to it and carefully read the choices at the bottom.

Step 10
Again, bear in mind that Testdisk is a multi-function tool. Most of these options deal with groups of files; we only want our damn resume back! So hit “c”.
As you can see from the scoreboard, we’ve won 1-0. After hitting “c” there are options about where you might want to recover the file to, but it defaults to your home folder. And again this is generally the best thing to do. Navigating in Testdisk is a little tricky, whereas dragging and dropping after the fact is a breeze.
A few tips on recovering deleted files in Linux using TestDisk
First, if you find yourself somewhere you don’t want to be, hit “q” for quit. This won’t close the program, instead, it will act like the “back” button on a program with a full blown GUI, and put you back a page. And just like a “back” button repeating will eventually lead you back to the beginning.
Second, as with anything, the fewer the distractions, the easier it is to find what you’re looking for. In other words, physically detach all other storage drives. In graphically simple environments simplicity is your friend.
Finally, Testdisk can also help you retrieve files that have become inaccessible for other reasons. In fact, this is why I started using the program in the first place. I was trying to save files from a corrupted drive that could not be made to boot. Normally it’s simply a matter of removing said drive any hooking it up to a USB adapter. You can then mount it on another PC and copy the files where ever you want.
But what if the drive is formatted to LVM? This was my problem because a mounted LVM drive looks nothing like a normal Linux OS. None of the usual files appear, and hunting around simply doesn’t help. This, among other reasons, is because most Linux file managers can no longer read ext.2 file systems.
Nevertheless, after a few false starts, I was able to find and save the missing files. Note, however, that the sequence of steps here will be a little different, you may need to use the “analyze” option for Testdisk to make sense of the drive and you may have to poke around a little to find the “home” folder once you do. Furthermore, the files you’re looking for will not appear in red since they were never deleted in the first place. But once you do find them, the copying procedure is basically the same.
With Testdisk and a little luck, you may never lose your resume again as you can always recover deleted files in Linux.
Disclaimer: This tutorial is a reader submission.

Dave Merritt
I’m a 59 years old, fulltime landscaper and parttime PCmedic. I’ve been an avid Linux user for over ten years. In that time, I do not claim to have made every possible mistake, only most of them. I’m a big fan of prog rock, avant jazz and J S Bach, and enjoy reading Neal Stevenson and anything to do with the foundational problems in modern physics.
Like what you read? Please share it with others.
Источник


