- How to rollback & uninstall Windows 10 version 20H2 October 2020 Update
- Uninstall Windows 10 version 20H2 Update
- How to temporarily prevent a driver update from reinstalling in Windows 10
- Rolling back a device driver
- how to roll back a driver update in windows 10.
- Replies (5)
- How to Revert a Windows Update
- Server 2016 with Windows 10
- Server 2008R2 and 2012R2 with Windows 7/8
- Windows 10 April Update broke your PC? Here’s how to roll it back
- How to roll back from Windows 10 April Update
- 1: Roll back through the system
- 2: Roll back from the Advanced boot menu
How to rollback & uninstall Windows 10 version 20H2 October 2020 Update
If after installing the Windows 10 version 20H2 Update you are facing problems and issues with it, you can uninstall it and go back or rollback to the previous Windows version. Most of you may be familiar with the instructions, but for those of you who are not, this post will help you uninstall the latest Windows 10 Feature Update from your PC.
Uninstall Windows 10 version 20H2 Update
To uninstall this Feature Update, you will have to open the Start Menu. Next, click on the Settings link.
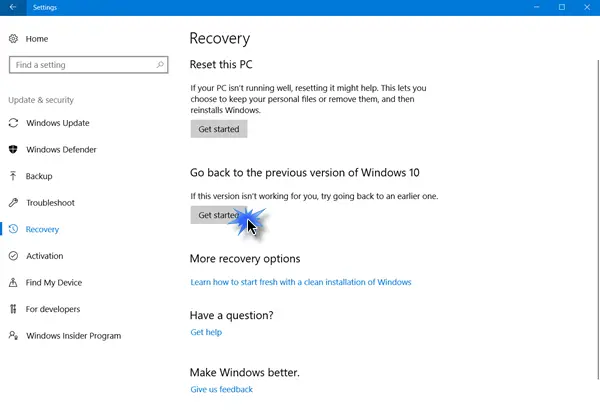
Having opened the Settings panel, click on Update and security and here select Recovery settings.
Next click on the Get started button under Go back to an earlier build section.
The process will start, and you will be asked some questions for information purposes, as to why you are going back to the previous build of Windows 10.
The options are:
- My apps or devices don’t work on this build
- Earlier builds seemed easier to use
- Earlier builds seemed faster
- Earlier builds seemed more reliable
- For another reason – Tell them more.
Do the needful and click Next to move on. If you wish, you have a chance to Cancel now.
You have to remember that when you go back, you will lose the settings changes or the apps you may have installed after you upgraded to the current build.
Windows 10 will offer to check for updates. Maybe some new fixes have been released!
Remember to note down your password or login credentials as you will be required to enter them after the process is completed.
Click on Next, and you will be thanked for trying out this build.
Once you are completely sure click on the Go back to earlier build button and the upgrade process will start.
Just to be on the safe side, you may want to also back up your data before you begin.
Once you have done this, you may want to defer installing Windows Updates on your Windows 10.
How to temporarily prevent a driver update from reinstalling in Windows 10
In Windows 10, your device is always kept up-to-date with the latest features and fixes. Drivers are installed automatically so that you don’t have to select which updates are needed. In rare cases, a specific driver might temporarily cause issues that affect your device. In this situation, you can prevent the problematic driver from reinstalling automatically the next time Windows Updates are installed.
Rolling back a device driver
If a driver that you are offered is causing system crashes or instability, and if Windows was operating correctly before that change, you can use this method to roll back the driver to the previous version.
The appropriate steps to roll back a driver installation depend on the version of Windows 10 that you have installed. We recommend that you update to the latest version of Windows 10 before you try to uninstall any drivers because this may resolve the issue. You can use Windows Update to check for the latest update by selecting the Start button, then selecting Settings > Update & security > Windows Update , and then Check for updates. Or you can install the latest version of Windows by going to Download Windows 10, and then selecting Update Now.
If you aren’t sure which version of Windows 10 you have, select the Start button, and then select Settings > System > About.
Start Device Manager. To do this, in the search box on the task bar type device manager, and then select Device Manager.
Locate and right-click the device that has the problem driver installed, and then select Properties.
Select the Driver tab, and then select Roll Back Driver.
Important If you don’t have the latest version of Windows 10, we recommend that you update now. To update to the latest version, go to Download Windows 10, and select Update Now.
Start Device Manager. To do this, in the search box on the task bar type device manager, and then select Device Manager.
Locate the category of device and right-click the device that has the problem driver installed, select Properties, and then choose the Driver tab.
In the Confirm Device Uninstall dialog box, select the Delete the driver software for this device check box.
Choose your automatic updates
To prevent the driver from being reinstalled by Windows Update, use the “Show or Hide Updates” troubleshooter to hide the driver. Window Update won’t install hidden drivers or updates.
Download the troubleshooter from the Microsoft Download Center:
how to roll back a driver update in windows 10.
Today MS released an update for windows 10 (aug 5-6).
That update has messed up my touch interface, so that my touch screen is now more of a liability than an asset.
My question is how does one remove the updated drivers.
I already «uninstalled» the udate but it has left the new drivers intact , before giving up on windows 10 and going back to windows 8.1, I want to try to fix the situation.
so how can I roll back my machine a couple of days. if that is even possible in win10 I believe it may be the display driver that is causing the issue.
Replies (5)
![]()
Thank you for your interest in Windows 10.
To rollback the driver, you may follow the steps below:
- Press Windows + R on the desktop screen.
- Type devmgmt.msc and hit enter.
- Expand the category you want and right click on the driver and select properties.
- Navigate to driver tab and click on RollBack driver.
Hope this information was helpful.
24 people found this reply helpful
Was this reply helpful?
Sorry this didn’t help.
Great! Thanks for your feedback.
How satisfied are you with this reply?
Thanks for your feedback, it helps us improve the site.
How satisfied are you with this reply?
Thanks for your feedback.
What if the driver doesn’t stay rolled back? Every few days, I have the rolled back driver for my Bluetooth adapter rolled forward by Windows Update. This is only since updating from 10240 (RTM) to build 10586. Any way to block this driver from being added by WU? See attached screen capture of the driver below. Curious to me that the BTHUSB.SYS file, which is stamped 10.0.10586 remains on the system after rollback. Guessing there may be security issues involved?
6 people found this reply helpful
Was this reply helpful?
Sorry this didn’t help.
Great! Thanks for your feedback.
How satisfied are you with this reply?
Thanks for your feedback, it helps us improve the site.
How satisfied are you with this reply?
Thanks for your feedback.
Hi: I’m trying to roll back from an Nvidia display adapter driver which MS just automatically updated, but unfortunately the RollBack driver tab is blank—there’s nothing to roll back to. How do I install the MS display adapter driver which came with the windows 10 update—that was working fine.
1 person found this reply helpful
Was this reply helpful?
Sorry this didn’t help.
Great! Thanks for your feedback.
How satisfied are you with this reply?
Thanks for your feedback, it helps us improve the site.
How satisfied are you with this reply?
Thanks for your feedback.
I ran into this issue with the latest updates; my system froze 3 times in about 2 hours. The 1 Aug NVIDIA drivers were to blame.
Where there is no «roll back» — I clicked «uninstall» and then waited for the magic to happen; when finished; I let windows search for compatible drivers (tapped F5), and it replaced the absent driver with the old driver; job almost done.
To prevent Microsoft from screwing up my machine again, I downloaded & installed the latest NVidia drivers and the machine is once again stable. (These should have a signature that is higher than the Windows Update ones, and thus shouldn’t be downgraded).
Windows 10 is generally good, but Microsoft’s arrogant assumption that all «updates» are «improvements» is a serious flaw.
11 people found this reply helpful
Was this reply helpful?
Sorry this didn’t help.
Great! Thanks for your feedback.
How satisfied are you with this reply?
Thanks for your feedback, it helps us improve the site.
How to Revert a Windows Update
Windows periodically checks for the latest updates and security features for your devices. Automatic updates are implemented with the intention of running your device smoothly and securely. With top security in mind, most Liquid Web servers are set to automatically install these updates thus saving you the task of remembering to implement critical updates or patches.
The vast majority of the times, windows updates complete successfully, keeping you and your customers safe. These updates rarely cause any server issues, but you may find that you want to roll back an update due to an unforeseen server change. Fear not, in this tutorial we’ll show you how to easily undo a Windows update on 2016, 2008R2 and 2012R2 servers.
Server 2016 with Windows 10
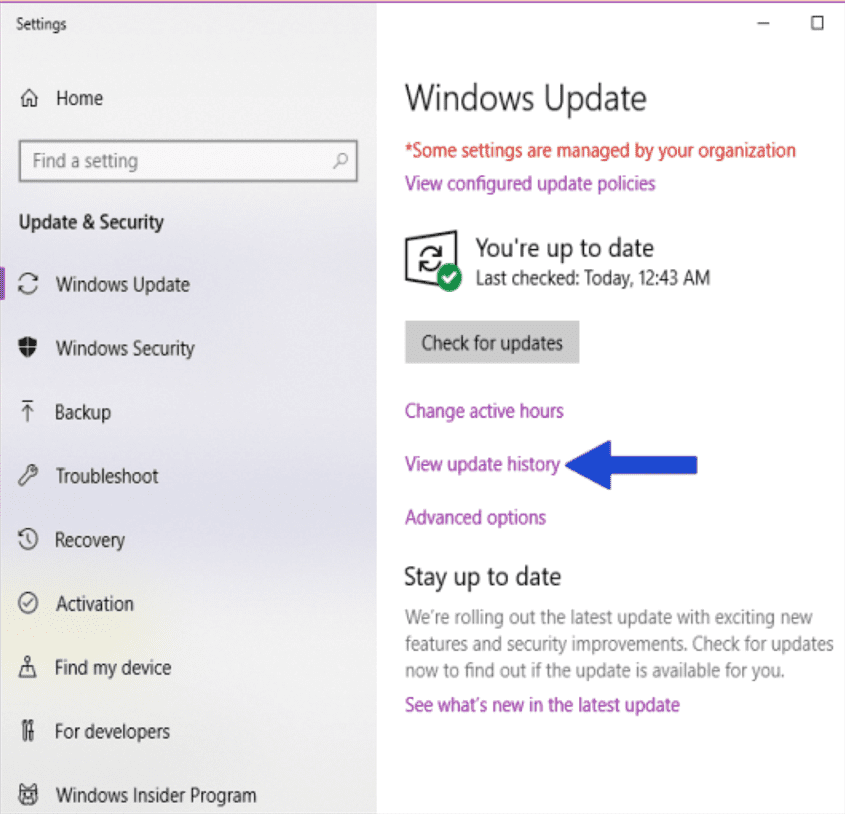
- Click on the Start button, search for Windows Update and hit Enter.
- Go to View Update History and select Uninstall Updates. Click the update you are wanting to uninstall/remove. (Generally, these are the most recent installs.)
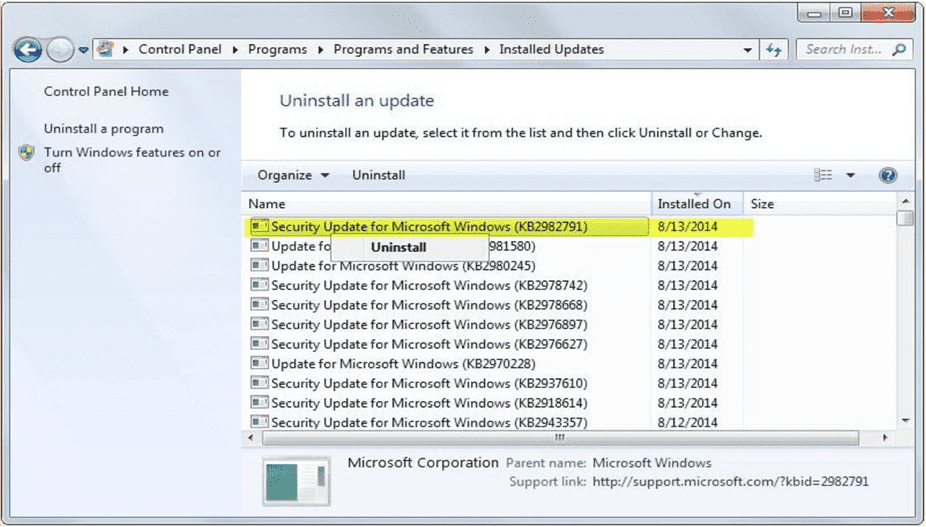
- When the installed update window comes up, you can see the updates by name, KB number, type of program, version, and even the date of installation.

- Select the update and choose Uninstall. Follow the on screen instructions.
- Depending on the update, there may be a need to reboot the server to complete removal.
- While you are still in the Windows Update screen, select the offending update and click Hide Update. ** Once the Update is fixed and it is safe to install, then you can go in and manually install it on your system.
Complete the removal of the update by rebooting the server.
Server 2008R2 and 2012R2 with Windows 7/8
- Go to the Start button and select Control Panel.
- Go to Programs >> Uninstalla program.
- Select the program and right-click to Uninstall.
- Select the update you would like to revert.
- Select Yes to uninstall the selected update.
- Select the Restart Now button.
- While you are still in the Updates screen, select the offending update and right-click, to select Hide Update. ** To re-instate the update you can manually install it on your system.
Complete the removal of the update by rebooting the server.
Still having issues with reverting a Windows update? Liquid Web customers enjoy 24/7 support with our Managed Dedicated servers and VPS servers. Find out today why we are the most loved in hosting!
Windows 10 April Update broke your PC? Here’s how to roll it back


It looks like every step forward leads to two back when it comes to Microsoft’s update distribution. The Windows 10 April Update hit the general population after numerous tests and fixes on various security loopholes. However, even though the Redmond Giant complied with the release date expectations, the system is full of issues, causing the public outburst. Until they sort it out, you can always roll back to a previous Windows 10 iteration.
Today, we offer two ways to roll back to previous system version. Make sure to check them out below if you’re in dire need to dispose of the April Update.
How to roll back from Windows 10 April Update
1: Roll back through the system
There are two ways to roll back from the Windows 10 April Update. The first way is utilized through the system since the option resides in the Settings app. Using this way implies that you’re able to access the Settings app in the first place. Even though this procedure won’t cost you your data and installed applications, we still recommend backing up everything you deem worthy of the system partition. As the saying goes “Microsoft m isfortune does not come alone”, so things can still get even worse.
Follow these steps to roll back via the Settings app:
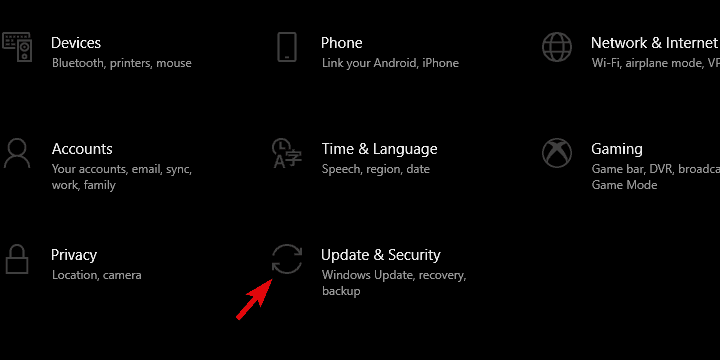
- Press Windows key + I to open the Settings app.
- Choose Update & Security section.
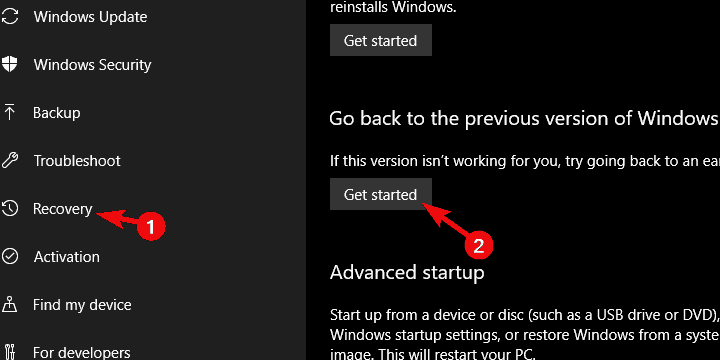
- Select the Recovery from the left pane.
- Under the “Go back to the previous version of Windows 10” option, click Get started.
- Keep your files and start the resetting procedure.
2: Roll back from the Advanced boot menu
On the other hand, if you’re stuck in the system limbo, you won’t be able to boot and access Settings in a standard manner. You can do so by booting into a Safe mode, but there’s really no a dire need to do so. The Advanced boot menu offers the option to roll back to the previous Windows 10 iteration in a few simple steps.
Follow these instructions to roll back the Windows 10 April Update via the Advanced boot menu:
- Hard power off your PC 3 times until the Advanced Recovery environment appears.
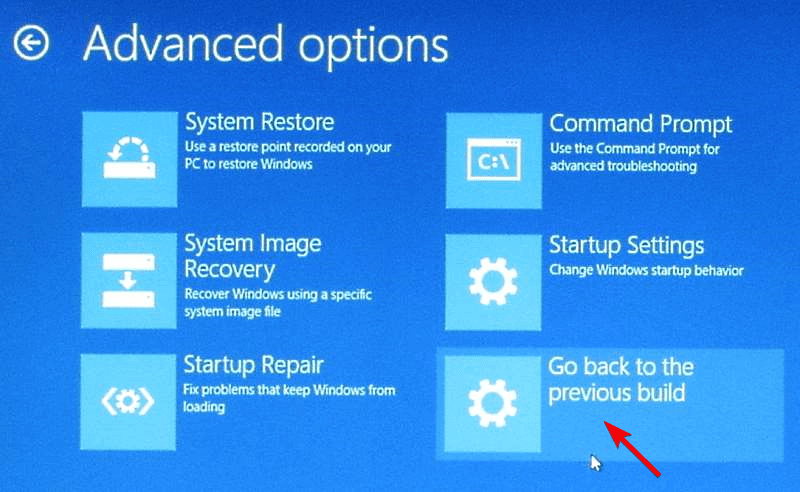
- Choose Advanced options.
- Select the “Go back to the previous build” option and confirm the selection.
- Wait until the procedure ends and restart your PC.
That’s it. Hopefully, after the redraw, you’ll be able to get back to seamless Windows 10 experience. At least, until Microsoft deals with the issues plaguing Windows 10 users around the world. Don’t forget to share your questions or suggestions in the comments section below. We look forward to hearing from you.
RELATED STORIES YOU SHOULD CHECK OUT:


