- Linux 5.0 запустили на процессоре ESP32 с 8 МБ RAM
- Hackaday
- 42 thoughts on “ It’s Linux – But On An ESP32 ”
- Лабораторные записки
- Сделанное не должно быть забыто.
- Настройка Ubuntu для работы с ESP32
- Toolchain
- Обновляем переменные системы
- ESP-IDF
- Пакеты Python
- Подсоединяем ESP32 к компьютеру
- Проект «Привет мир»
- Настройка проекта
- Прошивка
- Мониторинг
- Настройка Eclipse
- Импорт нового проекта
- Настройка проекта
- Сборка в Eclipse
- Прошивка в Eclipse
Linux 5.0 запустили на процессоре ESP32 с 8 МБ RAM
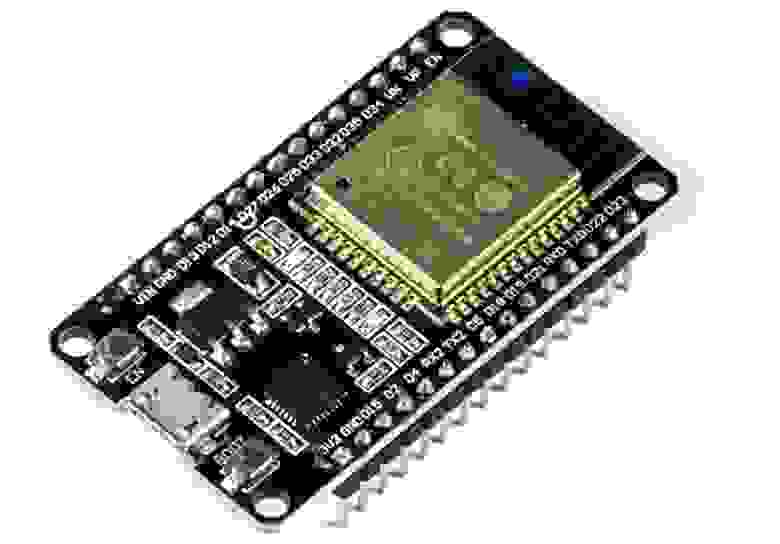
ESP32 Espressif ESP-WROOM-32 Dev Board
ESP32 — серия бюджетных микроконтроллеров с низким энергопотреблением. Используются в различных устройствах Интернета вещей. Представляют собой SoC с интегрированными контроллерами Wi-Fi и Bluetooth и антеннами.
Процессор ESP32 поддерживает до 8 МБ RAM, что соответствует минимальным требованиям для запуска Linux. В этом мало практической пользы, но почему бы не проверить теорию на практике.
Китайский разработчик Хуэй Линь сумел успешно загрузить Linux 5.0 на процессоре ESP32 с 8 МБ RAM. Подробностями он поделился в треде Reddit и на форуме WhyCan.
Лог загрузчика на скриншоте:

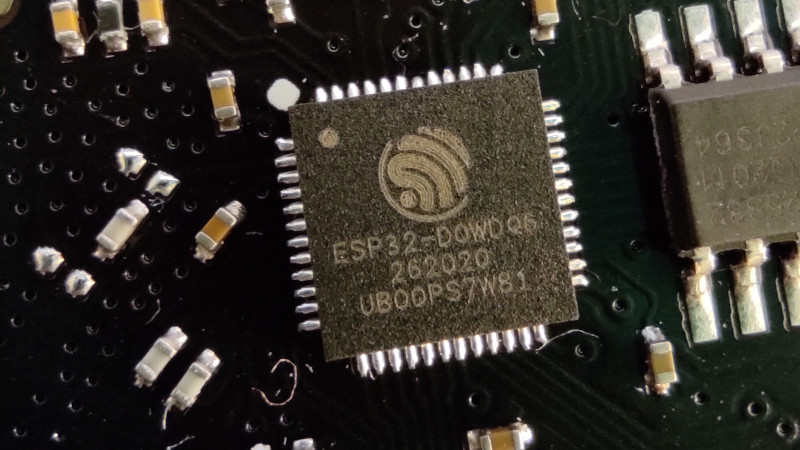
В данном случае Linux 5.0.0 загружается на плате с двухъядерным процессором Xtensa (ESP32-D0WD) производства китайской компании Tensilica, с 8 МБ PSRAM и 2 МБ флэш-памяти SPI.
Процесс загрузки немного запутанный. Сначала загрузчик загружает Juice VM (маленькая виртуальная машина RISC-V), которая запускает интерфейс OpenSBI (RISC-V Open Source Supervisor Binary Interface). Через него загружается ядро Linux и небольшая файловая система.
Все файлы опубликованы в репозитории. Общий размер образа около 1,5 МБ, что почти полностью заполняет флэш-память объемом 2 МБ на плате. Интерфейсы SPI и UART поддерживаются, но загрузка в консоль пока не проходит, судя по всему.
Juice VM — это виртуальная машина RISC-V, которая умеет загружать FreeRTOS, RT-Thread и другие операционные системы. В данном случае её портировали на ESP-IDF с поддержкой ESP32, ESP32-S2 и ESP32-C3.
(видео воспроизводится с ускорением 30х)
Нужно отметить, что Linux не первый раз запускают на этих микроконтроллерах. В прошлом году умельцы сумели загрузить старую версию Ubuntu 9.04 на ESP32.
Если вспомнить, то в начале 90-х Linux запускали даже на настольных компьютерах 386DX/40 с 4 МБ RAM, не говоря уже о мощных рабочих станциях 486DX2/66.
А вообще, Linux можно запустить даже на 8-битном микроконтроллере, хотя на нём нужно подождать примерно два часа до появления строки bash, и ещё четыре часа до логина в Ubuntu.
Источник
Hackaday
GNU/Linux is an open-source marvel that has over the past three decades given us an almost infinitely versatile and powerful UNIX-like operating system. But even it has its limitations, particularly at the lower end of the hardware scale where less fully-featured processors often lack the prerequisites such as a memory management unit. Thus [JuiceRV]’s feat of booting a Linux kernel on an ESP32 microcontroller seems impossible, what’s happening?
The ESP’s dual 32-bit Xtensa cores are no slouch in the processing power department, but without that MMU it’s not an obvious Linux candidate platform. The solution to this problem comes in the form of an emulated RISC-V virtual machine which provides just enough grunt for a Linux 5.0.0 kernel to boot.
By any measure this represents an impressive piece of work, but will this new-found ability to run Linux on a microcontroller take the world by storm? Of course not, unless your tastes run to the very slowest of computing experiences. It is however the essence of the hack, and for that we salute it.
Header image: Ubahnverleih, CC0.
42 thoughts on “ It’s Linux – But On An ESP32 ”
Hah! This is cool
The virtual machine appears cool, could work for very many platforms.
But MMU-less Linux (previously uClinux) has been in mainline for a long time now, so probably this could be done natively also.
Google s6105 Linux
Nobody cared, the hardware went out of production, bits started to rot, we removed the code.
In practice modern Linux is so bloated with features for the PC and server world that the MMUless option is almost irrelevant because anything big enough to usefully run Linux other than as a single kernel bound to a single appliance binary (probably in XIP flash) already has external DRAM and an MMU. Didn’t use to be the case – ucLinux used to be fine with 1Mb in the 2.x days.
Running Linux without MMU is highly insecure and a vast of memory because in that case there are no pages that can be protected, managed and shared efficiently. The irony it that it’a precisely CPUs designed for low memory that lack MMU. A have been forced to build such systems by incompetents that simply don’t understand what a MMU is in the first place and how critically important is a MMU to get all the best features of the Linux operating system. There all went back later when there realized that a simple bug in there user application will most of the time crash the full system because of the lack of protection. Also there a lot of scenarios where you can exhaust the memory faster without a MMU than with a MMU.
I’ll admit I haven’t had my first cup of tea of the morning, but I’ve read, and re-read that passage… and I’m just getting a garbled mess. Maybe auto-incorrect is to blame, but either way, the end result is the same.
What’s a “vast” of memory? “It’a”? “A have been forced”? “There all went back”? If you could re-post without the grammatical and typographical errors, then I think your post could make sense and you may have a good point.
Probably the biggest limitations without an MMU are that:
1. the linker needs to do symbol relocations itself in software
2. swap space is an impossibility, run out of RAM, tough titties, `malloc() == NULL; errno = ENOSPC;` for you.
Years ago, cost would have been a big driver in MMU-less Linux systems. Today, MMU-capable chips are common enough there’s just no point in putting the extra engineering time into making a MMU-less design work.
There are MMU-less designs that work right out of the box. One example is KubOS with the MSP430. This application works well enough, although memory is limited.
The embedded world has been using uClinux, very successfully, for most on my linux career (over 30 years now) with several significant successful product designs under my belt. I am neither incompetent nor lacking in knowledge or understanding of these systems.
So don’t be too hasty to discount the merits of a very important aspect of the linux world.
Sounds like the linux kernel needs some profiling 😀
With ucLinux being in the mainline kernel for almost 20 years, this seems to me like reinventing a less circular wheel.
Google s6105 Linux. Bits started to rot because no one cared so they removed it.
Why? … Sledge hammer to crack a peanut. How about something like FreeRTOS on the ESP32? Wait!! That has already been done and is widely supported. Amazon likes it :). Admirable work, though, Jenny.
Espressif’s own official SDK uses FreeRTOS, so that’s kind of moot. Besides which, just simply making Linux run on the ESP32 for the shits and giggles is a reasonable reason in and of itself — it doesn’t always have to be anything useful.
Are you suggesting that Linux on the ESP32 is not useful? Please clarify. I guess next project could be Linux on the venerable 8051, …, just for “shits and giggles.”
If you did it, I’d read it.
I wish the ESP tools and SDK had a stronger focus on dynamically loading code. That’s one thing missing from the IoT is “apps”.
Having the ability to make “app capable” devices with less powerful hardware would be amazing, because everything from kitchen timers to multimeters to watches could benefit from just being able to drop an app file on an SD card to customize it.
They always try to make an OS for devices(Usually just Android) but it always sucks because it doesn’t run on “device” hardware and the battery life is abysmal, and the UIs are touch based instead of some kind of 3 or 4 button standard and 128px screen.
Being able to make *real* smart devices without taking a poo on cost and battery life would be amazing.
No keep that away from my esp32 what a way to nicely introduce a big security risk.
If you ask me, is better freertos on a pi after linux on esp32.
I think people misunderstood what this whole thing is supposed to be. From what i understand juicevm was made first as a small risc-v emulator, and then they ported the emulator to the esp32 which means it can run software that supports the risc-v. They didn’t do this whole thing to run linux or whatever, the point is to make a risc-v emulator that is small enough to be ported to anything.
Or atleast thats my understanding from this whole thing.
Let me get this straight. He built a VM on an ESP-32 and then boot Linux on it. Wow. I have enough hassles to get a RISC-V chip burned into a FPGA. So my question: Can he run an Amiga Emulator on his RISC-V? Then one can run an Apple II Emulator in the Amiga Emulator, I can play Epic again and find a use for all my ESP-32s lying around in a box.
…there you go! – fun bottom line challenges the $ one…
Does it run LXC or KVM? So i can virtualize all my ESP32 based IoT gadgets to single physical host saving space and money 🙂
Imagine a beowful cluster of that
In the 1980’s Microware’s OS9 ran fine on an 8-bit CPU, the entire kernel fit into 8k, and the machines booted using about 32k of 512k. What did you get for that? Real-time multitasking, and Unix-like, but not only that, you got up to 15 virtual windows, for command-line, graphics, and whatever, that could be switched by tapping a key.
So, no, it’s not quite a miracle that Linux ran on a 32-bit processor.
Didn’t the OS-9 run on the Motorola MC6809? This was a project came out of Motorola, Austin, TX, around 1978-79. There was a Basic09 also. OS9 was awesome!! It was simply ahead of its time. Also the 6809 had a companion MMU chip. I was working in the Applications Group along with Terry, Ed, Joel, et al. Those were the good ol’ days!!
Yes it was the 6809, that had 16bit registers inside, and designed for high level languages.
The story goes that Motorola wanted to show it off, so they went to Microware. I can’t remember how much Motorola had to do with the design of BASIC09, which was BASIC but had things for more structure. It’s an i terpreter, but you couod do something so the results could run as a program (it’s been years since I last used it.). Microware had previously been offering improvements on Motorola’s monitor for the 6800, or rather, improved monitors that were compatible with Motorola’s.
Microware didn’t stop with BASIC09, the came up with OS-9. Unix-like, not an attempt at cloning it, it was multiuser and multitasking, with pipes and redirection. Any program could run anywhere, no absolute addresses (the 6809 allowed e eruthing to be relative).
There were two levels of OS-9. One could only handle 64K, the other required an MMU, and I’m not sure what the limit was.
Motorola did have the 6829 (I think it was) but I never heard of that MMU being used. SWTP used a 7489 RAM for MMU.
Radio Shack sold OS-9 for their Color Computer, which maybe was its most visible place. The prices were better there. In 1986 or 87, they introduced the CoCo III, which had a better keyboard, more integration, an 80 column video output, and the needed MMU to handle 128K of RAM, 512K if you upgraded. And they sold OS-9 Level II that made use of that RAM, included BASIC09, a steal.
There was customizing, not sure if by Microware or the customer, so OS-9 could be adapted to different MMU (the COCO III had 8K blocks, but others had 2K).
There was a version of OS-9 for the 68000, no MMU there.
Let’s not forget that in the early eighties Microsoft Xenix was a variant of Unix, and ran withiut an MMU.
There is an OS9 community, in the darkest corners of the retro-computing world. I, myself have a Color Computer 3, with a Coco SDC drive emulator. There’s a good CC3 emulator, and plenty of fresh images. The NitrOS9 source is available. There’s a Drive-Wire system for using a Windows computer to serve images as well.
Источник
Лабораторные записки
Сделанное не должно быть забыто.
Настройка Ubuntu для работы с ESP32
На данный момент дебаг можно использовать лишь под Linux. Выбор мой пал на Ubuntu с его стандартным «гномом» (графическая оболочка очень похожа на Windows). В качестве редактора кода будет использоваться Eclipse.
Я исхожу из того, что Ubuntu и Eclipse уже установлены на компьютере, в этой статье мы займёмся их настройкой.
Toolchain
Будем следовать инструкциям с сайта espressif.com
Начинаем наши уроки колдовства:
sudo apt-get update
sudo apt-get install gcc git wget make libncurses-dev flex bison gperf python python-pip python-setuptools python-serial python-cryptography python-future python-pyparsing
После того, как загрузка закончится читаем новое заклинания:
Обновляем переменные системы
/.profile) добавляем новые строчки с новыми значениями системы:
export PATH=»$HOME/esp/xtensa-esp32-elf/bin:$PATH»
export IDF_PATH=
Эти изменения вступят в силу после перезагрузки системы, а для проверки потом можно будет воспользоваться командой «printenv PATH».
ESP-IDF
Пакеты Python
Устанавливаем дополнительные пакеты Python:
python -m pip install —user -r $IDF_PATH/requirements.txt
Подсоединяем ESP32 к компьютеру
В терминале надо будет выполнить команду «ls /dev/tty*» два раза. В первый раз до того, как подключите ESP32 к USB-порту, и второй раз, когда ESP32 будет подключена к вашему компьютеру. После чего посмотрите чем отличаются выводы этой команды в обоих случаях. Скорее всего во втором случае будет дополнительная строчка: «/dev/ttyUSB0».
Если она не появится, попробуйте выполнить следующую команду:
Проект «Привет мир»
Копируем проект из собрания примеров:
/esp
cp -r $IDF_PATH/examples/get-started/hello_world .
Настройка проекта
Переходим внутрь папки с проектом и запускаем инструмент для настройки:
/esp/hello_world
make menuconfig
После чего должно открыться меню. Там вы идёте по следующим пунктам меню: «Serial flasher config» -> «Default serial port», после чего Вы выбираете пункт сохранить, подтверждаете и выходите из меню.
Прошивка
Зажимаем прищепкой кнопку «Boot» и в консоле вводим:
Мониторинг
Команда « make monitor» отобразит данные с модуля. Чтобы выйти из этого режима нажмите Ctr+5.
Настройка Eclipse
Вначале воспользуемся магией esp-idf. Через консоль зайдите в папку с проектом, а там запустите « make menuconfig». (Не забудьте сохранить перед выходом.)
Импорт нового проекта
Теперь запускаем eclipse и импортируем новый проект (уже существующий).
В eclipse идём по следущим пунктам меню: «File» -> «Import…»
В новом окне выбираем «С/С++» -> «Existing Code as Makefile Project» и нажимаем на кнопку «Next >».
Пользуемся кнопкой «Browse…» и выбираем папку с проектом. Ниже в списке тулчанов выбираем «Cross GCC». После чего нажимаем на кнопку «Finish».
Настройка проекта
В окне со списком проектов выбираем наш проект, кликаем по нему правой клавишей мышки, выбираем «Properties».
Теперь навигируем по следующим пунктам меню: «C/C++ Build» -> «Environment».
Нажимаем на кнопку «Add…». В новом окне заполняем оба поля данными «BATCH_BUILD» и «1». После чего жмём на кнопку «OK».
Вновь нажимаем на кнопку «Add…». Новая переменная будет «IDF_PATH», а значение папка, где находится «esp-idf», должно будет что-то на подобии «/home/
Проверьте переменную «PATH», там в том числе и должен быть прописан путь до папки «xtensa-esp32-elf/bin».
По пунктам меню переходим в «C/C++ General» -> «Preprocessor Include Paths». Там выбираем закладку «Providers».
В списке выбираем «CDT Cross GCC Built-in Compiler Settings», и меняем команду («Command to get compiler specs») на xtensa-esp32-elf-gcc $
Потом в списке кликаем по «CDT GCC Build Output Parser» и там меняем команду на «xtensa-esp32-elf-(gcc|g\+\+|c\+\+|cc|cpp|clang)».
После вновь переходим по следующим пунктам меню «C/C++ General» -> «Indexer». Там ставим галочку у «Enable project specific settings», а после убираем галочку с «Allow heuristic resolution of includes».
И под конец кликаем по пункту меню «C/C++ Build». Там выбираем таб «Behavior». Тут ставим галочку у «Enable parallel build».
Сохраняем нажимая на кнопку «Apply and Close».
Сборка в Eclipse
Напоминаю, что до этого в папке с проектом должна быть запущена команда « make menuconfig «.
В меню Eclipse идём по следующему путю: «Project» -> «Build All» (или нажимаем на кнопки «Ctrl+B»).
Примечание:
Если до этого проект был где-то в другом месте собран, то надо его «очистить». («Project» -> «Clean…»)
После этого файлы переподключатся и многие ошибки должны пропасть.
Прошивка в Eclipse
В окне с проектами кликаем правой клавишей мышки по нашему проекту. Там идём по пунктам меню «Build Targets» -> «Create…».
В новом окне в поле «Target name:» вводим «flash». И нажимаем на кнопку «OK».
Теперь можно прошивать. В окне с проектами кликаем правой клавишей мышки по нашему проекту и идём по менюшкам «Build Targets» -> «Build…» (Или жмите на клавиши Shift+F9). В новом окне жмите на кнопку «Build», а так же не забудьте зажать кнопку «Boot» на ESP32.
Источник


