- How to Run Mac Programs on a Windows PC
- Related
- Initial Installations and Downloads
- Installing OS X
- Start up your Mac in Windows or macOS with Boot Camp
- Set the default operating system
- Restart in macOS
- The 5 Best Ways to Run Windows on Your Mac
- Find out which option best fits you
- Boot Camp
- Virtualization
- How to Run Mac On Windows -XP,7,8,8.1,10
- Methods to Dual Boot Mac alongside Windows on PC or Laptop
- Requirements to Run Mac On Windows
- Tools Needed to Install Mac On Windows PC or laptop
- How To Run Mac On Windows [Guide]
- www.makeuseof.com
- Follow MUO
- How to Run Mac Apps on Windows 10
- Step 1: Create a macOS Virtual Machine
- Step 2: Log Into Your Apple Account
- Step 3: Download Your First macOS App
- Step 4: Save Your macOS Virtual Machine Session
- Snapshot or Power Off?
- The Apple Apps Aren’t Very Fast
- Updating Your macOS Virtual Machine
- MacinCloud: A Cloud-Based Alternative?
- Using Apple Apps on Windows 10
- Subscribe To Our Newsletter
- One More Step…!
How to Run Mac Programs on a Windows PC

Related
Apple offers a variety of apps that can be quite alluring to Windows PC users, and you don’t have to buy a brand new machine to try them. Using a program called VirtualBox, you can run Apple’s OS X on your Intel-based PC. This will be a complete version of OS X, allowing you to run Apple-specific software like Mac apps and programs.
Initial Installations and Downloads
Download and install VirtualBox and the VirtualBox Extension Pack (link available in Resources).
Download the Hackboot 1 and Hackboot 2 ISO files (link available in Resources). These ISOs will be used to start the OS X installer and the operating system itself, respectively.
Open VirtualBox and click “New.”
Name the new virtual machine and set the Operating System box to Mac OS X and the Version box to “Mac OS X Server (64 bit).”
Use the slider to allocate RAM to your virtual machine; at least 4GB of RAM is a recommended.
Click “Next” and select “Create New Disk.” The program will return to its main menu.
Right-click the named OS X virtual machine and click “Settings.”
Uncheck the box next to «Enable EFI» in the System tab. EFI is an alternative to BIOS but Windows machines are unable to use EFI to boot in VirtualBox as of August 2013.
Navigate to the Storage tab and click on the CD icon called Empty. Select “Choose a virtual CD/DVD disk file” and select the Hackboot 1 ISO. This sets your virtual machine to boot from Hackboot 1 the first time it starts up.
Installing OS X
Select your OS X virtual machine in the VirtualBox main menu.
Click “Start” in the toolbar and then click the CD icon at the bottom of your screen.
Click “Choose a virtual CD/DVD disk file” and select the ISO disc image of the Mountain Lion version of OS X.
Click on the main screen and press “F5” to refresh the program. An icon in the middle of your screen will now be labeled as “OS X Install DVD.”
Press the “Enter” key on your keyboard to bring up the OS X Installation screen.
Select your language and agree to the operating system’s terms. You will be taken to an installation page that gives you no hard drive installation option.
Click “Utilities” and then click “Disk Utility…” in the VirtualBox toolbar labeled OS X Installer.
Click on the VirtualBox hard drive, navigate to the Erase tab and click “Erase” to clean the virtual hard drive and allow OS X to be installed. None of your data will be lost by erasing the drive.
Close the Disk Utility window and click on the hard drive icon now in the middle of your screen.
Follow the on-screen steps to finish the OS X installation.
Click the CD icon at the bottom of your screen when the installation finishes and you see a black screen with white text. Select the Hackboot 2 ISO so your virtual machine will properly boot when you restart it.
Restart the virtual machine.
Select the Apple icon and press “Enter” on your keyboard.
Follow the final on-screen instructions to setup Mac OS X. You can now use this virtual operating system to run any Mac programs on your Windows PC.
- Since multiple downloads are required, it is best to keep a record of where each is located to make the installation process easier.
- You must allocate a minimum of 2GB of RAM to your virtual machine — though at least 4GB is recommended — but the majority of your RAM should remain allocated to your Windows installation in order to properly run VirtualBox and all of your other software.
Geoff Whiting is a writer and copy editor who has specialized in business technology, consumer electronics and research reports since 2007. He has written for national magazines like «American Shipper» and «BIC Magazine,» has written daily news articles for FierceMarkets, and has crafted research reports for Rider Research, Intel and Spotify.
Start up your Mac in Windows or macOS with Boot Camp
After you use Boot Camp Assistant to install Windows on your Intel-based Mac, you can set the default operating system to either macOS or Windows. The default operating system is the one you want to use when you turn on or restart your Mac.
Set the default operating system
In Windows on your Mac, click  in the right side of the taskbar, click the Boot Camp icon
  , then choose Boot Camp Control Panel.
If a User Account Control dialog appears, click Yes.
Select the startup disk that has the default operating system you want to use.
If you want to start up using the default operating system now, click Restart. Otherwise, click OK.
You can’t change your startup volume to an external drive while you’re using Windows.
To learn how to change the default operating system using macOS, see Get started with Boot Camp.
Restart in macOS
In Windows on your Mac, do one of the following:
Restart using Startup Manager: Restart your Mac, then immediately press and hold the Option key. When the Startup Manager window appears, release the Option key, select your macOS startup disk, then press Return.
If you’re using a Mac notebook computer with an external keyboard, make sure you press and hold the Option key on the built-in keyboard.
Restart using Boot Camp Control Panel: Click in the right side of the taskbar, click the Boot Camp icon , then choose Restart in macOS.
This also sets the default operating system to macOS.
For more information about restarting in macOS, see the Apple Support article Restart your Mac in macOS or Windows.
The 5 Best Ways to Run Windows on Your Mac
Find out which option best fits you
While macOS is made to run using Mac hardware, it is not the only operating system that can run on a Mac computer.
Plenty of other operating systems, including Window and Linux, will work on a Mac device. That makes the Mac among the most versatile computers you can buy. Here’s what we’d use to install Windows on a Mac.
Boot Camp
:max_bytes(150000):strip_icc()/BootCampPartition-5849de633df78c491eaf721b.jpg)
Supports Windows 7, 8.1, and 10
Windows runs natively on Mac hardware for best performance
Requires a full Windows license for the initial install.
Cannot run Windows and Mac OS concurrently.
Perhaps the best-known option for running Windows on a Mac is Boot Camp. Included free with your Mac, Boot Camp allows you to install Windows and then choose between Mac and Windows on startup.
Because Boot Camp runs Windows directly on your Mac’s hardware (there is no virtualization or emulation to be performed) Windows can run at the best possible speed your Mac is able to deliver.
Installing Windows on your Mac is no more difficult than installing Windows on a PC. Apple even provides the Boot Camp Assistant to partition the startup drive to make room for Windows as well as to install all the drivers Windows needs for special Apple hardware.
Virtualization
:max_bytes(150000):strip_icc()/ParallelsWizard-576f016d5f9b585875b92396.jpg)
Run both macOS and a guest OS side-by-side.
Not limited to Windows; a large number of guest operating systems are supported.
Performance tuning and customization needed to achieve the best performance.
May impact the performance of your Mac.
Virtualization allows several operating systems to run on computer hardware at the same time. Virtualization abstracts the hardware layer, making it look like each operating system has its own processor, RAM, graphics, and storage.
Virtualization on the Mac makes use of a software layer called a hypervisor to emulate all of the underlying hardware. As a result, the guest operating system running on the virtual machine does not run as fast as in Boot Camp. But unlike Boot Camp, both the Mac operating system and the guest operating system run at the same time.
There are three primary virtualization apps for Mac:
- Parallels: The first to bring virtualization to the Mac. Parallels supports a wide range of guest OS, including Windows, Linux, and Mac.
- VMWare Fusion: Fusion is the Mac virtualization app offered by VMWare — a leader in virtualization tech. Fusion supports the installation of many different operating systems, including Windows, Linux, and macOS.
- VirtualBox: Oracle supports an open source virtualization app known as VirtualBox. This free virtualization app runs on multiple computer systems, including Mac. Like the other virtualization apps, VirtualBox can be used to run many different operating systems, including Windows, Linux, and macOS.
Installing the virtualization apps is similar to any other Mac app. Guest OS may be more involved with some customization required to obtain the best performance. All three apps have lively forums and support services to help with tuning the performance.
How to Run Mac On Windows -XP,7,8,8.1,10
Mac OS X is an advanced operating system, easy to use and extremely stable when used daily, and sometimes one would prefer to have OSX on PC rather than using Windows 7 or latest Windows 10. Well we have brought something interesting for you – The Guide to Run OSX on Windows which means users can Run Mac OS alongside Windows 7,8,8.1. The aim of installing Mac On Windows will be achieved by Virtual Technology. Many users aspire to buy Apple powered Macbook or any other premium Mac OS X running Apple device, but as we know that all can’t afford it, but atleast one can make ends meet by getting Mac OSx experience on Windows with very few steps.
Here is the glimpse of the result that you will see after you install mac on windows 7 on laptop :
Methods to Dual Boot Mac alongside Windows on PC or Laptop
We actually have two methods by which you will be able to use Mac On Windows PC –
- Buy Apple’s Macbook which will cost you three times you buy a new Window powered Laptop.
- Use this tutorial and little tech work which will cost you nothing but will give you a feeling of self-satisfaction that you have installed Mac OS on PC without spending even a penny.
So I would like to go by procedure 2 as that is very easy and hope you will not mind it 😛 So now the basic question that arises is – How to Run Mac On Windows -XP,7,8,8.1,10 – Follow up this easy tutorial to Install or Run OSX on Windows PC without losing important data or compromising with the Speed of your PC.
Requirements to Run Mac On Windows
The Basic Requirements to Run MAC on PC or Laptop or to Install Mac OS X (10.5 and above) on Virtual Machine VMWare. As VMWare is a virtual machine so it runs alongside windows and unlike other Operating System which we run using VMware, we need little more hardware requirements to run Mac on Vmware.
- 8 GB RAM will give you more than enough speed to cope up with the load of Mac OS on Virtual Machine
- Intel Core i3, i5, i7 will work like a charm.
- 128 GB of storage available on the hard disk to make Mac run without errors on PC.
It is not compulsory to have the above requirements. But lower than this will result into slow performance by the VMWare Workstation while loading MAC. But one can always give it a try to Run OSX on Windows with whatever config you have.
Tools Needed to Install Mac On Windows PC or laptop
To run mac on windows VMware one need to have few essentials that will equip you up to Run MAC OS-X alongside windows smoothly.first and the foremost software we require is the VMWare Virtual Machine itself. Download
First and the foremost software we require is the VMWare Virtual Machine itself. Download VMware Workstation from here.
VMWare is not the only one software required to Install MAC on Windows 7,8 or 10; You require an essential Unlocker as well. Download Latest MaC Unlocker required to Install Mac OSX on Windows from link in the Social Locker Below. [Like/+1/Tweet in order to Download latest Mac Unlocker]
Now Download the Essential VMDK Disk image of OSX that you will be using for running mac on windows from here and extract the same with xnohat as password 🙂
How To Run Mac On Windows [Guide]
- Step 1: Install the latest virtual technology powered VMWare Workstation which can be done easily by following on-screen instructions.
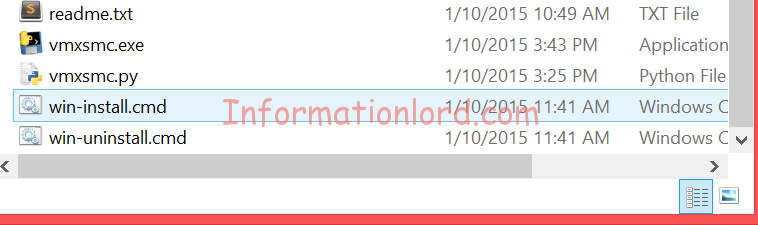
- Step 2: Now the real task starts here- Unzip the Unlocker 2.0.8 which you downloaded from second link and then Run the file named “win-install.cmd“. We would recommend that you run the file as Administrator.

You can hereafter link your CD Drive, Internet connection etc via editing settings of the Virtual Machine! If you are facing any problem to run OS-X on windows or if you want to share your views, do comment here, We will be at your service!
Running Mac OS X on Windows via Dual Boot is not a very hard task as well, but then the procedure mentioned here to Install Mac alongside Windows using VMware is of much use compared to totally formatting the system for Hackintosh. Do let us know if you are looking for Hackintosh tutorials in the comments section. This setup is all for free to get Mac Os X running on your Windows pc with all official udpates.
www.makeuseof.com
Follow MUO
How to Run Mac Apps on Windows 10
Have you found amazing software that’s Mac-only? Here’s how you can run Mac apps on your Windows 10 machine.
Have you ever found a piece of amazing software, only to realize it is Mac-only? With such a vast range of software available for Windows machines, it is a rarity. But, at times, there are just some apps that are better on macOS.
If you have a Windows 10 system, there are very few ways you can run Mac apps on your device. However, it isn’t impossible.
Here’s how you run Mac apps on your Windows 10 machine, for free.
Step 1: Create a macOS Virtual Machine
The easiest way to run Mac apps on your Windows 10 machine is with a virtual machine. While it is the easiest method, it is also a lengthy process. Don’t worry!
The tutorial will guide you through the virtual machine download and installation process, how to download the macOS operating system, and how to install it in the virtual machine.
Once your macOS virtual machine is up and running, return to this tutorial to find out how to install your Mac apps.
Step 2: Log Into Your Apple Account
From here, downloading and using an Apple app is very similar to the regular macOS experience. You still need to log in to your Apple account to download and use apps from the App Store.
Step 3: Download Your First macOS App
Once you sign into your account, you have the run of the App Store. You can install almost any macOS software you want in your virtual machine.
Select the App Store from the Dock at the bottom of the screen. You may well have to enter your Apple ID credentials again.
Browse to the macOS app you want to download. Hit Get, then Install. After installation completes, select Open, and you’re good to go. For instance, here’s an example where I am using Downlink to put an automatically update my background with satellite images.
Step 4: Save Your macOS Virtual Machine Session
Saving the state of your macOS virtual machine session is easy. Why? Well, you’re using a virtual hard disk. The changes you make to the virtual machine save in the virtual hard drive, ready for the next time you want to open the macOS virtual machine and continue using the Apple Apps on your Windows machine.
The best way to shut down the macOS virtual machine is from within macOS itself. Both VirtualBox and VMware have an option to power down on command, but as with physical hardware, this can cause an issue. In fact, a sudden shutdown on your virtual machine can corrupt the virtual drive.
Select the Apple logo in the top-right corner, then Shut Down. The operating system will close in the correct sequence, then the virtual machine will close.
Snapshot or Power Off?
VirtualBox users also have the option to take a snapshot. A snapshot saves the current state of the virtual machine, allowing you to create a string of snapshots as you use Apple apps and the macOS operating system.
Snapshots are handy if you are about to attempt something that might damage your virtual machine. A snapshot allows you to restore the virtual machine to the previous state, picking up where you left off.
The free version of VMware doesn’t have the same functionality, unfortunately.
Still, you shouldn’t rely on a snapshot to back up your virtual machine activities, nor are snapshots suitable as an alternative to shutting down your virtual machine using the macOS Shut Down option.
The Apple Apps Aren’t Very Fast
Your macOS virtual machine isn’t working well? Or are the macOS apps you’re downloading not running as you expect?
The thing to remember is that your virtual machine doesn’t have the same processing power as your host machine. That is because your virtual machine is sharing the system resources of the host. You may well have a very powerful host machine, with incredible amounts of RAM and multi-core Intel i9 processor. But the vast majority don’t.
What I’m saying is, don’t expect too much from the software you install. It isn’t the same as installing and testing on a dedicated Mac.
Updating Your macOS Virtual Machine
If you update your macOS virtual machine on either VirtualBox or VMware, there is a very strong chance your macOS virtual machine will stop working.
Due to the nature of the configuration of the virtual machines, the update process is not the same as a regular macOS installation on proper hardware. The patches and workarounds that make the macOS virtual machine work with a particular version may not work with the update.
Of course, you are welcome to try, but know that you could lose everything in the virtual machine in the process.
MacinCloud: A Cloud-Based Alternative?
Running a macOS virtual machine to use Apple apps isn’t an option for everyone. While you can get away with running your macOS virtual machine with 4GB RAM, your experience will suffer. Older machines certainly won’t handle the requirements.
One alternative is to use a cloud-based macOS environment. macOS cloud environments are predominantly for Apple app and macOS development, but you can still run an app if you wish. The downside is the cost of the cloud service and the latency between your system and the cloud server.
Using Apple Apps on Windows 10
The vast majority of Apple apps now also have Windows equivalents or alternatives. Many have a Linux equivalent, too. All it takes is a quick internet search, and you will find the equivalent app, perhaps saving you a heap of time in the process.
Do also note that using macOS on non-Apple hardware is against Apple’s End User License Agreement (EULA).
Running a macOS virtual machine to test an app is handy, but only if you have the correct hardware and a little time to get it all set up. Of course, you can also consider installing Windows your Mac. Plus, you can use a virtual machine to test other operating systems, too. Here’s a guide on how to install Linux in Windows with a virtual machine.
The company saved on 861,000 tons of metal and reduced its plastic and zinc consumption by removing the charger.

Gavin is the Junior Editor for Windows and Technology Explained, a regular contributor to the Really Useful Podcast, and was the Editor for MakeUseOf’s crypto-focused sister site, Blocks Decoded. He has a BA (Hons) Contemporary Writing with Digital Art Practices pillaged from the hills of Devon, as well as over a decade of professional writing experience. He enjoys copious amounts of tea, board games, and football.
Subscribe To Our Newsletter
Join our newsletter for tech tips, reviews, free ebooks, and exclusive deals!
One More Step…!
Please confirm your email address in the email we just sent you.


