- Start up your Mac in Windows or macOS with Boot Camp
- Set the default operating system
- Restart in macOS
- Как установить Boot Camp и запустить Windows на Mac
- Подготовка к установке Boot Camp
- Запуск Ассистента Boot Camp (для X 10.6 или более поздних версий)
- Раздел жесткого диска
- Установка Windows на Mac
- Установка драйверов Windows
- Выбор операционной системы для запуска
- Install Windows 10 on your Mac with Boot Camp Assistant
- What you need to install Windows 10 on Mac
- How to install Windows 10 on Mac
- 1. Check your Secure Boot setting
- 2. Use Boot Camp Assistant to create a Windows partition
- 3. Format the Windows (BOOTCAMP) partition
- 4. Install Windows
- 5. Use the Boot Camp installer in Windows
- How to switch between Windows and macOS
- Learn more
- How to install Windows 10 on your Mac using a “Boot Camp” external drive via Windows To Go [Video]
- Stuff you’ll need
- Macs that support Windows 10
- Video walkthrough
- Download necessary files and save to desktop
- Open Boot Camp Assistant on macOS
- Connect and format the external drive
- Install and run VMWare Fusion
- Installing the Windows 10 Virtual Machine
- Connect the external drive to the Virtual Machine
- Install Windows on the external drive using WinToUSB
- Boot into Windows from external Boot Camp drive
- Restarting back into macOS
- Conclusion
Start up your Mac in Windows or macOS with Boot Camp
After you use Boot Camp Assistant to install Windows on your Intel-based Mac, you can set the default operating system to either macOS or Windows. The default operating system is the one you want to use when you turn on or restart your Mac.
Set the default operating system
In Windows on your Mac, click  in the right side of the taskbar, click the Boot Camp icon
  , then choose Boot Camp Control Panel.
If a User Account Control dialog appears, click Yes.
Select the startup disk that has the default operating system you want to use.
If you want to start up using the default operating system now, click Restart. Otherwise, click OK.
You can’t change your startup volume to an external drive while you’re using Windows.
To learn how to change the default operating system using macOS, see Get started with Boot Camp.
Restart in macOS
In Windows on your Mac, do one of the following:
Restart using Startup Manager: Restart your Mac, then immediately press and hold the Option key. When the Startup Manager window appears, release the Option key, select your macOS startup disk, then press Return.
If you’re using a Mac notebook computer with an external keyboard, make sure you press and hold the Option key on the built-in keyboard.
Restart using Boot Camp Control Panel: Click in the right side of the taskbar, click the Boot Camp icon , then choose Restart in macOS.
This also sets the default operating system to macOS.
For more information about restarting in macOS, see the Apple Support article Restart your Mac in macOS or Windows.
Как установить Boot Camp и запустить Windows на Mac
С помощью Boot Camp от Apple можно загружать свой Mac изначально в Microsoft Windows, без запуска двух операционных систем одновременно. Это во многом полезно для программ, которые не работают в виртуальных машинах Parallels или в VMWare Fusion.
Подготовка к установке Boot Camp
Для начала обязательно надо убедиться, что все обновления от Apple установлены:
- Перейдите на страницу поддержки Boot Camp, чтобы посмотреть есть ли обновления для вашей модели. Скачать и установить при необходимости;
- В меню Apple откройте Обновление ПО [Software Update] и установите все обновления системы;
- Обязательно создайте резервную копию!
Запуск Ассистента Boot Camp (для X 10.6 или более поздних версий)
- Закройте все открытые приложения, затем в Finder в Программы/Утилиты [Applications/Utilities] запустите Асситент Boot Camp;
- Нажмите кнопку Далее, чтобы начать установку;
- Если необходимо выберите «Загрузить последнее ПО поддержки Windows от Apple» [Download the Windows support software for this Mac];
- Если нужно введите пароль администратора, чтобы начать загрузку ПО. После завершения загрузки, сохраните файлы на жесткий диск или USB.

Раздел жесткого диска
Как только загрузка программного обеспечения закончилась, Ассистент предложит создать раздел для Windows на жестком диске. Надо будет указать сколько свободного места будет отведено данному разделу. Для установки Windows 7 на Mac потребуется не менее 16 ГБ свободного места.
Установка Windows на Mac
- Вставьте установочный диск Windows;
- Нажмите кнопку «Начать установку». Компьютер перезагрузится и запустит установку Windows;
- Следуйте инструкциям мастера установки Windows;
- На экране с вопросом «куда вы хотите установить Windows?» выберите раздел BOOTCAMP;
- Затем выберите Параметры диска (дополнительно) и отформатируйте диск. Лучше не трогать другие настройки.
Установка драйверов Windows
Как только Windows установлена, необходимо установить драйверы, которые были скачены ранее, чтобы все оборудование работало корректно в Windows, в том числе звук, дисплей и беспроводные сетевые адаптеры.
- Извлеките установочный диск Windows;
- Вставьте флэш-накопитель или диск, на который ранее были записаны драйверы для Windows;
- Откройте для просмотра содержимое и в папке Boot Camp дважды щелкните файл setup.exe, чтобы установить драйверы. Далее следуйте инструкциям на экране для завершения установки. Не отменяйте установку!
- После завершения установки перезагрузите компьютер.
Выбор операционной системы для запуска
Теперь на вашем Mac установлены одновременно Windows и Mac OS X, и при загрузке можно выбрать, какую операционную систему использовать. Просто удерживайте нажатой клавишу Option [Alt] при включении компьютера или при перезагрузке, чтобы открыть меню выбора.
Install Windows 10 on your Mac with Boot Camp Assistant
With Boot Camp, you can install Microsoft Windows 10 on your Mac, then switch between macOS and Windows when restarting your Mac.
What you need to install Windows 10 on Mac
- MacBook introduced in 2015 or later
- MacBook Air introduced in 2012 or later
- MacBook Pro introduced in 2012 or later
- Mac mini introduced in 2012 or later
- iMac introduced in 2012 or later 1
- iMac Pro (all models)
- Mac Pro introduced in 2013 or later
The latest macOS updates, which can include updates to Boot Camp Assistant. You will use Boot Camp Assistant to install Windows 10.
64GB or more free storage space on your Mac startup disk:
- Your Mac can have as little as 64GB of free storage space, but at least 128GB of free storage space provides the best experience. Automatic Windows updates require that much space or more.
- If you have an iMac Pro or Mac Pro with 128GB of memory (RAM) or more, your startup disk needs at least as much free storage space as your Mac has memory. 2
An external USB flash drive with a storage capacity of 16GB or more, unless you’re using a Mac that doesn’t need a flash drive to install Windows.
A 64-bit version of Windows 10 Home or Windows 10 Pro on a disk image (ISO) or other installation media. If installing Windows on your Mac for the first time, this must be a full version of Windows, not an upgrade.
- If your copy of Windows came on a USB flash drive, or you have a Windows product key and no installation disc, download a Windows 10 disk image from Microsoft.
- If your copy of Windows came on a DVD, you might need to create a disk image of that DVD.

![]()
How to install Windows 10 on Mac
To install Windows, use Boot Camp Assistant, which is included with your Mac.
1. Check your Secure Boot setting
Learn how to check your Secure Boot setting. The default Secure Boot setting is Full Security. If you changed it to No Security, change it back to Full Security before installing Windows. After installing Windows, you can use any Secure Boot setting without affecting your ability to start up from Windows.
2. Use Boot Camp Assistant to create a Windows partition
Open Boot Camp Assistant, which is in the Utilities folder of your Applications folder. Follow the onscreen instructions.
- If you’re asked to insert a USB drive, plug your USB flash drive into your Mac. Boot Camp Assistant will use it to create a bootable USB drive for Windows installation.
- When Boot Camp Assistant asks you to set the size of the Windows partition, remember the minimum storage-space requirements in the previous section. Set a partition size that meets your needs, because you can’t change its size later.
3. Format the Windows (BOOTCAMP) partition
When Boot Camp Assistant finishes, your Mac restarts to the Windows installer. If the installer asks where to install Windows, select the BOOTCAMP partition and click Format. In most cases, the installer selects and formats the BOOTCAMP partition automatically.
4. Install Windows
Unplug any external devices that aren’t necessary during installation. Then click Next and follow the onscreen instructions to begin installing Windows.
5. Use the Boot Camp installer in Windows
After Windows installation completes, your Mac starts up in Windows and opens a ”Welcome to the Boot Camp installer” window. Follow the onscreen instructions to install Boot Camp and Windows support software (drivers). You will be asked to restart when done.
- If the Boot Camp installer never opens, open the Boot Camp installer manually and use it to complete Boot Camp installation.
- If you have an external display connected to a Thunderbolt 3 port on your Mac, the display will be blank (black, gray, or blue) for up to 2 minutes during installation.
How to switch between Windows and macOS
Restart, then press and hold the Option (or Alt) ⌥ key during startup to switch between Windows and macOS.
Learn more
If you have one of these Intel-based Mac models using OS X El Capitan or later, you don’t need a USB flash drive to install Windows:
- MacBook introduced in 2015 or later
- MacBook Air introduced in 2017 or later 3
- MacBook Pro introduced in 2015 or later 3
- iMac introduced in 2015 or later
- iMac Pro (all models)
- Mac Pro introduced in late 2013 or later
For more information about using Windows on your Mac, open Boot Camp Assistant and click the Open Boot Camp Help button.
1. If you’re using an iMac (Retina 5K, 27-inch, Late 2014) or iMac (27-inch, Late 2013) or iMac (27-inch, Late 2012) with a 3TB hard drive and macOS Mojave or later, learn about an alert you might see during installation.
2. For example, if your Mac has 128GB of memory, its startup disk must have at least 128GB of storage space available for Windows. To see how much memory your Mac has, choose Apple menu > About This Mac. To see how much storage space is available, click the Storage tab in the same window.
3. These Mac models were offered with 128GB hard drives as an option. Apple recommends 256GB or larger hard drives so that you can create a Boot Camp partition of at least 128GB.
Information about products not manufactured by Apple, or independent websites not controlled or tested by Apple, is provided without recommendation or endorsement. Apple assumes no responsibility with regard to the selection, performance, or use of third-party websites or products. Apple makes no representations regarding third-party website accuracy or reliability. Contact the vendor for additional information.
How to install Windows 10 on your Mac using a “Boot Camp” external drive via Windows To Go [Video]
— Aug. 31st 2017 7:04 am PT
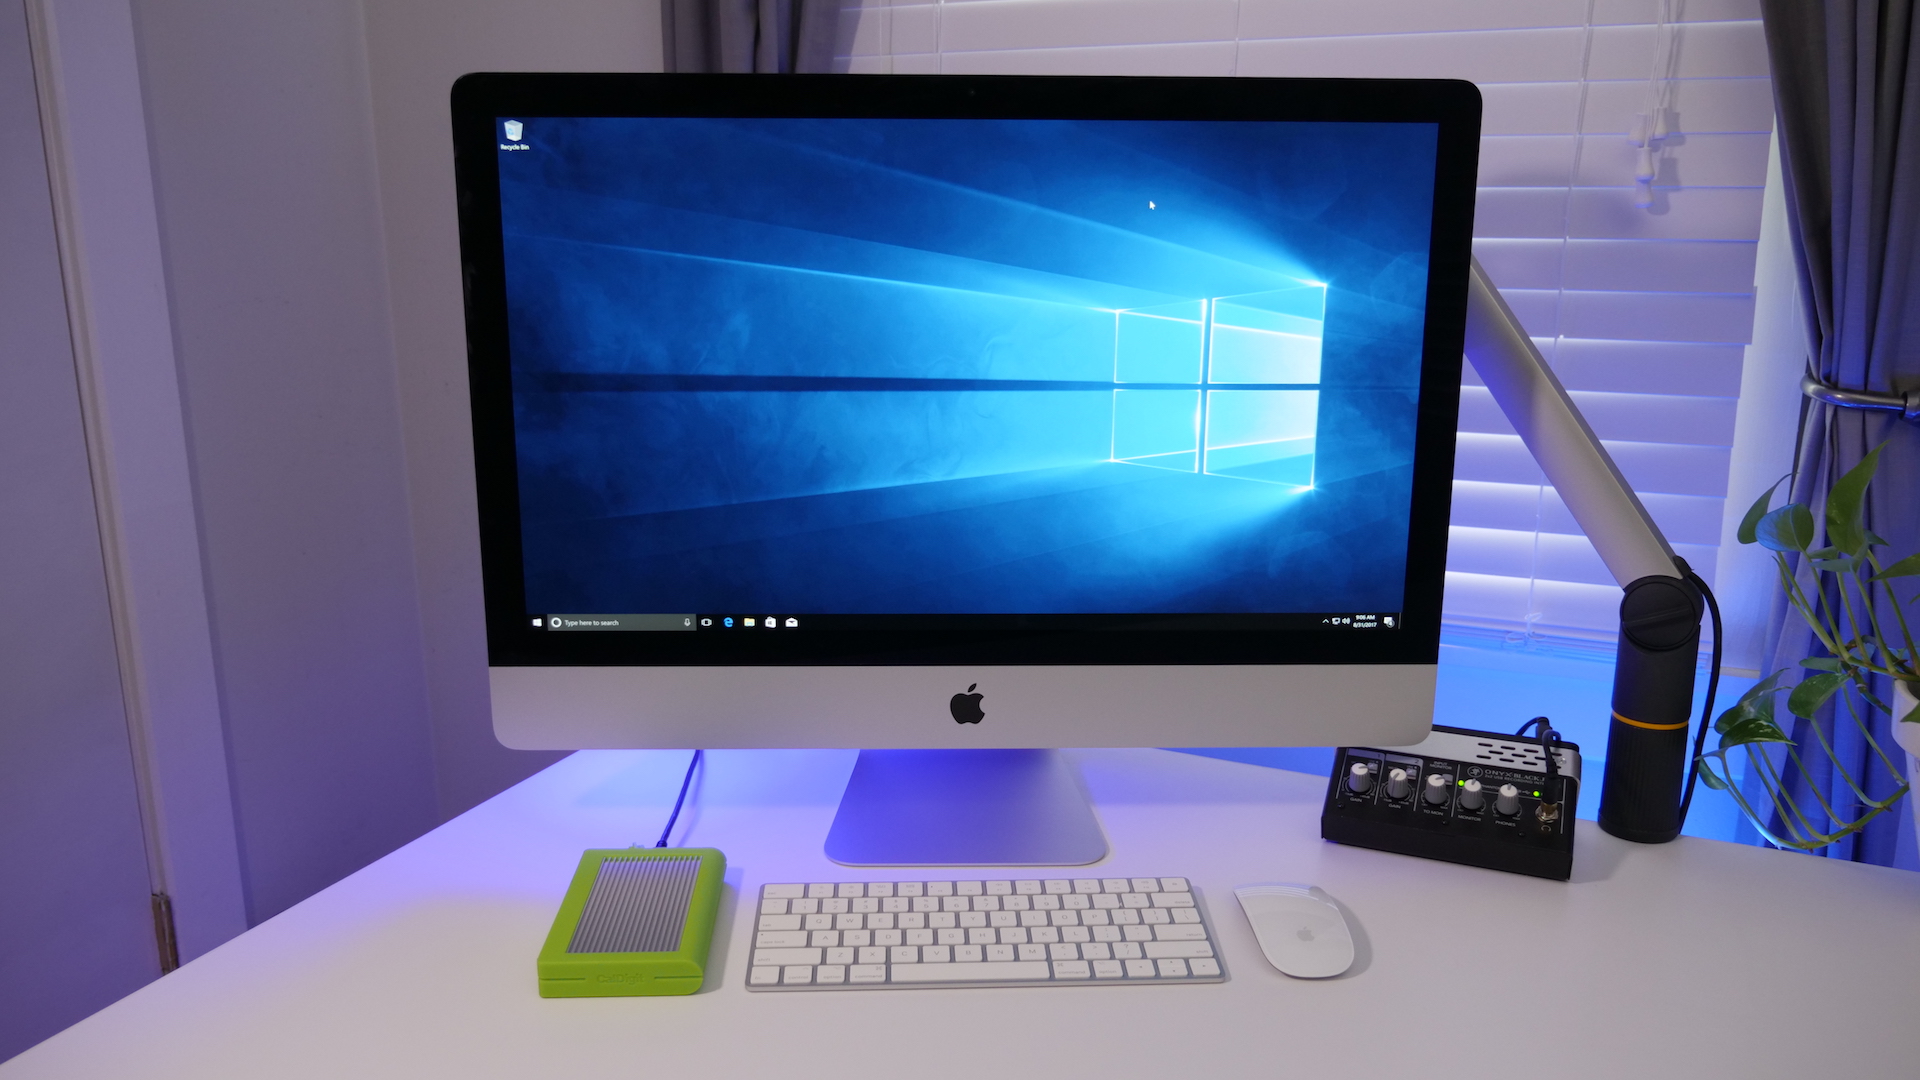
Ever since I wrote about installing Windows 10 on a Mac earlier this year, I’ve received tons of questions about installing Windows 10 on an external drive using Boot Camp drivers. The truth is, this is a workaround using Windows To Go, and the process for doing so is a bit more in-depth than it is for installing proper Boot Camp on your Mac’s internal disk, but it’s still very easy to do, and only takes about 30-40 minutes.
In this hands-on step-by-step walkthrough, we show you how to install Windows 10 on your Mac using an external drive. Watch our video inside to see how.
Note: Before you do anything, back up your Mac just to be safe.
Stuff you’ll need
- An eligible Mac
- An external drive (preferably an SSD like the speedy Samsung T5)
- Windows 10 ISO
- VMWare Fusion (30-Day Trial)
- WinToUSB
Macs that support Windows 10
- MacBook Pro (2012 and later)
- MacBook Air (2012 and later)
- MacBook (2015 and later)
- iMac (2012 and later)
- Mac mini (2012 and later)
- Mac mini Server (Late 2012)
- Mac Pro (Late 2013)
Video walkthrough
Download necessary files and save to desktop
Step 01: Venture over to Microsoft’s Download Windows 10 Disc Image (ISO File) page to download Windows 10. For Edition, choose Windows 10 under the Windows 10 Anniversary Update heading, and click Confirm. Next, select the desired language, and click Confirm. Finally, click the 64-bit Download button to commence the Windows 10 ISO download.
Step 02: Download VMWare Fusion and save to desktop.
Step 03: Download the latest version of WinToUSB from Hasleo Software and save to desktop. This is a Windows executable that will be used later in the VM environment.
Open Boot Camp Assistant on macOS
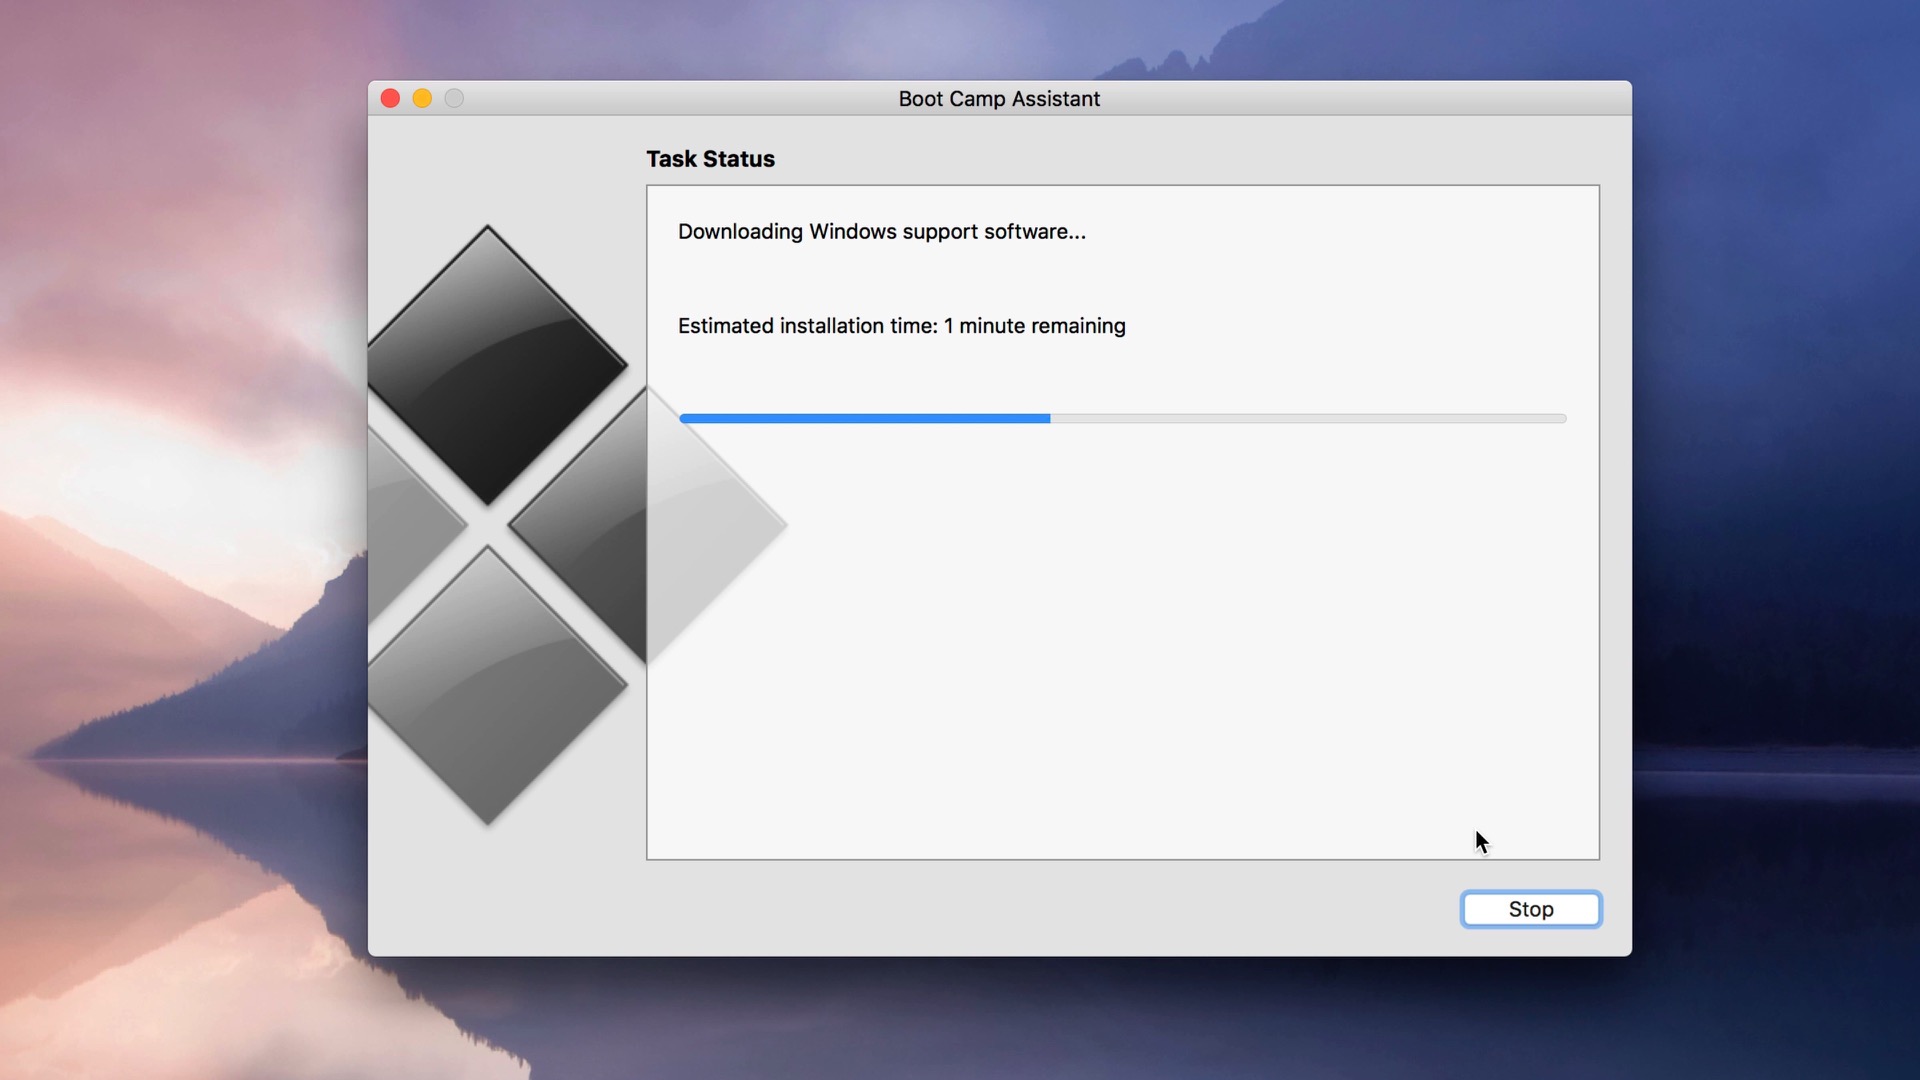
Step 04: Open Finder and go to Applications → Utilities → Boot Camp Assistant. In the menu bar, click Action → Download Windows Support Software. Choose Desktop for download location and click Save.
Step 05: Once the download process is completed, you will be asked to enter your administrator password to complete the process. Once Boot Camp Assistant reports that the Windows support software has been saved, and the WindowsSupport folder is on the desktop, close Boot Camp Assistant.
Connect and format the external drive
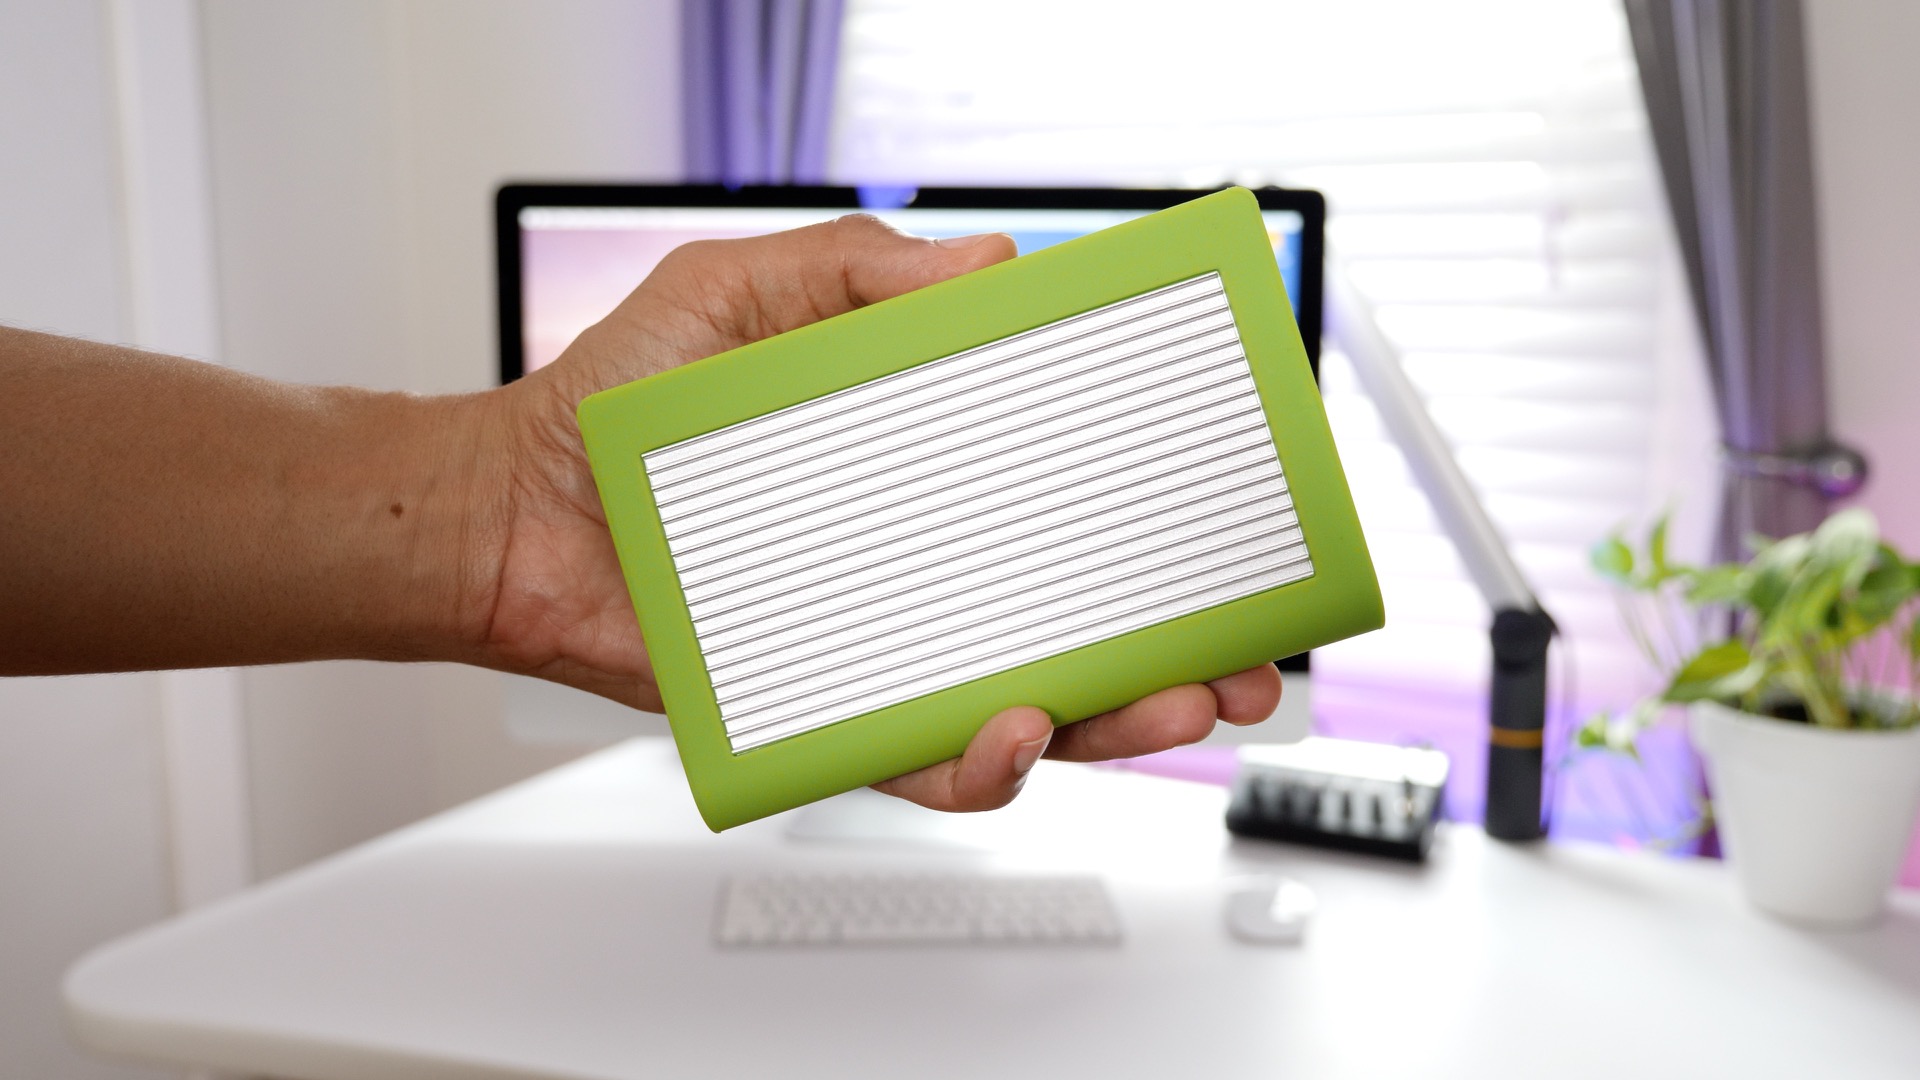
Step 06: Connect the external drive that you wish to use for Windows on your Mac. Keep in mind that everything on the external drive will be erased, so ensure that anything you wish to save is backed up before proceeding.
Step 07: Open Finder and go to Applications → Utilities → Disk Utility.
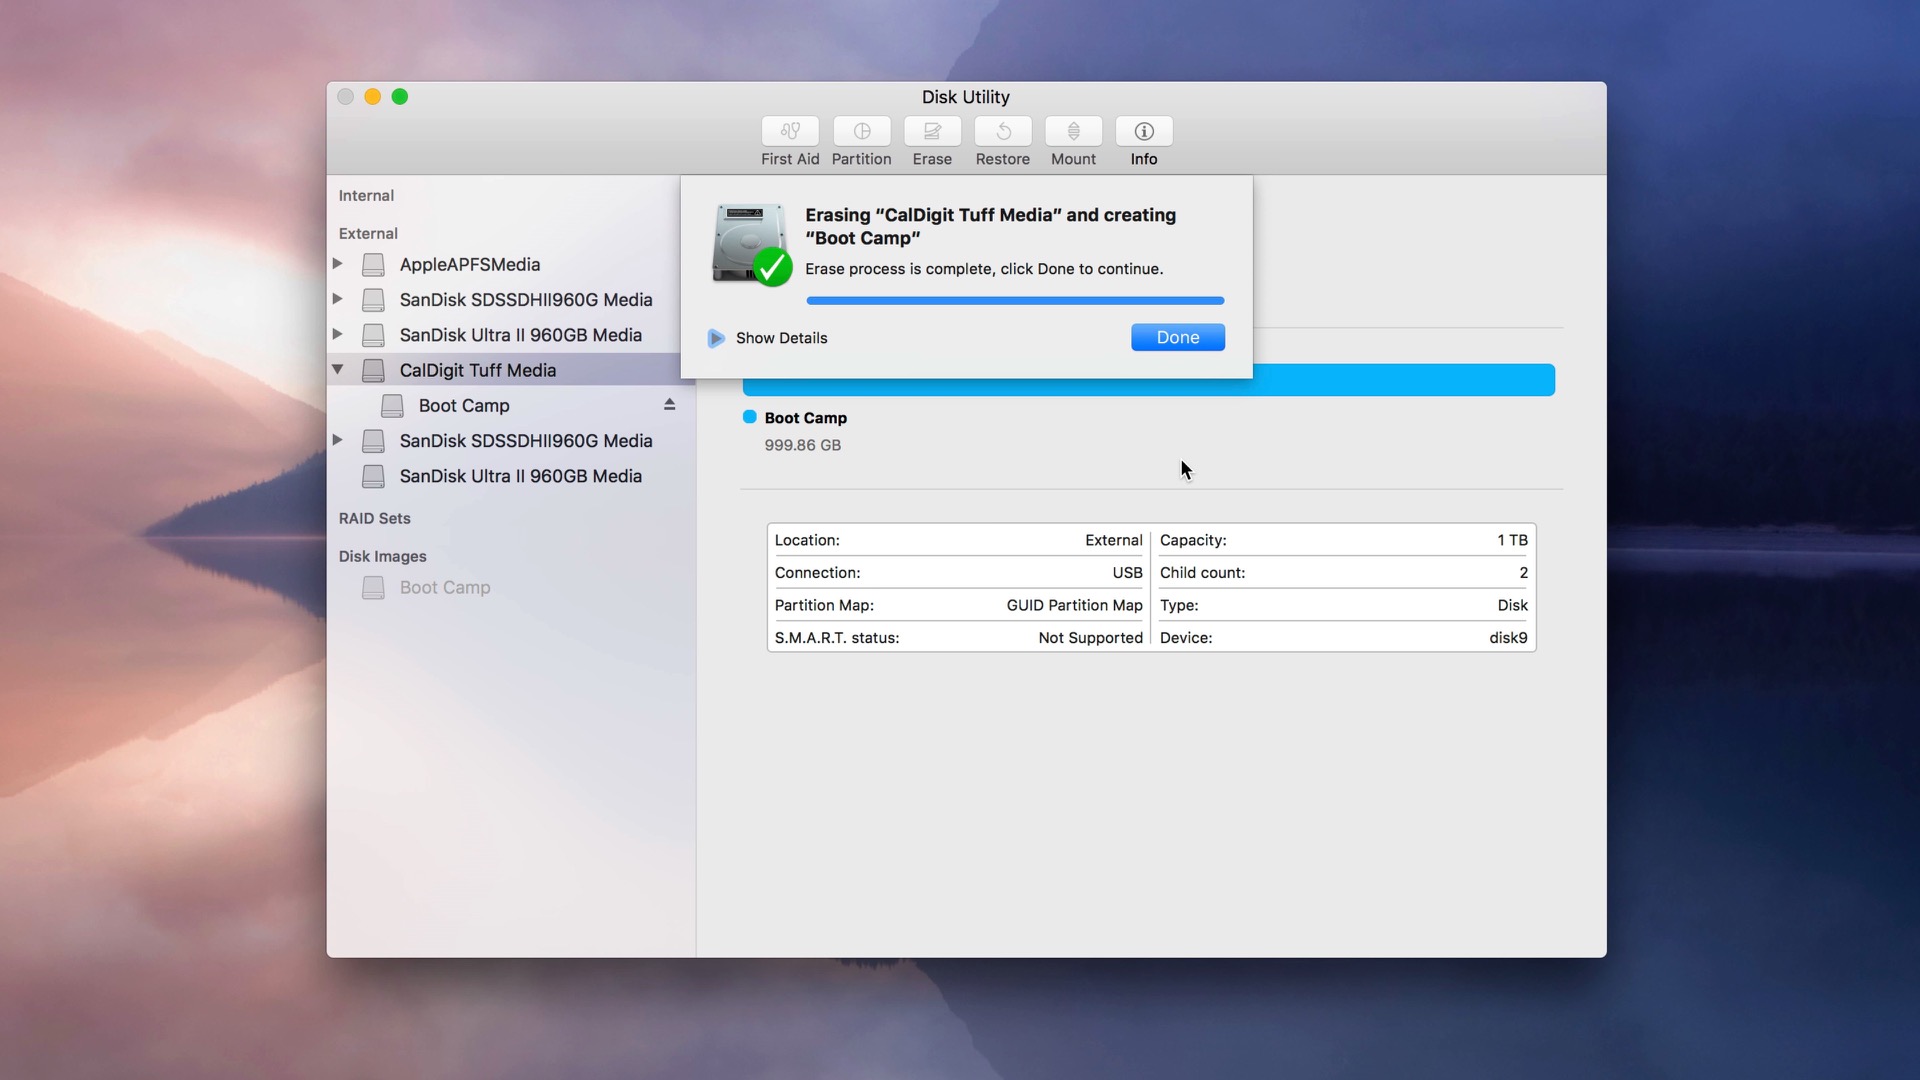
Step 08: Select the external drive under the External list on the left-hand side. Be sure to select the correct drive! Click the Erase button, and use the following settings:
- Name: Boot Camp
- Format: Mac OS Extended (Journaled)
- Scheme: GUID Partition Map
Click Erase to confirm. The disk will be erased and formatted, which will prepare it to be used in later steps. Close Disk Utility.
Install and run VMWare Fusion
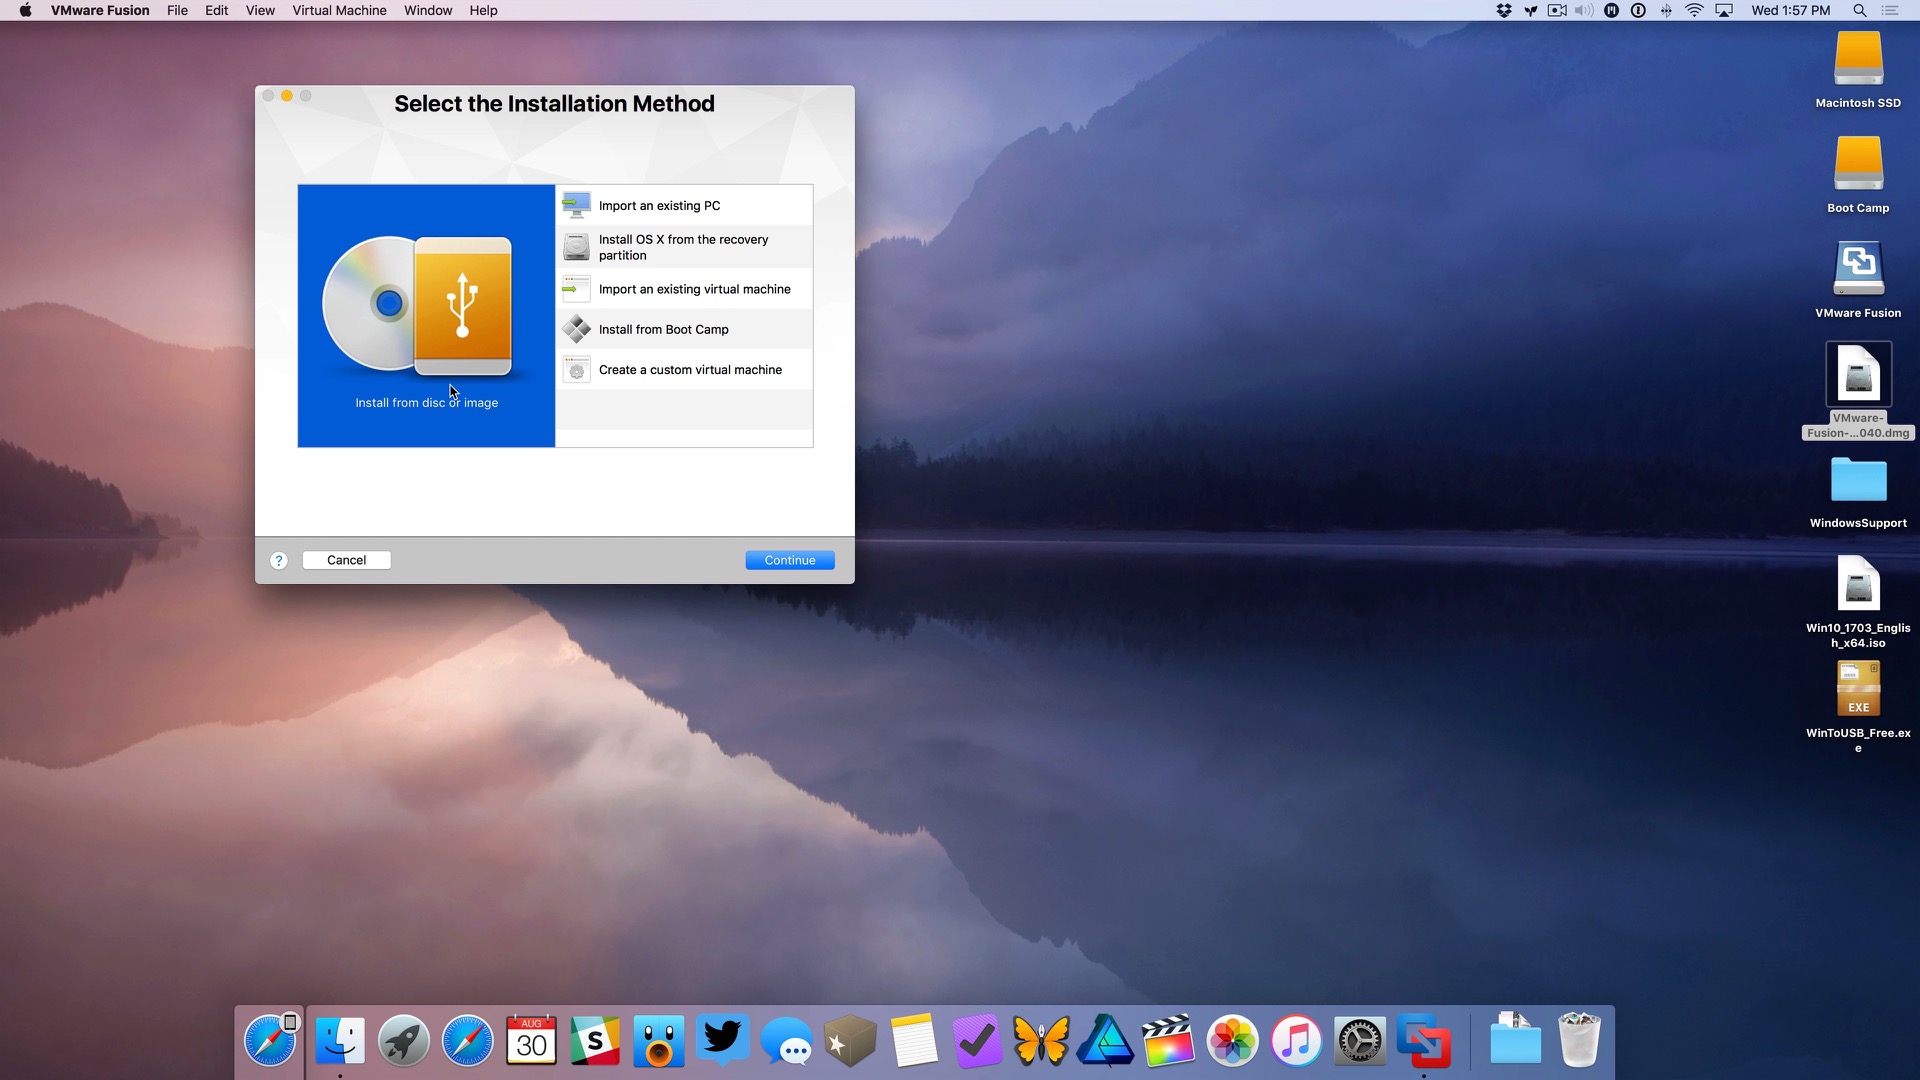
Step 09: Install and run VMWare Fusion. VMWare allows for a 30-day trial period.
Step 10: On the Select the Installation Method page, select Install from disc or image and click Continue.
Step 11: Drag the Windows 10 ISO image from the desktop to the Create a New Virtual Machine page and click Continue.
Step 12: On the Microsoft Windows Easy Install page, select Windows 10 Pro in the drop down box at the bottom of the page and click Continue.
Step 13: Click Continue Without Key when asked about a Windows Product Key.
Step 14: On the Integration page choose More Isolated and click Continue.
Step 15: On the Summary page, click Finish and click Save to save the virtual machine instance. This will commence the Windows 10 installation.
Installing the Windows 10 Virtual Machine
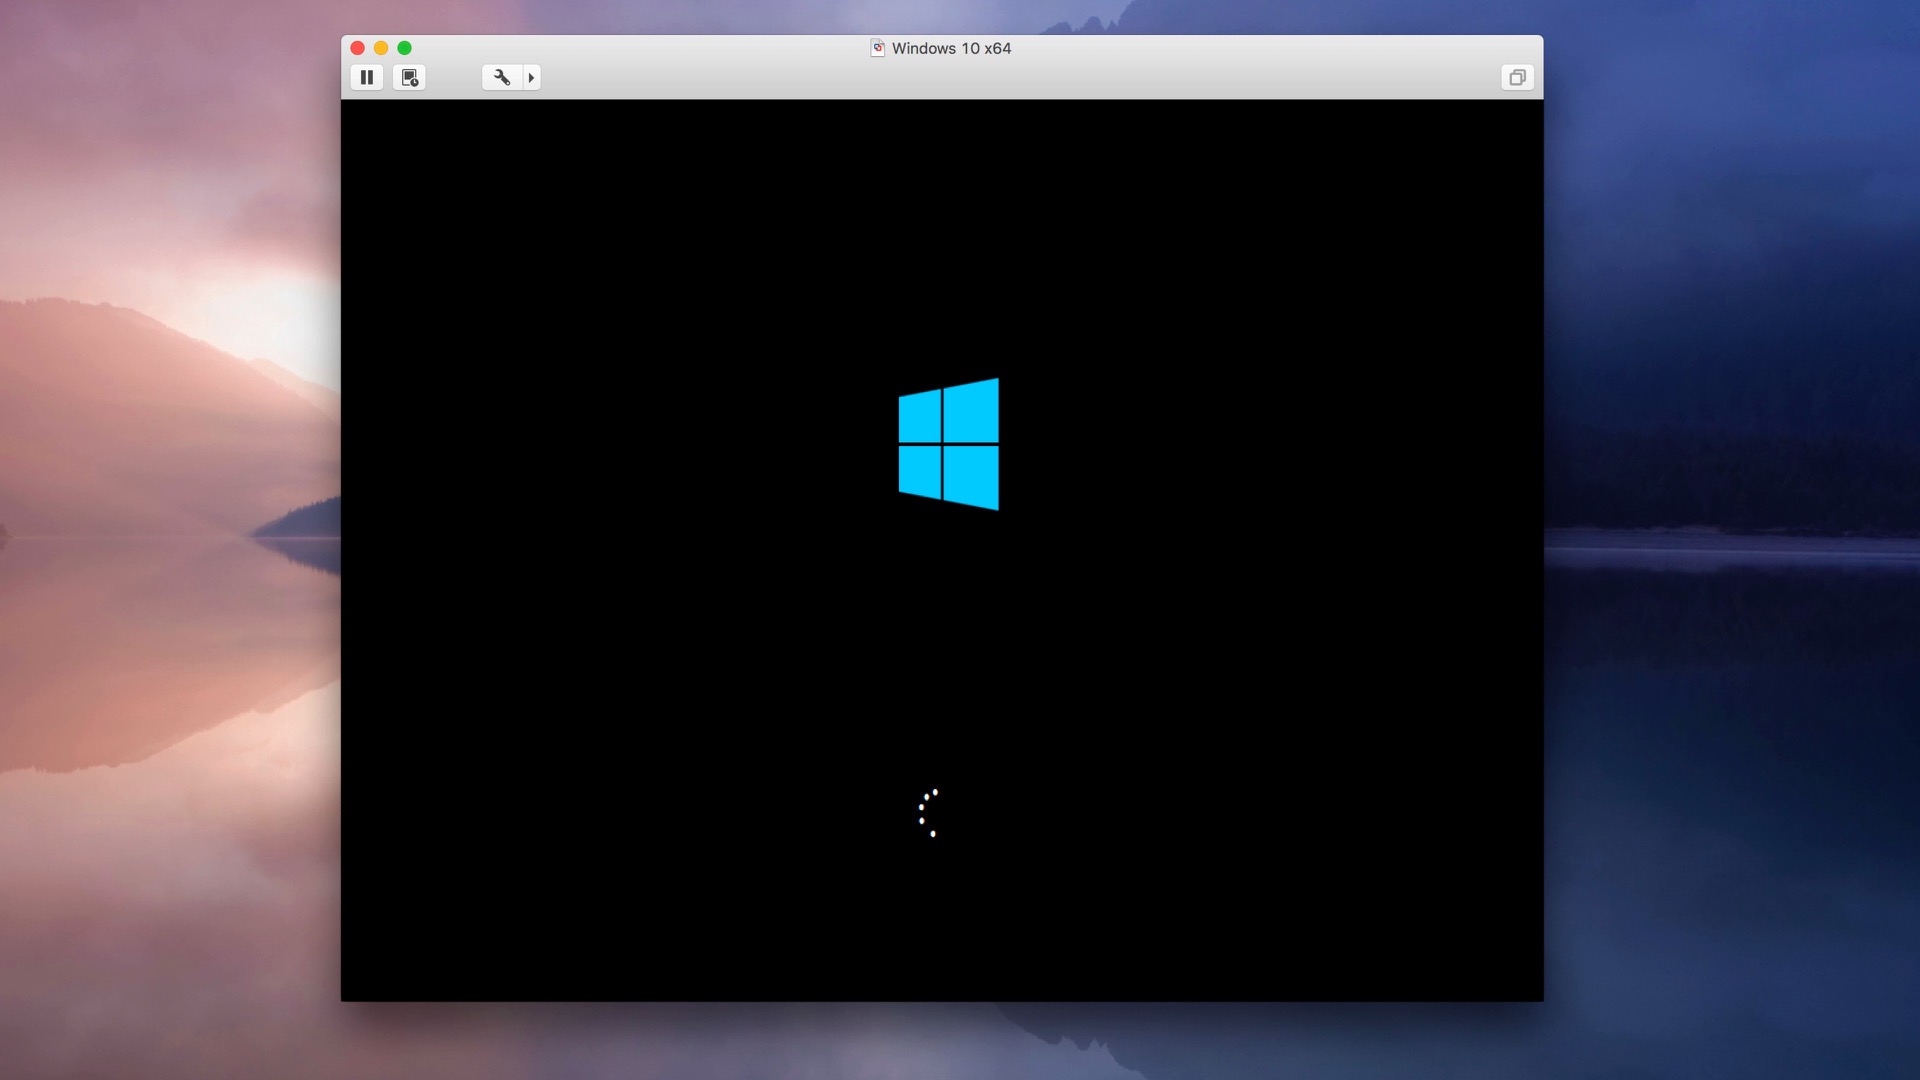
One of the benefits of using VMWare is that the Windows installation is fully automated. Windows should automatically begin the installation process, and will reboot a couple of times during the installation. Once the installation is completed, you should be at the Windows desktop.
Connect the external drive to the Virtual Machine
Step 16: Eject the external drive via the macOS Finder and unplug and replug the drive’s connector cable to your Mac.
Step 17: VMWare Fusion should prompt about the drive once it’s detected. Select Connect to Windows.
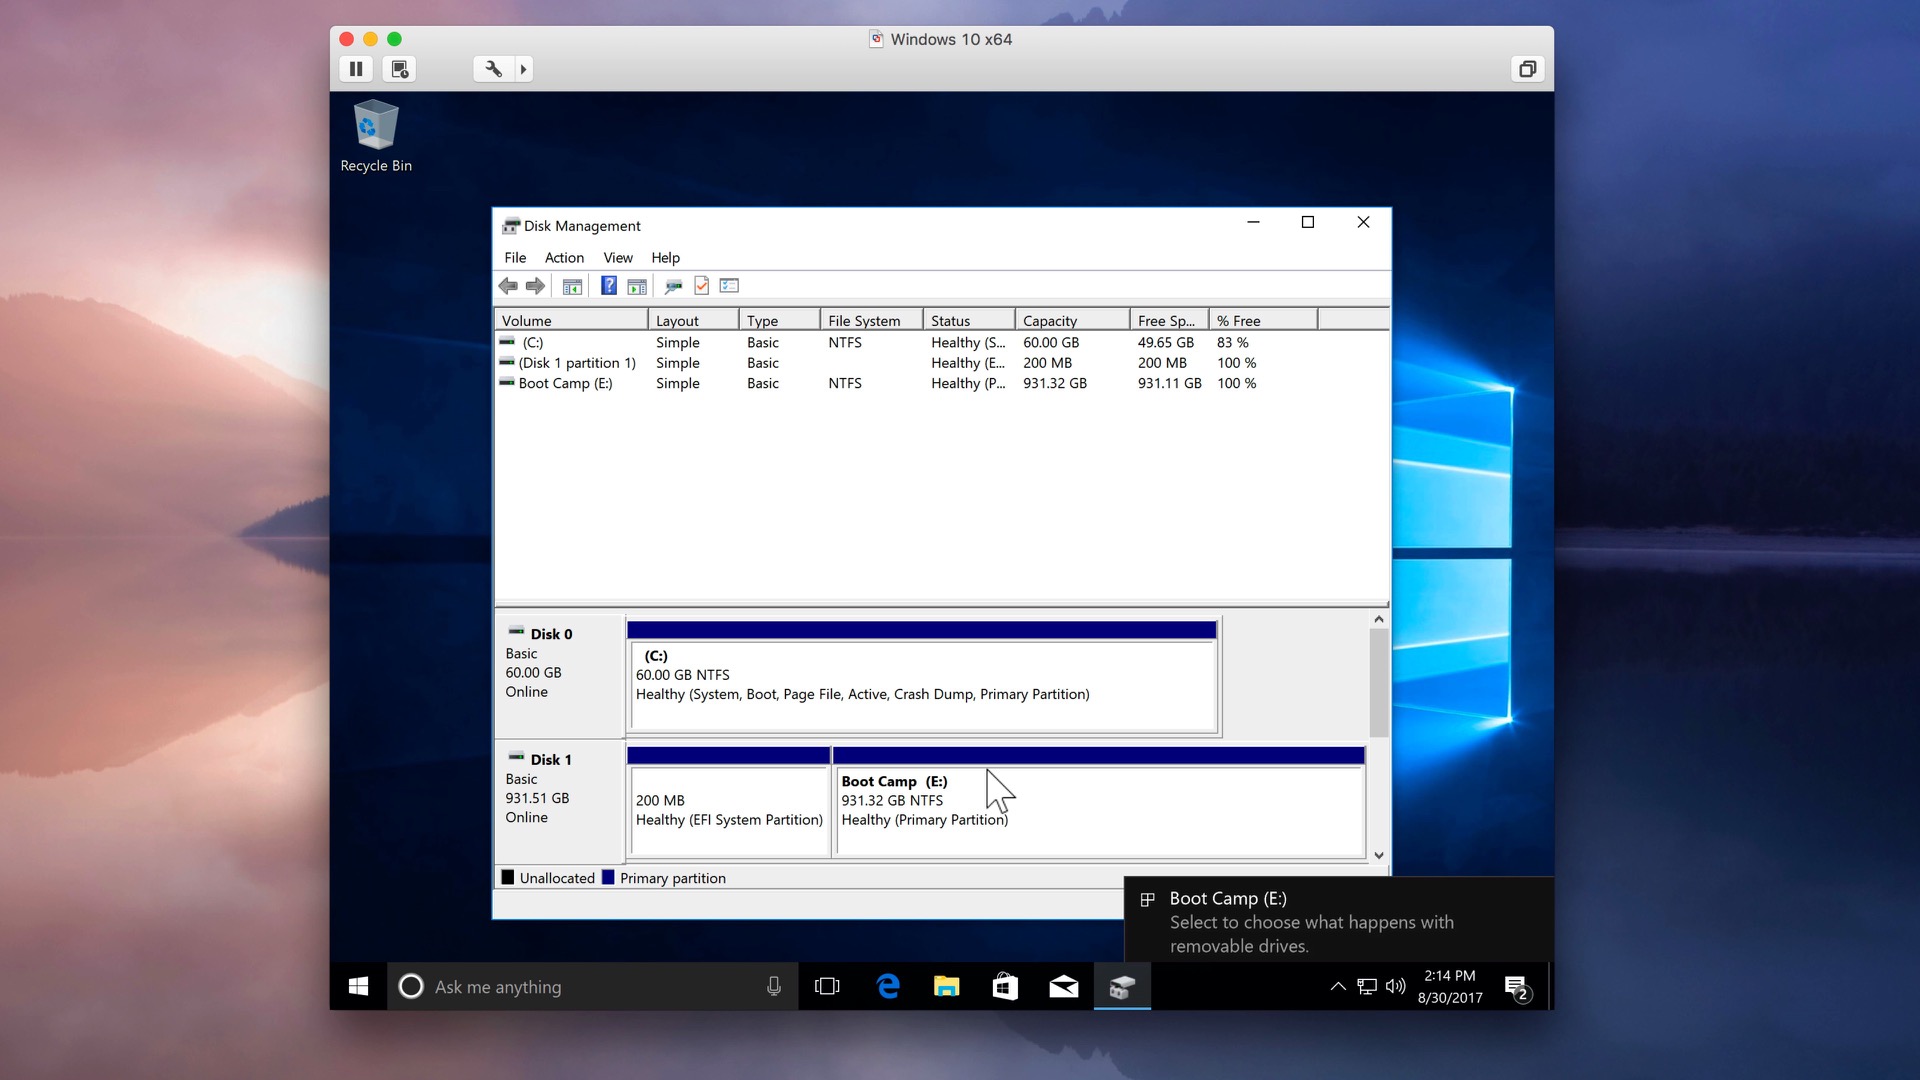
Step 18: Right click on the Windows Start Menu and select Disk Management.
Step 19: Find your disk, which should be broken up into two partitions. Right click on the large primary partition, and select Delete Volume → Yes.
Step 20: Right click on the drive’s Unallocated space and select New Simple Volume.
Step 21: On the Welcome to New Simple Volume Wizard, click Next → Next → Next and in the Volume Label box, type Boot Camp and ensure File System is set to NTFS. Click Next → Finish.
Step 22: Close the Disk Management utility.
Install Windows on the external drive using WinToUSB
Step 23: Mount the Windows 10 ISO by clicking Virtual Machine in the menu bar and selecting CD/DVD (SATA) → Choose Disk or Disc Image. Select the Windows 10 ISO on the Desktop and click Open. Now click Virtual Machine in the menu bar again and select CD/DVD (SATA) → Connect CD/DVD to mount the Windows 10 ISO.
Step 24: Drag the WinToUSB installer and the WindowsSupport folder from the macOS desktop to the virtual machine Windows desktop.
Step 25: Install and run WinToUSB.
Step 26: On the WinToUSB interface select the CD Drive and select the Windows 10 ISO image (CCSA_X64FRE_EN-US-DV5) in the CD/DVD drop-down menu.
Step 27: Select Windows 10 Pro and click Next.
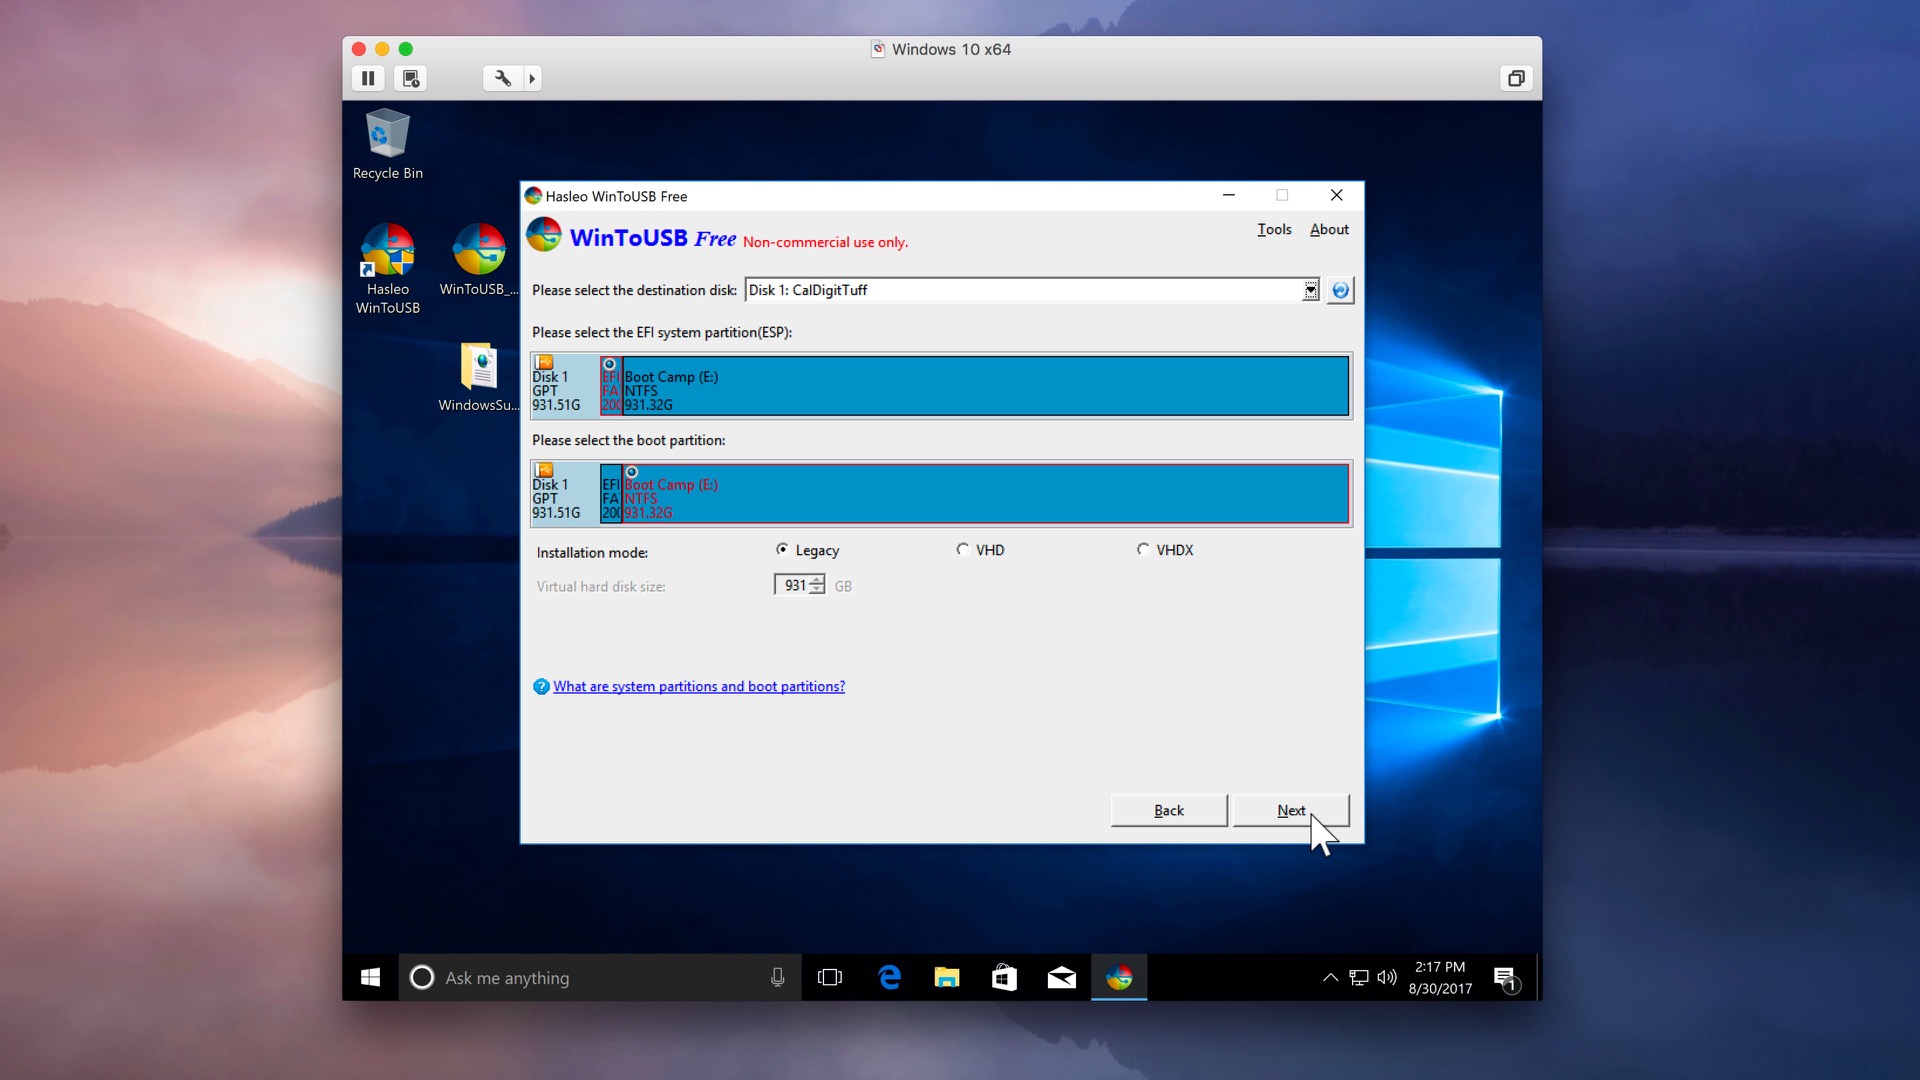
Step 28: For destination disk select your external drive from the drop-down menu and click Next.
Step 29: For EFI system partition, select the 200MB EFI partition radio button. For boot partition select the larger Boot Camp partition. Click Next and the installation will begin. Be patient, as it will take several minutes to complete the Windows installation on the external drive.
Step 30: After the installation is complete, click Home and close the WinToUSB window.
Step 31: Open the Boot Camp drive in Windows Explorer, and drag the WindowsSupport folder from the Windows desktop to the Boot Camp drive.
Step 32: Shut down the virtual machine instance, and quit VMWare Fusion.
Boot into Windows from external Boot Camp drive

Step 33: Open System Preferences → Startup Disk.
Step 34: Click the Lock in the bottom left-hand corner, and enter your Mac’s administrator password.
Step 35: Select the Boot Camp Windows option, and click the Restart button to reboot the Mac and boot into Windows Boot Camp.
Step 36: Upon reboot, you should see the Windows logo and initial setup sequences. You’ll need to go back through the initial setup again like we did when setting up the virtual machine. However, this time you’ll need to interact with the installation for submitting things like username, password, etc.
Step 37: After setup is complete, you should see the Windows 10 desktop. Open the Boot Camp drive in Windows Explorer and open the WindowsSupport folder. Open the BootCamp folder and run the Setup app to install the Boot Camp drivers. The installation process may take a few minutes, so be patient.
Step 38: Once all of the drivers are installed, click the Finish button to restart your Mac back into Windows.
Note: Depending on your machine’s resolution, you may need to adjust the custom scaling by right-clicking the desktop and selecting Display Settings. For the 5K iMac at native resolution I set custom scaling to 300%. Your scaling preference may differ depending on the type of Mac you’re using. Once you Apply the scaling changes, you’ll need to sign out and sign back in for the changes to take effect.
Restarting back into macOS
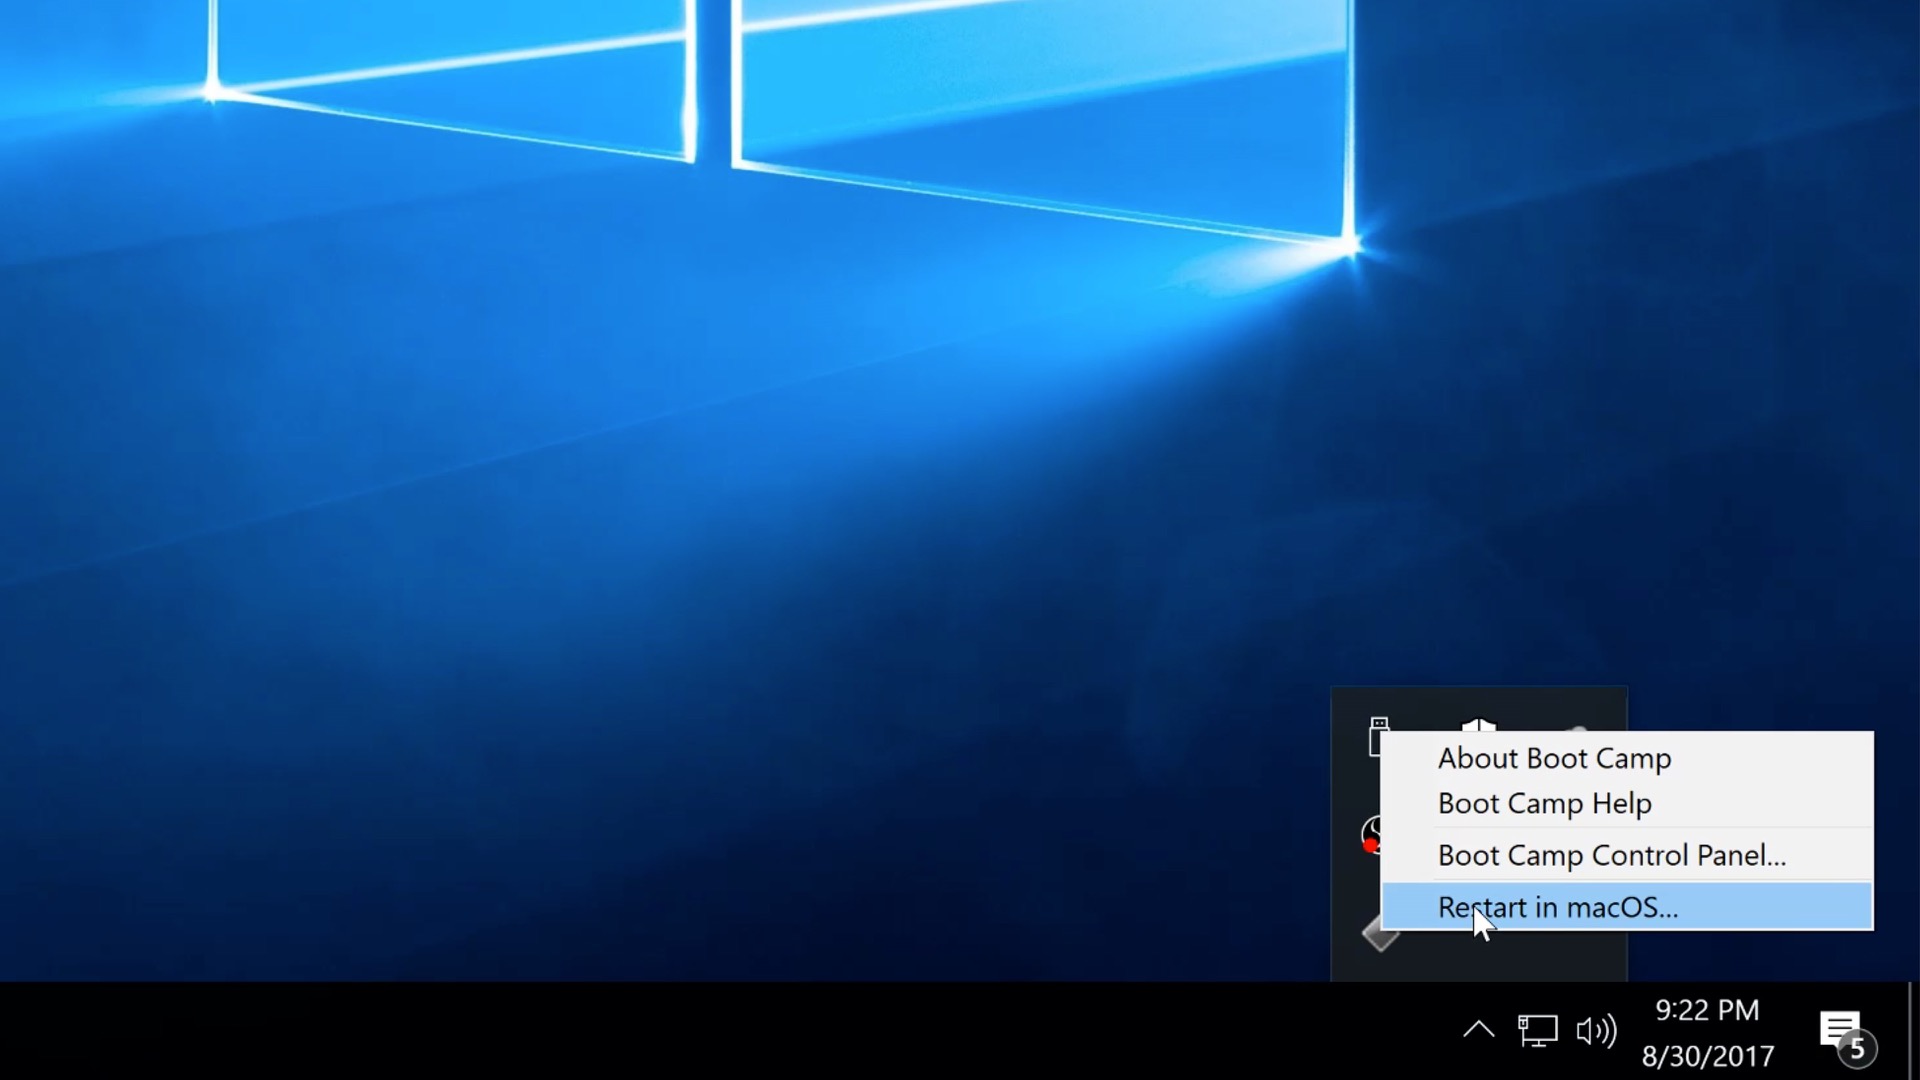
Whenever you wish to restart in macOS, click the Boot Camp shortcut in the System Tray and select Restart in macOS.
You can also hold the Option (⌥) key when restarting your Mac to be presented with a selection of boot options. There you can choose between your Boot Camp installation and macOS installation.
Conclusion
That may seem like a lot of steps, but the most difficult thing about this installation is the waiting period required by the Windows installs. All in all, you should be able to complete this installation in around 30-40 minutes or so.
Installing Windows on an external drive a is a good choice because it allows you to keep Windows and macOS on completely separate drives, thus it saves precious internal space on your main internal drive.
Although I use Windows occasionally, I don’t use it enough to require a permanent installation on my internal macOS drive. Hence, using an external drive for Windows Boot Camp is the perfect solution for me.
That acknowledged, some of you may still wish to install Windows on your Mac via Boot Camp using the traditional method. If so, we have a hands-on video walkthrough that guides you through step-by-step.
FTC: We use income earning auto affiliate links. More.


