- Открываем EXE-файлы на macOS
- Запуск EXE на macOS
- Способ 1: Установка Windows посредством Boot Camp
- Способ 2: Виртуальная машина
- Способ 3: Wine
- Заключение
- The 5 Best Ways to Run Windows on Your Mac
- Find out which option best fits you
- Boot Camp
- Virtualization
- How to Run Windows Programs on Mac
- Emulation
- Virtualization
Открываем EXE-файлы на macOS
Запуск EXE на macOS
Естественно, сами по себе исполняемые файлы для «окон» на Маке не заработают: ОС от Майкрософт и Эппл слишком разные. Тем не менее, существуют возможные варианты работы с ними, а именно установка Windows второй системой посредством Boot Camp, использование виртуальной машины или эмулятора Wine.
Способ 1: Установка Windows посредством Boot Camp
Изначально компьютеры Apple работали на процессорах архитектур RISC и MIPS, аппаратно несовместимых с архитектурой x86-64, но вот уже десять лет как в MacBook и iMac используются решения от Intel, что позволяет установить на эти машины ОС Виндовс. Причём последнее поддерживается вполне официально – не так давно Эппл начали встраивать в свои настольные продукты инструмент Boot Camp, предоставляющий возможность инсталляции операционной системы от Майкрософт в качестве второй рабочей. Один из наших авторов подготовил инструкцию по его использованию, ознакомиться с которой вы можете по ссылке далее.

Этот вариант является идеальным решением нашей сегодняшней задачи: доступны все аппаратные возможности машины и программные особенности Виндовс, что позволяет без проблем работать со всеми совместимыми программами. Однако этот метод требует перезагрузки компьютера, а также отнимает приличный объём пространства на накопителе.
Способ 2: Виртуальная машина
Следующий метод запуска EXE-файлов на макОС – инсталляция виртуальной машины с последующей установкой в неё одной из систем от Майкрософт. Таковых для ОС от Apple существует несколько, лучшие из них представлены в отдельном обзоре.
Работу с этим ПО покажем на примере программы Parallels Desktop.
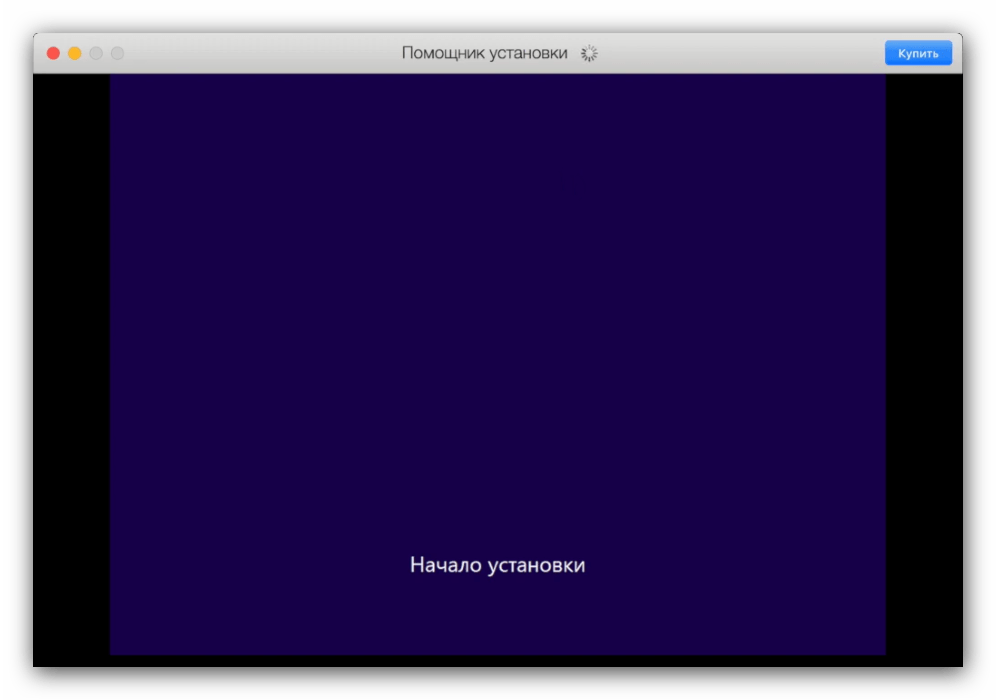
- Загрузите приложение и установите его. После окончания процедуры потребуется инсталлировать версию Windows в среду. Доступны два варианта – автоматический, посредством самого приложения, запускаемый по нажатию кнопки «Установить Windows». При этом будет загружена новейшая версия «десятки».

Нажатие на кнопку «Пропустить» позволит вам самостоятельно поставить нужную версию Виндовс с образа.
Для автоматической установки ОС нажмите указанную в предыдущем шаге кнопку и подождите, пока программа самостоятельно скачает, инсталлирует и сконфигурирует систему.
Вариант вручную подразумевает использование бесплатных тестировочных образов Microsoft, загрузочных флешек либо ISO-файла.
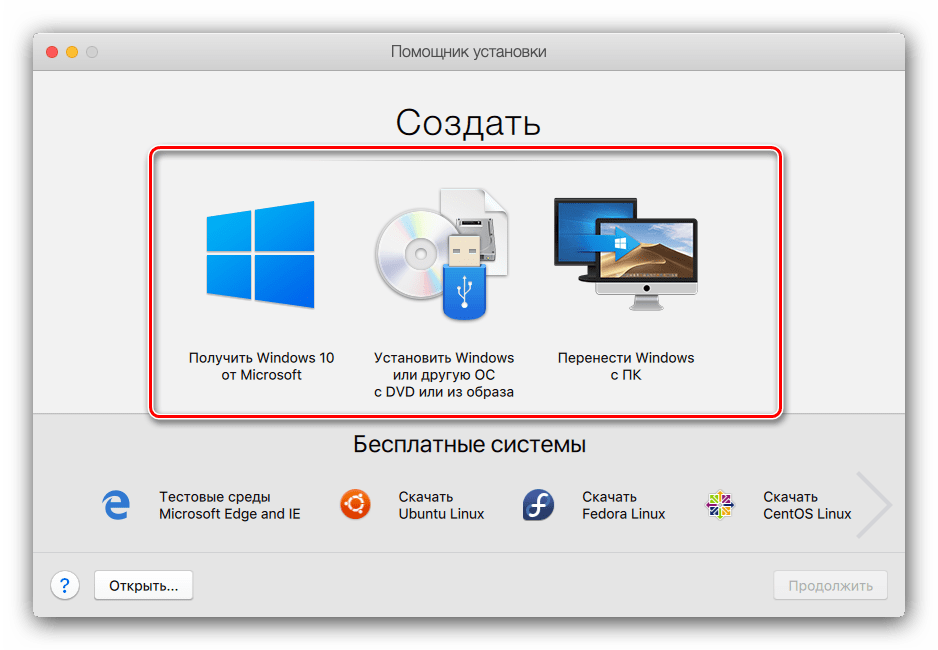
Выберите подходящий для вашей ситуации вариант и установите Виндовс – технически непосредственно процедура инсталляции ничем не отличается от таковой для обычного компьютера.
Урок: Установка Windows 10 с флешки
По окончании процедуры получите соответствующее сообщение.
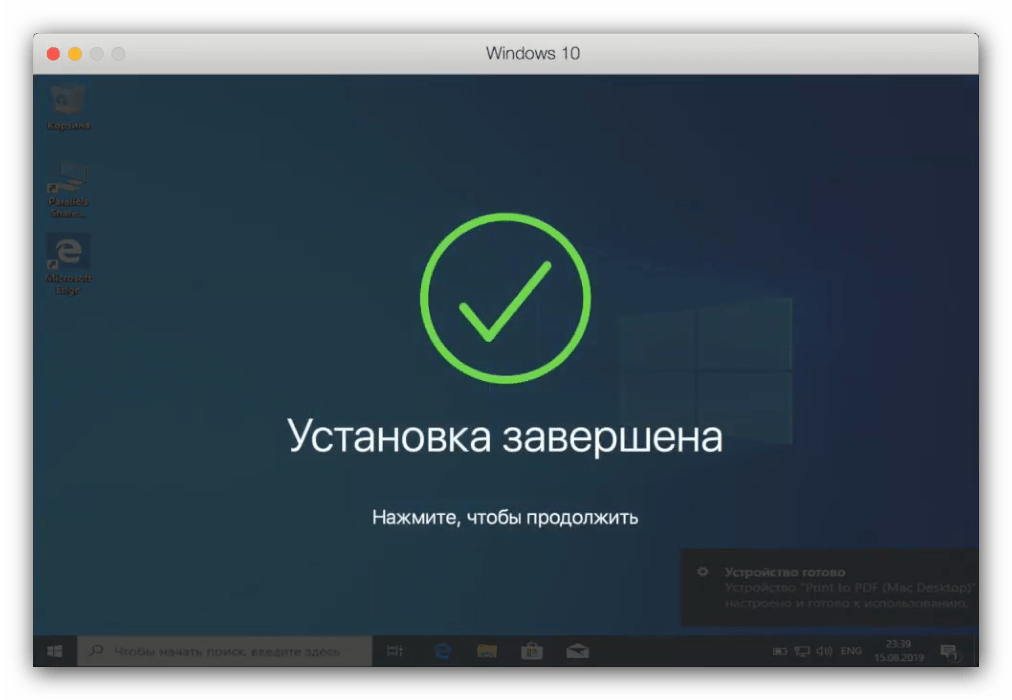
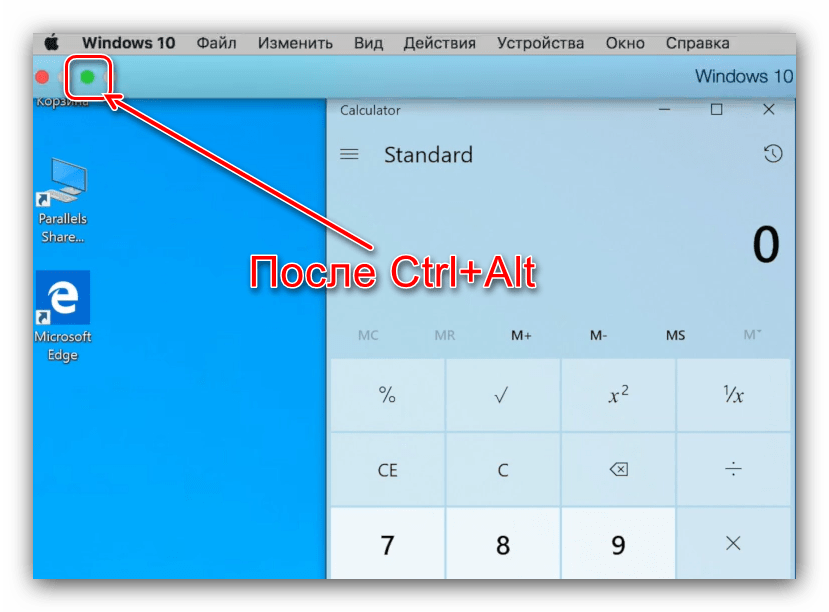
По умолчанию среда запускается в полноэкранном режиме – для уменьшения окна воспользуйтесь сочетанием Ctrl+Alt, после чего нажмите на кнопку сворачивания в шапке окошка.
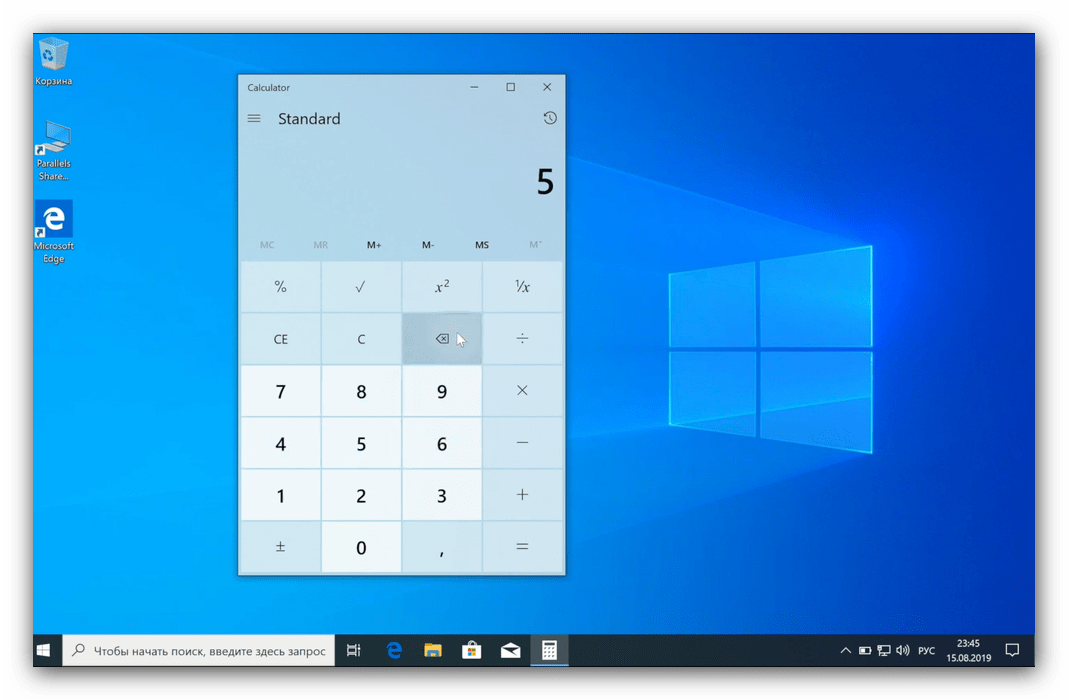
Можно использовать виртуальную среду – Parallels Desktop поддерживает интеграцию основной и гостевой ОС, так что EXE-файл для открытия достаточно просто перетащить в пространство приложения. Дальнейшие манипуляции с этим файлом ничем не отличаются от таковых для полноценной Виндовс.
О дополнительных возможностях Параллелс Десктоп мы расскажем в отдельном материале.
Parallels Desktop представляет собой одно из самых мощных решений, однако приложение распространяется на платной основе, причём полноценная версия стоит весьма дорого. К счастью, у него есть бесплатные альтернативы, пусть и не такие богатые функционально. Однако стоит иметь в виду, что виртуальные среды могут работать неправильно или не работать вовсе на «хакинтошах».
Способ 3: Wine
Пользователям систем на ядре Linux известна программа Wine, которая представляет собой программную «прослойку» для работы приложений Windows на ОС с ядром UNIX. Существует версия этого ПО и для macOS, однако нужно иметь в виду, что оно пока несовместимо с новейшим на момент написания статьи релизом 10.15 Catalina.
- Для стабильной работы приложения рекомендуем загружать Stable-релиз.

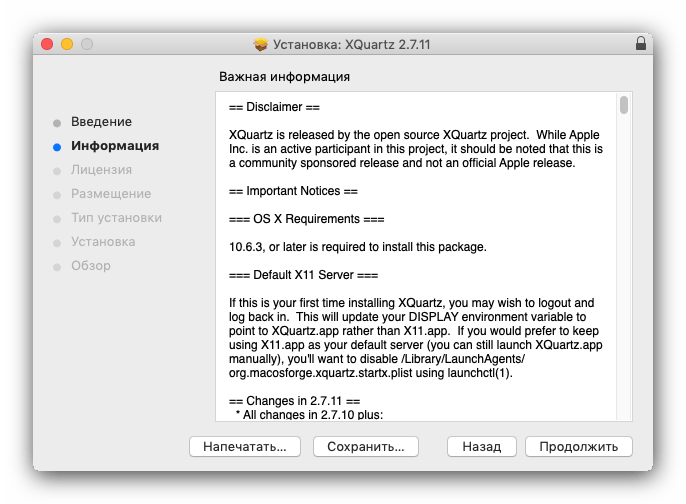
Также потребуется загрузить программный компонент под названием XQuartz – без этого фреймворка Вайн не заработает.

После загрузки установите оба требуемых компонента – сначала XQuartz.
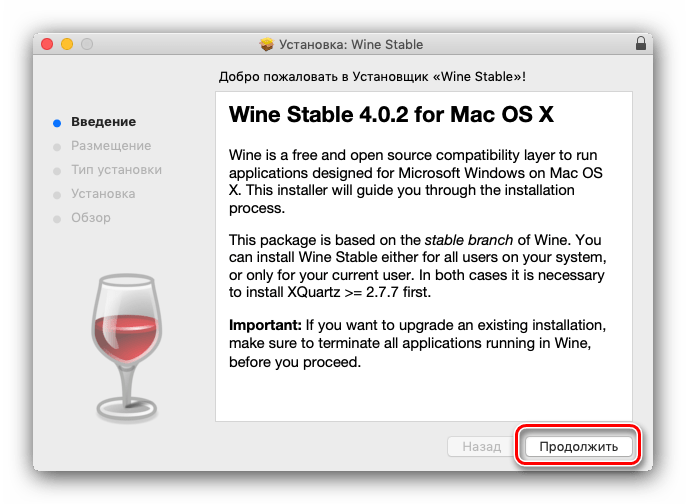
Далее инсталлируйте Wine.
После окончания установки перейдите к местоположению EXE-файла. Как вы можете заменить, его иконка теперь имеет вид иконки Вайна – это означает, что приложение ассоциировано с транслятором.
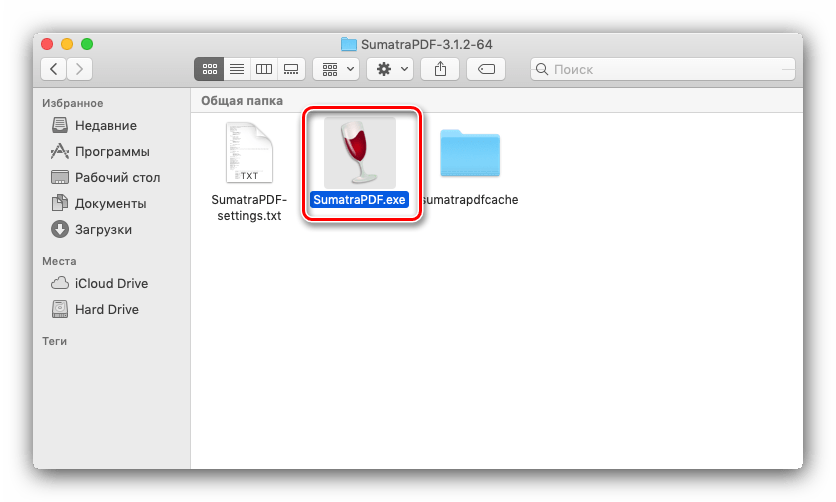
Для запуска исполняемого файла теперь достаточно дважды кликнуть по нему мышкой.
При первом запуске программы пойдёт обновление конфигурации, дождитесь его окончания.

Если в процессе появилось сообщение о необходимости инсталляции дополнительных компонентов, соглашаемся с каждым.

После непродолжительного времени программа будет запущена и готова к использованию.
![]()
Wine по совокупности параметров представляет собой хорошее решение нашей сегодняшней задачи, однако недостатки в виде проблем с совместимостью мешают назвать его идеальным.
Заключение
На этом заканчиваем наше руководство по запуску EXE-файлов в операционной системе macOS. Подводя итоги, отметим, что оптимальным в плане совместимости будет установка Windows через Boot Camp, тогда как по простоте эксплуатации лидирует Wine, а вариант с виртуальной машиной занимает промежуточное место между этими двумя.
The 5 Best Ways to Run Windows on Your Mac
Find out which option best fits you
While macOS is made to run using Mac hardware, it is not the only operating system that can run on a Mac computer.
Plenty of other operating systems, including Window and Linux, will work on a Mac device. That makes the Mac among the most versatile computers you can buy. Here’s what we’d use to install Windows on a Mac.
Boot Camp
:max_bytes(150000):strip_icc()/BootCampPartition-5849de633df78c491eaf721b.jpg)
Supports Windows 7, 8.1, and 10
Windows runs natively on Mac hardware for best performance
Requires a full Windows license for the initial install.
Cannot run Windows and Mac OS concurrently.
Perhaps the best-known option for running Windows on a Mac is Boot Camp. Included free with your Mac, Boot Camp allows you to install Windows and then choose between Mac and Windows on startup.
Because Boot Camp runs Windows directly on your Mac’s hardware (there is no virtualization or emulation to be performed) Windows can run at the best possible speed your Mac is able to deliver.
Installing Windows on your Mac is no more difficult than installing Windows on a PC. Apple even provides the Boot Camp Assistant to partition the startup drive to make room for Windows as well as to install all the drivers Windows needs for special Apple hardware.
Virtualization
:max_bytes(150000):strip_icc()/ParallelsWizard-576f016d5f9b585875b92396.jpg)
Run both macOS and a guest OS side-by-side.
Not limited to Windows; a large number of guest operating systems are supported.
Performance tuning and customization needed to achieve the best performance.
May impact the performance of your Mac.
Virtualization allows several operating systems to run on computer hardware at the same time. Virtualization abstracts the hardware layer, making it look like each operating system has its own processor, RAM, graphics, and storage.
Virtualization on the Mac makes use of a software layer called a hypervisor to emulate all of the underlying hardware. As a result, the guest operating system running on the virtual machine does not run as fast as in Boot Camp. But unlike Boot Camp, both the Mac operating system and the guest operating system run at the same time.
There are three primary virtualization apps for Mac:
- Parallels: The first to bring virtualization to the Mac. Parallels supports a wide range of guest OS, including Windows, Linux, and Mac.
- VMWare Fusion: Fusion is the Mac virtualization app offered by VMWare — a leader in virtualization tech. Fusion supports the installation of many different operating systems, including Windows, Linux, and macOS.
- VirtualBox: Oracle supports an open source virtualization app known as VirtualBox. This free virtualization app runs on multiple computer systems, including Mac. Like the other virtualization apps, VirtualBox can be used to run many different operating systems, including Windows, Linux, and macOS.
Installing the virtualization apps is similar to any other Mac app. Guest OS may be more involved with some customization required to obtain the best performance. All three apps have lively forums and support services to help with tuning the performance.
How to Run Windows Programs on Mac
Windows programs which don’t have a dedicated version for Mac OS X cannot be ran on Mac directly, but they can be ran with the help of a special tool. There are two basic ways to run Windows programs on a Mac. One is emulation, and another is virtualization.
Emulation
Emulation refers to simulating the basic portions of the Windows environment necessary to run some Windows programs on a non-Windows system. The most well known emulator is WINE, which is a humorous acronym for “WINE Is Not an Emulator”. While it is possible to build WINE on Mac an official pre-built binary package is not available, and building it yourself is probably exceedingly difficult. That’s where third party WINE distributions come in.
There is a full list of those available on this wiki page. Likely the best among them is PlayOnMac which comes as a standard Mac app and features an easy to use interface with which you can browse and install compatible Windows applications.
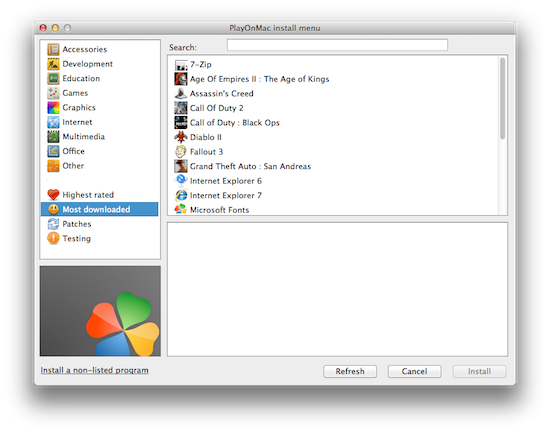
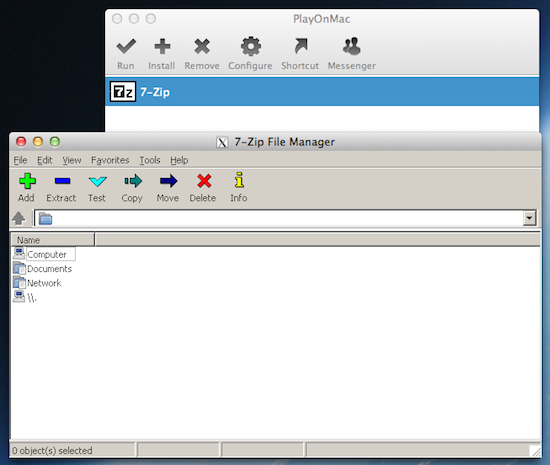
To install a Windows program using PlayOnMac just click on the Install button in the toolbar, navigate through the lists of available programs, select one, and click install. Then just follow prompts on the screen. If the program installs successfully it will be listed in the main PlayOnMac window where you can select it and click “Run” on the toolbar to launch it.
Another way to try running Windows programs with PlayOnMac is to simply download a Windows executable and try running it. PlayOnMac will be automatically associated with all Windows .exe files, and will try to help you install the program. This is a way to try out installing those Windows programs which aren’t on PlayOnMac’s install list. It just might work.
As an alternative solution there is a pay-for Crossover package which offers a potentially more polished experience. You can try it out and see if your program can run through it, and if you are satisfied you can choose to buy it.
The shortcoming of this method is a limited selection of available programs, and potential quirks in running some of them because they are not running in their native environment. The WINE process can also take quite a bit of CPU time.
The advantage, however, is that it is relatively fast to get going with it so it may be worth trying out to see if the program you want to run is supported before trying a more involved method.
Virtualization
Virtualization refers to running an entire operating system in a virtual machine. The virtual machine is a software simulation of a real machine. It is then possible to simulate a Windows PC on a Mac, and run Windows programs in it.
The downside to this approach is somewhat greater usage of memory and CPU resources because you are not only simulating a virtual computer, but also running two operating systems at the same time. The virtual computer also may not be able to fully utilize your real hardware capabilities, such as graphics acceleration. That said, if you have at least 4GB of memory and a recent dual core processor in your Mac you’ll probably be fine. You will also need to have a Windows install DVD.
The advantage of virtualization as a method of running Windows programs is that they have a full blown Windows environment to work with so the program should function just as it does on a real Windows PC without any loss of functionality. It is also a way to run virtually any Windows program on Mac since you are running a complete Windows system within your Mac system.
There are multiple pieces of software you can use to virtualize the Windows system and programs. VirtualBox is a Free and Open Source virtual machine manager, which is what we will be covering here. If you would like more features you can also opt to buy VMWare Fusion or Parallels Desktop. The general principles of functioning should apply to all of them.
Running Windows programs in VirtualBox
The first thing to do is download the right VirtualBox package for Mac. Go to the VirtualBox download page and click on the “x86/amd64” link next to the VirtualBox version for OS X hosts. Once you open the downloaded DMG archive launch the VirtualBox.mpkg installer to start the installation.
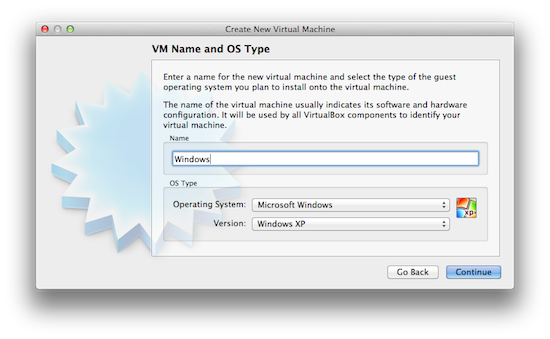
Once you install and launch VirtualBox you will see a VirtualBox Manager dialog that allows you to add a new virtual machine. To start the process click on the “New” button in the toolbar and follow the prompts on the screen.
1. Select Windows version
You will first need to provide a name for your new virtual machine. It can be anything you want, but something clear like “Windows” should do. You’ll also leave “Microsoft Windows” selected as an Operating System, but choose the version which you wish to run. If you have a Windows XP CD, for example, then make sure “Windows XP” is selected. If you have Windows 7 select Windows 7.
2. Allocate some memory to the virtual machine
The next step is to allocate some of your system memory to the virtual machine. The default and recommended amount for Windows XP is 192 MB, and for Windows 7 it is 512 MB. How much memory you will ultimately need depends on the Windows programs you want to run. If they are heavier and more memory hungry they will consume more memory.
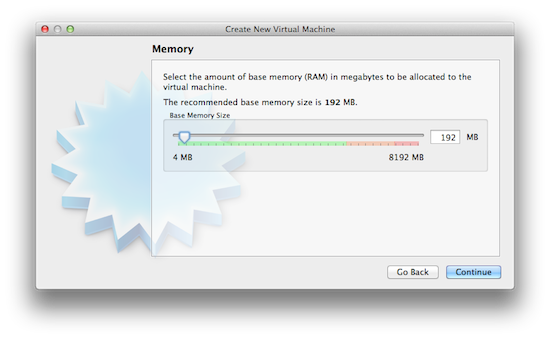
A limiting factor will be the overall amount of memory you have on your machine. If you have 4GB then allocating 1GB is probably safe. If you’re unsure just stick to the defaults.
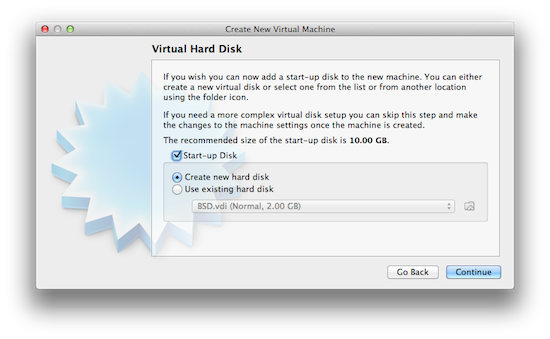
3. Create a virtual hard disk
Now we need to create a virtual hard disk to install Windows on. Just leave “Create new hard disk” selected and click continue. VirtualBox will recommended a start-up disk size depending on the Windows version you’ve selected. For Windows 7 it recommends 20GB.
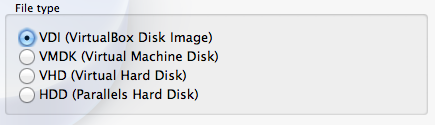
When you click continue it will offer a few options for the format of the virtual hard disk. If unsure simply leave it at the default selection (VDI).
On the next screen you can select if you want the virtual hard disk size to be dynamically allocated or of fixed size. With dynamic allocation your virtual hard disk will only take as much space on your real hard disk as it needs, which is the safest option if you’re hard pressed for free disk space. If you have plenty of space to spare fixed size may provide a better option as it may make your virtual machine perform somewhat faster.

Finally, the next screen allows you to select the location of your virtual disk, which can be anywhere on your hard drive or on your external hard drive. This is where you can also select the virtual disk size. This matters most if you previously chose fixed size. If you previously selected dynamic allocation just leave it as is.

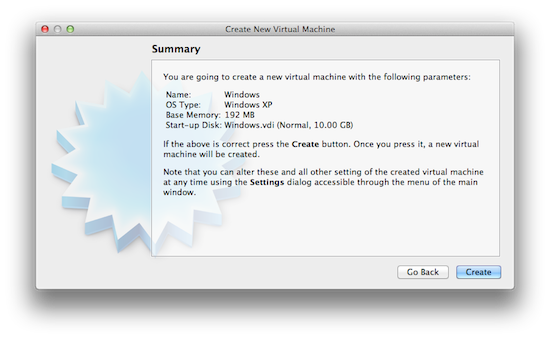
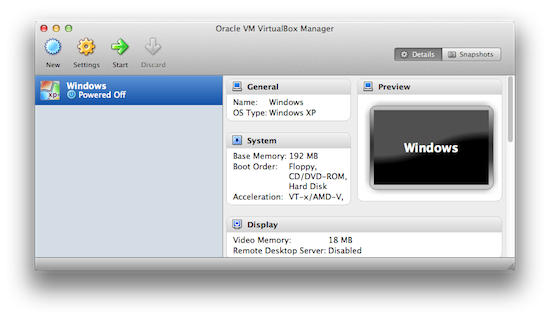
Once you click continue, review your virtual disk settings and click “Create”. Then review your overall virtual machine settings and click “Create” again to create the machine. The new virtual machine will be added to your VirtualBox manager where you can see all information about it, edit its settings, and start it up.
4. Install Windows
Simply click on the “Start” button in the toolbar to turn on your new virtual machine. This will display a new wizard that allows you to select where to boot the machine from. Your options are the internal DVD drive, which is selected by default, or an existing disk image. Since you probably don’t have a virtual Windows install disk you can keep the DVD drive selected as is.
Then you should insert a Windows install DVD to your DVD drive and click continue. The virtual machine will then try booting from the disk and initiate a Windows install process. You should be safe following the instructions on the screen as it will already have the previously created virtual disk drive detected, and will install Windows to it. Nothing you do here would delete any data on your actual hard drive.
5. Boot up and run your program
After Windows installation completes you can boot up the virtual machine and use it as you would a normal computer. The virtual machine should support an internet connection and the DVD drive so you can install any Windows program you wish to run in it.
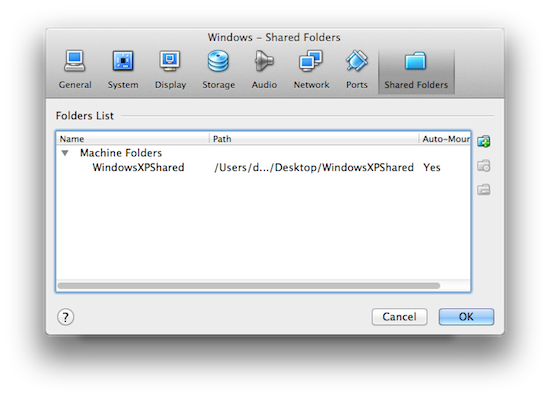
You can also set up a shared folder on your Mac, which will appear as a separate drive in your virtual Windows installation. To set it up go to the Devices menu while in the virtual machine, click Shared Folders, and then click the small add (+) icon to add a new shared folder. You can also set to make it permanent, making it persist when you boot the machine next time, or transient to make it temporary. Of course, this folder has to exist on your Mac, and otherwise you need to create it before making it a shared folder.
You can also access the Shared Devices set up by selecting the virtual machine in the Virtualbox manager, clicking on the “Settings” button in the toolbar, and then the “Shared Devices” tab.
After adding the shared folder reboot Windows in your VM to have it detected. Now you can drop files in this folder when you want to make them visible on a virtual disk drive within your virtual Windows machine.
It is also possible to run the virtual machine in full-screen mode selecting it from the View menu or pressing Command-F. You could put it in its own Space, and make it full-screen on that Space to make it easy to switch between your normal Mac system and your virtual Windows system.
Another great feature is the seamless mode which allows you to see your virtual Windows dialogs, menus and windows alongside your Mac user interface for a more natural workflow, albeit only within a single Space. You can enable seamless mode from the View menu or by pressing Command-S. When in seamless mode it is recommended to move your dock to the right edge of the screen so it doesn’t interfere with the bottom Windows panel and the Start menu, as shown on the screenshot below.


