- How To Run Windows Applications On Linux [Beginners Guide]
- Using Wine to run Windows programs in Linux
- Installing Wine
- What Windows applications are Supported by Wine?
- Finding an Application in Wine Application Database
- Getting Started with Wine
- WinePrefix
- Installing an Application with Wine
- Let’s make things (a lot) Easier
- Advantages of using Wine
- Wine Derivatives
- Additional Tips on using Wine
- Winetricks
- Запуск EXE-файлов в Linux
- Шаг 1: Установка Wine
- Шаг 2: Первый запуск и настройка Wine
- Шаг 3: Запуск EXE-файлов через Wine
How To Run Windows Applications On Linux [Beginners Guide]
Last updated September 12, 2019 By Munif Tanjim 41 Comments
As you’re here, I’m going to assume that you’re a Linux user. And every once in a while, you find yourself asking: can I run windows applications on Linux?.
Answer to that question is yes. Yes, you can run Windows applications in Linux. Here are some of the ways for running Windows programs with Linux :
Both of them works just fine. But they are somewhat resource hungry.
If you only need to use a small Windows application, installing Windows on a separate HDD partition or as a Virtual Machine is not efficient. Moreover, Virtual Machine can’t utilize the total power of your machine. So, what is the solution?
No worries, there is another way to use Windows software on Linux. It’s called Wine. If you aren’t yet familiar with it or you are a beginner in the world of Linux, this article is for you.
In this beginner’s guide, I’ll show you what is Wine and how to use it to run Windows software on Linux. I have used Ubuntu here as Ubuntu is one of the best Linux distros for beginners, but any other Linux distribution will have more or less same steps (except for the commands in Arch or Fedora based distros).
Using Wine to run Windows programs in Linux
Wine stands for Wine Is Not an Emulator. And WINE is actually an acronym for that. And as previously stated, it’s not even a virtual machine.
Rather it is a compatibility layer for running Windows applications on UNIX-like or POSIX-compliant operating systems (e.g. Linux, Mac, BSD). While a virtual machine or emulator simulates internal Windows logic, Wine translates those Windows logic to native UNIX/POSIX-complaint logic.
In simple and non-technical words, Wine converts internal Windows commands to commands your Linux system can natively understand.
Installing Wine
There are various ways to install Wine on your system. As this is a beginners’ guide, I’ll describe the most straightforward one here.
Almost all the Linux distros come with Wine in their package repository. Most of the time the latest stable version of Wine is available via package repository. Installing Wine on Ubuntu is as easy as firing up a terminal and running these commands:
However, if you are using an 64bit installation of Ubuntu, you will need to run these additional commands:
This will add 32bit architecture support on your distro which will benefit you in installing specific software. If you don’t know whether you have a 32bit installation or 64bit, check this article: 32bit or 64bit Ubuntu?
What Windows applications are Supported by Wine?
There is a large number of Windows applications that are currently fully supported by Wine. They will run without any hassle.
However, new Windows applications are being developed every day. Many of them wouldn’t function as we want on Wine. But the development pace of Wine is also rapid, support for new applications is being added all the time.
And there is a dedicated database for keeping track of just that.
Wine Application Database has almost 24,000 applications rated with different status depending upon how well that applications run in Wine. If you want to quickly check the rating of the application you want to use in Wine, you can take a look there. Here are the meaning of those ratings:
- Platinum: These applications install and run flawlessly in out-of-the-box Wine.
- Gold: These applications work flawlessly with some special configuration.
- Silver: Applications with minor issues are tagged as Silver.
- Bronze: The Bronze ones have major issues that seriously affect usage.
- Garbage: These simply won’t run on Wine.
Reviews, Installation Procedure, which Wine version it was tested against and various useful data are also available for each application here.
Of course, Wine Application Database is mostly user-generated data, so you are always welcome to try running an application with a different version of Wine and share your result with rest of the community.
Finding an Application in Wine Application Database
Let’s see how we can find an application in Wine Application Database.
Go to Wine Application Database. Click Browse Apps from the left sidebar.
Write the name of the application you want to find in the Name field.
Click on the link to the application from the search result.
You’ll see a description of the application. There will be a list of various versions with their compatibility rating with a specific Wine version.
Let’s click on the latest version link.
This is the main page you need to check. There will be detailed information about that specific version.
You’ll get an idea of what will work and what will not. Also, the installation procedure will be included here if any additional tasks are needed for installation.
Getting Started with Wine
Before we go on installing and running applications in Wine, we should have clear idea about a few things and about how to configure Wine for usage:
WinePrefix
Windows applications need a C: drive. Wine uses a virtual C: drive for this purpose. The directory of this virtual C: drive is called wineprefix. First of all, we need to create a wineprefix. For doing that, fire up a terminal and enter this command:
This will create a wineprefix and open the configuration window for Wine. You can change the configuration options if you want or let it be as is for time being and close it. Now, you can locate the virtual C: drive at
The general rule is to install each new application into a fresh wineprefix. We can create and maintain multiple wineprefix manually. But that task would seem rather tedious for the beginners. So, we will skip that part for now. But, later I’m going to show the way for doing that part with ease.
Installing an Application with Wine
Installing a supported application in Wine is generally as easy as double-clicking on the installation file. However, we are now going to see a step-by-step guide for installing 7-zip on Wine.
First of all, check for 7-zip rating on Wine Application Database. It has Platinum rating, so we are good to go. Open Wine configuration ( winecfg ) and set the Windows Version to Windows 7.
Right-click on the 7-zip installation file and select Open With Wine Windows Program Loader.
See that destination folder path? 7-zip installation has recognized the virtual C: drive from wineprefix.
Finish the installation and go to the installation directory [ $HOME/.wine/drive_c/Program Files/7-zip/ ] from the file browser.
Right-click on 7zFM.exe and go to Properties > Open With.
Select Wine Windows Program Loader and close the window. Double-click on 7zFM.exe.
And there you go! For creating a shortcut on your desktop, right click on the file.
Now move the Link to Desktop.
Now, you can run 7-zip just from your desktop. All you have to do is double-click on the icon.
If you want to access your files on Linux, they are generally located in Z: Drive.
You can use the 7-zip just as you would use it on Windows – for extracting and creating archives and such.
Let’s make things (a lot) Easier
You might have noticed that, at Wine Application Database, with every version of application review a specific Wine version is mentioned.
It is because of the rapid development rate of Wine. Though an application runs with the current version of Wine, it might not run with a future version, because of the changes made.
Also, I’ve mentioned about installing each application in its own fresh wineprefix. So that, an application has no chance of interfering with another. And doing all these manually, usually from the terminal, is time-consuming, tiresome and at times, confusing.
PlayOnLinux is here to rescue. It provides a nice interface for doing all these things easily. For installing PlayOnLinux on Ubuntu, simply run this command:
You can easily perform every task related to Wine with PlayOnLinux from a beautiful and intuitive graphical interface:
- Installing & Uninstalling applications.
- Creating, Updating & Removing wineprefixes.
- Maintain Wine of different architecture and versions.
- Run & Create shortcut for installed applications.
- And so on…
But still, you will need to check Wine Application Database for reviews, installation procedures and such.
Advantages of using Wine
When it comes to running Windows applications on Linux system, Wine provides many advantages over using emulators or virtual machines.
- Performance: Wine is immune to the performance loss that otherwise occurs while emulating.
- Native Experience: There is no need to open Wine before running a Windows application. Exactly how Wine works will be more clear from this quote from official site,
Wine can be thought of as a Windows emulator in much the same way that Windows Vista can be thought of as a Windows XP emulator: both allow you to run the same applications by translating system calls in much the same way. Setting Wine to mimic Windows XP is not much different from setting Vista to launch an application in XP compatibility mode.
Wine Derivatives
There are quite a number of projects for running Windows applications on other platforms, based on Wine:
- CrossOver: CrossOver is a developed by the company named CodeWeavers. It is directly based on Wine with a few tweaks and proprietary add-ons. In fact, CodeWeavers employs a large portion of Wine developers. Unlike the rapid releases of Wine, CrossOver releases are more stable. The one and major downside is that Crossover is not free.
- PlayOnLinux: PlayOnLinux is completely based on Wine. And provides easier route for installing and managing application with Wine. PlayOnLinux is free.
It is also available for Mac as PlayOnMac. - ReactOS: ReactOS is an entirely different open-source operating system for running Windows applications. It reuses a considerable amount of codes from Wine. However, this is a project under development for more than a decade and I won’t recommend it.
Additional Tips on using Wine
Winetricks
This is another important part of using Wine. Winetricks is a helper script to download and install various redistributable runtime libraries needed to run some applications in Wine. These may include replacements for components of Wine using closed source libraries. Winetricks comes with Wine installation on Ubuntu.
For starting winetricks, run this command:
There are many options for helping you with various tasks.
Installing an Application with Winetricks
If you Install an app from winetricks, it will be installed in a separate wineprefix. Let’s install VLC:
It will then begin to download the VLC installation files. And then guide you through the rest of the process. It’s pretty simple.
Install Windows DLL or components and others
You can select a wineprefix from winetricks and install various libraries and components required by the application you want to run and also perform other operations.
N.B.: If using winetricks seems complicated to you, it’s perfectly okay. I feel the same way too. I always use PlayOnLinux for this reason. PlayOnLinux can do everything you might need to do from winetricks.
For more information you can check Wine FAQ and Documentation.
I hope you find this complete beginner’s guide to using Wine in Linux helpful. Now you can run Windows programs in Linux without installing a virtual machine or dual booting.
Let us know if you have any questions or opinion in the comment section below.
Like what you read? Please share it with others.
Запуск EXE-файлов в Linux
Шаг 1: Установка Wine
Запуск EXE-файлов в Linux — задача несложная, однако небольшие трудности заключаются в поиске инструментов, позволяющих справиться с этим. Популярной программой является Wine, и ее аналогов почти нет, а существующие неизвестны практически никому. Поэтому в сегодняшней статье мы поговорим именно об этом решении. Начать стоит с его добавления в дистрибутив, поскольку по умолчанию Wine отсутствует в любой сборке ОС, основанной на Linux.
Способ 1: Менеджер приложений
Существует несколько доступных вариантов инсталляции Wine. Первый подразумевает использование менеджера приложений, который встроен в популярные дистрибутивы, основанные на Debian или RedHat. В первую очередь рассмотрим именно этот вариант, а осуществляется поставленная цель так:
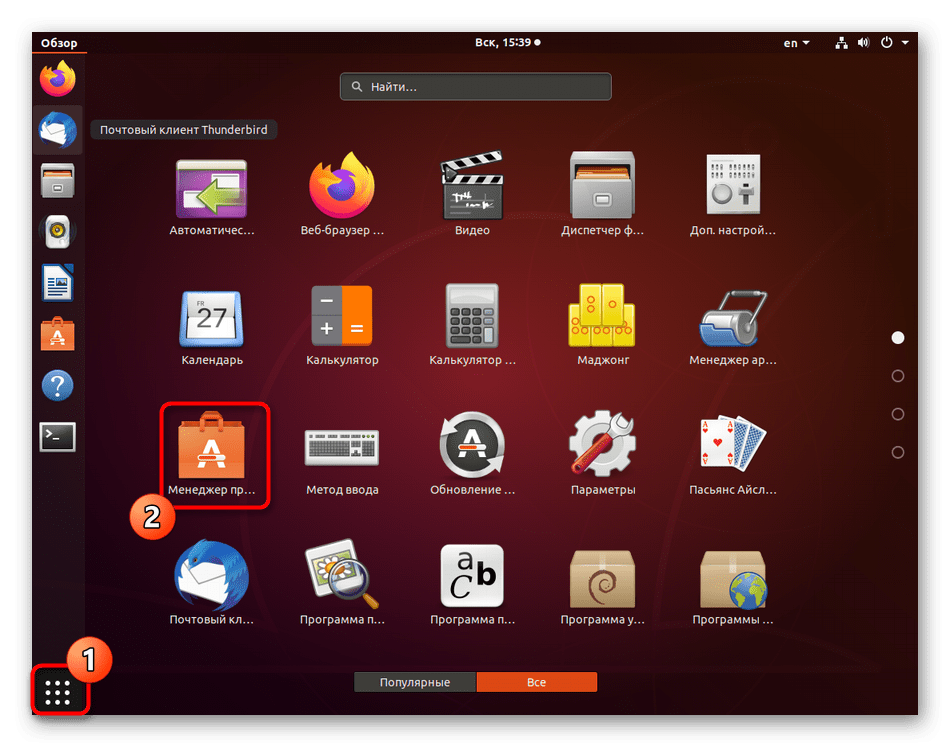
- Откройте основное меню, кликнув по соответствующей кнопке, и запустите оттуда «Менеджер приложений».
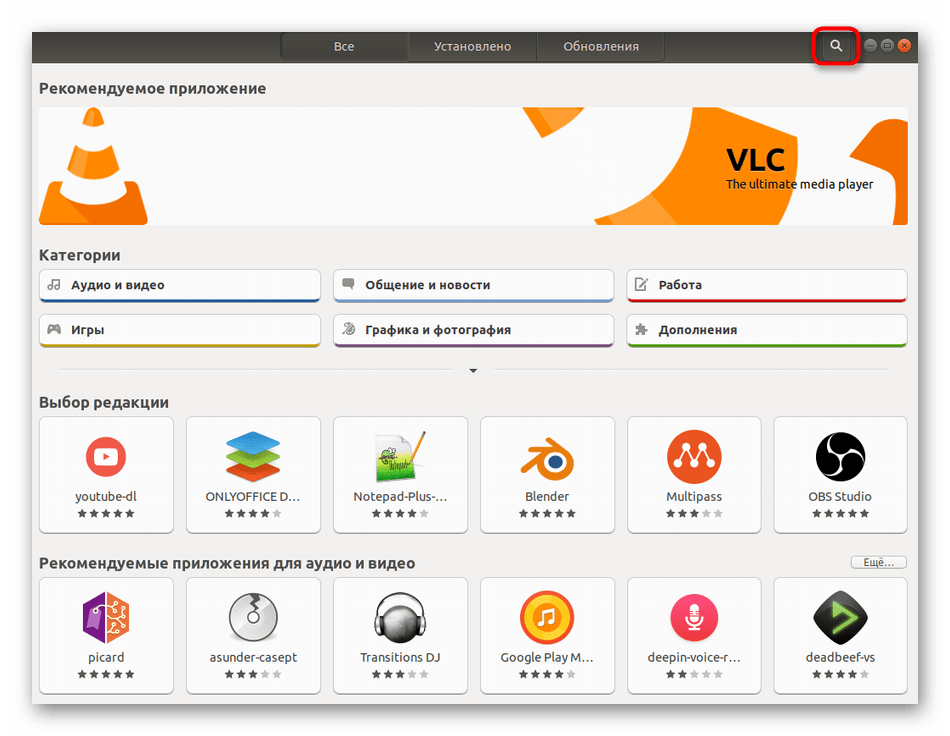
Отыщите кнопку поиска, чтобы открыть строку для ввода названия программы.
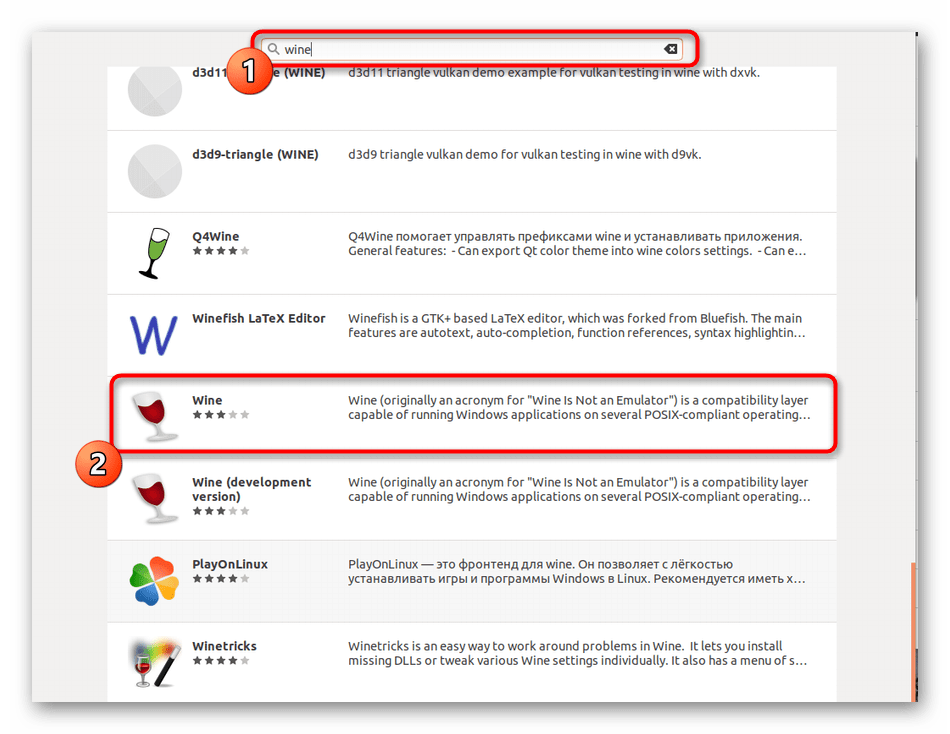
Напишите Wine и опуститесь вниз по списку, чтобы найти подходящий вариант.
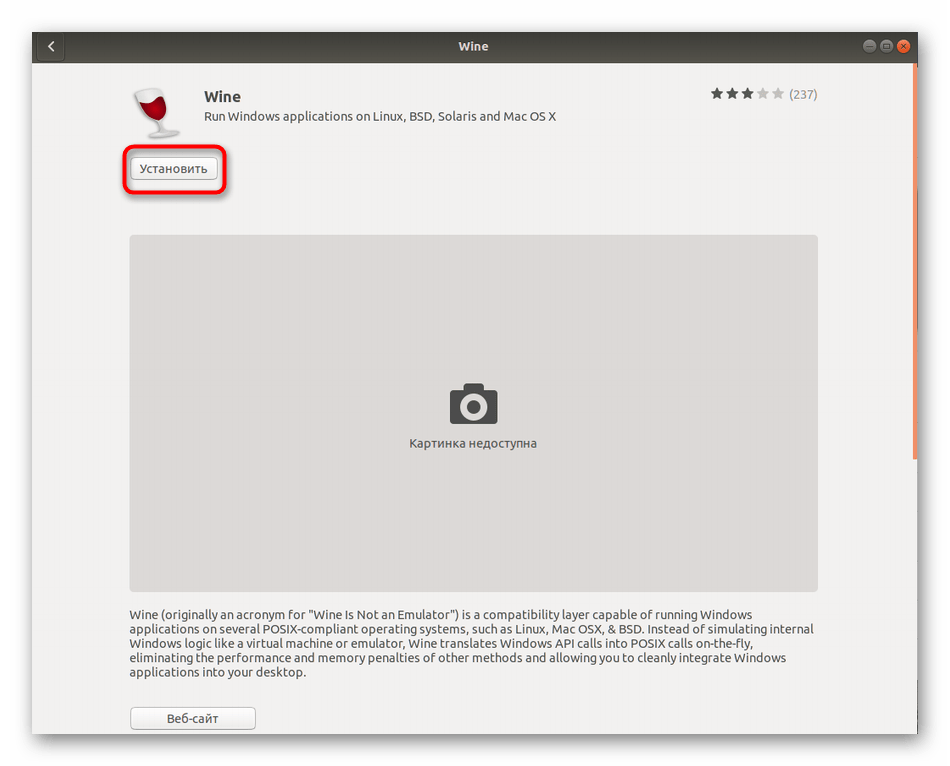
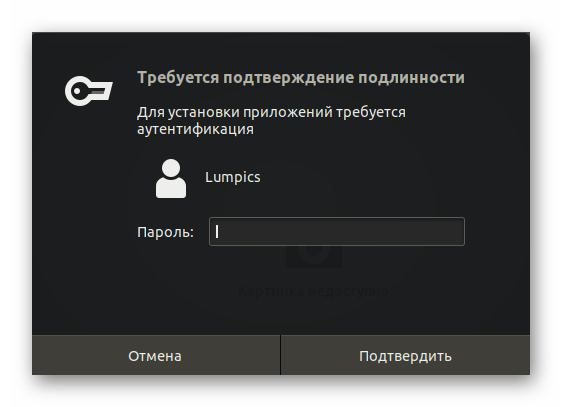
Для начала этой процедуры придется подтвердить подлинность учетной записи, введя пароль.
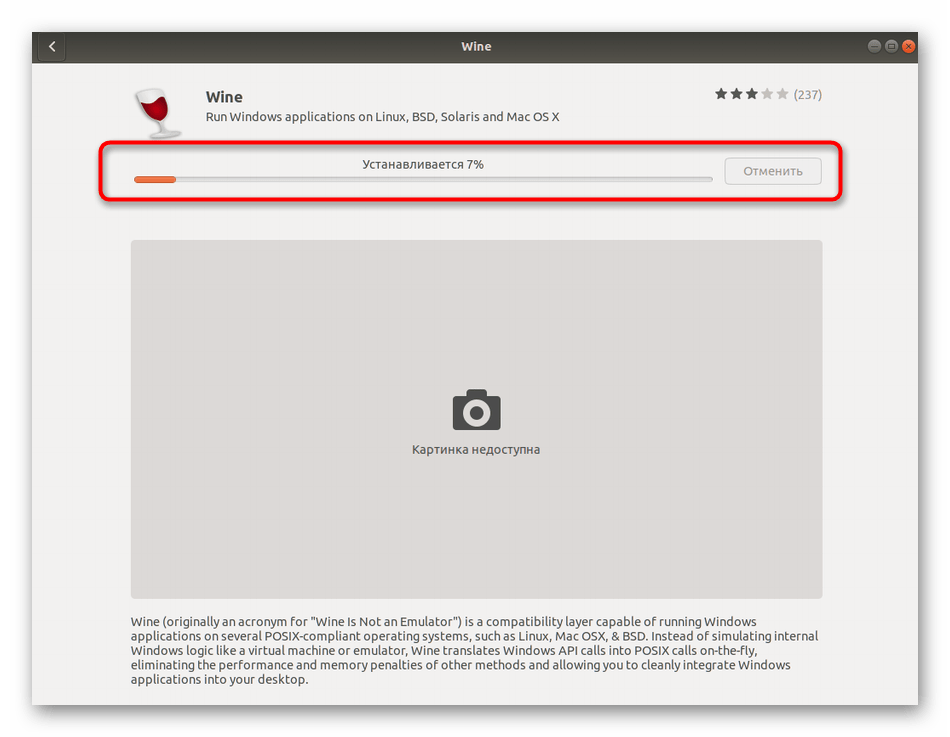
Ожидайте завершения инсталляции. Данная операция займет несколько минут, поскольку Wine является объемным приложением.
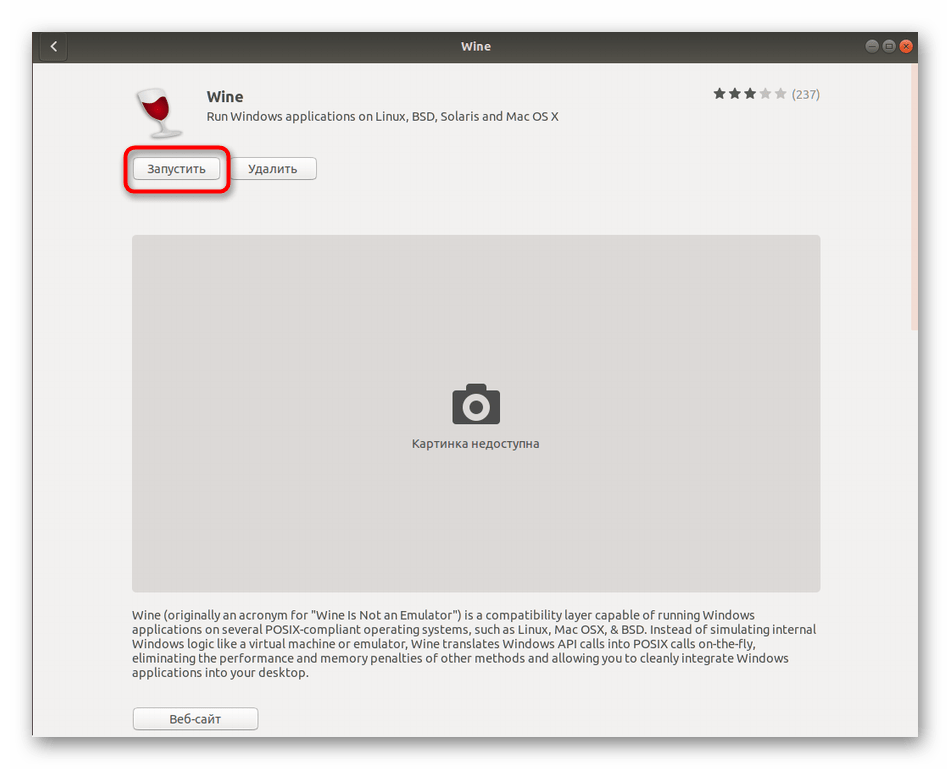
После нажмите на кнопку «Запустить», чтобы выполнить предварительную конфигурацию.
Сейчас давайте приступим к рассмотрению альтернативного варианта инсталляции, если этот вам не подходит, а о предварительной настройке установленного инструмента поговорим в отдельном шаге данного материала.
Способ 2: Официальные репозитории
Как известно, программы в «Менеджере приложений» находятся в официальных репозиториях, а принцип их установки основан на терминальных командах. Именно их и следует задействовать в тех случаях, когда нет возможности открыть решение с GUI или оно попросту отсутствует в используемом дистрибутиве. Не переживайте, управление консолью не является чем-то сложным, в чем и удостоверимся далее.
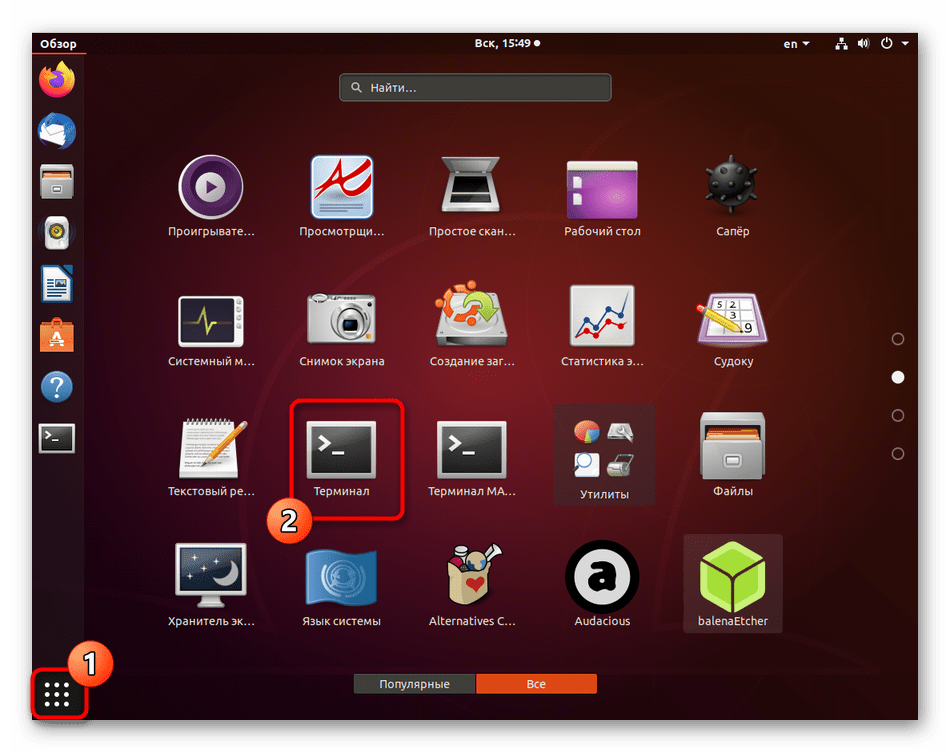
- Запустите «Терминал» удобным для вас образом, например, через меню приложений или горячую клавишу Ctrl + Alt + T.
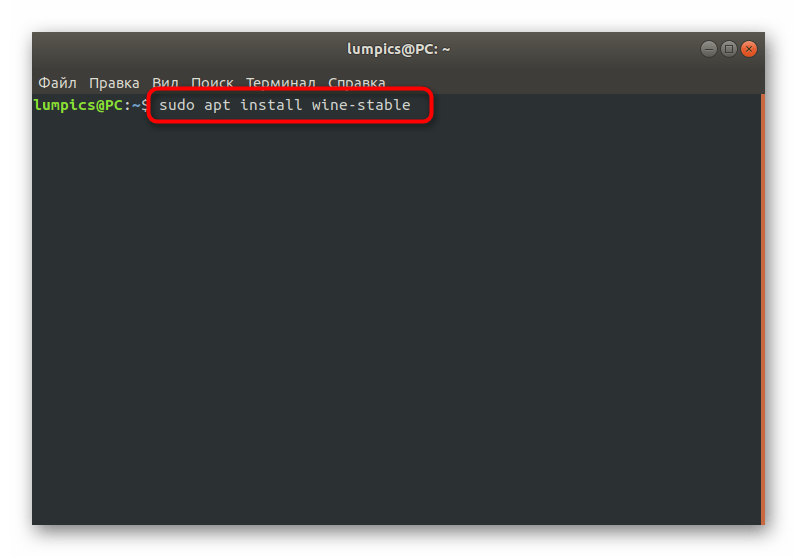
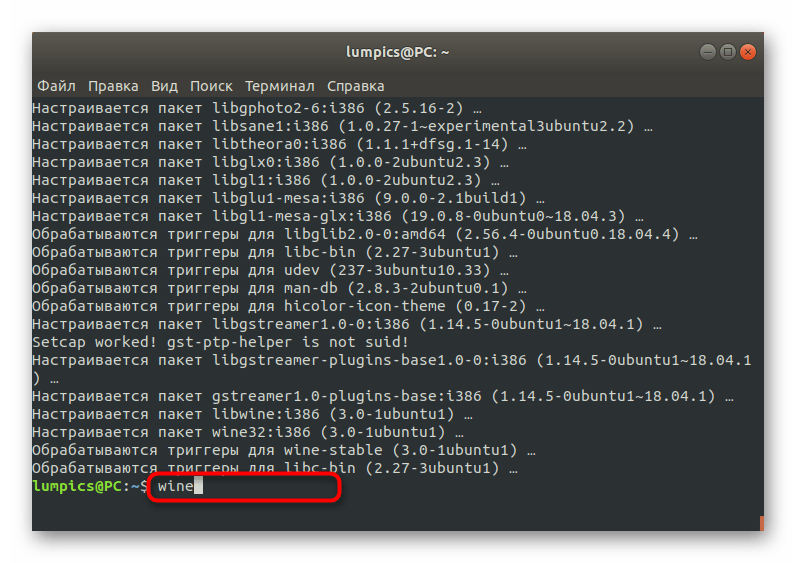
В появившейся строке введите sudo apt install wine-stable . Если вы используете дистрибутив, основанный, например, на RedHat, следует заменить пакетный менеджер APT на установленный в текущей сборке. Это может быть, например, YUM или Pacman.
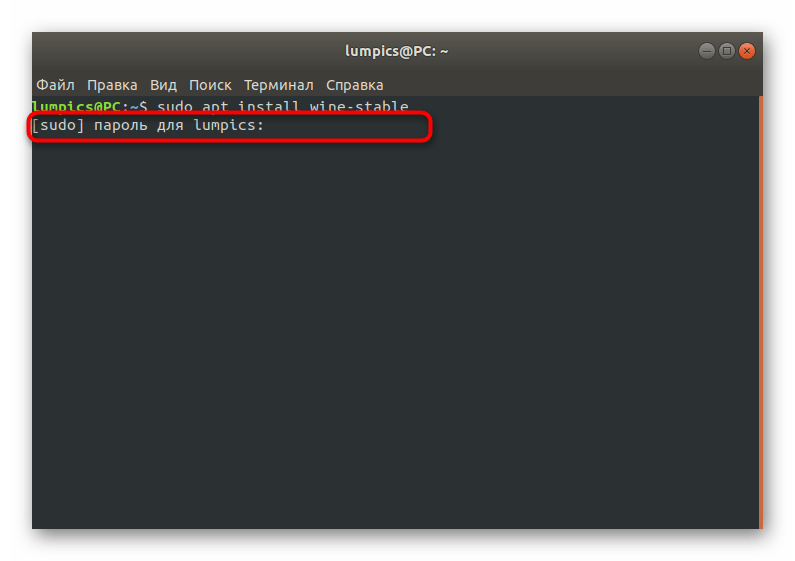
Подтвердите действие, написав пароль суперпользователя. Учитывайте, что символы, вводимые таким образом, никогда не отображаются в консоли, однако существуют и исключения. В некоторых дистрибутивах при указании символов в строке появляются звездочки.
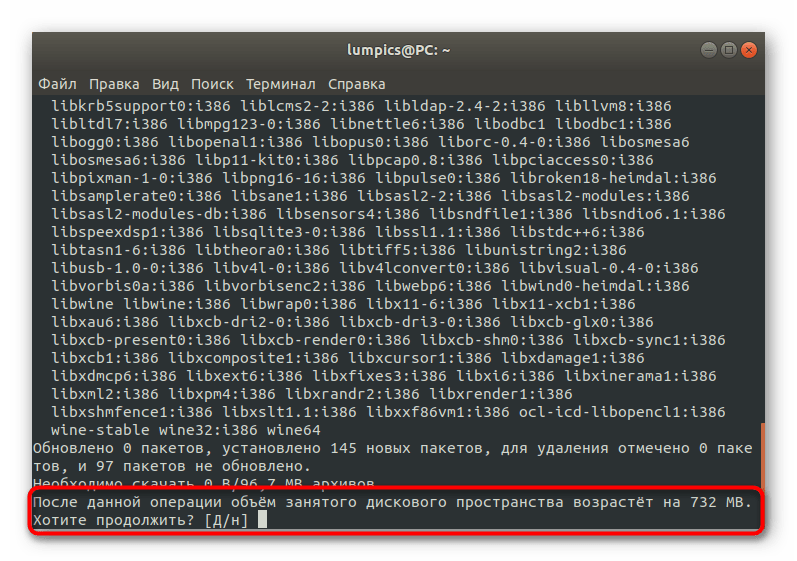
Вы будете уведомлены об увеличении количества занятого пространства. Подтвердите это сообщение, выбрав вариант Д.
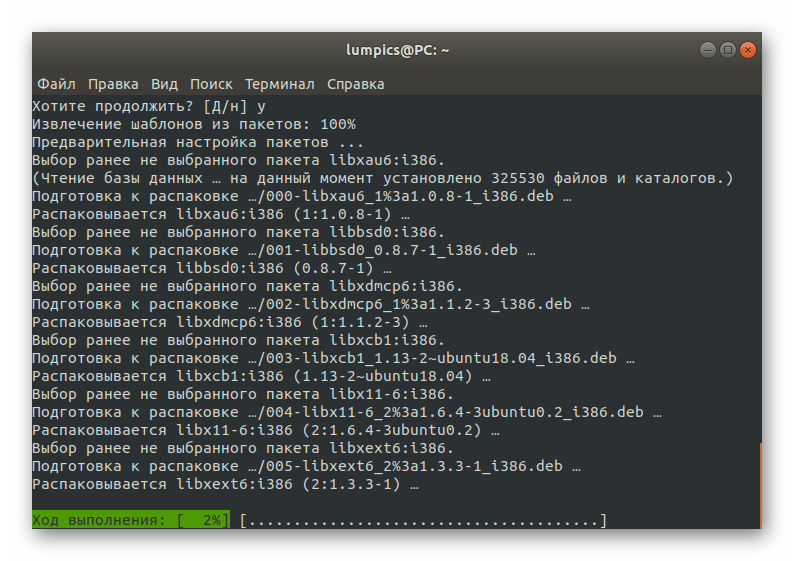
Ожидайте окончания инсталляции. Во время этого не закрывайте «Терминал», иначе весь процесс будет сброшен.
На этом инсталляция завершена. Имеются еще и другие альтернативные методы добавления Wine в операционную систему, но их детальный разбор сейчас не имеет смысла, поэтому перемещаемся к следующему этапу.
Шаг 2: Первый запуск и настройка Wine
К счастью, большинство параметров рассматриваемой программы уже настроены автоматически, а недостающие компоненты так же самостоятельно загружаются. Однако юзеру все-таки придется выполнить несколько действий перед переходом к запуску EXE-файлов.
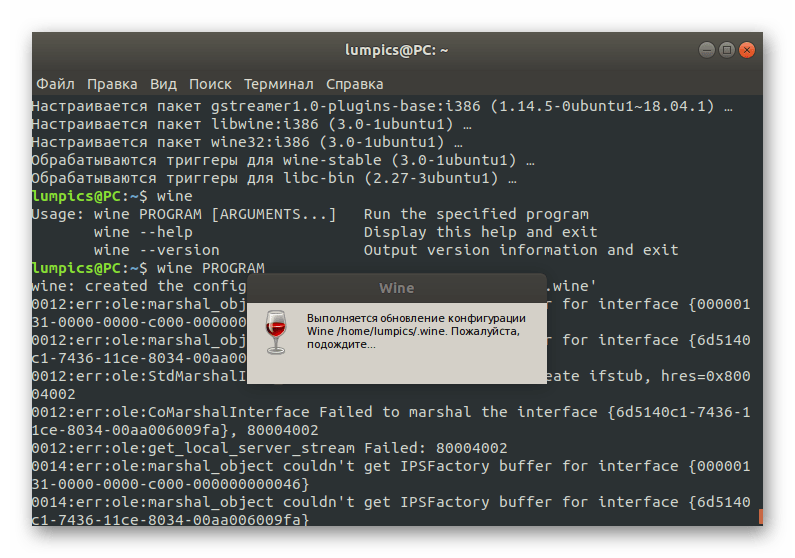
- Запустите софт, например, через «Менеджер приложений» или введя его название в консоли.
Дождитесь завершения обновления конфигурации. Во время этого на экране будут появляться сообщения о надобности инсталляции дополнительных компонентов, включая .NET Framework и Gecko.
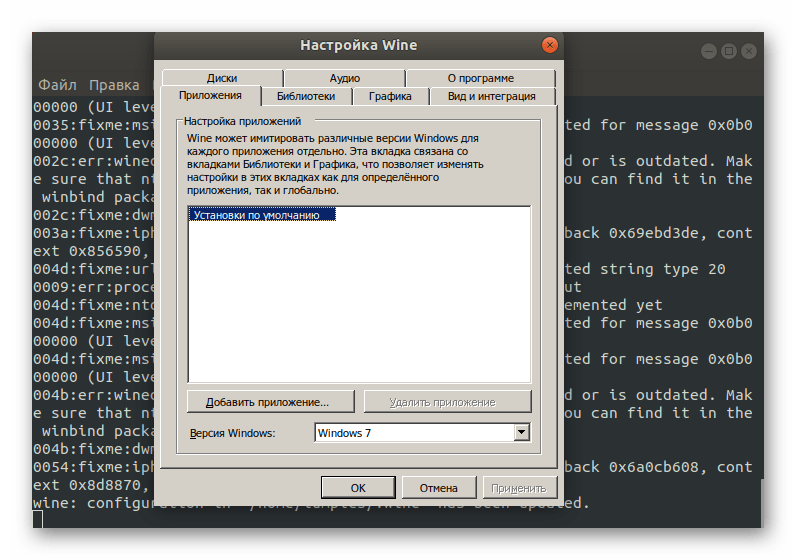
После этого отобразится графическое меню с пользовательской конфигурацией. Здесь присутствуют детальные описания каждого пункта на русском языке, поэтому мы предлагаем разобраться с этим самостоятельно. Связано это и с тем, что все параметры устанавливаются по желанию пользователей.
На этом процедура конфигурации успешно завершена, а значит, можно переходить к непосредственному запуску имеющихся EXE-файлов.
Шаг 3: Запуск EXE-файлов через Wine
Перед началом выполнения поставленной задачи хотим отметить, что не стоит рассматривать Wine как полноценное средство работы с программами для Windows. Конечно, он является эмулятором, но потребление системных ресурсов при запуске софта поднимается в несколько раз, а также могут отсутствовать какие-либо опции, изначально работающие в Windows. Далее мы расскажем о более подходящих решениях для использования ПО в Linux, а сейчас давайте все-таки разберемся с выполнением EXE-объектов.
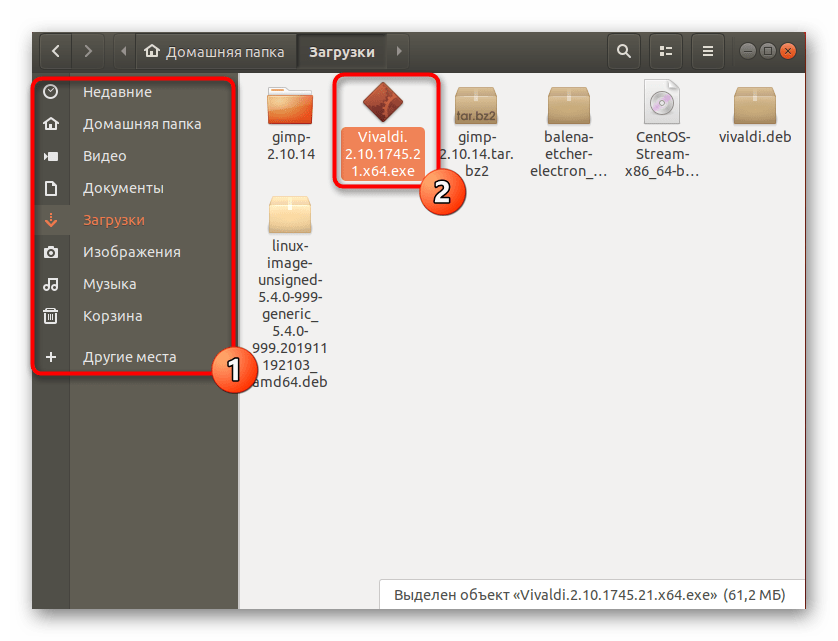
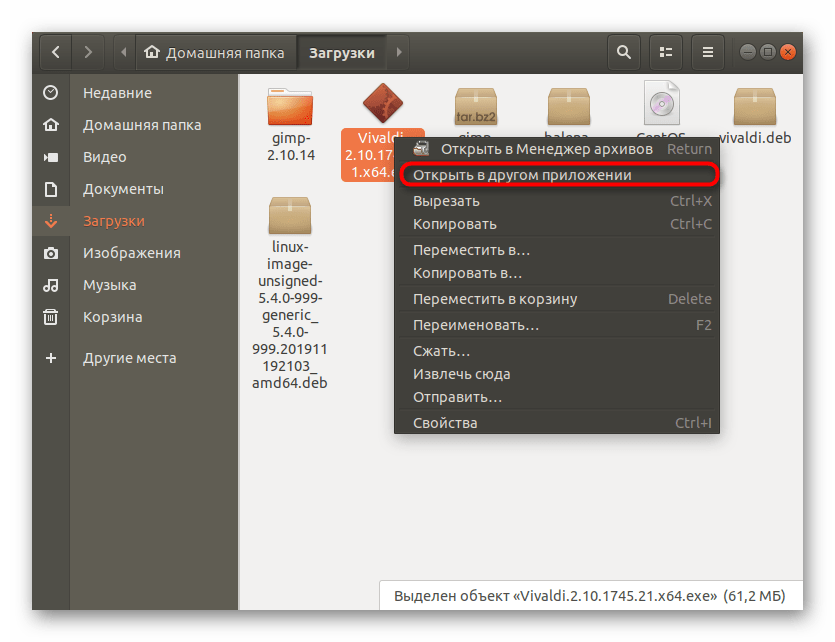
- Откройте файловый менеджер и переместитесь к расположению необходимого файла.
Щелкните по нему правой кнопкой мыши и в контекстном меню выберите пункт «Открыть в другом приложении».
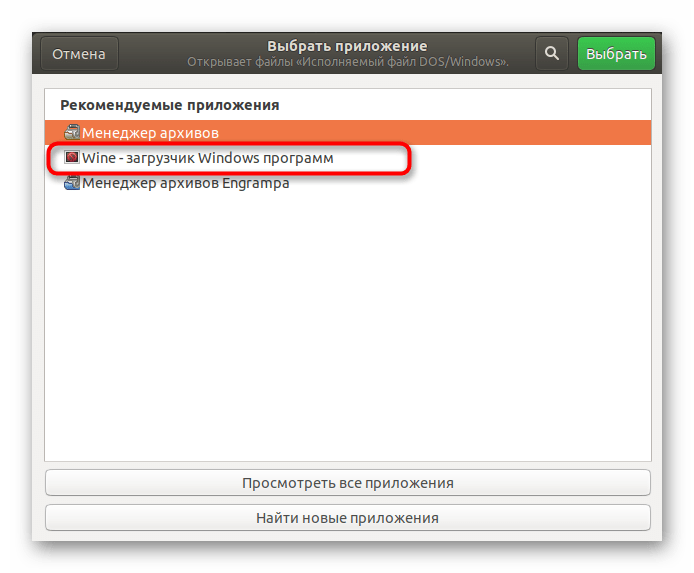
Появится отдельное окно «Выбрать приложение». Здесь вас интересует пункт «Wine — загрузчик Windows программ».
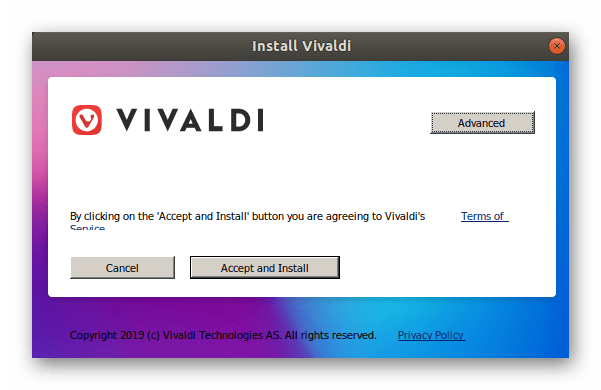
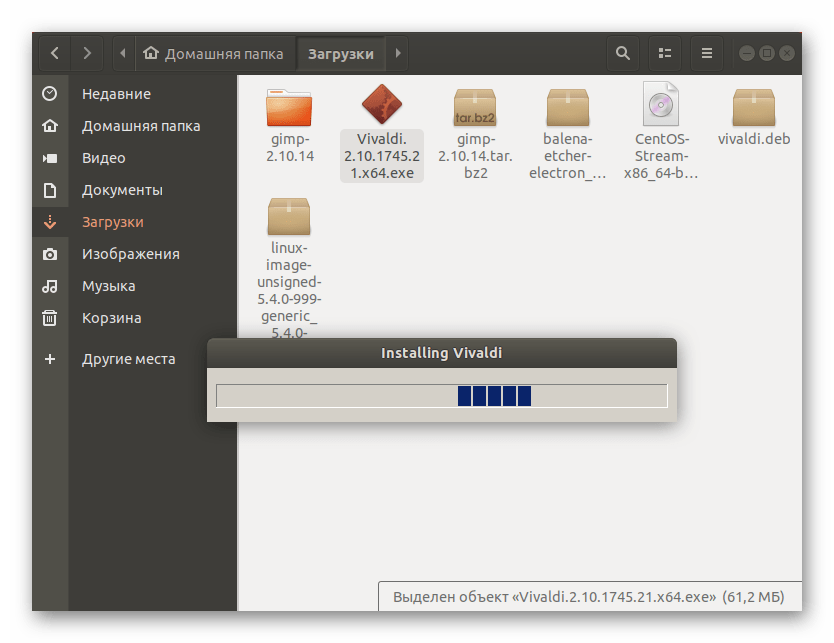
Если это уже полноценный софт, он откроется в новом окне и им можно управлять. В случае взаимодействия с инсталлятором начните стандартную операцию установки.
Дождитесь окончания этой операции. Она может занять много времени, поскольку процессор в большинстве ситуаций нагружается на максимум.
После этого вы можете запустить программу через значок на рабочем столе, графический интерфейс Wine или меню приложений.
Как уже было сказано ранее, запуск EXE-файлов — не лучший способ взаимодействовать с программами в Linux. Сейчас многие разработчики создают версии, корректно функционирующие в разных дистрибутивах, однако часто их нет в официальных репозиториях, то есть скачать из менеджеров приложений такой софт не получится. Приходится скачивать отдельные DEB или RPM-пакеты либо же вообще вручную распаковывать архивы. Не потрудитесь отыскать сборку требуемого софта для вашего дистрибутива, а затем установите ее, используя инструкции из приведенной далее статьи.
Это было все, что мы хотели рассказать о запуске ПО для Windows в Linux. Как видно, лучшее решение всего одно, поэтому его и задействуют абсолютно все пользователи, желающие реализовать данную цель. Остается только следовать инструкциям, чтобы без каких-либо проблем открыть EXE-элемент и начать взаимодействие с ним.


