- How to Activate Parallels Desktop and Install Windows on Mac
- How do you install Windows on Mac?
- How to install Parallels Desktop
- How to activate Parallels Desktop Business Edition
- Experience how easy it is to install Windows on Mac
- How to Install Windows 10 in Parallels Desktop for Mac
- Scenario 1: You have just installed Parallels Desktop on your Mac.
- Scenario 2: You have Parallels Desktop on your Mac, and you want to add a Windows 10 VM.
- Scenario 3: You want to move Windows 10 from a physical PC into a Parallels Desktop VM.
- How to run Windows 10 on your Mac using Parallels Desktop 15
- Check your system and hardware requirements
- Before you start: Back up your Mac
- How to run Windows on Mac using Parallels Desktop 15
- How to download and install Parallels Desktop 15
- Any questions?
How to Activate Parallels Desktop and Install Windows on Mac
Almost all users who purchase a subscription for Parallels Desktop do so with one goal in mind: to install Windows on Mac. Parallels Desktop Mac Business Edition will help you and your employees easily work with Windows programs on Mac, running even the most demanding applications effortlessly.
Before proceeding, you should have already signed up for Parallels My Account. In this article, you’ll learn how to how to install and activate Parallels Desktop. Only then can you install Windows on Mac.
How do you install Windows on Mac?
Installing Windows on Mac is a crucial step to being able to run Windows applications on a macOS® device. To be able to do this, you first need to install a Windows virtualization tool on your Mac computer, such as Parallels Desktop. Parallels Desktop is not only perfectly compatible with any Windows program—it’s also fast, secure, and designed for rapid mass deployments.
How to install Parallels Desktop
- Download the Parallels Desktop installer to your Mac.
- Double-click the .dmg installation file to mount it in Finder, then double-click Install.
- Read through the Software License Agreement and click Accept.
- Once prompted, enter your local Mac user password to finalize the installation.
Next, you’ll activate Parallels Desktop Business Edition.
How to activate Parallels Desktop Business Edition
- Start Parallels Desktop by double-clicking the icon.
- If the first screen that opens is the Installation Assistant, Skip it for now. The Installation Assistant helps you install Windows—you can run this at a later time.
- Go to the Parallels Desktop dropdown menu, and then click Account & License.
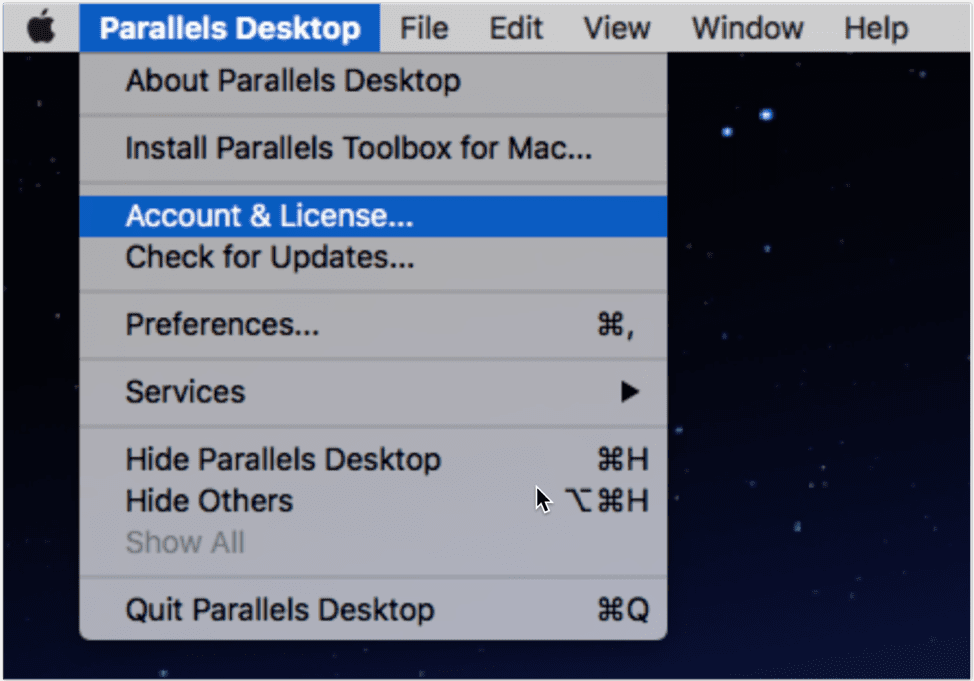
4. This opens the Sign-in dialog box.
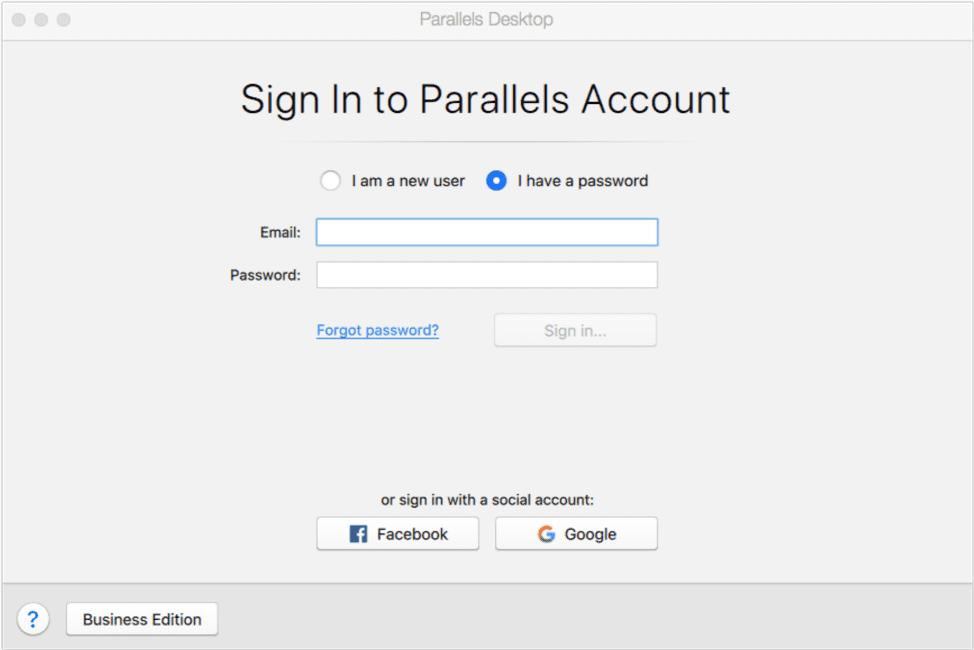
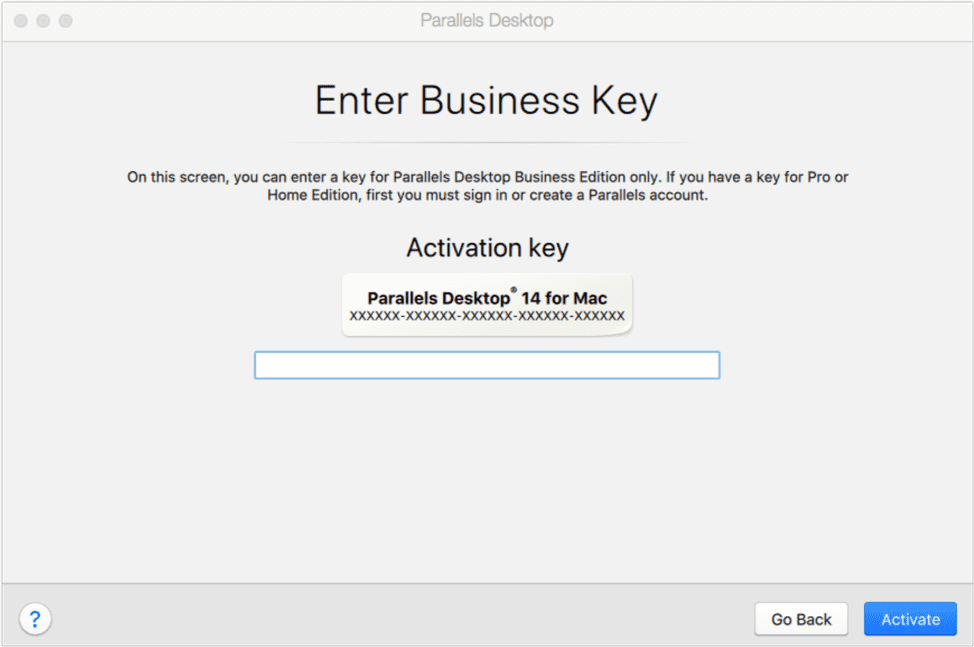
5. Click on the Business Edition button at the lower-left corner, which opens the Enter Business Key dialog. This then prompts you to enter your Parallels Desktop Business Edition license key. After entering it, click Activate.
6. If your activation was successful, you’ll see a confirmation message.
And just like that, your Parallels Desktop Business Edition is installed, activated and ready for Windows installation!
Read “How to Install Windows 10 in Parallels Desktop for Mac” for the complete instructions on how to install Windows on Mac.
Experience how easy it is to install Windows on Mac
With Parallels Desktop Business Edition, you can install Windows on Mac across your organization without breaking a sweat. Try it out yourself. Download the free trial now.
How to Install Windows 10 in Parallels Desktop for Mac
Windows 10 is the most popular version of Windows. Installing it on Parallels Desktop® for Mac is easy to do—and does not require you to purchase Windows 10 beforehand.
There are four different scenarios you might find yourself in, with slightly different steps:
Scenario 1: You have just installed Parallels Desktop on your Mac.
Scenario 2: You have Parallels Desktop on your Mac, and you want to add a Windows 10 virtual machine (VM).
Scenario 3: You want to move Windows 10 from a physical PC into a Parallels Desktop VM.
Here are the individual steps for each:
Scenario 1: You have just installed Parallels Desktop on your Mac.
When you first launch Parallels Desktop on a Mac, it will detect that you have no virtual machines and will automatically offer to download and install Windows 10 for you. (See Figure 1.)
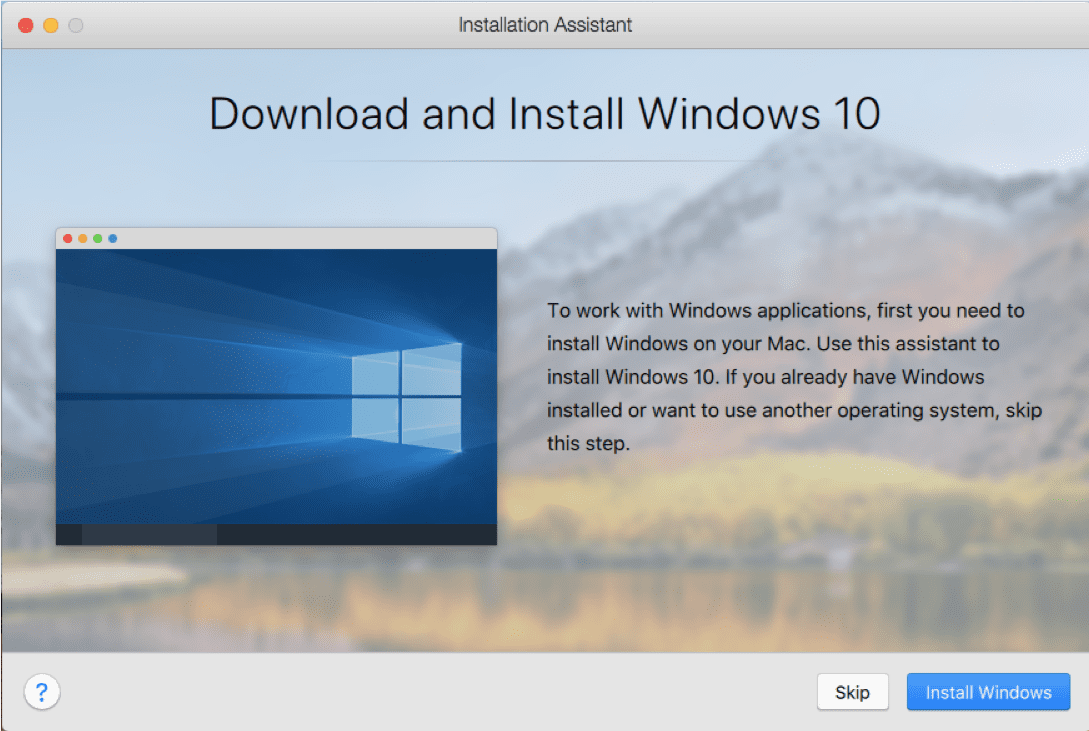
Figure 1_Download and install Windows 10
Once you click “Install Windows,” there is basically nothing else for you to do. The Windows 10 installation files will begin downloading (Figure 2).
Note: If you click on “Skip” instead, you will be directed to the Installation Assitant where you can purchase Windows 10 (see Figure 8).

Figure 2_Downloading Windows 10
Once the download finishes, the installation of Windows 10 into a new VM in Parallels Desktop will begin (Figure 3).
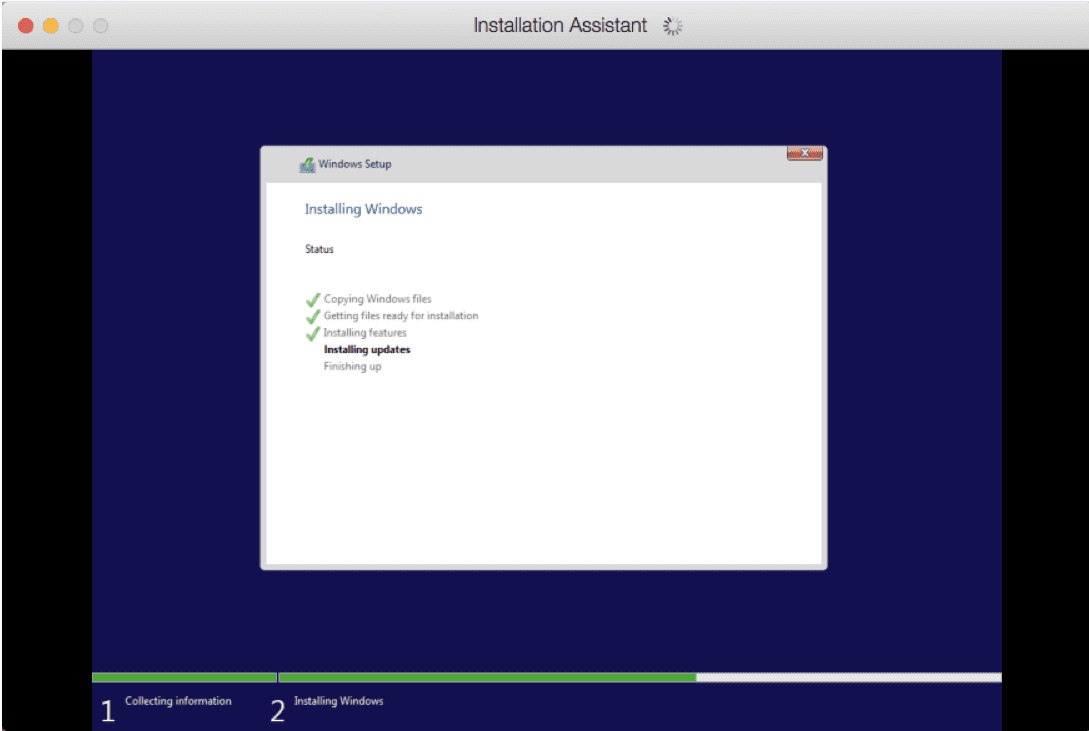
Figure 3_Installing Windows
You will be notified when it completes (Figure 4).
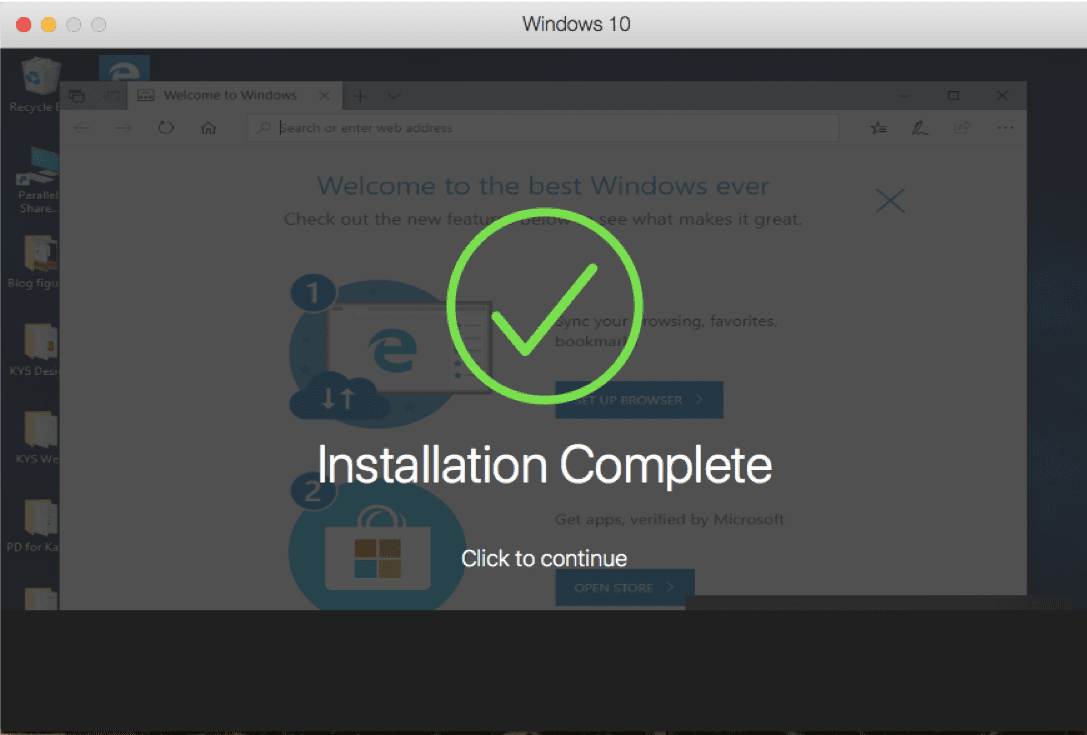
Figure 4_Windows 10 installation complete
How long this process takes depends on the speed of your Internet connection and Mac. For me, at home and on a new MacBook Air, this took about one hour and 40 minutes.
While Windows 10 is installing, you’ll see dialogs about the installation of Parallels® Toolbox, a separate Parallels product that’s bundled with Parallels Desktop (Figure 5).
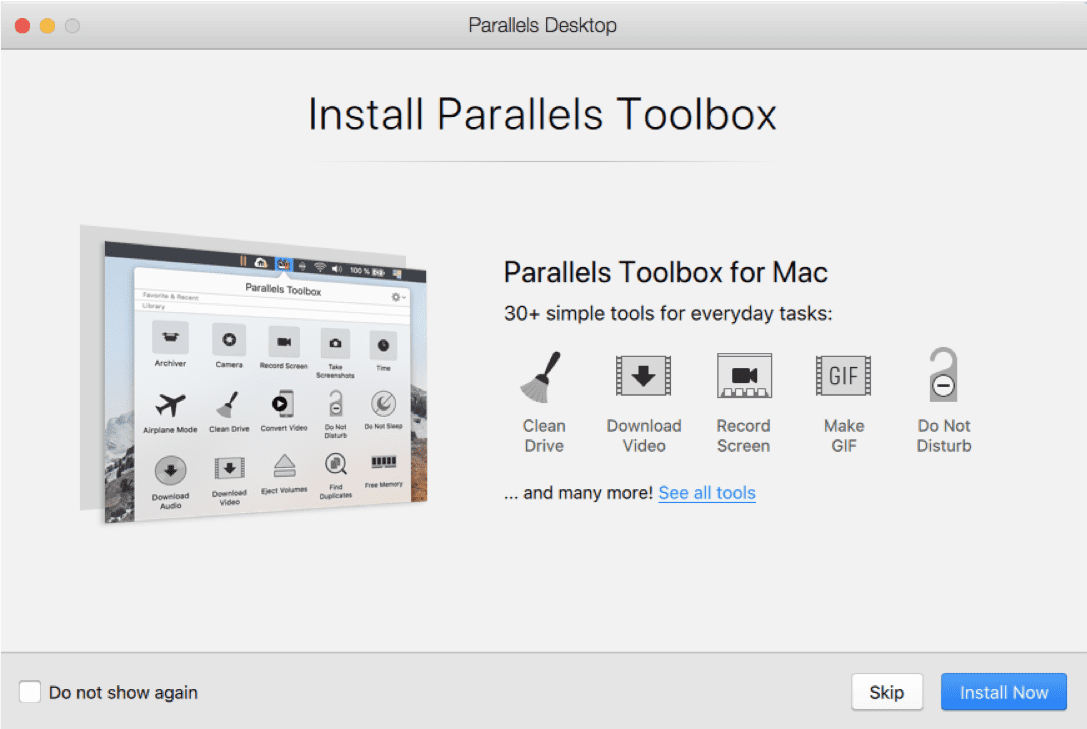
Figure 5_Parallels Toolbox, a product that is bundled with Parallels Desktop
Parallels Toolbox gives you 30+ single-purpose tools for common tasks. I encourage you to install Parallels Toolbox—I think you’ll find the tools very useful.
After Windows 10 is installed, you should get all of the available updates, and probably there will be several of them (Figure 6).
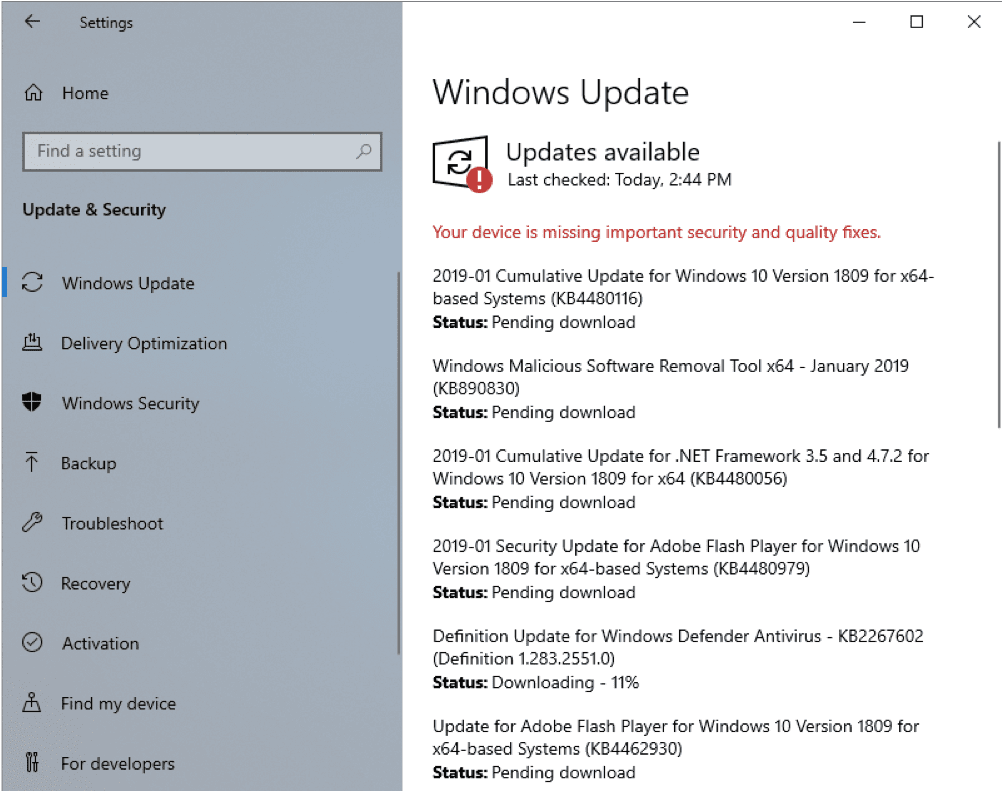
Figure 6_Get all of the available Windows updates
This may take a while but is very important.
At this point, you have a working installation of Windows 10 in a Parallels Desktop VM. You have not yet purchased Windows from Microsoft. A few features will be disabled until you do so. You can purchase and activate Windows from within your Windows VM, and the entire process takes only a few minutes (Figure 7).
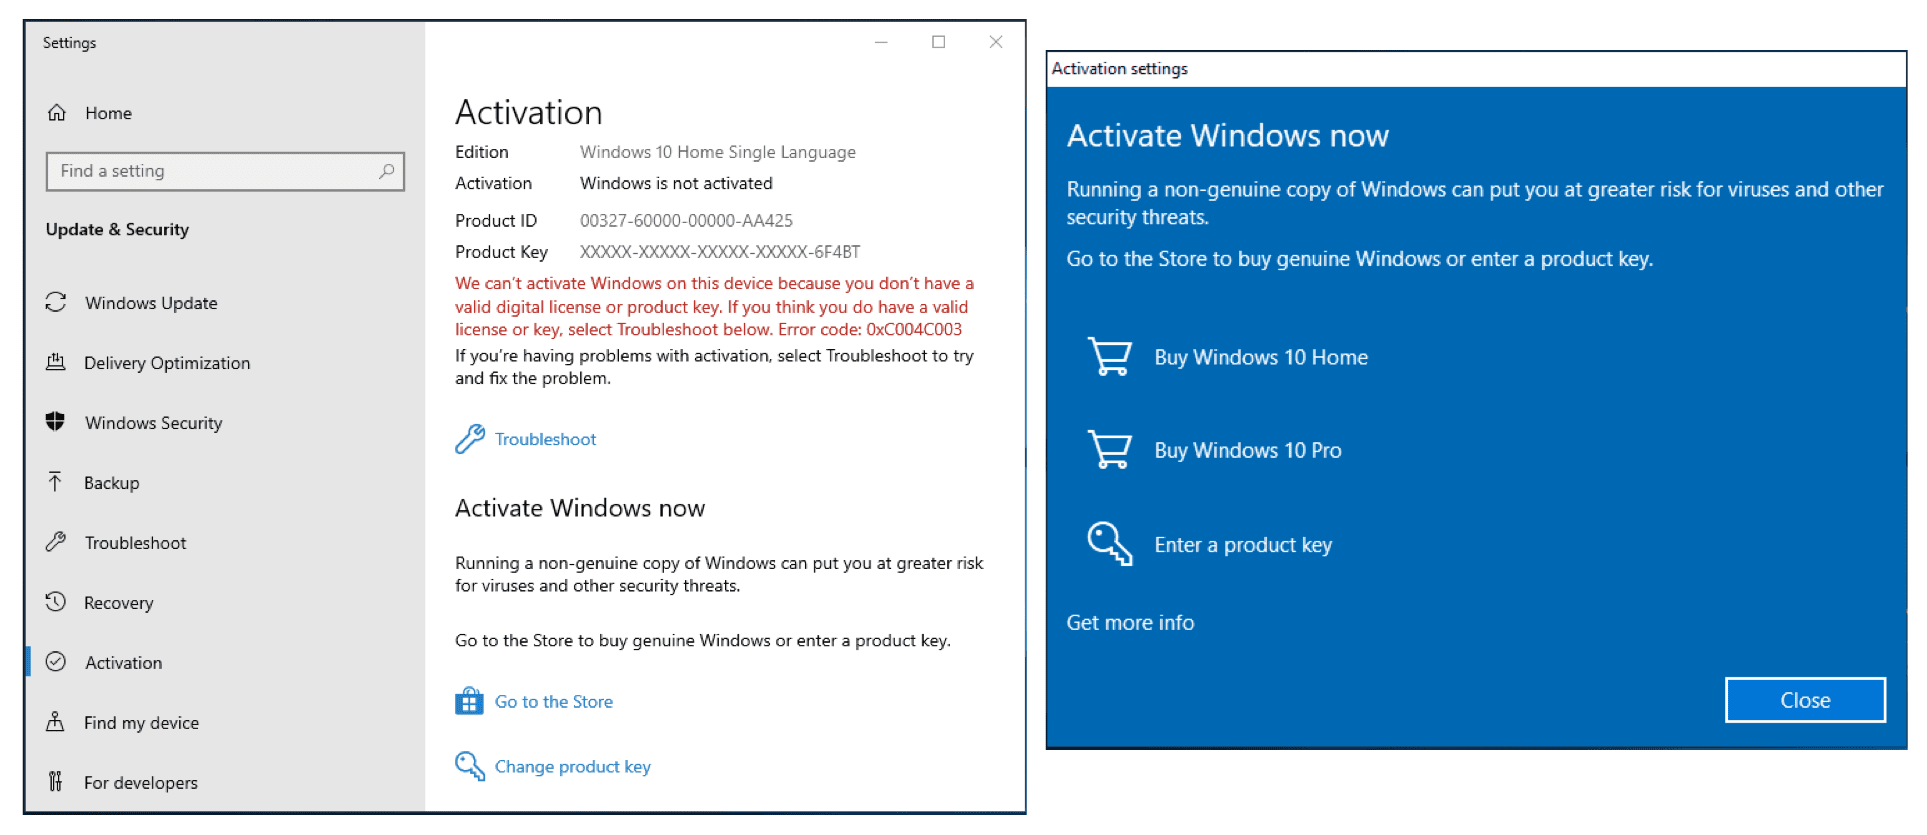
Figure 7_Purchasing and activating Windows 10
Scenario 2: You have Parallels Desktop on your Mac, and you want to add a Windows 10 VM.
Adding Windows 10 as an additional VM in Parallels Desktop is also easy.
To start the process, either choose “New…” in the File menu of Parallels Desktop, or click on the “+” sign in the top right corner of the Control Center window.
Assuming that you don’t have a Windows 10 installation DVD laying around, click on the “Get Windows 10 from Microsoft” button (Figure 8).
Figure 8_Get Windows 10 button in the Installation Assistant
Then choose to purchase Windows 10 Home or Windows 10 Pro in the next screen. If you want to install Windows 10 without making a purchase yet, choose to download it (Figure 9).
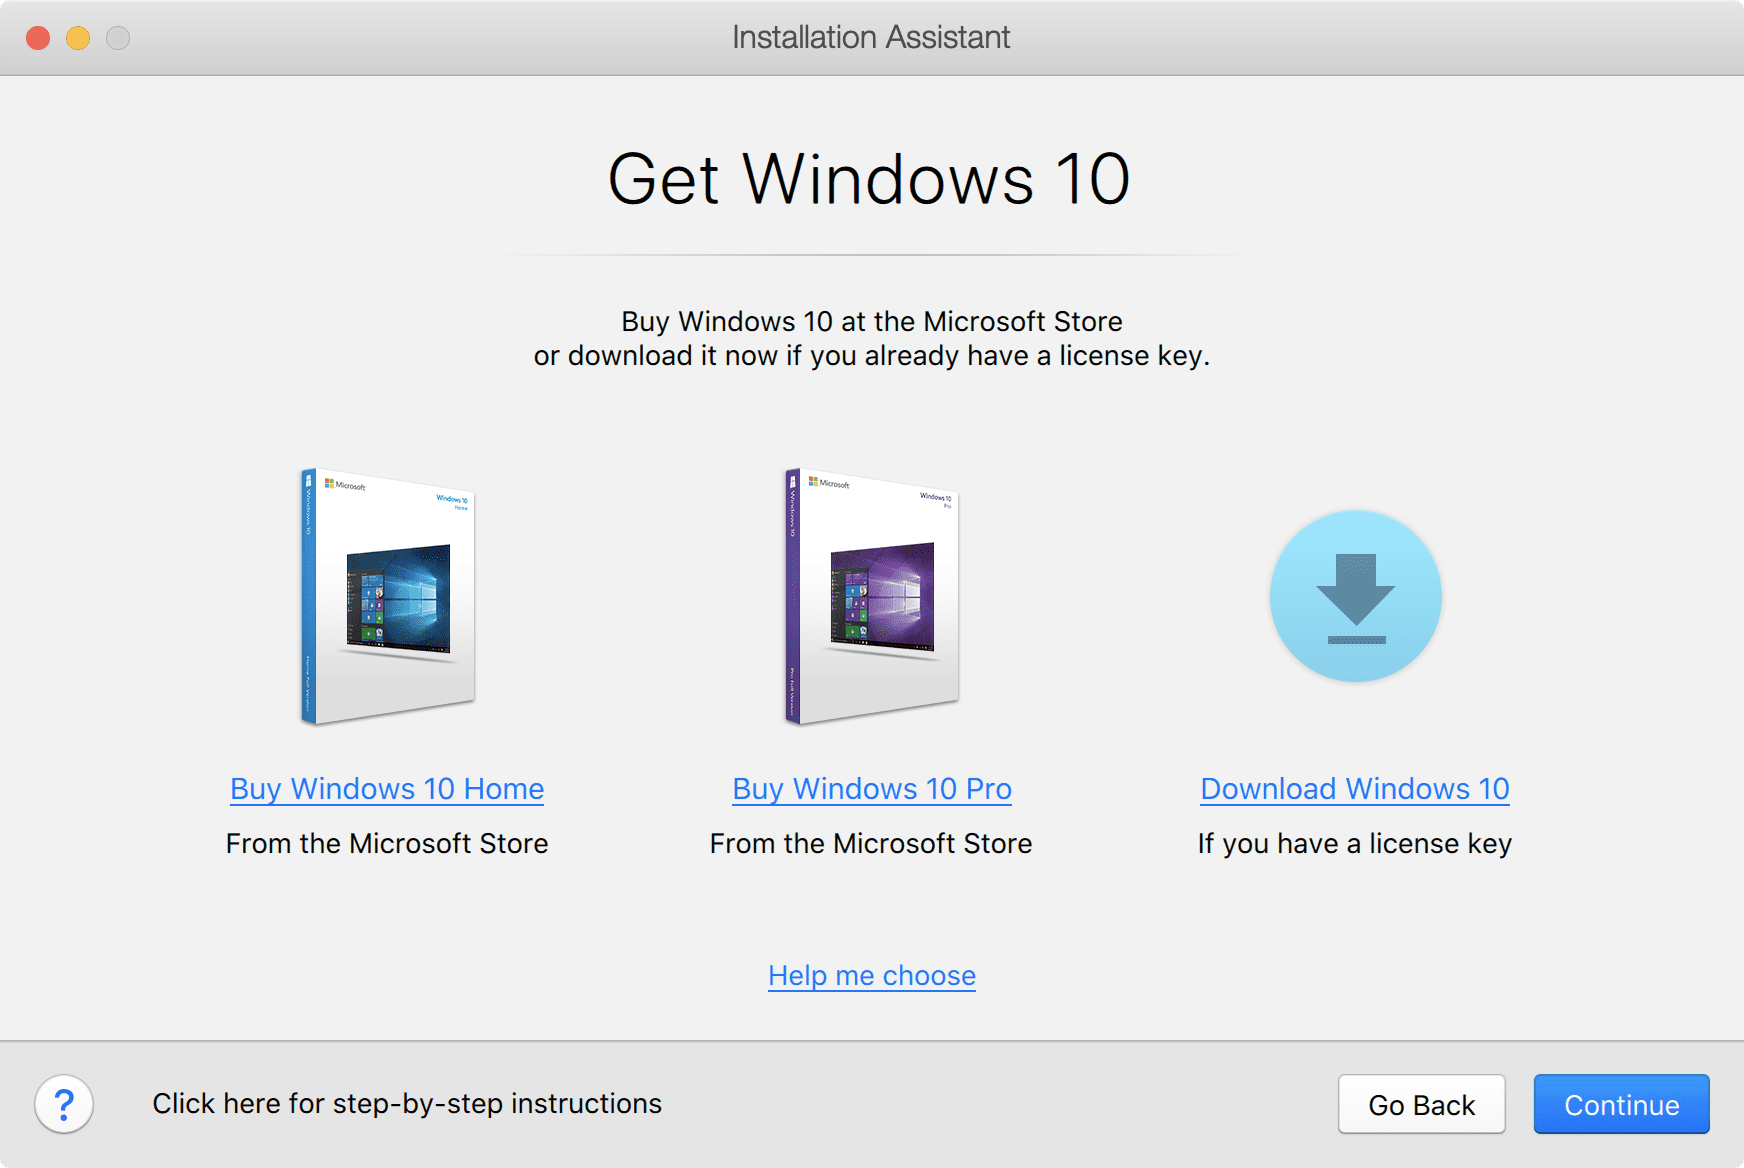
Figure 9_Choose which way to get Windows 10
Whichever path you choose, you will end up with a Windows 10 installation ISO file and a Windows 10 product key. After that, everything proceeds in the same manner as scenario 1. (See the previous Figure 2 as an example.) Don’t forget to install Parallels Toolbox and all the available Windows 10 updates!
Scenario 3: You want to move Windows 10 from a physical PC into a Parallels Desktop VM.
In this last scenario, you start out with the Installation Assistant dialog (see previous Figure 8) but choose “Transfer Windows from a PC.” You will then see the Transfer Windows dialog shown in Figure 14.
![]()
Figure 14_Transfer Your PC
This process will copy everything from a physical PC to a Parallels Desktop VM: apps, data files, and Windows itself. The physical PC will not be modified.
The most common way to transfer is via the network. The amount of time this will take depends on how much information is on the PC and how fast your network is.
There may be several Windows PCs on your network, so you need to indicate which PC you want to migrate into a VM. Do this by installing the Parallels Transfer Agent on the PC to be migrated.
There are two computers involved in this transfer: the Windows PC you are transferring from, and the Mac running Parallels Desktop which you are transferring to. Some of the actions you’ll take to set up this transfer occur on the PC and others on the Mac, so you will need to go back and forth between the two computers to set everything up. These tasks are not complicated, as shown in this video:
I hope you’ve seen how easy it is to install Windows 10 on Parallels Desktop. Feel free to download a free full-featured trial of Parallels Desktop and install Windows 10 like explained in scenario 1 right away at no extra cost.
Feel free to also check out our detailed video about How to install Windows on your Mac with Parallels Desktop – at no cost to you:
Let us know in the comments below, on Twitter or Facebook which way of installing Windows 10 on your Mac worked best for you.
How to run Windows 10 on your Mac using Parallels Desktop 15
You can use Apple’s built-in Boot Camp software to install Windows on your Mac, which will require you to partition your hard drive in order to make a space for the new operating system. You don’t, however, have to partition your hard drive in order to use Windows on a Mac.
You can use a virtual machine instead. A virtual machine is what it sounds like. It’s a virtual simulation of a real machine. You can install a virtual machine program onto your Mac and use it to open and run a full operating system like Windows, right on your desktop without having to partition your hard drive at all. You can have both operating systems running at the same time!
One of the most popular virtual machine programs for Mac is Parallels Desktop. It’s been around for a long time and is kept up to date with support for the latest computers and operating systems.
Here’s how to get Parallels Desktop on your Mac and then install and run Windows 10 from within your macOS operating system without having to switch hard drive partitions.
Check your system and hardware requirements
Before getting started with this guide, make sure you have the minimum requirements for hardware. Here are the hardware system requirements to install Parallels Desktop.
- A Mac computer with an Intel Core 2 Duo, Core i3, Core i5, Core i7, Core i9, Intel Core M or Xeon processor
- Minimum 4 GB of memory, 16 GB is recommended
- 500 MB for Parallels Desktop application installation
- Additional disk space for the guest operating system (at least 16 GB is required for Windows 10)
- SSD drive is recommended for better performance
- Internet connection for product activation and select features
Your Mac operating system should also be no older than four years.
- macOS Catalina 10.15
- macOS Mojave 10.14
- macOS High Sierra 10.13
- macOS Sierra 10.12
Additionally, your Mac must be able to support Windows 10.
- MacBook (2015 and later)
- MacBook Air (2012 and later)
- MacBook Pro (2012 and later)
- Mac mini (2012 and later)
- iMac (2012 and later)
- iMac Pro (2017 and later)
- Mac Pro (2013 and later)
Before you start: Back up your Mac
This is one of those aweful mistakes that people make, thinking that they don’t need to back up their Mac before doing something big. First offf, you should be backing up your Mac on a regular basis, but even if you don’t do so multiple times per day, you should definitely do so right now, before you continue with this guide. Seriously. Back it up.
How to run Windows on Mac using Parallels Desktop 15
Of course, you’ll need Parallels Desktop and Windows 10 in order to download and install them. Parallels Desktop costs $80 for a standard license. The Pro Edition and Business Edition are both $100 per year. You can either buy a full license right now, or start with the free two-week trial and make your full purchase later.
You’ll also need a copy of Windows 10. You might already have a license or you might need to buy a copy. You can load Windows 10 right from within Parallels Desktop and you’ll be up and running as soon as the installation is complete.
How to download and install Parallels Desktop 15
Step one is to download Parallels desktop. You can either buy a full license right now, or start with the free two-week trial.
Once the program is finished downloading, follow these steps to complete the installation process:
- Double-click on the ParallelsDesktop.dmg file to open it (it might be in Finder or on your desktop, you can search for it in Spotlight if it’s not easy to find).
- Double-click on Install in the Parallels Desktop window that appears.
Click Open if you are asked to confirm that you want to install Parallels Desktop.

Once Parallels Desktop is installed, it will automatically take you to a page where you can download Windows 10. If you already have a copy of Windows 10, you can skip the step. If not, click Install Windows to begin the installation process.

If you already own a copy of Windows 10, click Skip and then click New from the Parallels Desktop dropdown menu. You can then select your copy of Windows 10 from the available options.
After Windows 10 has installed on your Mac, you’ll be directed to sign into your Parallels Desktop account. If you don’t already have one, you can create one right now.
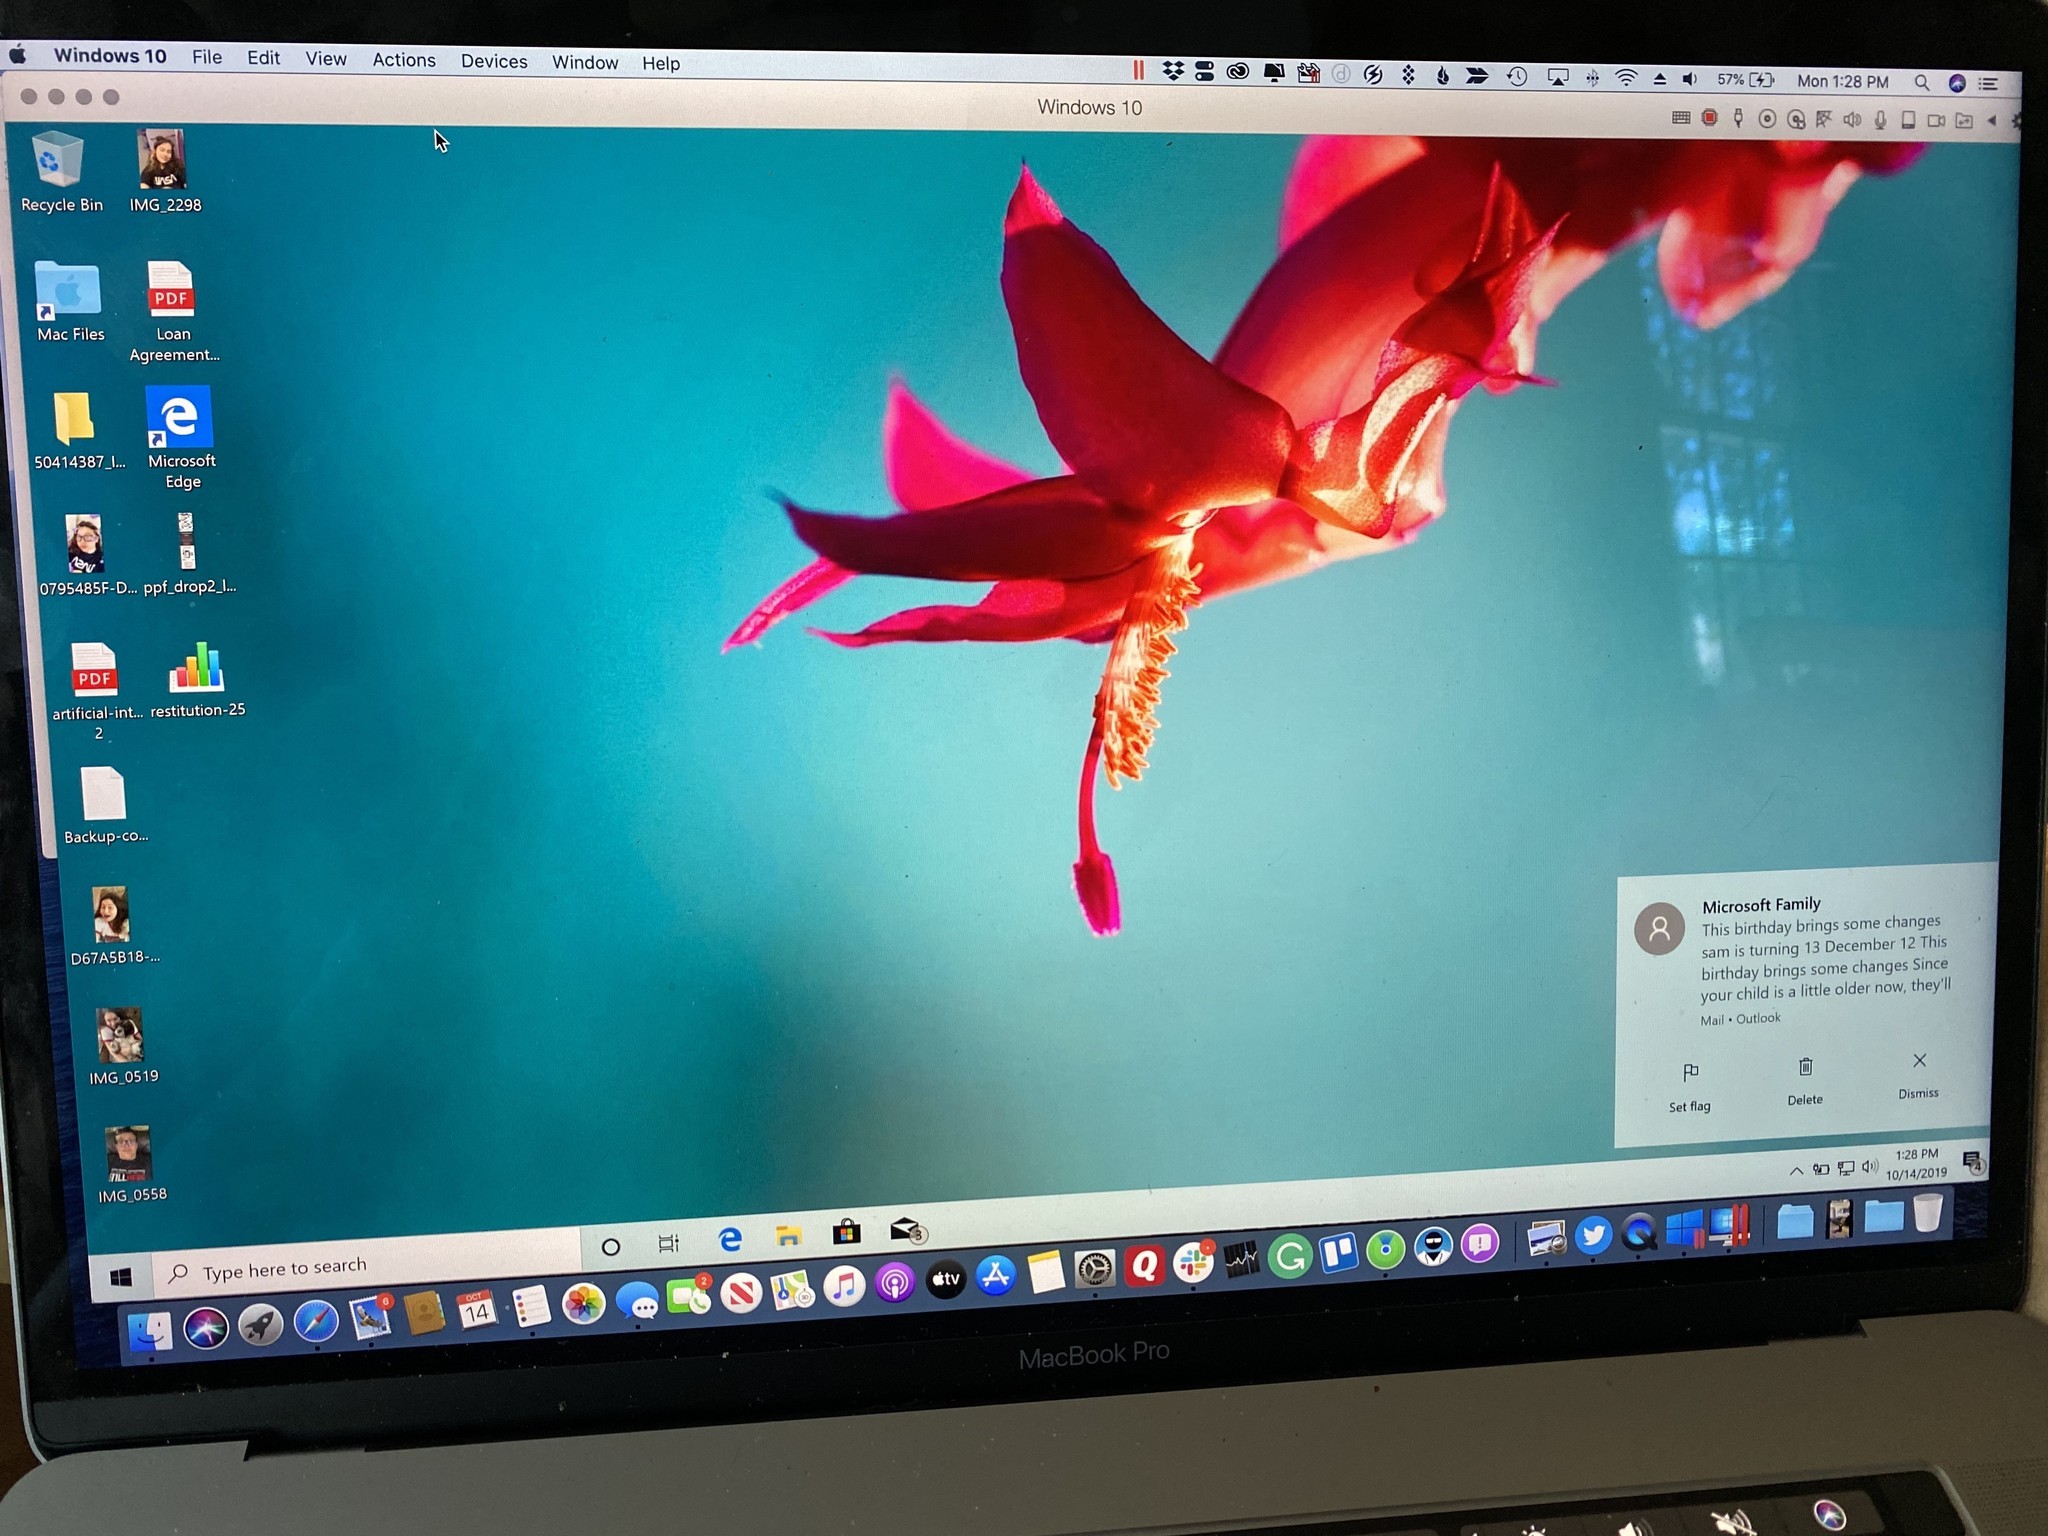
After signing in or signing up for a Parallels Desktop account, Windows 10 will pop up in a new window. It sort of looks like you’re just using a new program or web browser, but you’ve got a virtual simulation of Windows 10, in its entirety right on your Mac!
Any questions?
Do you have any questions about how to run Windows 10 on your Mac using Parallels Desktop? Put them in the comments section and we’ll help you out.


