- Use the System File Checker tool to repair missing or corrupted system files
- Run the System File Checker tool (SFC.exe)
- More Information
- Run DISM to repair Windows System Image and Windows Component Store in Windows 10
- Windows Component Store Corrupt
- How to Run DISM in Windows 10
- Inbox Corruption Repair
- How To Repair and Restore Windows 10
- Method 1: Use Windows Startup Repair
- Method 2: Use Windows Restore
- Method 3: Perform a Disk Scan
- Method 4: Reset Windows 10
- Method 5: Reinstall Windows 10 from Scratch
Use the System File Checker tool to repair missing or corrupted system files
If some Windows functions aren’t working or Windows crashes, use the System File Checker to scan Windows and restore your files.
Though the steps below might look complicated at first glance, just follow them in order, step-by-step, and we’ll try to get you back on track.
Run the System File Checker tool (SFC.exe)
To do this, follow these steps:
Open an elevated command prompt. To do this, do the following as your appropriate:
If you are running Windows 10, Windows 8.1 or Windows 8, first run the inbox Deployment Image Servicing and Management (DISM) tool prior to running the System File Checker. (If you are running Windows 7 or Windows Vista, skip to Step 3.)
Type the following command, and then press Enter. It may take several minutes for the command operation to be completed.
DISM.exe /Online /Cleanup-image /Restorehealth
Important: When you run this command, DISM uses Windows Update to provide the files that are required to fix corruptions. However, if your Windows Update client is already broken, use a running Windows installation as the repair source, or use a Windows side-by-side folder from a network share or from a removable media, such as the Windows DVD, as the source of the files. To do this, run the following command instead:
DISM.exe /Online /Cleanup-Image /RestoreHealth /Source: C:\RepairSource\Windows /LimitAccess
Note: Replace the C:\RepairSource\Windows placeholder with the location of your repair source. For more information about using the DISM tool to repair Windows, reference Repair a Windows Image.
At the command prompt, type the following command, and then press ENTER:
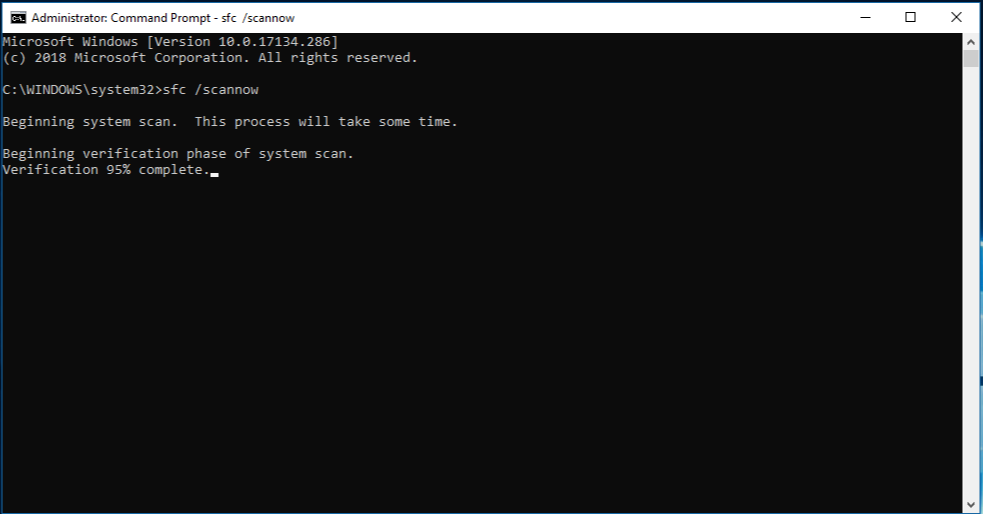
The sfc /scannow command will scan all protected system files, and replace corrupted files with a cached copy that is located in a compressed folder at %WinDir%\System32\dllcache.
The %WinDir% placeholder represents the Windows operating system folder. For example, C:\Windows.
Note Do not close this Command Prompt window until the verification is 100% complete. The scan results will be shown after this process is finished.
After the process is finished, you may receive one of the following messages:
Windows Resource Protection did not find any integrity violations.
This means that you do not have any missing or corrupted system files.
Windows Resource Protection could not perform the requested operation.
To resolve this problem, perform the System File Checker scan in safe mode, and make sure that the PendingDeletes and PendingRenames folders exist under %WinDir%\WinSxS\Temp.
Windows Resource Protection found corrupt files and successfully repaired them. Details are included in the CBS.Log %WinDir%\Logs\CBS\CBS.log.
To view the detail information about the system file scan and restoration, go to How to view details of the System File Checker process.
Windows Resource Protection found corrupt files but was unable to fix some of them. Details are included in the CBS.Log %WinDir%\Logs\CBS\CBS.log.
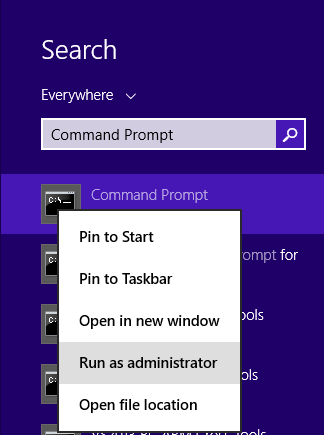
Swipe in from the right edge of the screen, and then tap Search. Or, if you are using a mouse, point to the lower-right corner of the screen, and then click Search. Type Command Prompt in the Search box, right-click Command Prompt, and then click Run as administrator. If you are prompted for an administrator password or for a confirmation, type the password, or click Allow.
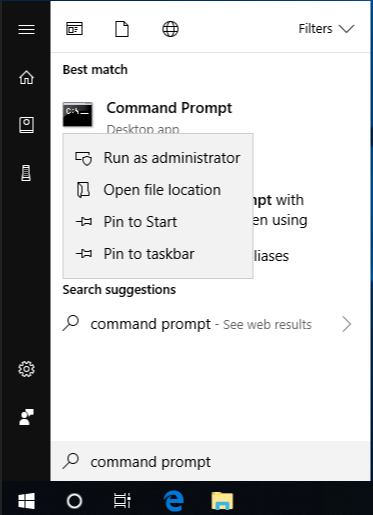
To do this, click Start, type Command Prompt or cmd in the Search box, right-click Command Prompt, and then click Run as administrator. If you are prompted for an administrator password or for a confirmation, type the password, or click Allow.
More Information
To view the details that included in the CBS.Log file, you can copy the information to the Sfcdetails.txt file by using the Findstr command, and then view the details in the Sfcdetails.txt. To do this, follow these steps:
Open an elevated command prompt as described in the previous step 1.
At the command prompt, type the following command, and then press ENTER:
Note The Sfcdetails.txt file contains details from every time that the System File Checker tool has been run on the computer. The file includes information about files that were not repaired by the System File Checker tool. Verify the date and time entries to determine the problem files that were found the last time that you ran the System File Checker tool.
Open the Sfcdetails.txt file from your desktop.
The Sfcdetails.txt file uses the following format:
Date/Time SFC detail The following sample log file contains an entry for a file that could not be repaired: 2007-01-12 12:10:42, Info CSI 00000008 [SR] Cannot repair member file [l:34<17>]»Accessibility.dll» of Accessibility, Version = 6.0.6000.16386, pA = PROCESSOR_ARCHITECTURE_MSIL (8), Culture neutral, VersionScope neutral, PublicKeyToken =
How to manually replace a corrupted system file with a known good copy of the file
After you determine which system file was corrupted and could not be repaired through the detail information in the Sfcdetails.txt file, find where the corrupted file located, and then manually replace the corrupted file with a known good copy of the file. To do this, follow these steps:
Note You may be able to get a known good copy of the system file from another computer that is running the same version of Windows with your computer. You may perform a System File Checker process on that computer to make sure the system file that you intend to copy is a good copy.
Take administrative ownership of the corrupted system file. To do this, at an elevated command prompt, copy and then paste (or type) the following command, and then press ENTER:
takeown /f Path_And_File_Name Note The Path_And_File_Name placeholder represents the path and the file name of the corrupted file. For example, type takeown /f C:\windows\system32\jscript.dll. 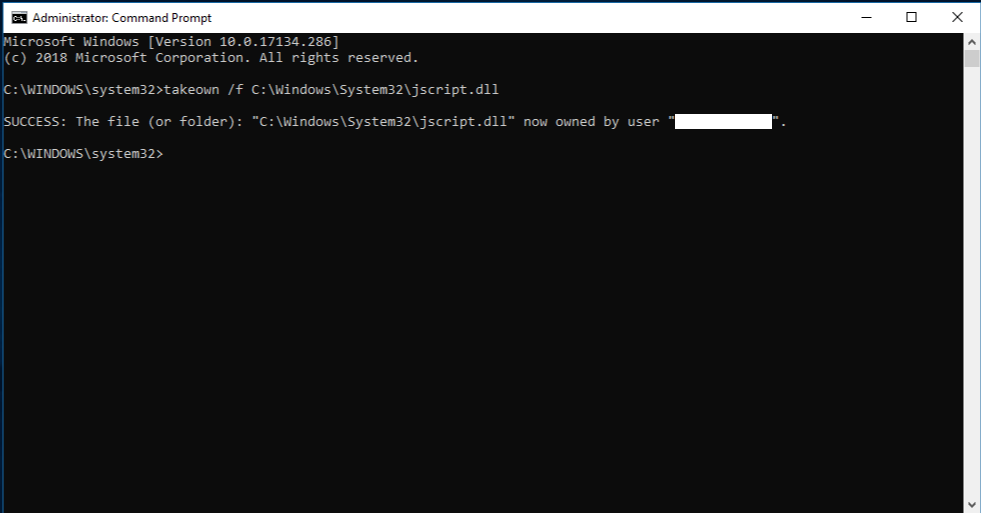
Grant administrators full access to the corrupted system file. To do this, copy and paste (or type) the following command, and then press ENTER:
icacls Path_And_File_Name /GRANT ADMINISTRATORS:F Note The Path_And_File_Name placeholder represents the path and the file name of the corrupted file. For example, type icacls C:\windows\system32\jscript.dll /grant administrators:F.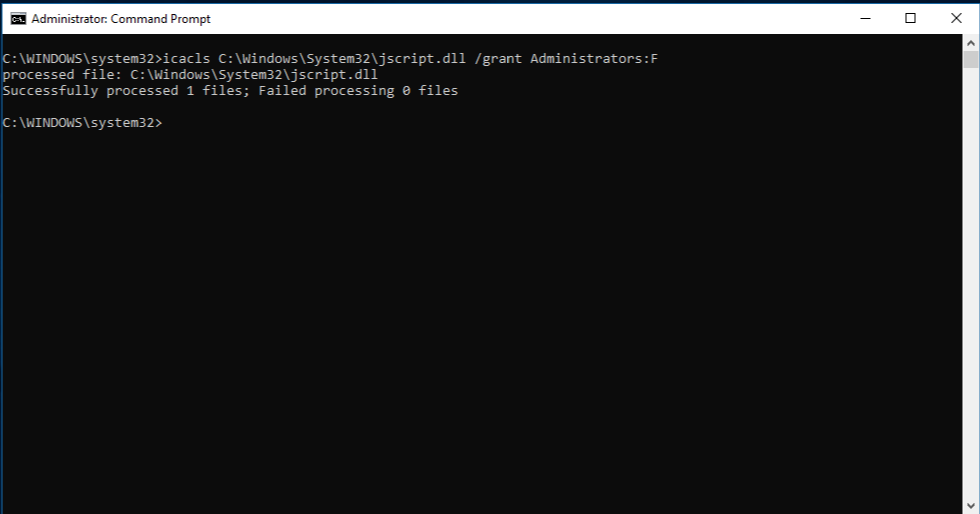
Replace the corrupted system file with a known good copy of the file. To do this, copy and paste (or type) the following command, and then press ENTER:
Copy Source_File Destination Note The Source_File placeholder represents the path and file name of the known good copy of the file on your computer, and the Destination placeholder represents the path and file name of the corrupted file. For example, type copy E:\temp\jscript.dll C:\windows\system32\jscript.dll.
If the steps above don’t work, you may need to reinstall Windows. For more info, see Windows 10 recovery options.
Run DISM to repair Windows System Image and Windows Component Store in Windows 10
This post will show you how to use the DISM Tool to repair a Windows System Image in Windows 10/8.1. The System Update and Readiness Tool or CheckSUR tool will scan your Windows computer for inconsistencies, which may be caused by various hardware failures or by software issues and potentially fix that corruption. In Windows 10/8 and Windows Server, the Inbox Corruption Repair brings the functionality of CheckSUR into Windows. You do not require a separate download to get the tool.
Windows Component Store Corrupt
How to Run DISM in Windows 10
You can repair Windows System Image using the DISM tool.
If a Windows image becomes unserviceable, you can use the Deployment Imaging and Servicing Management (DISM) tool to update the files and correct the problem. In the case of system inconsistencies and corruption, you can use the DISM tool by using the Cleanup-Image functionality along with these available switches.
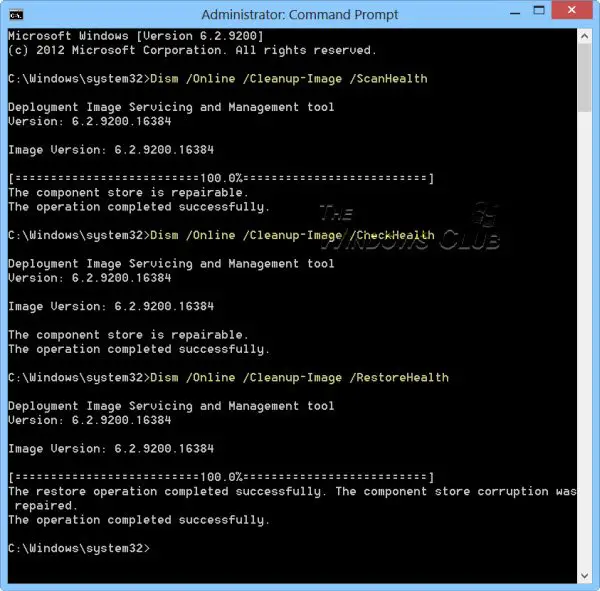
Use Dism /Online /Cleanup-Image followed by these switches:
1] /ScanHealth: This checks for component store corruption and records that corruption to the C:\Windows\Logs\CBS\CBS.log but no corruption is fixed using this switch. This is useful for logging what, if any, corruption exists. Use:
This could take 10-15 minutes.
2] /CheckHealth: This checks to see if a component corruption marker is already present in the registry. This is merely a way to see if corruption currently exists. Think of it as a read-only CHKDSK. Use:
This could take less than a minute.
3] /RestoreHealth : This checks for component store corruption records the corruption to C:\Windows\Logs\CBS\CBS.log and FIXES the corruption using Windows Update. Use:
This operation takes 15 mins or more depending on the level of corruption.
To carry out these operations you have to open an elevated Command Prompt. First, you have to check if there are corruptions and it the corruption or image is repairable. If yes, then you can use the /RestoreHealth switch to fix the corruption.
Inbox Corruption Repair
You can use this:
- If your System File Checker is corrupted or SFC is not working and the SFC /SCANNOW command is unable to repair corrupted system files because the store is corrupted.
- To fix Windows component store corruption when the same Windows Updates continue to appear to be available to install even though they already show successfully installed in update history.
- If a Windows image becomes unserviceable, you can use the Deployment Imaging and Servicing Management (DISM) tool to update the files, correct the problem, and repair Windows image. You can use DISM to repair an offline Windows image in a WIM or VHD file or an online Windows image.
Incidentally, our freeware FixWin 10 for Windows 10, let you repair the Windows Component Store, in a click. Windows Software Repair Tool from Microsoft will repair system components and detect corrupt files, resync System date and Time, reset System Settings, reinstall System Applications and run the DISM Tool to repair system image, with a click.
See this post if you receive a DISM fails The source files could not be found error message.
How To Repair and Restore Windows 10
By Henry T. Casey 19 August 2019
So Windows 10 won’t load. Or maybe it starts up, but crashes a lot. Either way, you need to fix the problem before you can use your laptop. If your screen is rotated, we have an easy fix for that. If the operating system is booting slower than molasses, you can also use power settings to speed up its launch. Otherwise, here are a few ways to repair Windows 10.
Method 1: Use Windows Startup Repair
If Windows 10 is unable to boot up and takes you to the login screen or the desktop, your first step should be to use Startup Repair. Here’s how:
1. Navigate to the Windows 10 Advanced Startup Options menu. On many laptops, hitting F11 as soon as you power on will get you to the Windows 10 Advanced Startup Options. Booting off an install disk and hitting Next then Repair offers a secondary option.
Once your computer has booted, select Troubleshoot

And then you’ll need to click Advanced options.
2. Click Startup Repair.
Windows will take anywhere from a few seconds to a few minutes to attempt to fix the problem. It may not be able to. If you don’t actually have a startup problem, it will also say it can’t fix the problem.
Method 2: Use Windows Restore
1. Complete step 1 from the previous method to get to Windows 10’s Advanced Startup Options menu.
2. Click System Restore.
The computer will reboot.
3. Select your username.
4. Enter your password.
5. Select a restore point from the menu and follow the prompts. If you have no restore points, you can’t use this method.
Method 3: Perform a Disk Scan
Your Windows 10 problems may stem from a corrupt file. If you can boot into the operating system — even if you have to boot into safe mode — you should perform a file scan to check for problems.
1. Type «cmd» into the main search box.
2. Right click on Command Prompt and select Run as Administrator.
3. Type sfc /scannow at command prompt and hit Enter.
The scan will take a while and should fix any corrupted files it finds.
Method 4: Reset Windows 10
If you want to get a clean start, free from rogue software and drivers, you usually don’t need to do a full install. Instead, Windows 10 provides a built-in reset feature which takes your computer back to the way it was before you had any software, special devices or data preloaded. On a side note, if you’re giving your computer to someone else, resetting is a good way to wipe it.
See our tutorial on how to reset Windows 10 to refresh your PC.
Method 5: Reinstall Windows 10 from Scratch
If all else fails and you can’t even reset your Windows computer, you can reinstall entirely. You won’t even need an activation number or any proof of purchase, either. Just make sure you have more than 4GB of space available, as that’s how much space the file you’ll download takes up. Here’s how to reinstall Windows 10:
1. Visit this page and click Download tool now.
2. Click on the download link at the bottom of your screen.
3. Click Accept.
4. Select Create installation media for another PC and click Next.
7. Select ISO file and click Next.
7. Click Finish.
7. Open the Windows ISO file you downloaded.
8. Open Setup.
9. Click Next.
10. Click Accept. Be prepared to wait a while. This next part may take a while.
11. Click Install. Again, this will take a moment while your system restarts.
12. Wait for your system to restart and install Windows 10.
You’ve reinstalled Windows 10! We hope it fixed your problems. Check out the below table of contents for more fixes.
Windows 10 still acting slow? Here’s how to defragment your hard drive in Windows 10 to improve performance.


