- How to Run Jar File in Ubuntu Linux
- How to execute Jar file in Ubuntu and other distributions
- Further troubleshooting Jar file not running on Linux
- Java: работа с jar-архивами из консоли Linux
- Извлечение объектов из архива
- Создание jar-архива
- Просмотр содержимого jar-архива
- Добавление объектов в jar-архив
- Дополнение
- Запуск Java классов и JAR-ов не по учебнику
- Первое открытие
- Исполняемые классы
- Creating a JAR File
- An Example
- Creating a JAR File
- An Example
How to Run Jar File in Ubuntu Linux
Last updated October 29, 2019 By Abhishek Prakash 19 Comments
Got a Jar file but struggling to execute it? Learn how to run a Jar file in Ubuntu and other Linux distributions.
How to execute Jar file in Ubuntu and other distributions
A Jar file is basically a Java executable file. So you must have Java installed on your system. If you have Java installed in your Ubuntu, you should be able to run it either by double clicking or by selecting from right click options.
The problem here is that most Linux distributions don’t come with Java pre-installed. So please make sure to install Java on Ubuntu. or whichever distribution you are using.
You only need the Java Runtime Environment and you can install it using the command below in Ubuntu-based distributions:
Even with Java installed, sometimes running a Java application is not as straightforward as double-clicking the icon. You might have to go through a few steps.
When I tried to open the .jar file by double clicking, I was presented with the following error:
Fixing this error is very trivial. Right click the .jar file, and open properties.
Now in the properties menu, open the ‘Permissions’ tab. Enable the ‘Allow executing this file as program’ checkbox.
Now, you can simply double click the .jar file to launch the application, AndroMouse in my case. You can see that it works without any problems.
You have to keep in mind that you have to enable the ‘Allow executing as program’ permission for every .jar application you download. It is disabled by default as a security measure. You should enable it only for the applications that you trust and know are safe.
Further troubleshooting Jar file not running on Linux
Even if you have Java Runtime Environment installed and execution permission set, in some older versions of Ubuntu, the Jar file won’t run. Here’s a fix for that.
Right click on the .jar file and choose the option “Open With Other Application“:

Now on the next screen, select the option Show other applications:

In other applications, if you do not find option for Java, install the Java Runtime Environment first. Normally, you should be able to see the option Open With OpenJDK Java x Runtime. Select it and successfully run it.

Enjoy running Jar file on Ubuntu!
I hope this short guide was useful to all of you. Which Java based applications do you use? Do you have any other problems with them? Let me know in the comments below!
Like what you read? Please share it with others.
Источник
Java: работа с jar-архивами из консоли Linux
Извлечение объектов из архива
Распаковать архив ojdbc14-10.2.0.4.jar в текущую директорию:
-x — extract, распаковать;
-f — file, файл, который необходимо распаковать;
В результате получим содержимое архива:
Извлечь только определённый файл или каталог, например — только папку oracle из архива ojdbc14-10.2.0.4.jar :
Извлечь только определённый файл:
Необходимые каталоги (в данном случае oracle/sql ) будут созданы автоматически.
Создание jar-архива
-v — verbose, будет выводить полную информацию о действиях;
-0 — zero, не будет сжимать файлы перед добавлением в арихв;
-f — file, направить всё в файл;
-c — create, создать архив;
-C — change, сменить каталог на время выполнения операции.
Создадим простой архив oracle.jar в который заархивируем содержимое каталога oracle :
То же, но в подробном режиме:
Видно, что файлы сжимаются. Избежим этого, добавим -0 :
Видим, что файлы добавляются в архив вместе с директориями. Что бы избежать этого, и файлы размещать в корне архива — используем опцию -C :
Файл file.d находится в корне архива, т.к. перед выполнением добавления его в архив — архиватор сменил текущую директорию на or .
Просмотр содержимого jar-архива
-f — file, файл архива;
-t — table, список содержимого;
-v — verbose, более полная инфомрация.
Добавление объектов в jar-архив
-u — update, обнвоить содержимое архива.
И добавим его в имеющийся архив oracle.jar :
При обновлении архива — так же можно использовать опцию -C (change).
Дополнение
Простой способ найти файл, который находится в каком-то jar -архиве, но вы не знаете в каком именно:
Источник
Запуск Java классов и JAR-ов не по учебнику
Меня давно занимала мысль как в Linux-е запускать программы на Java без вспомогательных Bash скриптов. Я не видел приемлемого решения, если не считать способ «bash script payload», когда в конец скрипта помещается бинарный файл.
Но на прошлой неделе случайно наткнулся на модуль ядра binfmt_misc, с помощью которого можно перехватить исполнение файла по его magic number. Для этого через update-binfmts добавляется собственный обработчик для получения имени исполняемого файла и аргументов пользователя.
Первое открытие
Как оказалось в моей Ubuntu 16.04 уже зарегистрирован обработчик для JAR файлов:
Отдав команду chmod +x foo.bar я радостно потирал руки, но реальность оказалось сурова — запуск ./foo.jar выдал следующее:
Погуглив, я нашел обросший мхом баг bugs.java.com/bugdatabase/view_bug.do?bug_id=6401361 Как оказывается сборка через Maven не добавляет «0xcafe» в начало JAR файла. Не менее безответственно ведет себя и плагин maven-assembly-plugin. Что не нравится /usr/bin/jexec, зарегистрированному обработчику по умолчанию.
Погуглив еще, я нашел решение проблемы через установку пакета jarwrapper. После установки добавляется новый обработчик /usr/bin/jarwrapper и страховка /usr/bin/jardetector (проверяет по META-INF что это действительно JAR). Но изучив код обработчика мне не понравилась куча лишней работы, которую делает скрипт запуская множество вспомогательных программ.
Поэтому решением стал собственный обработчик:
Дальше открываем файл sudo gedit /var/lib/binfmts/jar и регистрируем обработчик заменив строчку с /usr/bin/jexec на /usr/bin/jarinvoke. На самом деле это плохое решение и лучше создать собственную группу (об этом ниже), но для первичного понимания сойдет.
Для вступления изменений в силу может потребоваться выполнить:
После чего можете запускать JAR файлы как любые другие исполняемые файлы.
Исполняемые классы
Теперь можно идти дальше и сделать из Java классов исполняемые файлы, где jarwrapper не сможет помочь. Обработчик будет работать только для классов с пакетом по умолчанию (т.е. классы с отсутствующим package заголовком). Может можно сделать и лучше, но мне хватило такой функциональности для «скриптования» на Java:
После чего регистрируем собственный обработчик (этим же способом можно создать новый обработчик для JAR-ов не редактируя /usr/bin/jexec):
Можно пойти и дальше, сделав более сложный обработчик, который по импорту классов будет определять какие библиотеки добавить в CLASSPATH из
/.m2, но это отдельная история. Сейчас интересен взгляд со стороны, замечания, дополнения, если таковые есть. После чего думаю оформить это в deb пакет и выложить всё на гитхабе.
Источник
Creating a JAR File
The basic format of the command for creating a JAR file is:
The options and arguments used in this command are:
- The c option indicates that you want to create a JAR file.
- The f option indicates that you want the output to go to a file rather than to stdout.
- jar-file is the name that you want the resulting JAR file to have. You can use any filename for a JAR file. By convention, JAR filenames are given a .jar extension, though this is not required.
- The input-file(s) argument is a space-separated list of one or more files that you want to include in your JAR file. The input-file(s) argument can contain the wildcard * symbol. If any of the «input-files» are directories, the contents of those directories are added to the JAR archive recursively.
The c and f options can appear in either order, but there must not be any space between them.
This command will generate a compressed JAR file and place it in the current directory. The command will also generate a default manifest file for the JAR archive.
The metadata in the JAR file, such as the entry names, comments, and contents of the manifest, must be encoded in UTF8.
You can add any of these additional options to the cf options of the basic command:
jar command options| Option | Description |
|---|---|
| v | Produces verbose output on stdout while the JAR file is being built. The verbose output tells you the name of each file as it’s added to the JAR file. |
| 0 (zero) | Indicates that you don’t want the JAR file to be compressed. |
| M | Indicates that the default manifest file should not be produced. |
| m | Used to include manifest information from an existing manifest file. The format for using this option is: |
| -C | To change directories during execution of the command. See below for an example. |
When you create a JAR file, the time of creation is stored in the JAR file. Therefore, even if the contents of the JAR file do not change, when you create a JAR file multiple times, the resulting files are not exactly identical. You should be aware of this when you are using JAR files in a build environment. It is recommended that you use versioning information in the manifest file, rather than creation time, to control versions of a JAR file. See the Setting Package Version Information section.
An Example
Let us look at an example. A simple TicTacToe applet. You can see the source code of this applet by downloading the JDK Demos and Samples bundle from Java SE Downloads. This demo contains class files, audio files, and images having this structure:
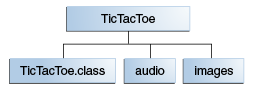
TicTacToe folder Hierarchy
The audio and images subdirectories contain sound files and GIF images used by the applet.
You can obtain all these files from jar/examples directory when you download the entire Tutorial online. To package this demo into a single JAR file named TicTacToe.jar, you would run this command from inside the TicTacToe directory:
The audio and images arguments represent directories, so the Jar tool will recursively place them and their contents in the JAR file. The generated JAR file TicTacToe.jar will be placed in the current directory. Because the command used the v option for verbose output, you would see something similar to this output when you run the command:
You can see from this output that the JAR file TicTacToe.jar is compressed. The Jar tool compresses files by default. You can turn off the compression feature by using the 0 (zero) option, so that the command would look like:
You might want to avoid compression, for example, to increase the speed with which a JAR file could be loaded by a browser. Uncompressed JAR files can generally be loaded more quickly than compressed files because the need to decompress the files during loading is eliminated. However, there is a tradeoff in that download time over a network may be longer for larger, uncompressed files.
The Jar tool will accept arguments that use the wildcard * symbol. As long as there weren’t any unwanted files in the TicTacToe directory, you could have used this alternative command to construct the JAR file:
Though the verbose output doesn’t indicate it, the Jar tool automatically adds a manifest file to the JAR archive with path name META-INF/MANIFEST.MF. See the Working with Manifest Files: The Basics section for information about manifest files.
In the above example, the files in the archive retained their relative path names and directory structure. The Jar tool provides the -C option that you can use to create a JAR file in which the relative paths of the archived files are not preserved. It’s modeled after TAR’s -C option.
As an example, suppose you wanted to put audio files and gif images used by the TicTacToe demo into a JAR file, and that you wanted all the files to be on the top level, with no directory hierarchy. You could accomplish that by issuing this command from the parent directory of the images and audio directories:
The -C images part of this command directs the Jar tool to go to the images directory, and the . following -C images directs the Jar tool to archive all the contents of that directory. The -C audio . part of the command then does the same with the audio directory. The resulting JAR file would have this table of contents:
By contrast, suppose that you used a command that did not employ the -C option:
The resulting JAR file would have this table of contents:
Источник
Creating a JAR File
The basic format of the command for creating a JAR file is:
The options and arguments used in this command are:
- The c option indicates that you want to create a JAR file.
- The f option indicates that you want the output to go to a file rather than to stdout.
- jar-file is the name that you want the resulting JAR file to have. You can use any filename for a JAR file. By convention, JAR filenames are given a .jar extension, though this is not required.
- The input-file(s) argument is a space-separated list of one or more files that you want to include in your JAR file. The input-file(s) argument can contain the wildcard * symbol. If any of the «input-files» are directories, the contents of those directories are added to the JAR archive recursively.
The c and f options can appear in either order, but there must not be any space between them.
This command will generate a compressed JAR file and place it in the current directory. The command will also generate a default manifest file for the JAR archive.
The metadata in the JAR file, such as the entry names, comments, and contents of the manifest, must be encoded in UTF8.
You can add any of these additional options to the cf options of the basic command:
jar command options| Option | Description |
|---|---|
| v | Produces verbose output on stdout while the JAR file is being built. The verbose output tells you the name of each file as it’s added to the JAR file. |
| 0 (zero) | Indicates that you don’t want the JAR file to be compressed. |
| M | Indicates that the default manifest file should not be produced. |
| m | Used to include manifest information from an existing manifest file. The format for using this option is: |
| -C | To change directories during execution of the command. See below for an example. |
When you create a JAR file, the time of creation is stored in the JAR file. Therefore, even if the contents of the JAR file do not change, when you create a JAR file multiple times, the resulting files are not exactly identical. You should be aware of this when you are using JAR files in a build environment. It is recommended that you use versioning information in the manifest file, rather than creation time, to control versions of a JAR file. See the Setting Package Version Information section.
An Example
Let us look at an example. A simple TicTacToe applet. You can see the source code of this applet by downloading the JDK Demos and Samples bundle from Java SE Downloads. This demo contains class files, audio files, and images having this structure:
TicTacToe folder Hierarchy
The audio and images subdirectories contain sound files and GIF images used by the applet.
You can obtain all these files from jar/examples directory when you download the entire Tutorial online. To package this demo into a single JAR file named TicTacToe.jar, you would run this command from inside the TicTacToe directory:
The audio and images arguments represent directories, so the Jar tool will recursively place them and their contents in the JAR file. The generated JAR file TicTacToe.jar will be placed in the current directory. Because the command used the v option for verbose output, you would see something similar to this output when you run the command:
You can see from this output that the JAR file TicTacToe.jar is compressed. The Jar tool compresses files by default. You can turn off the compression feature by using the 0 (zero) option, so that the command would look like:
You might want to avoid compression, for example, to increase the speed with which a JAR file could be loaded by a browser. Uncompressed JAR files can generally be loaded more quickly than compressed files because the need to decompress the files during loading is eliminated. However, there is a tradeoff in that download time over a network may be longer for larger, uncompressed files.
The Jar tool will accept arguments that use the wildcard * symbol. As long as there weren’t any unwanted files in the TicTacToe directory, you could have used this alternative command to construct the JAR file:
Though the verbose output doesn’t indicate it, the Jar tool automatically adds a manifest file to the JAR archive with path name META-INF/MANIFEST.MF. See the Working with Manifest Files: The Basics section for information about manifest files.
In the above example, the files in the archive retained their relative path names and directory structure. The Jar tool provides the -C option that you can use to create a JAR file in which the relative paths of the archived files are not preserved. It’s modeled after TAR’s -C option.
As an example, suppose you wanted to put audio files and gif images used by the TicTacToe demo into a JAR file, and that you wanted all the files to be on the top level, with no directory hierarchy. You could accomplish that by issuing this command from the parent directory of the images and audio directories:
The -C images part of this command directs the Jar tool to go to the images directory, and the . following -C images directs the Jar tool to archive all the contents of that directory. The -C audio . part of the command then does the same with the audio directory. The resulting JAR file would have this table of contents:
By contrast, suppose that you used a command that did not employ the -C option:
The resulting JAR file would have this table of contents:
Источник


