- 4 Ways to Run Linux Commands in Windows
- Using Linux commands inside Windows
- 1. Use Linux Bash Shell on Windows 10
- 2. Use Git Bash to run Bash commands on Windows
- 3. Using Linux commands in Windows with Cygwin
- 4. Use Linux in virtual machine
- How to Run Linux on Windows 10
- Defining Bash
- Enabling Linux on Windows
- Use PowerShell
- Use Windows Features
- Downloading a Linux Distro
- Running Linux
- Как выполнять Linux-команды внутри Windows: официальный и сторонние способы
- Содержание
- WSL — официальная подсистема Linux внутри Windows
- CoreUtils — лёгкий инструмент для запуска базовых команд
- Cygwin — запуск команд и Bash-скриптов
4 Ways to Run Linux Commands in Windows
Last updated October 29, 2020 By Abhishek Prakash 16 Comments
Brief: Want to use Linux commands but don’t want to leave Windows? Here are several ways to run Linux bash commands in Windows.
If you are learning Shell scripting probably as a part of your course curriculum, you need to use Linux commands to practice the commands and scripting.
Your school lab might have Linux installed but personally you don’t have a Linux laptop but the regular Windows computer like everyone else. Your homework needs to run Linux commands and you wonder how to run Bash commands and scripts on Windows.
You can install Linux alongside Windows in dual boot mode. This method allows you to choose either Linux or Windows when you start your computer. But taking all the trouble to mess with partitions for the sole purpose of running Linux command may not be for everyone.
You can also use Linux terminals online but your work won’t be saved here.
The good news is that there are several ways you can run Linux commands inside Windows, like any regular application. Isn’t it cool?
Using Linux commands inside Windows

As an ardent Linux user and promoter, I would like to see more and more people using ‘real’ Linux but I understand that at times, that’s not the priority. If you are just looking to practice Linux to pass your exams, you can use one of these methods for running Bash commands on Windows.
1. Use Linux Bash Shell on Windows 10
Did you know that you can run a Linux distribution inside Windows 10? The Windows Subsystem for Linux (WSL) allows you to run Linux inside Windows. The upcoming version of WSL will be using the real Linux kernel inside Windows.
This WSL, also called Bash on Windows, gives you a Linux distribution in command line mode running as a regular Windows application. Don’t be scared with the command line mode because your purpose is to run Linux commands. That’s all you need.
You can find some popular Linux distributions like Ubuntu, Kali Linux, openSUSE etc in Windows Store. You just have to download and install it like any other Windows application. Once installed, you can run all the Linux commands you want.
 Linux distributions in Windows 10 Store
2. Use Git Bash to run Bash commands on Windows
You probably know what Git is. It’s a version control system developed by Linux creator Linus Torvalds.
Git for Windows is a set of tools that allows you to use Git in both command line and graphical interfaces. One of the tools included in Git for Windows is Git Bash.
Git Bash application provides and emulation layer for Git command line. Apart from Git commands, Git Bash also supports many Bash utilities such as ssh, scp, cat, find etc.
In other words, you can run many common Linux/Bash commands using the Git Bash application.
You can install Git Bash in Windows by downloading and installing the Git for Windows tool for free from its website.
3. Using Linux commands in Windows with Cygwin
If you want to run Linux commands in Windows, Cygwin is a recommended tool. Cygwin was created in 1995 to provide a POSIX-compatible environment that runs natively on Windows. Cygwin is a free and open source software maintained by Red Hat employees and many other volunteers.
For two decades, Windows users use Cygwin for running and practicing Linux/Bash commands. Even I used Cygwin to learn Linux commands more than a decade ago.
You can download Cygwin from its official website below. I also advise you to refer to this Cygwin cheat sheet to get started with it.
4. Use Linux in virtual machine
Another way is to use a virtualization software and install Linux in it. This way, you install a Linux distribution (with graphical interface) inside Windows and run it like a regular Windows application.
This method requires that your system has a good amount of RAM, at least 4 GB but better if you have over 8 GB of RAM. The good thing here is that you get the real feel of using a desktop Linux. If you like the interface, you may later decide to switch to Linux completely.
There are two popular tools for creating virtual machines on Windows, Oracle VirtualBox and VMware Workstation Player. You can use either of the two. Personally, I prefer VirtualBox.
Conclusion
The best way to run Linux commands is to use Linux. When installing Linux is not an option, these tools allow you to run Linux commands on Windows. Give them a try and see which method is best suited for you.
Like what you read? Please share it with others.
How to Run Linux on Windows 10
Linux users celebrated when it was reported that Bash shell was coming to Windows. And while it was not readily available to all users at first, the Windows 10 Creators Update made Linux on Windows more accessible.
Want to join in on the fun? Here’s how you can have Linux on Windows operating system without having to go through a virtual machine.

Defining Bash
Bash is basically a subsystem for Ubuntu. With Bash, you have a Linux system running inside Windows. It’s the very same Bash you’d find in Linux. You can use it to execute Linux commands without the need for a virtual machine or dual booting.
Using Bash shell, developers can experience Linux natively on a Windows machine.
Enabling Linux on Windows
There are two ways of enabling a Windows subsystem for Linux. One is through PowerShell and the other would be through Windows Features.
Use PowerShell
Search for PowerShell and run it as an administrator. Once open, type this command and press Enter after:
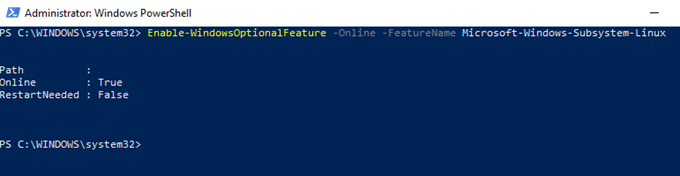
You will be prompted to confirm by hitting Y or N. Press Y to proceed then reboot your computer. If it’s already installed, you won’t have to restart.
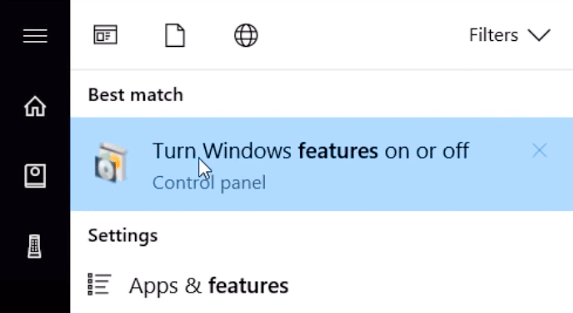
Use Windows Features
Use Search to look for a Control Panel application called Turn Windows Features On or Off.
Note: You can also get to the application by heading directly to Control Panel > Programs > Programs and Features > Turn Windows Features On or Off.
Once open, go through the list of features until you find Windows Subsystem for Linux. Tick the box to enable the option.
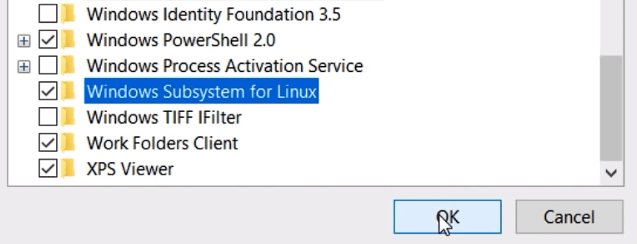
The computer will run and apply some changes. After it’s done, you will be asked to restart your computer.
Downloading a Linux Distro
Windows should now be able to run Linux. Now you have to download a Linux distro like Ubuntu for Windows to enter Linux commands.

Simply head on over to the Microsoft Store and download the Linux distro of your choice. You need to be logged in to proceed.
There are multiple systems available, but we’ll install Ubuntu and use it throughout the rest of this post. The download will likely take a while because of the large file size.
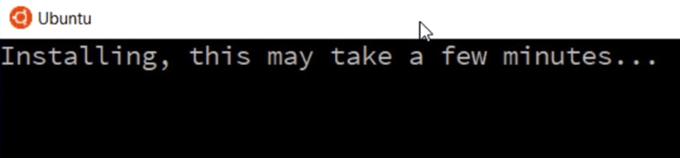
Running Linux
The Linux system you installed will run like a regular Windows application. Open Ubuntu. It will perform a one-time installation. You will be able to use Ubuntu Linux faster the next time you open the application.
Once installed, you will be asked to enter a username and a password. Provide all the necessary information.

From here on out, you will be able to go through the directory as you would in Linux. You will need to use SUDO APT to run root commands. You can also use APT-GET, APT INSTALL, AND APT UPDATE. You’re pretty much free to do everything you can do in a Linux terminal.
One thing to remember is that the Windows files system will be located inside the MNT folder.
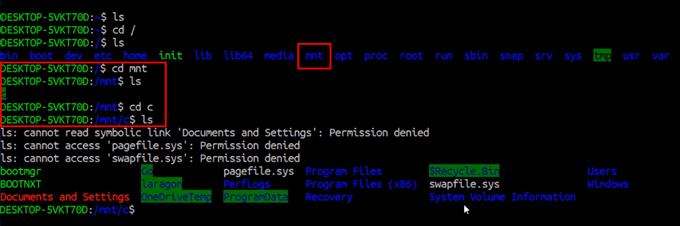
If you want to edit Windows files from the Linux system, you would have to enter CD MNT, do LS then enter CD C and another LS to locate all the files stored inside Windows. Enjoy Linux with Windows 10!
Christopher Jan Benitez is a freelance writer for hire who provides actionable and useful web content to small businesses and startups. In his spare time, he religiously watches professional wrestling and finds solace in listening to ’80s speed metal. Read Christopher’s Full Bio
Как выполнять Linux-команды внутри Windows: официальный и сторонние способы
Под GNU/Linux-дистрибутивы создано огромное количество полезных и удобных инструментов и приложений для обычных пользователей и разработчиков. Далеко не всё из этого доступно на Windows, но, к счастью, для ОС от Microsoft есть решения, исправляющие эту проблему.
Содержание
WSL — официальная подсистема Linux внутри Windows
В Windows 10 существует крайне полезная вещь под названием Windows Subsystem for Linux (WSL). Она позволяет использовать GNU/Linux-среду прямо в Windows и запускать не только команды, но и, например, Bash-скрипты. Для использования WSL необходимо следовать инструкции ниже.
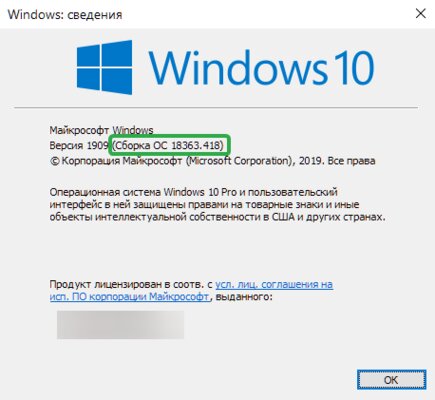
Шаг 1. Проверьте, подходит ли текущая версия Windows требованиям. Для этого нажмите сочетание клавиш Win+R, затем введите winver. Найдите строку «Сборка ОС» — она должна быть свежее версии 14316.
Шаг 2. Запустите стандартную утилиту PowerShell от имени администратора и введите в ней команду для включения WSL:
dism.exe /online /enable-feature /featurename:Microsoft-Windows-Subsystem-Linux /all /norestart
Шаг 3. Если версия Windows, определённая в первом пункте, свежее 18362, вы можете установить WSL 2, который в разы быстрее первой версии и обладает доработанным ядром. Введите команду ниже, если нужно установить WSL 2:
dism.exe /online /enable-feature /featurename:VirtualMachinePlatform /all /norestart
После этого скачайте и установите пакет обновления с официального сайта.
Шаг 4. Перезагрузите компьютер. Если была произведена установка WSL 2, введите в PowerShell от имени администратора следующую команду:
Шаг 5. После перезагрузки откройте фирменный магазин приложений Microsoft Store и найдите подходящий GNU/Linux-дистрибутив. Самым популярным является Ubuntu — вы можете установить любую версию из представленных в Microsoft Store.
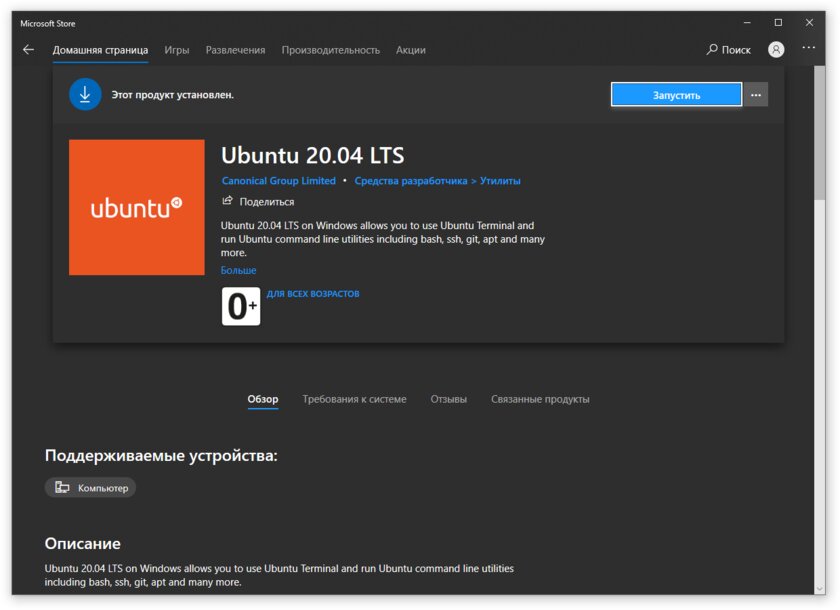
Шаг 6. Как только установка завершится, найдите дистрибутив в меню «Пуск» и запустите его.
Шаг 7. Пройдите этап первоначальной настройки, введя имя нового пользователя и придумав пароль.
Шаг 8. Теперь различные GNU/Linux-команды можно выполнять, запустив дистрибутив, либо введя в командной строке wsl . Например, для просмотра всех файлов в текущей директории достаточно в командной строке выполнить wsl ls -a.
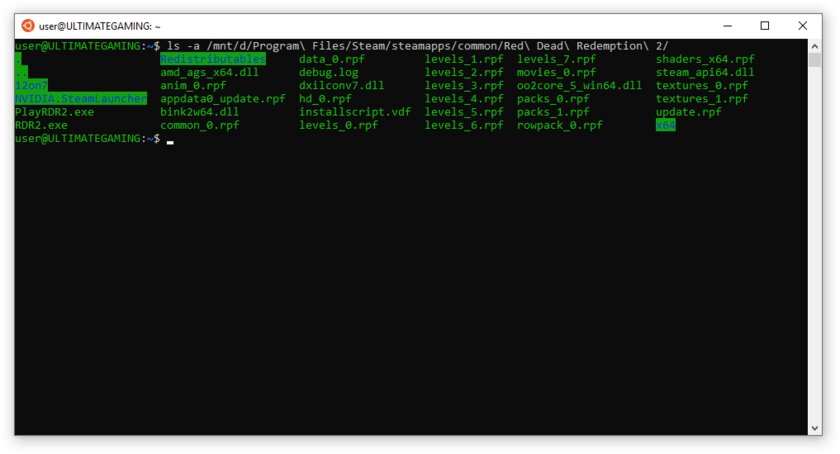
Обращу внимание на то, что путь к дискам в WSL отличается от такового в Windows. Вместо привычного C:/ используйте /mnt/c/. Также не забывайте про экранирование пробелов с помощью символа \ — это также пригодится при вводе путей к файлам.
Помимо выполнения базовых команд, с помощью WSL можно даже запускать приложения с графическим интерфейсом. Правда, рассчитывать на большое количество поддерживаемых подобных программ не стоит.
Шаг 1. Загрузите X-сервер и установите его.
Шаг 2. Запустите его с помощью ярлыка на рабочем столе. В открывшемся окне выберите вариант Multiple windows, затем Start no client. Завершите настройку кнопкой Finish.
Шаг 3. Откройте дистрибутив через меню Пуск и выполните команду export DISPLAY=:0
Шаг 4. Запустив приложение с графическим интерфейсом в WSL, вы увидите новое окно прямо в Windows.
CoreUtils — лёгкий инструмент для запуска базовых команд
Плюс данной утилиты — возможность запуска не только на Windows 10, но и на более старых версиях ОС. Кроме того, она легка и не занимает много места. Не обошлось без недостатков — программа скудна на функционал и не обновлялась очень давно. Она не только не умеет запускать скрипты и приложения с GUI, но и поддерживает лишь самые базовые GNU/Linux-команды. Установка CoreUtils весьма проста.
Шаг 1. Скачайте утилиту с официального сайта.
Шаг 2. Следуйте инструкциям установщика.
Шаг 3. Откройте «Панель управления», в разделе «Система и безопасность» выберите пункт «Система». На панели слева откройте «Дополнительные параметры системы». Нажмите кнопку «Переменные среды» и в открывшемся окне найдите область с заголовком «Системные переменные». В случае, когда там есть переменная Path, выберите её, нажмите «Изменить» и далее создайте новую строку. Содержимым этой строки должен быть путь к папке, который был указан при установке. Если вы ничего не меняли, то введите следующее:
Переменной Path нет? Тогда для начала создайте её кнопкой «Создать», затем в поле имени введите Path, а в поле значения — строку выше.
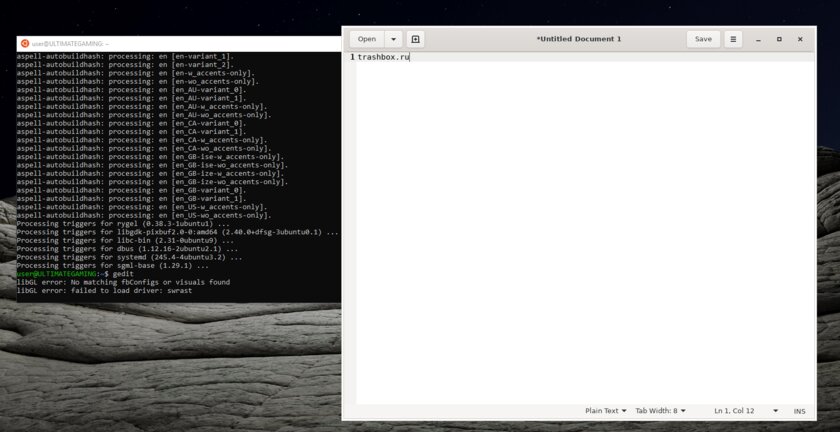
Шаг 4. Запустите командную строку и выполняйте команды прямо там.
Cygwin — запуск команд и Bash-скриптов
Ещё одна утилита, схожая с CoreUtils, но обладающая более широким функционалом — в том числе и возможностью запуска скриптов. Из минусов — немалый вес и более сложная установка. Разумеется, не идёт ни в какое сравнение с максимально удобным WSL, но для базовых команд вполне подойдёт.
Шаг 1. Загрузите Cygwin и запустите установку.
Шаг 2. Выберите Install from Internet, укажите директории для установки и загрузки пакетов, а также любой подходящий сайт из списка для скачивания файлов.
Шаг 3. В процессе установки можете выбрать необходимые пакеты, либо сразу нажать «Далее», оставив базовый набор.
Шаг 4. Откройте «Панель управления», в разделе «Система и безопасность» выберите пункт «Система». На панели слева откройте «Дополнительные параметры системы». Нажмите кнопку «Переменные среды» и в открывшемся окне найдите область с заголовком «Системные переменные». В случае, когда там есть переменная Path, выберите её, нажмите «Изменить» и далее создайте новую строку. Содержимым этой строки должен быть путь к папке, который был указан при установке. Если вы ничего не меняли, то введите следующее:
Переменной Path нет? Тогда для начала создайте её кнопкой «Создать», затем в поле имени введите Path, а в поле значения — строку выше.
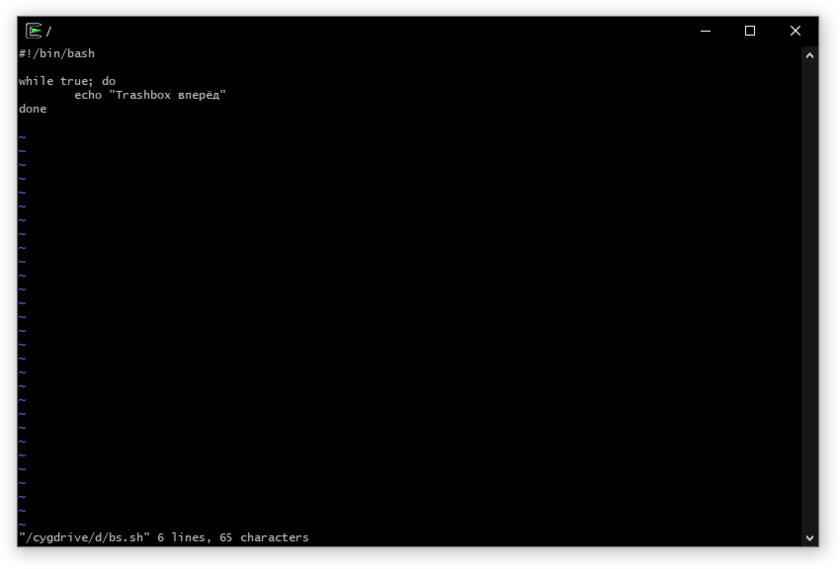
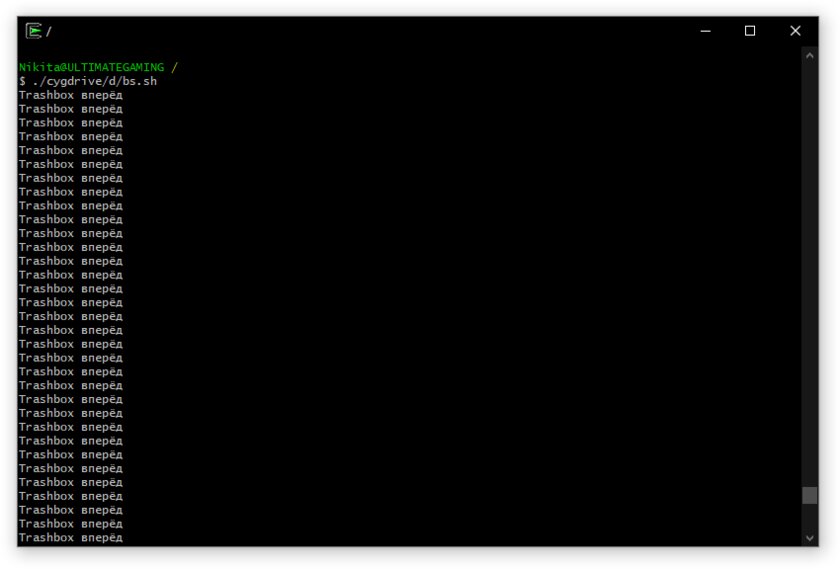
Шаг 5. Команды можно выполнять как через командную строку, так и через специальный терминал.
Шаг 6. Для удаления Cygwin достаточно удалить папку, в которую программа была установлена, а также (по желанию) значение из переменной Path по методу, обратному тому, что был описан в 4 шаге (не удаляйте саму переменную).


