Установка и настройка XAMPP
XAMPP — это набор программ, который состоит из веб-сервера, базы данных, интерпретатора PHP, Phpmyadmin, а также других инструментов, которые предназначены для удобной разработки приложений. По сравнению с другими программами, его очень просто установить и использовать. Вам достаточно загрузить установщик с официального сайта, запустить его, и через несколько минут ваш компьютер будет полностью готов к разработке веб-приложений.
В этой небольшой статье мы рассмотрим, как выполняется установка XAMPP в Ubuntu 18.04, а также первоначальную настройку программы для более удобной работы.
Установка и настройка XAMPP
1. Загрузка программы
Программа доступна для Windows, Linux, а также MacOS, и скачать её вы можете на официальном сайте. На момент написания статьи уже вышла версия с PHP 7.3. Её мы и будем использовать.

Откройте вкладку Download, найдите версию для Linux и скачайте её.
2. Установка XAMPP
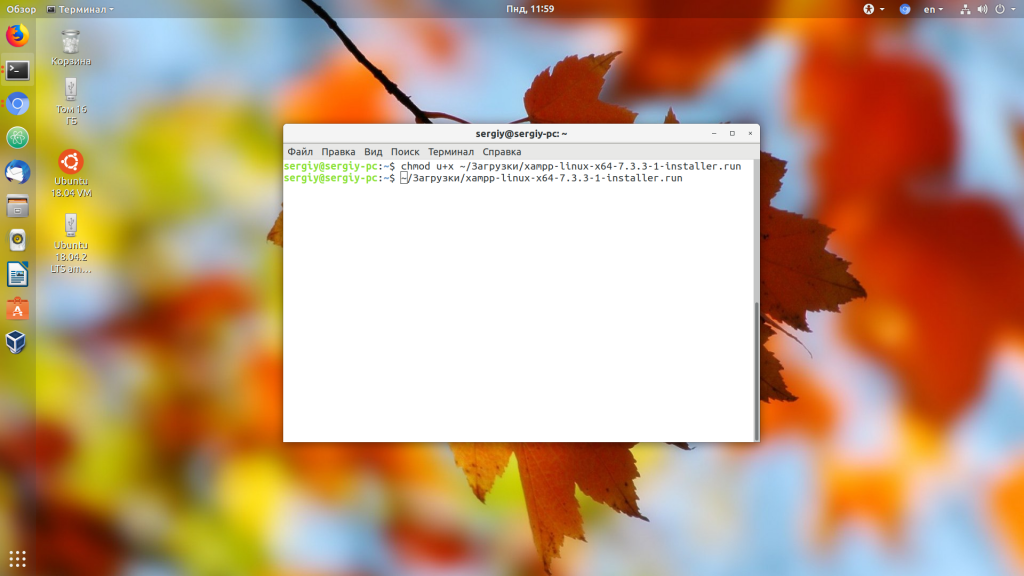
Далее нужно запустить только что загруженный установщик. По умолчанию он находится в папке
/Загрузки. Сначала нужно добавить файлу установщика флаг исполняемости:
Затем запустите установщик от имени суперпользователя:
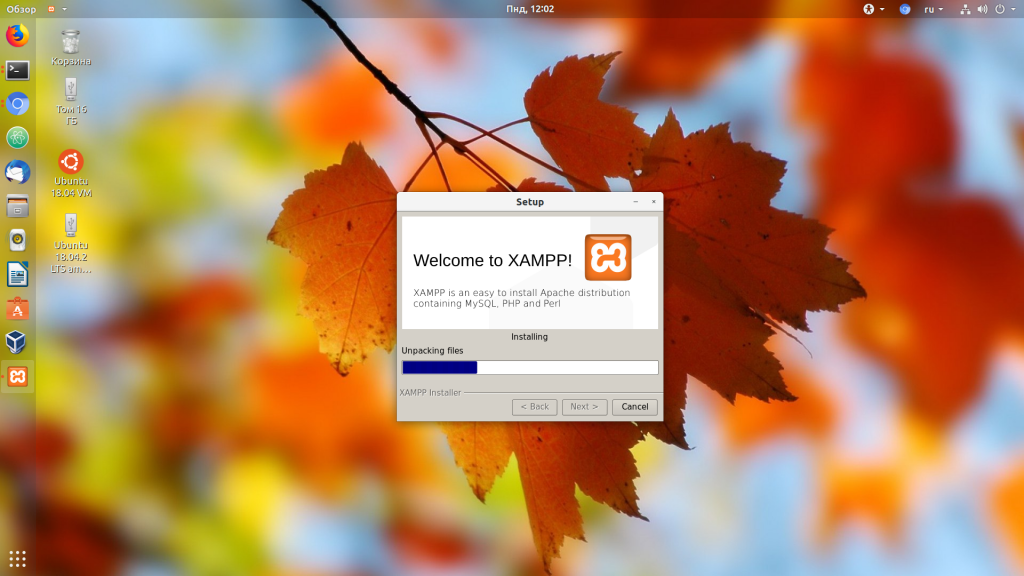
Затем нужно пройти несколько шагов установщика, на которых достаточно только нажимать кнопку Далее:


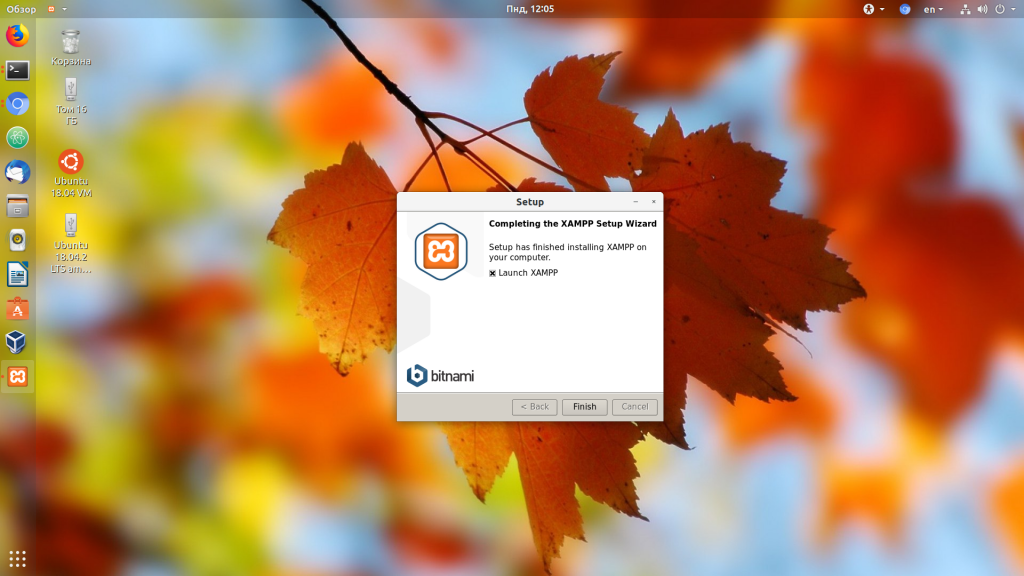
После этого установка XAMPP Linux будет завершена, а все файлы программы будут находится в каталоге /opt/xampp.
3. Настройка XAMPP
Управлять работой установленных сервисов можно через терминал или с помощью графической утилиты. Запустить графическую утилиту можно, отметив галочку Launch XAMPP в последнем окне мастера установки.
Здесь, на вкладке Manage Servers, вы можете запустить веб-сервер, сервер баз данных и FTP-сервер:
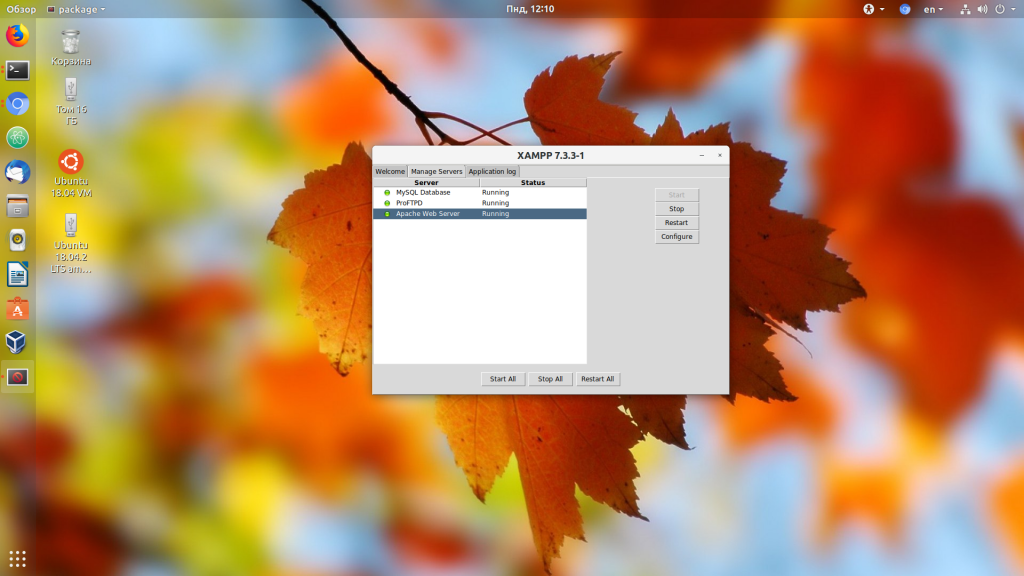
Для запуска всего сразу нажмите кнопку Start All. Когда сервис запущен, его состояние меняется на running, а иконка становится зёленой. К тому же, выбрав любой из серверов и нажав кнопку Config, вы можете его настроить:
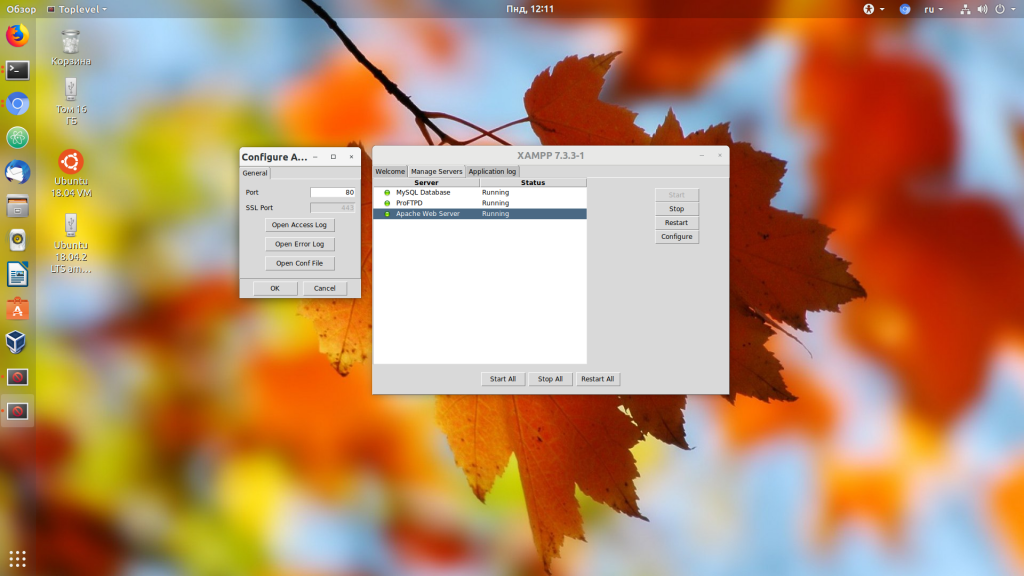
Здесь можно изменить порт, открыть логи ошибок и доступа, а также открыть конфигурационный файл и изменять любые настройки выбранного сервиса:
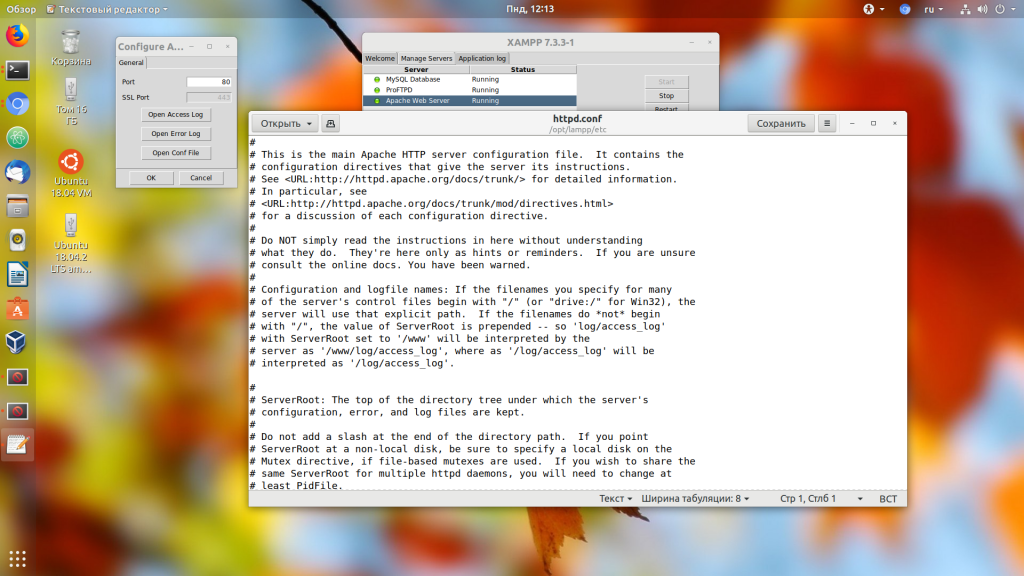
Но здесь будьте осторожны. Одна ошибка в конфигурационном файле — и сервис может не запуститься. Это всё, что касается графического интерфейса.
4. Управление XAMPP через терминал
В терминале можно сделать всё то же самое, плюс ещё несколько функций. Для управления используется утилита xampp:
Вот её основные опции:
- start — запустить все серверы;
- startapache — запустить только apache;
- startmysql — запустить только mysql;
- startftp — запустить только ftp;
- stop — остановить всё;
- stopapache — остановить только apache;
- stopmysql — остановить только mysql;
- stopftp — остановить только ftp;
- reload, reloadapache, reloadmysql, reloadftp — аналогично, только перезагрузка всех этих сервисов;
- restart — остановить и запустить XAMPP;
- security — проверить настройки безопасности XAMPP;
- enablessl — включить SSL в Apache;
- disablessl — выключить SSL в Apache;
- panel — открыть графическую панель настройки, с которой мы работали в первом пункте.
Я рекомендую после установки программы выполнить команду security, чтобы поменять основные настройки по умолчанию, которые будут небезопасны:
sudo /opt/lampp/xampp security
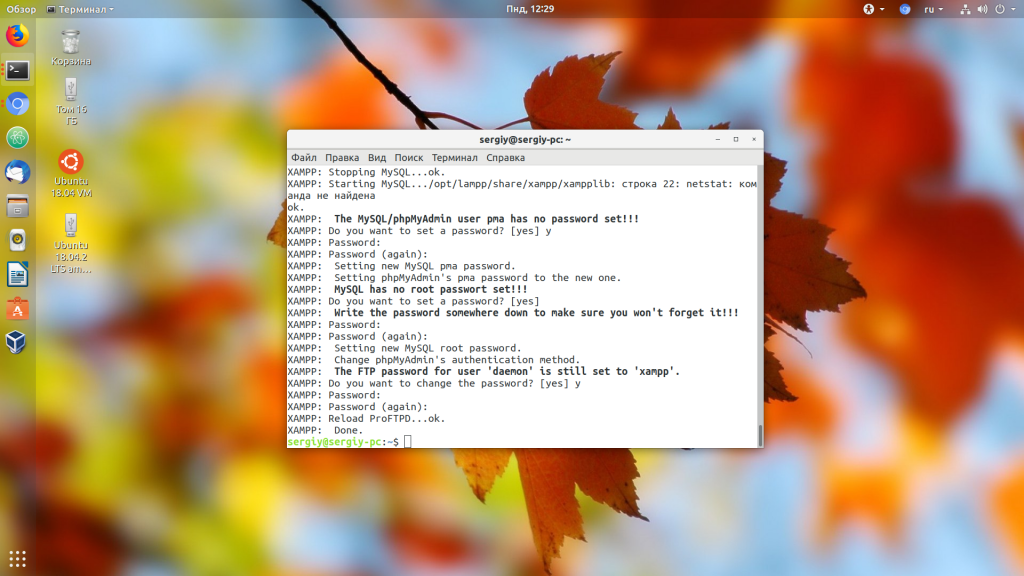
Утилита отключит доступ к MySQL из сети, предложит задать пароль для Phpmyadmin, MySQL, а также пароль для FTP. После этого вы можете запустить все серверы, если не сделали это ранее:
sudo /opt/lampp/xampp start
А для остановки используйте:
sudo /opt/lampp/xampp stop
Запустить графическую панель, с которой мы работали вначале, вы можете такой командой:
5. Развёртывание приложения
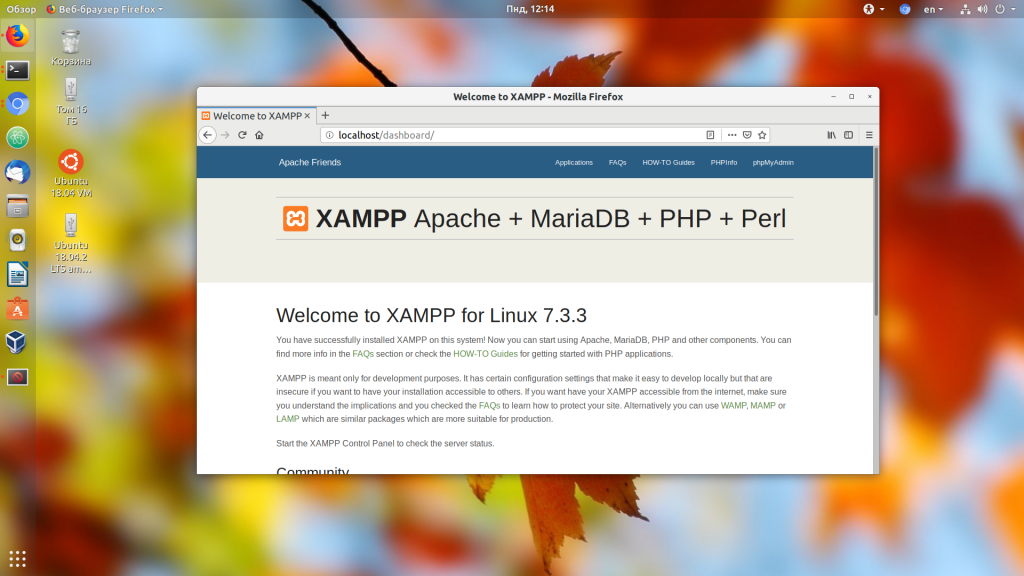
Вы можете проверить, всё ли запущено и работает, открыв адрес http://localhost в вашем браузере:
Все файлы веб-сервера находятся в директории /opt/lampp/htdocs/. Вы можете удалить всё, что там есть лишнего и загружать туда файлы своего приложения или, например WordPress.
Выводы
В этой небольшой статье мы разобрали, как выполняется установка и настройка XAMPP-сервера в Ubuntu и других дистрибутивах Linux. Поскольку это программа практически портативная, то эта инструкция должна отлично работать для любого дистрибутива и даже в некотором смысле для Windows и MacOS. А также её намного удобнее устанавливать, по сравнению с LAMP.
Источник
Linux Frequently Asked Questions
Choose your flavor for your linux OS, the 32-bit or 64-bit version.
Change the permissions to the installer
chmod 755 xampp-linux-*-installer.run
Run the installer
That’s all. XAMPP is now installed below the /opt/lampp directory.
Does XAMPP include MySQL or MariaDB?
Since XAMPP 5.5.30 and 5.6.14, XAMPP ships MariaDB instead of MySQL. The commands and tools are the same for both.
How do I start XAMPP?
To start XAMPP simply call this command:
sudo /opt/lampp/lampp start
You should now see something like this on your screen:
Starting XAMPP 1.8.2.
LAMPP: Starting Apache.
LAMPP: Starting MySQL.
LAMPP started.
Ready. Apache and MySQL are running.
If you get any error messages visit our community pages for help.
Also, note that there is a graphical tool that you can use to manage your servers easily. You can start this tool with the following commands:
cd /opt/lampp
sudo ./manager-linux.run (or manager-linux-x64.run)
How do I stop XAMPP?
To stop XAMPP simply call this command:
sudo /opt/lampp/lampp stop
You should now see something like this on your screen:
Stopping XAMPP 1.8.2.
LAMPP: Stopping Apache.
LAMPP: Stopping MySQL.
LAMPP stopped.
If you get any error messages visit our community pages for help.
Also, note that there is a graphical tool that you can use to start/stop your servers easily. You can start this tool with the following commands:
cd /opt/lampp
sudo ./manager-linux.run (or manager-linux-x64.run)
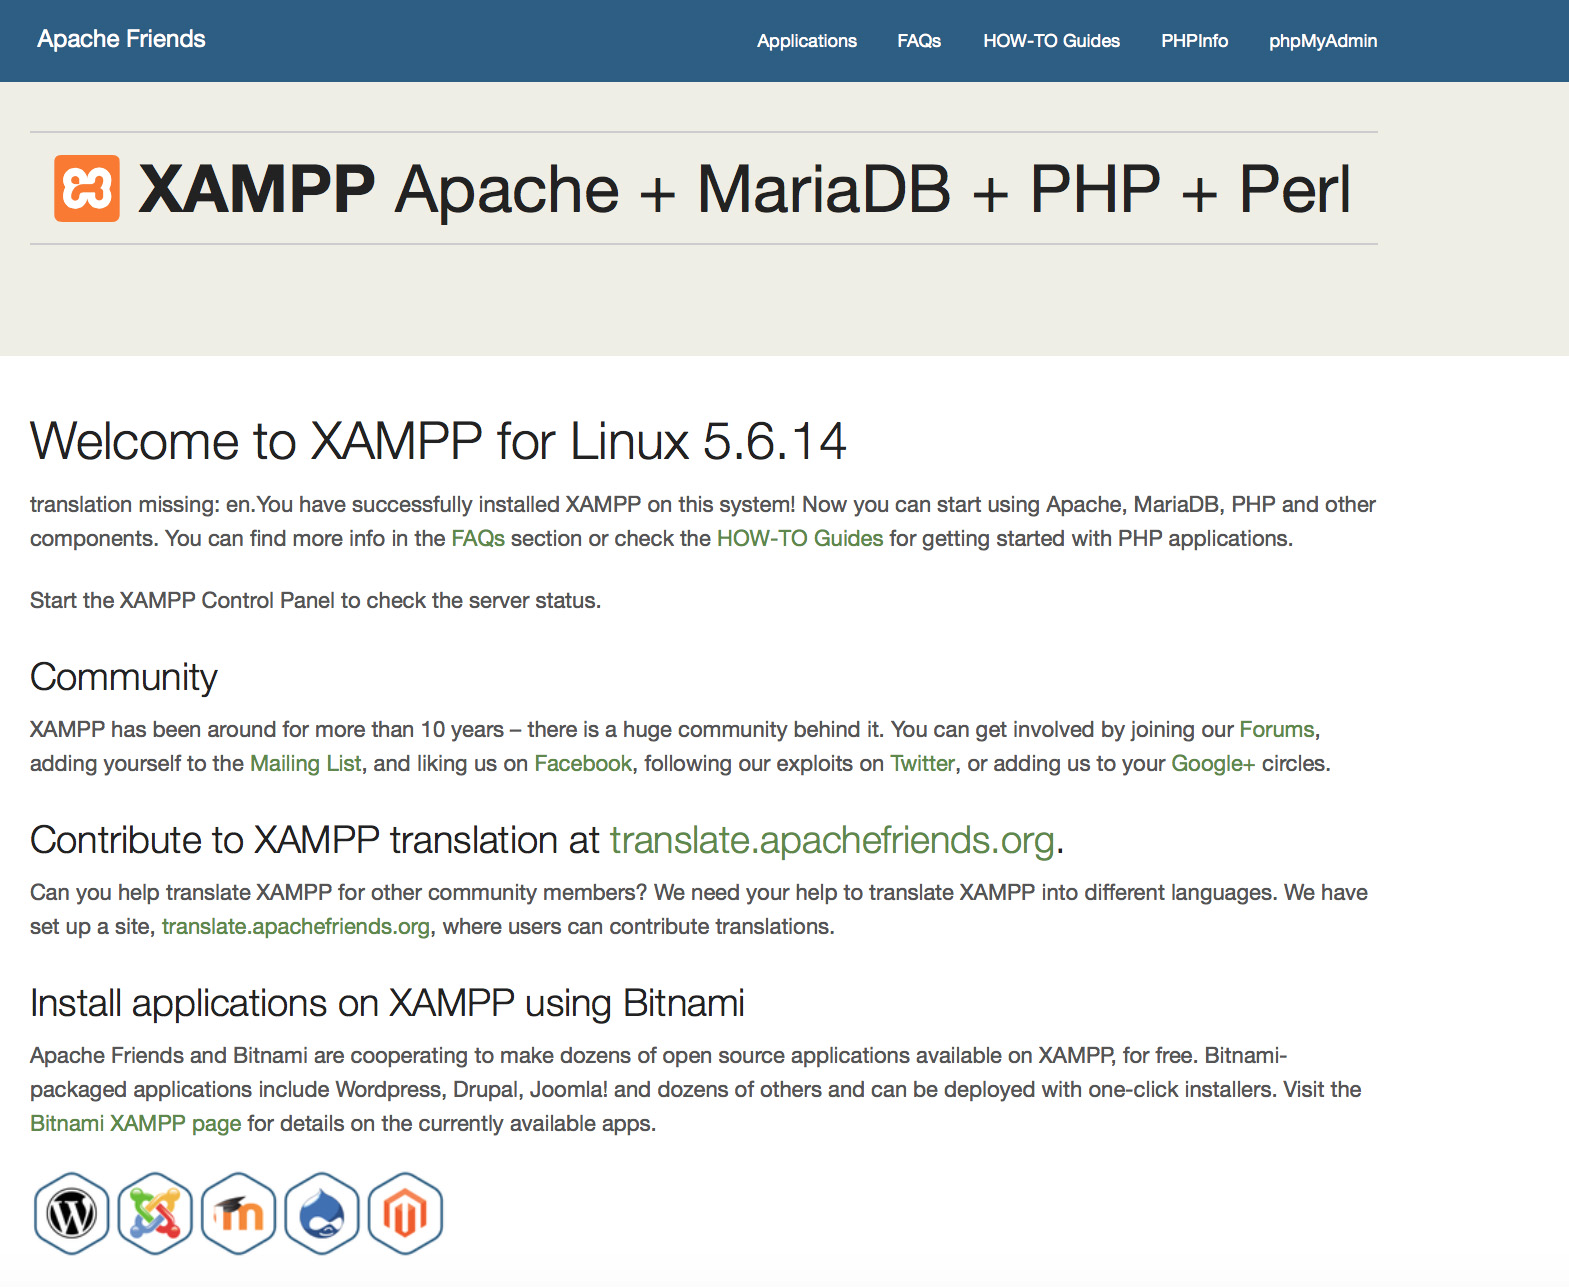
How can I test that everything worked?
Type in the following URL at your favourite web browser:
You should see the XAMPP start page, as shown below.
 Is XAMPP production ready?
XAMPP is not meant for production use but only for development environments. XAMPP is configured to be open as possible to allow the developer anything he/she wants. For development environments, this is great but in a production environment, it could be fatal.
Here a list of missing security in XAMPP:
- The MySQL administrator (root) has no password.
- The MySQL daemon is accessible via network.
- ProFTPD uses the password «lampp» for user «daemon».
To fix most of the security weaknesses simply call the following command:
sudo /opt/lampp/lampp security
It starts a small security check and makes your XAMPP installation secure. For example this protects the XAMPP demo pages by a username (‘lampp’) and password combination.
What is the meaning of the error messages I see when starting XAMPP?
You may get several error messages while starting XAMPP:
LAMPP-Apache is already running.
An Apache daemon is already running.
The LAMPP startup script did not start XAMPP-Apache because there is an Apache instance already running. To start XAMPP properly, first you have to stop this daemon.
LAMPP-MySQL is already running.
A MySQL daemon is already running.
Mostly due to the same reasons as the above error, the LAMPP startup script found a MySQL daemon already running on your system. To start LAMPP properly, you have to stop this daemon first.
Apache doesn’t seem to start. What can I do?
This error can exist for multiple reasons. Apache displays this error under several circumstances. To find the exact reason, you have to do some research:
tail -2 /opt/lampp/logs/error_log
If you get any error messages visit our community pages for help.
What do I do if the error message is «Cannot restore segment prot after reloc: Permission denied?»
Some Linux distributions have SELinux activated by default and this is preventing the successful start of XAMPP. You should disable it in order to start the XAMPP servers:
sudo /usr/sbin/setenforce 0
Now XAMPP should work fine again.
After I rebooted my Linux box XAMPP stopped running! How can I fix this?
Correct. That’s normal Linux behaviour (which applies to any other Unix-like system). It’s the admin’s job to make sure a particular application is started at bootup.
There is no real standard way to configure the boot process of a Linux system, but most of them should allow you to start XAMPP at boot time using the following steps.
Debian, Ubuntu.
sudo ln -s /opt/lampp/lampp /etc/init.d/lampp sudo update-rc.d lampp start 80 2 3 4 5 . stop 30 0 1 6 .
RedHat, Fedora, CentOS. If your Linux distro uses «chkconfig» tool to install the services you can run the following commands:
sudo ln -s /opt/lampp/lampp /etc/init.d/lampp
sudo chkconfig —add lampp
SUSE
sudo ln -s /opt/lampp/lampp /etc/init.d/lampp sudo chkconfig lampp 2345
How can I make my XAMPP installation more secure?
By default, XAMPP has no passwords set and it is not recommended to run XAMPP with this configuration as it is accessible to others.
Simply type the following command (as root) to start a simple security check:
sudo /opt/lampp/lampp security
Now you should see the following dialog on your screen:
XAMPP: Quick security check. XAMPP: MySQL is accessable via network. XAMPP: Normaly that’s not recommended. Do you want me to turn it off? [yes] yes XAMPP: Turned off. XAMPP: Stopping MySQL. XAMPP: Starting MySQL. XAMPP: The MySQL/phpMyAdmin user pma has no password set. XAMPP: Do you want to set a password? [yes] yes XAMPP: Password: ****** XAMPP: Password (again): ****** XAMPP: Setting new MySQL pma password. XAMPP: Setting phpMyAdmin’s pma password to the new one. XAMPP: MySQL has no root passwort set. XAMPP: Do you want to set a password? [yes] yes XAMPP: Write the passworde somewhere down to make sure you won’t forget it. XAMPP: Password: ****** XAMPP: Password (again): ****** XAMPP: Setting new MySQL root password. XAMPP: Setting phpMyAdmin’s root password to the new one. XAMPP: The FTP password for user ‘nobody’ is still set to ‘lampp’. XAMPP: Do you want to change the password? [yes] yes XAMPP: Password: ****** XAMPP: Password (again): ****** XAMPP: Reload ProFTPD. XAMPP: Done.
(1) Setting a password will protect the XAMPP demo pages (http://localhost/xampp/) using this password. The user name is ‘lampp’!
After running this command, your XAMPP installation should be more secure.
How do I activate eAccelerator?
To activate eAccelerator simply find the following lines in your /opt/lampp/etc/php.ini:
;extension=»eaccelerator.so» ;eaccelerator.shm_size=»16″ ;eaccelerator.cache_dir=»/opt/lampp/tmp/eaccelerator» ;eaccelerator.enable=»1″ ;eaccelerator.optimizer=»1″ ;eaccelerator.check_mtime=»1″ ;eaccelerator.debug=»0″ ;eaccelerator.filter=»» ;eaccelerator.shm_max=»0″ ;eaccelerator.shm_ttl=»0″ ;eaccelerator.shm_prune_period=»0″ ;eaccelerator.shm_only=»0″ ;eaccelerator.compress=»1″ ;eaccelerator.compress_level=»9″
Remove the semicolon at the beginning of each line and restart XAMPP. eAccelerator is now active. For more information about eAccelerator, check the eAccelerator home page: http://eaccelerator.net.
How do I activate the OCI8/Oracle extension for PHP?
To activate the OCI8/Oracle extension for PHP please execute the following command:
sudo /opt/lampp/lampp oci8
The following dialog will start:
Please enter the path to your Oracle or Instant Client installation: [/opt/lampp/lib/instantclient-11.2.0.3.0] installing symlinks. patching php.ini. OCI8 add-on activation likely successful. LAMPP: Stopping Apache with SSL. LAMPP: Starting Apache with SSL.
The extension should now be active.
XAMPP runs, but why are none of the images being displayed?
That’s a special problem with some Linux systems. Please open your /opt/lampp/etc/httpd.conf and look for these two lines:
#EnableMMAP off #EnableSendfile off
Remove the # in both lines and restart your Apache. Your images should be back.
How do I enable access to phpMyAdmin from the outside?
In the basic configuration of XAMPP, phpMyAdmin is accessible only from the same host that XAMPP is running on, at http://127.0.0.1 or http://localhost.
IMPORTANT: Enabling external access for phpMyAdmin in production environments is a significant security risk. You are strongly advised to only allow access from localhost. A remote attacker could take advantage of any existing vulnerability for executing code or for modifying your data.
To enable remote access to phpMyAdmin, follow these steps:
- Edit the etc/extra/httpd-xampp.conf file in your XAMPP installation directory.
- Within this file, find the lines below.
Alias /phpmyadmin «/opt/lampp/phpmyadmin/» AllowOverride AuthConfig Require local
Then replace ‘Require local’ with ‘Require all granted’.
Alias /phpmyadmin «/opt/lampp/phpmyadmin/» AllowOverride AuthConfig Require all granted
Where are the main XAMPP configuration files?
The main XAMPP configuration files are located as follows:
- Apache configuration file: /opt/lampp/etc/httpd.conf, /opt/lampp/etc/extra/httpd-xampp.conf
- PHP configuration file: /opt/lampp/etc/php.ini
- MySQL configuration file: /opt/lampp/etc/my.cnf
- ProFTPD configuration file: /opt/lampp/etc/proftpd.conf
How do I send email with XAMPP?
To send email with XAMPP, use the PEAR Mail and Net_SMTP packages, which allow you to send email using an external SMTP account (such as a Gmail account). Follow these steps:
- Install the Mail and Net_SMTP PEAR modules: pear install Net_SMTP Mail Note that if these packages are already installed in your system you see the messages below when executing that command: Ignoring installed package pear/Net_SMTP Ignoring installed package pear/Mail Nothing to install
- Create the following example script in your «htdocs» directory to send an email: $from, ‘To’ => $to,’Subject’ => $subject); $smtp = Mail::factory(‘smtp’, array (‘host’ => $host, ‘port’ => $port, ‘auth’ => true, ‘username’ => $username, ‘password’ => $password)); $mail = $smtp->send($to, $headers, $body); if (PEAR::isError($mail)) < echo($mail->getMessage()); > else < echo("Message successfully sent!\n"); >?>
Remember to replace the dummy values shown with your actual Gmail address and account password. If you don’t plan to use Gmail’s SMTP server, replace the SMTP host details with appropriate values for your organization or ISP’s SMTP server.
How do I backup/restore my XAMPP system?
WARNING: The backup and restore functionality is still under development and may not work correctly.
You can create the backup by calling:
sudo /opt/lampp/lampp backup
sudo /opt/lampp/lampp backup secret
Where «secret» is your MySQL root password. This command will create the following output:
Backing up databases. Backing up configuration, log and htdocs files. Calculating checksums. Building final backup file. Backup finished. Take care of /opt/lampp/backup/xampp-backup-22-01-14.sh
The file /opt/lampp/backup/xampp-backup-22-01-14.sh (in the example above) contains your backup. Store this file in a safe place.
On the new machine you need the same version of XAMPP as on your original/source machine.
sudo sh xampp-backup-22-01-14.sh
You should see something like this:
Checking integrity of files. Restoring configuration, log and htdocs files. Checking versions. Installed: XAMPP 1.4.2 Backup from: XAMPP 1.4.2 Restoring MySQL databases. Restoring MySQL user databases. Backup complete. Have fun! You may need to restart XAMPP to complete the restore.
That’s all. Keep in mind that it’s a beta feature.
Support
Visit our our community pages for additional help.
Источник


