- Rustafied
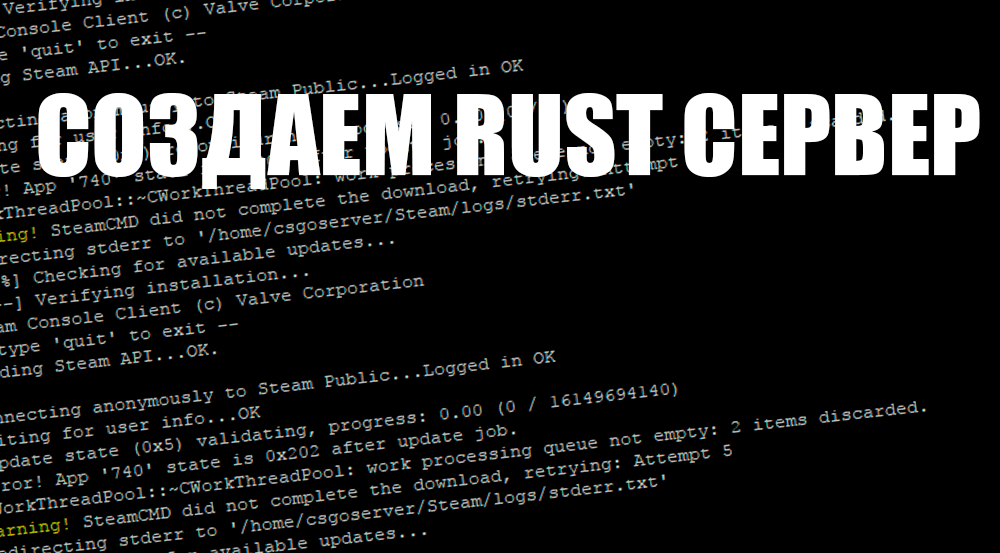
- How to host a Rust server in Linux
- Initial Setup
- SteamCMD
- Vanilla
- Oxide
- Updating
- Firewall (advanced users)
- Knowledge
- Rust dedicated server linux
- Начальная настройка
- SteamCMD
- VANILLA
- Oxide
- Обновление
- Фаервол (для продвинутых пользователей)
- Дополнительная информация
- Rust Wiki
- Requirements
- Installing and updating SteamCMD
- OPTIONAL: Installing uMod/Oxide for having Plugins
- Setting up a batch file to run your server
- Additional and optional considerations in setup
- Connecting to the server
- Method 1 — Connect using localhost:
- Method 2 — Connect using your IP:
- Test local connection on your network
- Adding yourself as administrator
- Setting up your router
- Links
Rustafied
On The Pulse of Rust

How to host a Rust server in Linux
Ever wondered how to make your own server but couldn’t due to the OS restriction to Windows? Well fear no more! This section of the guide will focus on the realm of Linux but more particularly on the Debian 8 x64 distribution. Rather than solely being focused on vanilla Rust I will also branch into Oxide and security of your server itself.
Initial Setup
This bit will be the longest part of the guide but will serve you well in terms of the security of your server. This will be mainly focused on people who aren’t familiar in terms of security or Debian in general.
Login to your server through SSH (PuTTY is recommended).
Head over to a PasswordGenerator site and generate a random password with a length of 50+ and copy it. Then type “passwd root” and then right click twice in the terminal.
Now your root password is secure you need to update the software by doing “apt-get update -y && apt-get upgrade -y” then “apt-get install fail2ban nano -y”.
Now download PuTTYgen then generate the key. Now type all of these individually on a per line basis in PuTTY:
Now head back to PuTTYgen then right click inside the box with lots of characters and press select all then copy. Now head back to PuTTY where you left off at the nano editor and right click to paste your public key in then do ctrl+o -> enter -> ctrl+x.
Now type “nano /etc/ssh/sshd_config” then ctrl+w then “PasswordAuth” then enter. Now remove the hash and change the yes at the end to a no. Now page down to the bottom and change UsePAM to no. Now ctrl+w and do type PermitRootLogin and simply change it to “without-password”. Now press ctrl+p (save) and ctrl+x (exit) and then finally type “service ssh reload”
Now you just need to open PuTTYgen back open and save the public and private key in a folder somewhere safe. Now close PuTTY and reopen it then simply on the left side goto Connection -> SSH -> Authentication then browse and select your private key file that you just saved. Once you’ve done that head back to Session then click Default Settings then Save then open for a passwordless login.
SteamCMD
Valve have their own documentation for setting up SteamCMD you can find this here. Once your at app_update section you type “app_update 258550”.
Vanilla
Once you’ve done the above with SteamCMD it is now smooth sailing you now do “cd directorysetwithsteamcmd” and then nano startrust.sh and paste this:
#!/bin/sh
clear while : do
exec ./RustDedicated -batchmode -nographics \
-server.ip IPAddressHere \
-server.port 28015 \
-rcon.ip IPAddressHere \
-rcon.port 28016 \
-rcon.password «rcon password here» \
-server.maxplayers 75 \
-server.hostname «Server Name» \
-server.identity «my_server_identity» \
-server.level «Procedural Map» \
-server.seed 12345 \
-server.worldsize 3000 \
-server.saveinterval 300 \-server.globalchat true \
-server.description «Description Here» \
-server.headerimage «512x256px JPG/PNG headerimage link here» \
-server.url «Website Here»
echo «\nRestarting server. \n» done
You will need to fill in your own values such as world seed etc. Now do “chmod u+x startrust.sh” then “./startrust.sh” which will start your server. If there is no hitches within just a few minutes you will be able to connect through RCON. Then ingame through the server list or “connect ipaddresshere:28015”. Once ingame you can refer to our Console System Guide to setup your admin status.
Oxide
This modded version of Rust is very popular so here is how to set it up. First things first you need to do “wget https://github.com/OxideMod/Snapshots/raw/master/Oxide-Rust_Linux.zip”. Then if you haven’t already install unzip “apt-get install unzip -y” then “unzip Oxide-Rust_Linux.zip” while your in the main rust directory set by SteamCMD then accept any override prompts. Then you do “chmod u+x CSharpCompiler” to ensure cs plugins being able to work such as the Kits plugin. Now you have a fully working Oxide Server. You can refer to here for aspects such as Permissions and making yourself aware of current Rust and Oxide issues.
Updating
This is just as easy. You simply need to redo the SteamCMD steps and if you’ve using Oxide you redownload it after updating rust through SteamCMD using link above then unzip it and potentially chmod the CSharpCompiler again.
Firewall (advanced users)
For extra security, you can change the firewall settings. Warning: This is for advanced users and could block access to other services on your box (like teamspeak).
Type “nano iptables.sh” then copy/paste this:
iptables -P INPUT ACCEPT
iptables -P OUTPUT ACCEPT
iptables -F
iptables -A INPUT -m conntrack —ctstate ESTABLISHED,RELATED -j ACCEPT
iptables -A INPUT -p tcp —dport 22 -j ACCEPT
iptables -A INPUT -p tcp —dport 28016 -j ACCEPT
iptables -A INPUT -p udp —dport 28015 -j ACCEPT
iptables -A INPUT -i lo -j ACCEPT
iptables -A INPUT -j DROP
apt-get install iptables-persistent -y
invoke-rc.d iptables-persistent save
Then type “chmod u+ux iptables.sh” then type “./iptables.sh”. This will then execute a bunch of commands which will ultimately just allow the standard ssh port (22) and then the two standard rust ports for later.
Knowledge
If you would like to know more about IPTables and SSH Keys you can refer to these two links:
Источник
Rust dedicated server linux
Вы когда-нибудь задавались вопросом, как сделать свой собственный RUST сервер, но столкнулись с ограничениями ОС Windows? Больше нет смысла переживать! В этом руководстве мы уделим настройке сервера под Linux, в особенности дистрибутиву Debian 8 x64. Вместо того, чтобы сосредоточиться только на RUST VANILLA, мы распишем настройки под Oxide и научим как обезопасить ваш сервер.
Начальная настройка
Это наверное будет самой длинной частью руководства, но поможет вам с точки зрения настройки безопасности сервера. В основном, этот мануал нацелен на людей, которые не знакомы с понятиями безопасности серверов и Debian в целом.
- Подключитесь к серверу с помощью SSH клиента (рекомендуем использовать PuTTY).
- Перейдите на сайт ГенераторПаролей и создайте случайный пароль длиной 50+ и скопируйте его. Затем введите в консоль «passwd root», щелкните правой кнопкой мыши дважды в терминале.
- Теперь когда у вас установлен безопасный пароль, можно сделать обновление системы: напишите в терминале “apt-get update -y && apt-get upgrade -y”, нажмите Enter, затем “apt-get install fail2ban nano -y” и опять Enter.
- Теперь скачайте программу PuTTYgen и сгенерируйте ключ. Теперь введите следующие команды друг за другом нажимая Enter для перехода на новую строку в PuTTY:
/.ssh/authorized_keys
chmod 0644
Теперь вернитесь к PuTTYgen, затем щелкните правой кнопкой мыши внутри окна с большим количеством символов и нажмите выбрать все, а затем скопировать. Теперь вернитесь к PuTTY, где вы открыли редактор nano, и щелкните правой кнопкой мыши, чтобы вставить свой открытый ключ, затем нажмите ctrl + o -> enter -> ctrl + x.
Теперь введите «nano /etc/ssh/sshd_config», затем ctrl + w, затем введите «PasswordAuth». Теперь удалите хэш и измените yes в конце на no. Теперь прокрутите страницу вниз и измените UsePAM на no. Теперь ctrl + w и введите тип PermitRootLogin и просто измените его на «without-password». Теперь нажмите ctrl + p (сохранить) и ctrl + x (выйти), а затем введите «service ssh reload».
Возвращаемся обратно к PuTTYgen: нужно сохранить в безопасном месте открытый и закрытый ключи. Закрываем PuTTY и снова открываем его, с левой стороны выбираем Подключение -> SSH -> Авторизация, и указываем файл с приватным ключем, который вы только что сохранили. После возврата к сеансу, нажмите «Настройки по умолчанию», затем «Сохранить», затем «Открыть» для входа в систему без пароля.
SteamCMD
Valve имеет собственную документацию для настройки SteamCMD, которую вы можете найти здесь. После того, как вы перейдете в разделе app_update введите «app_update 258550». Это как раз идентификатор сервера RUST.
VANILLA
После того, как вы выполнили все пункты со SteamCMD, можно переходить к настройке VANILLA. Делаем «cd ДиректорияСоSteamCMD», а затем пишем nano startrust.sh и вставляем это: «258550».
#!/bin/sh
clear while : do
exec ./RustDedicated -batchmode -nographics \
-server.ip IPAddressHere \
-server.port 28015 \
-rcon.ip IPAddressHere \
-rcon.port 28016 \
-rcon.password «rcon password here» \
-server.maxplayers 75 \
-server.hostname «Server Name» \
-server.identity «my_server_identity» \
-server.level «Procedural Map» \
-server.seed 12345 \
-server.worldsize 3000 \
-server.saveinterval 300 \-server.globalchat true \
-server.description «Description Here» \
-server.headerimage «512x256px JPG/PNG headerimage link here» \
-server.url «Website Here»
echo «\nRestarting server. \n» done
Вам нужно будет заполнить свои собственные значения, такие как seed (для этого можно воспользоваться генератором предварительного просмотра карт) и т.д. Теперь делаем «chmod u + x startrust.sh», затем «./startrust.sh» и ваш сервер запустится. Если во время старта проблем не возникнет, то вы сможете подключиться к серверу через RCON. В игре вы сможете подключиться к серверу нажав F1, выбрав консоль и напечатав следующее: «connect IPАдресСервера:28015». Как настроить свой статус администратора в игре мы опишем в следующих руководствах.
Oxide
Эта надстройка над сервером Rust очень популярна. Здесь мы опишем процесс ее настройки. Прежде всего вам нужно сделать «wget https://github.com/OxideMod/Snapshots/raw/master/Oxide-Rust_Linux.zip». Затем, если вы еще не установили unzip «apt-get install unzip -y», после «unzip Oxide-Rust_Linux.zip». Это нужно сделать в каталоге сервера RUST, который вы установили через SteamCMD (нужно соглашаться со всем что будут предлагать). Затем нужно настроить права на запуск для компилятора: «chmod u + x CSharpCompiler», чтобы он мог компилироваться плагины для RUST сервера с расширением cs (вспомните про плагин Kits). Поздравляем с созданием полностью работающего Oxide сервера игры RUST. В следующих гайдах мы затронем такие аспекты, как «Разрешения» и текущих проблемах серверов RUST.
Обновление
Это очень просто. Нужно повторить шаги, которые вы делали когда устанавливали RUST через SteamCMD. Если вы используете Oxide, то придется повторно загрузить его после обновления. Используйте ссылку выше, затем разархивируйте его. Возможно, снова придется поменять права для CSharpCompiler.
Фаервол (для продвинутых пользователей)
Для дополнительной безопасности сервера RUST, можно настроить фаервол. Внимание: Внесение изменений в настройки сервера на системе Debian может привести к полной неработоспособности, ограниченному или полному отсутствию доступа к серверу.
Напишите “nano iptables.sh” затем скопируйте следующее:
iptables -P INPUT ACCEPT
iptables -P OUTPUT ACCEPT
iptables -F
iptables -A INPUT -m conntrack —ctstate ESTABLISHED,RELATED -j ACCEPT
iptables -A INPUT -p tcp —dport 22 -j ACCEPT
iptables -A INPUT -p tcp —dport 28016 -j ACCEPT
iptables -A INPUT -p udp —dport 28015 -j ACCEPT
iptables -I INPUT 1 -i lo -j ACCEPT
iptables -P INPUT ACCEPT
iptables -A INPUT -j DROP
apt-get install iptables-persistent -y
invoke-rc.d iptables-persistent save
Затем введите «chmod u + ux iptables.sh», затем введите «./iptables.sh». Она выполнит кучу команд, которые в конечном итоге просто откроют стандартный порт ssh (22), а затем два стандартных порта для сервера RUST.
Дополнительная информация
Более подробно о том как настроить IPTable’ы и ключи SSH:
SSH ключи
IPTable’ы
Источник
Rust Wiki
Requirements
These values are not fixed and highly depend on the use case and population of the server. Note that you do NOT need a Steam account to have a Rust server running. If you want to PLAY on that server or give yourself admin/mod rights, you DO need a Steam account.
Disclaimer: This prevents the use of oxide/umod as it overwrites the files at startup
Facepunch has provided this Rust_server.zip file for a quick installation of a local server that you can find here
Simply extract the contents of the zip file to the file location you want it on your PC and then edit the Run_DS.bat as you wish to edit the server’s name/description/seed/size and any startup configurations.
To start the server simply run the Run_DS.bat . The server will check for updates and then validate all files before starting.
Installing and updating SteamCMD
- Rust has the Steam App ID 258550
- Please visit https://developer.valvesoftware.com/wiki/SteamCMD for more information on that topic.
OPTIONAL: Installing uMod/Oxide for having Plugins
To install uMod/Oxide onto your Windows server:
- Visit https://umod.org/games/rust and Click the top Download Button, This downloads a .zip file including all the necessary files to install mods on your server.
- PROCESS:
- Extract the .zip which includes a folder «RustDedicated_Data» and copy this over to your Server Directory which includes the RustDedicated.exe file, if it asks to override some files, Select the option that does override the files.
Setting up a batch file to run your server
Your server needs to know how you want the server to run. There are numerous switches and configuration settings you can tell your server at startup.
An example command line to run a Windows server would be:
That looks like a lot, but lets break down each item one by one:
| Setting | Function | Notes |
|---|---|---|
| -batchmode | Tells the server to run without a GUI | |
| +server.port 28015 | Sets the port people will use to connect to the game | 28015 is typical |
| +server.level «Procedural Map» | Sets the type of map. There are other values for Barren or Hapis | For now keep Procedural. |
| +server.seed 1234 | Sets the random seed for how the map is generated | Change this value to any number up to 8 digits long |
| +server.worldsize 4000 | Sets the world size. | The larger the map, the more disk space and memory you need. Use 1000 to 6000 |
| +server.maxplayers 10 | Sets the max number of players connecting at one time | The more players, the faster your computer CPU needs to be |
| +server.hostname «Tom Server» | Sets a server name | Name of server as shown on the client server list |
| +server.description «Awesome!» | Sets a description for your server | Description shown on server connection window, for example you could show the size or intent of the server. |
| +server.url «http://mysite.com» | If you have your own website, you can set it here. | You can also omit this. For this example we will leave a generic non-working name |
| +server.headerimage «http://mysite.com/serverimage.jpg» | Sets the picture for the server | Not required |
| +server.identity «server1» | This is the internal name of the server. | This example name will be used to create a «C:\Rust\MyServer\server1» directory for all of your server files. |
| +rcon.port 28016 | Set the remote connect port. | Use this port to remote connect to the server for admin configuration/control. |
| +rcon.password letmein | Sets the remote connect password for remote administration. | Change this value. |
| +rcon.web 1 | Sets the type of remote connect method. | rcon.web 1 is suggested. |
Steps to create the batch file.
- Change file explorer to show known file extensions
- Navigate to «C:\Rust\MyServer»
- Right click and select «New | Text Document»
- Change the name to «RunServer.BAT» and hit enter
- Confirm file extension is fine
- Right click on file name and select edit
- Copy the example command line above and paste into notepad
- Change the settings to what your server should be (seed, password, worldsize, maxplayers)
- Save (TODO add notepad screenshots)
- Run this batch file.
After a few minutes the server will have created all of the files it needs to run.
Congratulations! You have just created a whole new world! You are a GOD!
(TODO add screenshot)
Additional and optional considerations in setup
Rust has beta branches available for your server if you are wanting to test new features not released to the public. To set up a server with one of these beta branches, you need to change your SteamCMD above to download the «beta prerelease» or «beta staging» branches of Rust development. For example, you can choose ONE of these branches:
Better batch file
You may wish for your batch file to be more robust. An example of some things you may want to do would make your batch file look like this:
- The «:start» line sets up a place for the «goto start» to jump to.
- The SteamCMD line does all of the steps to update your server just as you did manually above.
- The RustDedicated line is the line to start your server
- The «goto start» line is run when the server is shut down via failure or command «restart» in the server.
There are many other things you could put in this, such as logging the restart or starting other background services that you use for your server. All of this is optional.
Connecting to the server
Your server will have been assigned an IP address by your router.
Method 1 — Connect using localhost:
Launch Rust from the Steam library and when you get to the menu hit f1 and type connect localhost:28015 (or whatever port you’ve used) and hit enter
If you’ve installed and launched the server correctly you should now connect to the server!
Method 2 — Connect using your IP:
Here we will determine what IP address that is.
- Hold down the windows key and hit R
- In the Run Box that pops up, type CMD and hit enter
- In the Command Box that runs, type ipconfig and hit enter.
Your screen will have a section that looks similar to this
- Look for the line that starts with IPv4 Address and record this number
This is the IP address for your Rust Server that you will use to connect to it.
Test local connection on your network
You can run the server using the IP address set by your local router.
In Step 7 above, we found the IP address to be 192.168.1.2
In step 5 above, we set the server port to be 28015
To test this, we are going to start a Rust client and check to see if we can connect locally.
Launch Rust from the Steam library and when you get to the menu hit f1 and type connect 192.168.1.2:28015 (or whatever your information is) and hit enter
If you’ve inputted the correct information and have installed and launched the server correctly you should now connect to the server!
Adding yourself as administrator
Once you are playing locally, switch to the black command box that is the server and type «users». Don’t confuse this command with a SteamCMD. This is to be done in the text window that is your server. You should receive back that 1 user is connected. It will give you data similar to the following but with your Steam information:
While still in the server command box, to set yourself up as admin or moderator respectively, type one the following:
Note that the if you know how to copy/paste, the colon «:» in the output needs to be replaced with a space. Now write the config change with the following command:
You are now able to do admin/moderator functions while playing Rust with your client.
Setting up your router
You want your server to always be the same local IP. To do this, you need to set up your router to always assign the same IP address to the computer running your server
Refer to your router user manual for how to set up a static IP for your Rust server computer.
If you want people outside your network to be able to connect, you need to have your router forward traffic coming from the internet to the port on your computer. If you are just running on your local network, you don’t need this step.
Refer to your router user manual on how to port forward internet traffic to a specific computer and UDP port.
Links
Additional server commands are needed for Hosting Custom Maps
Источник


