- Интеграция драйверов SATA в дистрибутив Wndows XP
- Замена драйверов AHCI на драйвера Microsoft® SATA
- Downloading, Preparing and Loading SATA Drivers
- Creating up to Date Windows 7 Installation Media
- What are Storage Controller Drivers?
- How Up to Date is my Windows Installation Media?
- Checking your Device Manager
- Downloading the Latest Driver from Intel
- Downloading the Latest Driver from AMD
- Downloading the Driver from Dell
- Loading SATA Drivers
Интеграция драйверов SATA в дистрибутив Wndows XP
Очень распространенная проблема при установке Windows XP — это появление ошибки отсутствия жестких дисков.
Проблема в том, что у современных компьютерах, в особенности ноутбуков, используются контроллеры жестких дисков произведенные гораздо позже, чем Windows XP.
Поэтому стандартная версия Windows XP не содержит необходимых драйверов для установки.
Одним из способов обойти эту проблему — это переключение в BIOS режима работы SATA-контроллера.
Необходимо переключить режим работы SATA контроллера в IDE Mode. Но часто в BIOS ноутбуков такой опции нет.
В этом случае драйвера SATA можно интегрировать непосредственно в дистрибутив Windows с помощью программы nLite.
Данный способ является самым удобным, безопасным, и созданный в результате образ Windows XP можно использовать многократно.
Также этот вариант остается единственным для владельцев ноутбуков, так как у них нет возможности подключить флоппи-дисковод.
Итак, как же интегрировать драйвера в дистрибутив Windows XP?
Для интеграции нам понадобиться:
1. Дистрибутив Windows XP. Настоятельно рекомендуется использовать оригинальный образ Windows XP. Также лучше взять Windows XP SP2, и уже после установки Windows устанавливать сервис пак 3.
2. Программа nLite. Качать е следует с сайта-производителя (скачать). Если интеграция драйверов будет проходит на компьютере с установленной Windows XP, то для работы программы следует также установить Microsoft .NET Framework 2.0 (скачать). Для Windows Vista и выше, ничего кроме программы устанавливать не нужно.
3. Драйвера Sata/RAid контроллеров:
Устанавливаем программу nLite.
Качаем драйвера SATA и сохраняем у себя на компьютере. После этого необходимо их распаковать в какую-нибудь папку (например C:/SATA/).
В дисковод CD/DVD вставляем диск с Windows XP и копируем все содержимое диска на жесткий диск, например в папку C:/WINXP/.
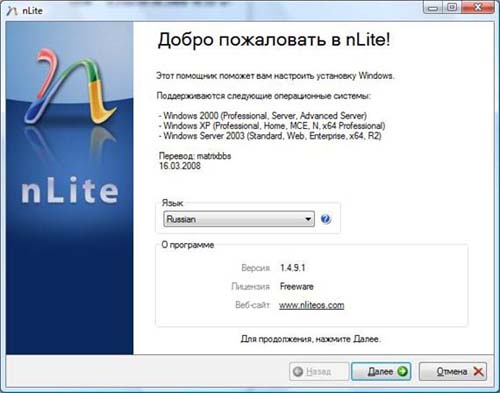
Запускаем программу nLite. При запуске сразу можно указать язык интерфейса программы — русский.
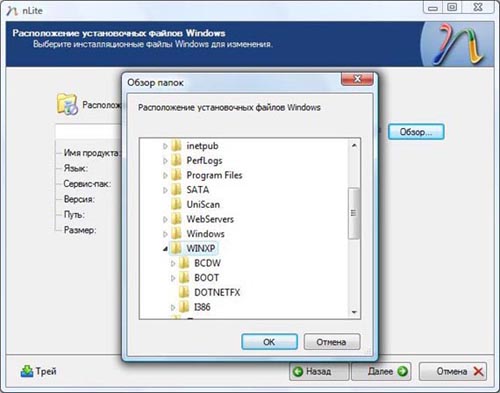
Для продолжения нажимаем кнопку «Далее«. В появившемся окне «Расположение установочных файлов Windows» необходимо после нажатия кнопки «Обзор» указать путь к папке C:/WINXP/, куда было скопировано содержимое диска Windows XP.
после небольшой проверки программа nLite нам укажет подробные данные о версии Windows XP
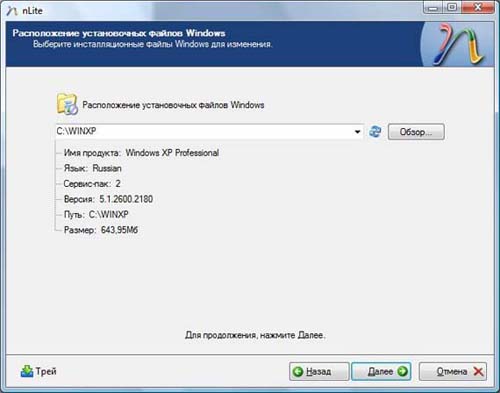
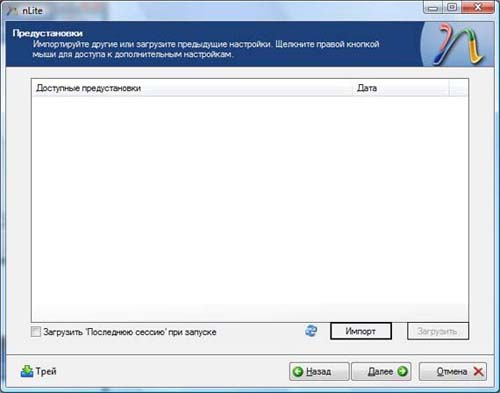
нажимаем кнопку «Далее«. Так как драйвера интегрируем впервые, то в следующем окне также жмем «Далее«.
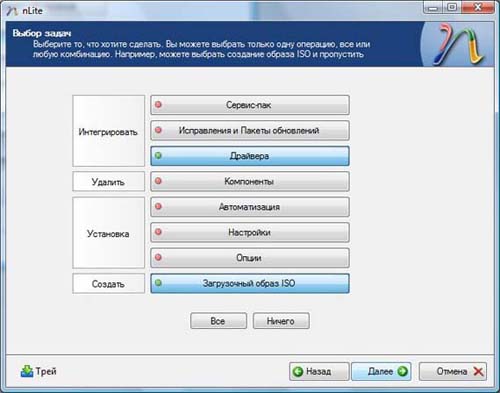
В окне «Выбор задач» отмечаем в разделе Интегрировать пункт Драйвера, а в разделе Создать — Загрузочный образ ISO.
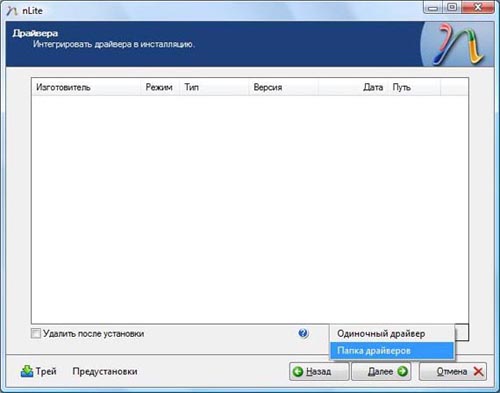
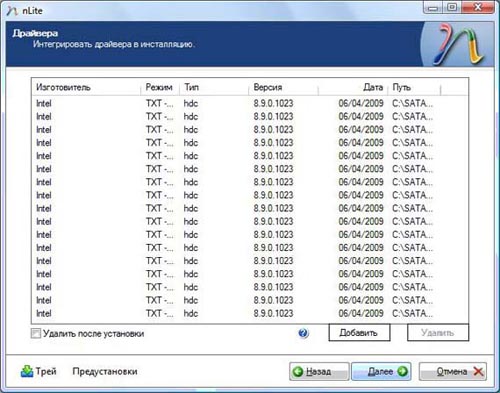
Жмем «Далее«. Затем в окне «Драйвера» нажимаем на кнопку «Добавить«

и в появившемся меню выбираем пункт «Папка драйверов«
указываем путь к папке с распакованными драйверами
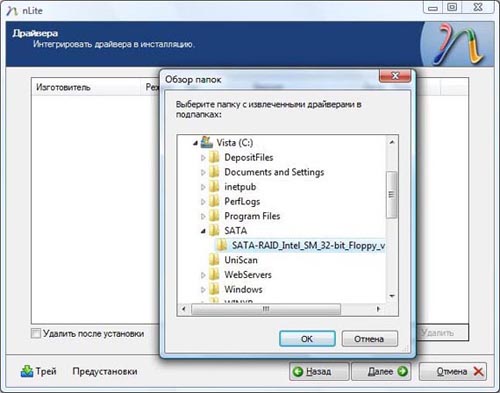
Здесь и далее очень важно указать на папку с драйверами именно той разрядности, что и используемого дистрибутива Windows. В 32-х разрядную Windows XP следует интегрировать только драйверы для 32-разрядной системы (в папке 32-bit или x86), а для 64-разрядной ОС — драйверы для 64-разрядной системы (они находятся в папке 64-bit или x64).
Это очень важный момент, иначе во время установки Windows может появится ошибка
«Файл ahcix64.sys испорчен. Для продолжения нажмите любую клавишу«.
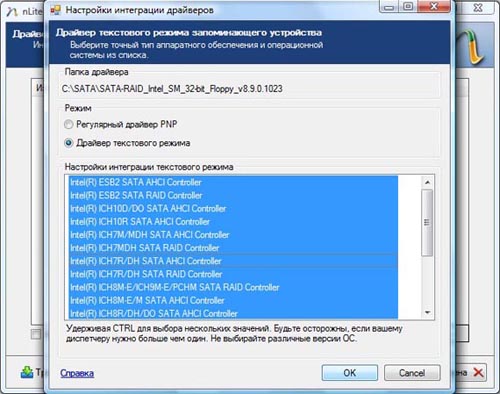
В появившемся окне «Выберите драйвера для интеграции» укажите необходимые (используйте клавишу CTRL для выделения нескольких). Не забывайте про разрядность вашей Windows XP.
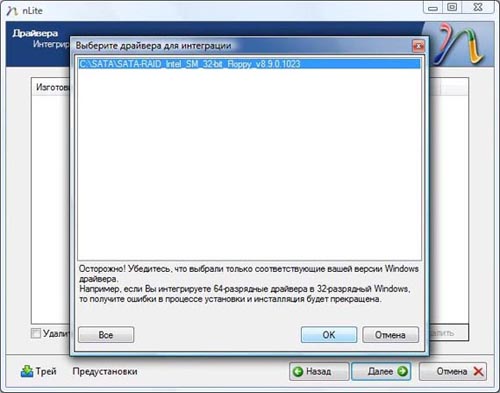
После выбора драйверов жмем «ОК«. В следующем диалоговом окошке также выбираем драйвера. Для драйверов Intel можно смело выбирать все драйвера (CTRL+A), для драйверов AMD соблюдайте разрядность.
После выбора жмем «OK«. В следующем окне нажимаем «Далее«.
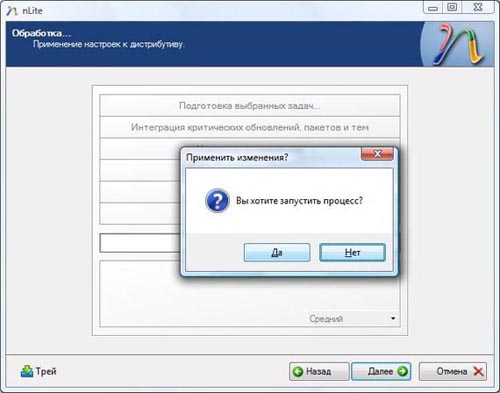
соглашаемся на запуск процесса интеграции, нажав кнопку «Да«.
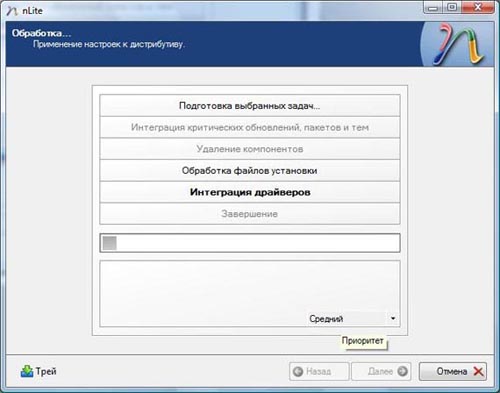
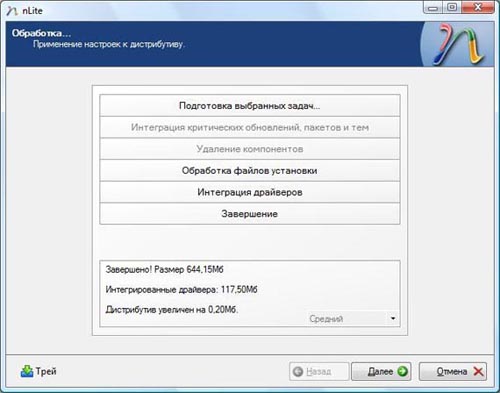
После окончания интеграции драйверов SATA нажимаем клавишу «Далее» для продолжения
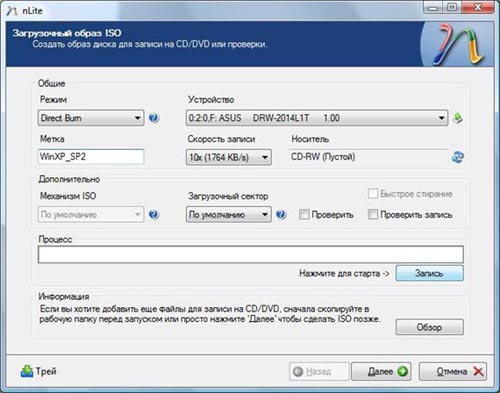
Появляется окно «Загрузочный образ ISO«. Вставляем в пишущий привод CD/DVD чистый компакт диск. Дожидаемся его инициализации программой nLite. Указываем нужную нам метку (например, WinXP_SP2). Выбираем скорость записи. Для качественной записи лучше выбрать самую маленькую скорость.
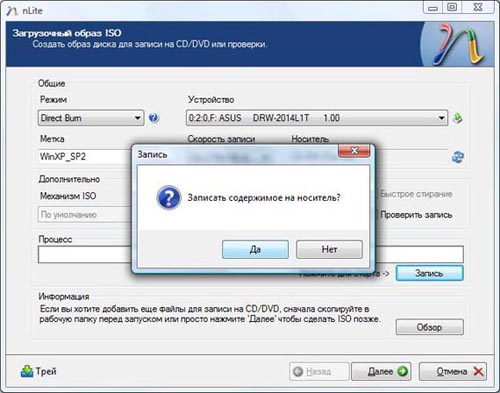
После необходимых настроек нажимаем кнопку «Запись» и соглашаемся на запись диска, нажав кнопку «Да«.
Все, остается дождаться лишь окончание записи диска.
После этого вставляем диск в дисковод нужного нам компьютера, перезагружаемся и устанавливаем Windows XP.
После установки Windows XP, устанавливаем драйвера и Service Pack 3, если образ XP был с SP2.
Замена драйверов AHCI на драйвера Microsoft® SATA
Аномальная производительность операционных систем Windows® после установки SSD, например, более медленное выполнение тестов, чем ожидалось, или сбои системы может быть из-за устаревших или неподдерживаемых драйверов контроллера памяти. Помимо установки самых последних драйверов производителя вашей материнской платы или системы, замена драйверов на встроенные драйверы Windows может улучшить производительность или устранить проблемы с ней.
Для этого откройте Диспетчер устройств (введите Диспетчер устройств в строке поиска).
В Диспетчере устройств вы увидите список различных категорий драйверов. Найдите категорию под названием «Контроллеры IDE ATA/ATAPI» и разверните ее.
Если вы не можете найти раздел IDE ATA/ATAPI, скорее всего, ваша система не работает в режиме AHCI. Обратитесь к документации вашей операционной системе (ОС) и производителя компьютера и следуйте их инструкциям, чтобы проверить, что ваша система настроена на режим AHCI для обеспечения оптимальной производительности при установке одного SSD.
Вы увидите несколько записей для контроллера AHCI (например, показанные ниже драйверы Intel® ).
Щелкните правой кнопкой мыши на записи драйвера контроллера и выберите Свойства, затем нажмите на вкладку Драйвер, после чего Обновить драйверы.
После этого выберите Выполнить поиск драйверов на этом компьютере.
На следующем экране выберите драйвер из списка имеющихся драйве ров .
В списке Моделей вы увидите текущие драйверы, а также драйвер Microsoft, который называется Standard AHCI 1.0 Serial ATA Controller. Выберите Standard AHCI1.0 Serial ATA Controller и нажмите Далее.
Когда драйвер Microsoft будет установлен, вам нужно будет перезагрузить компьютер, чтобы изменения вступили в силу (иногда требуется несколько перезагрузок). Вы также можете вернуться в Диспетчер устройств и проверить, что стандартные драйверы Microsoft установлены.
Если после внесения изменений проблемы не устранены, обратитесь в нашу службу поддержки для получения дополнительной помощи.
© Корпорация Micron Technology, Inc., 2019. Все права защищены. Продукты, их технические характеристики, а также информация о них могут быть изменены без уведомления. Crucial и Micron Technology, Inc. не несут ответственности за ошибки и неточности в текстовых или фотографических материалах. Micron, логотип Micron, Crucial и логотип Crucial являются товарными знаками или зарегистрированными товарными знаками компании Micron Technology, Inc. Microsoft и Windows являются зарегистрированными товарными знаками корпорации Microsoft в США и/или других странах. Intel является товарным знаком компании Intel Corporation или ее дочерних компаний в США и/или других странах. Все остальные товарные знаки и знаки обслуживания являются собственностью соответствующих владельцев.
Downloading, Preparing and Loading SATA Drivers
Creating up to Date Windows 7 Installation Media
This guide is focused mainly on Windows 7 which is only supported on up to 6th Generation Intel Hardware. It is recommended to slipstream drivers and updates for up to 6th Generation Intel Hardware.
What are Storage Controller Drivers?
Storage Controller drivers are required for Windows to recognise the storage controller and hence write to the SSD or HDD during Windows Installation.
These drivers are labelled F6FLPY SATA drivers for historical reasons as they could only be loaded from a floppy disk by pressing F6 during the Windows XP setup.
To install Windows you will need to prepare and load F6FLPY SATA drivers otherwise Windows won’t see the drive
i.e. you may get a screen like this:

This screen may also show however be careful as this screen also shows when the Windows Installation Media is corrupt, usually due to an incomplete download or badly burn DVD/USB:

In a few other cases, the drive will be seen during installation however Windows will fail to configure at the last stage.
How Up to Date is my Windows Installation Media?
Windows installation media contains an assortment of preinstallation drivers so they do not need to be loaded separately in many cases. As a rule of thumb; if you systems hardware is significantly newer than the Windows installation media or you are using an advanced configuration such as a Solid State Drive as a Cache Drive or an Advanced Format Hard Drive on an older system, you may need to load SATA drivers. If your hardware is older than the Windows Installation media then the Windows Installation Media more than likely obtains the SATA drivers.
This guide will hence focus primarily on Windows 7.
- Windows 7 «Skylake» – 2016 Media Refresh At End of Life
- Windows 7 SP1 – 2011 Media Refresh At End of Life
- Windows 7 SP0 – 2009 At End of Life
A completely Obsolete Version of Windows not worth mentioning in this day and age:
- Windows Vista SP2 – 2009 At End of Life
- Windows Vista SP1 – 2008 At End of Life
- Windows Vista SP0 – 2007 At End of Life
As Windows XP is at End of Life I do not recommend installing Windows XP at all especially in a non-virtual environment… For Windows XP the procedure to load preinstallation drivers on physical hardware required a floppy drive and you had to press F6 at the start of the setup hence the name F6-FLPY. Slipstreaming with nLite was easier and didn’t require a floppy drive, see here for details.
- Windows XP SP3 – 2008 At End of Life
- Windows XP SP2 – 2006 At End of Life
- Windows XP SP1 – 2002 At End of Life
Checking your Device Manager
If you cannot access the old Operating System and are in start of your installation then ignore this step and try the 5 drivers I list from Intel (one by one newest to oldest). If you can still access the old Operating System then left click the start button, then right click computer and select properties:

On this screen you will be told whether your version of Windows is 64 Bit or 32 Bit and whether your processor is Intel or AMD. If your processor is Intel (most Dell Systems) you have an Intel Storage Controller and if your processor is AMD you have an AMD storage controller.
To the left select Device Manager:

The Device Manger will open, expand IDE ATA/ATAPI Controllers and select the Devices listed. In this case «Standard SATA AHCI Controller»:

Right click it and select Properties:


Then change the Property from Device Description to Hardware IDs:

VEN_8086 means Intel &DEV_xxxx is your specific Device.

Press [Ctrl] and [ f ] on this page and search for your Hardware ID on this page.
In my case PCI\VEN_8086&DEV_1c02 shows 12.9.0.1001.

Downloading the Latest Driver from Intel
All Windows 7 Drivers have been removed by Intel as Windows 7 has reached end of life.
15.5.0.1051 (6-7th generation)
Intel® 200 Series Chipset Family SATA AHCI/RAID Controller (PCI\VEN_8086&DEV_A282)
7th Generation Intel® Core™ Processor Family Platform I/O SATA AHCI/RAID Controller (PCI\VEN_8086&DEV_A102)
Intel® 100 Series/C230 Series Chipset Family SATA AHCI/RAID Controller (PCI\VEN_8086&DEV_A103)
6th Generation Intel® Core™ Processor Family Platform I/O SATA AHCI/RAID Controller (PCI\VEN_8086&DEV_9D03)
14.8.1.1061 (4th-5th generation)
Intel(R) 9 Series Chipset Family SATA AHCI Controller (PCI\VEN_8086&DEV_8D02)
Intel(R) 9 Series Chipset Family SATA AHCI Controller (PCI\VEN_8086&DEV_9C83)
Intel(R) 9 Series Chipset Family SATA AHCI Controller (PCI\VEN_8086&DEV_9C82)
Intel(R) 9 Series Chipset Family SATA AHCI Controller (PCI\VEN_8086&DEV_8C83)
Intel(R) 9 Series Chipset Family SATA AHCI Controller (PCI\VEN_8086&DEV_8C82)
Intel(R) 8 Series Chipset Family SATA AHCI Controller (PCI\VEN_8086&DEV_9C03)
Intel(R) 8 Series/C220 Chipset Family SATA AHCI Controller (PCI\VEN_8086&DEV_9C02)
Intel(R) 8 Series Chipset Family SATA AHCI Controller (PCI\VEN_8086&DEV_8C03)
Intel(R) 8 Series/C220 Chipset Family SATA AHCI Controller (PCI\VEN_8086&DEV_8C02)
13.1.0.1058 (3rd generation)
Intel(R) C600 Series Chipset SATA AHCI Controller (PCI\VEN_8086&DEV_1D02)
Intel(R) 7 Series/C216 Chipset Family SATA AHCI Controller (PCI\VEN_8086&DEV_1E02)
12.9.0.1001 (1st-3rd generation)
Intel(R) 7 Series Chipset Family SATA AHCI Controller (PCI\VEN_8086&DEV_1E03)
Intel(R) Mobile Express Chipset SATA AHCI Controller (PCI\VEN_8086&DEV_1C03)
Intel(R) Desktop/Workstation/Server Express Chipset SATA AHCI Controller (PCI\VEN_8086&DEV_1C02)
Intel(R) 5 Series 4 Port SATA AHCI Controller (PCI\VEN_8086&DEV_3B29)
Intel(R) 5 Series 6 Port SATA AHCI Controller (PCI\VEN_8086&DEV_3B2F)
Intel(R) 5 Series/3400 Series SATA AHCI Controller (PCI\VEN_8086&DEV_3B22)
11.7.0.1013 (1st-2nd Generation)
Intel(R) ICH10R SATA AHCI Controller (PCI\VEN_8086&DEV_3A22)
Intel(R) ICH10D/DO SATA AHCI Controller (PCI\VEN_8086&DEV_3A02)
Intel(R) ICH9M-E/M SATA AHCI Controller (PCI\VEN_8086&DEV_2929)
Intel(R) C600 Series Chipset SATA AHCI Controller (PCI\VEN_8086&DEV_1D02)
On Intel’s website select Show More:

Scroll until you find your correct version:


Select the 64 Bit f6-flpy-x64.zip for Windows 7 64 Bit and f6-flpy-x86.zip for Windows 7 32 Bit. The .exe Application cannot be used during the Windows Setup:
Accept the License Agreement:


Once the download is complete. Extract the folder by right clicking it and selecting Extract All…

I advise renaming the extracted folder by the driver version. In particular if you do not what is the correct version for your model and are downloading multiple versions:

The Storage Controllers should look like this:

Copy the folder to your Bootable USB:

Downloading the Latest Driver from AMD
AMD’s latest drivers may be found here. Storage Controllers may be found under Chipset:

I am not familiar with AMD’s hardware and cannot advise on the means of finding the latest driver from their website.
Downloading the Driver from Dell
For Dell systems check the Dell FTP Website:
Select your system type and model number. Alternatively press [Ctrl] and [ f ] and search for your model number. In the case an XPS 8300.
Dell sometimes package the SATA drivers as .exes however they cannot be loaded by Windows in this form. You will need to launch the Dell .exe to extract the driver, double click it:


Right click the location the .exe is going to extract the files to and select copy then select ok

Then select yes

Then select ok once its informed you all the files have unzipped.

If any additional setup Windows begin, cancel the installation.
Open up Windows explorer, right click the search bar and select paste.

If there is an x86 (32 Bit) and x64 (64 Bit) folder open the correct one depending on your architecture.

The SATA drivers should be present as a security catalog and security information files.

Loading SATA Drivers
When you get stuck on this screen select load driver.

You will be prompted to Browse for the Driver:

I have made the entire SATA driver folder including the original applications into a .iso and loaded it as a DVD in a VM for illustrations but the results will be similar with a USB:

If I then select ok I get the following:

Because I am using a VM and not an XPS 8700, none of the SATA drivers in this folder are compatible. I am going to uncheck the «Hide Drivers that are not compatible with hardware on this computer» so I can see the drivers:

In general you wouldn’t uncheck this box and the drivers would display if you have the right drivers for your hardware. If multiple dirvers are listed press [Ctrl] and [a] to select them all and then press next.
After Windows has loaded the correct drivers for the storage controller your hard drive will show. Now that Windows can read/write to the driver you will have the options to Delete, Format or Create a New Partition.

You should return to A Clean Install of Windows for details on proceeding with the installation.


