How to SCP from Windows to Linux
Method 01: Using SSH Server
SCP or SSH as just a consumer is included in all Linux systems; therefore, you don’t have to do anything special upon the client end. We may have to deploy the SSH server facility just on the server-side, based on the Linux distribution. We must upgrade our system to the latest edition before beginning any deployment. Just use subsequent command for Debian-based computer systems (including Ubuntu and Kubuntu):

The updation takes a little time. After the system update, let’s install the SSH server on our Ubuntu 20.04 operating system. So, add the stated-below query in the terminal and tap on the “enter” key to proceed with the installation.
Between the processing of OpenSSH-server installation, it will be paused to ask you to make it confirmed. The system wants you to re-check if you need to install it on your Ubuntu 20.04 operating system or not. If you need it, press “Y” or tap “n” to halt the process.

Now the installation processing has been resumed, as shown below. When it reaches 100%, this means the processing is complete.

The last few processing lines on the terminal shell to OpenSSH-server are as below.

Join the server through SSH to see whether the configuration was accomplished. Using your Ubuntu or Mac client, launch a console and type the regular expression. Type the code for the SSH key immediately if you’re using one. Alternatively, the host device’s user’s passcode should be supplied. When everything is in order, the external computer’s terminal must now be displayed. Verify your firewall rules if this isn’t the case. Port 22/tcp is required for SSH. You may also verify the SSH server’s configuration to ensure that your client has the proper rights. We can terminate the connection once it has been created successfully. Now you need to enable and allow port 22 of the SSH server in the Firewall. Therefore, we have been utilizing the below query in the shell with sudo rights.

We need to check the status of an SSH port on our system via the systemctl command. Hence, tried the below command in our console and found that our SSH port is actively running.

Now the configurations are set for the SSH port. Open the notepad from the search area of our Windows desktop. Add some data in the notepad text file and save it on the desktop with the “.txt” extension.

Now open the command prompt from the search area of the Windows desktop once again. Add the below command to see the logic and syntax of using the SCP command in it.

We have seen the SCP configured and how it should be used in the command prompt. Let’s move the notepad test.txt file, which we have just created on our desktop. For this purpose, you have to follows the below general syntax of SCP instruction. The path to a file where it has been saved is mentioned first. This path must contain the name of a file. After that, give the hostname, IP address, and the path where you want to save your file in the Linux system. Make sure the folder must exist in your Linux system where you want to save it.

Tap the Enter key to continue connecting to the host device. After the successful connection establishment, you have to add your user password for the Ubuntu system. This way, your test.txt file will be transferred to the “home” folder of the Ubuntu 20.04 Linux System.
Method 02: Using WinSCP
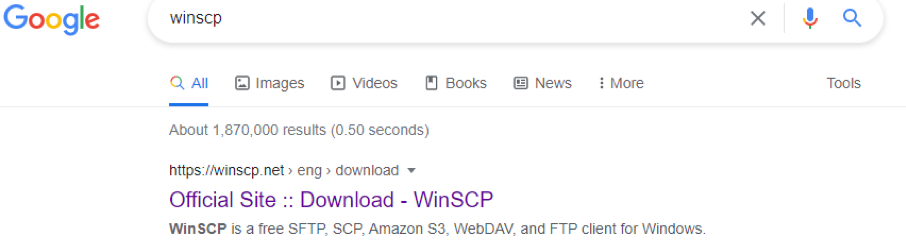
Another effective and simplest way to transfer your Windows files to the Linux operating system is via WinSCP Tool. So, to use this tool, we must download it first to install it. Open the Google search engine and write WinSCP in it, and press Enter to proceed. Click on the first-ever link that has been displayed on the search engine.
Now, you will be shown the Standard WINSCP tool Download. Tap on the “Download WinSCP” to quickly add it to your downloads.
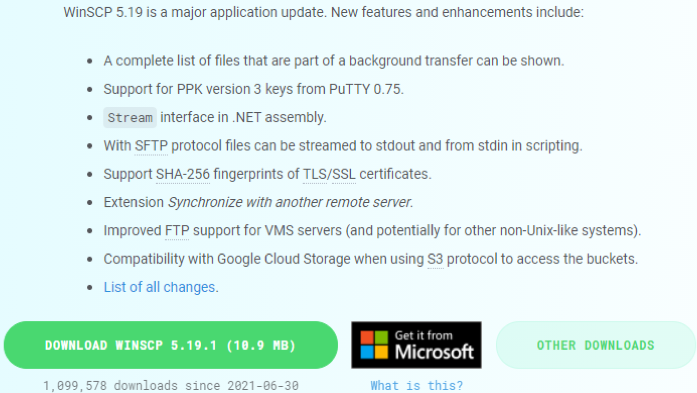
This will take up to 20 minutes according to the network speed on your system to download it. After the download gets completed, click on the downloaded file to execute it.

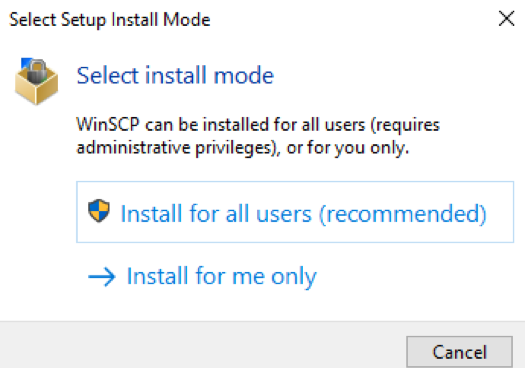
Setup Install Mode selection dialogue box will be appeared as in the image beneath. Tap on “Install for all users (recommended)” to start the installation.
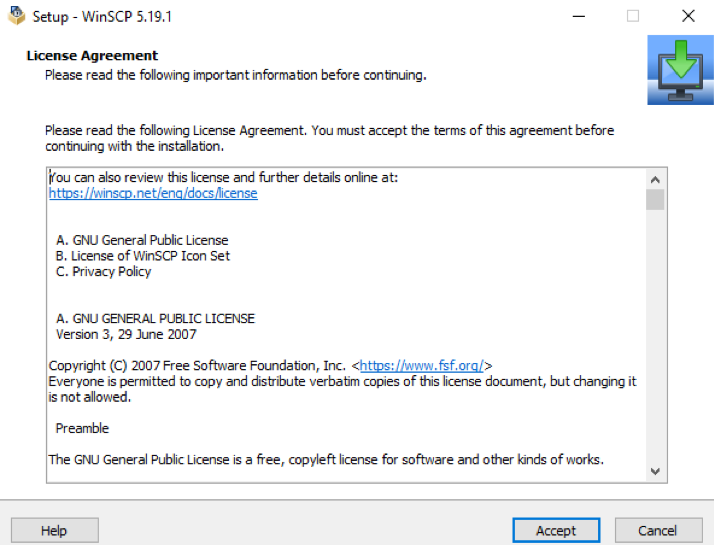
Now a new window will have appeared for the Setup of WinSCP. You have to sign the license agreement by clicking on the “Accept” button as presented in the snap below.
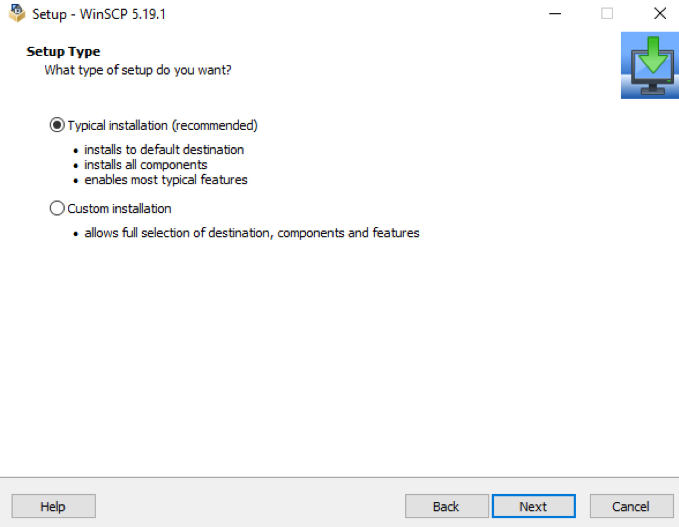
Select the check box of Setup Type as “Typical Installation (recommended)” and tap Next to carry on.
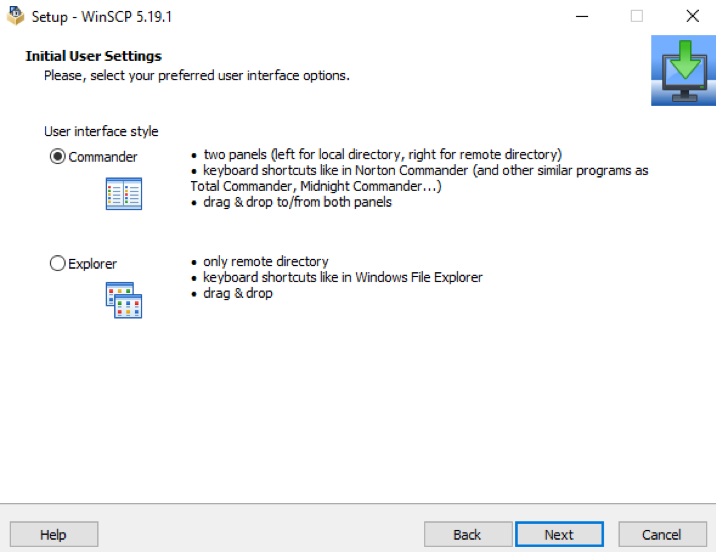
You have to wisely choose the User Interface style from the Initial User settings panel. Hit the “Next” key.
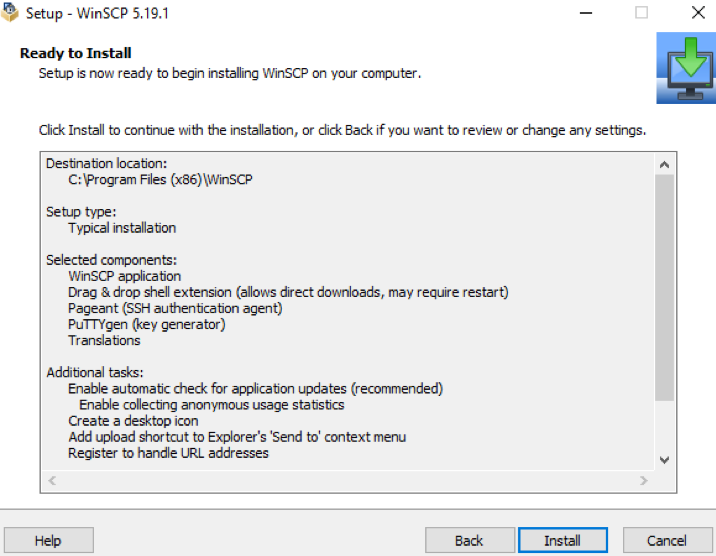
Now the Setup for WinSCP is ready to install. Hence tap on the “Install” button to continue and start installing WinSCP.
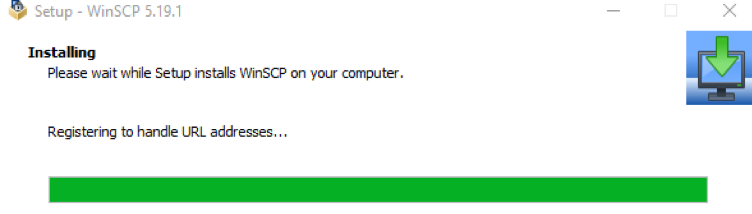
Now the installation process has been started. As the green line process, it means it is closer to the installation completion. It will be completed in some seconds.
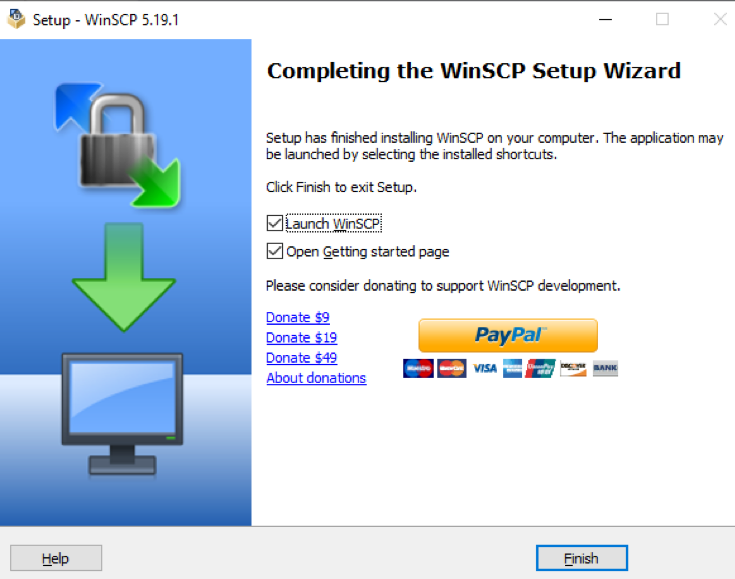
Now the WinSCP installation process has been completed; the following screen will be opened. Checkmark the button of “Launch WinSCP” and “Open Gettings, started page”. Press the Finish button to close the screen and end the process.
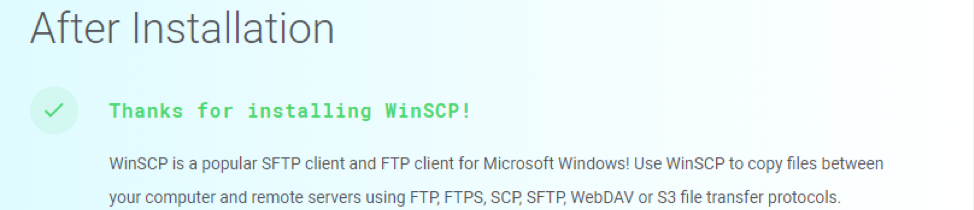
After the installation gets completed, the official site of WinSCP will be automatically opened, showing the successful installation completion message.
The WinSCP GUI will be opened automatically as we have checked mark the checkbox button. To start transferring your files from windows to ubuntu, you need to connect Windows and the Ubuntu Operating system. For this purpose, tap on the icon of the computer “New Session,” and a dialogue box will be appeared, named “login”. Select the File Protocol from the drop-down list as SCP first. Add the IP address of Ubuntu within the “Hostname” field. Add user name and password to connect and press Login. After a successful connection, drag the files from the left area to the right side of WinSCP to transfer.

Conclusion
SCP is simple to understand and capable of safely transmitting a huge quantity of data across the Net. You might, for instance, utilize WebDAV as just an option. Throughout this post, I have demonstrated to you how it works. If we operate with a variety of operating systems, we must investigate both methods.
About the author

Aqsa Yasin
I am a self-motivated information technology professional with a passion for writing. I am a technical writer and love to write for all Linux flavors and Windows.
Источник
Копирование файлов scp
Если у вас есть домашний сервер или сервер в интернете, то вам понадобится способ для безопасного перемещения файлов между машинами. Между локальными машинами мы могли бы просто переносить данные с помощью флешки, но на удаленный сервер нужно передавать данные только через сеть. Есть много способов реализации этой задачи.
В этой статье мы рассмотрим как выполняется копирование файлов с помощью утилиты scp (Secure Copy Command), а также что из себя представляет команда Linux scp. При передаче файлы шифруются, так что больше никто не сможет получить к ним доступ и самое интересное, что вам не нужно настраивать FTP или другое дополнительное программное обеспечение. Будет достаточно сервера SSH.
Что такое SCP?
Команда scp — это утилита, которая работает по протоколу SSH, а значит, все что вам нужно для передачи файла на компьютер, это чтобы на нем был запущен SSH сервер, а также вы должны знать логин и пароль для подключения к нему. С помощью команды scp вы можете не только перемещать файлы между локальной и удаленной системой, но и между двумя удаленными системами. Для этого тоже будет достаточно знать пароли от них. И в отличие от Rsync вам не нужно авторизоваться на одном из серверов.
Копирование файлов scp
Эта статья рассчитана в первую очередь на начинающих, поэтому я попытаюсь объяснять все как можно подробнее. Перед тем, как мы перейдем к практике, нужно рассмотреть общий синтаксис команды:
$ scp опции пользователь1@хост1 : файл пользователь2@хост2: файл
Опции утилиты больше касаются протокола SSH и настраивают общее ее поведение. Дальше следует адрес первого и второго файла. Каждый из них может быть расположен как на локальной, так и на удаленной машине. А теперь рассмотрим основные опции, которые могут нам понадобиться:
- -1 — использовать протокол SSH1;
- -2 — использовать протокол SSH2;
- -B — пакетный режим для передачи нескольких файлов;
- -C — включить сжатие;
- — l — установить ограничение скорости в кбит/сек;
- -o — задать нужную опцию SSH;
- -p — сохранять время модификации;
- -r — рекурсивное копирование директорий;
- -v — более подробный режим.
scp /home/sergiy/file root@losst.ru:/root/
В качестве пользователя нужно использовать любого пользователя, который есть на сервере. Вместо IP вы можете также домен сервера. Только необходимо, чтобы у выбранного пользователя были права записи в указанную папку.
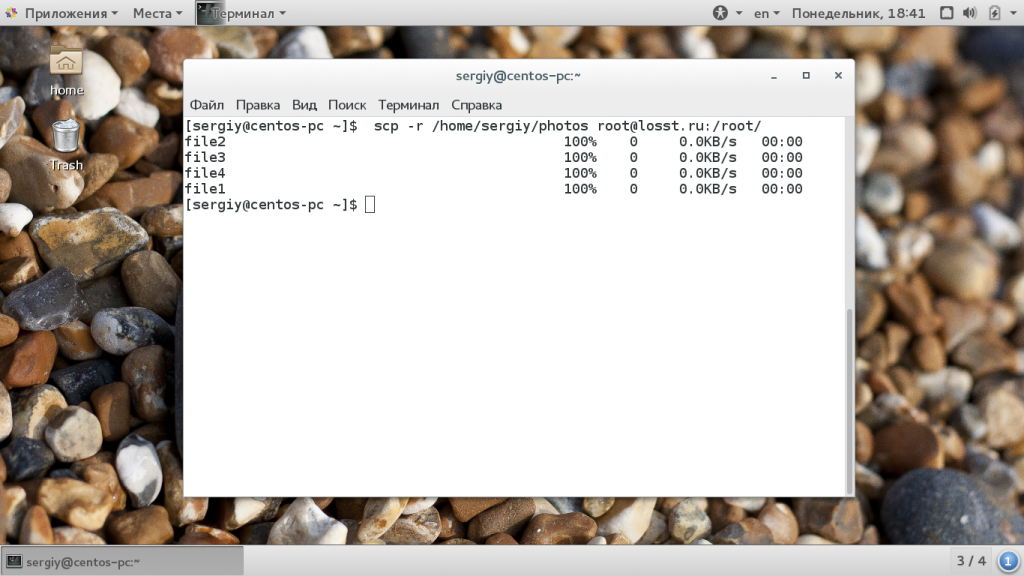
С помощью опции -r вы можете скопировать на удаленную машину целый каталог. Команда будет выглядеть вот так:
scp -r /home/sergiy/photos root@losst.ru:/root/
Убедитесь, что у исходного каталога нет косой черты, а у каталога назначения она должна обязательно быть. Немного изменив синтаксис с косой чертой можно передать все файлы из каталога на удаленный сервер:
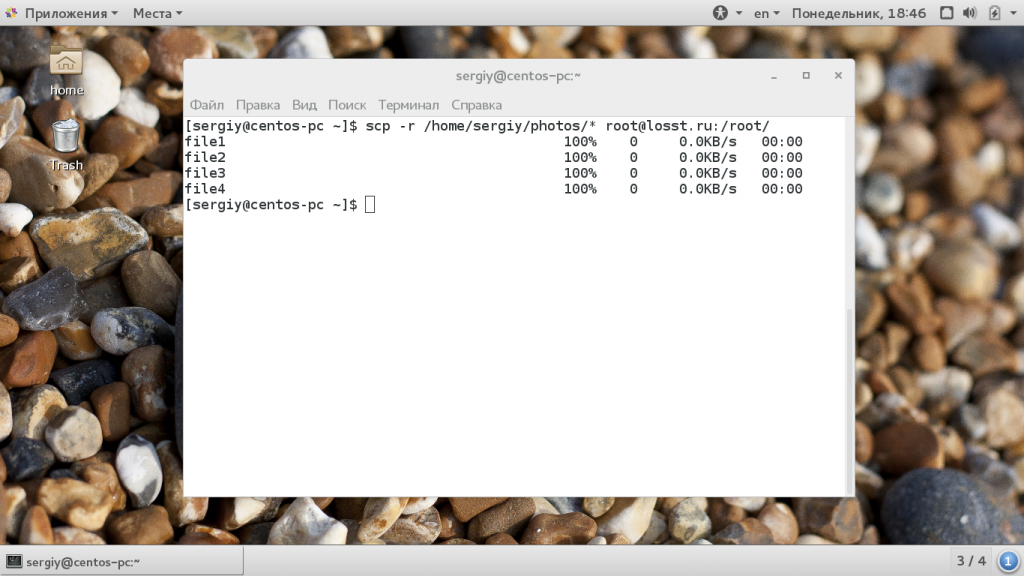
scp -r /home/sergiy/photos/* root@losst.ru:/root/
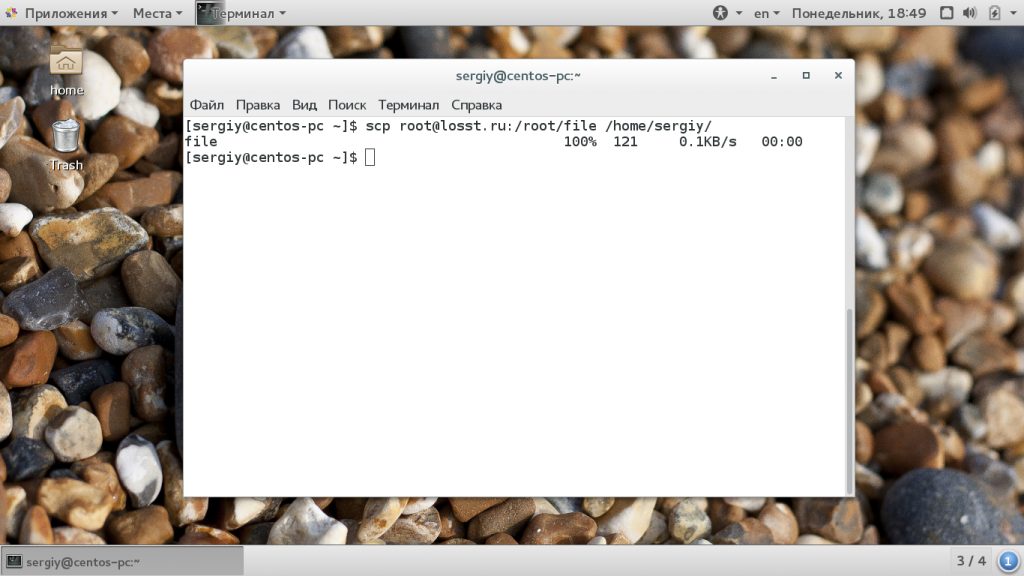
Если поменять местами локальный путь и сервер, то вы сможете копировать файлы scp c удаленного сервера на локальный компьютер:
scp root@losst.ru:/root/file /home/sergiy/
Таким же самым образом вы можете копирование файлов scp или папок с сервера:
scp -r root@losst.ru:/root/photos /home/sergiy/

Обратите внимание, что папка, в которую вы собираетесь копировать должна завершаться косой чертой, иначе папка, которую вы копируете запишется вместо той, в которую нужно скопировать.
Чтобы скачать файл scp из одного сервера на другой, просто необходимо указать данные аутентификации на каждом из них. Например, скопируем один файл:
scp root@losst.ru:/home/root/index.html root@losst.ru:/home/root/www/
Скопируем папку с того же удаленного сервера:
scp root@losst.ru:/root/photos root@losst.ru:/home/root/www/
Выводы
В этой статье мы рассмотрели как выполняется передача файлов scp, как это работает и что вы можете сделать с помощью этой утилиты. Как вы видите, перемещать файлы с одного сервера на другой очень просто. В Linux достаточно понять основы чтобы начать работать эффективнее! А команда scp один из таких инструментов.
Источник
SCP copy windows local file to linux remote folder
How to get a file from my path d:/test.txt and copy it to /etc/var/test/test.txt
but that didn’t worked, how to set the hard disk from where I copy my files?
11 Answers 11
Umm, if you’re using cygwin you want that command to look like
Or you can use WinSCP, you’ll probably find that simpler.
The best way to copy files from Windows to Linux using the command line is through pscp. It is very easy and secure. For pscp to work on your windows machine, you need it add its executable to your systems path. Once it is done, you can use the following format to copy the file.
You can refer the following blog post for more information on pscp setup.

Assuming you are on Windows, best way is to download and install cygwin. Get the path to the binary folder and add it to the system path. You can now run Linux commands on your command line.
Open the command prompt and go to the directory where your file is that you want to copy. Run the following command;
- scp — secure copy command
- file.txt — file you want to copy
- root — username used to log onto CentOS machine
- 1.1.1.1 — IP address of CentOS machine. Needless to say your Windows machine and the CentOS machine have to be able to communicate with one another
- :/opt — This is the directory with which you save the file to, I generally save everything to the /opt directory
- Don’t forget the @ between the username and IP Address and the : between the IP Address and directory you are saving the file to
If you need a key to login into the server, enter the following;
For handiness sake I just copy the file I want to copy across to the key file directory, that way you know everything will run smoothly
Источник


