- How to take and annotate screenshots on Windows 10
- Take a screenshot
- Annotate snips with Snip & Sketch
- How to Convert Screenshot to Text
- Convert Screenshot to Text
- Step 1: Create PDF from Screenshot Image
- Step 2: Perform OCR on the Converted Screenshot
- Step 3: Edit the Screenshot If Required
- Step 4: Export as Other Formats
- Screenshot to Text in Batches
- Step 1: Batch Process
- Step 2: Convert Screenshot to Text in a Batch
- Video on How to Convert Screenshot to Text
- A Solution to Convert Screenshot to Text Online
- Comparison Chart: PDFelement vs. Online Screenshot Conversion
- 3 способа преобразования надписей на экране в печатный текст
- 1. Easy Screen OCR
- 2. Abbyy Screenshot Reader
- 3. Office Lens в Windows 10
How to take and annotate screenshots on Windows 10
Sometimes the easiest way to make a copy of something is to take a snapshot of your screen. While you can already capture your screen using your keyboard’s PrtScn button, you can now press Windows logo key + Shift + S to open the new modern snipping experience (also called the snipping bar), then drag the cursor over the area you want to capture.
Here are some common ways to take and annotate screenshots in Snip & Sketch on Windows 10.
Take a screenshot
Option 1: Using the Snip & Sketch app
Press the Start button and enter Snip & Sketch in the search field.
Press the New button to start snipping with the snipping bar.
The snipping bar allows you to capture the following types of snips:
Rectangular snip. Drag the cursor around an object to form a rectangle.
Free-form snip. Draw a free-form shape around an object.
Full-screen snip. Capture the entire screen.
Once you snip an area of your screen — the snipped image is added to your clipboard and you can paste it immediately in another app. A screen prompt will also allow you to annotate, save or share it using the Snip & Sketch app.
Option 2: With the Print Screen key
While the PrtScn key already captures your full screen and sends it to your clipboard, opening the snipping bar provides you with more snipping tools you can use for precise snipping. For better control of your screen capturing options, you can opt to have your PrtScn key open the new snipping bar instead of having to type Windows logo key + Shift + S.
To turn on the new snipping feature keyboard shortcut Select Start > Settings > Ease of Access > Keyboard
Option 3: With the Window logo key + Shift + S shortcut
Pressing the S key + Windows logo + Shift keys down initiates the snipping bar at any time.
Annotate snips with Snip & Sketch
Opening images for editing with Snip & Sketch
To open an image from Snip & Sketch, select Open File or drag and drop an image from apps like File Explorer or Photos in the Snip & Sketch window.
Annotating images with Snip & Sketch
Snip & Sketch provides a few tools for annotating images, namely pen, pencil and highlighter. Once you click a tool to select it, you can click it again to change its color or thickness.
The tools work better with a pen device, but they can also be used with mouse or touch if you select the Touch Writing button icon.
Use the Eraser tool to remove specific strokes or click it twice to get the option to erase all ink.
Use the ruler or protractor tools and draw straight lines or arches.
Press the ruler/protractor button again to hide the ruler/protractor
Reside or rotate the ruler/protractor by using two finger touch gestures (if the Touch Writing button is selected) or with the mouse wheel.
Use the crop tool to crop the annotated image.
To undo cropping, select the crop tool again and press Cancel to restore the image to its full original area.
Panning the view
Some of the images you annotate might be larger than the size of the Snip & Sketch window. You can use the scroll bars to pan the view, but you can also pan the view with touch input (if the Touch Writing button is not selected) or by dragging with your mouse button while holding the Ctrl key down.
Zoom in and out of screenshots to make them easier to mark up using the magnifying glass icon. You can also zoom in and out of screenshots by pressing the Ctrl key down and tapping the + or — buttons.
Sharing and saving snips
Snip & Sketch copies the annotated snip to your clipboard when you open it and every time you make edits. Snip & Sketch allows you to save the annotated image to a file, share it or open with another app, or print it on paper or to a pdf file.
Using keyboard in Snip & Sketch
While annotating is best done using a pen or mouse — Snip & Sketch provides a lot of keyboard shortcuts you can use. Access keys are activated if you press and hold the Alt key.
How to Convert Screenshot to Text

Elise Williams
2021-03-11 11:18:56 • Filed to: How-To • Proven solutions
If you received a text message screenshot, you’re probably wondering how on earth you’re going to convert screenshot to text. That’s where optical character recognition, or called OCR, comes to your rescue. We’ll show you exactly how to convert screenshot files to text with PDFelement, and the best way to do this in an accurate manner.
Convert Screenshot to Text
PDFelement is the premiere PDF editor of choice for a growing number of small businesses today that simply cannot afford to throw large amounts of money every month into subscriptions for Adobe Acrobat Pro DC.
Despite its affordable pricing, PDFelement doesn’t skimp on features, matching Adobe’s product in lock-step and going one better by offering a smooth and clutter-free interface. You can do almost anything to a PDF document — create one, edit it, convert from or to it, apply various security settings, add watermarks, backgrounds, headers, and footers, and even extract data from scanned documents — or screenshot images! The last of these processes are outlined in detail below:
Step 1: Create PDF from Screenshot Image
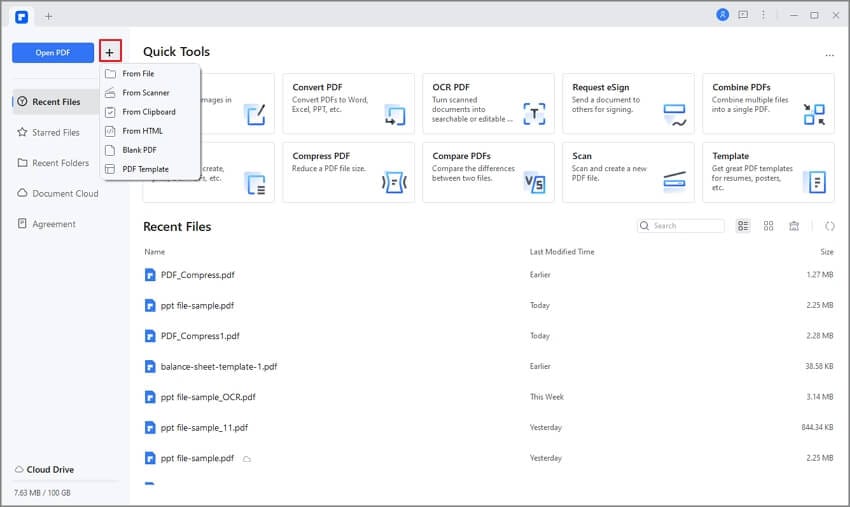
If your screenshot with text is in an image format, the first thing to do is to convert it into a PDF document so OCR can be done on it. To do that, click on «Create PDF» on the front page, and then navigate to your image file and import it.
Step 2: Perform OCR on the Converted Screenshot
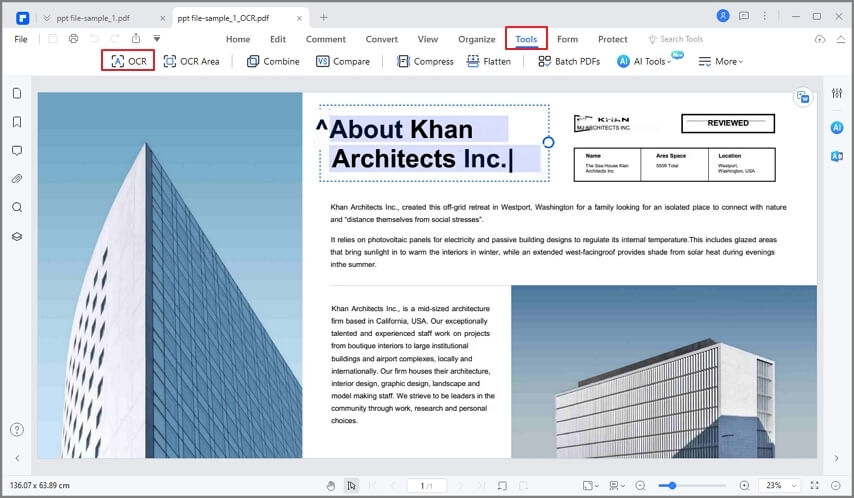
Now that the image is in PDF format, you will see an alert asking if you want to «Perform OCR.» Click on that option. Alternatively, you can go to «Tool» > «OCR.» In the popup window, there are two sections. Click on the «Scan to searchable text in image» option The language is automatically detected, but you can change it if you want. Hit «OK» to convert to text right within the PDF format.
Step 3: Edit the Screenshot If Required
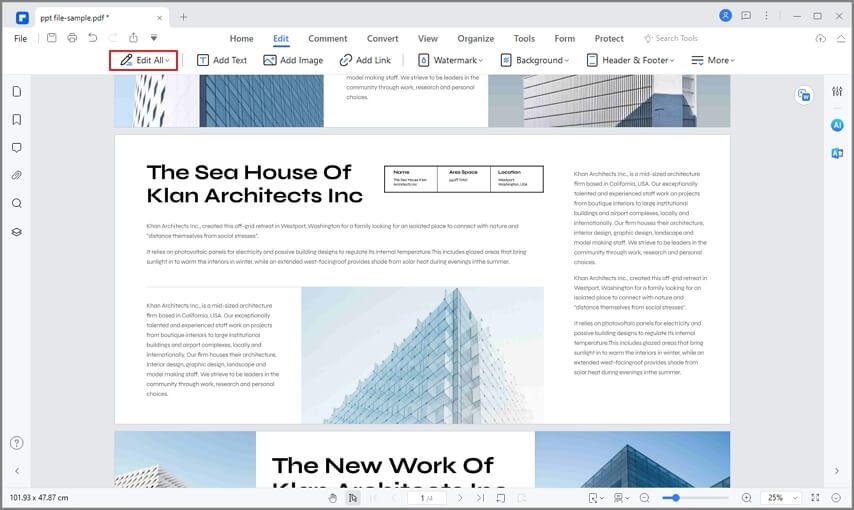
This is an optional step, but if you want to change the text in the screenshot after performing OCR, that’s also possible. Just select the text in question, then the edit mode (line or paragraph), and edit the text however you like. Get detailed steps about how to edit scanned PDF files here.
Step 4: Export as Other Formats
The last step allows you to export the PDF with the text into multiple formats such as a text file, a Word or Excel file, or even back to an image file. PDFelement makes it easy to convert to many such file types at the click of the mouse. Get detailed steps about how to convert PDF files.
PDFelement is, by far, the best screenshot to text app you’ll find that is versatile enough to handle all your other PDF needs and at a highly affordable price.

Screenshot to Text in Batches
PDFelement also provides the batch tool for you to convert screenshots to text effortlessly. If you have multiple screenshots that need to be converted to text, create the screenshots to PDF files firstly, then follow the steps below to complete.
Step 1: Batch Process
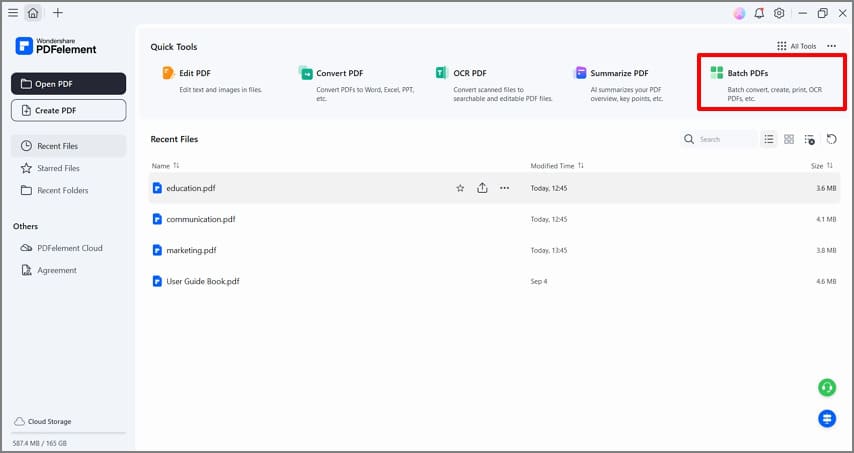
After launching PDFelement, click the «Batch PDF» button on the Home window.
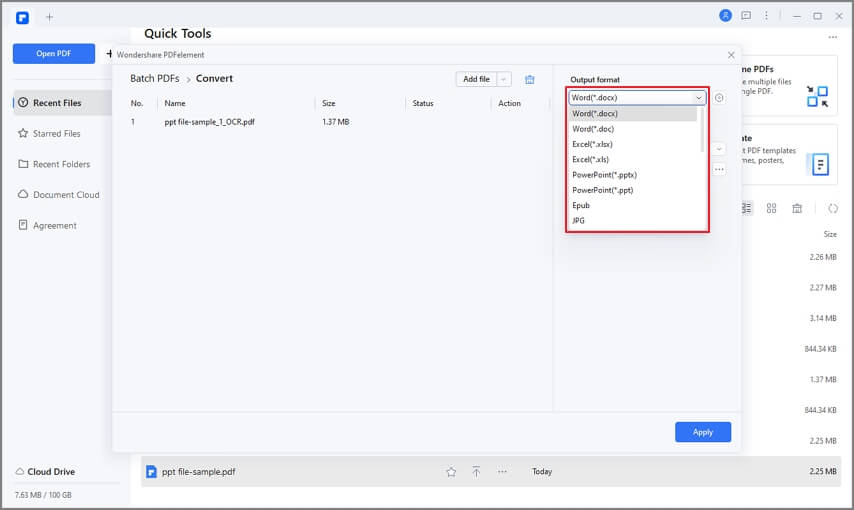
Step 2: Convert Screenshot to Text in a Batch
In the «Convert» tab, load your multiple PDF files that are created from screenshots, then choose «.txt» as the output format to convert them in a batch.
Video on How to Convert Screenshot to Text
PDFelement gives you many choices for converting different document formats, so this video shows you how to convert screenshots to text if you are still not very clear about the steps, making you get the detailed steps more directly and comprehensively, and you can also explore more interesting videos about PDFelement from Wondershare Video Community.
A Solution to Convert Screenshot to Text Online
There are many online tools that allow you to convert screenshot images into text by leveraging their OCR capabilities. The conversion and extraction are done вЂoff-site,’ so it doesn’t use up your computer’s resources. In addition, you will even come across free websites for the screenshot to text conversion, which is great if you just need a one-time conversion done. Using an example of one such site, let’s see how the general process works. There are bound to be some variations, obviously, such as required signing up and so on, but the flow is pretty much the same for all online conversion sites.
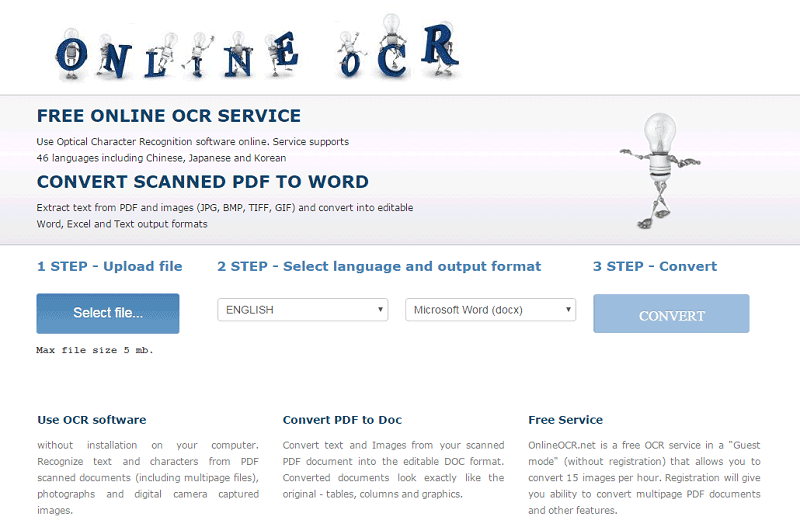
- Step 1: Upload your image document to the site by clicking on the Select File… or a similar button that you see on the screen.
- Step 2: Specify the language found in the image. Not all sites can convert multiple languages, and you’ll find that most are restricted to English, Chinese, Spanish, and several European languages.
- Step 3: Define the output type that you want once the OCR has been done. Word, Excel, and Text files are the most commonly available options.
- Step 4: All that’s left to do is to hit the Convert button, and your output file will be ready in a few minutes, depending on the file size and complexity of the text. Generally, if it’s a screenshot of printed text, it’s easier to identify the text, so it takes less time. Handwritten text is a lot harder, and you may find the output garbled beyond recognition.
Comparison Chart: PDFelement vs. Online Screenshot Conversion
Online services are a major convenience, but if you’re dealing with sensitive information, it could put you at risk of having the data hacked. In addition, most online services have a limit of about 15 MB or so, which means you can’t upload really large files, which you can easily do with PDFelement. On the whole, a standalone, installable software is a much better solution for converting screenshots to text or using OCR for a wide range of needs. Whether it’s for your organization or for personal use, PDFelement has you covered.
3 способа преобразования надписей на экране в печатный текст

Для преобразования текста, присутствующего на изображении, в текст печатный на рынке софта сегодня представлено достаточно многого программных продуктов. Это и известный Abbyy FineReader , и Scanitto Pro , и Ocr Cuneiform . Для разовых же задач можно использовать онлайн-технологии OCR – оптического распознавания текста. Загружаешь в такой сервис картинку, получаешь распознанный текст. Таких сервисов в сети много, достаточно ввести в поисковик запрос «текст распознать».
Многие из них бесплатны, ну или как минимум условно-бесплатны. Но как быть, если нужно активно работать с распознаванием текста на экране монитора? К примеру, при изучении интерфейса англоязычных программ, если его познания оставляют желать лучшего, или при необходимости извлечения текста со слайдов, электронных книг и подобного рода форматов некопируемого контента.
Для этих целей существуют программы по типу скриншотеров со встроенной технологией OCR. Рассмотрим ниже две таких для Windows, а также поговорим о способе преобразования нарисованного текста в печатный с помощью продукта Office Lens.
1. Easy Screen OCR
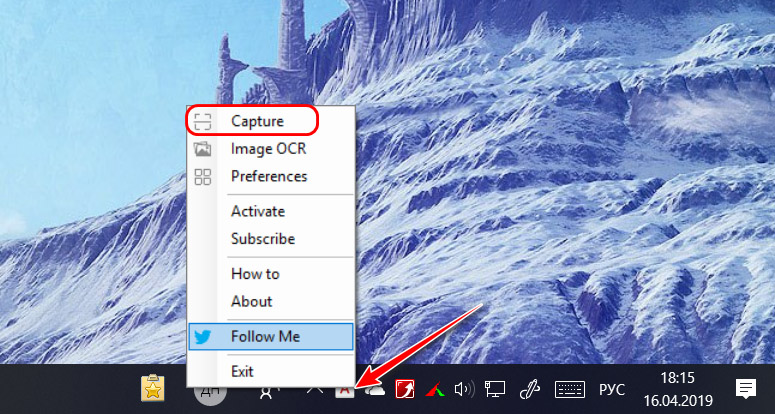
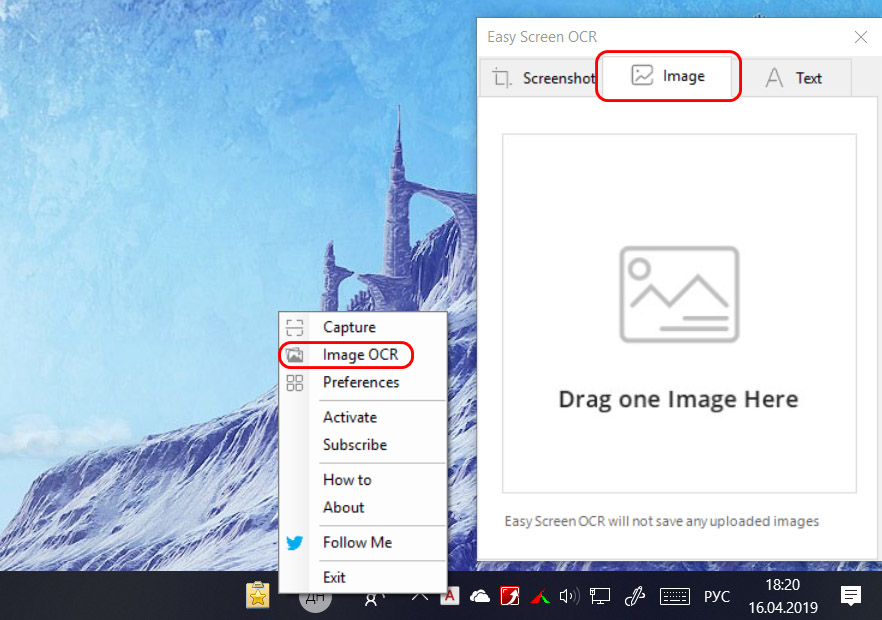
Программа Easy Screen OCR – это минималистичный инструмент для захвата изображения на экране монитора со встроенной технологией Google OCR . Программа работает из системного трея, где можно вызвать её опции. Для захвата текста на экране жмём «Capture».
Запустится режим захвата экрана, мышью указываем область распознавания. Скриншот отобразится в программном окошке, во вкладке «Screenshot». Здесь жмём кнопку «OCR» для старта процедуры распознавания.
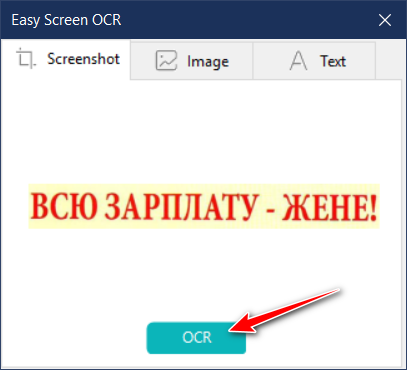
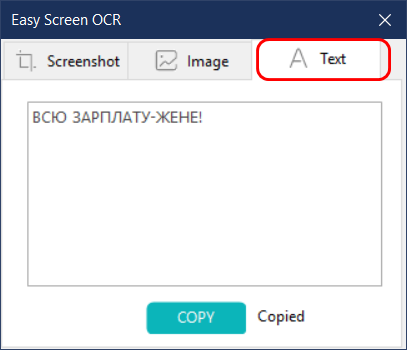
Далее переключаемся на вкладку «Text». Здесь увидим преобразованный текст и можем его скопировать.
У Easy Screen OCR есть и иной режим работы – распознавание текста с файлов изображений. В опциях в системном трее выбираем «Image OCR» и перетаскиваем во вкладку «Image» картинку.
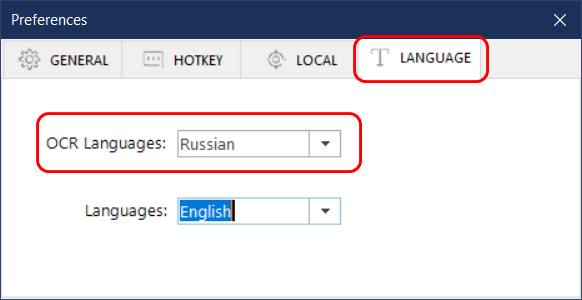
Easy Screen OCR поддерживает множество языков распознавания, в частности, английский и русский. Но программа не определяет язык сама. Язык распознавания каждый раз при его смене необходимо задавать в настройках (Preferences) .
Программа платная, распространяется по платной подписке за $9 в месяц. Есть полнофункциональная триал-версия.
2. Abbyy Screenshot Reader
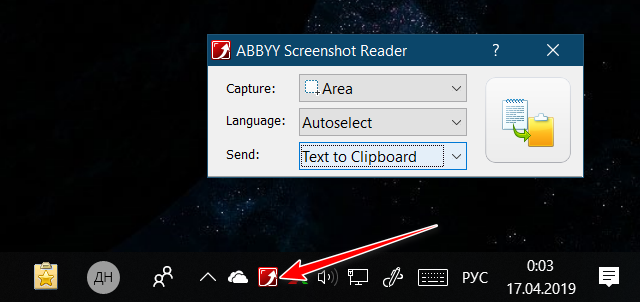
Abbyy Screenshot Reader – производный продукт от Abbyy FineReader , работающий, соответственно, на базе технологии OCR от компании Abbyy . Это скриншотер с различными областями захвата экрана и возможностью выбора дальнейших действий – распознавание с копированием в буфер, с сохранением в текстовый файл, в документы Word и Excel , сохранение в снимок, копирование снимка в буфер и т.п. Поддерживает множество языков распознавания, языки распознаёт автоматически.
Работает программа из системного трея, здесь запускается окно захвата. Выставляем нужные параметры захвата – область экрана и тип выгрузки распознанного текста.
Жмём кнопку захвата, указываем область, если выбран захват области экрана. И далее получаем результат в зависимости от выбранного типа выгрузки.
Abbyy Screenshot Reader – платная программа, стоит $149 . Есть триалка с 15-дневным тестовым периодом.
3. Office Lens в Windows 10
Обе рассмотренные программы, как видим, являются платными. В среде Windows 10 осуществить процедуру преобразования текста на картинке в текст печатный можно бесплатно, не прибегая при этом к помощи онлайновых OCR -сервисов. Для этого потребуется установить в Microsoft Store UWP -приложение Office Lens. Это сканер и редактор документов с выгрузкой изображения в различные форматы файлов, форматы продуктов Microsoft в частности.
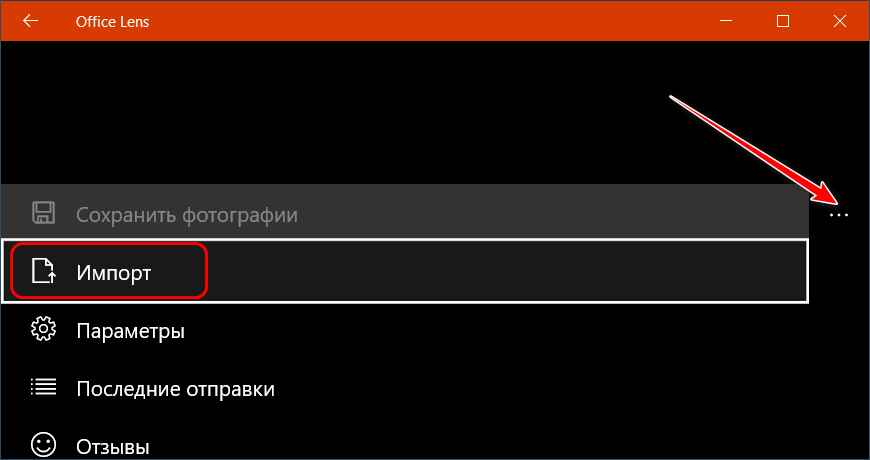
Запускаем приложение и делаем фото надписи на экране. Либо же делаем скриншот, например, штатными «Ножницами» или новым приложением «Фрагмент и набросок», затем импортируем его в Office Lens.
Применяем к изображению фильтр «Документ», сохраняем.
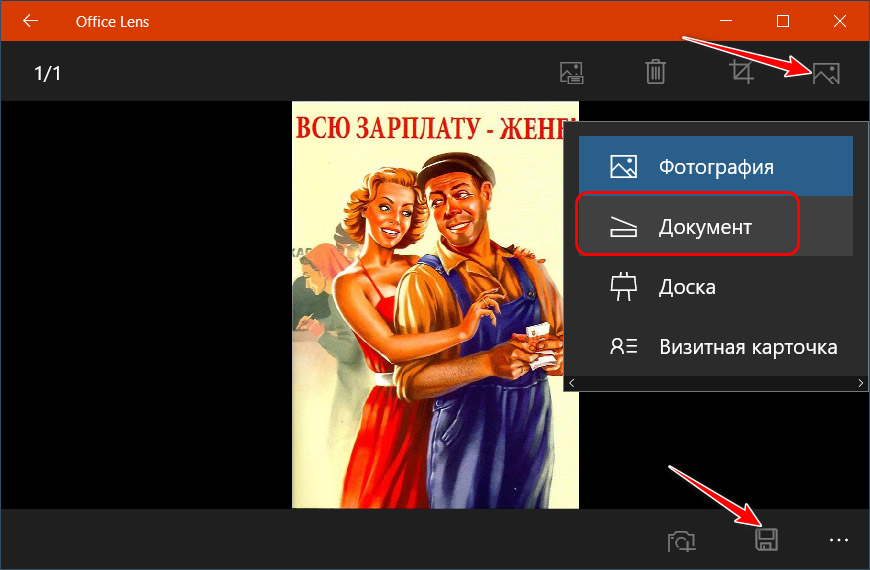
Сохраняем его как файл PDF .


