- Use Snipping Tool to capture screenshots
- Open Snipping Tool
- Work with your screenshots
- 5 best Windows 10 free screenshot-taking tools
- Here are the best screenshot-taking tools for Windows 10
- PicPick (recommended)
- TinyTake
- Lightshot
- 7 Best Free Windows 10 Screenshot Tools
- 1. ScreenRec
- Overview
- Why It’s Awesome
- Who’s It For
- 2. Windows Snipping Tool
- Overview
- Why It’s Awesome
- Who’s It For
- 3. Lightshot
- Overview
- Why It’s Awesome
- Who’s It For
- 4. Greenshot
- Overview
- Why It’s Awesome
- Who’s It For
- 5. ShareX
- Overview
- Why It’s Awesome
- Who’s It For
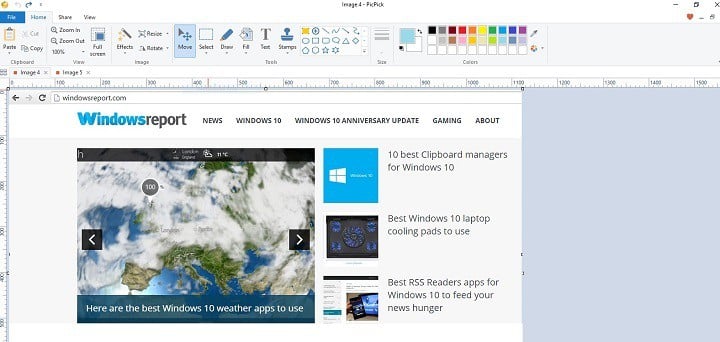
- 6. PicPick
- Overview
- Why It’s Awesome
- Who’s It For
- 7. Awesome Screenshot
- Overview
- Why It’s Awesome
- Who’s It For
- Compare The Best Free Windows 10 Screenshot Tools
- And the Winner for Best Screenshot Software for Windows is…
Use Snipping Tool to capture screenshots
Take a snapshot to copy words or images from all or part of your PC screen. Use Snipping Tool to make changes or notes, then save, and share.
Windows 10 has another screenshot app you might also like to try. When you open Snipping Tool, you’ll see an invitation and keyboard shortcut to Snip & Sketch. For more info on this app, see How to take and annotate screenshots on Windows 10.
Capture any of the following types of snips:
Draw a free-form shape around an object.
Drag the cursor around an object to form a rectangle.
Select a window, such as a dialog box, that you want to capture.
Capture the entire screen.
When you capture a snip, it’s automatically copied to the Snipping Tool window where you make changes, save, and share.
Open Snipping Tool
Select the Start button, type snipping tool in the search box on the taskbar, and then select Snipping Tool from the list of results.
For Windows 8.1 / Windows RT 8.1
Swipe in from the right edge of the screen, tap Search (or if you’re using a mouse, point to the lower-right corner of the screen, move the mouse pointer up, and then select Search), type snipping tool in the search box, and then select Snipping Tool from the list of results.
Select the Start button, then type snipping tool in the search box, and then select Snipping Tool from the list of results.
Work with your screenshots
With your Snipping Tool open, select one of the following to create and work with your screenshots.
In Snipping Tool, select Mode. In earlier versions of Windows, select the arrow next to the New button. Next, when you choose the kind of snip you want, you’ll see the whole screen change slightly to gray. Then, choosing from anything currently displayed on the screen, select the area of your screen that you want to capture.

After you open Snipping Tool, open the menu that you want to capture. For Windows 7, press the Esc key before opening the menu.
Press Ctrl + PrtScn keys. The entire screen changes to gray including the open menu.
Select Mode, or in earlier versions of Windows, select the arrow next to the New button. Select the kind of snip you want, and then select the area of the screen capture that you want to capture.
After you capture a snip, you can write or draw on or around it by selecting the Pen or Highlighter buttons. Select Eraser to remove the lines you’ve drawn.
After you capture a snip, select the Save Snip button.
In the Save As box, type a file name, location, and type, and then select Save.
When you capture a snip from a browser window and save it as an HTML file, the URL appears below the snip. To prevent the URL from appearing:
In the Snipping Tool, select the Options button.
In the Snipping Tools Options box, clear the Include URL below snips (HTML only) check box, then select OK.
After you capture a snip, select the arrow next to the Send Snip button, and then select an option from the list.
5 best Windows 10 free screenshot-taking tools


The easiest way to make a copy of an interesting article, a recipe, a how-to-guide or a funny image is to take a screenshot. You can simply use the dedicated keyboard key to take a screenshot, or you can use a specialized tool to help you get the job done better.
Using a screenshot-taking tool brings more advantages: your screenshots are clearer, especially when you’re taking screenshots of a video, you can quickly edit them, add comments, capture only a region of the screen, and more.
Here are the best screenshot-taking tools for Windows 10
PicPick (recommended)
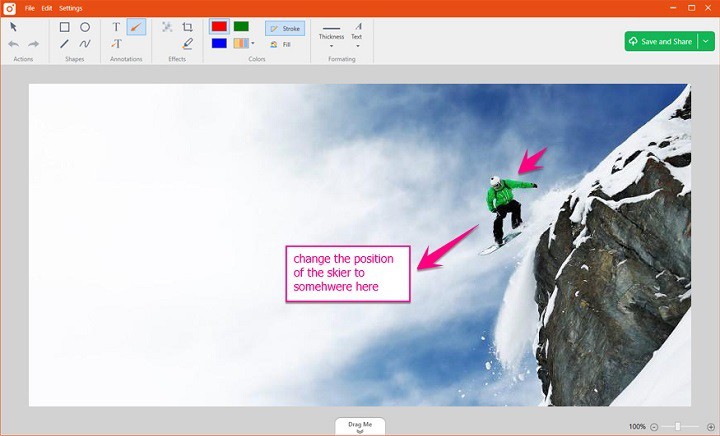
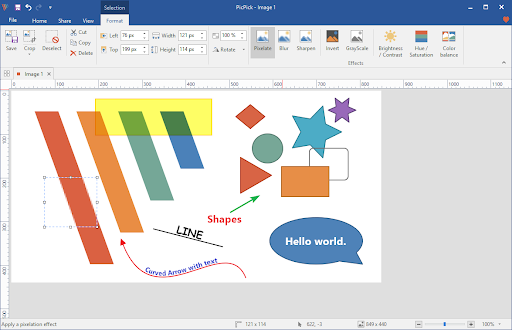
PicPick is a complex screenshot-taking software that brings many additional options to the table: an intuitive image editor, color picker, color palette, pixel-ruler, protractor, crosshair, whiteboard and more. Thanks to the plethora of features it offers, PicPick can be used by homeowners as well as graphic designers.
Other features include:
- Capture anything: take screenshots of an entire screen, an active window or any specific region of your desktop
- Enhance with effects: drop shadows, frames, watermarks, mosaic, motion blur, brightness control
- Edit your images: add text, arrows, shapes and more with the built-in image editor
- Share your screenshots everywhere: send your images via Web, email, Dropbox, Google Drive, Evernote, Facebook or Twitter.
The quality of the effects you can use is impressive and additional options, such as the stamps you can add, make PicPick one of the best Windows 10 screenshot-taking tools.
TinyTake
TinyTake developers boast about this tool as being the fastest way to take screenshots, record videos and share them with friends. You can also add comments, publish your screen captures online, get a shareable link, and reference your history. This tools is easy to use, it’s free and it’s very popular – more than 7500 companies use it worldwide.
TinyTake supports the following features:
- Record a video of your screen (upto 120 minutes)
- Record a video using your web-cam
- Capture a region, a window or entire screen
- Capture an image using your web-cam
- Open, annotate and share an existing image
- Copy to clipboard or save it locally
- Store screenshots & videos in the cloud
- Zoom in / zoom out
- Assign custom short-cut keys.
You can download TinyTake for free from the tool’s official page.
Lightshot
Key features include:
- Screenshot history: keep track of all your screenshots by signing in at www.prntscr.com
- Copy a screenshot to clipboard: you can then paste it into any suitable application such as Word, Paint or Photoshop
- Use hotkeys to speed up Lightshot: almost every task has its own hotkey.
You can download Lightshot for free from Skillbrains.
Editor’s Note: This article continues on the next page. If you’re interested in other screenshot software, check out our wide collection of guides.
7 Best Free Windows 10 Screenshot Tools
Taking a screenshot on Windows 10 can be a bit frustrating. Granted, there are a few tricks you can use…
For example, you can press the Print Screen key and the Windows key which will save a screenshot directly to your Pictures folder. That’s nice, but when it comes to how to edit and annotate a screenshot, you’re on your own. Your other option is the Windows 10 Snipping Tool which is simple but, sometimes, too basic.
There’s got to be more to PC screen capturing than that, right?
Right. Actually, there is such an abundance of Windows 10 screenshot tools that you can easily feel overwhelmed when you try to pick just one. To help you save time, we’ve rounded up the top 7 print screen software (free and easy).
And, if you’re too busy to read a top 7, you can watch our top 3 video below.
1. ScreenRec
Overview
If you’re looking for a way to take an instant screenshot on Windows , you’ll love ScreenRec. Besides being the easiest and fastest screenshot program on this list, ScreenRec is actually full-featured free screen capture software. This means that you can also use it to record your PC screen.
Why It’s Awesome
There is a single hotkey to remember (Alt + S) to either screengrab or record and you can add annotations to your screenshots with a few mouse clicks.
But what’s best about ScreenRec is the ability to share your screen captures instantly and securely (via private URL). As soon as you’re done taking a screenshot or recording your desktop, a sharing link is copied to your clipboard. You can paste it in an email, a private message or wherever you like.
Press Alt + S -> Capture -> Grab sharing link. Screenrec is as simple as that.
Who’s It For
Anyone can benefit from using ScreenRec. Yet, business people stand to gain a lot in productivity when implementing ScreenRec into their daily routine. They can send video email, create tutorial videos, record Skype/Zoom meetings.
2. Windows Snipping Tool
Overview
We know. We said we’d venture beyond the Windows Snipping Tool, but Microsoft has made some changes to the built-in screenshot utility that are worth mentioning. If you want to avoid this program at all costs, continue reading or check out our list of Snipping tool alternatives
Why It’s Awesome
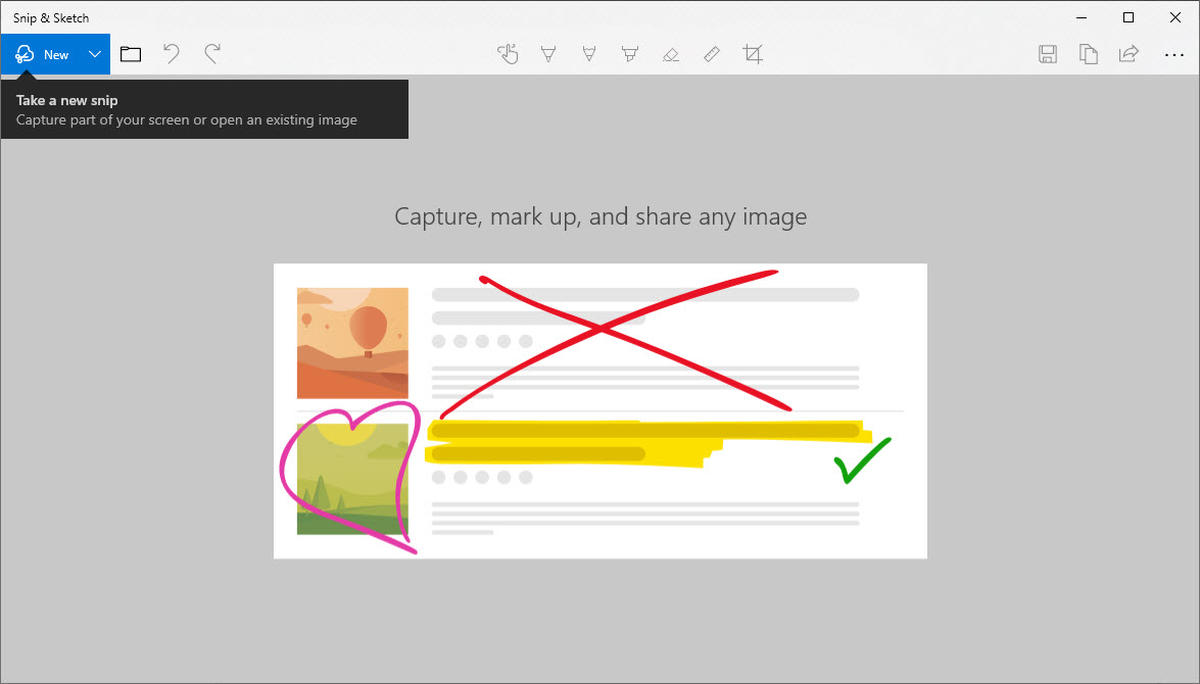
In the October 2018 update, Snip & Sketch replaced the Windows Snipping Tool which came with previous versions of Windows. The keyboard shortcut is Windows + Shift + S.
The annotation options in Snip & Sketch include more colors, writing tools, and even a ruler and a protractor. Another plus is that you can use Snip & Sketch on a Windows 10 tablet. Actually, it’s somewhat easier to use Snip & Sketch on a tablet than on a PC because it’s optimized for doodling rather than annotating with a mouse. But, if you need more editing options, you can open the snip in another app.
Who’s It For
Immediate sharing is still a pain in the butt, so we wouldn’t recommend this screenshot program for those who need easy and secure access to their captures. But, if you’re looking for a quick screen snip (especially if you want to do a free-form selection), this app will work just fine.
3. Lightshot
Overview
Offered by PrntScr.com, Lightshot is a screenshot app for PC that allows you to take quick snaps and edit them online or within the app.
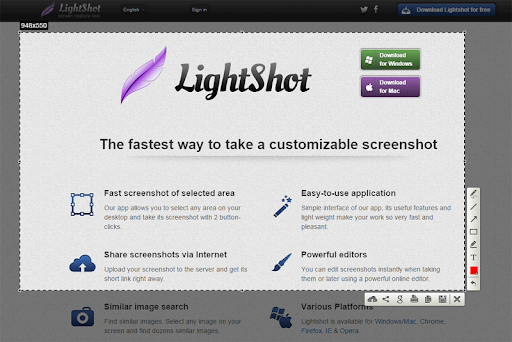
Why It’s Awesome
With Lightshot, you have access to an online image editing tools by clicking a single button and uploading your images to their servers. Some people may find this problematic as there is no way to guarantee the privacy of your captures. Nonetheless, once your images are uploaded (and you’ve created an account), you have full access to your online gallery and Lightshot’s editor.
Who’s It For
Lightshot is for anyone looking to edit/share their screen snapshots publicly. Due to the general lack of security, we wouldn’t recommend uploading images that contain sensitive information. So, Lightshot may not be ideal for business people and companies.
4. Greenshot
Overview
This open source screenshot app for Windows is perfectly suited for productivity while keeping things incredibly simple. Much like Gadwin Printscreen, Greenshot aims to make it easier to take screenshots and save them using the PrtScn key.
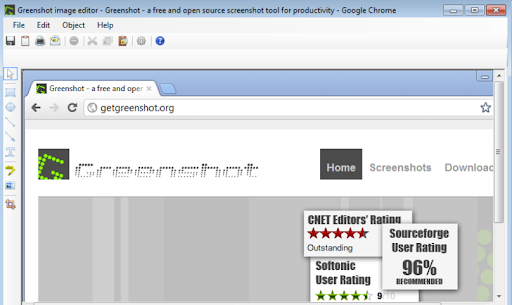
Why It’s Awesome
Greenshot requires no prior knowledge. In fact, it may be the most basic screenshot program available. And, by “basic” we mean this screen grab application has all of the necessary features (hotkey functions, annotation, built-in editor, upload/sharing options) without bells and whistles.
Who’s It For
If you just need to take a screenshot on Windows 10 and you don’t need a bunch of features, Greenshot is a good option. You can upload your captured images to file sharing sites or save them locally. Since Greenshot isn’t overly fancy, taking, editing, and sharing your screenshots is a breeze, saving valuable time.
5. ShareX
Overview
Ahh ShareX, the one with the most options… It does everything from capturing the active window or the active monitor, to uploading your content to dozens of predefined sites.
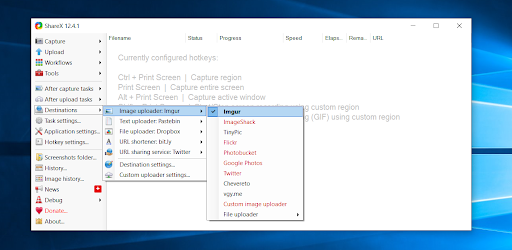
Why It’s Awesome
Like ScreenRec, ShareX has the ability to not only capture screenshots but also to record your screen. However, the long list of uploading options is worth mentioning. Pretty much every social media and file sharing site you can think of is available in the ShareX app. It certainly isn’t private sharing, but it is convenient.
Who’s It For
ShareX can be used by anyone who isn’t afraid to browse a ton of options and menus. Those who love to (or need to) share via social media will love this app.
6. PicPick
Overview
A buffet of features in a single app? Yes, please! PicPick is so full of various features that it’s more of a photo editor than a screenshot app. With its ability to capture scrolling screenshots when you need to snip entire webpages, this app is hard to ignore.
Why It’s Awesome
PicPick will require a bit of exploration first, but with a list of edit tools almost as big as Photoshop’s, it’s worth giving it a once-over. When you’re done editing your screenshot, you can save it as an image or upload it to a public sharing site such as imageshack.us. What’s more interesting about PicPick is that it is portable. You can move this print screen program onto a jump drive and open it up anywhere without needing to install it.
Who’s It For
PicPick is best suited for those who are looking for an advanced editor and a screen grab app rolled into one.
7. Awesome Screenshot
Overview
Awesome Screenshot is a browser extension that gives you everything an installed screenshot app offers. The downside? It could make your computer run slow.
Why It’s Awesome
Forget the downside for a moment. The upside is that, as long as you are signed in, you can use the app on any PC and upload your screen captures to Google Drive. This screenshot software can also capture web pages. Keep in mind, though, that you are allowed only 30 images per project and only 30 seconds of screen recording time.
Who’s It For
Anyone who is constantly on the go can benefit from using Awesome Screenshot. As long as you can log in to your personalized browser, you’re good to go.
Compare The Best Free Windows 10 Screenshot Tools
| Capture Full Screen | Capture Screen Area | Edit Screenshots (Annotation) | Automatic Upload | Instant Sharing | |
|---|---|---|---|---|---|
| Screenrec | Yes | Yes | Yes | Yes | Yes, 2 Gb free private cloud storage |
| Windows Snipping Tool | Yes | Yes | Yes | No | No |
| Lightshot | Yes | Yes | Yes | Yes | No |
| Greenshot | Yes | Yes | Yes | No | Yes, but not secure |
| ShareX | Yes | Yes | Yes | Yes | Yes, but not secure |
| PicPick | Yes | Yes | Yes | No | Yes, but not secure |
| Awesome Screenshot | Yes | Yes | Yes | No | Yes, if you’re connected to Google Drive |
And the Winner for Best Screenshot Software for Windows is…

In all seriousness, choosing the best app depends on what you need. In our opinion, ScreenRec works for anyone, no matter the requirements. If you’re looking to snap the full screen or just a section; ScreenRec has it covered. Want to record a video? ScreenRec can do that, too. What about editing and sharing securely? Only ScreenRec can do both. Let’s not forget that it’s completely free with an included 2 GB of free storage. Feel free to download it and check it out for yourself!
How to take a screenshot without using Print Screen?
To take a screenshot without using Print Screen, try a third-party app like ScreenRec. With ScreenRec in particular, you can take a screenshot, save it and share it by pressing a single hotkey Alt + S.
How to take a screenshot with high resolution quality?
To take a screenshot with high resolution, set your screen resolution as high as possible. This is done through the display settings.
What is the best free screen capture software for Windows?
The best free screen capture software is the one that fits your needs perfectly. We’d suggest ScreenRec because it’s super-fast, lightweight and gives you a sharing link instantly. It can take screenshots and record your screen. All screen captures are stored in your private cloud account (2Gb free storage included).


